Set up a permanent URL
By default obol stack up brings up a temporary Cloudflare quick tunnel. Its https://<id>.trycloudflare.com address is great for local testing, but it changes on every restart — so anyone who bookmarked it, or any ERC-8004 registration that points at it, breaks the next time your stack comes back up.
Once you're ready to attract buyers, give your stack a permanent URL on a hostname you control. Obol does this with a Cloudflare connector token: a least-privilege, single-tunnel credential — not an account-wide API key. You create the tunnel in the Cloudflare dashboard, and Obol runs the connector for you.
Prerequisite — a Cloudflare account with a domain. You need a Cloudflare account (the free plan is fine) with a domain that lives as a zone in that account — either bought through Cloudflare Registrar or transferred/added in. The hostname you expose has to live on that domain.
No domain yet? You have two options, whichever is easier:
- In the Cloudflare dashboard (recommended if you're more comfortable there) — buy a domain via Registrar or add an existing one as a zone, then come back here.
- From the CLI (optional convenience) —
obol domain search <keyword>,obol domain check <name>, andobol domain register <name>wrap Cloudflare Registrar so you never leave the terminal.obol domain listshows domains you already own.
Either way, registering a domain is billable, so your Cloudflare account needs a saved payment method. The CLI path also needs a scoped Cloudflare API token (Account → Domain permission) — note this is a different credential from the tunnel connector token below.
1. Create the tunnel and copy its token
Open the Cloudflare Zero Trust dashboard → Networks → Tunnels → Create a tunnel, and choose the Cloudflared connector type. On the Create a Tunnel screen, give it a name (e.g. Obol Agent Storefront), pick your operating system under Setup Environment, and copy the token from the Install and Run commands — it's the long eyJ… value.
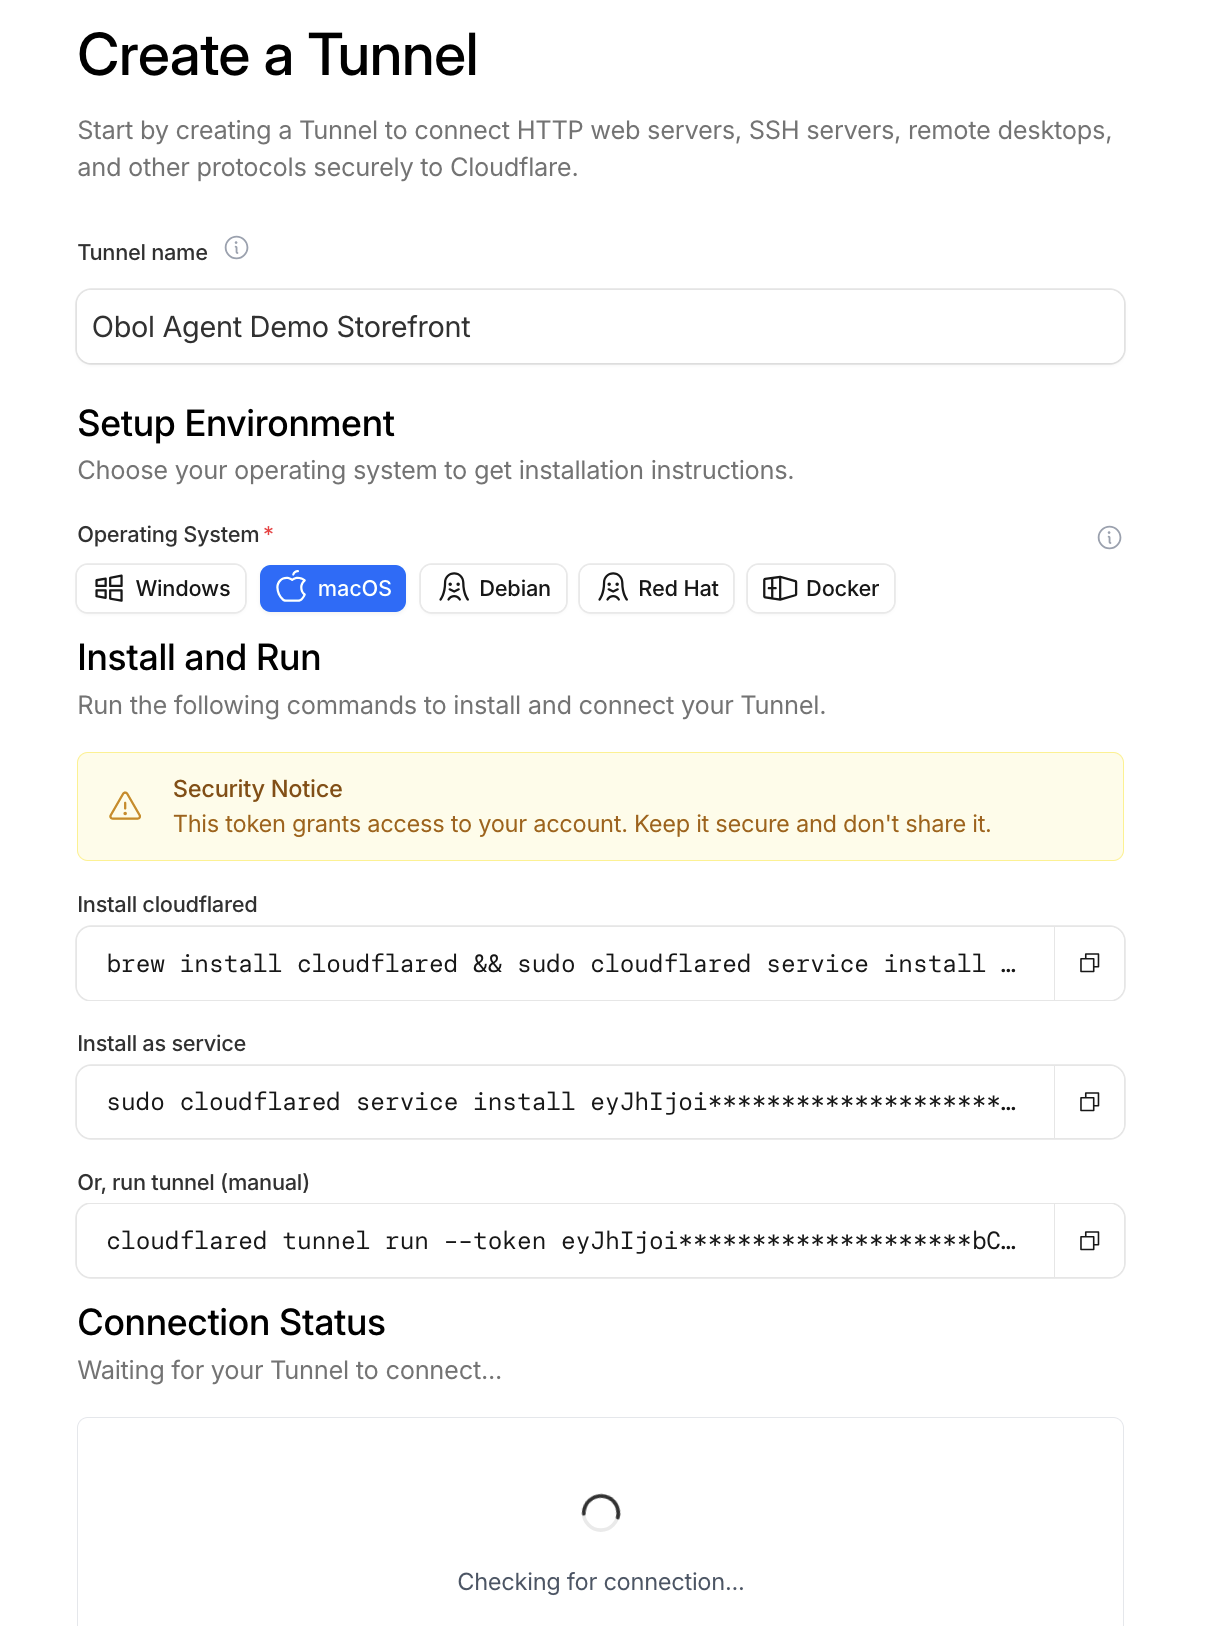
eyJ… token from the install commands.You do not run any of the commands Cloudflare shows — Obol runs the connector inside your cluster, so you don't install cloudflared yourself. You only need the token. The easiest is to copy the whole cloudflared tunnel run --token eyJ… line and paste it into Obol; it strips the prefix and keeps the token. Treat the token like a password.
2. Publish your stack on a hostname
Next, on Add published application (the "Route tunnel" / Public Hostname step), choose the Subdomain and Domain you want (e.g. demo + obol.org → demo.obol.org), leave Path empty, and set the Service URL to your cluster's Traefik ingress.
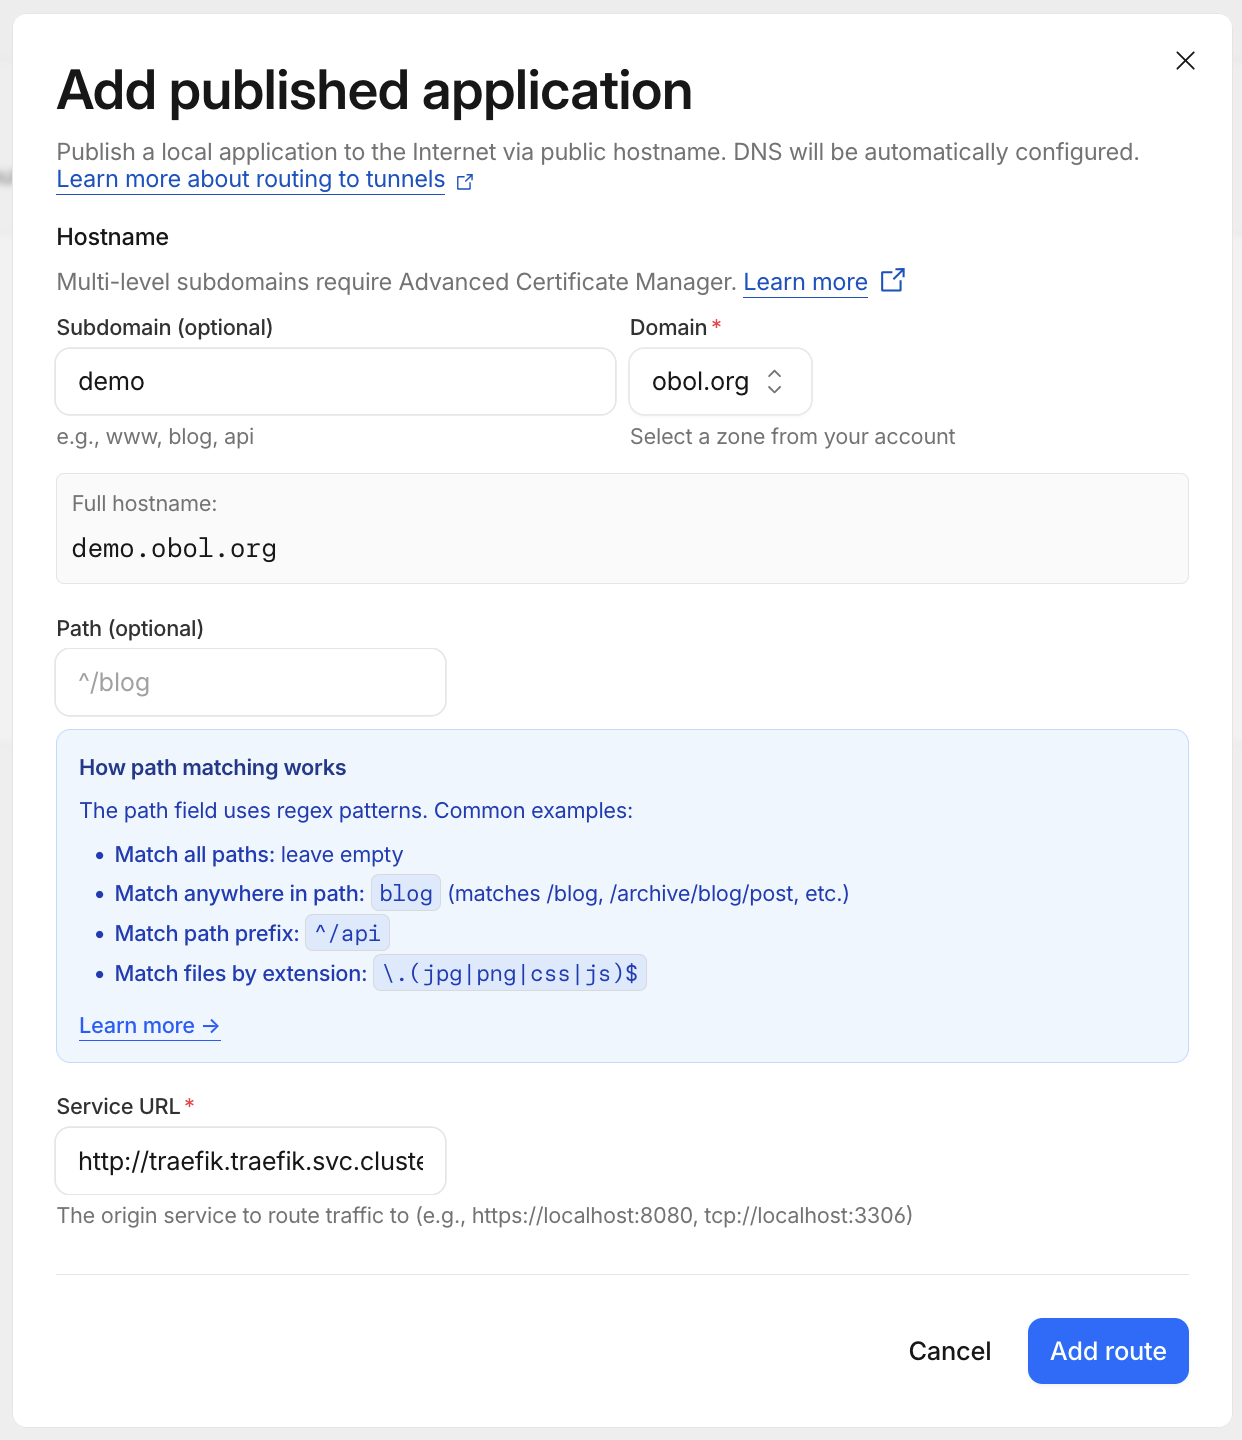
Set the Service URL to exactly this — it's the in-cluster address of your stack's Traefik ingress, and it's the same for every Obol Stack:
http://traefik.traefik.svc.cluster.local:80
Don't use localhost, obol.stack, or your machine's IP — the connector runs inside the cluster, so it must reach Traefik by its Kubernetes service name. Then click Add route.
Saving this creates the DNS record and forwards traffic for your hostname into the cluster automatically.
3. Hand the token to Obol
obol tunnel setup --hostname stack.example.com <connector-token>
You can paste the bare token, pass it with --token, or paste the whole cloudflared tunnel run --token … line. If you run obol tunnel setup with no token, it walks you through these dashboard steps interactively and prompts for it.
Obol stores the token as an in-cluster secret and runs the connector. Confirm it's live:
obol tunnel status
You should see a permanent mode, your hostname, and a connected connector. Your services are now reachable at https://stack.example.com/... and survive obol stack down / obol stack up.
With a stable URL in place, register on-chain so buyers can discover you — see Build a Profitable Obol Stack and Selling Agent Services.
Alternative: browser login (no dashboard)
If you'd rather not use the dashboard, Obol can authenticate a locally-managed tunnel through a browser login instead. This needs the cloudflared binary installed on your machine:
obol tunnel setup --hostname stack.example.com --management local
This opens a browser to authorize cloudflared against your Cloudflare account, then creates the tunnel and DNS route for you. It produces the same kind of permanent URL — the only difference is how the tunnel is managed.
Troubleshooting
obol tunnel statusshowswaiting_for_connections— the connector started but hasn't established a connection yet. Give it a few seconds, or checkobol tunnel logs.- Public check fails / 5xx — confirm the dashboard Public Hostname's Service is exactly
http://traefik.traefik.svc.cluster.local:80and that the hostname matches the one you passed toobol tunnel setup. Invalid format for Authorization header— you pasted a Cloudflare API token or Global API Key instead of the connector token from the tunnel's install screen. Use the connector token.- Need a fresh quick tunnel instead —
obol tunnel restartrotates the temporary URL;obol tunnel setupis only for the permanent one.