Create a Lido CSM DV
This is a guide on taking part in Lido's Community Staking Module (CSM) with a squad as part of a Distributed Validator Cluster.
To start, this guide makes a couple assumptions:
- You're running a Linux distribution and you've installed Git and Docker (as a non-root user).
- You will be deploying on Ethereum mainnet. Some screenshots in this guide are from a previous testnet; use Hoodi for testing. They are kept for demonstration purposes, so please verify you are using the correct mainnet addresses.
Getting started
This guide is broken down into 3 parts:
Part 1: Creating a shared SAFE wallet for the cluster, and a Splits.org reward splitting contract
Part 2: Using the Obol DV Launchpad + CLI to create the cluster
Part 3: Deploying the validator to Lido's CSM using their UI.
In this guide we'll be using the CSM widget and expanding Specify Custom Addresses to set the Manager Address to the cluster multi-sig (SAFE) and the Rewards Address to the Splits.org splitting contract. Finally, we'll be selecting Extended permissions type which grants Manager Address ultimate control over the Node Operator.
Part 1: Creating the Cluster SAFE + Splitter Contract
Deploy the SAFE
Detailed instructions on how to create a SAFE Wallet can be found here.
The squad leader should obtain signing addresses for all the cluster members, to create a new SAFE with the operators all as owners.
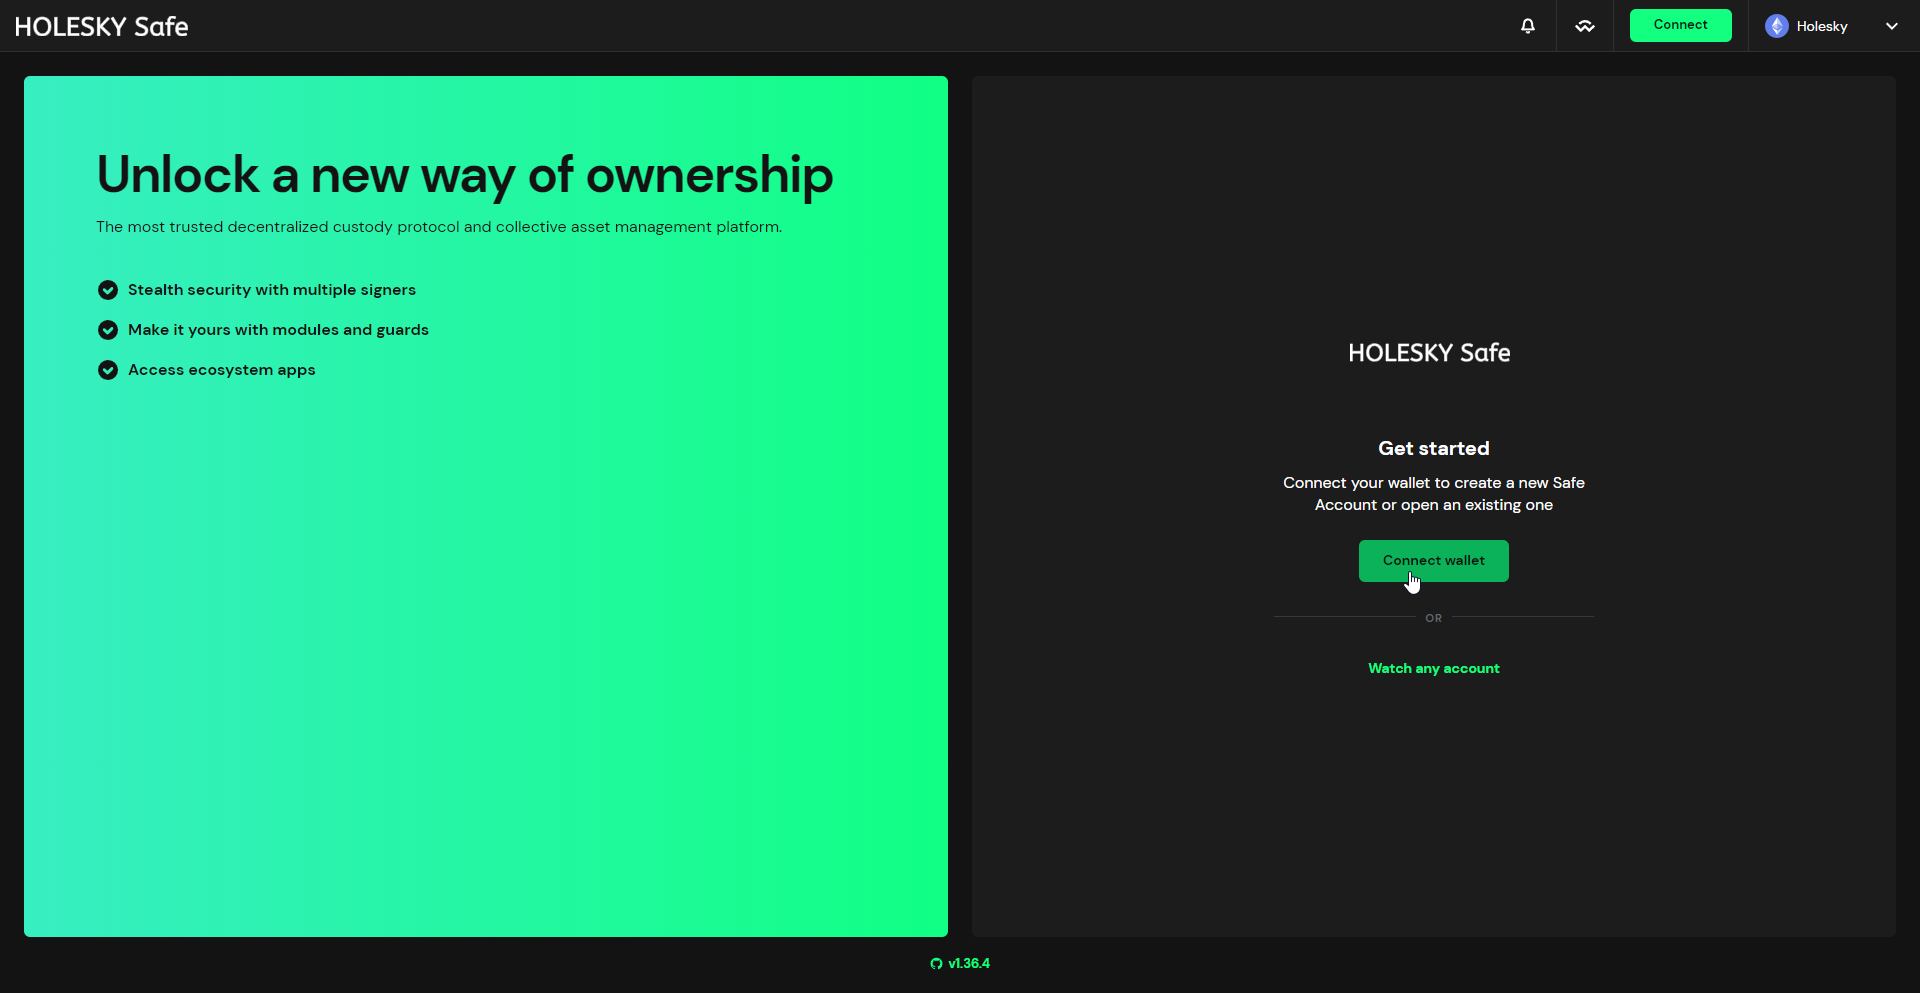
After giving the Safe a name and selecting the appropriate network, continue by clicking the Next button.
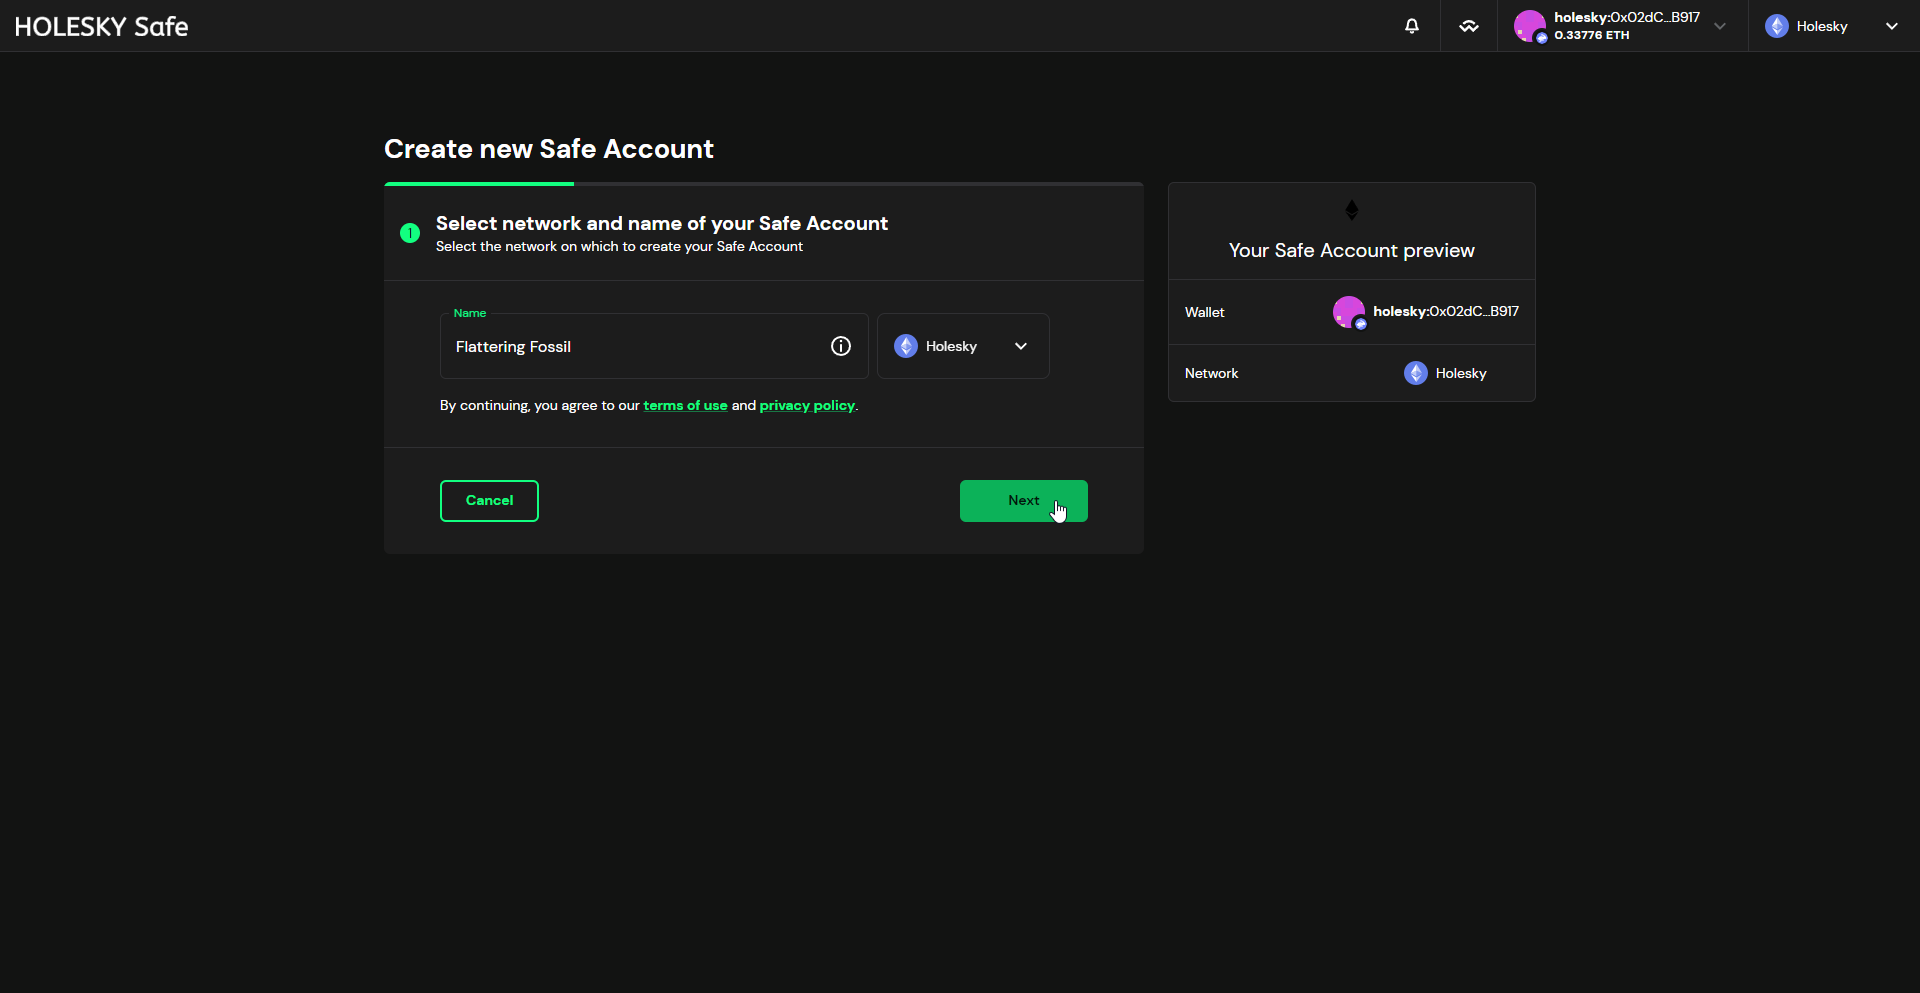
Add all the signer addresses of the cluster members, select a threshold, and proceed to the final step by clicking the Next button.
Don't require 100% of signers to approve transactions, in case someone loses access to their address. Using the same threshold as your cluster will use is a reasonable starting point.
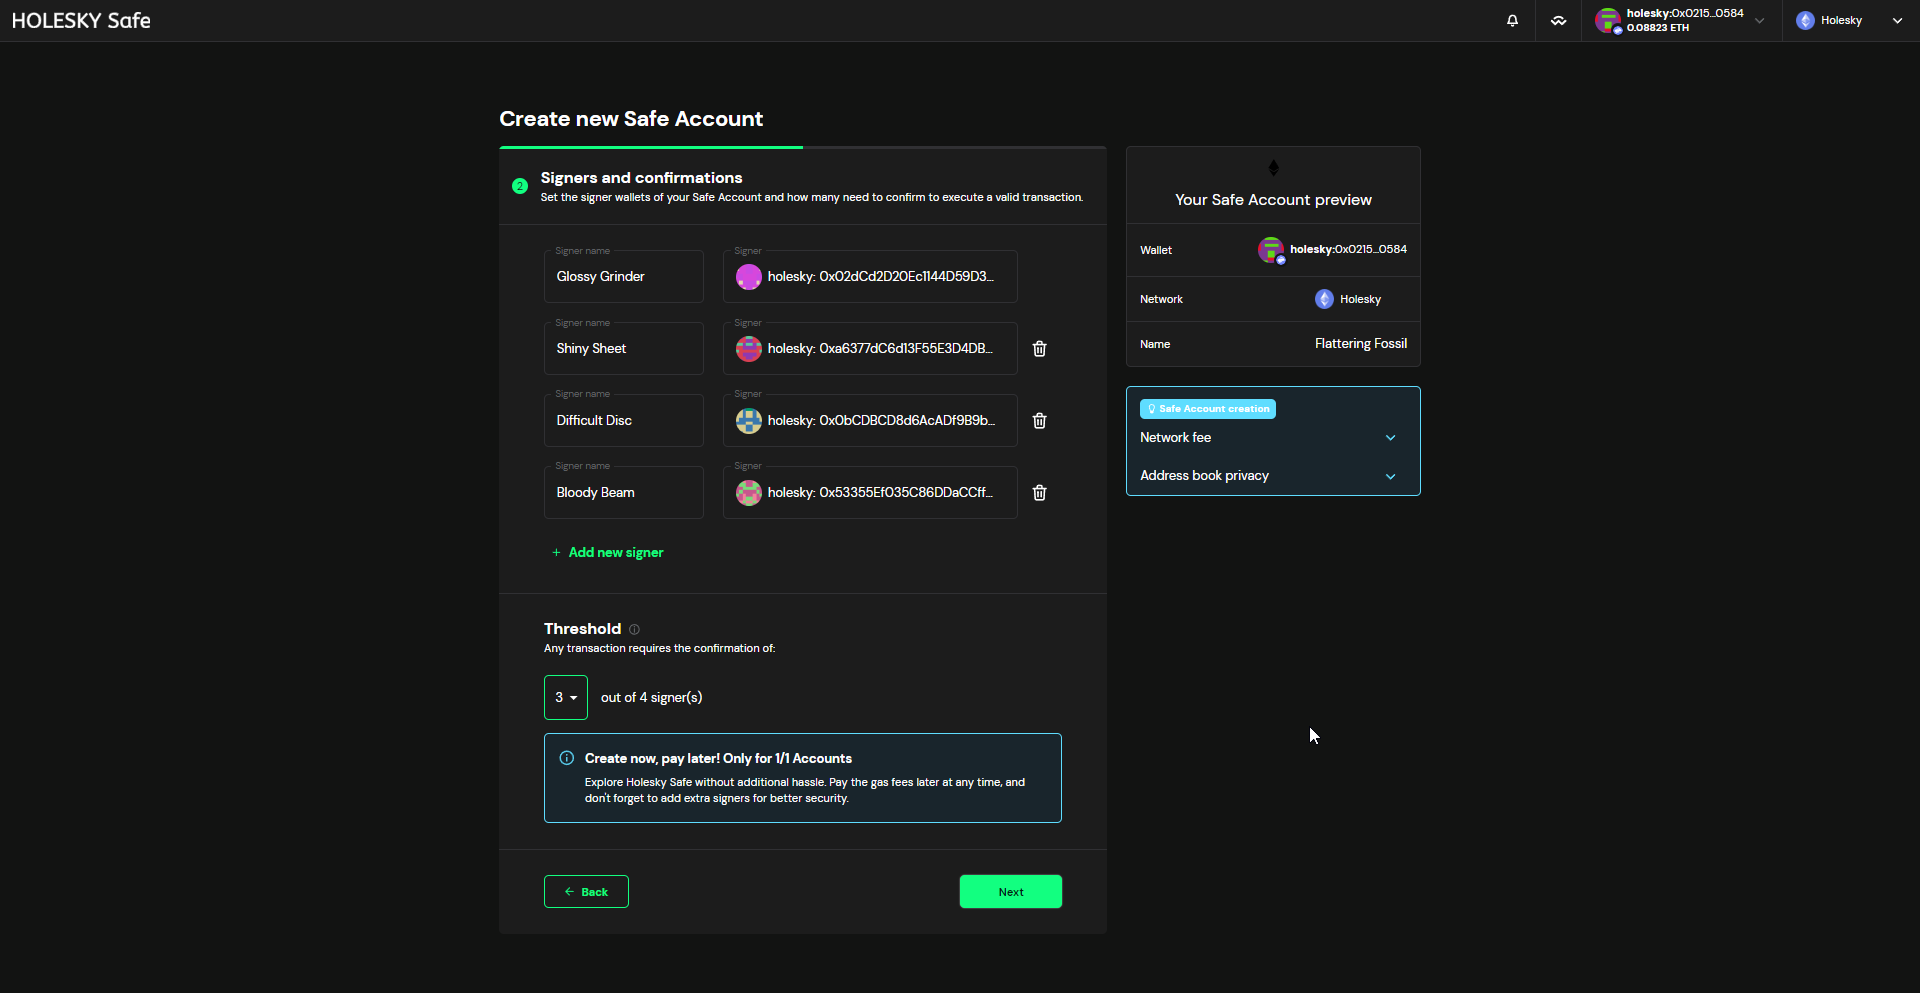
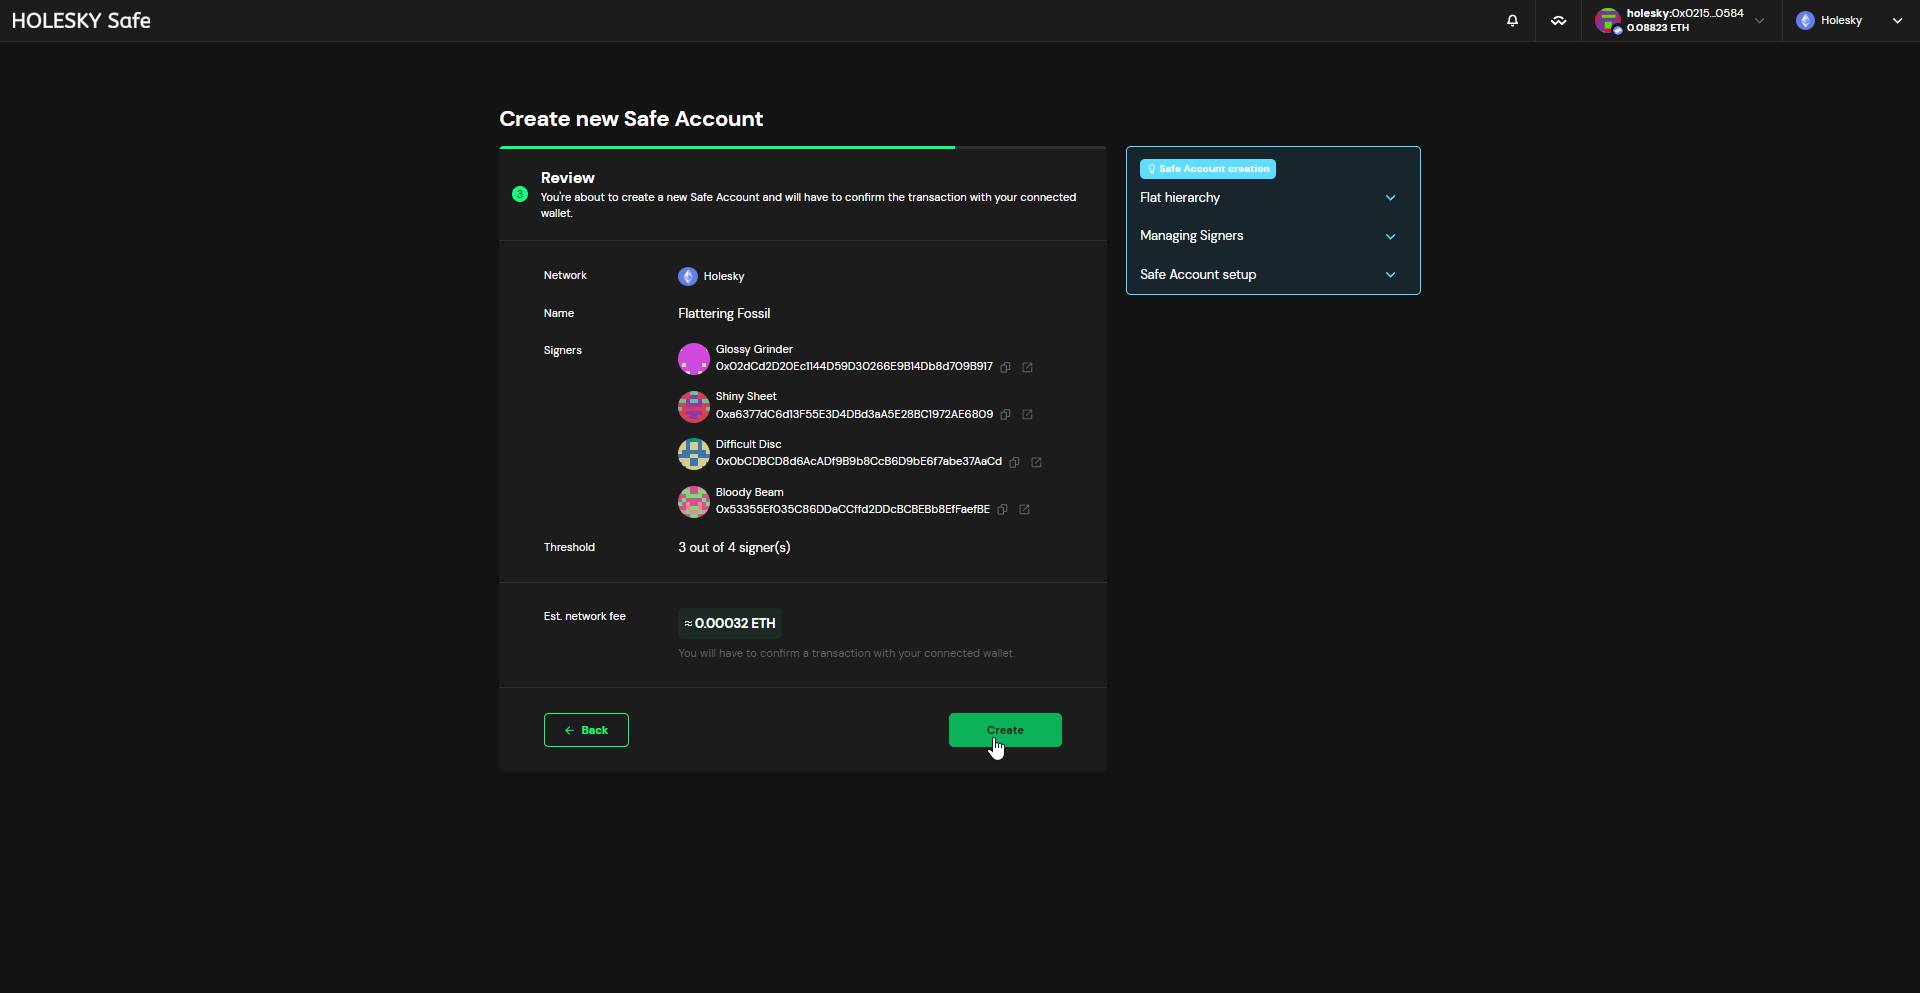
Finally, submit the transaction to create the Safe by clicking on the Create button.
Deploy the Splitter Contract
The squad leader should obtain the reward addresses from all the cluster members (this can be the same address used in the SAFE contract). Open https://app.splits.org and create a New contract. Make sure to select the appropriate network.
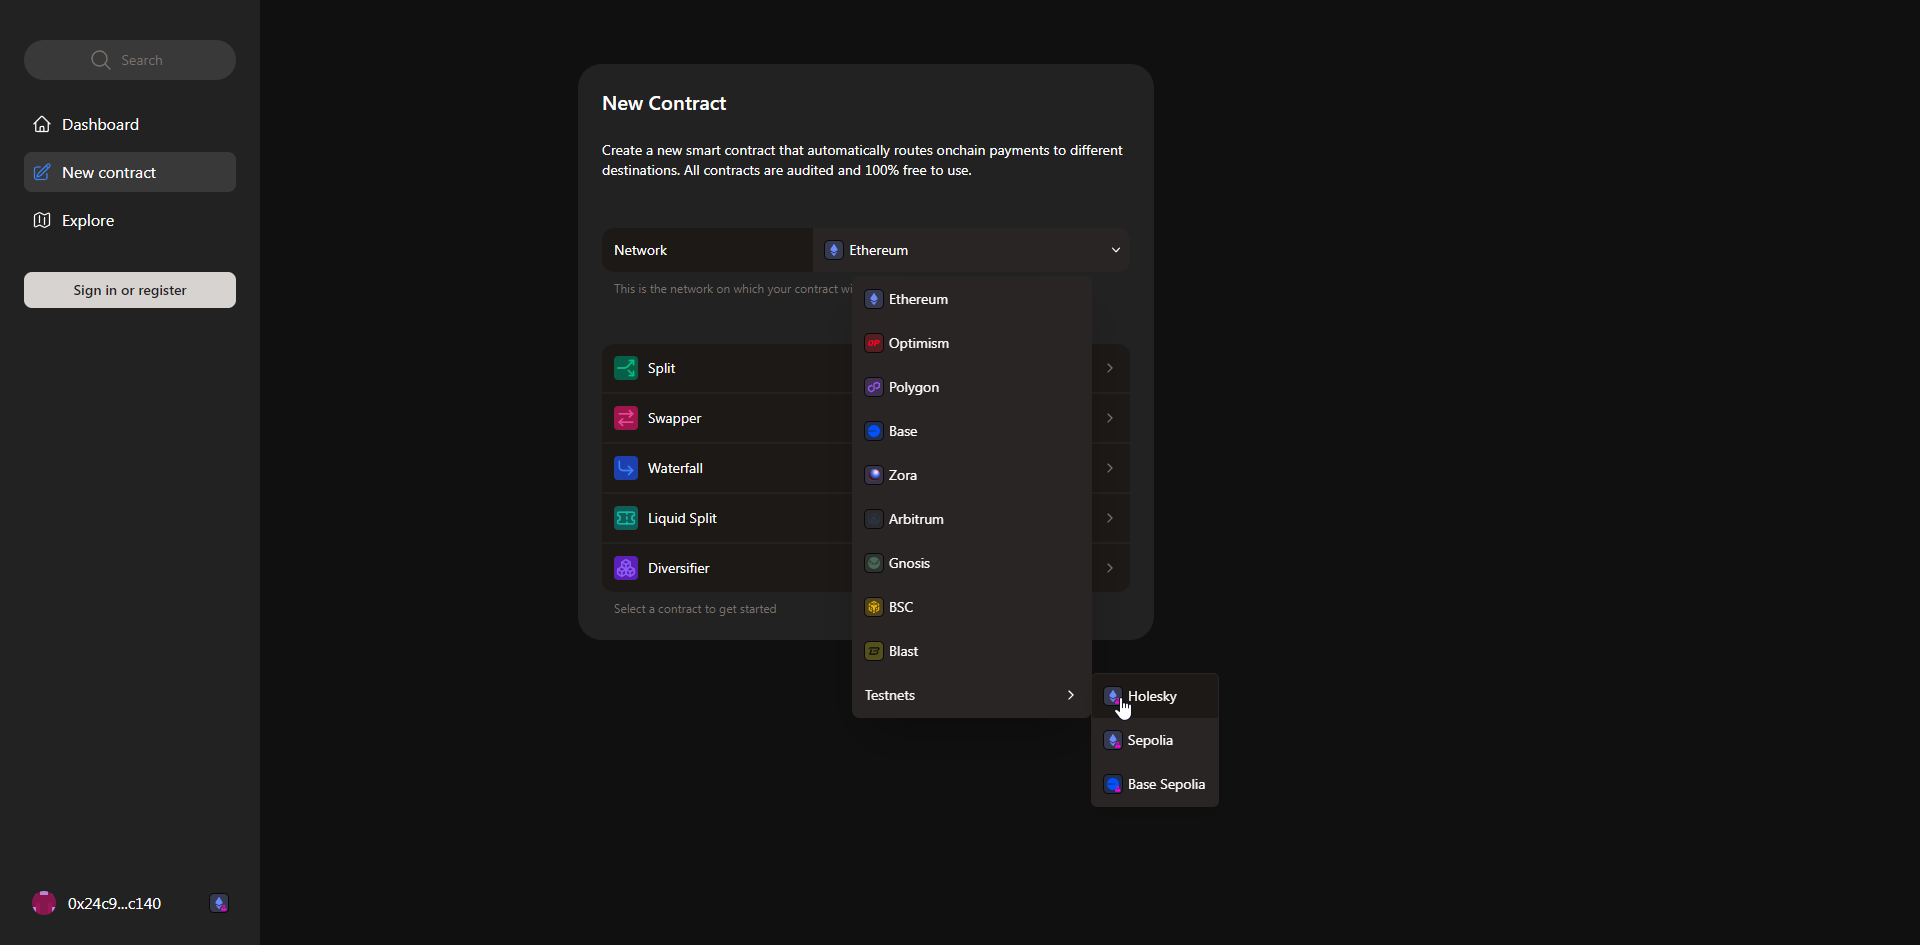
Select Split for the contract type.
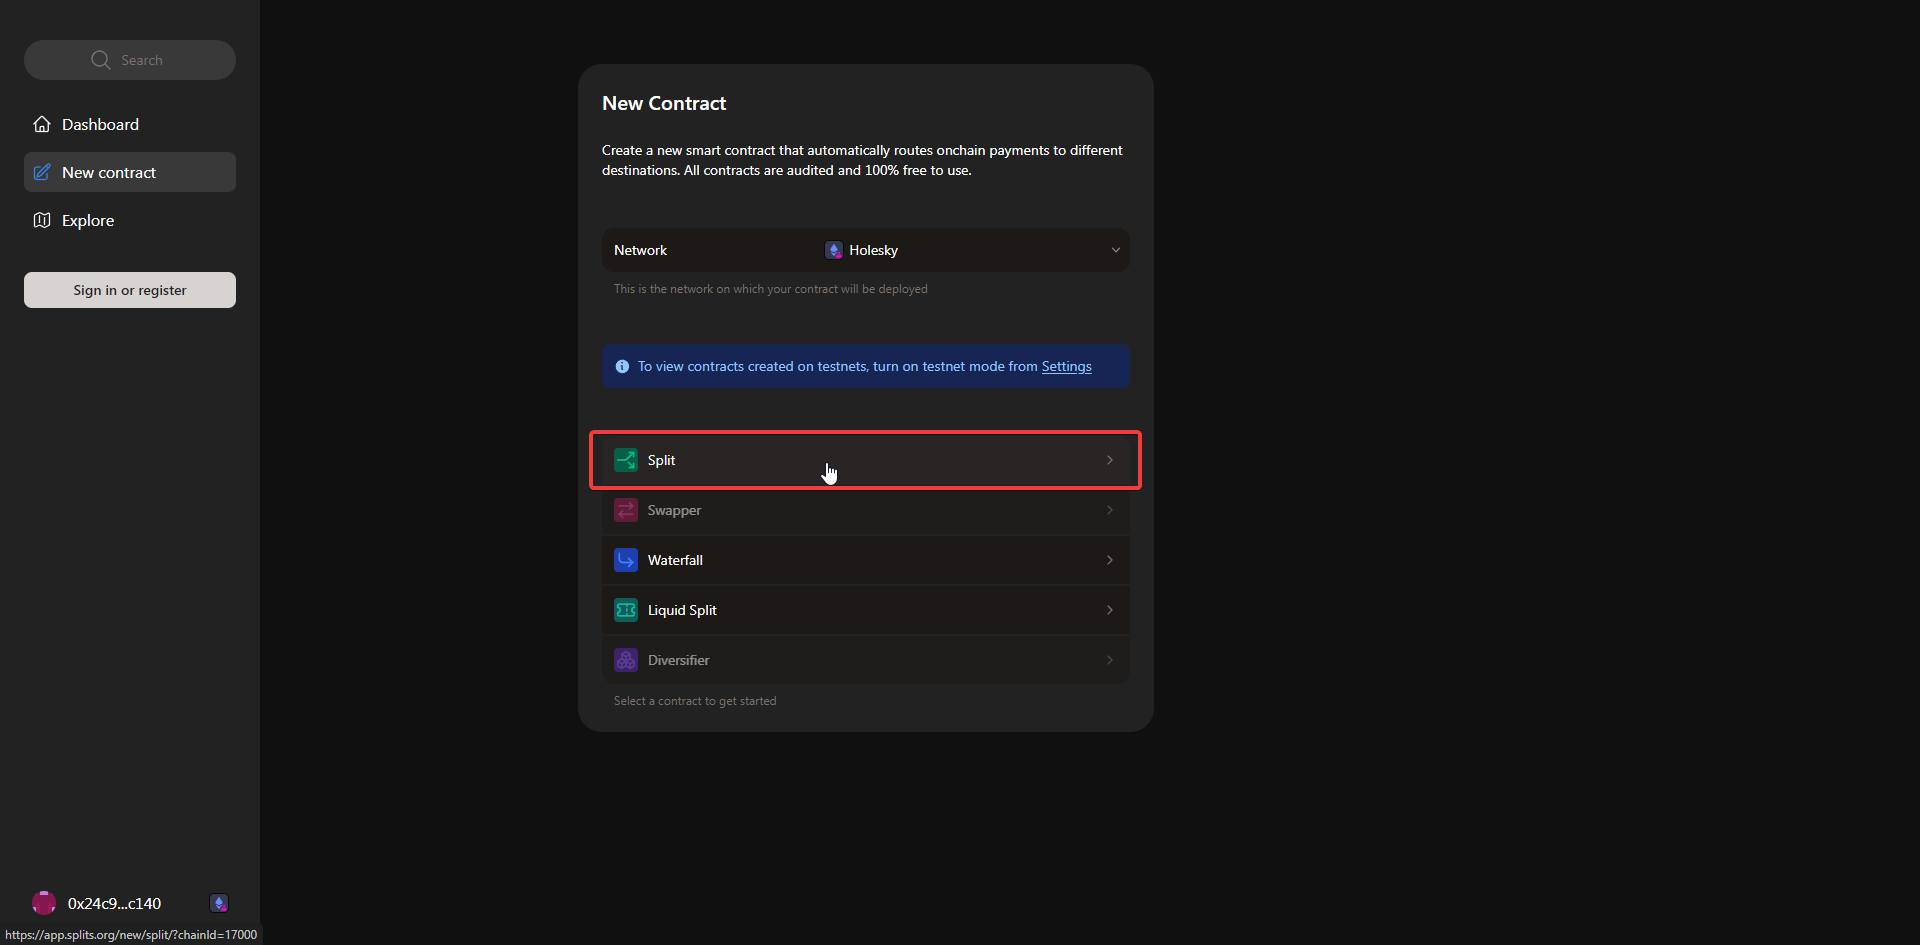
Add the reward addresses of all cluster members. Choose whether the contract is immutable (recommended option), whether to sponsor the maintainers of splits.org, and optionally whether to set a distribution bounty such that third parties could pay the gas costs of distributing the accrued rewards in exchange for a small fee.
If your cluster would like to contribute a portion of its rewards to Obol protocol development, thereby earning Obol Incentives as part of Lido's integration of CSM into the DV Vault, you must add protocoldevelopmentfee.obol.eth as a recipient of 0.1% of the splitter contract. This will contribute 0.1% of rewards and your CSM bond to Obol protocol development. Future versions of CSM integrations will enable contributing exactly 1% of accruing CSM rewards
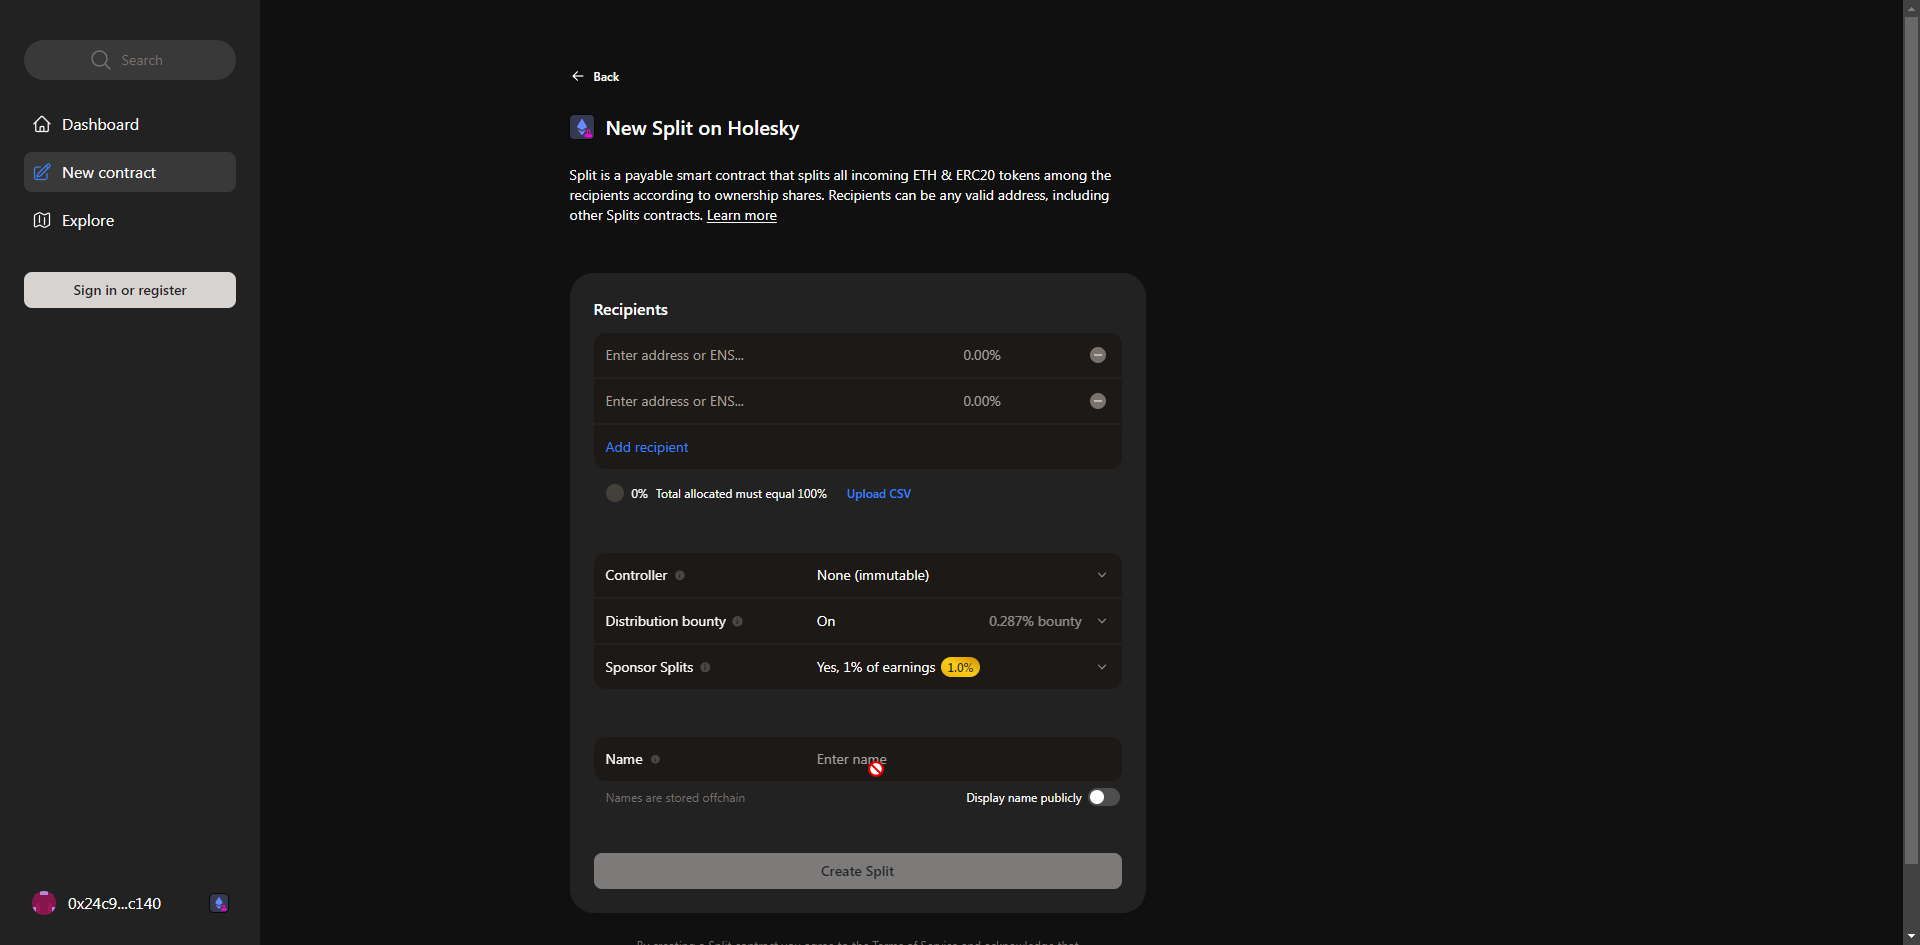
Finally, click the Create Split button, execute the transaction and share the created split contract with all cluster members for review.
Part 2: Use the DV Launchpad + CLI to create the cluster keys
Charon is the middleware client that enables validators to be run by a group of independent node operators - a cluster or squad. A complete multi-container Docker setup including execution client, consensus client, validator client, MEV-Boost, the Charon client and monitoring tools can be found in this repository.
Step 1: Clone the repo
git clone https://github.com/ObolNetwork/charon-distributed-validator-node.git
Step 2: Create ENR and Backup your Private Key
Enter the CDVN directory:
cd charon-distributed-validator-node
Use docker to create an ENR
docker run --rm -v "$(pwd):/opt/charon" obolnetwork/charon:v1.10.0 create enr
Back up the private key located in .charon/charon-enr-private-key
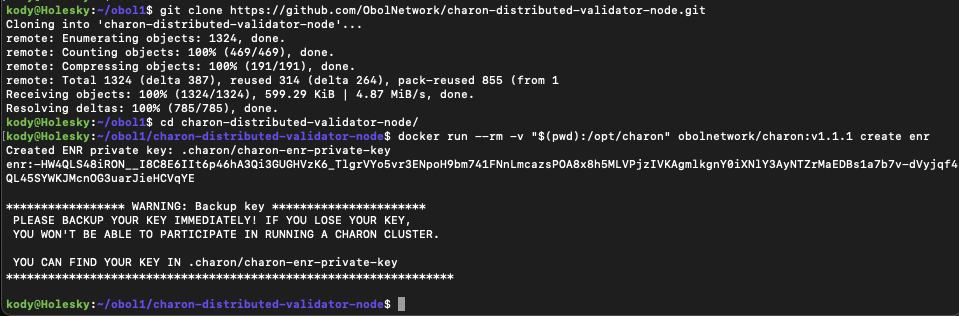
What you see in the console starting with enr:- is the public key for your Charon node (known as an ENR). The private key is in the file .charon/charon-enr-private-key, be sure to back it up securely.
Step 3: Create the DV cluster configuration using the Launchpad
Obol has integrated the CSM details into the DV Launchpad. Choosing the "Lido CSM" withdrawal configuration allows you to create validator keys with Lido's required withdrawal and fee recipient addresses.
To start, the squad leader opens the DV Launchpad, then connects their wallet and chooses Create a cluster with a group.
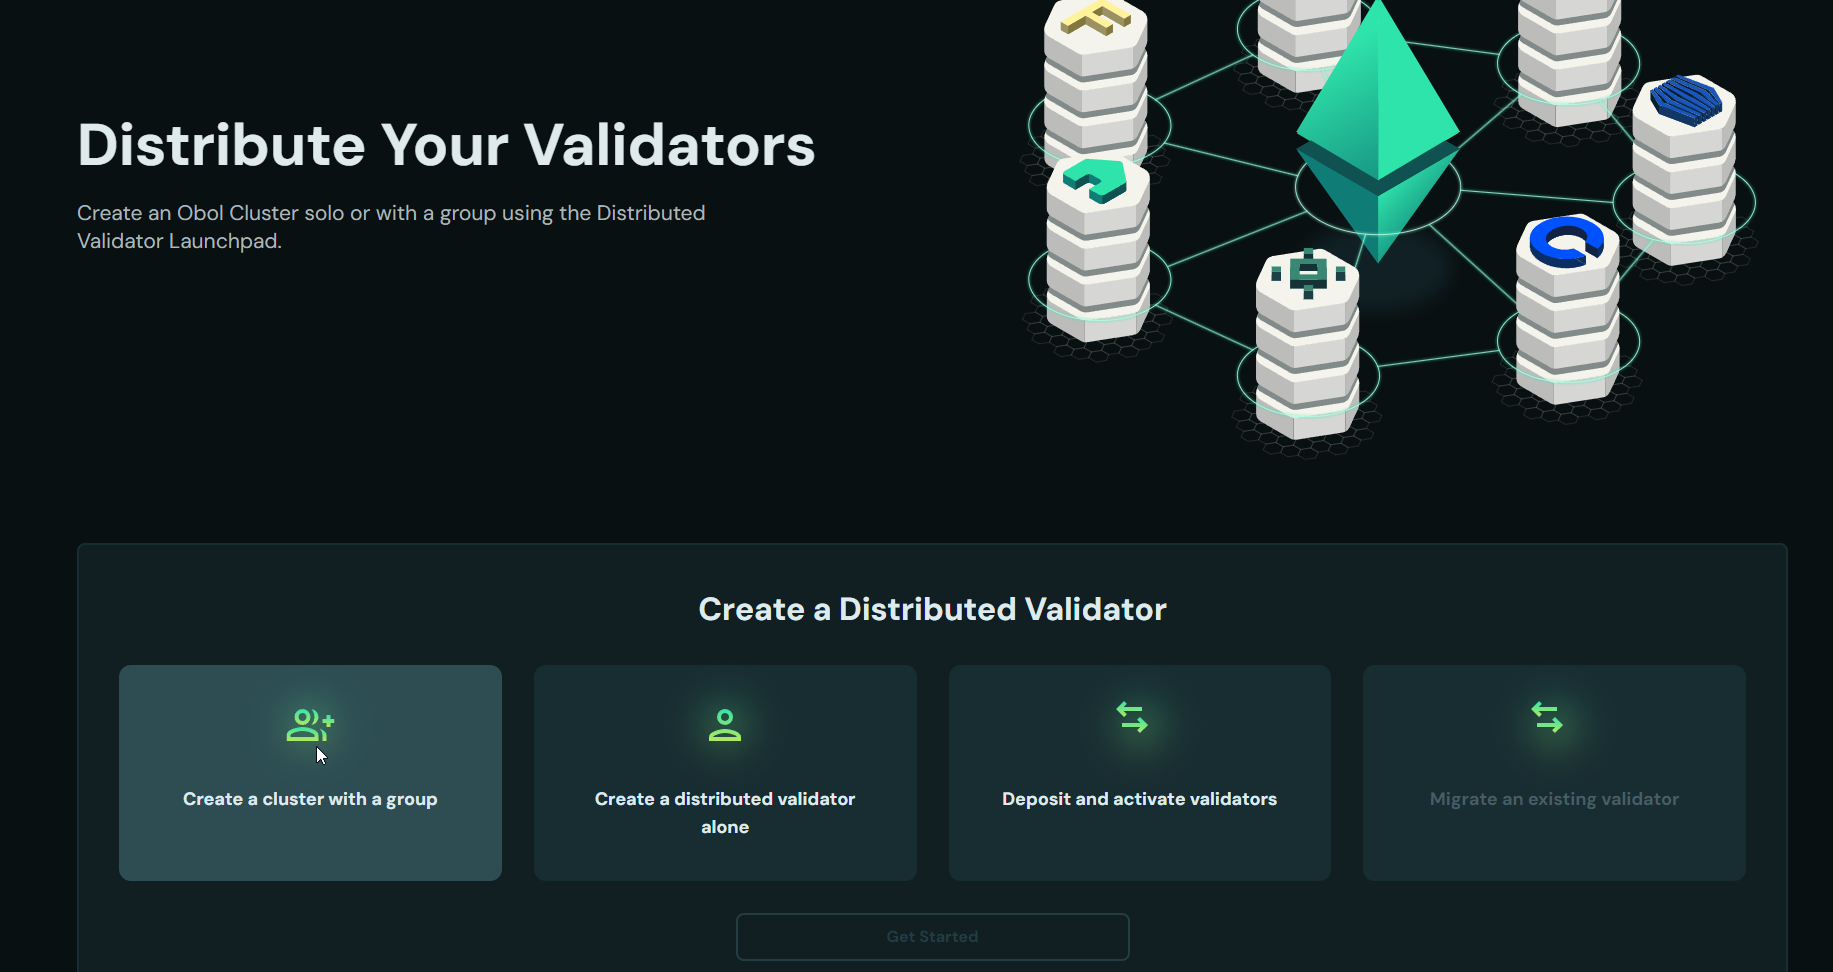
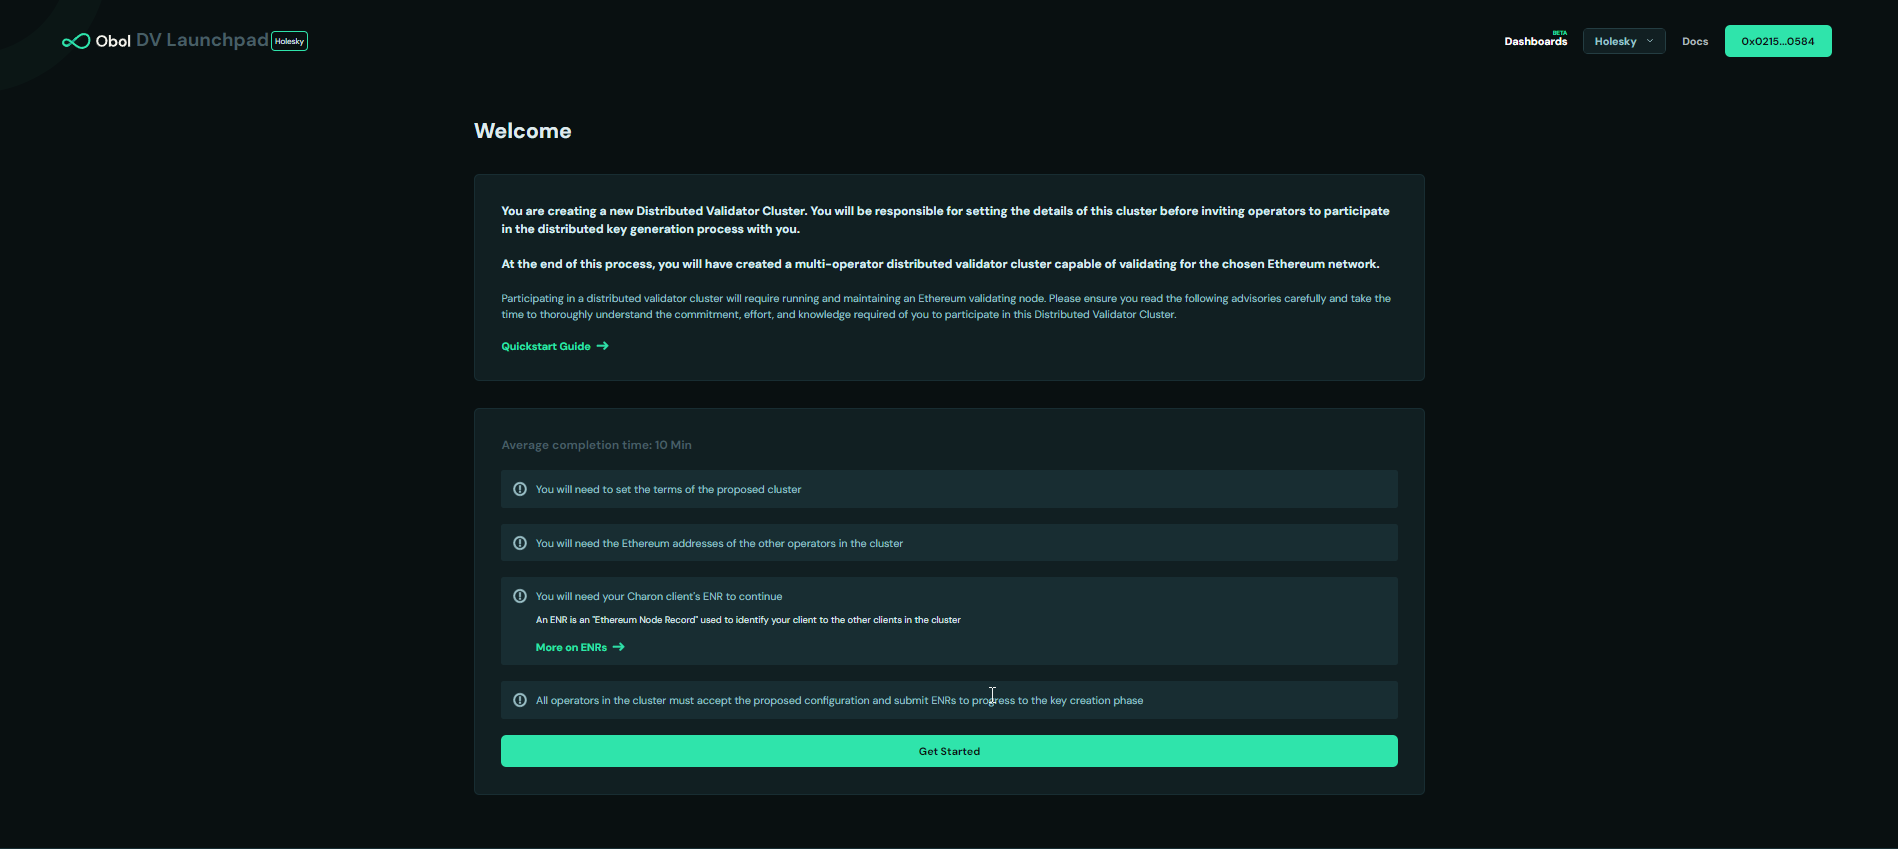
Then click Get Started.
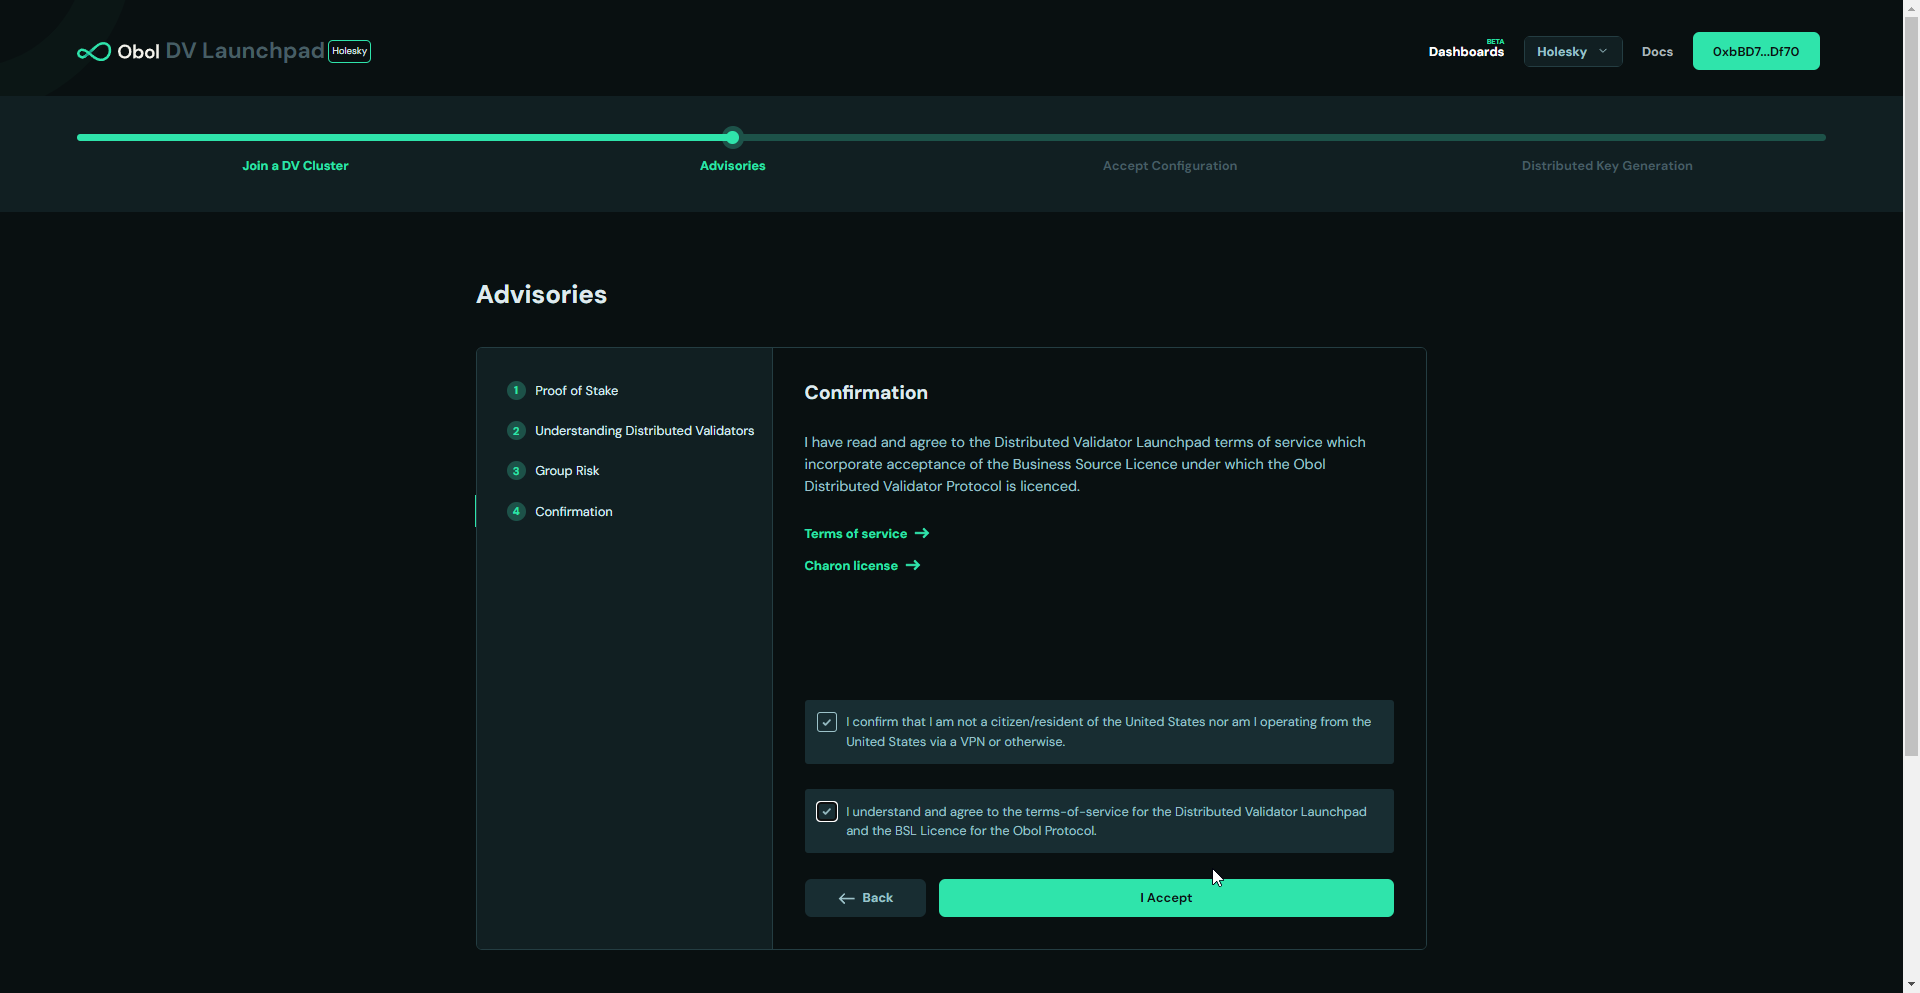
Accept all the necessary advisories and sign to confirm.
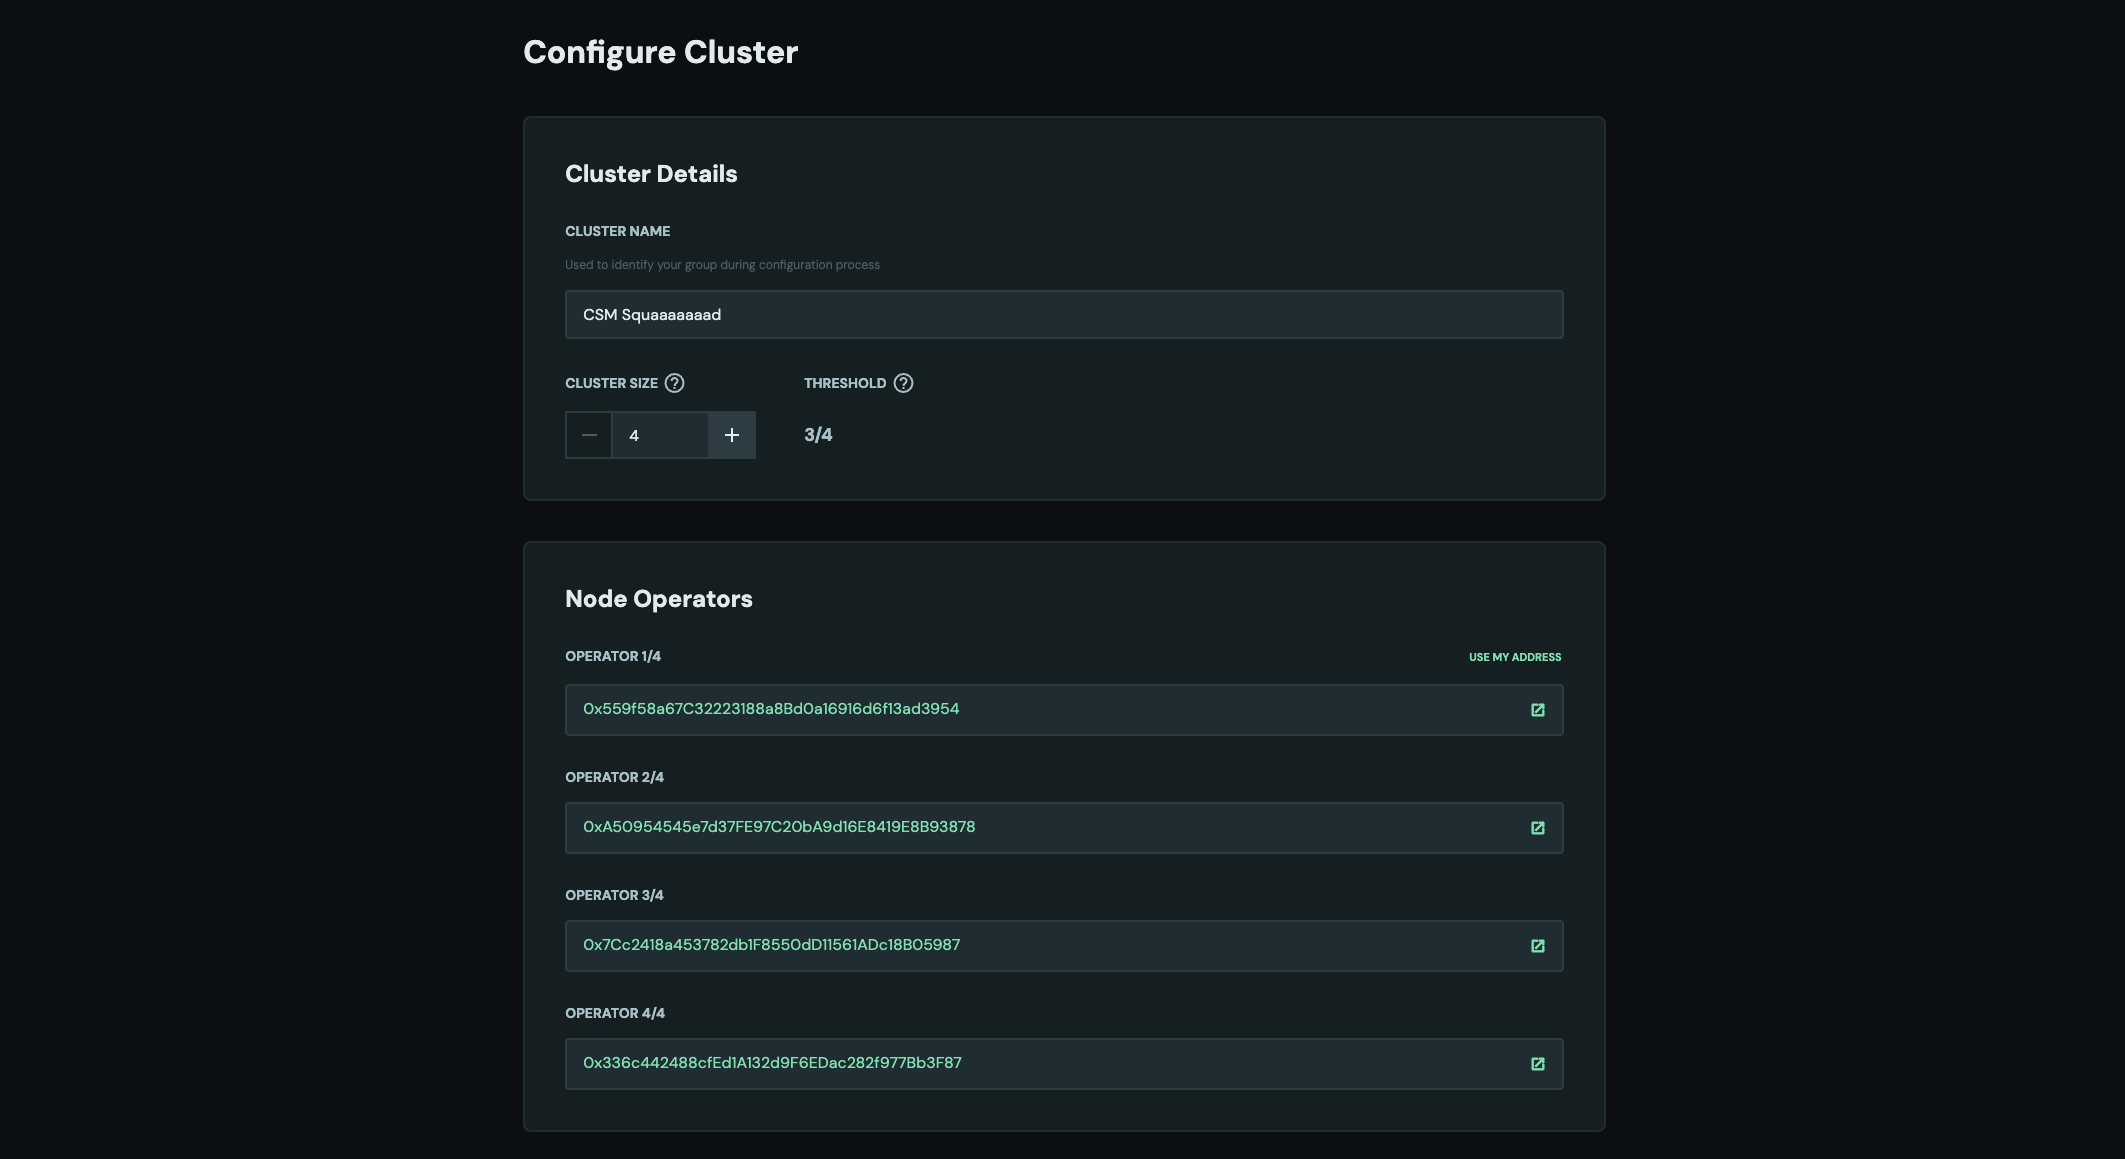
Cluster configuration begins next. First, select the cluster name and size, then enter all cluster members signer addresses.
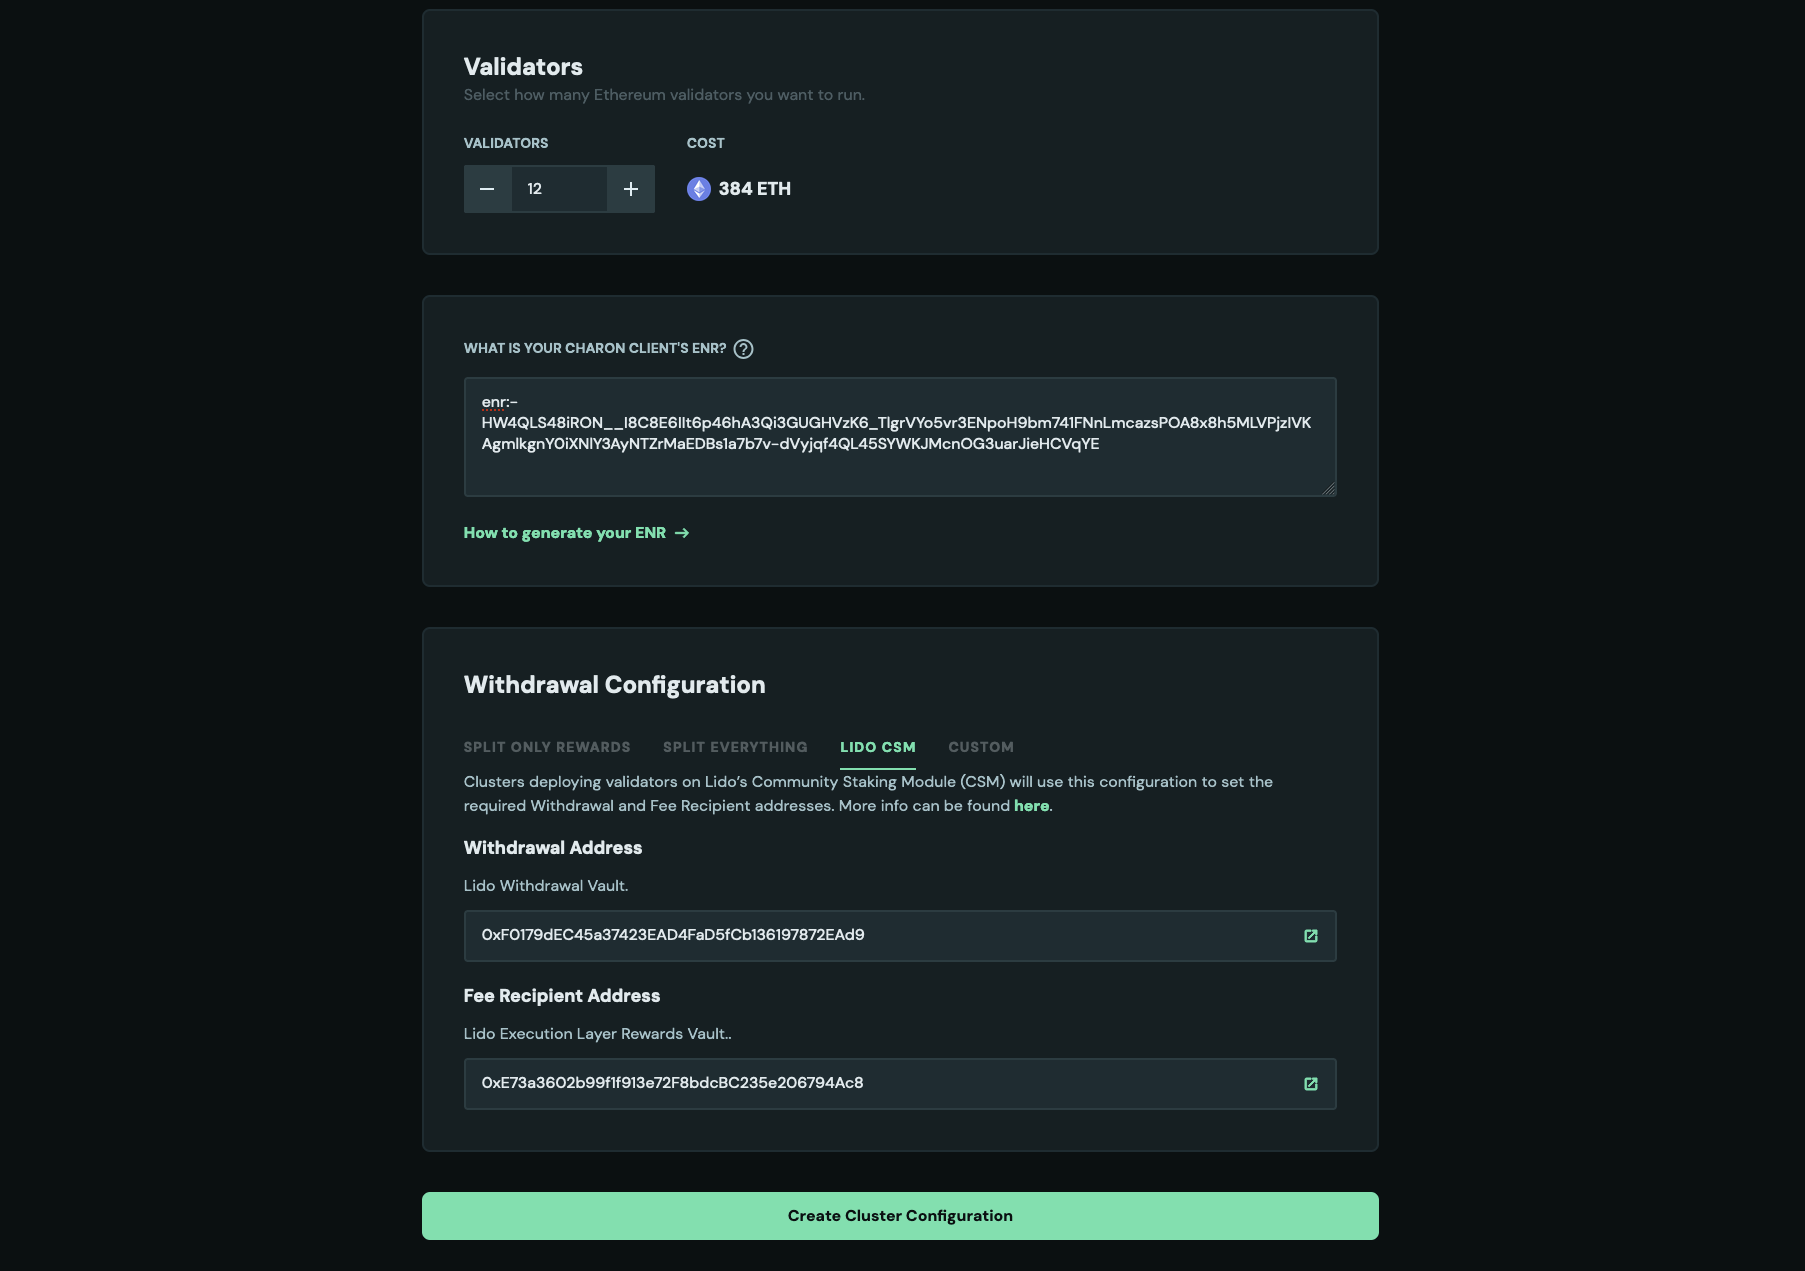
- Select the number of validators to create.
- (If the cluster creator is taking part in the cluster) Enter your Charon node's ENR which was generated during step 2 above.
- In the Withdrawal Configuration field, select
LIDO CSM. This will automatically fill the required Withdrawal Address and Fee Recipient Addresss per Lido's Documentation. - Finally, click on the Create Cluster Configuration button.
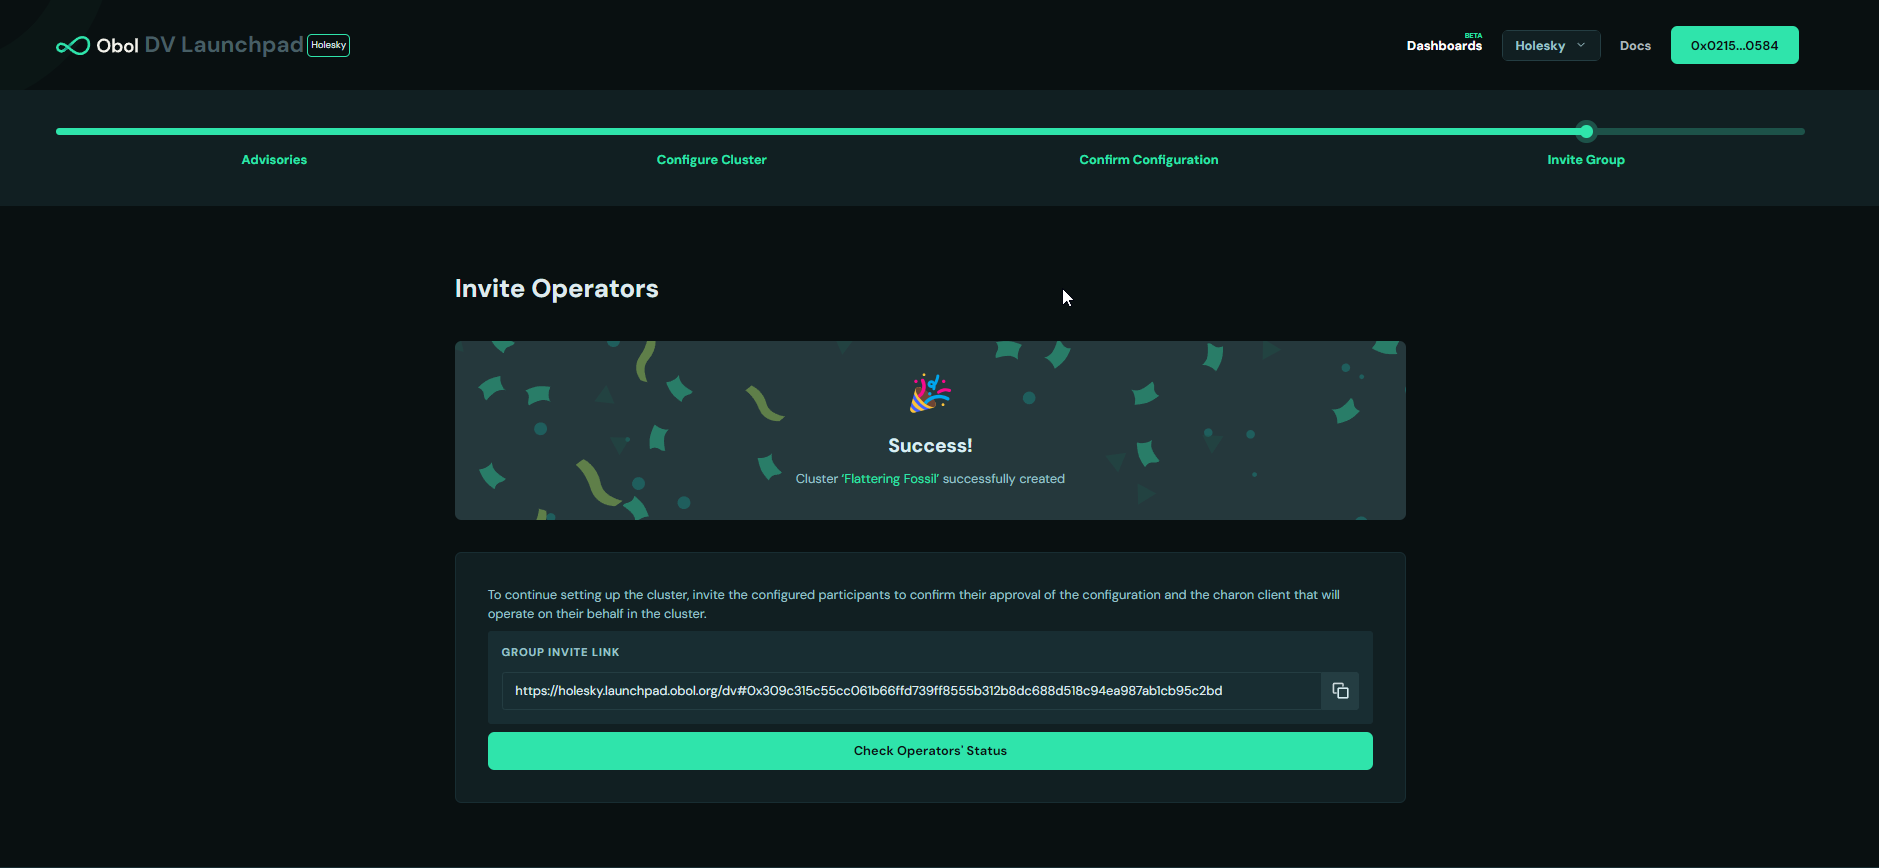
Lastly, share the cluster invite link with the other cluster members.
Step 4: Distributed Key Generation (DKG)
All squad members need to open the cluster invitation link, connect their wallet, accept all necessary advisories, and to verify the cluster configuration is correct with a signature. Each squad member will also need to upload and sign an ENR to represent their Charon client, so see steps 1 and 2 above.
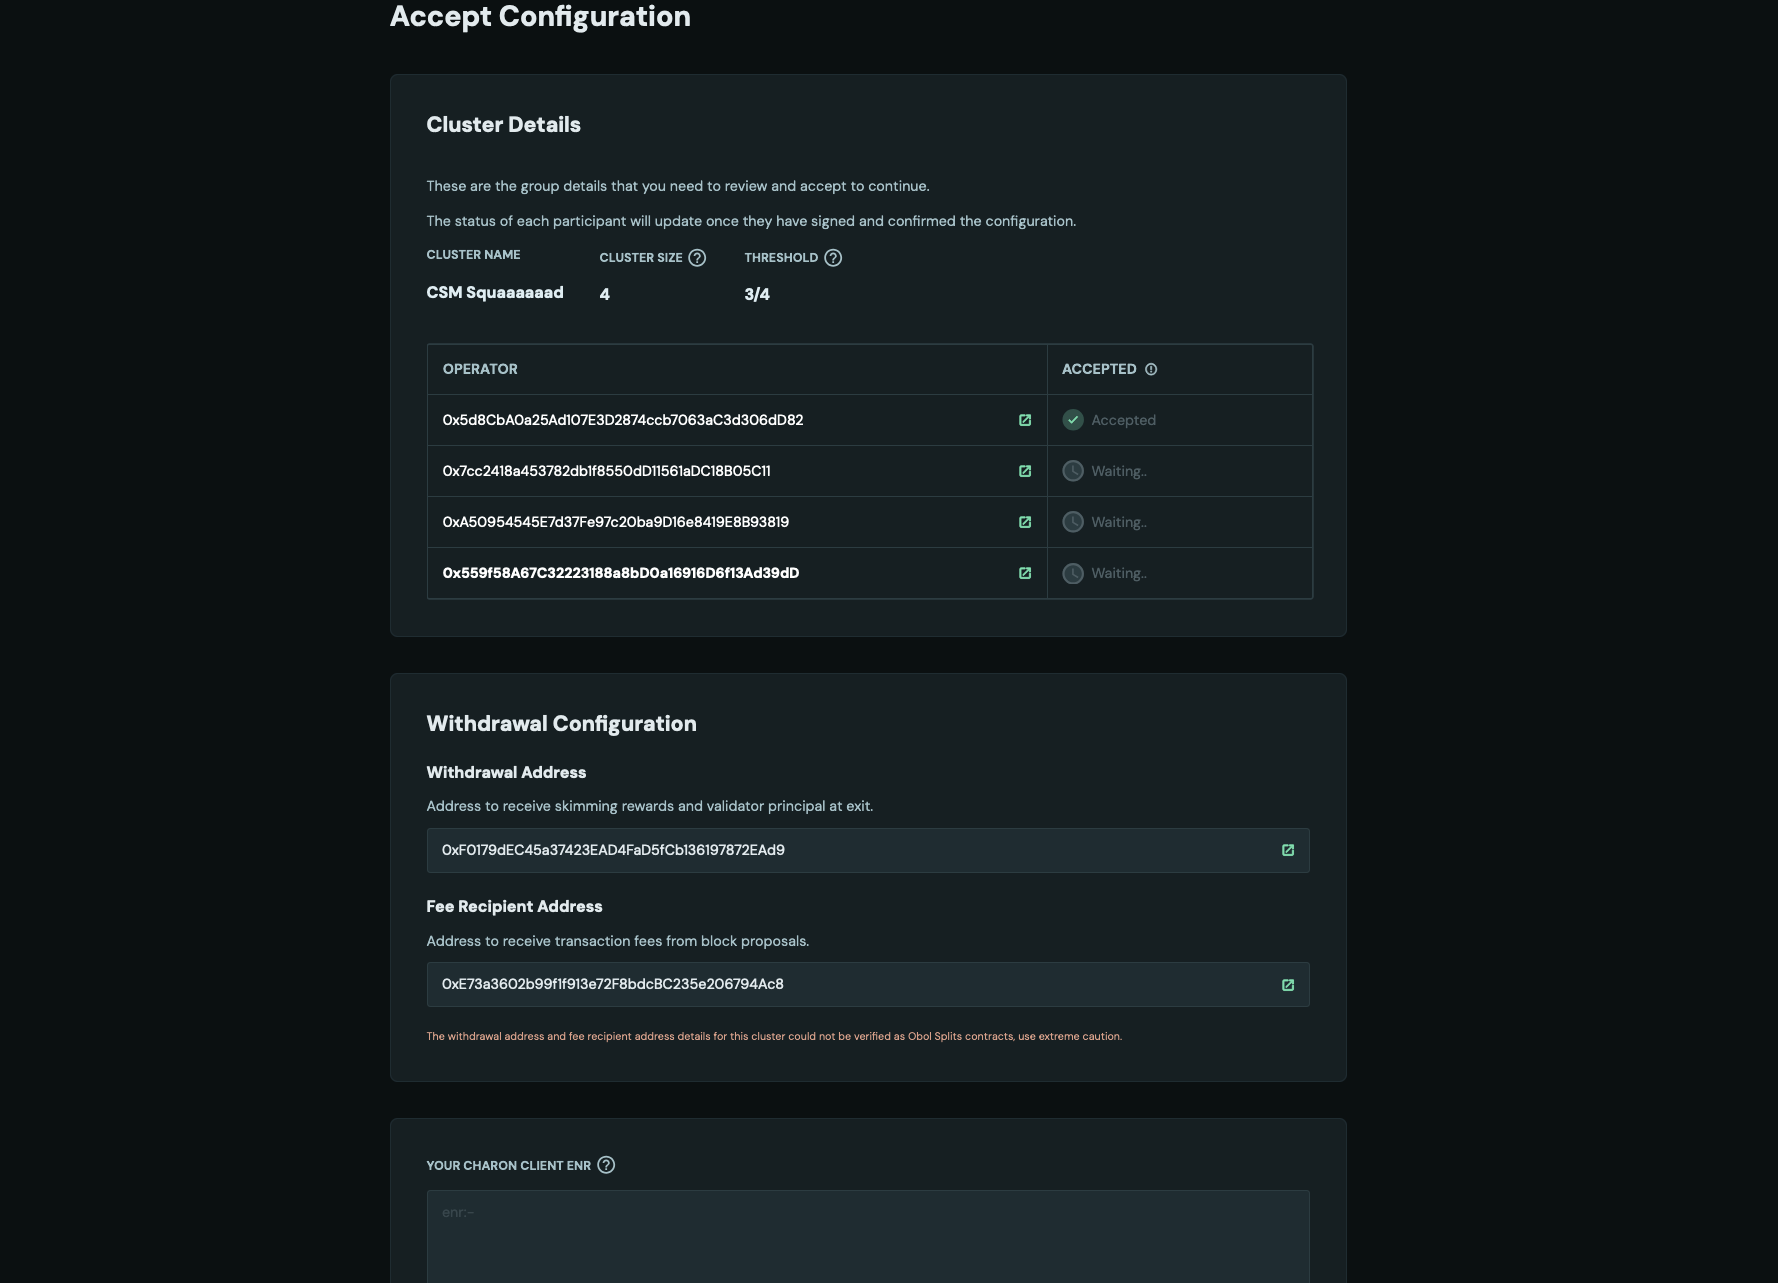
Once all members confirm the configuration they will see the Continue button.
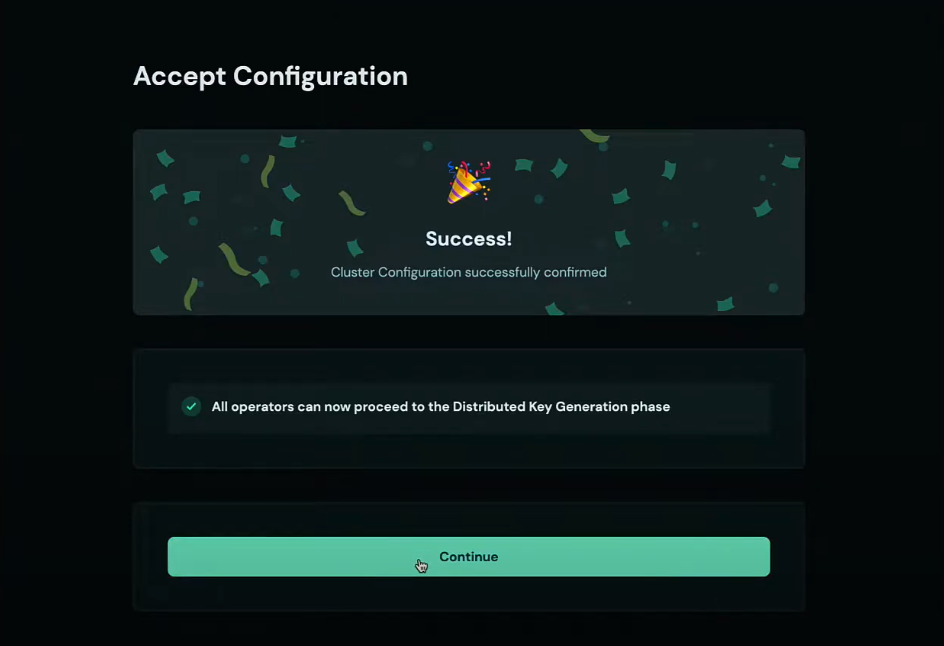
On the next page, they will find a CLI command which is used to begin the Distributed Key Generation (DKG) ceremony. All members need to synchronously complete this step.
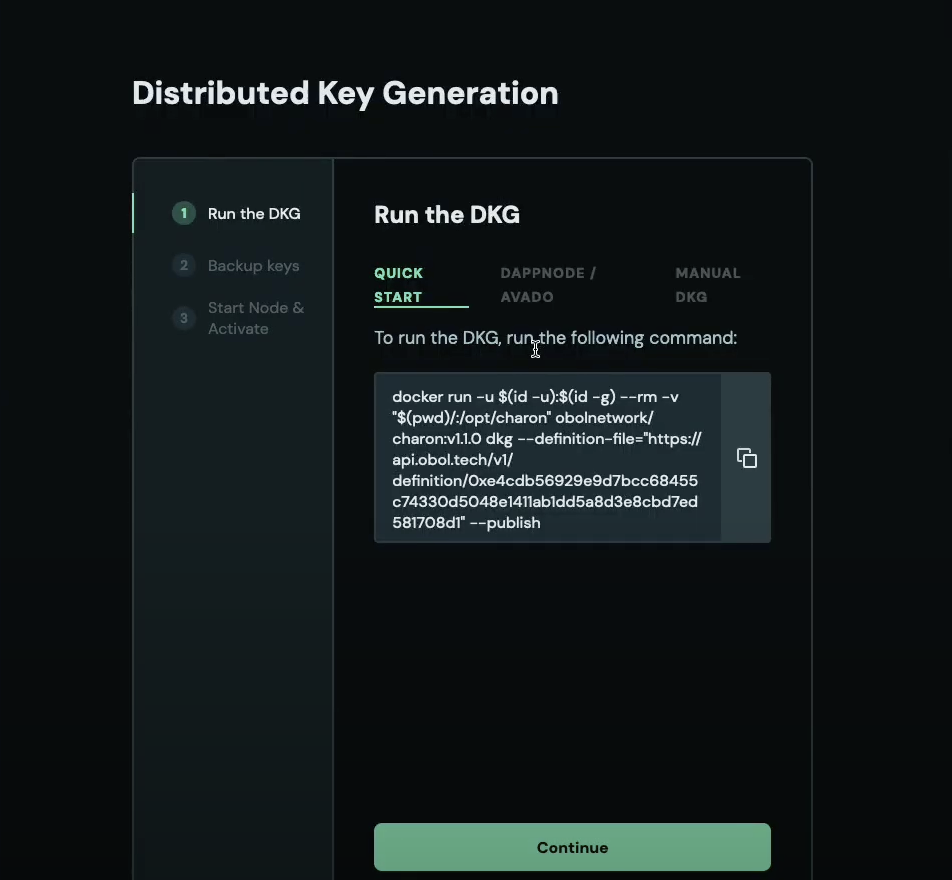
Go back to the terminal and make sure you're in the charon-distributed-validator-node directory before running the DKG command:
pwd
If you are not, navigate to it using the cd command.
Paste the DKG command into your terminal and wait for all the other squad members to connect and complete the DKG ceremony.
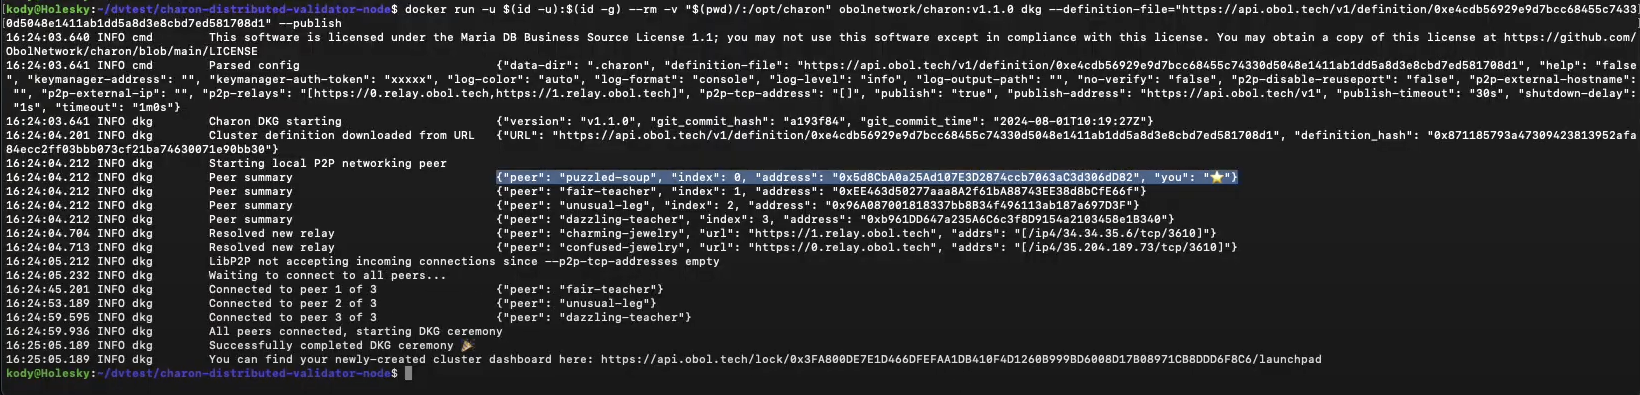
New files were generated: cluster-lock.json, deposit-data.json, validator_keys are all found in the .charon folder (hidden by default). This contains each operator's partial key signatures for the validators.
At this point, each operator must make a backup of the .charon folder and keep it safe, as validator keys cannot be recreated if lost.
Step 5: Create a .env file for Mainnet
Copy and rename the .env.sample.mainnet file to .env
cp .env.sample.mainnet .env
Open the .env file using your favorite editor:
nano .env
Uncomment and set BUILDER_API_ENABLED=true.
Uncomment MEVBOOST_RELAYS= and set it to the URL of at least one of Lido's approved MEV relays here. Multiple relays must be separated by a comma. Consult our deployment best practices for further info on MEV relay selection.
Step 6: Starting the Node
Each cluster member should start the node with the following command:
docker compose up -d
At this point, execution and consensus clients should start syncing. Charon and the validator client should start waiting for the consensus client to be synced and the validator to be activated.
Part 3: Upload the public keys and deposit to Lido CSM
CSM V3 introduces a new operator type, Identified DVT Cluster (IDVTC), that is purpose-built for distributed validator clusters. An IDVTC cluster must have exactly four operators (no more, no less), and every operator must already hold the Identified Community Staker (ICS) operator type. See Lido's IDVTC description page for full eligibility and rules.
Choose the tab below that matches how your cluster will deposit. Both flows continue with the shared Create the Node Operator section once any pre-deposit steps are complete.
- ICS
- IDVTC
A single squad member who holds ICS should be the one to create the node through the CSM widget. Doing so ensures the cluster's validators receive ICS benefits.
There are no additional pre-deposit steps for ICS clusters. Proceed to Create the Node Operator below.
Before depositing, your cluster must be approved as an Identified DVT Cluster. The squad leader submits a single application on behalf of all four operators.
The squad leader connects to the Lido CSM UI using the SAFE multisig wallet (created in Part 1) via WalletConnect. WalletConnect sessions can drop if the initiator disconnects, so keep the browser tab and WalletConnect session open while you collect the threshold of SAFE signatures needed to connect.
Step 1: Open the IDVTC Application Form
The squad leader navigates to csm.lido.fi, connects the SAFE multisig via WalletConnect, then in the left sidebar clicks Operator Type followed by Apply for IDVTC. You can also navigate directly to csm.lido.fi/type/idvtc-apply.
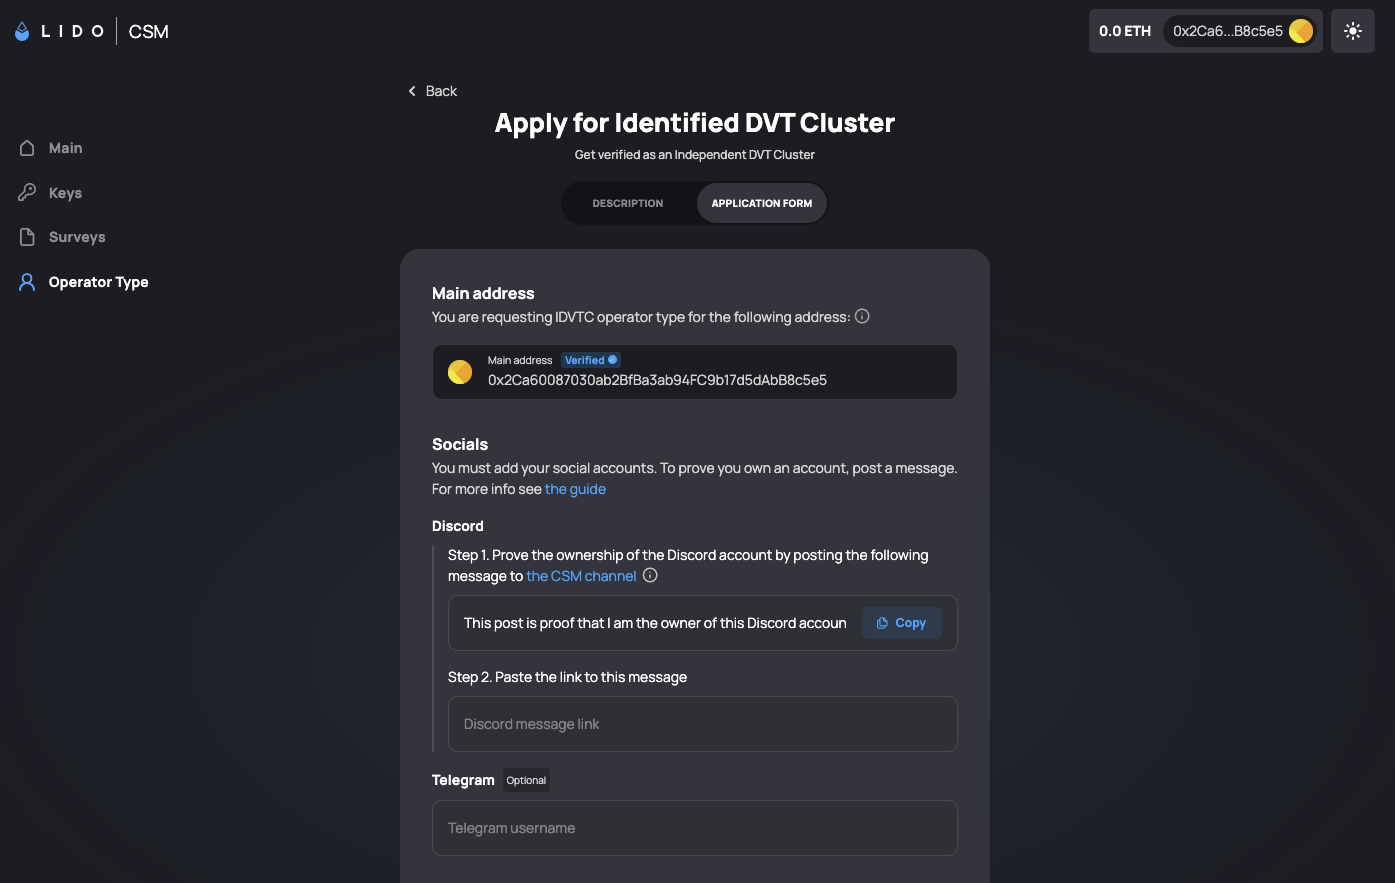
The Main address shown on the form will be the connected SAFE multisig.
Step 2: Prove Discord Ownership
- In the Discord section, click Copy to copy the generated proof message.
- Post the message in the Lido CSM Discord channel. The application form links directly to the correct channel.
- Copy the link to your posted message and paste it into the Discord message link field.
Optionally, add a Telegram username in the Telegram field for follow-up communication from the Lido team.
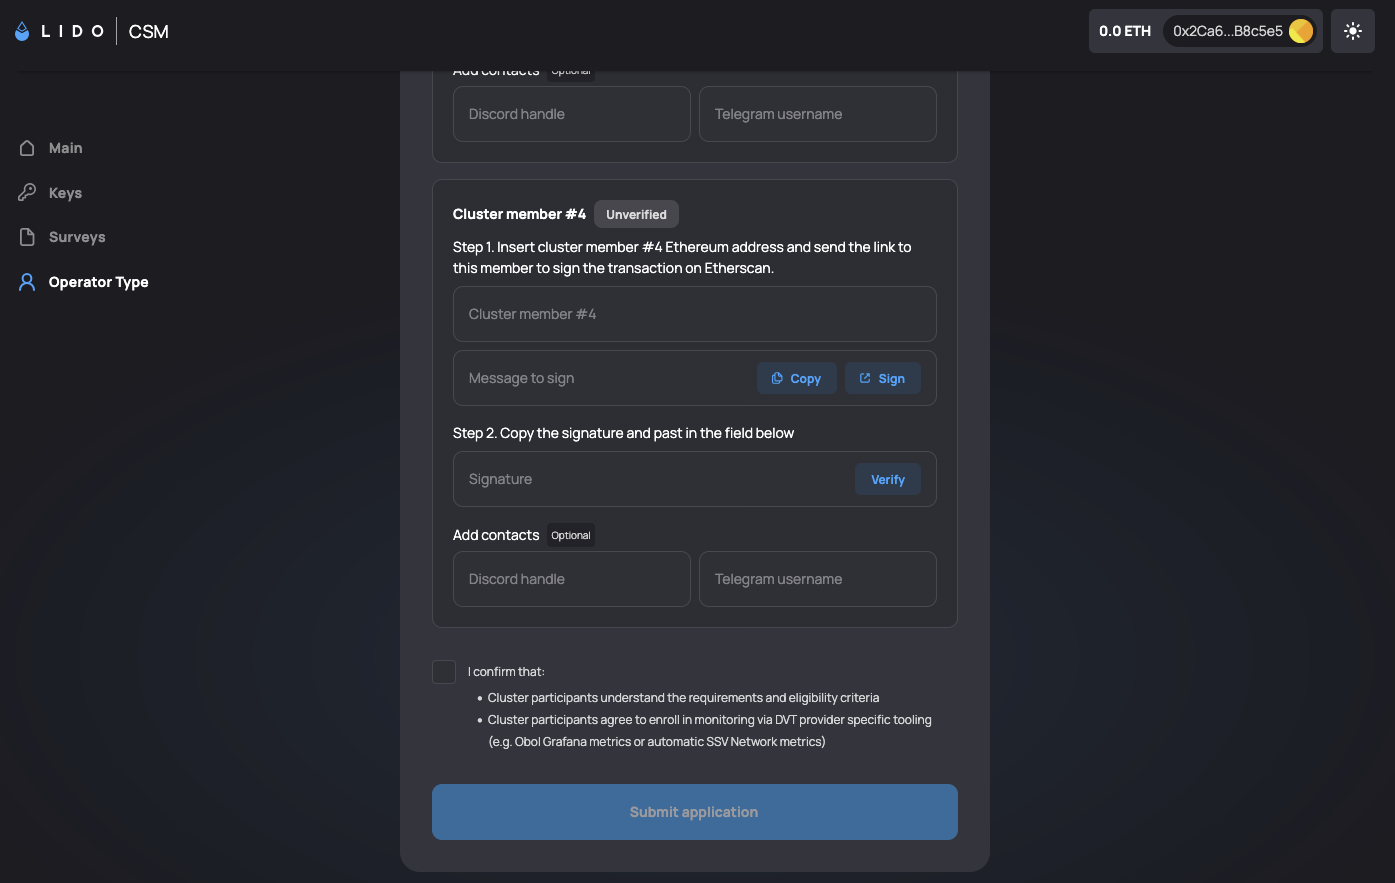
Step 3: Verify the Four Cluster Member Addresses
This section requires coordination with your three teammates. Each cluster member must prove ownership of their ICS-verified Ethereum address by signing a message on Etherscan.
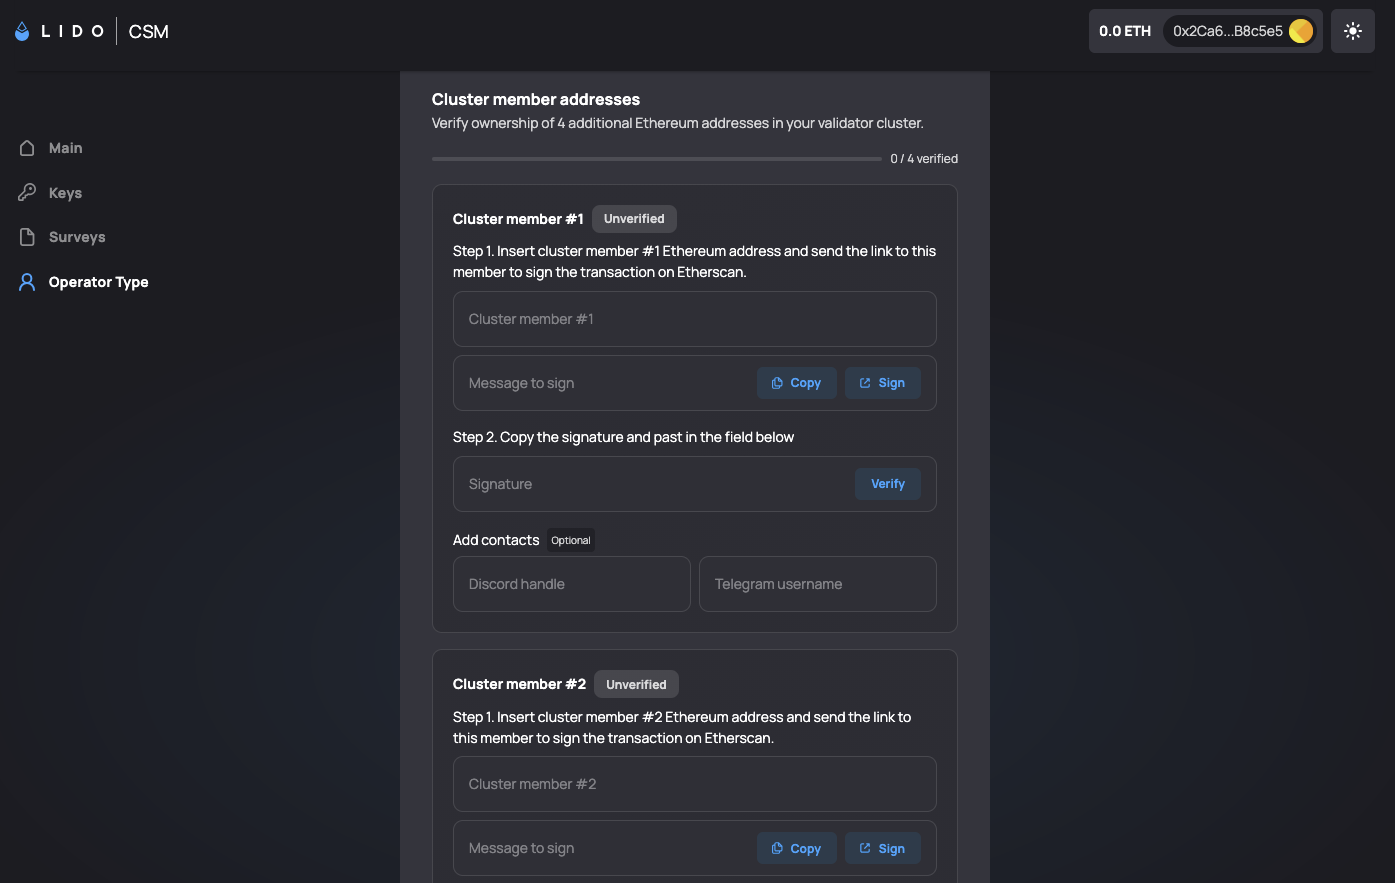
Starting with Cluster member #1 (typically the squad leader), and then for each remaining member:
- Enter the member's ICS-verified Ethereum address into the Cluster member #N field. The form generates a unique Message to sign for that address.
- Click Sign next to the message. This opens Etherscan's Verified Signatures tool in a new tab.
- The member whose address is being verified connects their wallet to Etherscan, pastes the generated message into the Message field, clicks Sign Message, and then Publish.
- Etherscan returns a signature. Paste the signature into the Signature field in the application form and click Verify.
- When the signature is valid, the member's status flips from Unverified to Verified.
Repeat for cluster members #2, #3, and #4.
The squad leader does not need to be physically co-located with the other members. Send each teammate the generated message and the Etherscan signing link, then collect the resulting signature from them to paste into the form on their behalf.
Step 4: Submit the Application
Once all four cluster members show as Verified, tick the confirmation checkbox at the bottom of the form, then click Submit application.
At time of writing, the Lido IDVTC application review and approval flow has not yet been finalized publicly. Once Lido publishes the post-submission process (including how applicants are notified of approval and how to proceed with depositing as an IDVTC), this section will be updated.
Once your IDVTC application is approved, proceed to Create the Node Operator below.
Create the Node Operator
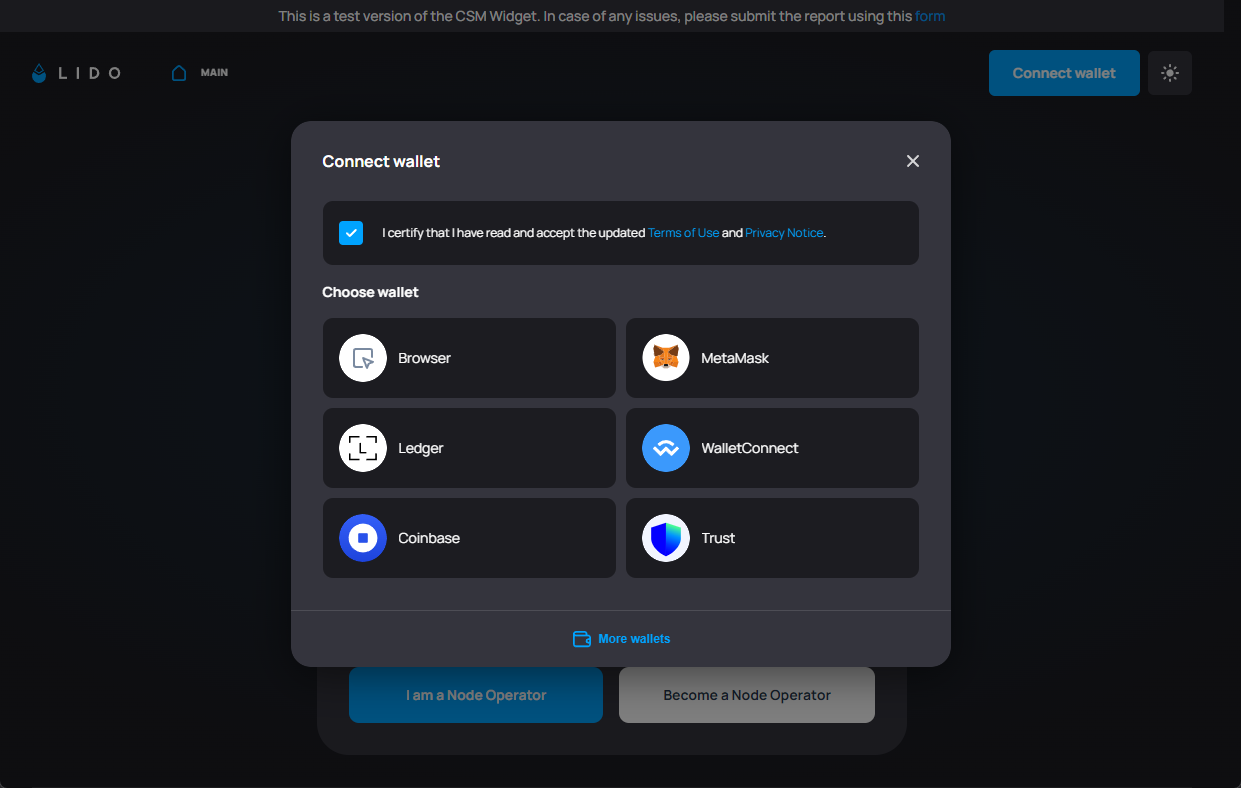
An ICS member of the cluster heads to csm.lido.fi and connects their wallet.
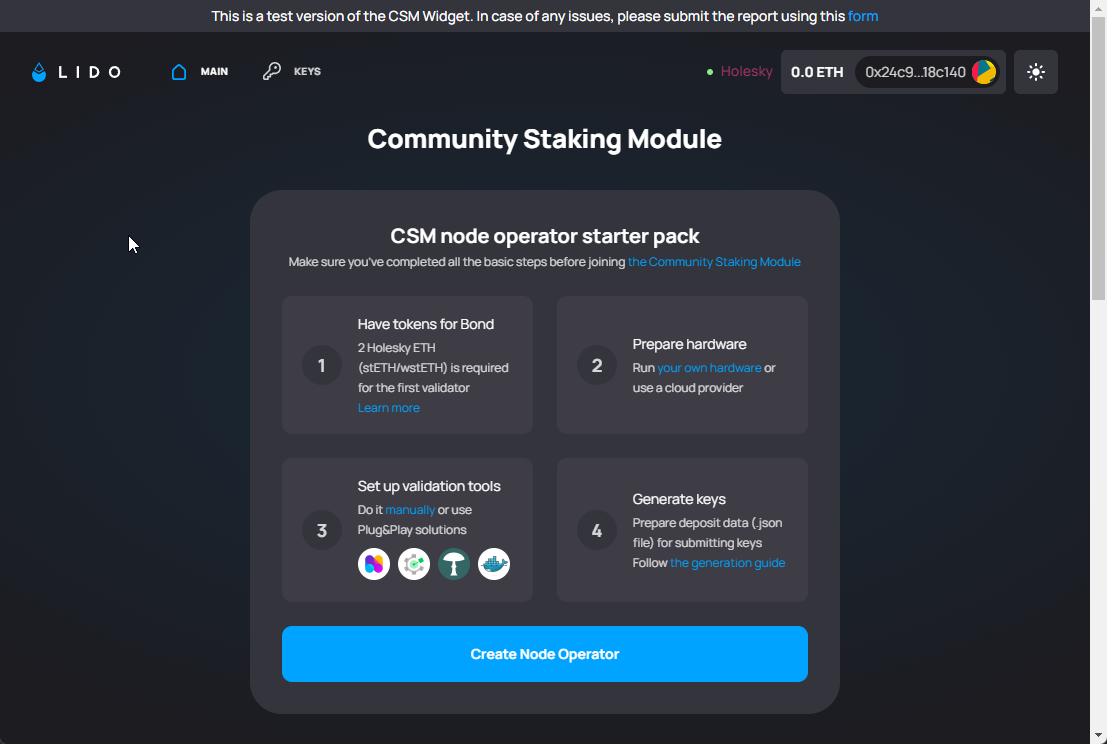
Click the Create Node Operator button.
-
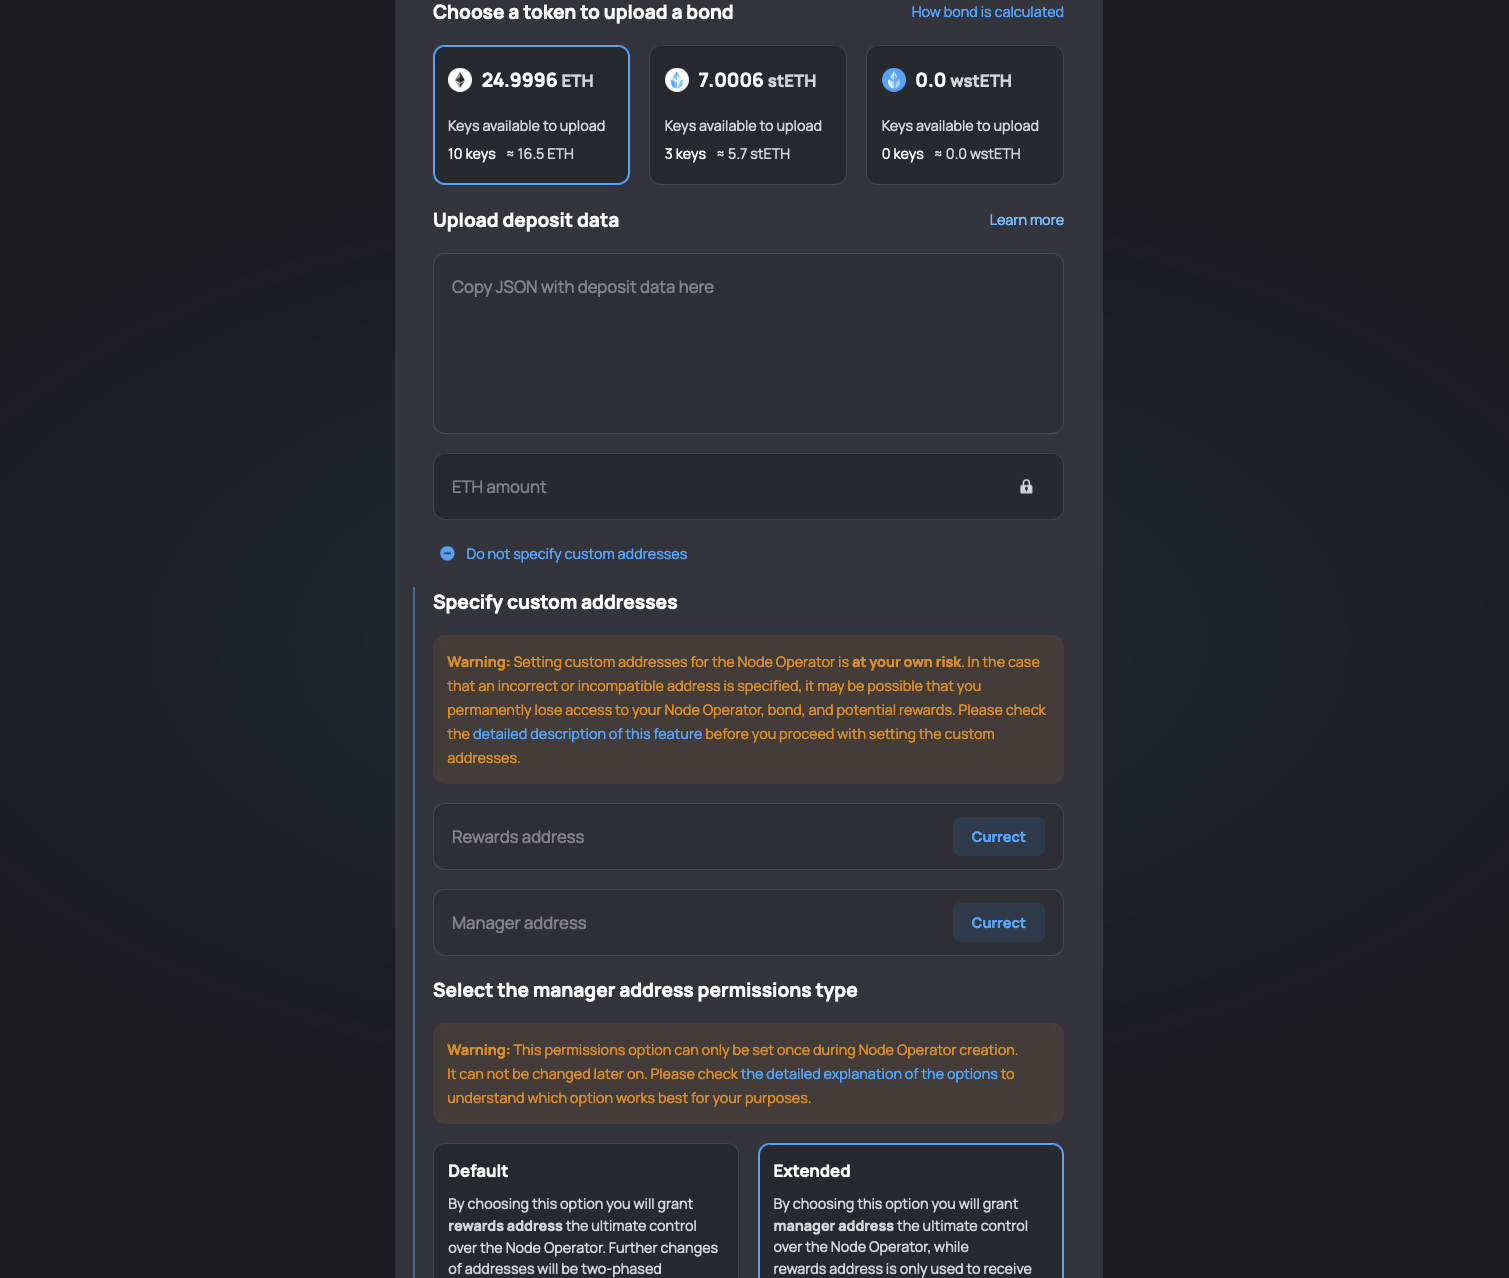
Paste the contents of the
deposit-data.jsonfile into the Upload deposit data field. The member submitting the transaction should have enough ETH/stETH/wstETH to cover the bond. -
Expand the Specify custom addresses section.
- Set the Reward Address field to the
Splitcontract address and the Manager Address field to theSafewallet address. (These were created previously in part 1) - Verify that the Extended box is outlined. This ensures that the
Safeaddress has the ability to change the reward address if necessary.
- Set the Reward Address field to the
-
Check that the correct addresses are set and click the Create Node Operator button.
Sign the transaction. The cluster is ready for deposit from Lido CSM. At this point, your job is finished.
When claiming your cluster's rewards, be sure to claim in wstETH. Claiming native ETH will result in loss of funds. Rebasing tokens like stETH may not receive the incremental yield you’re expecting. More information can be found in the splits.org documentation.