# Introduction
URL: https://docs.obol.org/learn/readme
## Welcome to Obol!
Obol builds Distributed Validator Technology (DVT), which empowers node operators, staking protocols, and institutions run Ethereum validators that are more secure, fault-tolerant, and performant. DVT benefits both operators and capital allocators while strengthening the network itself by reducing centralization risk and protecting against supermajority failures. Obol DVs are the staking endgame.
Whether you’re here to learn about DVT, integrate it into your staking stack, or want to stake your ETH on DVs, these docs will help you get started.
---
## Quick start
> **Browsing as an AI agent?** Start with [obol.org/llms.txt](https://obol.org/llms.txt) for a terse index of the ecosystem, or [obol.org/llms-full.txt](https://obol.org/llms-full.txt) for a self-contained briefing. The [`ObolNetwork/skills`](https://github.com/ObolNetwork/skills) repo publishes Claude Code skills for running DVs and the Obol Stack.
---
# Learn About Obol
URL: https://docs.obol.org/learn/readme/learn-about-obol
## Learn About Obol
Obol is deeply embedded in Ethereum, working with node operators, staking protocols, and institutions to advance the staking ecosystem.
The team and community come from the early Proof-of-Stake era, including contributors to the original Ethereum Staking Launchpad, and continue to focus on the important work that helps Ethereum scale while remaining decentralized.
This section is a starting point for the core topics behind Obol and how it fits into Ethereum staking today.
---
---
# Obol Collective
URL: https://docs.obol.org/learn/readme/obol-collective
# Obol Collective
## What is the Obol Collective?
Obol is the largest Decentralized Operator Ecosystem. We provide the technology, opportunities, and community to scale decentralized infrastructure networks. The list of Obol Collective participants includes 50+ staking protocols, client teams, software tools, education & community projects, professional node operators, home operators, and stakers, including names like EigenLayer, Lido, EtherFi, Figment, Bitcoin Suisse, Stakewise, Nethermind, Blockdaemon, Chorus One, DappNode, and many more. Learn more at [Obol.org](https://obol.org).
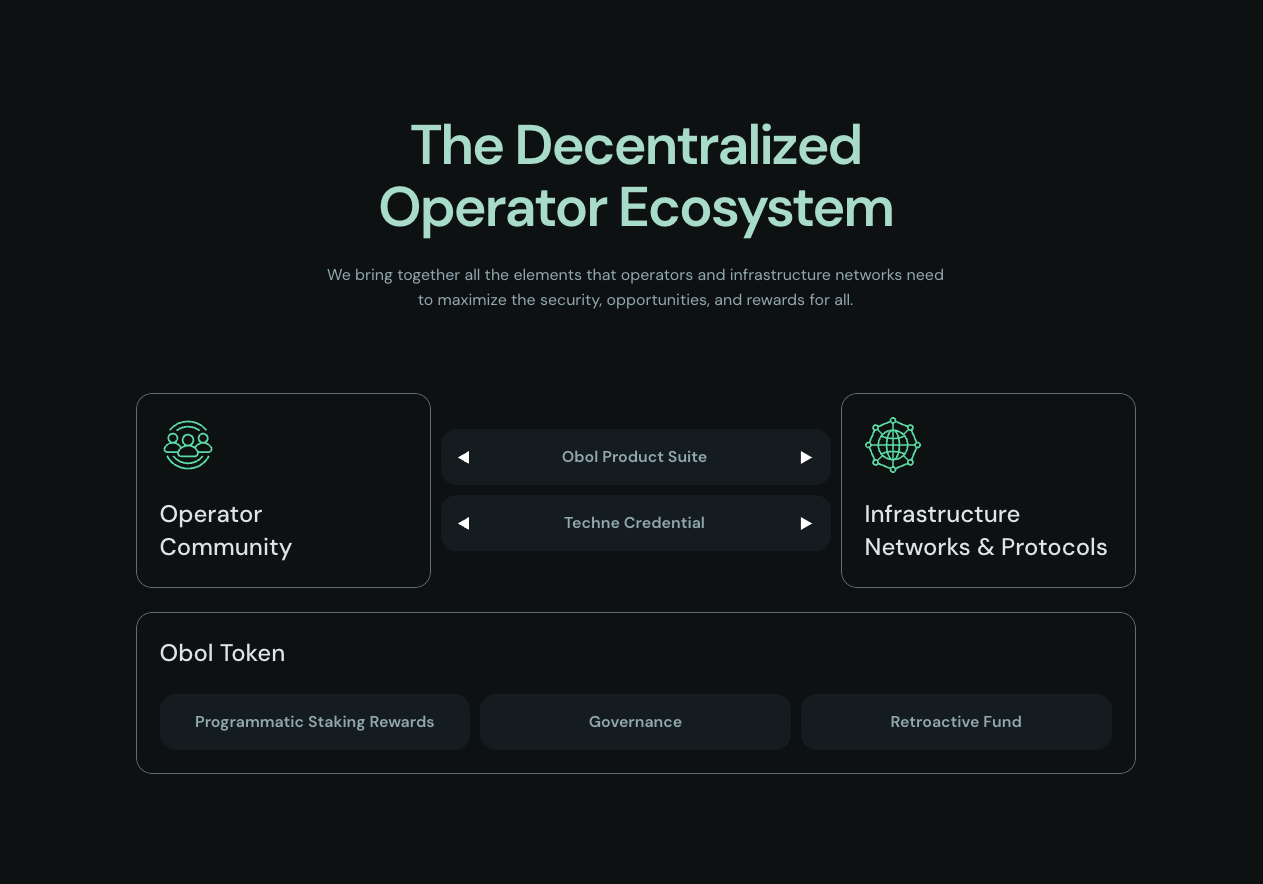
## Scaling Infrastructure Networks
Obol is focused on scaling consensus by providing permissionless access to Distributed Validators (DVs), which offer not only protection against client issues and key mismanagement, but also Byzantine fault tolerance. We believe that distributed validators should and will make up a large portion of mainnet validator configurations, with the transition of the Ethereum community to DVs enabling a new trust paradigm.
The Distributed Validator middleware client, Charon, boosts the security, resilience, and decentralization of the Ethereum validator network by enabling “squad staking”. The Collective is fueled by Obol’s economic model, which directs funding to ecosystem projects via retroactive funding - a positive flywheel to accelerate adoption of DVs and scale infrastructure networks like Ethereum.
## What is DV Labs?
DV Labs (originally “Obol Labs”) is one of the core research and software development teams building DVT. DV Labs’ mission is to build shared web3 technologies for node operators, to establish a credibly neutral and trust-minimized infrastructure layer. DV Labs’ Distributed Validator middleware client, Charon, boosts security, resilience, and decentralization by enabling “squad staking”. Learn more at [DVLabs.tech](https://dvlabs.tech).
### The Obol Product Suite
The [Obol Product Suite](https://obol.org/product-suite) empowers any node operator to run fault-tolerant, slashing-resistant distributed validators. Choose from [a suite of tools](../further-reading/resources.md) to get distributed validators running on any type of hardware, with any combination of software clients.
* Foundation: [Charon](../charon/intro.md), a middleware client that enables validators to run in a fault-tolerant, distributed manner;
* Configuration: The [Distributed Validator Launchpad](launchpad.md), a user interface for configuring Distributed Validators. The Obol [SDK](../../sdk/index.md) & [API](../../api/what-is-this-api.md), allowing Distributed Validator clusters to be configured and run at scale, for example within staking protocols.
* Launchers: Obol's [Charon Distributed Validator Node (CDVN)](../../run-a-dv/start/create-a-dv-with-a-group.mdx), Obol's Distributed Validator Pod.
* Rewards: [Obol Splits](obol-splits.md), a set of solidity smart contracts for the distribution of rewards from Distributed Validators, among multiple node operations.
---
# OBOL Incentives
URL: https://docs.obol.org/learn/readme/obol-incentives
# OBOL Incentives
## OBOL Incentives Program
The **OBOL Incentives Program** is designed to be powerful and transparent, rewarding anyone OBOL tokens for staking on **Distributed Validators (DVs).**
### What is the OBOL Incentives Program?
OBOL Incentives offer an opportunity to **earn OBOL Token incentives** for staking on **Distributed Validators**.
* **12.5 million OBOL Tokens** (2.5% of the total supply) will be distributed in the **first year (2025).**
* Incentives **begin accruing on March 24th, 2025.**
* **Claiming** will be possible shortly after the OBOL Token is unlocked (as per O[IP#2](https://community.obol.org/t/oip-2-unlock-obol-token/)) and starts trading.
Each week, **1/52 of the 12.5M OBOL** will be distributed (**\~240,385 OBOL per week**).
If you are staking with a partner, incentives will either be claimed via the participating partner UI frontends or via the [DV Launchpad](https://launchpad.obol.org/) as per the table below.
***
### How do I participate?
You can participate by:
1. **Staking through Staking Partners**
* For the latest list of partners that qualify for OBOL Incentives, visit [https://obol.org/incentives](https://obol.org/incentives) and see the table below.
2. **Running Your Own DV Cluster**
* Use the [DV Launchpad](https://launchpad.obol.org) to create and manage your own DV cluster, e.g., using a [DappNode](https://dappnode.com/) or other hardware. Please note, you must opt into [1% for Decentralization](https://blog.obol.org/1-percent-for-decentralisation/) to qualify for Obol Incentives.
* This method directly supports Ethereum’s decentralization while earning OBOL incentives.
* Visit the official Obol Discord to find squad mates.
***
### Is existing stake eligible?
* If you are staking yourself directly on Obol DVs and/or Squad Staking, your stake is 100% eligible for rewards. Please note, you must opt into [1% for Decentralization](https://blog.obol.org/1-percent-for-decentralisation/) to qualify for Obol Incentives.
* If you are staking with a partner protocol, it's best to review the details of that partner at Obol.org/incentives. Only ETH staked on Obol DVs with qualified partners qualify for Obol Incentives and not all partners are created equal.
***
### How much OBOL will I receive per ETH staked on DVs?
* **The OBOL amount per ETH depends on total ETH participation.**
* The **240,385 OBOL per week** is distributed **proportionally** across all participating ETH.
* Your **share of the total ETH** determines your **share of OBOL incentives.**
* If you need help calculating your potential rewards, feel free to use this community created calculator:
* **NOTE:** This is a community created calculator, is not managed by DV Labs or the Obol Association, and is not to be fully trusted.
***
### How are incentives tracked?
OBOL incentives are based on staking rewards earned by validators (pubkeys). Performance factors like effectiveness and uptime impact rewards.
* Incentives are tracked off-chain in a centralized database.
* API endpoints allow users & protocols to query earned incentives.
* Incentives are displayed in the [Obol DV Launchpad](https://launchpad.obol.org) and/or participating partner UI frontends.
***
### How do you ensure calculations for OBOL Incentives are made properly?
Our rewards calculation and distribution system is built for accuracy, transparency, and security. We use Miga Labs' indexer to reliably track validator rewards, and all critical data—such as total rewards, split configurations, and depositor allocations—is verified on-chain and made publicly available for cross-verification. In cases where a partner misreports depositor splits, it only affects their own internal distribution and does not compromise the total rewards allocation or the fairness of the system.
***
### How can I track my OBOL incentives?
* For those staking with a Partner: Your staking platform should show and distribute your OBOL incentives in their UI frontend.
* For those running their own Distributed Validators: Incentives are displayed on the [DV Launchpad](https://launchpad.obol.org).
***
### What benefits do I get from the OBOL Token?
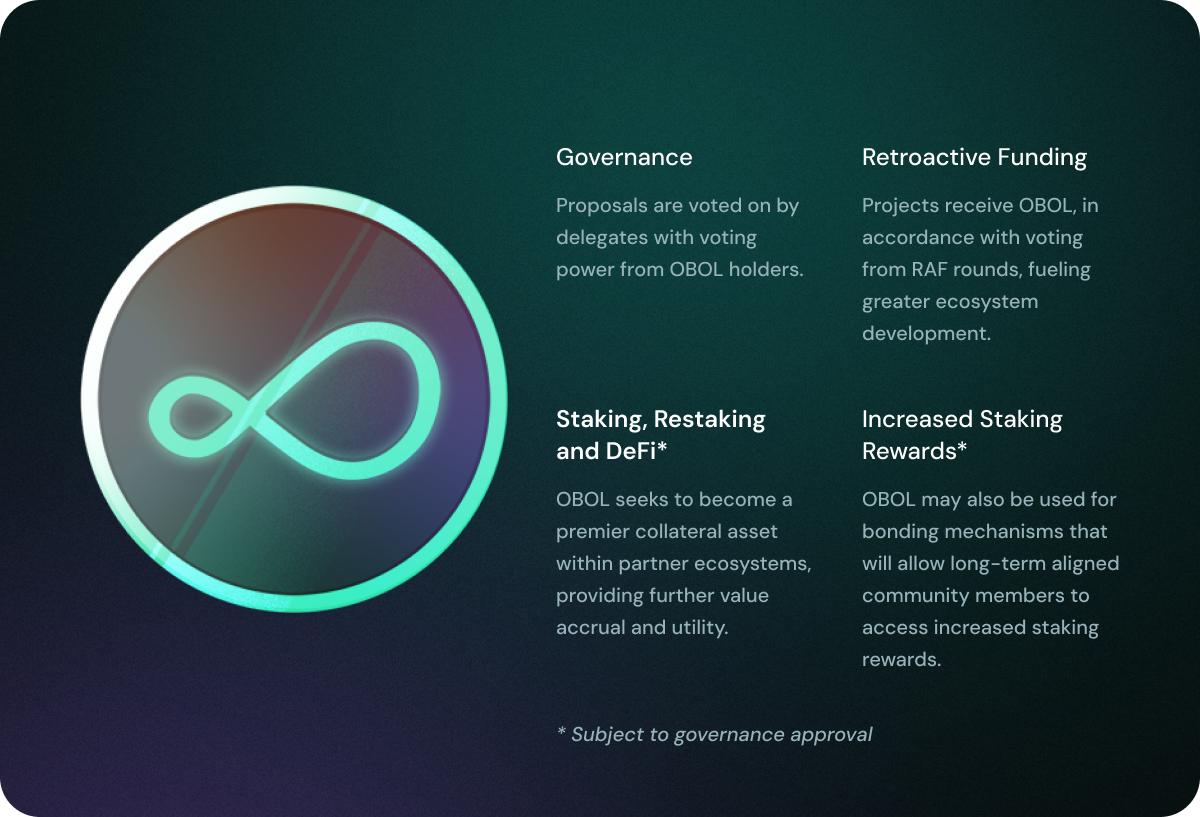
OBOL Tokens serve as the basis for ownership and governance of the Obol Collective.\
Learn more on the OBOL Token page.
***
### How are incentives calculated?
OBOL incentives are tied to validator staking rewards and calculated daily.
For a validator with total staking rewards ( R ), and operator split percentages ( p\_1, p\_2, ..., p\_n ), the operator’s rewards (Oᵢ) are:
\[ Oᵢ = R × pᵢ × 0.01 × 1.01 ]
* ( pᵢ ) = Operator’s percentage split.
* The 1.01 multiplier ensures the full 1% of rewards is distributed correctly.
Higher effectiveness & uptime = more incentives.
***
### Can I withdraw my staked ETH at any time?
Yes, you can withdraw at any time but you **stop accruing incentives** upon withdrawal.
* If you are staking with a partner, they may choose to set penalties for early withdrawals but this is not common.
* If you are running your own distributed validator, there is no penalty for withdrawing or exiting.
***
### What is the minimum amount of ETH needed to stake?
* If you are staking with a partner, they will have their own minimum deposit amount.
* If you are running your own distributed validator, the total amount required by your squad is 32 ETH.
* Check each partner’s requirements at [https://obol.org/incentives](https://obol.org/incentives).
***
### What happens if my validator has downtime?
Since OBOL incentives are tied to staking rewards, validator performance metrics directly impact earned incentives.
* More uptime & effectiveness = More incentives.
* Longer downtime = Fewer rewards.
***
### Will my incentives be public?
Yes. Incentives are publicly accessible through the Obol API (with the correct protocol address).
***
### How do I increase the amount of OBOL I can earn?
* Increase the amount of ETH staked.
* Improve validator performance (higher uptime & effectiveness).
***
### What are the benefits of using Distributed Validators?
Distributed Validators improve performance, lower risks and increase rewards. Learn more at [obol.org/learn](https://obol.org/learn).
***
### How can I get support if I have issues?
* Join the Obol Discord community: [discord.obol.org](https://discord.obol.org).
* If you are staking with a partner, reach out to them directly.
***
### Who are the staking partners and how can I get access to my rewards?
For each partner listed below, you’ll find:
* The eligible TVL for Obol Incentives
* How depositors can claim these incentives
* The portion of incentives (if any) retained by the partner
You’ll also see an estimated multiplier, which reflects how each partner manages these incentives.
* A **multiplier below 100%** typically means Obol incentives are spread across all depositors, even though only a portion of the partner's total TVL is running Obol DVs.
* A **multiplier above 100%** usually indicates that the partner is concentrating Obol rewards on a specific vault, which has less TVL than the total TVL running Obol DVs.
| Partner Name | Eligible TVL | Claim Method | Incentives Split | Multiplier |
| ---------------------------------------------------------------- | --------------------------------------------------------------------------------------------------------------------------- | -------------------------------------------------------------------------------------------------- | ------------------------------------------------------------------------------------------------------------------- | ---------- |
| [Mellow DVV](https://app.mellow.finance/vaults/ethereum-dvsteth) | All of Mellow DVV TVL
+ Lido SDVT Module validators added post Jan 13th Airdrop
+ Lido CSM TVL ran by Obol DVs
| [Obol Launchpad](https://launchpad.obol.org/) | - Mellow Depositors: 80% for CSM TVL, 90% for SDVT TVL
| ≥ 100% |
| [Ether.fi](https://app.ether.fi/weeth) | Portion of total TVL running on Obol DVs | Directly accruing as [KING rewards](https://etherfi.gitbook.io/etherfi/king-protocol-formerly-lrt) | According to partner's [fee structure](https://etherfi.gitbook.io/etherfi/ether.fi-whitepaper/ether.fi-staking) | <100% |
| Blockdaemon | TBD | [Blockdaemon UI](https://www.blockdaemon.com/) | According to partner's fee structure | TBD |
| [Chorus One](https://opus.chorus.one/pool/stake/) | Total TVL of the OBOL Vault | TBD | According to partner's fee structure | = 100% |
| [Dinero](https://dinero.xyz/pxeth/deposit) | Portion of total TVL running on Obol DVs | TBD | According to partner's fee structure | < 100% |
| [Stakewise](https://app.stakewise.io/) | Portion of total TVL running on Obol DVs | [Stakewise UI](https://app.stakewise.io/) | According to partner's [fee structure](https://docs.stakewise.io/protocol-overview-in-depth/fees#vault-staking-fee) | < 100% |
| [Swell](https://app.swellnetwork.io/stake/rsweth) | Portion of total TVL running on Obol DVs | TBD | According to partner's fee structure | < 100% |
| [Hashkey Cloud](https://www.hashkey.cloud/) | TBD | [Obol Launchpad](https://launchpad.obol.org/) | According to partner's fee structure | TBD |
| [Validation Cloud](https://www.validationcloud.io/) | Portion of total TVL running on Obol DVs | [Obol Launchpad](https://launchpad.obol.org/) | According to partner's fee structure | = 100% |
---
# Key Staking Concepts
URL: https://docs.obol.org/learn/readme/key-concepts
# Key Staking Concepts
This page outlines a number of the key concepts behind the various technologies that Obol is developing.
## Distributed validator
A distributed validator is an Ethereum proof-of-stake validator that runs on more than one node/machine. This functionality is possible with the use of **Distributed Validator Technology** (DVT).
Distributed validator technology removes some of the single points of failure in validation. Should <33% of the participating nodes in a DV cluster go offline, the remaining active nodes can still come to consensus on what to sign and can produce valid signatures for their staking duties. This is known as Active/Active redundancy, a common pattern for minimizing downtime in mission-critical systems.
## Distributed Validator Node

A distributed validator node is the set of clients an operator needs to configure and run to fulfil the duties of a Distributed Validator Operator. An operator may also run redundant execution and consensus clients, an execution payload relayer like [mev-boost](https://github.com/flashbots/mev-boost), or other monitoring or telemetry services on the same hardware to ensure optimal performance.
In the above example, the stack includes Geth, Lighthouse, Charon and Teku.
### Execution Client
An execution client (formerly known as an Eth1 client) specializes in running the EVM and managing the transaction pool for the Ethereum network. These clients provide execution payloads to consensus clients for inclusion into blocks.
Examples of execution clients include:
* [Go-Ethereum](https://geth.ethereum.org/)
* [Nethermind](https://docs.nethermind.io/)
* [Erigon](https://github.com/ledgerwatch/erigon)
### Consensus Client
A consensus client's duty is to run the proof-of-stake consensus layer of Ethereum, often referred to as the beacon chain.
Examples of Consensus clients include:
* [Prysm](https://docs.prylabs.network/docs/how-prysm-works/beacon-node)
* [Teku](https://docs.teku.consensys.net/en/stable/)
* [Lighthouse](https://lighthouse-book.sigmaprime.io/api-bn.html)
* [Nimbus](https://nimbus.guide/)
* [Lodestar](https://github.com/ChainSafe/lodestar)
### Distributed Validator Client
A distributed validator client intercepts the validator client ↔ consensus client communication flow over the [standardized REST API](https://ethereum.github.io/beacon-APIs/#/ValidatorRequiredApi), and focuses on two core duties:
* Coming to consensus on a candidate duty for all validators to sign.
* Combining signatures from all validators into a distributed validator signature.
The only example of a distributed validator client built with a non-custodial middleware architecture to date is [Charon](../charon/intro/).
### Validator Client
A validator client is a piece of code that operates one or more Ethereum validators.
Examples of validator clients include:
* [Prysm](https://docs.prylabs.network/docs/how-prysm-works/prysm-validator-client/)
* [Lodestar](https://github.com/ChainSafe/lodestar)
* [Teku](https://docs.teku.consensys.net/en/stable/)
* [Lighthouse](https://lighthouse-book.sigmaprime.io/api-vc.html)
* [Vouch](https://www.attestant.io/posts/introducing-vouch/)
## Distributed Validator Cluster
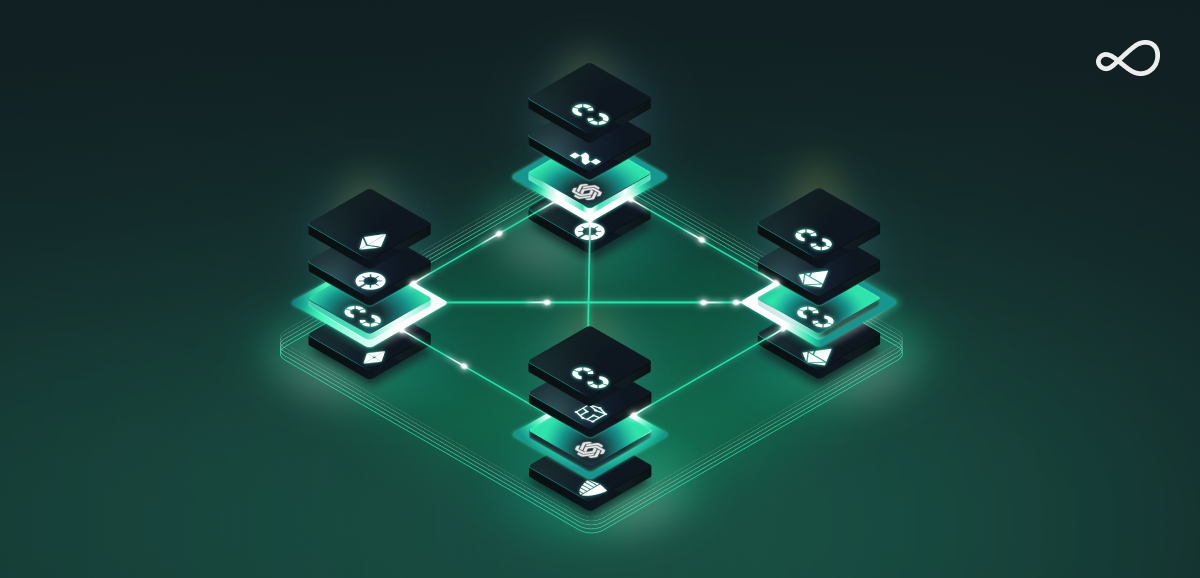
A distributed validator cluster is a collection of distributed validator nodes connected together to service a set of distributed validators generated during a DVK ceremony.
### Distributed Validator Key
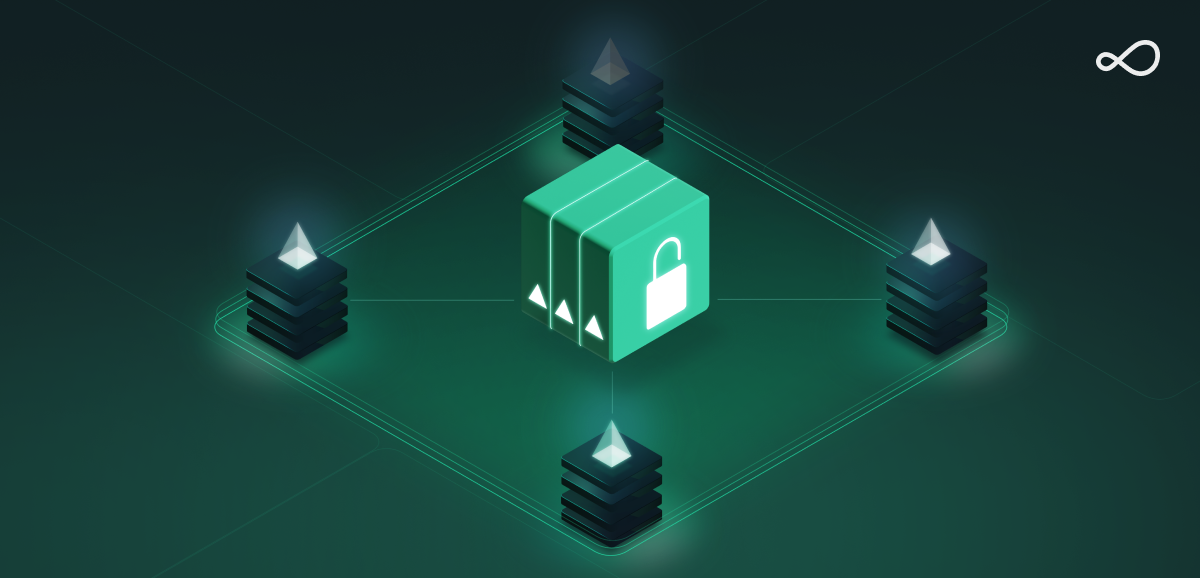
A distributed validator key is a group of BLS private keys which together operate as a threshold key for participating in proof-of-stake consensus.
### Distributed Validator Key Share
One piece of the distributed validator private key.
### Distributed Validator Threshold
The number of nodes in a cluster that need to be online and honest for their distributed validators to be online is outlined in the following table.
| Cluster Size | Threshold | Note |
| :----------: | :-------: | --------------------------------------------- |
| 3 | 2/3 | Minimum to tolerate one offline node |
| 4 | 3/4 | Minimum to tolerate one **malicious** node |
| 5 | 4/5 | |
| 6 | 4/6 | Minimum to tolerate two offline nodes |
| 7 | 5/7 | Minimum to tolerate two **malicious** nodes |
| 8 | 6/8 | |
| 9 | 6/9 | Minimum to tolerate three offline nodes |
| 10 | 7/10 | Minimum to tolerate three **malicious** nodes |
:::warning
Running the same Charon node in two places is considered a malicious (or byzantine) act, you should **take extra care not to run duplicate instances of a particular Charon peer if it is running in a three node setup**, which only tolerates one offline node, not a malicious one. Read more [here](../charon/cluster-configuration#cluster-size-and-resilience).
:::
### Distributed Validator Key Generation Ceremony
To achieve fault tolerance in a distributed validator, the individual private key shares need to be generated together. Rather than have a trusted dealer produce a private key, split it and distribute it, the preferred approach is to never construct the full private key at any point, by having each operator in the distributed validator cluster participate in what is known as a Distributed Key Generation ceremony.
A distributed validator key generation ceremony is a type of DKG ceremony. A ceremony produces signed validator deposit and exit data, along with all of the validator key shares and their associated metadata. Read more about these ceremonies [here](../charon/dkg/).
---
# Obol vs Other DV Implementations
URL: https://docs.obol.org/learn/readme/obol-vs-others
# Obol vs Other DV Implementations
This page outlines the unique features of Obol's DV implementation, contrasting with other DV implementations. We built Obol’s DVT as a middleware to keep Ethereum secure, resilient, and composable. See also the blog article [Why We Built Charon as a Middleware](https://blog.obol.org/why-we-built-charon-as-a-middleware/).
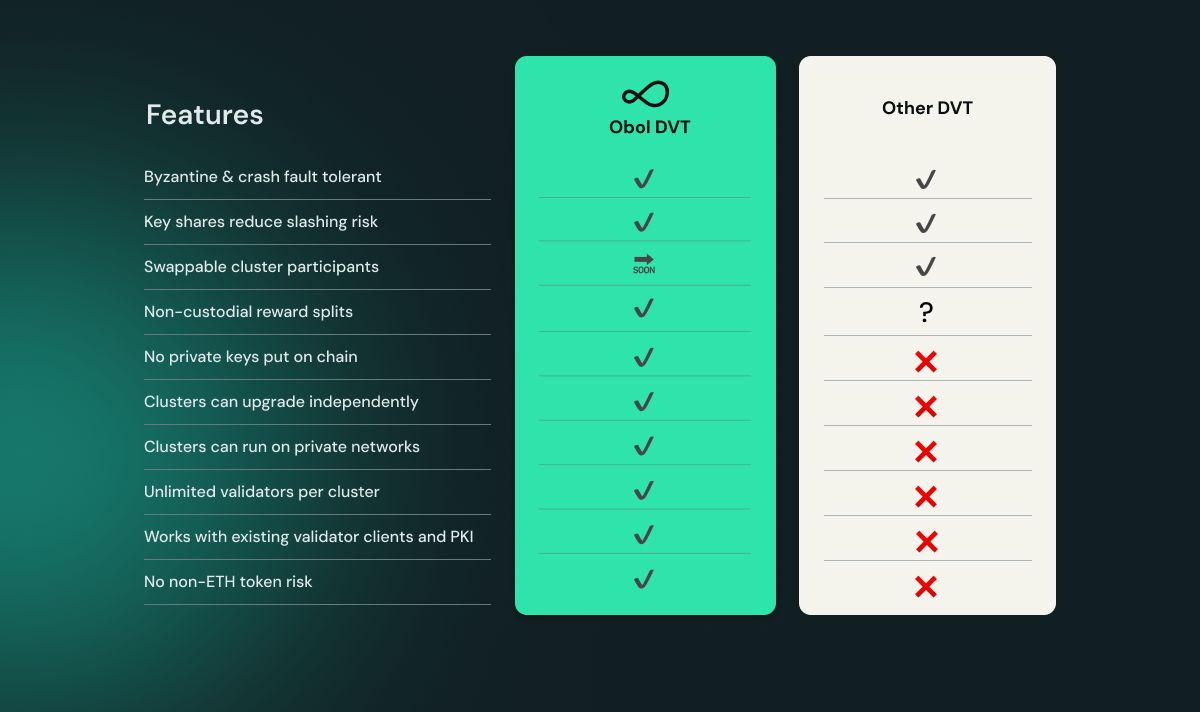
## No private keys put on chain
Obol's distributed key generation (DKG) event generates key shares for each node within the DV cluster. The entire validator key NEVER exists in one place. Keys are generated locally on the nodes, and can be backed up. The private keys of Obol DVs are NEVER uploaded to the internet or published on-chain.
An alternative approach to doing this is to split it into shares, encrypt each share with the public key of a node operator, and publish the encrypted private key on chain. The operators’ node key could then decrypt the validator private key. In our opinion, this is not secure. We believe that the safest approach is to avoid the existence of a singular private key, and certainly never to post any private key to a public blockchain network.
## Cluster independance: Clusters can upgrade independently
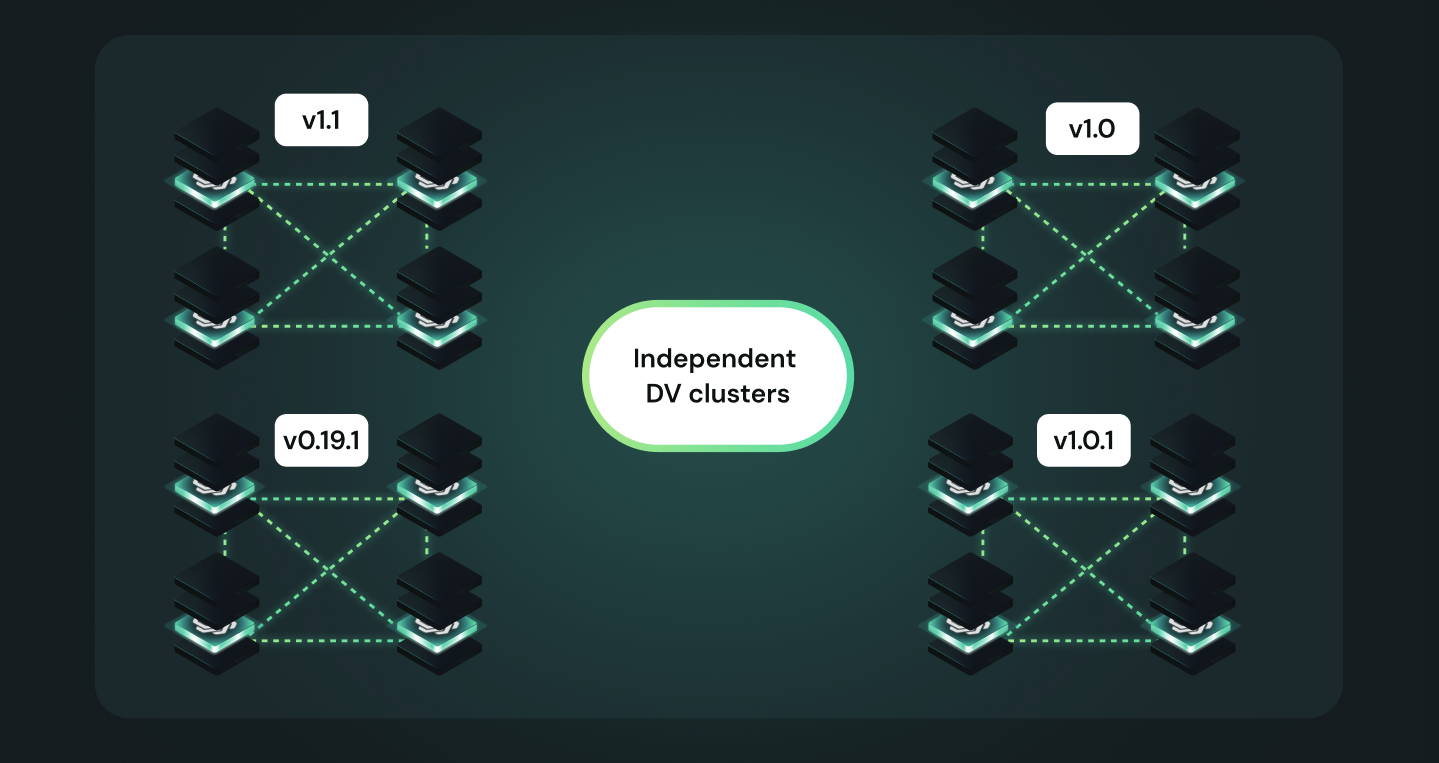
In an Obol DV cluster, nodes use LibP2P to communicate directly with each other, and communications are end-to-end encrypted with TLS. Clusters are independent from one another, can run different versions of Charon, and don't need to upgrade together. This means that when a new version of Obol’s Charon is released, Obol DV clusters can upgrade on their own time, individually from other DV clusters. Charon will NEVER require a hard fork or simultaneous updates across clusters for any upgrades.
## Works with existing validator clients and keys
We built Obol’s DV implementation as a secure and trust-minimized middleware architecture. Our middleware client, Charon, doesn’t replace anything in the client stack, instead it sits between the consensus and validator clients. Node operators integrating the Charon DVT middleware into their stack can continue to use the same clients and private key infrastructure as before, albeit with a different key generation method.
The alternative approach to DV design is to replace the validator client with a DV-native client, which has custody of the private keys and the capability to sign arbitrary data. However, in our opinion a full validator client capable of signing and exfiltrating arbitrary data without the oversight of a second software implementation has much higher risk of causing correlated slashing.
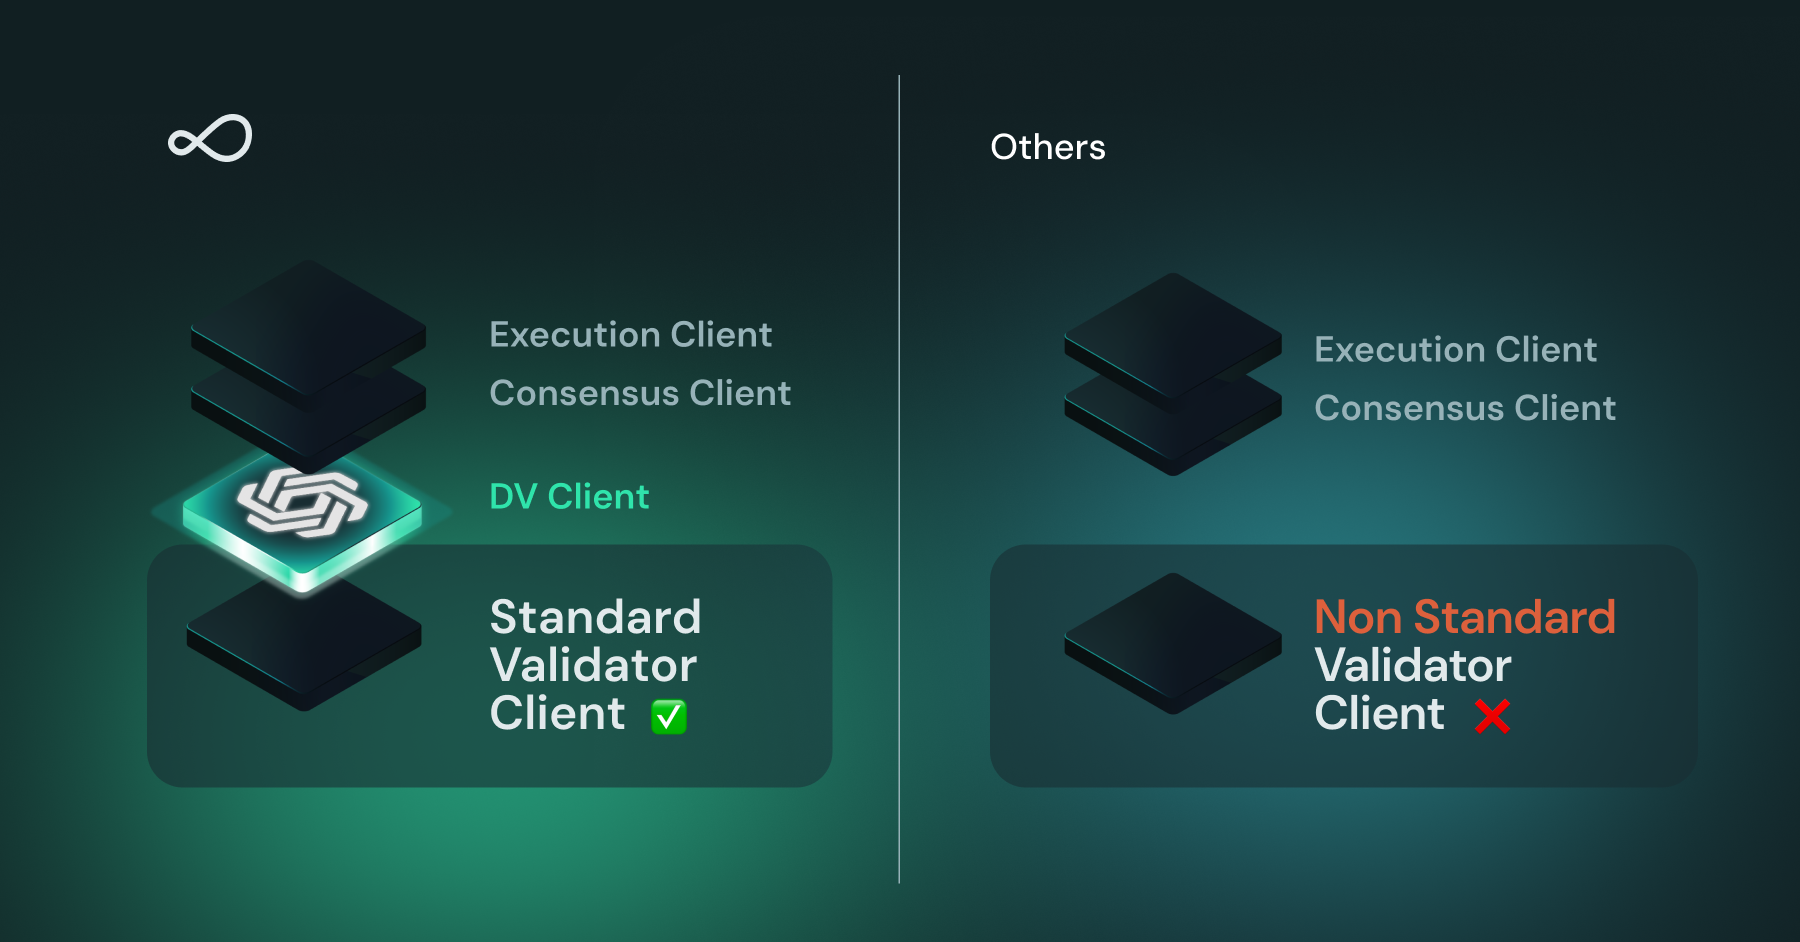
This gives the benefit of having both Charon and the existing validator client as failsafes, greatly reducing the odds of unintended slashing. Even in the worst case scenario where Charon is compromised by a supply chain attack or a remote code execution attack, or the Obol team become bad actors and push a malicious release, Charon cannot do a lot of damage as a middleware. If a compromised Charon client proposes a potential double vote or surround vote for a validator to sign, the validator client will check its anti-slashing database, see that it has already signed something conflicting, and simply refuse to return a signature. Charon could propose that a validator should sign an invalid block, but the chain would reject this and simply consider the proposal missed - a much better outcome than slashing.
## No non-ETH token risk
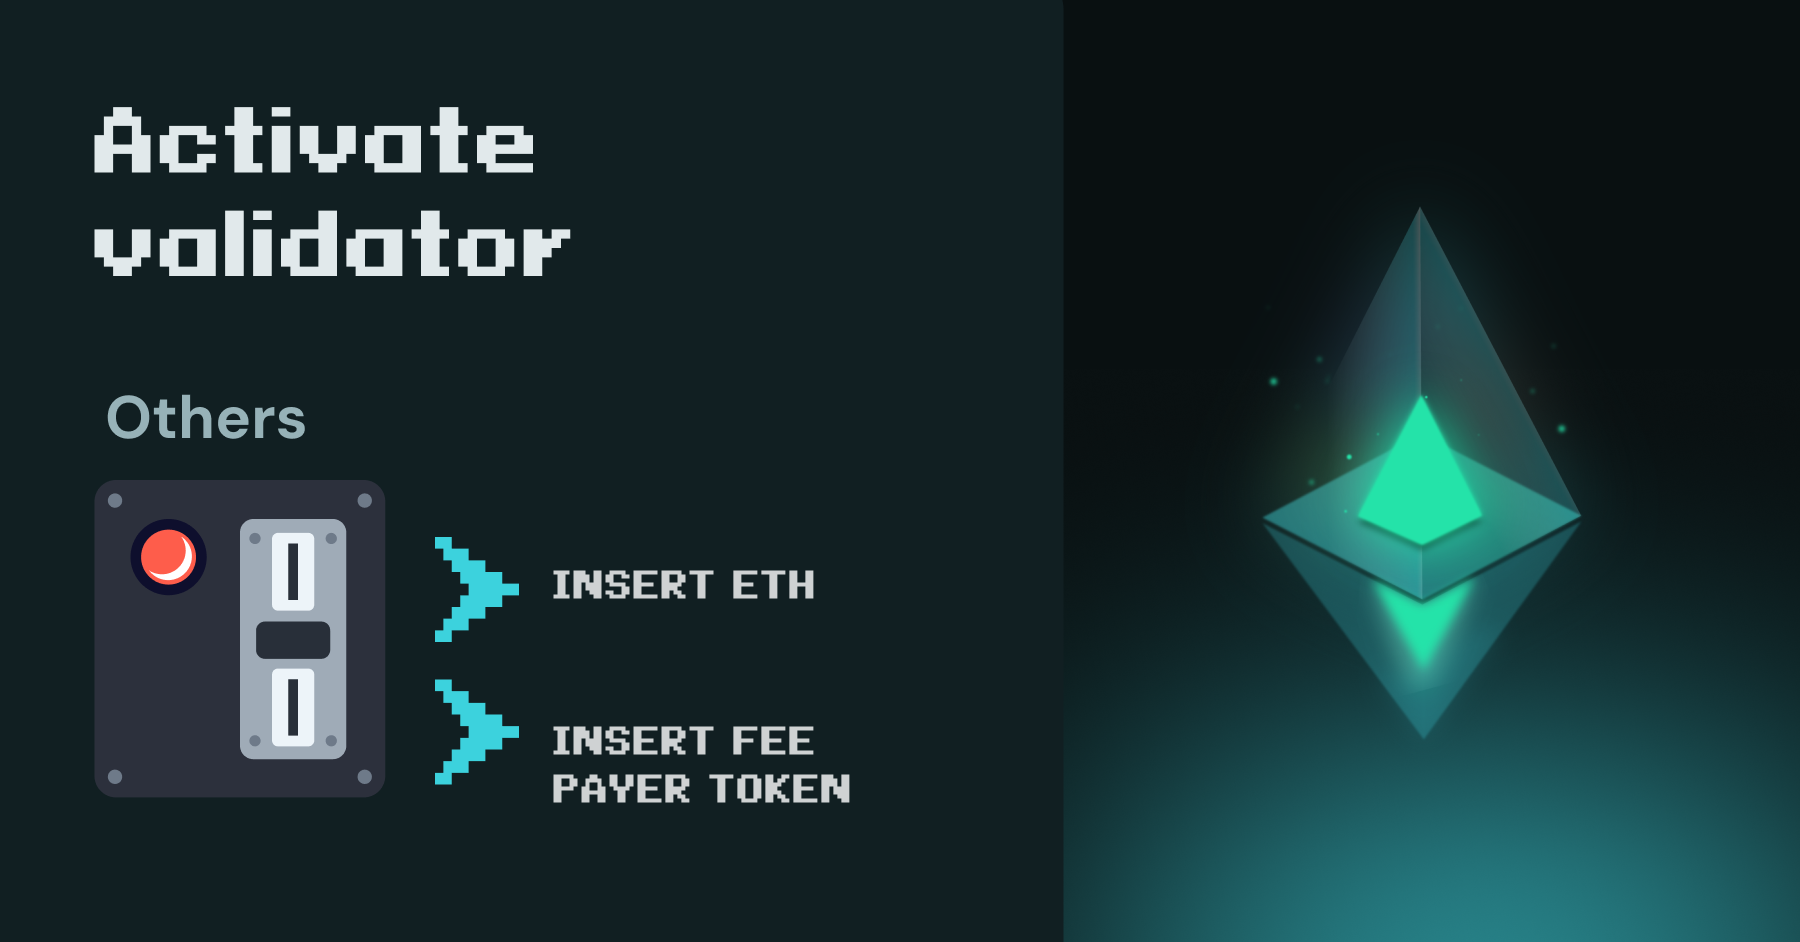
Obol makes no changes to Ethereum’s standard bonding and reward mechanism, and does not require nodes to post any bonds additional to the 32 ETH required for a validator. To pay out rewards to operators, splitter contracts like [Obol Splits](obol-splits.md) can be used to withdraw and share rewards on a continuous basis. This allows products like liquid staking protocols to be built on top of Obol, implementing a bond or unique token into their protocol, should they choose to do so.
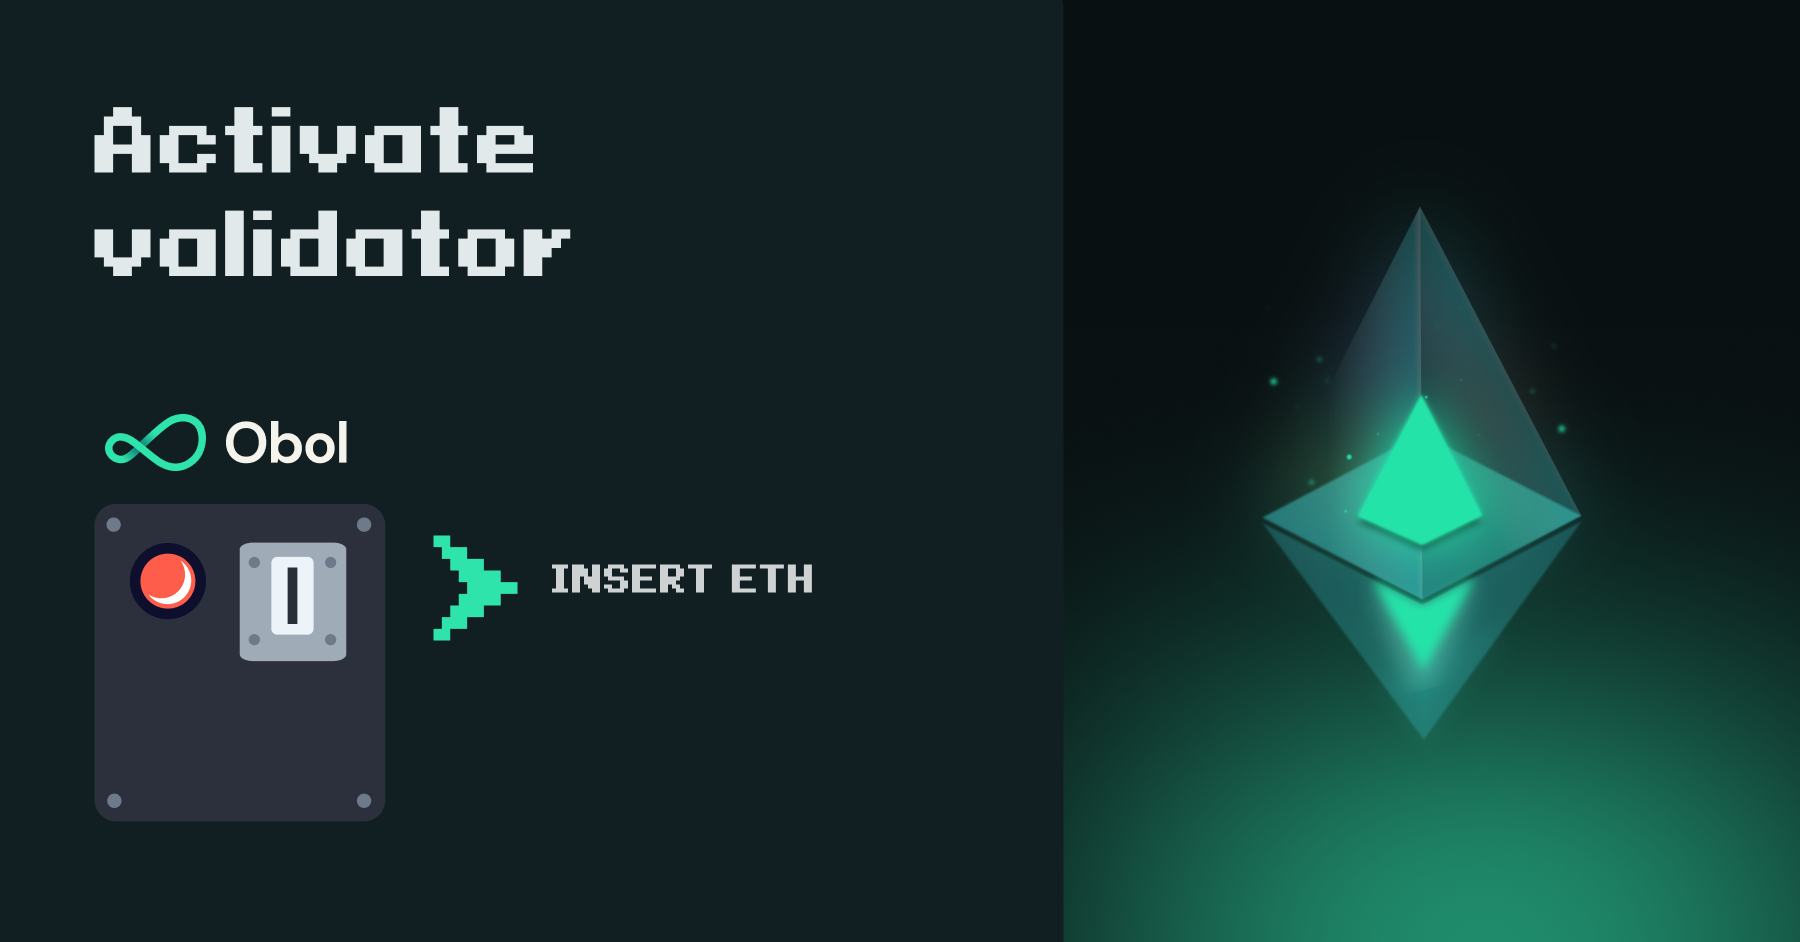
The alternative approach is to create a token and require stakers to pay operators in that token. This would require stakers to keep a balance of the network token ready for fee paying, in order to continue using the staking service. This mechanism would be informed by oracles, which decide when to post rewards and punish operators. This alternative model has some drawbacks. Namely, the varying price of the network’s unique token will change relative to the price of ETH: operators are not able to determine their commission as a percentage of ETH staked, and stakers likewise must consider the additional initial cost of purchasing the token to determine their long-term rate of return on their staked ETH.
## Non-custodial reward splits
(see also the [docs page on Splits](obol-splits.md), and the [Splits.org blog article](https://splits.org/blog/obol-ethereum-resilience/).)
To pay out rewards to operators, splitter contracts like Obol Splits can be used to withdraw and share rewards on a continuous basis. Two key goals of validator reward management are: 1. To be able to differentiate reward ether from principal ether such that node operators can be paid a percentage of the _reward_ they accrue for the principal provider, rather than a percentage of _principal and reward_. 2. To be able to withdraw the rewards in an ongoing manner without exiting the validator. This allows products like liquid staking protocols to be built on top of Obol, implementing a bond or unique token into their protocol, should they choose to do so.
---
# Obol Splits
URL: https://docs.obol.org/learn/readme/obol-splits
# Obol Splits
Obol develops and maintains a suite of smart contracts for use with Distributed Validators and their surrounding ecosystem of decentralized infrastructure. These contracts include:
* Validator Managers: Contracts used for a validator's withdrawal address, enabling ownership transfer, partial withdrawals, full exits, and operator rotation.
* Reward Splitting contracts: Contracts to split ether (and tokens) across multiple entities. Developed by [Splits.org](https://splits.org/)
Key Design Principles the Obol Smart Contract suite include are:
* That they are secure. All [released](https://github.com/ObolNetwork/obol-splits/releases/) Obol Splits products are [audited by high quality security teams](../../advanced-and-troubleshooting/security/overview.md#list-of-security-audits-and-assessments).
* They are not upgradeable.
* They are self-sovereign. Any permissioned actions, such as withdrawal, exit, or operator rotation, are controlled by the user, not an unaccountable set of third parties with the ability to upgrade your contract's behavior.
* They do not require a token to function.
* They are oracle-free. (Unless you intend to leverage a [swapper](https://docs.splits.org/core/swapper)).
* They divide the reward ether from principal ether such that staking providers can be paid a percentage of the _reward_ they accrue for the principal provider rather than a percentage of _principal and reward_.
* That rewards can be withdrawn in an ongoing manner without exiting the validator. (Some conditions apply).
## Obol Validator Managers {#obol-validator-managers}
An Obol Validator Manager (OVM) is a smart contract which manages the deposit, withdrawal, exit, and public key rotation of one or more Ethereum validators. It is deployed as the withdrawal address for a validator and supports 0x01 and 0x02 validator types.
### Creation
You create a new Validator Manager contract using the [factory](obol-splits.md#ovm-factory-deployment) by calling the `ObolValidatorManagerFactory.createObolValidatorManager()` function, passing:
* `owner` - The address that is the ultimate administrator of this Validator Manager deployment, it manages the assignment of roles for the contract, and **can call all privileged methods**. This address is best suited to being a multi-sig (such as a [SAFE](https://safe.global)) with a large number of signers, used only as a fallback, or it can be owned temporarily, fine-grained roles can be assigned to addresses, and then the [`renounceOwnership()`](https://github.com/vectorized/solady/blob/main/src/auth/Ownable.sol#L186) or [`transferOwnership()`](https://github.com/vectorized/solady/blob/main/src/auth/Ownable.sol#L174) methods can be called.
* `beneficiary` - This is the **address where the principal will be returned** to when validators exit or a withdrawal above the `principalThreshold` is made. This can be changed later by the `owner` or addresses with the `SET_BENEFICIARY_ROLE`.
* `rewardRecipient` - This is the **address where the accrued ether reward will be sent** when `distributeFunds()` is called. Usually it is a [Pull Split](https://docs.splits.org/core/split-v2#how-it-works) from [splits.org](https://splits.org). This can be changed later by the `owner` or addresses with the `SET_REWARD_ROLE`.
* `principalThreshold` - This is a configurable amount of Ether which dictates at what amount of value in the contract should we consider it to be principal being returned rather than reward accrued. The amount is immutable. A sensible default here is 16 ether (16000000000 gwei), the threshold used in Obol's earlier [Optimistic Withdrawal Recipients](obol-splits.md#optimistic-withdrawal-recipient). Further detail in the [FAQ](obol-splits.md#faq) section.
### Roles
Obol Validator Managers implement standard Role-Based Access Control. The OVM has the following roles that can be granted by the OVM owner, using the `grantRoles()` function.
* `DEPOSIT_ROLE`: Permits an address to call the `deposit()` function.
* `CONSOLIDATION_ROLE`: Permits an address to initiate a consolidation between one or more source validators and a target validator, all managed by this contract. All source and target validators must be active with a balance greater than 32 ether.
* `WITHDRAWAL_ROLE`: Permits an address to trigger a partial withdrawal, or full exit of all validators managed by this contract using [EIP7002](https://eips.ethereum.org/EIPS/eip-7002).
* `SET_BENEFICIARY_ROLE`: Permits an address to change the recipient of the principal returned when validators exit, or a withdrawal above the principalThreshold is initiated. Also this permits an address to adjust the amount of principal stake being tracked by the contract.
* `SET_REWARD_ROLE`: Permits an address to change the recipient of the reward when `distributeFunds()` is called.
* `RECOVER_FUNDS_ROLE`: Permits an address to initiate `ERC20.transfer()` calls to arbitrary external addresses, with the intent to recover otherwise stuck tokens.
#### Role Risks and Trust Assumptions
Granting a role extends trust to the address that holds it. The OVM is non-custodial and has no upgrade path or admin override beyond its owner, so a malicious or compromised role holder can act up to the limit of their role and nobody can stop them mid-transaction. Grant roles narrowly, prefer multi-sigs over externally owned accounts (EOAs) for any privileged address, and revoke roles you no longer need with `revokeRoles()`. A single address holding several roles, or whose key is later compromised, combines the risks below.
* `CONSOLIDATION_ROLE` — **can steal the entire stake.** [EIP-7251](https://eips.ethereum.org/EIPS/eip-7251) does not require a consolidation's source and target validators to share withdrawal credentials; it only requires the target to be a compounding (0x02) validator. The `consolidate()` method does not restrict the target to validators managed by this contract, so a malicious holder can consolidate the OVM's validators into an external 0x02 validator that they control, moving all principal and reward balances out of the OVM's reach. This is the most dangerous role to grant.
* `SET_BENEFICIARY_ROLE` — **can redirect returned principal.** Setting the beneficiary to an attacker-controlled address sends all principal returned on the next exit, or above-threshold withdrawal, to that address. The same role can change `amountOfPrincipalStake` via `setAmountOfPrincipalStake()`, distorting the principal-versus-reward accounting to misclassify funds in either direction.
* `SET_REWARD_ROLE` — **can redirect accrued rewards.** Setting the reward recipient to an attacker-controlled address sends all rewards to that address the next time `distributeFunds()` is called, which anyone can do. In the misclassification edge cases of the optimistic accounting, this can also capture ether that was really principal.
* `WITHDRAWAL_ROLE` — cannot send funds to an external address, because withdrawals always return to the OVM, whose address is committed to in the validators' withdrawal credentials. It can, however, **force-exit every validator**, taking the cluster offline and locking funds in the exit queue for days. By choosing withdrawal amounts above or below the `principalThreshold`, a holder can also influence whether withdrawn ether is later treated as principal or reward (see the [principal threshold FAQ](obol-splits.md#what-is-the-principal-threshold-for)), shifting value between the beneficiary and the reward recipient.
* `RECOVER_FUNDS_ROLE` — **can drain any ERC20 token** held by the contract to an arbitrary address. This does not touch the staked ETH, the principal, or the rewards, which are all native ETH rather than ERC20, but any tokens that arrive at the contract — airdrops, liquid staking tokens, or accidental transfers — can be taken.
* `DEPOSIT_ROLE` — **can distort the principal accounting.** `deposit()` does not validate the supplied withdrawal credentials, so a malicious holder can register validators whose credentials point outside the OVM, or whose signing keys they control. The depositor spends their own ether and cannot withdraw the contract's existing funds, but every deposit increases `amountOfPrincipalStake`, so depositing to validators that never return their principal to the OVM inflates the principal accounting and skews the principal-versus-reward split. See the deposit warning in the [Deposit](obol-splits.md#deposit) section — only deposit to validators whose keys were generated by operators you trust.
The `owner` is the most powerful actor of all. The owner passes every permission check without holding any role, and additionally controls owner-only functions such as `transfer()` and the ownership handover flow. A malicious or compromised owner can therefore do everything listed above — steal principal and rewards, drain tokens, and force-exit validators. Treat the owner as the contract's master key: use a high-threshold multi-sig such as a [SAFE](https://safe.global), or assign fine-grained roles and then call [`renounceOwnership()`](https://github.com/vectorized/solady/blob/main/src/auth/Ownable.sol#L186) so that no single key retains full control. Because the owner holds such significant control over the contract's funds, operators should only run validators for customers they trust.
:::info
Pointing the beneficiary or reward recipient at a contract address does not expose the OVM to re-entrancy theft. The fund-moving methods `distributeFunds()`, `sweep()`, `withdraw()`, and `consolidate()` are protected by a re-entrancy guard, and every method that sends ether updates its internal accounting before the transfer, so a malicious recipient cannot re-enter to claim the same funds twice. The only consideration is liveness: in push mode (`distributeFunds()`) the payout is atomic, so a recipient contract that rejects the transfer blocks that distribution until the recipient is changed. The pull path (`distributeFundsPull()` followed by `withdrawPullBalance()` or `sweep()`) is unaffected and lets each recipient claim independently.
:::
### Deposit
Every validator managed by an Obol Validator Manager must be deposited through the `deposit()` method. This method has the same signature as the official Ethereum deposit contract, but internally it accounts for the principal amount being deposited for the future calculation of returns of principal vs rewards. Only the `owner` address, or any address with the `DEPOSIT_ROLE` can call this method.
:::info
If a deposit was done directly to the official Ethereum deposit contract, the OVM will not have recorded the principal amount. To fix this, consider using `setAmountOfPrincipalStake()` to update the total principal amount of stake.
:::
:::warning
A validator's withdrawal credentials are fixed by the **first** deposit submitted for its public key. Every later deposit for that key is treated as a top-up, and its withdrawal credentials are ignored by the consensus layer. The `deposit()` method does not validate the withdrawal credentials it submits, and it cannot detect or prevent a deposit made directly to the Ethereum deposit contract for the same public key beforehand.
Creating a validator with a different withdrawal address requires its signing key, which for a Distributed Validator means a colluding threshold of its operators. Such operators could create the validator first, pointing its withdrawal address outside the OVM, so that the OVM's later deposit only tops up a validator whose principal exits beyond the contract's reach. No on-chain check can remove this property of the Ethereum deposit mechanism; it falls under the same trust assumption as the rest of the contract — **only deposit to validators whose keys were generated by operators you trust.**
:::
### Partial Withdrawals & Full Exits
Obol Validator Managers support [EIP-7002](https://eips.ethereum.org/EIPS/eip-7002) smart contract-based withdrawals. The `owner` address, or any address with the `WITHDRAWAL_ROLE` can call the `withdraw()` method to initiate a partial (or full) withdrawal of the balance of a validator managed by this contract.
:::info
If you request to withdraw an amount that would leave a validator with less than a 32 ETH balance, only the amount that would leave the validator with 32 ETH will be withdrawn.
:::
:::info
If you request to partially withdraw a validator's balance, the funds will be available in the OVM contract at the end of the exit queue. (Usually \~27 hours)
However, if you withdraw the full balance of the validator, triggering its complete exit, the Ether will be available to the OVM contract once the validator is through the exit queue, **and** the skimming process has completed. (Average of \~5 days) This could add a number of days to the wait for validator funds, and full exiting at an optimal moment could significantly shorten the duration.
:::
```solidity
function withdraw(
bytes[] calldata pubKeys,
uint64[] calldata amounts,
uint256 maxFeePerWithdrawal,
address excessFeeRecipient
) external payable onlyOwnerOrRoles(WITHDRAWAL_ROLE) {}
```
```solidity title="Event"
/// Emitted when a withdrawal request is submitted for a validator
/// @param pubKey Validator public key
/// @param amount Withdrawal amount in gwei
/// @param fee Fee paid for the withdrawal
event WithdrawalRequested(bytes pubKey, uint64 indexed amount, uint256 indexed fee);
```
### Validator Consolidations
Obol Validator Managers support [EIP-7251](https://eips.ethereum.org/EIPS/eip-7251) smart contract-based validator consolidations. This is an important feature for rotating the private keys for the validators managed by this contract. The rotation of private keys allows for the secure re-distribution of validation duties among new operators, without a significant period of inactivity in a normal exit and recreate flow.
The `owner` address, or any address with the `CONSOLIDATION_ROLE` can call the `consolidate()` method, to initiate a consolidation between one or more source validators and a target validator, all managed by this contract.
:::info
All source and target validators must be active with a balance greater than 32 ether for the consolidation to succeed. The target validator must be an 0x02 type validator, 0x01 type validators can become 0x02 type through a self-consolidation, where the public key is the `source` and `target`.
:::
:::info
It is possible to permissionlessly consolidate a validator into (or out of) an OVM. This could result in the OVM's `amountOfPrincipalStake()` not accurately reflecting the true amount of stake on validators exiting to the OVM withdrawal address. This could result in more (or less) ether being treated as reward, and disbursed to the rewardRecipient address. The owner of the OVM or any address with the `SET_BENEFICIARY_ROLE` can update the amount of Ether treated as principal with the `setAmountOfPrincipalStake()` function.
:::
```solidity
struct ConsolidationRequest {
bytes[] srcPubKeys;
bytes targetPubKey;
}
function consolidate(
ConsolidationRequest[] calldata requests,
uint256 maxFeePerConsolidation,
address excessFeeRecipient
) external payable onlyOwnerOrRoles(CONSOLIDATION_ROLE) {}
```
```solidity title="Event"
/// Emitted when a consolidation request is submitted
/// @param srcPubKey Source validator public key
/// @param targetPubKey Target validator public key
/// @param fee Fee paid for the consolidation
event ConsolidationRequested(bytes srcPubKey, bytes targetPubKey, uint256 indexed fee);
```
### Token Recovery
The `owner` address, or any address with the `RECOVER_FUNDS_ROLE` can call the `recoverFunds()` method, to send an ERC20 token balance on the ObolValidatorManager contract to an arbitrary `recipient` address.
:::warning
Be cautious when interacting with unknown ERC20 addresses, they may not behave as anticipated.
:::
```solidity
/// Recover non-OVM tokens to a recipient
/// @param nonOVMToken Token to recover
/// @param recipient Address to receive recovered token
function recoverFunds(address nonOVMToken, address recipient) external onlyOwnerOrRoles(RECOVER_FUNDS_ROLE) {}
```
``` title="Event"
/// Emitted after tokens are recovered to a recipient
/// @param nonOVMToken Recovered token (cannot be ETH)
/// @param recipient Address receiving recovered token
/// @param amount Amount of recovered token
event RecoverNonOVMFunds(address indexed nonOVMToken, address indexed recipient, uint256 amount);
```
### Ownership Transfer
The `owner` address can call the `transfer()` method to hand over control of an Obol Validator Manager in a single transaction. It sets a new beneficiary (the address receiving returned principal) and transfers contract ownership to a new owner. This is useful when transferring or selling a validator position without exiting the underlying validators.
:::danger
`transfer()` updates **only** the beneficiary and the owner. The contract does not enforce a reset of any other state, in particular:
* **Previously granted roles are not revoked.** Any addresses granted roles (such as `WITHDRAWAL_ROLE` or `SET_REWARD_ROLE`) by the previous owner keep those roles after the transfer. The new owner should audit role assignments — using `rolesOf()` for known addresses, or by reviewing the contract's `RolesUpdated` event history — and call `revokeRoles()` for any address that should no longer have access.
* **The reward recipient is not changed.** Accrued rewards will continue to be sent to the existing `rewardRecipient` address when `distributeFunds()` is called. The new owner (or an address with the `SET_REWARD_ROLE`) should call `setRewardRecipient()` if rewards should flow to a different address.
:::
## Optimistic Withdrawal Recipient {#optimistic-withdrawal-recipient}
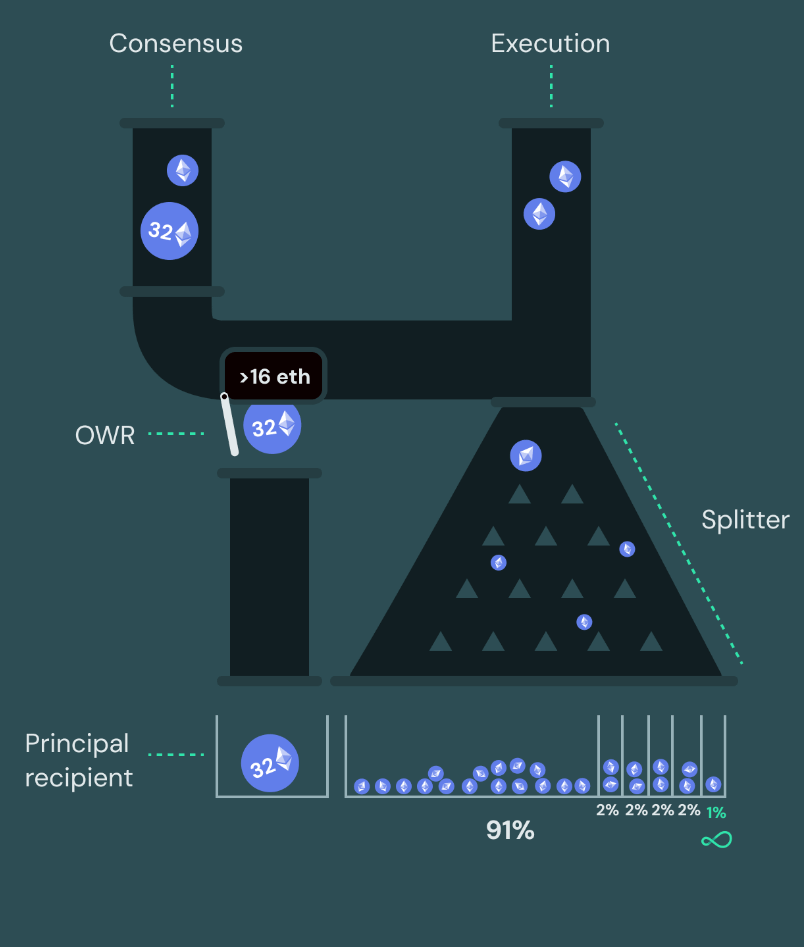
Optimistic Withdrawal Recipients (OWRs) **are the predecessor to Obol Validator Managers**. The primary addition with Validator Managers is the role-based control over validator withdrawals, exits and consolidations.
Optimistic Withdrawal Recipients allow for the separation of reward from principal, as well as permitting the ongoing withdrawal of accruing rewards.
An Optimistic Withdrawal Recipient [contract](https://github.com/ObolNetwork/obol-splits/blob/main/src/owr/OptimisticWithdrawalRecipient.sol) takes three inputs when deployed:
* A _principal_ address: The address that controls where the principal ether will be transferred post-exit.
* A _reward_ address: The address where the accruing reward ether is transferred to.
* The amount of ether that makes up the principal.
This contract **assumes that any ether that has appeared in its address since it was last able to do balance accounting is skimming reward from an ongoing validator** (or number of validators) unless the change is > 16 ether. This means balance skimming is immediately claimable as reward, while an inflow of e.g. 31 ether is tracked as a return of principal (despite being slashed in this example).
:::danger
Worst-case mass slashings can theoretically exceed 16 ether, if this were to occur, the returned principal would be misclassified as a reward, and distributed to the wrong address. This risk is the drawback that makes this contract variant 'optimistic'. If you intend to use this contract type, **it is important you fully understand and accept this risk**.
The alternative is to use a splits.org [waterfall contract](https://docs.splits.org/core/waterfall), which won't allow the claiming of rewards until all principal ether has been returned, meaning validators need to be exited for operators to claim their CL rewards.
:::
This contract fits both design goals and can be used with thousands of validators. It is safe to deploy an Optimistic Withdrawal Recipient with a principal higher than you actually end up using, though you should process the accrued rewards before exiting a validator or the reward recipients will be short-changed as that balance may be counted as principal instead of reward the next time the contract is updated. If you activate more validators than you specified in your contract deployment, you will record too much ether as reward and will overpay your reward address with ether that was principal ether, not earned ether. Current iterations of this contract are not designed for editing the amount of principal set.
## Split Contracts {#split-contracts}
Validators have two streams of revenue, the consensus layer rewards and the execution layer rewards. Validator Managers focus on the former, split contracts focus on the latter. They are best used in tandem.
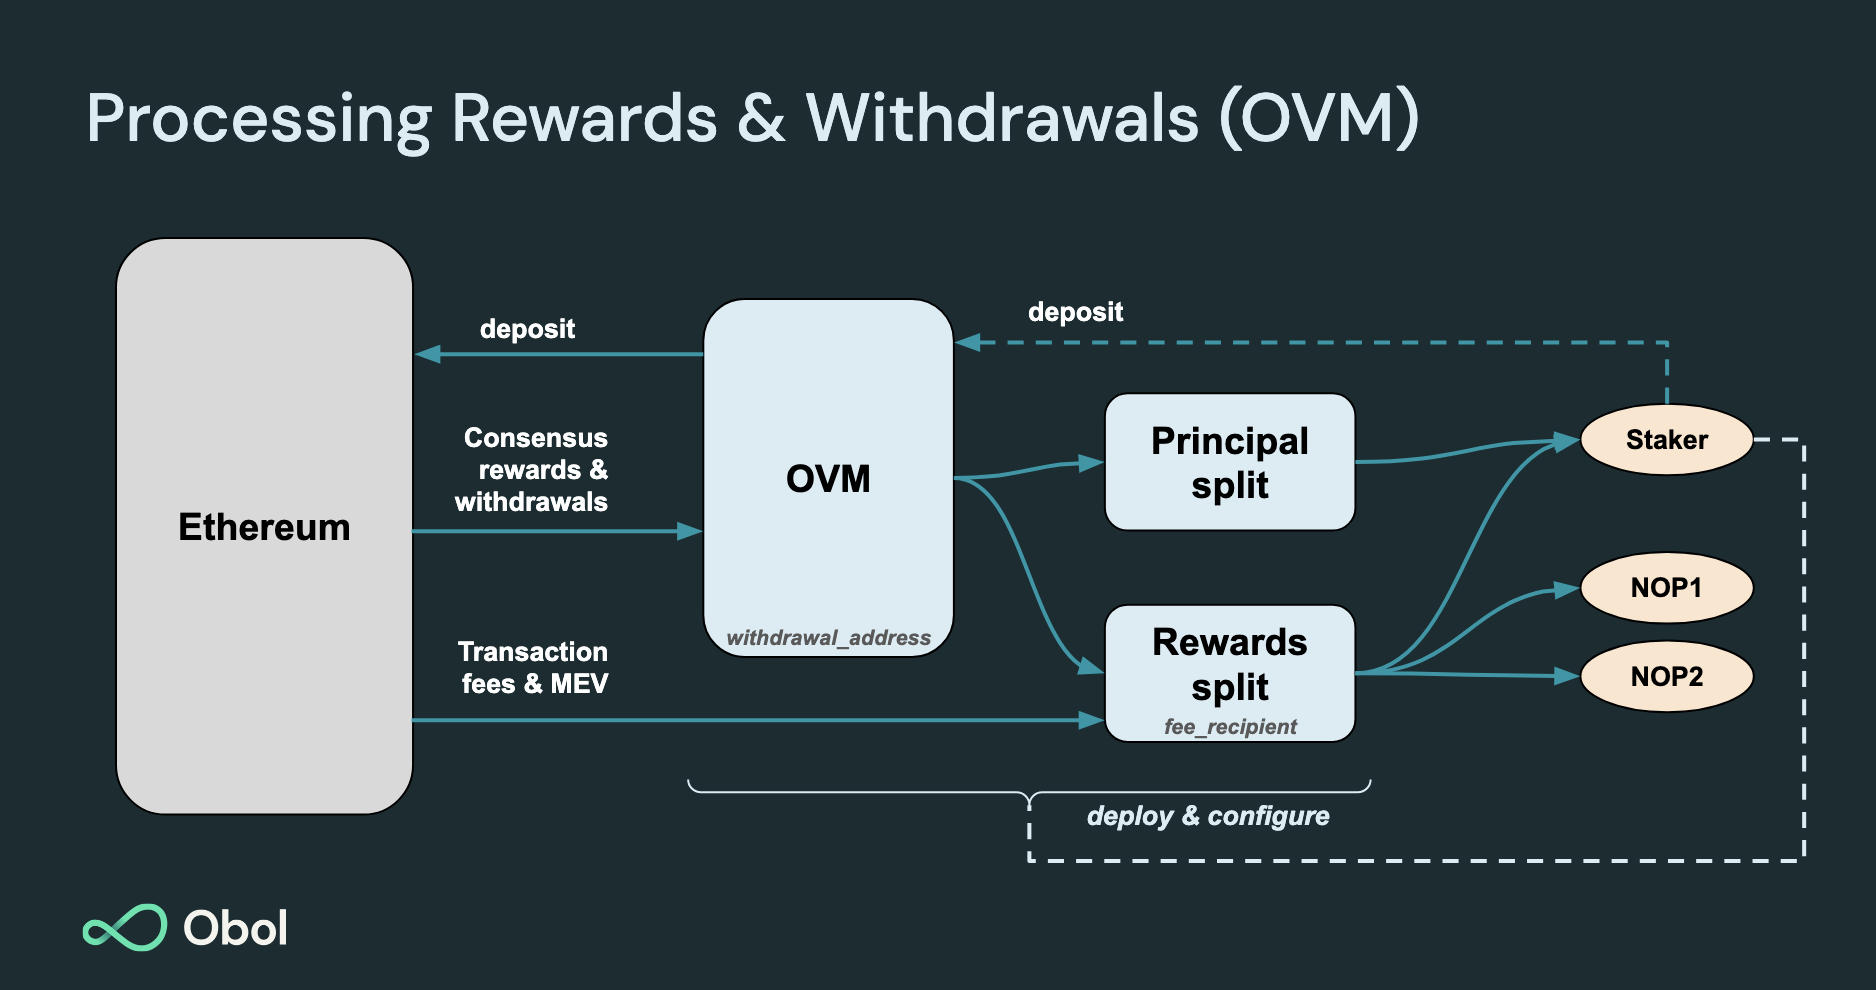
A split, or splitter, is a set of contracts that can divide ether or an ERC20 across a number of addresses. Splits are often used in conjunction with withdrawal recipients. Execution Layer rewards for a DV are directed to a split address through the use of a `fee recipient` address. Splits can be either immutable, or mutable by way of an admin address capable of updating them.
Further information about splits can be found on the splits.org team's [docs site](https://docs.splits.org/). The addresses of their deployments can be found [here](https://docs.splits.org/core/split#addresses).
### Split Controllers {#split-controllers}
Splits can be completely edited through the use of the `controller` address, however, total editability of a split is not always wanted. We recommend using a [SAFE wallet](https://safe.global) to manage the Split.
#### (Gnosis) SAFE wallet {#gnosis-safe-wallet}
A [SAFE](https://safe.global/) is a common method to administer an editable split. The most well-known deployment of this pattern is the [Protocol Guild](https://protocol-guild.readthedocs.io/en/latest/3-smart-contract.html). The SAFE can arbitrarily update the split to any set of addresses with any valid set of percentages.
## Deployments
### Obol Validator Manager Factory Deployment {#ovm-factory-deployment}
The `ObolValidatorManager` contract is deployed via a [factory contract](https://github.com/ObolNetwork/obol-splits/blob/main/src/ovm/ObolValidatorManagerFactory.sol). The factory is deployed at the following addresses on the following chains.
| Chain | Address |
| ------- | ----------------------------------------------------------------------------------------------------------------------------- |
| Mainnet | [0x2c26B5A373294CaccBd3DE817D9B7C6aea7De584](https://etherscan.io/address/0x2c26B5A373294CaccBd3DE817D9B7C6aea7De584) |
| Hoodi | [0x5754C8665B7e7BF15E83fCdF6d9636684B782b12](https://hoodi.etherscan.io/address/0x5754C8665B7e7BF15E83fCdF6d9636684B782b12) |
| Sepolia | [0xF32F8B563d8369d40C45D5d667C2B26937F2A3d3](https://sepolia.etherscan.io/address/0xF32F8B563d8369d40C45D5d667C2B26937F2A3d3) |
### Obol Lido Split Factory Deployment {#ols-factory-deployment}
The `ObolLidoSplit` contract is deployed via a [factory contract](https://github.com/ObolNetwork/obol-splits/blob/main/src/lido/ObolLidoSplitFactory.sol). The factory is deployed at the following addresses on the following chains.
| Chain | Address |
| ------- | --------------------------------------------------------------------------------------------------------------------------- |
| Mainnet | [0xa9d94139a310150ca1163b5e23f3e1dbb7d9e2a6](https://etherscan.io/address/0xa9d94139a310150ca1163b5e23f3e1dbb7d9e2a6) |
| Hoodi | [0xb633CD420aF83E8A5172e299104842b63dd97ab7](https://hoodi.etherscan.io/address/0xb633CD420aF83E8A5172e299104842b63dd97ab7) |
| Sepolia | |
### OWR Factory Deployment {#owr-factory-deployment}
The `OptimisticWithdrawalRecipient` contract is deployed via a [factory contract](https://github.com/ObolNetwork/obol-splits/blob/main/src/owr/OptimisticWithdrawalRecipientFactory.sol). The factory is deployed at the following addresses on the following chains.
| Chain | Address |
| ------- | ----------------------------------------------------------------------------------------------------------------------------- |
| Mainnet | [0x119acd7844cbdd5fc09b1c6a4408f490c8f7f522](https://etherscan.io/address/0x119acd7844cbdd5fc09b1c6a4408f490c8f7f522) |
| Sepolia | [0xca78f8fda7ec13ae246e4d4cd38b9ce25a12e64a](https://sepolia.etherscan.io/address/0xca78f8fda7ec13ae246e4d4cd38b9ce25a12e64a) |
| Hoodi | [0x9ff0c649d0bf5fe7efa4d72e94bed7302ed5c8d7](https://hoodi.etherscan.io/address/0x9ff0c649d0bf5fe7efa4d72e94bed7302ed5c8d7) |
## FAQ
### What are Obol Splits?
Obol Splits refers to a collection of composable smart contracts that enable the splitting of validator rewards and/or principal in a non-custodial, trust-minimized manner. Obol Splits contains integrations to enable DVs within Lido with Obol Lido Splits, and Native Staking with Obol Validator Managers.
### Are Obol Splits non-custodial?
Yes. Unless you were to decide to [deploy an editable splitter contract](obol-splits.md#can-i-change-the-percentages-in-a-split), Obol Splits are immutable, non-upgradeable, non-custodial, and oracle-free. Obol Validator Managers have owners and Role-Based Access Control, but these are self-sovereign and up to the deployer to set and manage. There is no third party with access to or control of your validators unless you grant them such access.
### Obol Validator Managers
#### What happens if I deposit to an OVM managed validator directly with the Ethereum deposit contract instead of through the dedicated OVM.deposit() method?
In this case, the OVM contract will not have recorded the deposit as principal to be returned, so when the validator exits, it will be sent to the reward address. Consider editing the reward address to pay 100% to the principal recipient, exiting the validator, claiming the 'rewards', and editing the reward split back to normal, before depositing through the OVM for **a new validator private key** that exits to the same OVM contract.
#### What is the principal threshold for?
Determining if Ether returned from a validator is principal deposited or rewards accrued is difficult. Rather than introducing an off-chain proof system, or trusted oracle, Obol Splits adopt an assumption that a mass slashing so severe that the principal returned is less than 16 eth is very rare, and the outcome that would happen in that case is the rewards would be sent to the reward rather than principal address, an accepted risk. This however does impact reward claiming on very large 0x02 validators. A validator could have earned 20 ether in rewards, and if a request for withdrawal of 20 ether is processed, it would be subtracted from principal and disbursed to the principal recipient, and upon a full exit, the remaining eth beyond the principal would be sent to the rewards address. To avoid this, entities with the `WITHDRAWAL_ROLE` should withdraw increments less than the `principalThreshold` if they want it treated as reward, and more than `principalThreshold` if they want to process it as a direct exit.
#### What should I check after receiving an OVM through the transfer() method?
The `transfer()` method changes only the owner and the beneficiary, so the contract may still carry configuration from the previous owner. Before relying on the contract, verify that no unexpected addresses hold roles (check `rolesOf()` for known addresses, or review the contract's `RolesUpdated` event history) and revoke any with `revokeRoles()`. Also check the `rewardRecipient` address, as it is not changed by the transfer, and update it with `setRewardRecipient()` if needed. See [Ownership Transfer](obol-splits.md#ownership-transfer) for details.
### Can I change the percentages in a split?
Generally Obol Splits are deployed in an immutable fashion, meaning you cannot edit the percentages after deployment. However, if you were to choose to deploy a _controllable_ splitter contract when creating your Split, then yes, the address you select as controller can update the split percentages arbitrarily. A common pattern for this use case is to use a Gnosis SAFE as the controller address for the split, giving a group of entities (usually the operators and principal provider) the ability to update the percentages if need be. A well-known example of this pattern is the [Protocol Guild](https://protocol-guild.readthedocs.io/en/latest/03-onchain-architecture.html).
### Are Obol Splits open source?
Yes, Obol Splits are licensed under GPLv3 and the source code is available [here](https://github.com/ObolNetwork/obol-splits).
### Are Obol Splits audited?
The Obol Splits contracts have been audited, though further development has continued on the contracts since. Consult the audit results [here](../../advanced-and-troubleshooting/security/overview.md#list-of-security-audits-and-assessments) and always deploy contracts only from published [releases](https://github.com/ObolNetwork/obol-splits/releases).
### Are the Obol Splits contracts verified on Etherscan?
Yes, you can view the verified contracts on Etherscan. A list of the contract deployments can be found [here](https://github.com/ObolNetwork/obol-splits?#deployment).
### Does my cold wallet have to call the Obol Splits contracts?
No. Any address can trigger the contracts to distribute the withdrawn/skimmed ether, they do not need to be a member of the Split either. You can set your cold wallet/custodian address as the recipient of the principal and rewards, and use any hot wallet to pay the gas fees to push the ether into the recipient address.
### Are there any edge cases I should be aware of when using Obol Splits?
The most important thing to be aware of is what address is the owner of the Obol Validator Manager, whether it has assigned any other addresses any roles, and whether or not the Split contract you are using has been set up with editability and by which address. If a splitter is editable, you should understand what the address that can edit the split does. Is the editor an EOA? Who controls that address? How secure is their seed phrase? Is it a smart contract? What can that contract do? Can the controller contract be upgraded? etc. Generally, the safest thing in Obol's perspective is to use a high threshold multi-sign like a SAFE as the `owner`/`controller`, or to renounce ownership and control entirely, and if in the future you are unhappy with the configuration, that you exit the validator and create a fresh cluster with new settings that fit your needs.
Another aspect to be aware of is how the splitting of principal from rewards works using the Optimistic Withdrawal Recipient contract. There are edge cases relating to not calling the contracts periodically or ahead of a withdrawal, activating more validators than the contract was configured for, and a worst-case mass slashing on the network. Consult the documentation on the contract [here](obol-splits.md#optimistic-withdrawal-recipient), its audit [here](../../advanced-and-troubleshooting/security/smart-contract-audit.md), and follow up with the core team if you have further questions.
---
# DV Launchpad
URL: https://docs.obol.org/learn/readme/launchpad
# DV Launchpad
In order to activate an Ethereum validator, 32 ETH must be deposited into the official deposit contract. Distributed validators are no different.
The vast majority of users that created validators to date have used the [~~**Eth2**~~** Staking Launchpad**](https://launchpad.ethereum.org/), a public good open-source website built by the Ethereum Foundation alongside participants who later went on to found Obol. This tool has been wildly successful in the safe and educational creation of a significant number of validators on the Ethereum mainnet.
To facilitate the generation of distributed validator keys among remote users with high-trust, the Obol Network developed and maintains a website that enables a group of users to come together and create these threshold keys: **The DV Launchpad**.
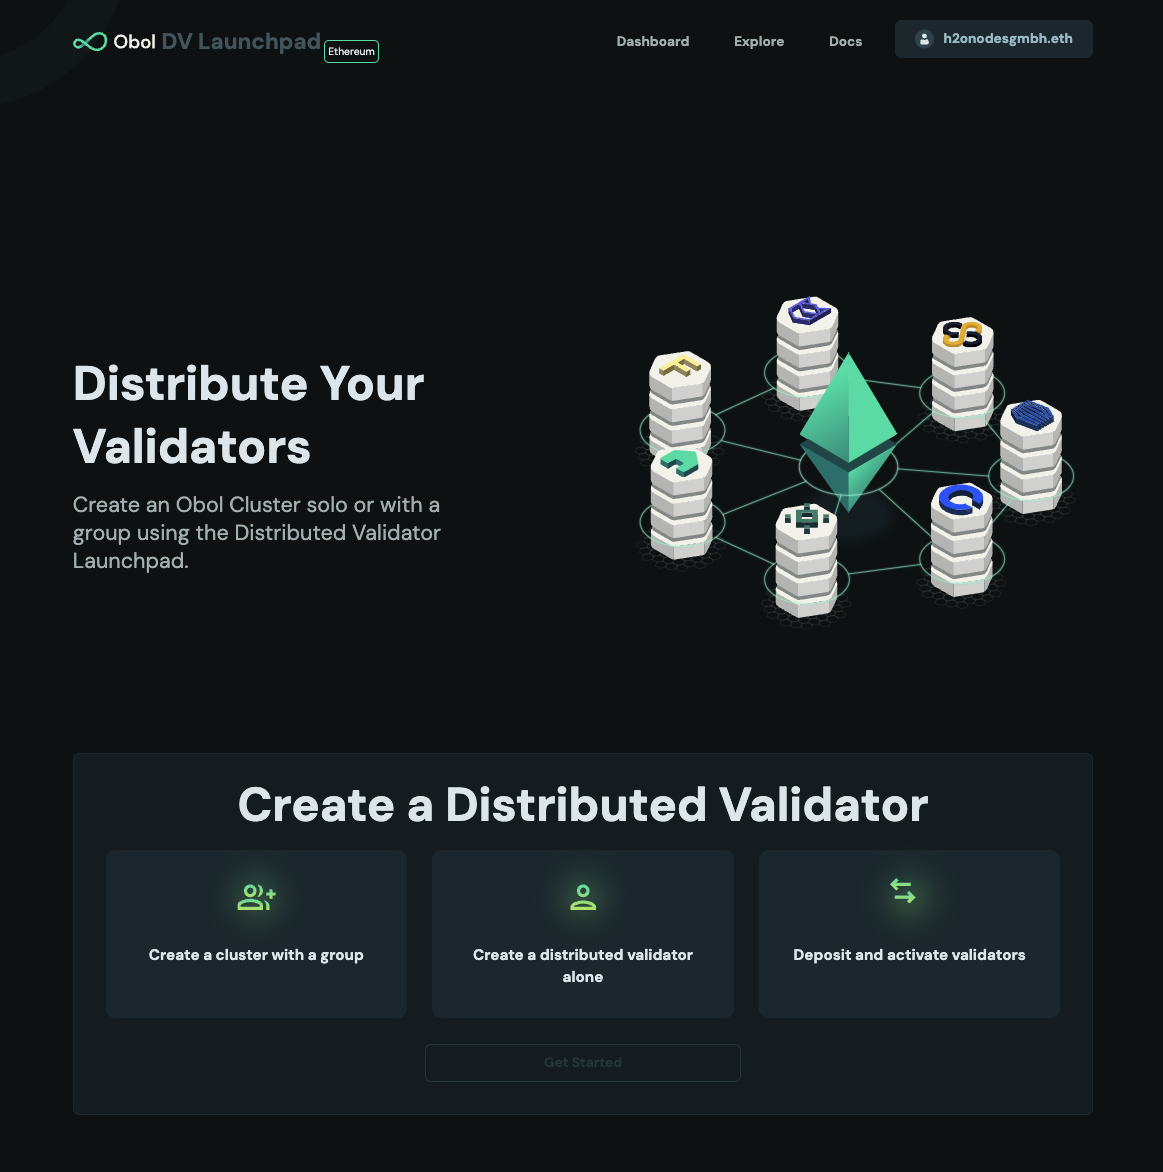
## Getting started
For more information on running Charon in a UI-friendly way through the DV Launchpad, take a look at our [Quickstart Guides](../../run-a-dv/start/quickstart_overview.md).
## DV Launchpad Links
| Ethereum Network | Launchpad |
| ---------------- | -------------------------------------- |
| Mainnet | https://launchpad.obol.org |
| Gnosis Chain | https://gnosischain.launchpad.obol.org |
| Hoodi | https://hoodi.launchpad.obol.org |
| Sepolia | https://sepolia.launchpad.obol.org |
## Operator Dashboard
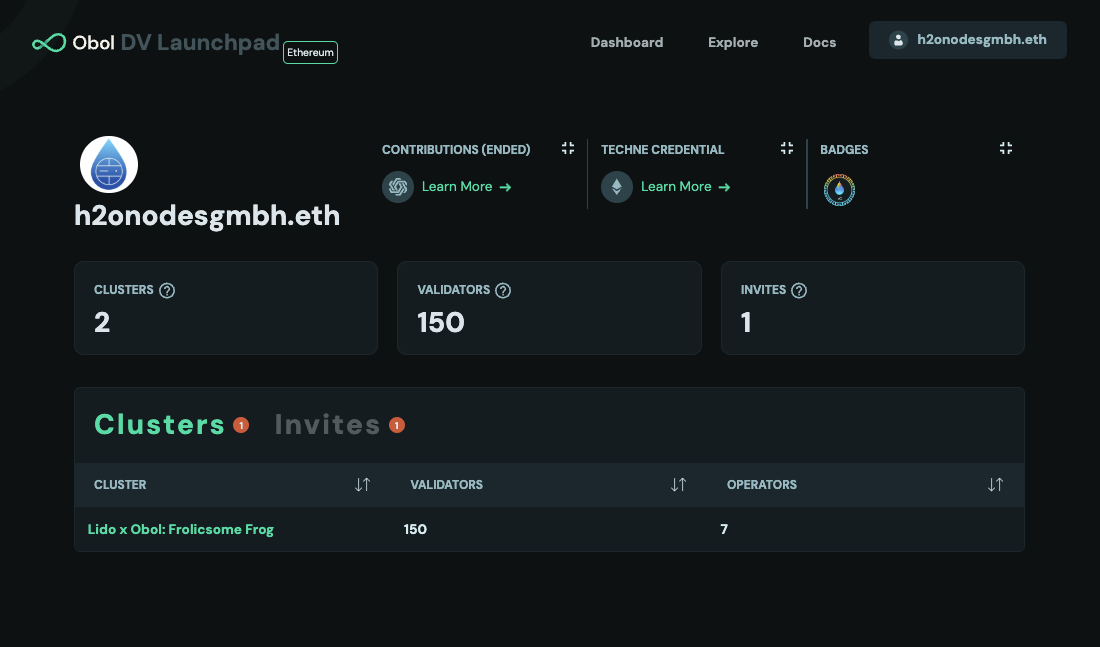
Clicking on "dashboard" on the top-right of the launchpad brings you to the operator view, where you can view information about the DV operator corresponding to the wallet address currently connected to the launchpad. It is also possible to view information about another operator, by substituting another wallet address in the URL, or using the explorer, described below.
## View a Cluster
An operator can be part of multiple clusters. Clusters, and cluster invites, are shown on the operator page. Clicking on a cluster takes you to the cluster page. Here you can see the status of the cluster, the operators, and validators associated with the cluster.
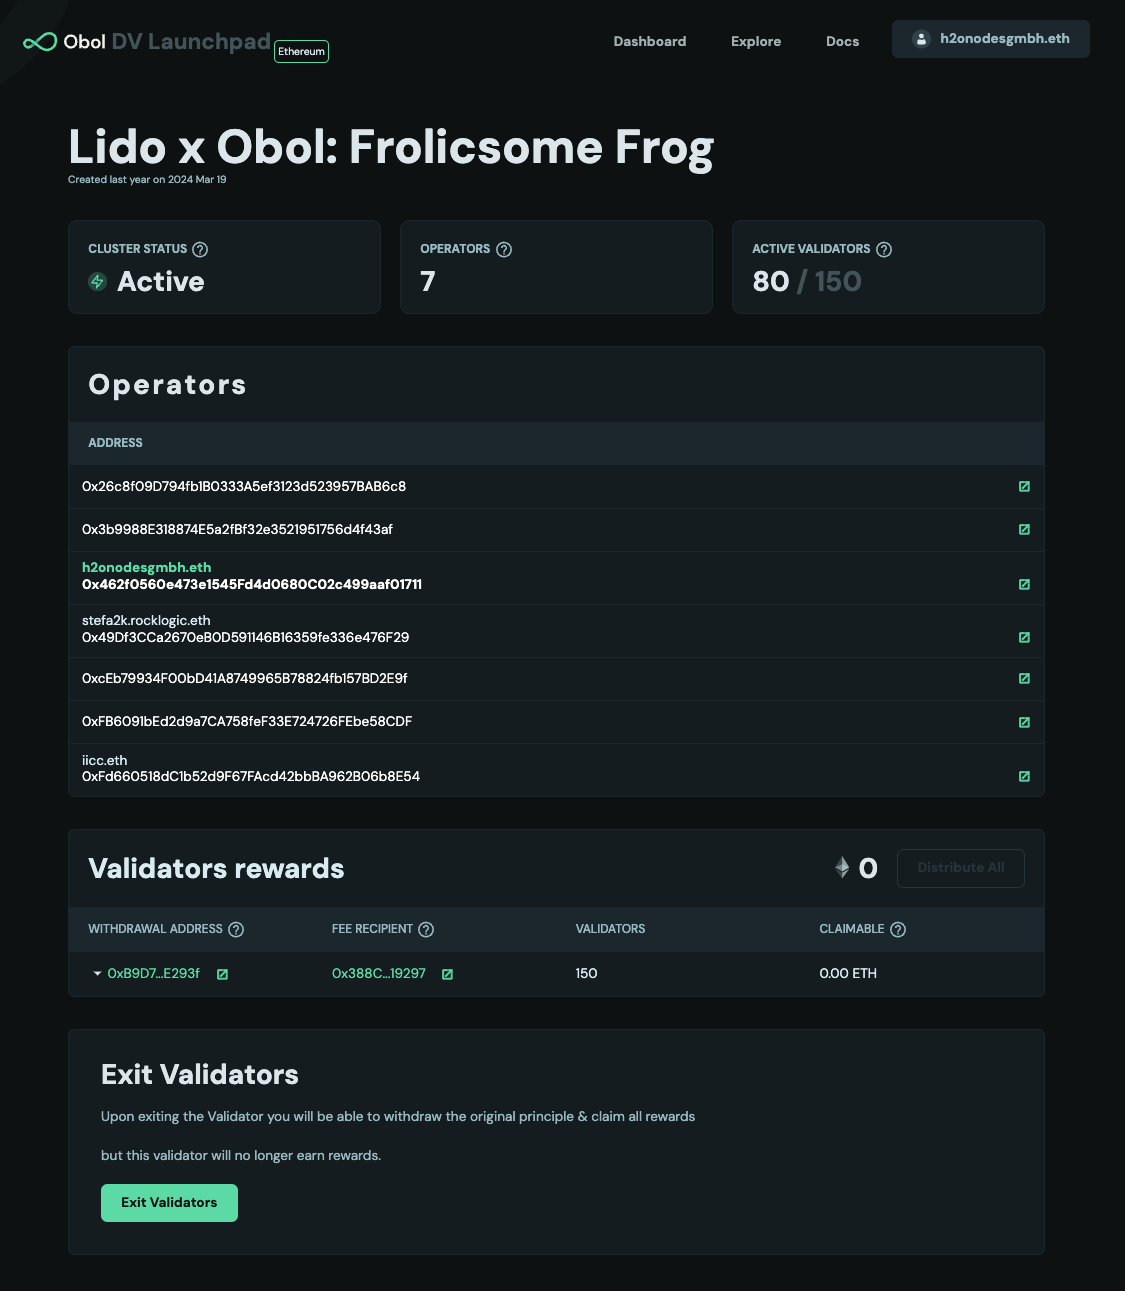
> \[!TIP] If you created a cluster locally, and didn't use the `--publish` command at the time, you can manually publish it by running this command from the folder with the `cluster-lock.json` in it.
>
> `curl -X POST -H "Content-Type: application/json" -d @cluster-lock.json https://api.obol.tech/v1/lock`
## Use the Explorer
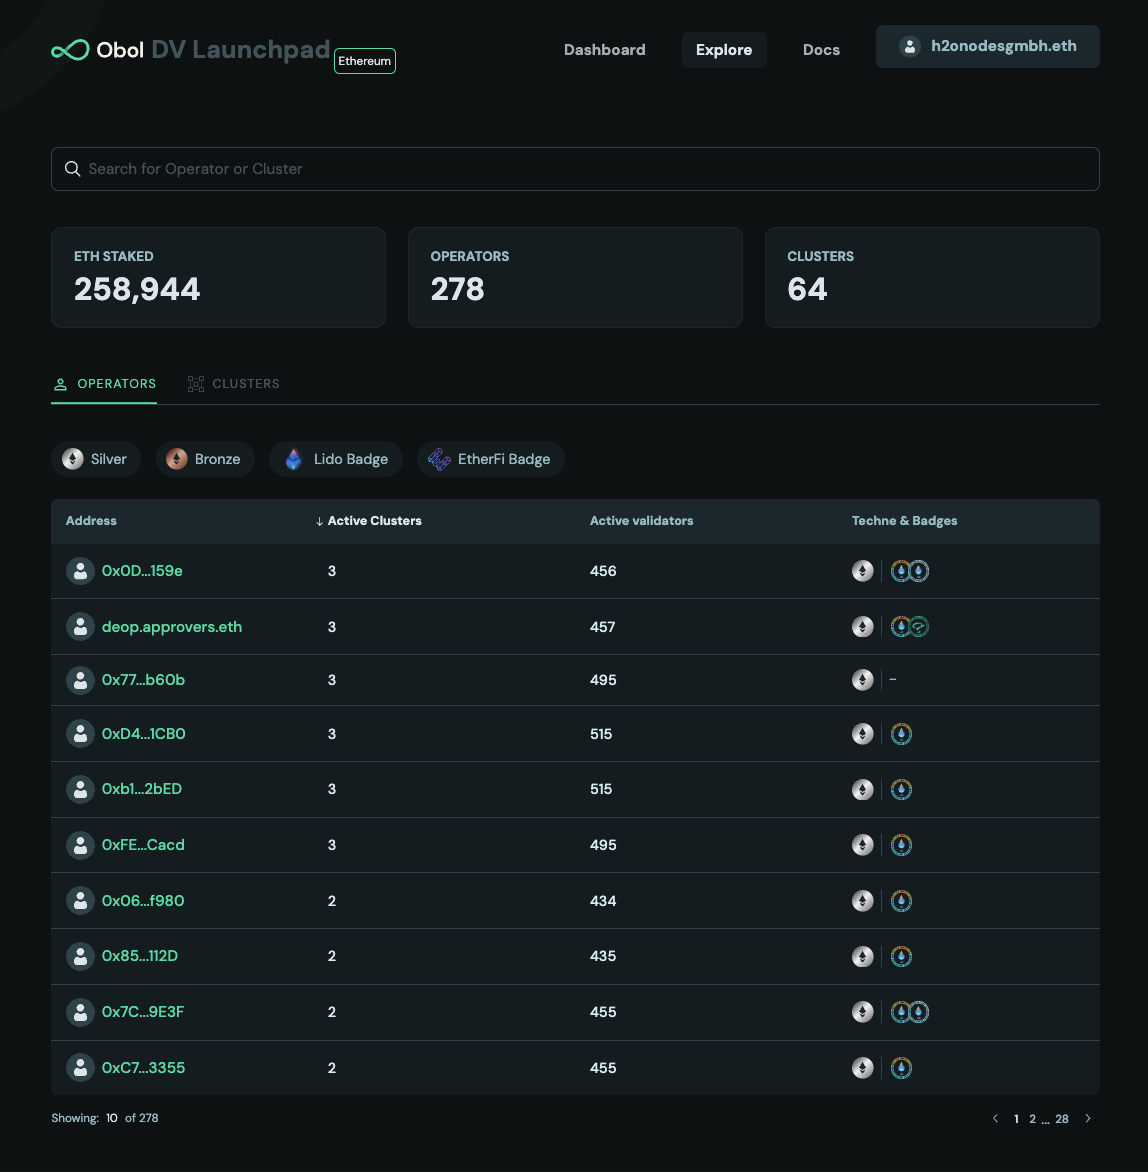
Clicking "explore" on the top-right of the launchpad brings you to the explorer view. It shows information about every DV cluster and operator being tracked by Obol. You can search for a cluster or operator by name, or filter based on badge or protocol type.
---
# Frequently Asked Questions
URL: https://docs.obol.org/learn/readme/frequently-asked-questions
# Frequently Asked Questions
## Frequently Asked Questions
### General {#general}
#### Does Obol have a token? {#does-obol-have-a-token}
Yes, please see the [token page](../../community-and-governance/obol-token/) for details about the OBOL Token and our [announcement](https://blog.obol.org/airdrop/) for details about the community airdrop that took place in January 2025. The official token contract address is [0x0B010000b7624eb9B3DfBC279673C76E9D29D5F7](https://etherscan.io/token/0x0B010000b7624eb9B3DfBC279673C76E9D29D5F7).
#### Where can I learn more about Distributed Validators? {#where-can-i-learn-more-about-distributed-validators}
Have you checked out our [blog site](https://blog.obol.tech/) and [twitter](https://twitter.com/ObolNetwork) yet? Maybe join our [discord](https://discord.gg/n6ebKsX46w) too.
#### Where does the name Charon come from? {#where-does-the-name-charon-come-from}
[Charon](https://www.theoi.com/Khthonios/Kharon.html) \[kharon] is the Ancient Greek Ferryman of the Dead. He was tasked with bringing people across the Acheron river to the underworld. His fee was one Obol coin, placed in the mouth of the deceased. This tradition of placing a coin or Obol in the mouth of the deceased continues to this day across the Greek world.
#### What are the hardware requirements for running a Charon node? {#what-are-the-hardware-requirements-for-running-a-charon-node}
Charon alone uses negligible disk space of not more than a few MBs. However, if you are running your consensus client and execution client on the same server as Charon, then you will typically need the same hardware as running a full Ethereum node:
| | Charon + VC | Beacon Node |
| ---------------------- | ----------- | ----------- |
| **CPU\*** | 1 | 2 |
| **RAM** | 2 | 16 |
| **Storage** | 100 MB | 2 TB |
| **Internet Bandwidth** | 10 Mb/s | 10 Mb/s |
| | Charon + VC | Beacon Node |
| ---------------------- | ----------- | ----------- |
| **CPU\*** | 2 | 4 |
| **RAM** | 3 | 24 |
| **Storage** | 100 MB | 2 TB |
| **Internet Bandwidth** | 25 Mb/s | 25 Mb/s |
| | Charon + VC | Beacon Node |
| ---------------------- | ----------- | ----------- |
| **CPU\*** | 2 | 8 |
| **RAM** | 4 | 32 |
| **Storage** | 100 MB | 2 TB |
| **Internet Bandwidth** | 100 Mb/s | 100 Mb/s |
\*if using vCPU, aim for 2x the above amounts
For more hardware considerations, check out the [ethereum.org guides](https://ethereum.org/en/developers/docs/nodes-and-clients/run-a-node/#environment-and-hardware) which explores various setups and trade-offs, such as running the node locally or in the cloud.
For now, Geth, Teku & Lighthouse clients are packaged within the docker compose file provided in the [quickstart guides](../../run-a-dv/start/quickstart_overview.md), so you don't have to install anything else to run a cluster. Just make sure you give them some time to sync once you start running your node.
#### What is the difference between a node, a validator and a cluster? {#what-is-the-difference-between-a-node-a-validator-and-a-cluster}
A node is a single instance of Ethereum EL+CL clients that can communicate with other nodes to maintain the Ethereum blockchain.
A validator is a node that participates in the consensus process by verifying transactions and creating new blocks. Multiple validators can run from the same node.
A cluster is a group of nodes that act together as one or several validators which allows for a more efficient use of resources, reduces operational costs, and provides better reliability and fault tolerance.
#### Can I migrate an existing Charon node to a new machine? {#can-i-migrate-an-existing-charon-node-to-a-new-machine}
It is possible to migrate your Charon node to another machine running the same config by moving the `.charon` folder with its contents to your new machine. Make sure the EL and CL on the new machine are synced before proceeding to the move to minimize downtime.
### Distributed Key Generation {#distributed-key-generation}
#### What are the min and max numbers of operators for a Distributed Validator? {#what-are-the-min-and-max-numbers-of-operators-for-a-distributed-validator}
Currently, the minimum is 4 operators with a threshold of 3.
The threshold (aka quorum) corresponds to the minimum number of operators that need to be active for the validator(s) to be able to perform its duties. It is defined by the following formula `n-(ceil(n/3)-1)`. We strongly recommend using this default threshold in your DKG as it maximizes liveness while maintaining BFT safety. Setting a 4 out of 4 cluster for example, would make your validator more vulnerable to going offline instead of less vulnerable. You can check the recommended threshold values for a cluster [here](key-concepts.md#distributed-validator-threshold).
### Obol Splits {#obol-splits}
#### What are Obol Splits? {#what-are-obol-splits}
Obol Splits refers to a collection of composable smart contracts that enable the splitting of validator rewards and/or principal in a non-custodial, trust-minimized manner. Obol Splits contains integrations to enable DVs within Lido, Eigenlayer, and in the future a number of other LSPs.
#### Are Obol Splits non-custodial? {#are-obol-splits-non-custodial}
Yes. Unless you were to decide to [deploy an editable splitter contract](#can-i-change-the-percentages-in-a-split), Obol Splits are immutable, non-upgradeable, non-custodial, and oracle-free.
#### Can I change the percentages in a split? {#can-i-change-the-percentages-in-a-split}
Generally, Obol Splits are deployed in an immutable fashion, meaning you cannot edit the percentages after deployment. However, if you were to choose to deploy a _controllable_ splitter contract when creating your Split, then yes, the address you select as controller can update the split percentages arbitrarily. A common pattern for this use case is to use a Gnosis SAFE as the controller address for the split, giving a group of entities (usually the operators and principal provider) the ability to update the percentages if need be. A well-known example of this pattern is the [Protocol Guild](https://protocol-guild.readthedocs.io/en/latest/03-onchain-architecture.html).
#### How do Obol Splits work? {#how-do-obol-splits-work}
You can read more about how Obol Splits work [here](obol-splits.md).
#### Are Obol Splits open source? {#are-obol-splits-open-source}
Yes, Obol Splits are licensed under GPLv3 and the source code is available [here](https://github.com/ObolNetwork/obol-splits).
#### Are Obol Splits audited? {#are-obol-splits-audited}
The Obol Splits contracts have been audited, though further development has continued on the contracts since. Consult the audit results [here](../../advanced-and-troubleshooting/security/smart-contract-audit.md).
#### Are the Obol Splits contracts verified on Etherscan? {#are-the-obol-splits-contracts-verified-on-etherscan}
Yes, you can view the verified contracts on Etherscan. A list of the contract deployments can be found [here](https://github.com/ObolNetwork/obol-splits?#deployment).
#### Does my cold wallet have to call the Obol Splits contracts? {#does-my-cold-wallet-have-to-call-the-obol-splits-contracts}
No. Any address can trigger the contracts to move the funds, they do not need to be a member of the Split either. You can set your cold wallet/custodian address as the recipient of the principal and rewards, and use any hot wallet to pay the gas fees to push the ether into the recipient address.
#### Are there any edge cases I should be aware of when using Obol Splits? {#are-there-any-edge-cases-i-should-be-aware-of-when-using-obol-splits}
The most important decision is to be aware of whether or not the Split contract you are using has been set up with editability. If a splitter is editable, you should understand what the address that can edit the split does. Is the editor an EOA? Who controls that address? How secure is their seed phrase? Is it a smart contract? What can that contract do? Can the controller contract be upgraded? etc. Generally, the safest thing in Obol's perspective is not to have an editable splitter, and if in the future you are unhappy with the configuration, that you exit the validator and create a fresh cluster with new settings that fit your needs.
Another aspect to be aware of is how the splitting of principal from rewards works using the Optimistic Withdrawal Recipient contract. There are edge cases relating to not calling the contracts periodically or ahead of a withdrawal, activating more validators than the contract was configured for, and a worst-case mass slashing on the network. Consult the documentation on the contract [here](obol-splits.md#optimistic-withdrawal-recipient), its audit [here](../../advanced-and-troubleshooting/security/smart-contract-audit.md), and follow up with the core team if you have further questions.
### Debugging Errors in Logs {#debugging-errors-in-logs}
You can check if the containers on your node are outputting errors by running `docker compose logs` on a machine with a running cluster.
Diagnose some common errors and view their resolutions [here](../../advanced-and-troubleshooting/troubleshooting/errors.md).
---
# Charon
URL: https://docs.obol.org/learn/charon
# Charon
---
# Introduction to Charon
URL: https://docs.obol.org/learn/charon/intro
# Introduction to Charon
This section introduces and outlines the Charon _\[kharon]_ middleware, Obol's implementation of DVT. Please see the [key concepts](../intro/key-concepts.md) section as background and context.
## What is Charon?
Charon is a GoLang-based, HTTP middleware built by Obol to enable any existing Ethereum validator clients to operate together as part of a distributed validator.
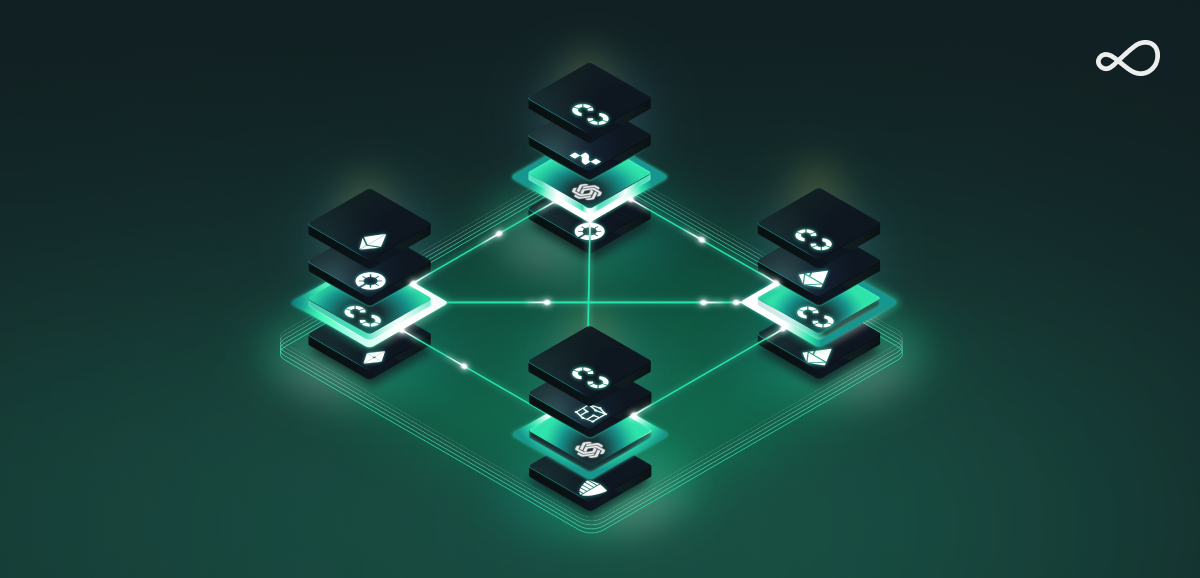
Charon sits as a middleware between a normal validating client and its connected beacon node, intercepting and proxying API traffic. Multiple Charon clients are configured to communicate together to come to consensus on validator duties and behave as a single unified proof-of-stake validator together. The nodes form a cluster that is _byzantine-fault tolerant_ and continues to progress assuming a supermajority of working/honest nodes is met.
## Charon Architecture
Charon is an Ethereum proof of stake distributed validator (DV) client. Like any validator client, its main purpose is to perform validation duties for the Beacon Chain, primarily attestations and block proposals. The beacon client handles a lot of the heavy lifting, leaving the validator client to focus on fetching duty data, signing that data, and submitting it back to the beacon client.
Charon is designed as a generic event-driven workflow with different components coordinating to perform validation duties. All duties follow the same flow, the only difference being the signed data. The workflow can be divided into phases consisting of one or more components:
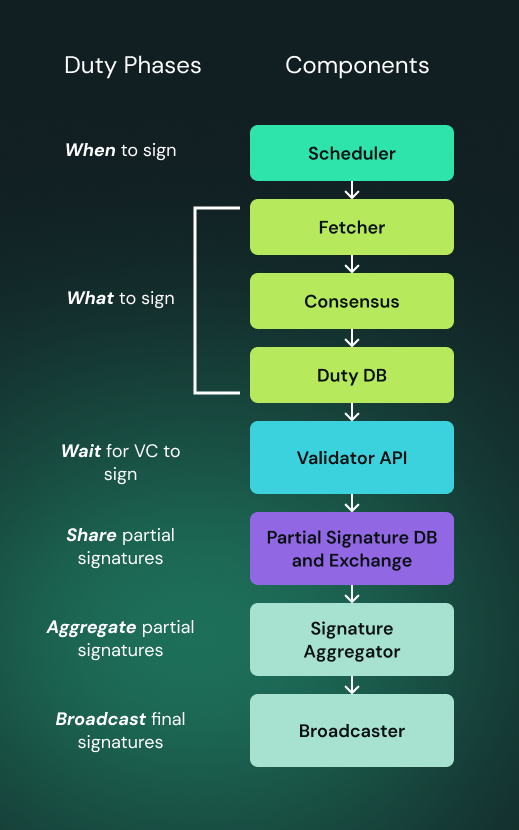
### Determine **when** duties need to be performed
The beacon chain is divided into [slots](https://eth2book.info/capella/part3/config/types/#slot) and [epochs](https://eth2book.info/capella/part3/config/types/#epoch), which divides it into deterministically fixed-size time chunks. The first step is to determine when (which slot/epoch) duties need to be performed. This is done by the `scheduler` component. It queries the beacon node to detect which validators defined in the cluster lock are active, and what duties they need to perform for the upcoming epoch and slots. When such a slot starts, the `scheduler` emits an event indicating which validator needs to perform what duty.
### Fetch and come to consensus on **what** data to sign
A DV cluster consists of multiple operators each provided with one of the M-of-N threshold BLS private key shares per validator. The key shares are imported into the validator clients which produce partial signatures. Charon threshold aggregates these partial signatures before broadcasting them to the Beacon Chain. _But to threshold aggregate partial signatures, each validator must sign the same data._ The cluster must therefore coordinate and come to a consensus on what data to sign.
`Fetcher` fetches the unsigned duty data from the beacon node upon receiving an event from `Scheduler`. For attestations, this is the unsigned attestation, for block proposals, this is the unsigned block.
The `Consensus` component listens to events from Fetcher and starts a [QBFT](https://docs.goquorum.consensys.net/configure-and-manage/configure/consensus-protocols/qbft/) consensus game with the other Charon nodes in the cluster for that specific duty and slot. When consensus is reached, the resulting unsigned duty data is stored in the `DutyDB`.
### **Wait** for the VC to sign
Charon is a **middleware** distributed validator client. That means Charon doesn’t have access to the validator private key shares and cannot sign anything on demand. Instead, operators import the key shares into industry-standard validator clients (VC) that are configured to connect to their local Charon client instead of their local Beacon node directly.
Charon, therefore, serves the [Ethereum Beacon Node API](https://ethereum.github.io/beacon-APIs/#/) from the `ValidatorAPI` component and intercepts some endpoints while proxying other endpoints directly to the upstream Beacon node.
The VC queries the `ValidatorAPI` for unsigned data which is retrieved from the `DutyDB`. It then signs it and submits it back to the `ValidatorAPI` which stores it in the `PartialSignatureDB`.
### **Share** partial signatures
The `PartialSignatureDB` stores the partially signed data submitted by the local Charon client’s VC. But it also stores all the partial signatures submitted by the VCs of other peers in the cluster. This is achieved by the `PartialSignatureExchange` component that exchanges partial signatures between all peers in the cluster. All Charon clients, therefore, store all partial signatures the cluster generates.
### **Threshold Aggregate** partial signatures
The `SignatureAggregator` is invoked as soon as sufficient (any M of N) partial signatures are stored in the `PartialSignatureDB`. It performs BLS threshold aggregation of the partial signatures resulting in a final signature that is valid for the beacon chain.
### **Broadcast** final signature
Finally, the `Broadcaster` component broadcasts the final threshold aggregated signature to the Beacon client, thereby completing the duty.
### Ports
The following is an outline of the services that can be exposed by Charon.
* **:3600** - The validator REST API. This is the port that serves the consensus layer's [beacon node API](https://ethereum.github.io/beacon-APIs/). This is the port validator clients should talk to instead of their standard consensus client REST API port. Charon subsequently proxies these requests to the upstream consensus client specified by `--beacon-node-endpoints`.
* **:3610** - Charon P2P port. This is the port that Charon clients use to communicate with one another via TCP. This endpoint should be port-forwarded on your router and exposed publicly, preferably on a static IP address. This IP address should then be set on the charon run command with `--p2p-external-ip` or `CHARON_P2P_EXTERNAL_IP`.
* **:3620** - Monitoring port. This port hosts a webserver that serves Prometheus metrics on `/metrics`, a readiness endpoint on `/readyz` and a liveness endpoint on `/livez`, and a pprof server on `/debug/pprof`. This port should not be exposed publicly.
## Getting started
For more information on running Charon, take a look at our [Quickstart Guides](../../run-a-dv/start/quickstart_overview.md).
---
# Distributed Key Generation
URL: https://docs.obol.org/learn/charon/dkg
# Distributed Key Generation
## Overview
A [**distributed validator key**](../intro/key-concepts.md#distributed-validator-key) is a group of BLS private keys that together operate as a threshold key for participating in proof-of-stake consensus.
To make a distributed validator with no fault-tolerance (i.e. all nodes need to be online to sign every message), due to the BLS signature scheme used by Proof of Stake Ethereum, each key share could be chosen by operators independently. However, to create a distributed validator that can stay online despite a subset of its nodes going offline, the key shares need to be generated together (4 randomly chosen points on a graph don't all necessarily sit on the same order three curve). To do this in a secure manner with no one party being trusted to distribute the keys requires what is known as a [**distributed key generation ceremony**](../intro/key-concepts.md#distributed-validator-key-generation-ceremony).
The Charon client has the responsibility of securely completing a distributed key generation ceremony with its counterparty nodes. The ceremony configuration is outlined in a [cluster definition](cluster-configuration.md).
## Actors Involved
A distributed key generation ceremony involves `Operators` and their `Charon clients`.
* An `Operator` is identified by their Ethereum address. They will sign a message with this address to authorize their Charon client to take part in the DKG ceremony.
* A `Charon client` is also identified by a public/private key pair, in this instance, the public key is represented as an [Ethereum Node Record](https://eips.ethereum.org/EIPS/eip-778) (ENR). This is a standard identity format for both EL and CL clients. These ENRs are used by each Charon node to identify its cluster peers over the internet, and to communicate with one another in an [end to end encrypted manner](https://github.com/libp2p/go-libp2p/tree/master/p2p/security/noise). These keys need to be created (and backed up) by each operator before they can participate in a cluster creation.
## Cluster Definition Creation
This cluster definition specifies the intended cluster configuration before keys have been created in a distributed key generation ceremony. The `cluster-definition.json` file can be created with the help of the [Distributed Validator Launchpad](cluster-configuration.md#using-the-dv-launchpad) or via the [CLI](cluster-configuration.md#using-the-cli).
## Carrying out the DKG ceremony
Once all participants have signed the cluster definition, they can load the `cluster-definition` file into their Charon client, and the client will attempt to complete the DKG.
Charon will read the ENRs in the definition, confirm that its ENR is present, and then will reach out to relays that are deployed to find the other ENRs on the network. (Fresh ENRs just have a public key and an IP address of 0.0.0.0 until they are loaded into a live Charon client, which will update the IP address and increment the ENR's nonce and resign with the client's private key. If an ENR with a higher nonce is seen by a Charon client, they will update the IP address of that ENR in their address book.)
Once all clients in the cluster can establish a connection with one another and they each complete a handshake (confirm everyone has a matching `cluster_definition_hash`), the ceremony begins.
No user input is required, Charon does the work and outputs the following files to each machine and then exits.
## Backing up the ceremony artifacts
At the end of a DKG ceremony, each operator will have a number of files outputted by their Charon client based on how many distributed validators the group chose to generate together.
These files are:
* **Validator keystore(s):** These files will be loaded into the operator's validator client and each file represents one share of a Distributed Validator.
* **A distributed validator cluster lock file:** This `cluster-lock.json` file contains the configuration a distributed validator client like Charon needs to join a cluster capable of operating a number of distributed validators.
* **Validator deposit data:** This file is used to activate one or more distributed validators on the Ethereum network.
Once the ceremony is complete, all participants should take a backup of the created files. In future versions of Charon, if a participant loses access to these key shares, it will be possible to use a key re-sharing protocol to swap the participant's old keys out of a distributed validator in favor of new keys, allowing the rest of a cluster to recover from a set of lost key shares. However for now, without a backup, the safest thing to do would be to exit the validator.
## DKG Verification
For many use cases of distributed validators, the funder/depositor of the validator may not be the same person as the key creators/node operators, as (outside of the base protocol) stake delegation is a common phenomenon. This handover of information introduces a point of trust. How does someone verify that a proposed validator `deposit data` corresponds to a real, fair, DKG with participants the depositor expects?
There are a number of aspects to this trust surface that can be mitigated with a "Don't trust, verify" model. Verification for the time being is easier off chain, until things like a [BLS precompile](https://eips.ethereum.org/EIPS/eip-2537) are brought into the EVM, along with cheap ZKP verification on chain. Some of the questions that can be asked of Distributed Validator Key Generation Ceremonies include:
* Do the public key shares combine together to form the group public key?
* This can be checked on chain as it does not require a pairing operation
* This can give confidence that a BLS pubkey represents a Distributed Validator, but does not say anything about the custody of the keys. (e.g. Was the ceremony sybil attacked, did they collude to reconstitute the group private key etc.)
* Do the created BLS public keys attest to their `cluster_definition_hash`?
* This is to create a backwards link between newly created BLS public keys and the operator's eth1 addresses that took part in their creation.
* If a proposed distributed validator BLS group public key can produce a signature of the `cluster_definition_hash`, it can be inferred that at least a threshold of the operators signed this data.
* As the `cluster_definition_hash` is the same for all distributed validators created in the ceremony, the signatures can be aggregated into a group signature that verifies all created group keys at once. This makes it cheaper to verify a number of validators at once on chain.
* Is there either a VSS or PVSS proof of a fair DKG ceremony?
* VSS (Verifiable Secret Sharing) means only operators can verify fairness, as the proof requires knowledge of one of the secrets.
* PVSS (Publicly Verifiable Secret Sharing) means anyone can verify fairness, as the proof is usually a Zero Knowledge Proof.
* A PVSS of a fair DKG would make it more difficult for operators to collude and undermine the security of the Distributed Validator.
* Zero Knowledge Proof verification on chain is currently expensive, but is becoming achievable through the hard work and research of the many ZK based teams in the industry.
## Appendix
### Sample Configuration and Lock Files
Refer to the details [here](cluster-configuration.md).
---
# Cluster Configuration
URL: https://docs.obol.org/learn/charon/cluster-configuration
# Cluster Configuration
:::warning
These cluster definition and cluster lock files are a work in progress. The intention is for the files to be standardized for operating distributed validators via the [EIP process](https://eips.ethereum.org/) when appropriate.
:::
This document describes the configuration options for running a Charon client or cluster.
A Charon cluster is configured in two steps:
* `cluster-definition.json` which defines the intended cluster configuration before keys have been created in a distributed key generation ceremony.
* `cluster-lock.json` which includes and extends `cluster-definition.json` with distributed validator BLS public key shares.
In the case of a solo operator running a cluster, the [`charon create cluster`](charon-cli-reference.md#create-a-full-cluster-locally) command combines both steps into one and just outputs the final `cluster-lock.json` without a DKG step.
## Cluster Definition File
The `cluster-definition.json` is provided as input to the DKG which generates keys and the `cluster-lock.json` file.
### Using the CLI
The [`charon create dkg`](charon-cli-reference.md#creating-the-configuration-for-a-dkg-ceremony) command is used to create the `cluster-definition.json` file which is used as input to `charon dkg`.
The schema of the `cluster-definition.json` is defined as:
```json
{
"name": "best cluster", // Optional cosmetic identifier
"uuid": "1234-abcdef-1234-abcdef", // Random unique identifier.
"creator": {
"address": "0x123..abfc", //ETH1 address of the creator
"config_signature": "0x123654...abcedf" // EIP712 Signature of config_hash using creator privkey
},
"version": "v1.8.0", // Schema version
"num_validators": 1, // Number of distributed validators to be created in cluster-lock.json
"threshold": 3, // Optional threshold required for signature reconstruction
"dkg_algorithm": "default", // Optional DKG algorithm for key generation
"fork_version": "0x10000910", // Chain/Network identifier
"config_hash": "0xabcfde...acbfed", // Hash of the static (non-changing) fields
"timestamp": "2025-01-01T12:00:00+00:00", // Creation timestamp
"operators": [
{
"address": "0x123..abfc", // ETH1 address of the operator
"enr": "enr://abcdef...12345", // Charon node ENR
"enr_signature": "0x123654...abcedf", // EIP712 Signature of ENR by ETH1 address priv key
"config_signature": "0x123456...abcdef" // EIP712 Signature of config_hash by ETH1 address priv key
},
{
"address": "0x123..abfc",
"enr": "enr://abcdef...12345",
"enr_signature": "0x123654...abcedf",
"config_signature": "0x123456...abcdef"
},
{
"address": "0x123..abfc",
"enr": "enr://abcdef...12345",
"enr_signature": "0x123654...abcedf",
"config_signature": "0x123456...abcdef"
},
{
"address": "0x123..abfc",
"enr": "enr://abcdef...12345",
"enr_signature": "0x123654...abcedf",
"config_signature": "0x123456...abcdef"
}
],
"definition_hash": "0xabcdef...abcedef", // Final hash of all fields
"validators": [
{
"fee_recipient_address": "0x123..abfc", // ETH1 fee_recipient address of validator
"withdrawal_address": "0x123..abfc" // ETH1 withdrawal address of validator
}
],
"deposit_amounts": [
"32000000000"
]
}
```
### Using the DV Launchpad
* A `leader/creator`, that wishes to coordinate the creation of a new Distributed Validator Cluster navigates to the launchpad and selects "Create new Cluster".
* The `leader/creator` uses the user interface to configure all of the important details about the cluster including:
* The `Withdrawal Address` for the created validators;
* The `Fee Recipient Address` for block proposals if it differs from the withdrawal address;
* The number of distributed validators to create;
* The list of participants in the cluster specified by Ethereum address(/ENS);
* The threshold of fault tolerance required.
* These key pieces of information form the basis of the cluster configuration. These fields (and some technical fields like DKG algorithm to use) are serialized and merklized to produce the definition's `cluster_definition_hash`. This merkle root will be used to confirm that there is no ambiguity or deviation between definitions when they are provided to Charon nodes.
* Once the `leader/creator` is satisfied with the configuration they publish it to the launchpad's data availability layer for the other participants to access. (For early development the launchpad will use a centralized backend db to store the cluster configuration. Near production, solutions like IPFS or arweave may be more suitable for the long-term decentralization of the launchpad.)
## Cluster Lock File
The `cluster-lock.json` has the following schema:
```json
{
"cluster_definition": {...}, // Cluster definition json, identical schema to above,
"distributed_validators": [ // Length equal to cluster_definition.num_validators.
{
"distributed_public_key": "0x123..abfc", // DV root pubkey
"public_shares": [ "abc...fed", "cfd...bfe"], // Length equal to cluster_definition.operators
"partial_deposit_data": [
{
"pubkey": "0x123..abfc",
"withdrawal_credentials": "0x123..abfc",
"amount": "32000000000",
"signature": "0x123456...abcdef",
"deposit_data_root": "0x123456...abcdef"
}
],
"builder_registration": {
"message": {
"fee_recipient": "0x123456...abcdef",
"gas_limit": 30000000,
"timestamp": 1696000704,
"pubkey": "0x123456...abcdef"
},
"signature": "0x123456...abcdef"
}
}
],
"signature_aggregate": "abcdef...abcedef", // BLS aggregate signature of the lock hash signed by each DV pubkey.
"lock_hash": "abcdef...abcedef", // definition_hash plus distributed_validators
"node_signatures": [
"0x123456...abcdef",
"0x123456...abcdef",
"0x123456...abcdef",
"0x123456...abcdef"
]
}
```
## Cluster Size and Resilience
The cluster size (the number of nodes/operators in the cluster) determines the resilience of the cluster; its ability to remain operational under diverse failure scenarios. Larger clusters can tolerate more faulty nodes. However, increased cluster size implies higher operational costs and potential network latency, which may negatively affect performance.
Optimal cluster size is therefore a trade-off between resilience (larger is better) vs cost-efficiency and performance (smaller is better).
Cluster resilience can be broadly classified into two categories:
* [**Byzantine Fault Tolerance (BFT)**](https://en.wikipedia.org/wiki/Byzantine_fault) - the ability to tolerate nodes that are actively trying to disrupt the cluster.
* [**Crash Fault Tolerance (CFT)**](https://en.wikipedia.org/wiki/Fault_tolerance) - the ability to tolerate nodes that have crashed or are otherwise unavailable.
Different cluster sizes tolerate different counts of byzantine vs crash nodes. In practice, hardware and software crash relatively frequently, while byzantine behavior is relatively uncommon. However, Byzantine Fault Tolerance is crucial for trust minimized systems like distributed validators. Thus, cluster size can be chosen to optimize for either BFT or CFT.
The table below lists different cluster sizes and their characteristics:
* `Cluster Size` - the number of nodes in the cluster.
* `Threshold` - the minimum number of nodes that must collaborate to reach consensus quorum and to create signatures.
* `BFT #` - the maximum number of byzantine nodes that can be tolerated.
* `CFT #` - the maximum number of crashed nodes that can be tolerated.
| Cluster Size | Threshold | BFT # | CFT # | Note |
| ------------ | --------- | ----- | ----- | ---------------------------------- |
| 1 | 1 | 0 | 0 | ❌ Invalid: Not CFT nor BFT! |
| 2 | 2 | 0 | 0 | ❌ Invalid: Not CFT nor BFT! |
| 3 | 2 | 0 | 1 | ⚠️ Warning: CFT but not BFT! |
| 4 | 3 | 1 | 1 | ✅ CFT and BFT optimal for 1 faulty |
| 5 | 4 | 1 | 1 | |
| 6 | 4 | 1 | 2 | ✅ CFT optimal for 2 crashed |
| 7 | 5 | 2 | 2 | ✅ BFT optimal for 2 byzantine |
| 8 | 6 | 2 | 2 | |
| 9 | 6 | 2 | 3 | ✅ CFT optimal for 3 crashed |
| 10 | 7 | 3 | 3 | ✅ BFT optimal for 3 byzantine |
| 11 | 8 | 3 | 3 | |
| 12 | 8 | 3 | 4 | ✅ CFT optimal for 4 crashed |
| 13 | 9 | 4 | 4 | ✅ BFT optimal for 4 byzantine |
| 14 | 10 | 4 | 4 | |
| 15 | 10 | 4 | 5 | ✅ CFT optimal for 5 crashed |
| 16 | 11 | 5 | 5 | ✅ BFT optimal for 5 byzantine |
| 17 | 12 | 5 | 5 | |
| 18 | 12 | 5 | 6 | ✅ CFT optimal for 6 crashed |
| 19 | 13 | 6 | 6 | ✅ BFT optimal for 6 byzantine |
| 20 | 14 | 6 | 6 | |
| 21 | 14 | 6 | 7 | ✅ CFT optimal for 7 crashed |
| 22 | 15 | 7 | 7 | ✅ BFT optimal for 7 byzantine |
The table above is determined by the QBFT consensus algorithm with the following formulas from [this](https://arxiv.org/pdf/1909.10194.pdf) paper:
```shell
n = cluster size
Threshold: min number of honest nodes required to reach quorum given size n
Quorum(n) = ceiling(2n/3)
BFT #: max number of faulty (byzantine) nodes given size n
f(n) = floor((n-1)/3)
CFT #: max number of unavailable (crashed) nodes given size n
crashed(n) = n - Quorum(n)
```
---
# Charon Networking
URL: https://docs.obol.org/learn/charon/charon-networking
# Charon Networking
## Charon networking
### Overview {#overview}
This document describes Charon's networking model which can be divided into two parts: the [_internal validator stack_](#internal-validator-stack) and the [_external p2p network_](#external-p2p-network).
### Internal Validator Stack {#internal-validator-stack}
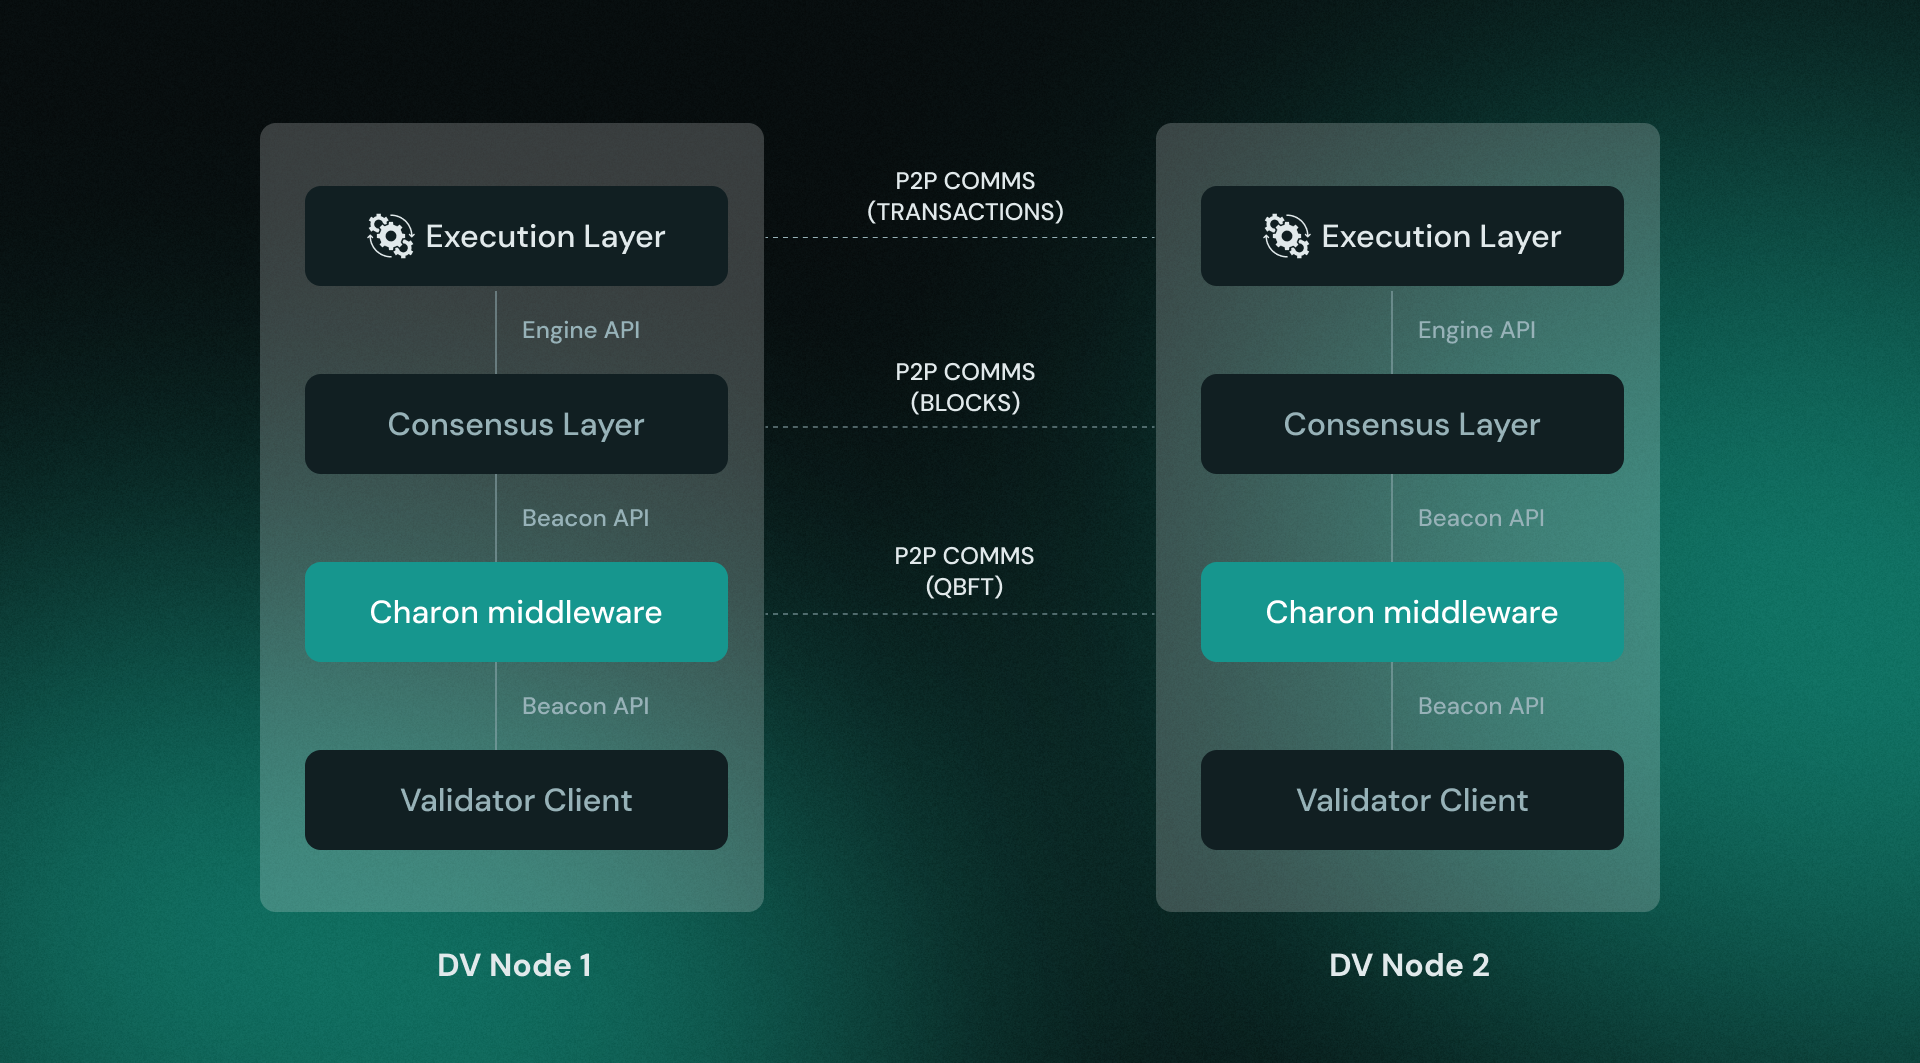
Charon is a middleware DVT client and is therefore connected to an upstream beacon node and a downstream validator client is connected to it. Each operator should run the whole validator stack (all 4 client software types), either on the same machine or on different machines. The networking between the nodes should be private and not exposed to the public internet.
Related Charon configuration flags:
* `--beacon-node-endpoints`: Connects Charon to one or more beacon nodes.
* `--validator-api-address`: Address for Charon to listen on and serve requests from the validator client.
### External P2P Network {#external-p2p-network}
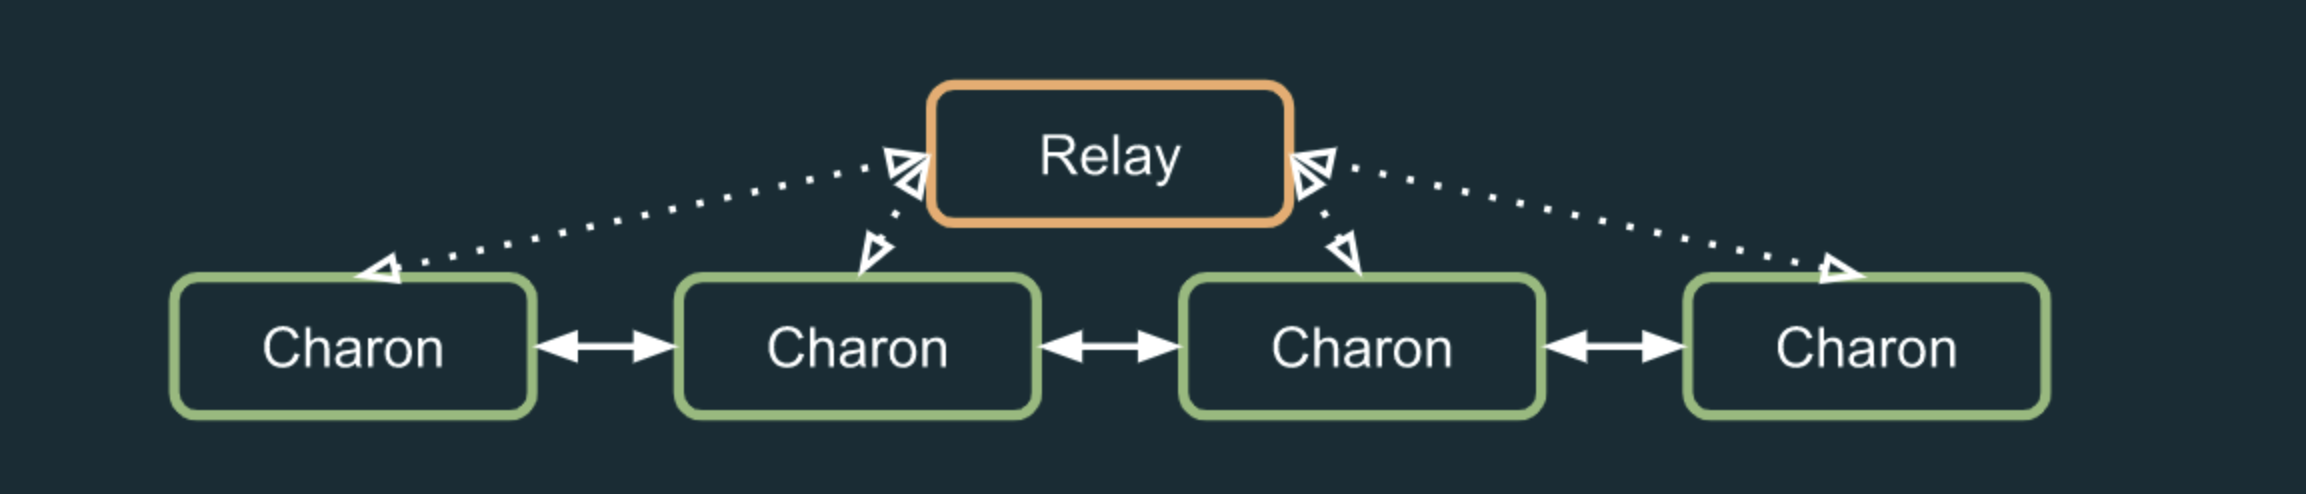
The Charon clients in a DV cluster are connected to each other via a small p2p network consisting of only the clients in the cluster. Peer IP addresses are discovered via an external "relay" server. The p2p connections are over the public internet so the Charon p2p port must be publicly accessible. Charon leverages the popular [libp2p](https://libp2p.io/) protocol over TCP port 3610 by default.
Related [Charon configuration flags](charon-cli-reference.md):
* `--p2p-tcp-address`: Address for Charon to listen on and serve p2p requests.
* `--p2p-relays`: Connect Charon to one or more relay servers.
* `--private-key-file`: Private key identifying the Charon client.
#### LibP2P Authentication and Security {#libp2p-authentication-and-security}
Each Charon client has a secp256k1 private key. The associated public key is encoded into the [cluster lock file](cluster-configuration.md#cluster-lock-file) to identify the nodes in the cluster. For ease of use and to align with the Ethereum ecosystem, Charon encodes these public keys in the [ENR format](https://eips.ethereum.org/EIPS/eip-778), not in [libp2p's Peer ID format](https://docs.libp2p.io/concepts/fundamentals/peers/).
:::warning
Each Charon node's secp256k1 private key is critical for authentication and must be kept secure to prevent cluster compromise.
Do not use the same key across multiple clusters, as this can lead to security issues.
For more on p2p security, refer to [libp2p's article](https://docs.libp2p.io/concepts/security/security-considerations).
:::
Charon currently only supports libp2p tcp connections with [noise](https://noiseprotocol.org/) security and only accepts incoming libp2p connections from peers defined in the cluster lock.
#### LibP2P Relays and Peer Discovery {#libp2p-relays-and-peer-discovery}
Relays are simple libp2p servers that are publicly accessible supporting the [circuit-relay](https://docs.libp2p.io/concepts/nat/circuit-relay/) protocol. Circuit-relay is a libp2p transport protocol that routes traffic between two peers over a third-party “relay” peer.
Obol hosts a publicly accessible relay at [https://0.relay.obol.tech](https://0.relay.obol.tech/) and will work with other organizations in the community to host alternatives. Anyone can host their own relay server for their DV cluster.
Each Charon node knows which peers are in the cluster from the ENRs in the cluster lock file, but their IP addresses are unknown. By connecting to the same relay, nodes establish “relay connections” to each other. Once connected via relay they exchange their known public addresses via libp2p’s [identify](https://docs.libp2p.io/concepts/fundamentals/protocols/#identify) protocol. The relay connection is then upgraded to a direct connection. If a node’s public IP changes, nodes once again connect via relay, exchange the new IP, and then connect directly once again.
Note that in order for two peers to discover each other, they must connect to the same relay. Cluster operators should therefore coordinate which relays to use.
Libp2p’s [identify](https://docs.libp2p.io/concepts/fundamentals/protocols/#identify) protocol attempts to automatically detect the public IP address of a Charon client without the need to explicitly configure it. If this however fails, the following two configuration flags can be used to explicitly set the publicly advertised address:
* `--p2p-external-ip`: Explicitly sets the external IP address.
* `--p2p-external-hostname`: Explicitly sets the external DNS host name.
:::warning
If a pair of Charon clients are not publicly accessible, due to being behind a NAT, they will not be able to upgrade their relay connections to a direct connection. Even though this is supported, it isn’t recommended as relay connections introduce additional latency and reduced throughput and will result in decreased validator effectiveness and possible missed block proposals and attestations.
:::
Libp2p’s circuit-relay connections are end-to-end encrypted, even though relay servers accept connections between nodes from multiple different clusters, relays are merely routing opaque connections. And since Charon only accepts incoming connections from other peers in its cluster, the use of a relay doesn’t allow connections between clusters.
Only the following three libp2p protocols are established between a Charon node and a relay itself:
* [circuit-relay](https://docs.libp2p.io/concepts/nat/circuit-relay/): To establish relay e2e encrypted connections between two peers in a cluster.
* [identify](https://docs.libp2p.io/concepts/fundamentals/protocols/#identify): Auto-detection of public IP addresses to share with other peers in the cluster.
* [peerinfo](https://github.com/ObolNetwork/charon/blob/main/app/peerinfo/peerinfo.go): Exchanges basic application [metadata](https://github.com/ObolNetwork/charon/blob/main/app/peerinfo/peerinfopb/v1/peerinfo.proto) for improved operational metrics and observability.\\
All other Charon protocols are only established between nodes in the same cluster.
#### Scalable Relay Clusters {#scalable-relay-clusters}
In order for a Charon client to connect to a relay, it needs the relay's [multiaddr](https://docs.libp2p.io/concepts/fundamentals/addressing/) (containing its public key and IP address). But a single multiaddr can only point to a single relay server which can easily be overloaded if too many clusters connect to it. Charon therefore supports resolving a relay’s multiaddr via HTTP GET request. Since Charon also includes the unique `cluster-hash` header in this request, the relay provider can use [consistent header-based load-balancing](https://cloud.google.com/load-balancing/docs/https/traffic-management-global#traffic_steering_header-based_routing) to map clusters to one of many relays using a single HTTP address.
The relay supports serving its runtime public multiaddrs via its `--http-address` flag.
E.g., [https://0.relay.obol.tech](https://0.relay.obol.tech/) is actually a load-balancer that routes HTTP requests to one of many relays based on the `cluster-hash` header returning the target relay’s multiaddr which the Charon client then uses to connect to that relay.
The charon `--p2p-relays` flag therefore supports both multiaddrs as well as HTTP URLs.
---
# CLI Reference
URL: https://docs.obol.org/learn/charon/charon-cli-reference
# CLI Reference
The following is a reference for Charon version [`v1.10.3`](https://github.com/ObolNetwork/charon/releases/tag/v1.10.3). Find the latest release on [our Github](https://github.com/ObolNetwork/charon/releases).
The following are the top-level commands available to use.
```markdown
charon --help
Charon enables the operation of Ethereum validators in a fault tolerant manner by splitting the validating keys across a group of trusted parties using threshold cryptography.
Usage:
charon [command]
Available Commands:
alpha Alpha subcommands provide early access to in-development features
combine Combine the private key shares of a distributed validator cluster into a set of standard validator private keys
completion Generate the autocompletion script for the specified shell
create Create artifacts for a distributed validator cluster
deposit Sign and fetch a new partial deposit.
dkg Participate in a Distributed Key Generation ceremony
enr Print the ENR that identifies this client
exit Exit a distributed validator.
feerecipient Manage the preferred fee recipient addresses for the cluster.
help Help about any command
relay Start a libp2p relay server
run Run the charon middleware client
version Print version and exit
Flags:
-h, --help Help for charon
Use "charon [command] --help" for more information about a command.
```
## The `create` command
The `create` command handles the creation of artifacts needed by Charon to operate.
```markdown
charon create --help
Create artifacts for a distributed validator cluster. These commands can be used to facilitate the creation of a distributed validator cluster between a group of operators by performing a distributed key generation ceremony, or they can be used to create a local cluster for single operator use cases.
Usage:
charon create [command]
Available Commands:
cluster Create private keys and configuration files needed to run a distributed validator cluster locally
dkg Create the configuration for a new Distributed Key Generation ceremony using charon dkg
enr Create an Ethereum Node Record (ENR) private key to identify this charon client
Flags:
-h, --help Help for create
Use "charon create [command] --help" for more information about a command.
```
### Creating an ENR for Charon
An `enr` is an Ethereum Node Record. It is used to identify this Charon client to its other counterparty Charon clients across the internet.
```markdown
charon create enr --help
Create an Ethereum Node Record (ENR) private key to identify this charon client
Usage:
charon create enr [flags]
Flags:
--data-dir string The directory where charon will store all its internal data. (default ".charon")
-h, --help Help for enr
```
### Create a full cluster locally
The `charon create cluster` command creates a set of distributed validators locally; including the private keys, a `cluster-lock.json` file, and deposit data. This command should only be used for solo-operation of distributed validators. To run a distributed validator cluster with a group of operators, it is preferable to create these artifacts using the [DV Launchpad](../intro/launchpad.md) and the `charon dkg` command. That way, no single operator custodies all of the private keys to a distributed validator.
:::warning
This command produces new distributed validator private keys or handles and splits pre-existing traditional validator private keys, please use caution and keep these private keys securely backed up and secret.
:::
```markdown
charon create cluster --help
Creates a local charon cluster configuration including validator keys, charon p2p keys, cluster-lock.json and deposit-data.json file(s). See flags for supported features.
Usage:
charon create cluster [flags]
Flags:
--cluster-dir string The target folder to create the cluster in. (default "./")
--compounding Enable compounding rewards for validators by using 0x02 withdrawal credentials.
--consensus-protocol string Preferred consensus protocol name for the cluster. Selected automatically when not specified.
--definition-file string Optional path to a cluster definition file or an HTTP URL. This overrides all other configuration flags.
--deposit-amounts ints List of partial deposit amounts (integers) in ETH. Values must sum up to at least 32ETH.
--execution-client-rpc-endpoint string The address of the execution engine JSON-RPC API.
--fee-recipient-addresses strings Comma separated list of Ethereum addresses of the fee recipient for each validator. Either provide a single fee recipient address or fee recipient addresses for each validator.
-h, --help Help for cluster
--insecure-keys Generates insecure keystore files. This should never be used. It is not supported on mainnet.
--keymanager-addresses strings Comma separated list of keymanager URLs to import validator key shares to. Note that multiple addresses are required, one for each node in the cluster, with node0's keyshares being imported to the first address, node1's keyshares to the second, and so on.
--keymanager-auth-tokens strings Authentication bearer tokens to interact with the keymanager URLs. Don't include the "Bearer" symbol, only include the api-token.
--name string The cluster name
--network string Ethereum network to create validators for. Options: mainnet, goerli, sepolia, hoodi, gnosis, chiado. (default "mainnet")
--nodes int The number of charon nodes in the cluster. Minimum is 3.
--num-validators int The number of distributed validators needed in the cluster.
--publish Publish lock file to obol-api.
--publish-address string The URL to publish the lock file to. (default "https://api.obol.tech/v1")
--split-existing-keys Split an existing validator's private key into a set of distributed validator private key shares. Does not re-create deposit data for this key.
--split-keys-dir string Directory containing keys to split. Expects keys in keystore-*.json and passwords in keystore-*.txt. Requires --split-existing-keys.
--target-gas-limit uint Preferred target gas limit for transactions. (default 60000000)
--testnet-chain-id uint Chain ID of the custom test network.
--testnet-fork-version string Genesis fork version of the custom test network (in hex).
--testnet-genesis-timestamp int Genesis timestamp of the custom test network.
--testnet-name string Name of the custom test network.
--threshold int Optional override of threshold required for signature reconstruction. Defaults to ceil(n*2/3) if zero. Warning, non-default values decrease security.
--withdrawal-addresses strings Comma separated list of Ethereum addresses to receive the returned stake and accrued rewards for each validator. Either provide a single withdrawal address or withdrawal addresses for each validator.
--zipped Create a tar archive compressed with gzip of the cluster directory after creation.
```
### Creating the configuration for a DKG Ceremony
This `charon create dkg` command creates a `cluster_definition.json` file used for the `charon dkg` command.
```markdown
charon create dkg --help
Create a cluster definition file that will be used by all participants of a DKG.
Usage:
charon create dkg [flags]
Flags:
--compounding Enable compounding rewards for validators by using 0x02 withdrawal credentials.
--consensus-protocol string Preferred consensus protocol name for the cluster. Selected automatically when not specified.
--deposit-amounts ints List of partial deposit amounts (integers) in ETH. Values must sum up to at least 32ETH.
--dkg-algorithm string DKG algorithm to use; default, frost or pedersen. (default "default")
--execution-client-rpc-endpoint string The address of the execution engine JSON-RPC API.
--fee-recipient-addresses strings Comma separated list of Ethereum addresses of the fee recipient for each validator. Either provide a single fee recipient address or fee recipient addresses for each validator.
-h, --help Help for dkg
--name string Optional cosmetic cluster name
--network string Ethereum network to create validators for. Options: mainnet, goerli, sepolia, hoodi, gnosis, chiado. (default "mainnet")
--num-validators int The number of distributed validators the cluster will manage (32ETH+ staked for each). (default 1)
--operator-addresses strings Comma-separated list of each operator's Ethereum address.
--operator-enrs strings Comma-separated list of each operator's Charon ENR address.
--output-dir string The folder to write the output cluster-definition.json file to. (default ".charon")
--publish Creates an invitation to the DKG ceremony on the DV Launchpad. Terms and conditions apply.
--publish-address string The URL to publish the cluster to. (default "https://api.obol.tech/v1")
--target-gas-limit uint Preferred target gas limit for transactions. (default 60000000)
--testnet-chain-id uint Chain ID of the custom test network.
--testnet-fork-version string Genesis fork version of the custom test network (in hex).
--testnet-genesis-timestamp int Genesis timestamp of the custom test network.
--testnet-name string Name of the custom test network.
-t, --threshold int Optional override of threshold required for signature reconstruction. Defaults to ceil(n*2/3) if zero. Warning, non-default values decrease security.
--withdrawal-addresses strings Comma separated list of Ethereum addresses to receive the returned stake and accrued rewards for each validator. Either provide a single withdrawal address or withdrawal addresses for each validator.
```
## The `dkg` command
### Performing a DKG Ceremony
The `charon dkg` command takes a `cluster_definition.json` file that instructs Charon on the terms of a new distributed validator cluster to be created. Charon establishes communication with the other nodes identified in the file, performs a distributed key generation ceremony to create the required threshold private keys, and signs deposit data for each new distributed validator. The command outputs the `cluster-lock.json` file and key shares for each Distributed Validator created.
```markdown
charon dkg --help
Participate in a distributed key generation ceremony for a specific cluster definition that creates
distributed validator key shares and a final cluster lock configuration. Note that all other cluster operators should run
this command at the same time.
Usage:
charon dkg [flags]
Flags:
--data-dir string The directory where charon will store all its internal data. (default ".charon")
--definition-file string The path to the cluster definition file or an HTTP URL. (default ".charon/cluster-definition.json")
--execution-client-rpc-endpoint string Optional address of an execution engine JSON-RPC API. Used to validate smart contract signatures for Node Operators in the cluster.
-h, --help Help for dkg
--keymanager-address string The keymanager URL to import validator keyshares.
--keymanager-auth-token string Authentication bearer token to interact with keymanager API. Don't include the "Bearer" symbol, only include the api-token.
--log-color string Log color; auto, force, disable. (default "auto")
--log-format string Log format; console, logfmt or json (default "console")
--log-level string Log level; debug, info, warn or error (default "info")
--log-output-path string Path in which to write on-disk logs.
--nickname string Human friendly peer nickname. Maximum 32 characters.
--no-verify Disables cluster definition and lock file verification.
--p2p-disable-reuseport Disables TCP port reuse for outgoing libp2p connections.
--p2p-external-hostname string The DNS hostname advertised by libp2p. This may be used to advertise an external DNS.
--p2p-external-ip string The IP address advertised by libp2p. This may be used to advertise an external IP.
--p2p-relays strings Comma-separated list of libp2p relay URLs or multiaddrs. (default [https://4.relay.obol.dev])
--p2p-tcp-address strings Comma-separated list of listening TCP addresses (ip and port) for libP2P traffic. Empty default doesn't bind to local port therefore only supports outgoing connections.
--p2p-udp-address strings Comma-separated list of listening UDP addresses (ip and port) for libP2P traffic. Empty default doesn't bind to local port therefore only supports outgoing connections.
--publish Publish the created cluster to a remote API.
--publish-address string The URL to publish the cluster to. (default "https://api.obol.tech/v1")
--publish-timeout duration Timeout for publishing a cluster, consider increasing if the cluster contains more than 200 validators. (default 1m0s)
--shutdown-delay duration Graceful shutdown delay. (default 5s)
--timeout duration Timeout for the DKG process, should be increased if DKG times out. (default 2m0s)
--zipped Create a tar archive compressed with gzip of the target directory after creation.
```
## The `run` command
### Run the Charon middleware
This `run` command accepts a `cluster-lock.json` file that was created either via a `charon create cluster` command or `charon dkg`. This lock file outlines the nodes in the cluster and the distributed validators they operate on behalf of.
```markdown
charon run --help
Starts the long-running Charon middleware process to perform distributed validator duties.
Usage:
charon run [flags]
Flags:
--beacon-node-endpoints strings Comma separated list of one or more beacon node endpoint URLs.
--beacon-node-headers strings Comma separated list of headers formatted as header=value
--beacon-node-submit-timeout duration Timeout for the submission-related HTTP requests Charon makes to the configured beacon nodes. (default 2s)
--beacon-node-timeout duration Timeout for the HTTP requests Charon makes to the configured beacon nodes. (default 2s)
--builder-api Enables the builder api. Will only produce builder blocks. Builder API must also be enabled on the validator client. Beacon node must be connected to a builder-relay to access the builder network.
--consensus-protocol string Preferred consensus protocol name for the node. Selected automatically when not specified.
--debug-address string Listening address (ip and port) for the pprof and QBFT debug API. It is not enabled by default.
--execution-client-rpc-endpoint string The address of the execution engine JSON-RPC API.
--fallback-beacon-node-endpoints strings A list of beacon nodes to use if the primary list are offline or unhealthy.
--feature-set string Minimum feature set to enable by default: alpha, beta, or stable. Warning: modify at own risk. (default "stable")
--feature-set-disable strings Comma-separated list of features to disable, overriding the default minimum feature set.
--feature-set-enable strings Comma-separated list of features to enable, overriding the default minimum feature set.
--fetch-feerecipient-updates Fetches updated fee recipients from a remote API.
--graffiti strings Comma-separated list or single graffiti string to include in block proposals. List maps to validator's public key in cluster lock. Appends "OB" suffix to graffiti. Maximum 28 bytes per graffiti.
--graffiti-disable-client-append Disables appending "OB" suffix to graffiti. Increases maximum bytes per graffiti to 32.
-h, --help Help for run
--jaeger-address string [DISABLED] Listening address for jaeger tracing.
--jaeger-service string [DISABLED] Service name used for jaeger tracing.
--lock-file string The path to the cluster lock file defining the distributed validator cluster. If both cluster manifest and cluster lock files are provided, the cluster manifest file takes precedence. (default ".charon/cluster-lock.json")
--log-color string Log color; auto, force, disable. (default "auto")
--log-format string Log format; console, logfmt or json (default "console")
--log-level string Log level; debug, info, warn or error (default "info")
--log-output-path string Path in which to write on-disk logs.
--loki-addresses strings Enables sending of logfmt structured logs to these Loki log aggregation server addresses. This is in addition to normal stderr logs.
--loki-service string Service label sent with logs to Loki. (default "charon")
--manifest-file string [DEPRECATED] The path to the cluster manifest file. If both cluster manifest and cluster lock files are provided, the cluster manifest file takes precedence. (default ".charon/cluster-manifest.pb")
--monitoring-address string Listening address (ip and port) for the monitoring API (prometheus). (default "127.0.0.1:3620")
--nickname string Human friendly peer nickname. Maximum 32 characters.
--no-verify Disables cluster definition and lock file verification.
--otlp-address string Listening address for OTLP gRPC tracing backend.
--otlp-headers strings Comma separated list of headers formatted as header=value, to include in OTLP requests.
--otlp-insecure Use insecure connection (no TLS) when connecting to OTLP endpoint.
--otlp-service-name string Service name used for OTLP gRPC tracing. (default "charon")
--overrides-file string Path to the builder registrations overrides file. (default ".charon/builder_registrations_overrides.json")
--p2p-disable-reuseport Disables TCP port reuse for outgoing libp2p connections.
--p2p-external-hostname string The DNS hostname advertised by libp2p. This may be used to advertise an external DNS.
--p2p-external-ip string The IP address advertised by libp2p. This may be used to advertise an external IP.
--p2p-relays strings Comma-separated list of libp2p relay URLs or multiaddrs. (default [https://0.relay.obol.tech,https://1.relay.obol.tech,https://2.relay.obol.dev])
--p2p-tcp-address strings Comma-separated list of listening TCP addresses (ip and port) for libP2P traffic. Empty default doesn't bind to local port therefore only supports outgoing connections.
--p2p-udp-address strings Comma-separated list of listening UDP addresses (ip and port) for libP2P traffic. Empty default doesn't bind to local port therefore only supports outgoing connections.
--private-key-file string The path to the charon enr private key file. (default ".charon/charon-enr-private-key")
--private-key-file-lock Enables private key locking to prevent multiple instances using the same key.
--proc-directory string Directory to look into in order to detect other stack components running on the host.
--publish-address string The URL of the remote API for background fee recipient fetching. (default "https://api.obol.tech/v1")
--publish-timeout duration Timeout for accessing the remote API. (default 5m0s)
--simnet-beacon-mock Enables an internal mock beacon node for running a simnet.
--simnet-beacon-mock-fuzz Configures simnet beaconmock to return fuzzed responses.
--simnet-slot-duration duration Configures slot duration in simnet beacon mock. (default 1s)
--simnet-validator-keys-dir string The directory containing the simnet validator key shares. (default ".charon/validator_keys")
--simnet-validator-mock Enables an internal mock validator client when running a simnet. Requires simnet-beacon-mock.
--synthetic-block-proposals Enables additional synthetic block proposal duties. Used for testing of rare duties.
--testnet-capella-hard-fork string Capella hard fork version of the custom test network.
--testnet-chain-id uint Chain ID of the custom test network.
--testnet-fork-version string Genesis fork version in hex of the custom test network.
--testnet-genesis-timestamp int Genesis timestamp of the custom test network.
--testnet-name string Name of the custom test network.
--validator-api-address string Listening address (ip and port) for validator-facing traffic proxying the beacon-node API. (default "127.0.0.1:3600")
--vc-tls-cert-file string The path to the TLS certificate file used by charon for the validator client API endpoint.
--vc-tls-key-file string The path to the TLS private key file associated with the provided TLS certificate.
```
## The `exit` command
A running Charon client will [aggregate and broadcast](../../run-a-dv/running/exit-a-dv.mdx) signed exit messages it receives from its validator client immediately. These `exit` commands are instead used to _pre-sign_ exit messages for an active distributed validator, to save to disk, or to broadcast; once enough of the operators of the cluster have submitted their partial exit signatures. Fully signed exit messages give a user or protocol a guarantee that they can exit an active validator at any point in future without the further assistance of the cluster's operators. In future, [execution-layer initiated exits](https://eips.ethereum.org/EIPS/eip-7002) will provide an even stronger guarantee that a validator can be exited by the withdrawal address it belongs to.
```markdown
charon exit --help
Sign and broadcast distributed validator exit messages using a remote API.
Usage:
charon exit [command]
Available Commands:
active-validator-list List all active validators
broadcast Submit partial exit message for a distributed validator
delete Delete a signed exit message from the remote API
fetch Fetch a signed exit message from the remote API
sign Sign partial exit message for a distributed validator
Flags:
-h, --help Help for exit
Use "charon exit [command] --help" for more information about a command.
```
### Pre-sign exit messages for active validators
:::warning
This command requires Charon to access the distributed validator's private keys, please use caution and keep these private keys securely backed up and secret.
The default `publish-address` for this command sends signed exit messages to Obol's [API](../../api/) for aggregation and distribution. Exit signatures are stored in line with Obol's [terms and contiditions](https://obol.tech/terms.pdf).
:::
This command submits partial exit signatures to the remote API for aggregation. The required flags are `--beacon-node-url` and `--validator-public-key` of the validator you wish to exit. An exit message can only be signed for a validator that is fully deposited and assigned a validator index.
```markdown
charon exit sign --help
Sign a partial exit message for a distributed validator and submit it to a remote API for aggregation.
Usage:
charon exit sign [flags]
Flags:
--all Exit all currently active validators in the cluster.
--beacon-node-endpoints strings Comma separated list of one or more beacon node endpoint URLs. [REQUIRED]
--beacon-node-headers strings Comma separated list of headers formatted as header=value
--beacon-node-timeout duration Timeout for beacon node HTTP calls. (default 30s)
--exit-epoch uint Exit epoch at which the validator will exit, must be the same across all the partial exits. (default 194048)
--fallback-beacon-node-endpoints strings A list of beacon nodes to use if the primary list are offline or unhealthy.
-h, --help Help for sign
--lock-file string The path to the cluster lock file defining the distributed validator cluster. (default ".charon/cluster-lock.json")
--log-color string Log color; auto, force, disable. (default "auto")
--log-format string Log format; console, logfmt or json (default "console")
--log-level string Log level; debug, info, warn or error (default "info")
--log-output-path string Path in which to write on-disk logs.
--private-key-file string The path to the charon enr private key file. (default ".charon/charon-enr-private-key")
--publish-address string The URL of the remote API. (default "https://api.obol.tech/v1")
--publish-timeout duration Timeout for publishing a signed exit to the publish-address API. (default 5m0s)
--testnet-capella-hard-fork string Capella hard fork version of the custom test network.
--testnet-chain-id uint Chain ID of the custom test network.
--testnet-fork-version string Genesis fork version of the custom test network (in hex).
--testnet-genesis-timestamp int Genesis timestamp of the custom test network.
--testnet-name string Name of the custom test network.
--validator-index uint Validator index of the validator to exit, the associated public key must be present in the cluster lock manifest. If --validator-public-key is also provided, validator existence won't be checked on the beacon chain.
--validator-keys-dir string Path to the directory containing the validator private key share files and passwords. (default ".charon/validator_keys")
--validator-public-key string Public key of the validator to exit, must be present in the cluster lock manifest. If --validator-index is also provided, validator liveliness won't be checked on the beacon chain.
```
### Delete exit message
Delete a previously signed exit message for a given validator from the remote API. The required flag is either `--validator-public-key` of the validator message you wish to delete or `--all` to delete all validators' exit message.
```markdown
charon exit delete --help
Deletes a partially signed exit message for a given validator from the remote API.
Usage:
charon exit delete [flags]
Flags:
--all Exit all currently active validators in the cluster.
-h, --help Help for delete
--lock-file string The path to the cluster lock file defining the distributed validator cluster. (default ".charon/cluster-lock.json")
--log-color string Log color; auto, force, disable. (default "auto")
--log-format string Log format; console, logfmt or json (default "console")
--log-level string Log level; debug, info, warn or error (default "info")
--log-output-path string Path in which to write on-disk logs.
--private-key-file string The path to the charon enr private key file. (default ".charon/charon-enr-private-key")
--publish-address string The URL of the remote API. (default "https://api.obol.tech/v1")
--publish-timeout duration Timeout for publishing a signed exit to the publish-address API. (default 5m0s)
--testnet-capella-hard-fork string Capella hard fork version of the custom test network.
--testnet-chain-id uint Chain ID of the custom test network.
--testnet-fork-version string Genesis fork version of the custom test network (in hex).
--testnet-genesis-timestamp int Genesis timestamp of the custom test network.
--testnet-name string Name of the custom test network.
--validator-public-key string Public key of the validator to exit, must be present in the cluster lock manifest. If --validator-index is also provided, validator liveliness won't be checked on the beacon chain.
```
### Download fully signed exit messages for cold storage
Once enough operators have submitted their partial signatures for an active validator, you can use the `charon exit fetch` command to download the complete exit message to a file for safe keeping. This file can be given to a delegator who wants a guarantee that they can exit the distributed validator if need be.
```markdown
charon exit fetch --help
Fetches a fully signed exit message for a given validator from the remote API and writes it to disk.
Usage:
charon exit fetch [flags]
Flags:
--all Exit all currently active validators in the cluster.
--fetched-exit-path string Path to store fetched signed exit messages. (default "./")
-h, --help Help for fetch
--lock-file string The path to the cluster lock file defining the distributed validator cluster. (default ".charon/cluster-lock.json")
--log-color string Log color; auto, force, disable. (default "auto")
--log-format string Log format; console, logfmt or json (default "console")
--log-level string Log level; debug, info, warn or error (default "info")
--log-output-path string Path in which to write on-disk logs.
--private-key-file string The path to the charon enr private key file. (default ".charon/charon-enr-private-key")
--publish-address string The URL of the remote API. (default "https://api.obol.tech/v1")
--publish-timeout duration Timeout for publishing a signed exit to the publish-address API. (default 5m0s)
--testnet-capella-hard-fork string Capella hard fork version of the custom test network.
--testnet-chain-id uint Chain ID of the custom test network.
--testnet-fork-version string Genesis fork version of the custom test network (in hex).
--testnet-genesis-timestamp int Genesis timestamp of the custom test network.
--testnet-name string Name of the custom test network.
--validator-public-key string Public key of the validator to exit, must be present in the cluster lock manifest. If --validator-index is also provided, validator liveliness won't be checked on the beacon chain.
```
### Broadcast a signed exit message
The `charon exit broadcast` subcommand can be used to broadcast either a signed exit message from a file that was downloaded via the `fetch` command, or it can retrieve and broadcast an exit message directly from the API.
```markdown
charon exit broadcast --help
Retrieves and broadcasts to the configured beacon node a fully signed validator exit message, aggregated with the available partial signatures retrieved from the publish-address. Can also read a signed exit message from disk, in order to be broadcasted to the configured beacon node.
Usage:
charon exit broadcast [flags]
Flags:
--all Exit all currently active validators in the cluster.
--beacon-node-endpoints strings Comma separated list of one or more beacon node endpoint URLs. [REQUIRED]
--beacon-node-headers strings Comma separated list of headers formatted as header=value
--beacon-node-timeout duration Timeout for beacon node HTTP calls. (default 30s)
--exit-epoch uint Exit epoch at which the validator will exit, must be the same across all the partial exits. (default 194048)
--exit-from-dir string Retrieves a signed exit messages from a pre-prepared files in a directory instead of --publish-address.
--exit-from-file string Retrieves a signed exit message from a pre-prepared file instead of --publish-address.
--fallback-beacon-node-endpoints strings A list of beacon nodes to use if the primary list are offline or unhealthy.
-h, --help Help for broadcast
--lock-file string The path to the cluster lock file defining the distributed validator cluster. (default ".charon/cluster-lock.json")
--log-color string Log color; auto, force, disable. (default "auto")
--log-format string Log format; console, logfmt or json (default "console")
--log-level string Log level; debug, info, warn or error (default "info")
--log-output-path string Path in which to write on-disk logs.
--private-key-file string The path to the charon enr private key file. (default ".charon/charon-enr-private-key")
--publish-address string The URL of the remote API. (default "https://api.obol.tech/v1")
--publish-timeout duration Timeout for publishing a signed exit to the publish-address API. (default 5m0s)
--testnet-capella-hard-fork string Capella hard fork version of the custom test network.
--testnet-chain-id uint Chain ID of the custom test network.
--testnet-fork-version string Genesis fork version of the custom test network (in hex).
--testnet-genesis-timestamp int Genesis timestamp of the custom test network.
--testnet-name string Name of the custom test network.
--validator-keys-dir string Path to the directory containing the validator private key share files and passwords. (default ".charon/validator_keys")
--validator-public-key string Public key of the validator to exit, must be present in the cluster lock manifest. If --validator-index is also provided, validator liveliness won't be checked on the beacon chain.
```
### List active validators
The `charon exit active-validator-list` command returns a list of all distributed validators in the specified cluster whose status is ACTIVE_ONGOING, meaning they can be exited.
```markdown
charon exit active-validator-list --help
Returns a list of all the DV in the specified cluster whose status is ACTIVE_ONGOING, i.e. can be exited.
Usage:
charon exit active-validator-list [flags]
Flags:
--beacon-node-endpoints strings Comma separated list of one or more beacon node endpoint URLs. [REQUIRED]
--beacon-node-headers strings Comma separated list of headers formatted as header=value
--beacon-node-timeout duration Timeout for beacon node HTTP calls. (default 30s)
--fallback-beacon-node-endpoints strings A list of beacon nodes to use if the primary list are offline or unhealthy.
-h, --help Help for active-validator-list
--lock-file string The path to the cluster lock file defining the distributed validator cluster. (default ".charon/cluster-lock.json")
--log-color string Log color; auto, force, disable. (default "auto")
--log-format string Log format; console, logfmt or json (default "console")
--log-level string Log level; debug, info, warn or error (default "info")
--log-output-path string Path in which to write on-disk logs.
--plaintext Prints each active validator on a line, without any debugging or logging artifact. Useful for scripting.
--testnet-capella-hard-fork string Capella hard fork version of the custom test network.
--testnet-chain-id uint Chain ID of the custom test network.
--testnet-fork-version string Genesis fork version of the custom test network (in hex).
--testnet-genesis-timestamp int Genesis timestamp of the custom test network.
--testnet-name string Name of the custom test network.
```
## The `enr` command
The standalone `charon enr` command prints an Ethereum Node Record (ENR) from the client's charon-enr-private-key. This serves as a public key that identifies this client to its peers.
```markdown
charon enr --help
Prints an Ethereum Node Record (ENR) from this client's charon-enr-private-key. This serves as a public key that identifies this client to its peers.
Usage:
charon enr [flags]
Flags:
--data-dir string The directory where charon will store all its internal data. (default ".charon")
-h, --help Help for enr
--verbose Prints the expanded form of ENR.
```
## The `combine` command
### Combine distributed validator key shares into a single validator key
The `combine` command combines many validator key shares into a single Ethereum validator key.
:::warning
This command requires Charon to access the distributed validator's private keys, please use caution and keep these private keys securely backed up and secret.
:::
```markdown
charon combine --help
Combines the private key shares from a threshold of operators in a distributed validator cluster into a set of validator private keys that can be imported into a standard Ethereum validator client.
Warning: running the resulting private keys in a validator alongside the original distributed validator cluster *will* result in slashing.
Usage:
charon combine [flags]
Flags:
--cluster-dir string Parent directory containing a number of .charon subdirectories from the required threshold of nodes in the cluster. (default "./")
--execution-client-rpc-endpoint string The address of the execution engine JSON-RPC API.
--force Overwrites private keys with the same name if present.
-h, --help Help for combine
--no-verify Disables cluster definition and lock file verification.
--output-dir string Directory to output the combined private keys to. (default "./validator_keys")
--testnet-chain-id uint Chain ID of the custom test network.
--testnet-fork-version string Genesis fork version of the custom test network (in hex).
--testnet-genesis-timestamp int Genesis timestamp of the custom test network.
--testnet-name string Name of the custom test network.
```
To run this command, one needs at least a threshold number of node operator's `.charon` directories, which need to be organized into a single folder:
```shell
tree ./cluster
cluster/
├── node0
│ ├── charon-enr-private-key
│ ├── cluster-lock.json
│ ├── deposit-data.json
│ └── validator_keys
│ ├── keystore-0.json
│ ├── keystore-0.txt
│ ├── keystore-1.json
│ └── keystore-1.txt
├── node1
│ ├── charon-enr-private-key
│ ├── cluster-lock.json
│ ├── deposit-data.json
│ └── validator_keys
│ ├── keystore-0.json
│ ├── keystore-0.txt
│ ├── keystore-1.json
│ └── keystore-1.txt
├── node2
│ ├── charon-enr-private-key
│ ├── cluster-lock.json
│ ├── deposit-data.json
│ └── validator_keys
│ ├── keystore-0.json
│ ├── keystore-0.txt
│ ├── keystore-1.json
│ └── keystore-1.txt
└── node3
├── charon-enr-private-key
├── cluster-lock.json
├── deposit-data.json
└── validator_keys
├── keystore-0.json
├── keystore-0.txt
├── keystore-1.json
└── keystore-1.txt
```
That is, each operator `.charon` directory must be placed in a parent directory, and renamed to avoid conflicts.
If for example the lock file defines 2 validators, each `validator_keys` directory must contain exactly 4 files, a JSON and TXT file for each validator.
Those files must be named with an increasing index associated with the validator in the lock file, starting from 0.
The chosen folder name does not matter, as long as it's different from `.charon`.
At the end of the process `combine` will create a new directory specified by `--output-dir` containing the traditional validator private keystore.
```shell
charon combine --cluster-dir="./cluster" --output-dir="./combined"
tree ./combined
combined
├── keystore-0.json
├── keystore-0.txt
├── keystore-1.json
└── keystore-1.txt
```
By default, the `combine` command will refuse to overwrite any private key that is already present in the destination directory.
To force the process, use the `--force` flag.
:::danger
The generated private keys are in the standard [EIP-2335](https://github.com/ethereum/ercs/blob/master/ERCS/erc-2335.md) format, and can be imported in any Ethereum validator client that supports it.
**Ensure your distributed validator cluster is completely shut down for at least two epochs before starting a replacement validator or you are likely to be slashed.**
:::
## The `deposit` command
:::warning
Activating a validator with an incorrect withdrawal address likely results in a loss of the funds. Take care when preparing alternative deposit data for a single validator client.
:::
For unused, inactive validators in an existing cluster, you can prepare alternative deposit data for them, allowing you to use them as validators for a different withdrawal address than originally intended.
See the [advanced guide](../../advanced-and-troubleshooting/advanced/alter-withdrawal-addresses.md) for more.
```markdown
charon deposit --help
Sign and fetch new deposit messages for unactivated validators using a remote API, enabling the modification of a withdrawal address after creation but before activation.
Usage:
charon deposit [command]
Available Commands:
fetch Fetch a full deposit message.
sign Sign a new partial deposit message.
Flags:
-h, --help Help for deposit
Use "charon deposit [command] --help" for more information about a command.
```
### Sign a deposit for an alternative withdrawal address
A threshold of node operators must run `charon deposit sign` with matching parameters, to enable a new deposit data to be fetched with `charon deposit fetch`.
```markdown
charon deposit sign --help
Signs new partial validator deposit messages using a remote API.
Usage:
charon deposit sign [flags]
Flags:
--deposit-amounts uints Comma separated list of partial deposit amounts (integers) in ETH. (default [32])
-h, --help Help for sign
--lock-file string Path to the cluster lock file defining the distributed validator cluster. (default ".charon/cluster-lock.json")
--private-key-file string Path to the charon enr private key file. (default ".charon/charon-enr-private-key")
--publish-address string The URL of the remote API. (default "https://api.obol.tech/v1")
--publish-timeout duration Timeout for publishing a signed deposit to the publish-address API. (default 5m0s)
--validator-keys-dir string Path to the directory containing the validator private key share files and passwords. (default ".charon/validator_keys")
--validator-public-keys strings [REQUIRED] List of validator public keys for which new deposits will be signed.
--withdrawal-addresses strings [REQUIRED] Withdrawal addresses for which the new deposits will be signed. Either a single address for all specified validator-public-keys or one address per key should be specified.
```
### Download a fully signed alternative deposit message
`charon deposit fetch` outputs a file `.charon/deposit-data-.json` for use with the Ethereum deposit contract.
```markdown
charon deposit fetch --help
Fetch full validator deposit messages using a remote API.
Usage:
charon deposit fetch [flags]
Flags:
--deposit-data-dir string Path to the directory in which fetched deposit data will be stored. (default ".charon/deposit-data-")
-h, --help Help for fetch
--lock-file string Path to the cluster lock file defining the distributed validator cluster. (default ".charon/cluster-lock.json")
--private-key-file string Path to the charon enr private key file. (default ".charon/charon-enr-private-key")
--publish-address string The URL of the remote API. (default "https://api.obol.tech/v1")
--publish-timeout duration Timeout for publishing a signed deposit to the publish-address API. (default 5m0s)
--validator-keys-dir string Path to the directory containing the validator private key share files and passwords. (default ".charon/validator_keys")
--validator-public-keys strings [REQUIRED] List of validator public keys for which new deposits will be signed.
```
## The `feerecipient` command
The `feerecipient` command manages the preferred fee recipient addresses for the cluster. A threshold of operators must sign new builder registration messages to update the fee recipient, after which the aggregated result can be fetched and applied locally.
```markdown
charon feerecipient --help
Manage the preferred fee recipient addresses for the cluster. These addresses receive transaction tips and MEV when a validator makes a proposal.
Usage:
charon feerecipient [command]
Available Commands:
fetch Fetch new fee recipients (builder registrations).
list Display the latest builder registration details for each validator.
sign Sign new builder registration messages.
Flags:
-h, --help Help for feerecipient
Use "charon feerecipient [command] --help" for more information about a command.
```
### Sign new fee recipient builder registrations
The `charon feerecipient sign` command signs new builder registration messages to update the preferred fee recipient and publishes them to a remote API. A threshold of operators must run this command with matching parameters for the new fee recipient to take effect. Builder registrations are applied by timestamp, so a manually supplied `--timestamp` must be later than the current latest registration for the validator — the command rejects a timestamp that is not later than the registration that currently has quorum on the remote API. The fee recipient address must not be the zero address, and a mixed-case address must match its EIP-55 checksum.
```markdown
charon feerecipient sign --help
Signs new builder registration messages to update the preferred fee recipient and publishes them to a remote API.
Usage:
charon feerecipient sign [flags]
Flags:
--fee-recipient string [REQUIRED] New fee recipient address to be applied to all specified validators.
--gas-limit uint Optional gas limit override for builder registrations. If not set, the most recent gas limit from the cluster lock, overrides file or remote API is used.
-h, --help Help for sign
--lock-file string Path to the cluster lock file defining the distributed validator cluster. (default ".charon/cluster-lock.json")
--overrides-file string Path to the builder registrations overrides file. (default ".charon/builder_registrations_overrides.json")
--private-key-file string Path to the charon enr private key file. (default ".charon/charon-enr-private-key")
--publish-address string The URL of the remote API. (default "https://api.obol.tech/v1")
--publish-timeout duration Timeout for accessing the remote API. (default 5m0s)
--timestamp int Optional Unix timestamp for the builder registration message. When set, all operators can sign independently with the same timestamp. If not set, either the current time is used for new registrations or if another peer already submitted partial signature to the API, its timestamp is used.
--validator-keys-dir string Path to the directory containing the validator private key share files and passwords. (default ".charon/validator_keys")
--validator-public-keys strings [REQUIRED] Comma-separated list of validator public keys to sign builder registrations for.
```
### Fetch aggregated fee recipient builder registrations
Once enough operators have signed their partial builder registrations, the `charon feerecipient fetch` command fetches and aggregates those with quorum from the remote API, then merges them into the local JSON overrides file. Existing overrides for validators outside the fetch are preserved, and the latest timestamp wins if an override already exists for a fetched validator. The `charon run` command will then use this overrides file to apply the updated fee recipients.
If no fetched validator has enough partial signatures to reach quorum, the command logs that no fully signed builder registrations are available and does not write or update the overrides file. Fetched registrations are signature-verified before they are written or applied. A registration that fails verification is skipped and logged as a warning; registrations for other validators in the same fetch are still merged and written. A fetched registration that is not newer than the existing override for the same validator is discarded with a warning. A corrupt or invalid existing overrides file does not block fetching — it is rebuilt from the valid entries and the fetched registrations, and the file is written atomically so an interrupted fetch cannot leave a truncated file behind.
```markdown
charon feerecipient fetch --help
Fetches builder registration messages from a remote API and aggregates those with quorum, writing them to a local JSON file.
Usage:
charon feerecipient fetch [flags]
Flags:
-h, --help Help for fetch
--lock-file string Path to the cluster lock file defining the distributed validator cluster. (default ".charon/cluster-lock.json")
--overrides-file string Path to the builder registrations overrides file. (default ".charon/builder_registrations_overrides.json")
--publish-address string The URL of the remote API. (default "https://api.obol.tech/v1")
--publish-timeout duration Timeout for accessing the remote API. (default 5m0s)
--validator-public-keys strings Optional comma-separated list of validator public keys to fetch builder registrations for.
```
### List current fee recipient details
The `charon feerecipient list` command displays the most recent builder registration for each validator, selecting the entry with the highest timestamp from the cluster lock file, the overrides file, or the remote API.
```markdown
charon feerecipient list --help
Displays the most recent builder registration for each validator, selecting the entry with the highest timestamp from the cluster lock file, the overrides file, or the remote API.
Usage:
charon feerecipient list [flags]
Flags:
-h, --help Help for list
--lock-file string Path to the cluster lock file defining the distributed validator cluster. (default ".charon/cluster-lock.json")
--overrides-file string Path to the builder registrations overrides file. (default ".charon/builder_registrations_overrides.json")
--publish-address string The URL of the remote API. (default "https://api.obol.tech/v1")
--publish-timeout duration Timeout for accessing the remote API. (default 5m0s)
--validator-public-keys strings Optional comma-separated list of validator public keys to list builder registrations for.
```
## Host a relay
Relays run a libp2p [circuit relay](https://docs.libp2p.io/concepts/nat/circuit-relay/) server that allows Charon clusters to perform peer discovery and for Charon clients behind strict NAT gateways to be communicated with. If you want to self-host a relay for your cluster(s) the following command will start one.
```markdown
charon relay --help
Starts a libp2p circuit relay that charon clients can use to discover and connect to their peers.
Usage:
charon relay [flags]
Flags:
--auto-p2pkey Automatically create a p2pkey (secp256k1 private key used for p2p authentication and ENR) if none found in data directory. (default true)
--data-dir string The directory where charon will store all its internal data. (default ".charon")
--debug-address string Listening address (ip and port) for the pprof and QBFT debug API. It is not enabled by default.
-h, --help Help for relay
--http-address string Listening address (ip and port) for the relay http server serving runtime ENR. (default "127.0.0.1:3640")
--log-color string Log color; auto, force, disable. (default "auto")
--log-format string Log format; console, logfmt or json (default "console")
--log-level string Log level; debug, info, warn or error (default "info")
--log-output-path string Path in which to write on-disk logs.
--loki-addresses strings Enables sending of logfmt structured logs to these Loki log aggregation server addresses. This is in addition to normal stderr logs.
--loki-service string Service label sent with logs to Loki. (default "charon")
--monitoring-address string Listening address (ip and port) for the monitoring API (prometheus).
--p2p-advertise-private-addresses Enable advertising of libp2p auto-detected private addresses. This doesn't affect manually provided p2p-external-ip/hostname.
--p2p-disable-reuseport Disables TCP port reuse for outgoing libp2p connections.
--p2p-external-hostname string The DNS hostname advertised by libp2p. This may be used to advertise an external DNS.
--p2p-external-ip string The IP address advertised by libp2p. This may be used to advertise an external IP.
--p2p-max-connections int Libp2p maximum number of peers that can connect to this relay. (default 16384)
--p2p-max-reservations int Updates max circuit reservations per peer (each valid for 30min) (default 512)
--p2p-relay-loglevel string Libp2p circuit relay log level. E.g., debug, info, warn, error.
--p2p-relays strings Comma-separated list of libp2p relay URLs or multiaddrs. (default [https://0.relay.obol.tech,https://1.relay.obol.tech,https://2.relay.obol.dev])
--p2p-tcp-address strings Comma-separated list of listening TCP addresses (ip and port) for libP2P traffic. Empty default doesn't bind to local port therefore only supports outgoing connections.
--p2p-udp-address strings Comma-separated list of listening UDP addresses (ip and port) for libP2P traffic. Empty default doesn't bind to local port therefore only supports outgoing connections.
```
You can also consider adding [alternative public relays](../../advanced-and-troubleshooting/security/risks.md) to your cluster by specifying a list of `p2p-relays` in [`charon run`](charon-cli-reference.md#run-the-charon-middleware).
## Experimental commands
These commands are subject to breaking changes until they are moved outside of the `alpha` subcommand in a future release.
### Edit cluster configuration
The `charon alpha edit` commands allow you to modify existing distributed validator cluster configurations.
```markdown
charon alpha edit --help
Subcommands allow users to modify existing distributed validator cluster configurations, such as adding, removing or replacing operators.
Usage:
charon alpha edit [command]
Available Commands:
add-operators Add new operators to an existing distributed validator cluster
add-validators Add new validators to an existing distributed validator cluster
recreate-private-keys Create new private key shares to replace existing validator private key shares
remove-operators Remove operators from an existing distributed validator cluster
replace-operator Replace an operator in an existing distributed validator cluster
Flags:
-h, --help Help for edit
Use "charon alpha edit [command] --help" for more information about a command.
```
#### Add validators to a cluster
The `charon alpha edit add-validators` command allows you to generate new validators and add them to an existing cluster. This process is very similar to the `charon dkg` ceremony, which requires all node operators to participate, because under the hood it runs the same DKG protocol with additional actions and verifications.
```markdown
charon alpha edit add-validators --help
Generates and appends new validator keys to an existing distributed validator cluster.
Usage:
charon alpha edit add-validators [flags]
Flags:
--execution-client-rpc-endpoint string Optional address of an execution engine JSON-RPC API. Used to validate smart contract signatures for Node Operators in the cluster.
--fee-recipient-addresses strings Comma separated list of Ethereum addresses of the fee recipient for each validator. Either provide a single fee recipient address or fee recipient addresses for each validator.
-h, --help Help for add-validators
--keymanager-address string The keymanager URL to import validator keyshares.
--keymanager-auth-token string Authentication bearer token to interact with keymanager API. Don't include the "Bearer" symbol, only include the api-token.
--lock-file string The path to the cluster lock file defining the distributed validator cluster. (default ".charon/cluster-lock.json")
--log-color string Log color; auto, force, disable. (default "auto")
--log-format string Log format; console, logfmt or json (default "console")
--log-level string Log level; debug, info, warn or error (default "info")
--log-output-path string Path in which to write on-disk logs.
--no-verify Disables cluster definition and lock file verification.
--num-validators int The number of new validators to generate and add to the existing cluster. (default 1)
--output-dir string The destination folder for the new (combined) cluster data. Must be empty. (default "distributed_validator")
--p2p-disable-reuseport Disables TCP port reuse for outgoing libp2p connections.
--p2p-external-hostname string The DNS hostname advertised by libp2p. This may be used to advertise an external DNS.
--p2p-external-ip string The IP address advertised by libp2p. This may be used to advertise an external IP.
--p2p-relays strings Comma-separated list of libp2p relay URLs or multiaddrs. (default [https://4.relay.obol.dev])
--p2p-tcp-address strings Comma-separated list of listening TCP addresses (ip and port) for libP2P traffic. Empty default doesn't bind to local port therefore only supports outgoing connections.
--p2p-udp-address strings Comma-separated list of listening UDP addresses (ip and port) for libP2P traffic. Empty default doesn't bind to local port therefore only supports outgoing connections.
--private-key-file string The path to the charon enr private key file. (default ".charon/charon-enr-private-key")
--publish Publish the created cluster to a remote API.
--publish-address string The URL to publish the cluster to. (default "https://api.obol.tech/v1")
--publish-timeout duration Timeout for publishing a cluster, consider increasing if the cluster contains more than 200 validators. (default 1m0s)
--shutdown-delay duration Graceful shutdown delay. (default 5s)
--timeout duration Timeout for the command, should be increased if the command times out. (default 1m0s)
--unverified If charon has no access to the existing validator keys, this flag allows the addition to proceed, but skips hashing and signing the new cluster lock data. charon run must be started with --no-verify flag.
--validator-keys-dir string Path to the directory containing the validator private key share files and passwords. (default ".charon/validator_keys")
--withdrawal-addresses strings Comma separated list of Ethereum addresses to receive the returned stake and accrued rewards for each validator. Either provide a single withdrawal address or withdrawal addresses for each validator.
```
#### Add operators to a cluster
The `charon alpha edit add-operators` command adds new operators to an existing distributed validator cluster while keeping all validator public keys unchanged. All existing operators and new operators must participate in this ceremony.
```markdown
charon alpha edit add-operators --help
Adds new operators to an existing distributed validator cluster, keeping validator public keys unchanged.
Usage:
charon alpha edit add-operators [flags]
Flags:
--execution-client-rpc-endpoint string Optional address of an execution engine JSON-RPC API. Used to validate smart contract signatures for Node Operators in the cluster.
-h, --help Help for add-operators
--lock-file string The path to the cluster lock file defining the distributed validator cluster. (default ".charon/cluster-lock.json")
--log-color string Log color; auto, force, disable. (default "auto")
--log-format string Log format; console, logfmt or json (default "console")
--log-level string Log level; debug, info, warn or error (default "info")
--log-output-path string Path in which to write on-disk logs.
--new-operator-enrs strings Comma-separated list of the new operators to be added (Charon ENR addresses).
--no-verify Disables cluster definition and lock file verification.
--output-dir string The destination folder for the new cluster data. Must be empty. (default "distributed_validator")
--p2p-disable-reuseport Disables TCP port reuse for outgoing libp2p connections.
--p2p-external-hostname string The DNS hostname advertised by libp2p. This may be used to advertise an external DNS.
--p2p-external-ip string The IP address advertised by libp2p. This may be used to advertise an external IP.
--p2p-relays strings Comma-separated list of libp2p relay URLs or multiaddrs. (default [https://4.relay.obol.dev])
--p2p-tcp-address strings Comma-separated list of listening TCP addresses (ip and port) for libP2P traffic. Empty default doesn't bind to local port therefore only supports outgoing connections.
--p2p-udp-address strings Comma-separated list of listening UDP addresses (ip and port) for libP2P traffic. Empty default doesn't bind to local port therefore only supports outgoing connections.
--private-key-file string The path to the charon enr private key file. (default ".charon/charon-enr-private-key")
--publish Publish the created cluster to a remote API.
--publish-address string The URL to publish the cluster to. (default "https://api.obol.tech/v1")
--publish-timeout duration Timeout for publishing a cluster, consider increasing if the cluster contains more than 200 validators. (default 1m0s)
--shutdown-delay duration Graceful shutdown delay. (default 5s)
--timeout duration Timeout for the protocol, should be increased if protocol times out. (default 1m0s)
--validator-keys-dir string Path to the directory containing the validator private key share files and passwords. (default ".charon/validator_keys")
```
#### Remove operators from a cluster
The `charon alpha edit remove-operators` command removes operators from an existing distributed validator cluster while leaving all validators intact. Remaining operators must participate in this ceremony.
```markdown
charon alpha edit remove-operators --help
Removes operators from an existing distributed validator cluster, leaving all validators intact.
Usage:
charon alpha edit remove-operators [flags]
Flags:
--execution-client-rpc-endpoint string Optional address of an execution engine JSON-RPC API. Used to validate smart contract signatures for Node Operators in the cluster.
-h, --help Help for remove-operators
--lock-file string The path to the cluster lock file defining the distributed validator cluster. (default ".charon/cluster-lock.json")
--log-color string Log color; auto, force, disable. (default "auto")
--log-format string Log format; console, logfmt or json (default "console")
--log-level string Log level; debug, info, warn or error (default "info")
--log-output-path string Path in which to write on-disk logs.
--new-threshold int Optional override of the new threshold required for signature reconstruction. Defaults to ceil(n*2/3) if zero. Warning, non-default values decrease security. All operators must use the same value.
--no-verify Disables cluster definition and lock file verification.
--operator-enrs-to-remove strings Comma-separated list of operators to be removed (Charon ENR addresses).
--output-dir string The destination folder for the new cluster data. Must be empty. Optional for removed operators. (default "distributed_validator")
--p2p-disable-reuseport Disables TCP port reuse for outgoing libp2p connections.
--p2p-external-hostname string The DNS hostname advertised by libp2p. This may be used to advertise an external DNS.
--p2p-external-ip string The IP address advertised by libp2p. This may be used to advertise an external IP.
--p2p-relays strings Comma-separated list of libp2p relay URLs or multiaddrs. (default [https://4.relay.obol.dev])
--p2p-tcp-address strings Comma-separated list of listening TCP addresses (ip and port) for libP2P traffic. Empty default doesn't bind to local port therefore only supports outgoing connections.
--p2p-udp-address strings Comma-separated list of listening UDP addresses (ip and port) for libP2P traffic. Empty default doesn't bind to local port therefore only supports outgoing connections.
--participating-operator-enrs strings Comma-separated list of operator ENRs participating in the ceremony. Required if --operator-enrs-to-remove specifies more operators to remove than the fault tolerance of the current cluster.
--private-key-file string The path to the charon enr private key file. (default ".charon/charon-enr-private-key")
--publish Publish the created cluster to a remote API.
--publish-address string The URL to publish the cluster to. (default "https://api.obol.tech/v1")
--publish-timeout duration Timeout for publishing a cluster, consider increasing if the cluster contains more than 200 validators. (default 1m0s)
--shutdown-delay duration Graceful shutdown delay. (default 5s)
--timeout duration Timeout for the protocol, should be increased if protocol times out. (default 1m0s)
--validator-keys-dir string Path to the directory containing the validator private key share files and passwords. (default ".charon/validator_keys")
```
#### Replace an operator in a cluster
The `charon alpha edit replace-operator` command replaces an operator in an existing distributed validator cluster, keeping validator public keys unchanged.
```markdown
charon alpha edit replace-operator --help
Replaces an operator in an existing distributed validator cluster, keeping validator public keys unchanged.
Usage:
charon alpha edit replace-operator [flags]
Flags:
--execution-client-rpc-endpoint string Optional address of an execution engine JSON-RPC API. Used to validate smart contract signatures for Node Operators in the cluster.
-h, --help Help for replace-operator
--lock-file string The path to the cluster lock file defining the distributed validator cluster. (default ".charon/cluster-lock.json")
--log-color string Log color; auto, force, disable. (default "auto")
--log-format string Log format; console, logfmt or json (default "console")
--log-level string Log level; debug, info, warn or error (default "info")
--log-output-path string Path in which to write on-disk logs.
--new-operator-enr string The new operator to be added (Charon ENR address).
--no-verify Disables cluster definition and lock file verification.
--old-operator-enr string The old operator to be replaced (Charon ENR address).
--output-dir string The destination folder for the new cluster data. Must be empty. (default "distributed_validator")
--p2p-disable-reuseport Disables TCP port reuse for outgoing libp2p connections.
--p2p-external-hostname string The DNS hostname advertised by libp2p. This may be used to advertise an external DNS.
--p2p-external-ip string The IP address advertised by libp2p. This may be used to advertise an external IP.
--p2p-relays strings Comma-separated list of libp2p relay URLs or multiaddrs. (default [https://4.relay.obol.dev])
--p2p-tcp-address strings Comma-separated list of listening TCP addresses (ip and port) for libP2P traffic. Empty default doesn't bind to local port therefore only supports outgoing connections.
--p2p-udp-address strings Comma-separated list of listening UDP addresses (ip and port) for libP2P traffic. Empty default doesn't bind to local port therefore only supports outgoing connections.
--private-key-file string The path to the charon enr private key file. (default ".charon/charon-enr-private-key")
--publish Publish the created cluster to a remote API.
--publish-address string The URL to publish the cluster to. (default "https://api.obol.tech/v1")
--publish-timeout duration Timeout for publishing a cluster, consider increasing if the cluster contains more than 200 validators. (default 1m0s)
--shutdown-delay duration Graceful shutdown delay. (default 5s)
--timeout duration Timeout for the protocol, should be increased if protocol times out. (default 1m0s)
--validator-keys-dir string Path to the directory containing the validator private key share files and passwords. (default ".charon/validator_keys")
```
#### Recreate private key shares
The `charon alpha edit recreate-private-keys` command creates new private key shares to replace the existing validator private keys while retaining the same operator identities and validator public keys. All operators must participate in this ceremony.
```markdown
charon alpha edit recreate-private-keys --help
Creates new private key shares to replace the existing validator private keys while retaining the same operator identities.
Usage:
charon alpha edit recreate-private-keys [flags]
Flags:
--execution-client-rpc-endpoint string Optional address of an execution engine JSON-RPC API. Used to validate smart contract signatures for Node Operators in the cluster.
-h, --help Help for recreate-private-keys
--lock-file string The path to the cluster lock file defining the distributed validator cluster. (default ".charon/cluster-lock.json")
--log-color string Log color; auto, force, disable. (default "auto")
--log-format string Log format; console, logfmt or json (default "console")
--log-level string Log level; debug, info, warn or error (default "info")
--log-output-path string Path in which to write on-disk logs.
--no-verify Disables cluster definition and lock file verification.
--output-dir string The destination folder for the new cluster artifacts. Must be empty. (default "distributed_validator")
--p2p-disable-reuseport Disables TCP port reuse for outgoing libp2p connections.
--p2p-external-hostname string The DNS hostname advertised by libp2p. This may be used to advertise an external DNS.
--p2p-external-ip string The IP address advertised by libp2p. This may be used to advertise an external IP.
--p2p-relays strings Comma-separated list of libp2p relay URLs or multiaddrs. (default [https://4.relay.obol.dev])
--p2p-tcp-address strings Comma-separated list of listening TCP addresses (ip and port) for libP2P traffic. Empty default doesn't bind to local port therefore only supports outgoing connections.
--p2p-udp-address strings Comma-separated list of listening UDP addresses (ip and port) for libP2P traffic. Empty default doesn't bind to local port therefore only supports outgoing connections.
--private-key-file string The path to the charon enr private key file. (default ".charon/charon-enr-private-key")
--publish Publish the created cluster to a remote API.
--publish-address string The URL to publish the cluster to. (default "https://api.obol.tech/v1")
--publish-timeout duration Timeout for publishing a cluster, consider increasing if the cluster contains more than 200 validators. (default 1m0s)
--shutdown-delay duration Graceful shutdown delay. (default 5s)
--timeout duration Timeout for the protocol, should be increased if protocol times out. (default 1m0s)
--validator-keys-dir string Path to the directory containing the validator private key share files and passwords. (default ".charon/validator_keys")
```
### Test your candidate distributed validator cluster
Charon comes with a test suite for understanding the suitability and readiness of a given setup.
```markdown
charon alpha test --help
Subcommands provide test suites to evaluate a cluster setup. The full validator stack can be tested - charon peers, consensus layer, validator client, MEV. Current machine's infra can be examined as well.
Usage:
charon alpha test [command]
Available Commands:
all Run tests towards peer nodes, beacon nodes, validator client, MEV relays, own hardware and internet connectivity.
beacon Run multiple tests towards beacon nodes
infra Run multiple hardware and internet connectivity tests
mev Run multiple tests towards MEV relays
peers Run multiple tests towards peer nodes
validator Run multiple tests towards validator client
Flags:
-h, --help Help for test
Use "charon alpha test [command] --help" for more information about a command.
```
#### Test all
```markdown
charon alpha test all --help
Run tests towards peer nodes, beacon nodes, validator client, MEV relays, own hardware and internet connectivity. Verify that Charon can efficiently do its duties on the tested setup.
Usage:
charon alpha test all [flags]
Flags:
--beacon-endpoints strings [REQUIRED] Comma separated list of one or more beacon node endpoint URLs.
--beacon-load-test Enable load test, not advisable when testing towards external beacon nodes.
--beacon-load-test-duration duration Time to keep running the load tests in seconds. For each second a new continuous ping instance is spawned. (default 5s)
--beacon-simulation-custom int Run custom simulation with the specified amount of validators.
--beacon-simulation-duration-in-slots int Time to keep running the simulation in slots. (default 32)
--beacon-simulation-file-dir string Time to keep running the simulation in slots. (default "./")
--beacon-simulation-verbose Show results for each request and each validator.
-h, --help Help for all
--infra-disk-io-block-size-kb int The block size in kilobytes used for I/O units. Same value applies for both reads and writes. (default 4096)
--infra-disk-io-test-file-dir string Directory at which disk performance will be measured. If none specified, current user's home directory will be used.
--infra-internet-test-servers-exclude strings List of server names to be excluded from the tests. To be specified only if you experience issues with a server that is wrongly considered best performing.
--infra-internet-test-servers-only strings List of specific server names to be included for the internet tests, the best performing one is chosen. If not provided, closest and best performing servers are chosen automatically.
--log-color string Log color; auto, force, disable. (default "auto")
--log-format string Log format; console, logfmt or json (default "console")
--log-level string Log level; debug, info, warn or error (default "info")
--log-output-path string Path in which to write on-disk logs.
--mev-beacon-node-endpoint string [REQUIRED] Beacon node endpoint URL used for block creation test.
--mev-endpoints strings Comma separated list of one or more MEV relay endpoint URLs.
--mev-load-test Enable load test.
--mev-number-of-payloads uint Increases the accuracy of the load test by asking for multiple payloads. Increases test duration. (default 1)
--mev-x-timeout-ms uint X-Timeout-Ms header flag for each request in milliseconds, used by MEVs to compute maximum delay for reply. (default 1000)
--output-json string File path to which output can be written in JSON format.
--p2p-disable-reuseport Disables TCP port reuse for outgoing libp2p connections.
--p2p-external-hostname string The DNS hostname advertised by libp2p. This may be used to advertise an external DNS.
--p2p-external-ip string The IP address advertised by libp2p. This may be used to advertise an external IP.
--p2p-relays strings Comma-separated list of libp2p relay URLs or multiaddrs. (default [https://4.relay.obol.dev])
--p2p-tcp-address strings Comma-separated list of listening TCP addresses (ip and port) for libP2P traffic. Empty default doesn't bind to local port therefore only supports outgoing connections.
--p2p-udp-address strings Comma-separated list of listening UDP addresses (ip and port) for libP2P traffic. Empty default doesn't bind to local port therefore only supports outgoing connections.
--peers-definition-file string The path to the cluster definition file or an HTTP URL.
--peers-direct-connection-timeout duration Time to keep trying to establish direct connection to peer. (default 2m0s)
--peers-enrs strings [REQUIRED] Comma-separated list of each peer ENR address.
--peers-keep-alive duration Time to keep TCP node alive after test completion, so connection is open for other peers to test on their end. (default 30m0s)
--peers-load-test-duration duration Time to keep running the load tests in seconds. For each second a new continuous ping instance is spawned. (default 30s)
--peers-lock-file string The path to the cluster lock file defining the distributed validator cluster.
--peers-private-key-file string The path to the charon enr private key file. (default ".charon/charon-enr-private-key")
--publish Publish test result file to obol-api.
--publish-address string The URL to publish the test result file to. (default "https://api.obol.tech/v1")
--publish-private-key-file string The path to the charon enr private key file, used for signing the publish request. Temporary key will be generated if the file does not exist. (default ".charon/charon-enr-private-key")
--quiet Do not print test results to stdout.
--test-cases strings List of comma separated names of tests to be executed. Available tests are: [Ping PingMeasure PingLoad DirectConn Libp2pTCPPortOpen PingRelay PingMeasureRelay PeerCount Simulate100 Simulate500 SimulateCustom Ping Synced PingLoad Simulate1 Simulate10 Simulate1000 PingMeasure Version Ping PingMeasure PingLoad Ping PingMeasure CreateBlock AvailableMemory TotalMemory InternetLatency DiskWriteSpeed DiskWriteIOPS DiskReadSpeed DiskReadIOPS InternetDownloadSpeed InternetUploadSpeed]
--timeout duration Execution timeout for all tests. (default 1h0m0s)
--validator-load-test-duration duration Time to keep running the load tests in seconds. For each second a new continuous ping instance is spawned. (default 5s)
--validator-validator-api-address string Listening address (ip and port) for validator-facing traffic proxying the beacon-node API. (default "127.0.0.1:3600")
```
#### Test beacon node
```markdown
charon alpha test beacon --help
Run multiple tests towards beacon nodes. Verify that Charon can efficiently interact with Beacon Node(s).
Usage:
charon alpha test beacon [flags]
Flags:
--endpoints strings [REQUIRED] Comma separated list of one or more beacon node endpoint URLs.
-h, --help Help for beacon
--load-test Enable load test, not advisable when testing towards external beacon nodes.
--load-test-duration duration Time to keep running the load tests in seconds. For each second a new continuous ping instance is spawned. (default 5s)
--output-json string File path to which output can be written in JSON format.
--publish Publish test result file to obol-api.
--publish-address string The URL to publish the test result file to. (default "https://api.obol.tech/v1")
--publish-private-key-file string The path to the charon enr private key file, used for signing the publish request. Temporary key will be generated if the file does not exist. (default ".charon/charon-enr-private-key")
--quiet Do not print test results to stdout.
--simulation-custom int Run custom simulation with the specified amount of validators.
--simulation-duration-in-slots int Time to keep running the simulation in slots. (default 32)
--simulation-file-dir string Time to keep running the simulation in slots. (default "./")
--simulation-verbose Show results for each request and each validator.
--test-cases strings List of comma separated names of tests to be executed. Available tests are: [PeerCount Simulate1 PingLoad Simulate10 Simulate100 Simulate500 Simulate1000 SimulateCustom Ping PingMeasure Version Synced]
--timeout duration Execution timeout for all tests. (default 1h0m0s)
```
#### Test infra
```markdown
charon alpha test infra --help
Run multiple hardware and internet connectivity tests. Verify that Charon is running on host with sufficient capabilities.
Usage:
charon alpha test infra [flags]
Flags:
--disk-io-block-size-kb int The block size in kilobytes used for I/O units. Same value applies for both reads and writes. (default 4096)
--disk-io-test-file-dir string Directory at which disk performance will be measured. If none specified, current user's home directory will be used.
-h, --help Help for infra
--internet-test-servers-exclude strings List of server names to be excluded from the tests. To be specified only if you experience issues with a server that is wrongly considered best performing.
--internet-test-servers-only strings List of specific server names to be included for the internet tests, the best performing one is chosen. If not provided, closest and best performing servers are chosen automatically.
--output-json string File path to which output can be written in JSON format.
--publish Publish test result file to obol-api.
--publish-address string The URL to publish the test result file to. (default "https://api.obol.tech/v1")
--publish-private-key-file string The path to the charon enr private key file, used for signing the publish request. Temporary key will be generated if the file does not exist. (default ".charon/charon-enr-private-key")
--quiet Do not print test results to stdout.
--test-cases strings List of comma separated names of tests to be executed. Available tests are: [InternetLatency DiskWriteSpeed DiskWriteIOPS DiskReadSpeed DiskReadIOPS TotalMemory InternetDownloadSpeed InternetUploadSpeed AvailableMemory]
--timeout duration Execution timeout for all tests. (default 1h0m0s)
```
#### Test MEV
```markdown
charon alpha test mev --help
Run multiple tests towards MEV relays. Verify that Charon can efficiently interact with MEV relay(s).
Usage:
charon alpha test mev [flags]
Flags:
--beacon-node-endpoint string [REQUIRED] Beacon node endpoint URL used for block creation test.
--endpoints strings Comma separated list of one or more MEV relay endpoint URLs.
-h, --help Help for mev
--load-test Enable load test.
--number-of-payloads uint Increases the accuracy of the load test by asking for multiple payloads. Increases test duration. (default 1)
--output-json string File path to which output can be written in JSON format.
--publish Publish test result file to obol-api.
--publish-address string The URL to publish the test result file to. (default "https://api.obol.tech/v1")
--publish-private-key-file string The path to the charon enr private key file, used for signing the publish request. Temporary key will be generated if the file does not exist. (default ".charon/charon-enr-private-key")
--quiet Do not print test results to stdout.
--test-cases strings List of comma separated names of tests to be executed. Available tests are: [PingMeasure CreateBlock Ping]
--timeout duration Execution timeout for all tests. (default 1h0m0s)
--x-timeout-ms uint X-Timeout-Ms header flag for each request in milliseconds, used by MEVs to compute maximum delay for reply. (default 1000)
```
#### Test Charon peers
```markdown
charon alpha test peers --help
Run multiple tests towards peer nodes. Verify that Charon can efficiently interact with Validator Client.
Usage:
charon alpha test peers [flags]
Flags:
--definition-file string The path to the cluster definition file or an HTTP URL.
--direct-connection-timeout duration Time to keep trying to establish direct connection to peer. (default 2m0s)
--enrs strings [REQUIRED] Comma-separated list of each peer ENR address.
-h, --help Help for peers
--keep-alive duration Time to keep TCP node alive after test completion, so connection is open for other peers to test on their end. (default 30m0s)
--load-test-duration duration Time to keep running the load tests in seconds. For each second a new continuous ping instance is spawned. (default 30s)
--lock-file string The path to the cluster lock file defining the distributed validator cluster.
--log-color string Log color; auto, force, disable. (default "auto")
--log-format string Log format; console, logfmt or json (default "console")
--log-level string Log level; debug, info, warn or error (default "info")
--log-output-path string Path in which to write on-disk logs.
--output-json string File path to which output can be written in JSON format.
--p2p-disable-reuseport Disables TCP port reuse for outgoing libp2p connections.
--p2p-external-hostname string The DNS hostname advertised by libp2p. This may be used to advertise an external DNS.
--p2p-external-ip string The IP address advertised by libp2p. This may be used to advertise an external IP.
--p2p-relays strings Comma-separated list of libp2p relay URLs or multiaddrs. (default [https://4.relay.obol.dev])
--p2p-tcp-address strings Comma-separated list of listening TCP addresses (ip and port) for libP2P traffic. Empty default doesn't bind to local port therefore only supports outgoing connections.
--p2p-udp-address strings Comma-separated list of listening UDP addresses (ip and port) for libP2P traffic. Empty default doesn't bind to local port therefore only supports outgoing connections.
--private-key-file string The path to the charon enr private key file. (default ".charon/charon-enr-private-key")
--publish Publish test result file to obol-api.
--publish-address string The URL to publish the test result file to. (default "https://api.obol.tech/v1")
--publish-private-key-file string The path to the charon enr private key file, used for signing the publish request. Temporary key will be generated if the file does not exist. (default ".charon/charon-enr-private-key")
--quiet Do not print test results to stdout.
--test-cases strings List of comma separated names of tests to be executed. Available tests are: [PingMeasure PingLoad DirectConn Ping Libp2pTCPPortOpen]
--timeout duration Execution timeout for all tests. (default 1h0m0s)
```
#### Test validator client
```markdown
charon alpha test validator --help
Run multiple tests towards validator client. Verify that Charon can efficiently interact with its validator client.
Usage:
charon alpha test validator [flags]
Flags:
-h, --help Help for validator
--load-test-duration duration Time to keep running the load tests in seconds. For each second a new continuous ping instance is spawned. (default 5s)
--output-json string File path to which output can be written in JSON format.
--publish Publish test result file to obol-api.
--publish-address string The URL to publish the test result file to. (default "https://api.obol.tech/v1")
--publish-private-key-file string The path to the charon enr private key file, used for signing the publish request. Temporary key will be generated if the file does not exist. (default ".charon/charon-enr-private-key")
--quiet Do not print test results to stdout.
--test-cases strings List of comma separated names of tests to be executed. Available tests are: [Ping PingMeasure PingLoad]
--timeout duration Execution timeout for all tests. (default 1h0m0s)
--validator-api-address string Listening address (ip and port) for validator-facing traffic proxying the beacon-node API. (default "127.0.0.1:3600")
```
---
# Further Reading
URL: https://docs.obol.org/learn/further-reading
# Further Reading
---
# Ethereum and Its Relationship With DVT
URL: https://docs.obol.org/learn/further-reading/ethereum_and_dvt
# Ethereum and Its Relationship With DVT
Our goal for this page is to equip you with the foundational knowledge needed to actively contribute to the advancement of Obol while also directing you to valuable Ethereum and DVT related resources. Additionally, we will shed light on the intersection of DVT and Ethereum, offering curated articles and blog posts to enhance your understanding.
## **Understanding Ethereum**
To grasp the current landscape of Ethereum's PoS development, we encourage you to delve into the wealth of information available on the [Official Ethereum Website.](https://ethereum.org/en/learn/) The Ethereum website serves as a hub for all things Ethereum, catering to individuals at various levels of expertise, whether you're just starting your journey or are an Ethereum veteran. Here, you'll find a trove of resources that cater to diverse learning needs and preferences, ensuring that there's something valuable for everyone in the Ethereum community to discover.
## **DVT & Ethereum**
### Distributed Validator Technology
> "Distributed validator technology (DVT) is an approach to validator security that spreads out key management and signing responsibilities across multiple parties, to reduce single points of failure, and increase validator resiliency.
>
> It does this by splitting the private key used to secure a validator across many computers organized into a "cluster". The benefit of this is that it makes it very difficult for attackers to gain access to the key, because it is not stored in full on any single machine. It also allows for some nodes to go offline, as the necessary signing can be done by a subset of the machines in each cluster. This reduces single points of failure from the network and makes the whole validator set more robust." _(ethereum.org, 2023)_
#### Learn More About Distributed Validator technology from [The Official Ethereum Website](https://ethereum.org/en/staking/dvt/)
### How Does DVT Improve Staking on Ethereum?
If you haven’t yet heard, Distributed Validator Technology, or DVT, is the next big thing on The Merge section of the Ethereum roadmap. Learn more about this in our blog post: [What is DVT and How Does It Improve Staking on Ethereum?](https://blog.obol.tech/what-is-dvt-and-how-does-it-improve-staking-on-ethereum/)\
\
\&#xNAN;_**Vitalik's Ethereum Roadmap:**_
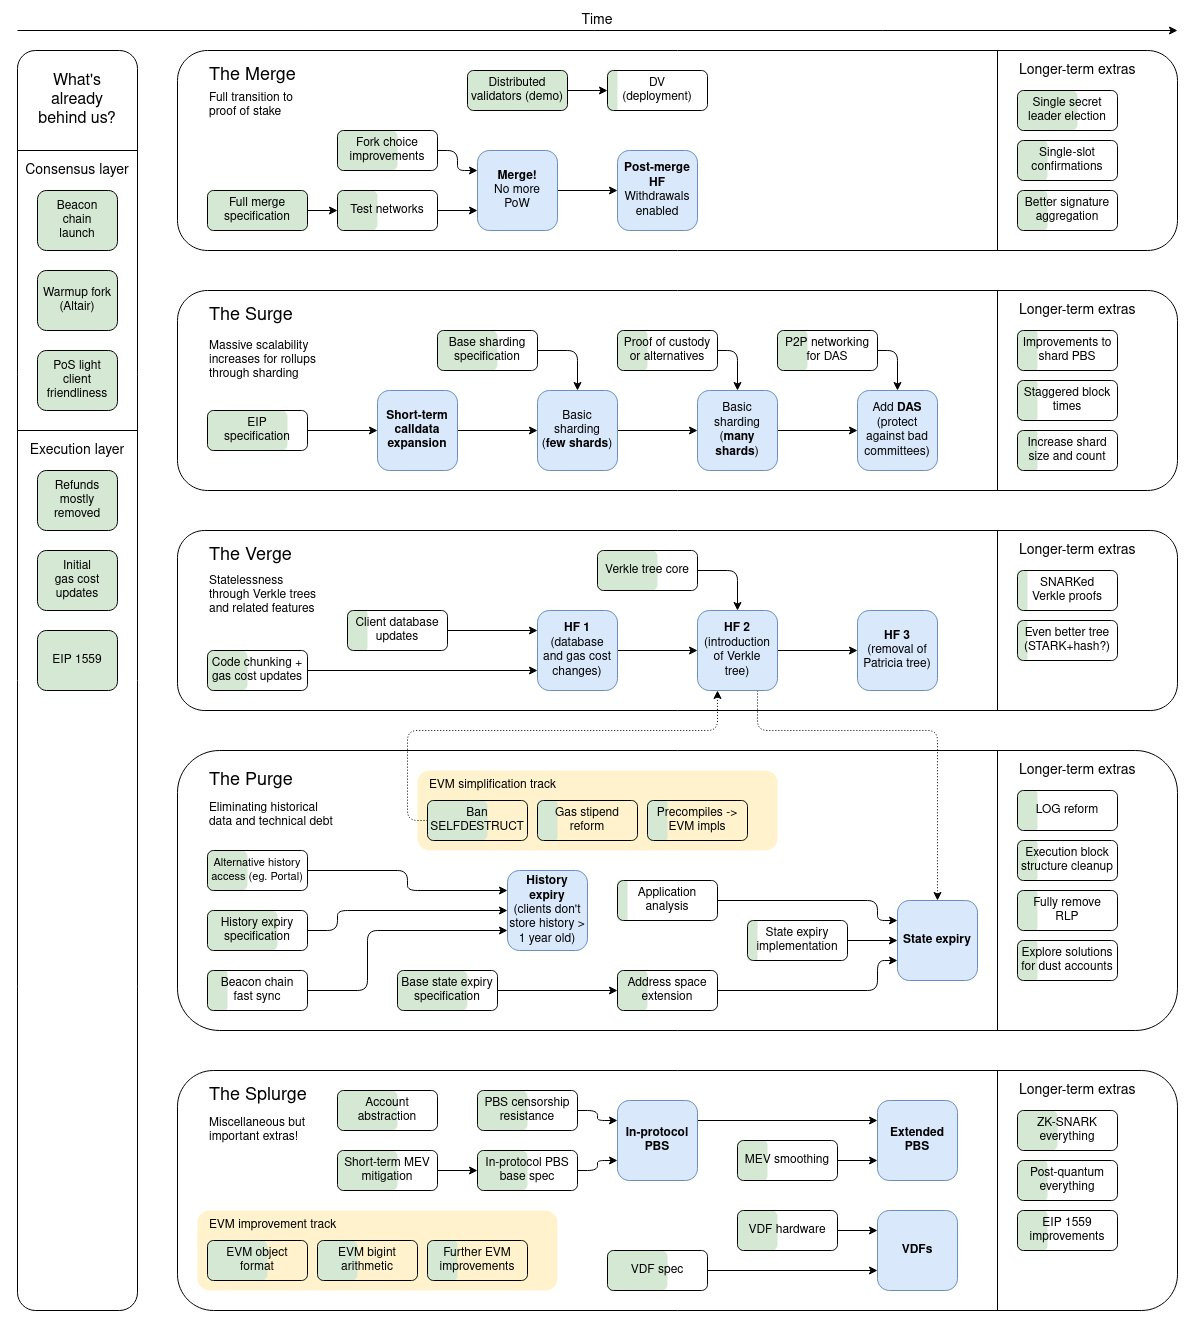
### Deep Dive Into DVT and Charon’s Architecture
Minimizing correlation is vital when designing DVT as Ethereum Proof of Stake is designed to heavily punish correlated behavior. In designing Obol, we’ve made careful choices to create a trust-minimized and non-correlated architecture.
[**Read more about Designing Non-Correlation Here**](https://blog.obol.tech/deep-dive-into-dvt-and-charons-architecture/)
### Performance Testing Distributed Validators
In our mission to help make Ethereum consensus more resilient and decentralized with distributed validators (DVs), it’s critical that we do not compromise on the performance and effectiveness of validators. Earlier this year, we worked with MigaLabs, the blockchain ecosystem observatory located in Barcelona, to perform an independent test to validate the performance of Obol DVs under different configurations and conditions. After taking a few weeks to fully analyze the results together with MigaLabs, we’re happy to share the results of these performance tests.
[**Read More About The Performance Test Results Here**](https://blog.obol.tech/performance-testing-distributed-validators/)
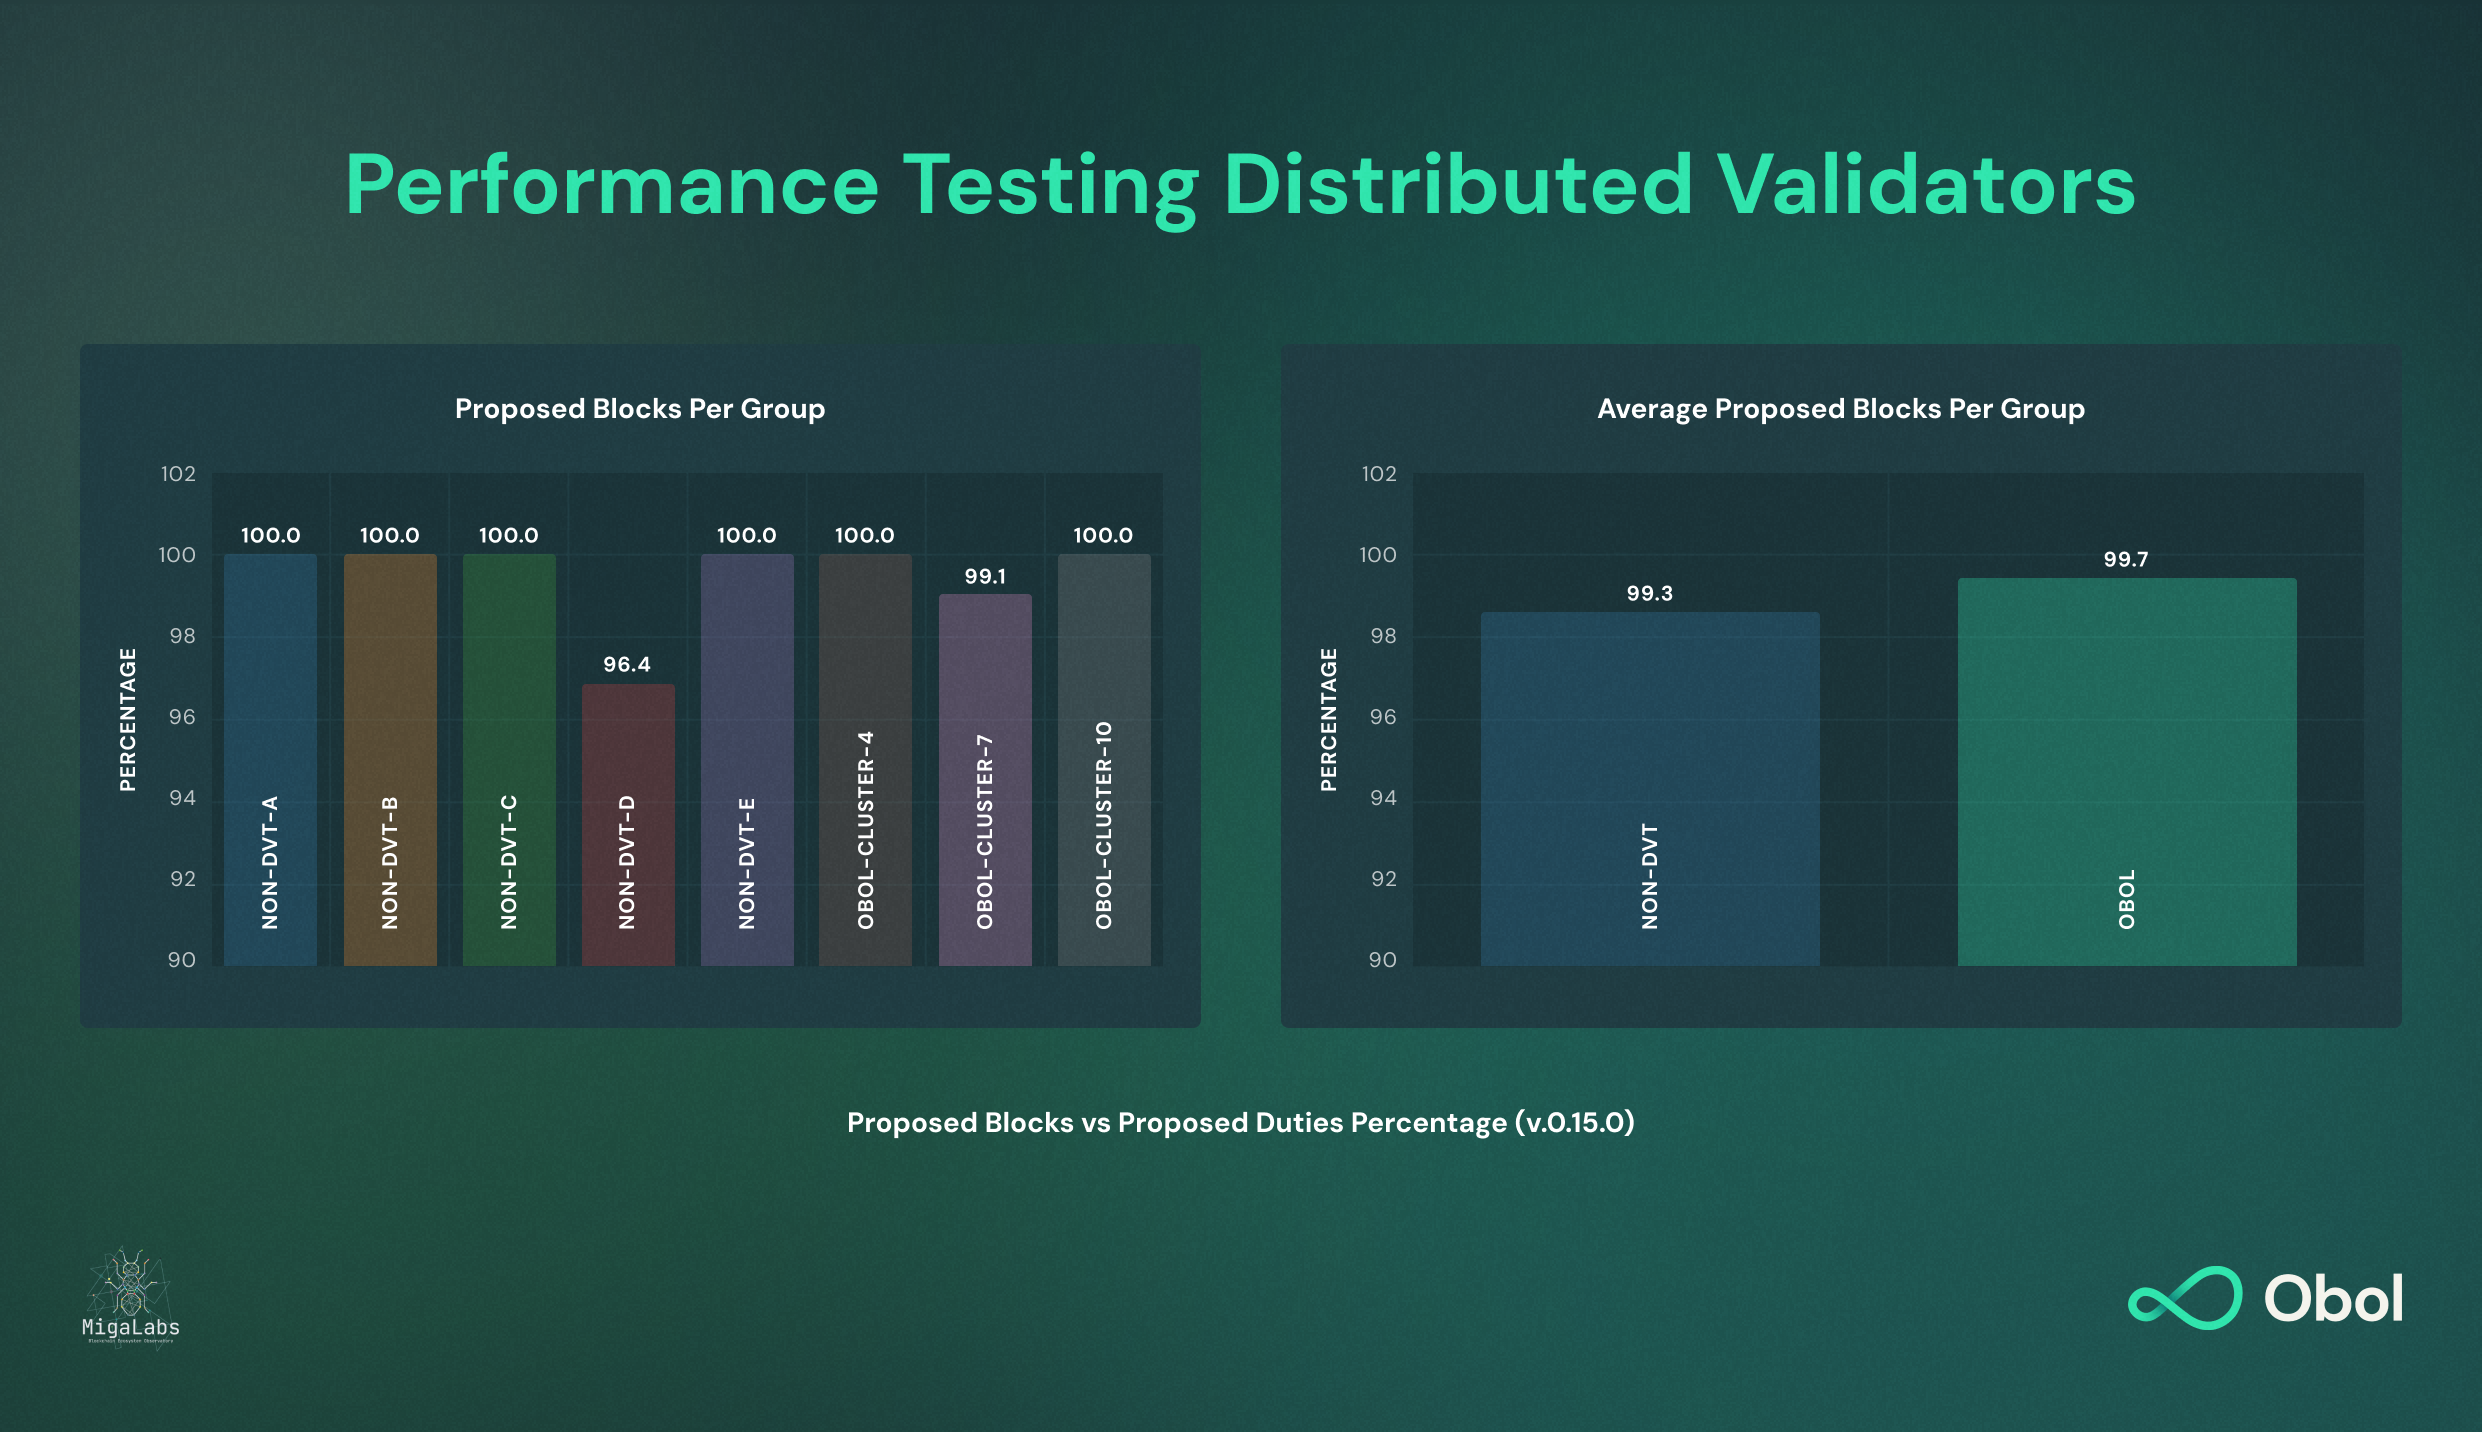
### More Resources
* [Sorting out Distributed Validator Technology](https://medium.com/nethermind-eth/sorting-out-distributed-validator-technology-a6f8ca1bbce3)
* [A tour of Verifiable Secret Sharing schemes and Distributed Key Generation protocols](https://medium.com/nethermind-eth/a-tour-of-verifiable-secret-sharing-schemes-and-distributed-key-generation-protocols-3c814e0d47e1)
* [Threshold Signature Schemes](https://medium.com/nethermind-eth/threshold-signature-schemes-36f40bc42aca)
#### References
* ethereum.org. (2023). Distributed Validator Technology. \[online] Available at: https://ethereum.org/en/staking/dvt/ \[Accessed 25 Sep. 2023].
---
# Community Testing
URL: https://docs.obol.org/learn/further-reading/testnet
# Community Testing
## Community Testing
:::tip
This page looks at the community testing efforts organized by Obol to test Distributed Validators at scale. If you are looking for guides to run a Distributed Validator on testnet you can do so [here](../../run-a-dv/start/quickstart_overview.md).
:::
Over the last number of years, DV Labs has coordinated and hosted progressively larger testing efforts to help harden the Charon client and iterate on the key generation tooling.
Below is a breakdown of the testing initiatives, the features targeted for completion in each testnet, along with their respective completion dates and durations.
## Testing Programs on Testnet
Listed from most recent to oldest:
* [x] [Lido Testnet 3 - SimpleDVT](testnet.md#lido-testnet-wave-3---simpledvt)
* [x] [Lido Testnet 2](testnet.md#lido-testnet-wave-2)
* [x] [Lido Testnet 1 - Pilot](testnet.md#lido-testnet-wave-1---pilot)
* [x] [Bia Public Testnet 2](testnet.md#bia-public-testnet-2)
* [x] [Athena Public Testnet 1](testnet.md#athena-public-testnet-1)
* [x] [Dev Net 2](testnet.md#devnet-2)
* [x] [Dev Net 1](testnet.md#devnet-1)
### Lido Testnet Wave 3 - SimpleDVT
Official report [available here](https://obol.org/lido_obol_3.pdf). The metrics presented were derived from a 45-day monitoring period starting on November 18th, 2023. Each cluster initially ran 5 validators, a number that was subsequently scaled up to 50 and then 100 for most clusters. Throughout the testing, various challenges were encountered, primarily stemming from infrastructure limitations due to the early-stage development of the Holesky testnet. Throughout this monitoring phase, the aggregate metrics of Obol DVT clusters surpassed both Lido’s minimum requirements and the Holesky network averages.
**Participants:** Professional and community operators. Initially 214 participants, which later fell to 196.
**State:** Pre-release
**Network:** Holesky
**Completed date:** Jan 11th, 2024
**Duration:** 2 months (Nov 28th, 2023 - Jan 11th, 2024)
**Goals:**
* Engage a broad set of node operators.
* Operate a high number of validators on each cluster.
* Gather performance data on potential candidates for Lido SimpleDVT onboarding.
* Conduct large-scale testing within Lido's framework.
* Demonstrate good performance, even with a large degree of geographic, client, and hardware diversity.
### Lido Testnet Wave 2
Official report [available here](https://obol.org/lido_obol_2.pdf). Our testing period spanned 59 days, from March 23rd to May 20th, 2023. During this time, we focused on key metrics for our Lido clusters, also drawing comparisons with industry peers. We're excited to share that the data displays strong performance of our DVT clusters as we continue to improve and enhance our middleware client, Charon.
**Participants:** >50 community professional and community node operators.
**State:** MVP
**Network:** Görli
**Completed date:** May 2023
**Duration:** 3 months (March - May 2023)
**Goals:**
* Engage a broad set of node operators.
* Conduct large-scale testing within Lido's framework.
* Demonstrate good performance, even with a large degree of geographic, client, and hardware diversity.
### Lido Testnet Wave 1 - Pilot
Offical report [available here](https://obol.org/lido_obol_1.pdf).Gathered key metrics from our Lido clusters, benchmarking these metrics against other industry players, showing strong results and reaffirming our confidence in the future of the technology.
**Participants:** Professional node operators: Hashquark, CryptoManufaktur, Nethermind, Simply Staking, DSRV, Kukis Global, Chorus One, Staking Facilities, Blockscape, Everstake, Stakely.
**State:** MVP
**Network:** Görli
**Completed date:** January 2023
**Duration:** 104 days (Oct 3rd, 2022 - Jan 15th, 2023)
**Goals:**
* Engage Lido and Lido node operators with DVT.
* Assist Lido to build out a testing program framework with can be repeated at a larger scale.
* Test up to 1000 active validators within each cluster.
### Bia Public Testnet 2
This second public testnet intends to take the learning from Athena and scale the network by engaging both the wider at-home validator community and professional operators. This is the first time users are setting up DVs using the DV launchpad.
This testnet is also important for learning the conditions Charon will be subjected to in production. A core output of this testnet is a large number of autonomous public DV clusters running and building up the Obol community with technical ambassadors.
**Participants:** Obol Community, Ethereum staking community
**State:** MVP
**Network:** Görli
**Completed date:** March 2023
**Duration:** 2 weeks cluster setup, 4-8 weeks operation
**Goals:**
* Engage the wider Solo and Professional Ethereum Staking Community.
* Get integration feedback.
* Build confidence in Charon after running DVs on an Ethereum testnet.
* Learn about the conditions Charon will be subjected to in production.
* Distributed Validator returns are competitive versus single validator clients.
* Make deploying Ethereum validator nodes accessible using the DV Launchpad.
* Build comprehensive guides for various profiles to spin up DVs with minimal supervision from the core team.
### Athena Public Testnet 1
With tutorials for solo and group flows having been developed and refined. The goal for public testnet 1 was to get distributed validators into the hands of the wider Obol Community for the first time. The core focus of this testnet was the onboarding experience.
The core output from this testnet was a significant number of public cluster running and public feedback collected.
This was an unincentivized testnet and formed the basis for us to figure out a Sybil resistance mechanism.
**Participants:** Obol Community
**State:** Bare Minimum
**Network:** Görli
**Completed date:** October 2022
**Duration:** 2 weeks cluster setup, 8 weeks operation
**Goals:**
* Get distributed validators into the hands of the Obol Early Community for the first time.
* Create the first public onboarding experience and gather feedback. This is the first time we need to provide comprehensive instructions for as many platforms (Unix, Mac, Windows) as possible.
* Make deploying Ethereum validator nodes accessible using the CLI.
* Generate a backlog of bugs, feature requests, platform requests and integration requests.
### Devnet 2
The second devnet aimed to have a number of trusted operators test out our earliest tutorial flows **together** for the first time.
The aim was for groups of 4 testers to complete a group onboarding tutorial, using `docker compose` to spin up 4 Charon clients and 4 different validator clients (Lighthouse, Teku, Lodestar and Vouch), each on their own machine located either at the operator's home or a location of their choice, while running at least a kiln consensus client.
This devnet was the first time `charon dkg` was tested with users. A core focus of this devnet was to collect network performance data.
This was also the first time Charon was run in variable, non-virtual networks (i.e. the real internet).
**Participants:** Obol Dev Team, Client team advisors.
**State:** Pre-product
**Network:** Kiln
**Completed Date:** July 2022
**Duration:** 2 weeks
**Goals:**
* Groups of 4 testers complete a group onboarding tutorial, using `docker compose` to spin up 4 Charon clients, each on their own machine located either at the operator's home or a location of their choice, while running at least a kiln consensus client.
* Operators avoid exposing Charon to the public internet on a static IP address through the use of Obol-hosted relay nodes.
* Users test `charon dkg`. The launchpad is not used, and this dkg is triggered by a manifest config file created locally by a single operator using the `charon create dkg` command.
* Effective collection of network performance data, to enable gathering even higher signal performance data at scale during public testnets.
* Block proposals are in place.
### Devnet 1
The first devnet aimed to have a number of trusted operators test out our earliest tutorial flows. The aim was for a single user to complete the tutorials alone, using `docker compose` to spin up 4 Charon clients, and 4 different validator clients on a single machine, using a remote consensus client. The keys were created locally in Charon and activated with the existing launchpad.
**Participants:** Obol Dev Team, Client team advisors.
**State:** Pre-product
**Network:** Kiln
**Completed Date:** June 2022
**Duration:** 1 week
**Goals:**
* A single user completes the first tutorial alone, using `docker compose` to spin up 4 Charon clients on a single machine, with a remote consensus client. The keys are created locally in Charon and activated with the existing launchpad.
* Prove that the distributed validator paradigm with 4 separate VC implementations together operating as one logical validator works.
* Establish basic monitoring systems in preparation for the next testnet, where accurate monitoring will be crucial as Charon operates across a network.
---
# Peer Score
URL: https://docs.obol.org/learn/further-reading/peer_score
# Peer Score
## Introduction
Validator effectiveness is a critical metric for assessing the health of a rated network. It determines how well validators perform their attestation and block proposal duties. Existing solutions, like RAVER (Rated Validator Effectiveness Rating), provide a effectiveness score of a validator. In a monolithic validator that is run by a single operator, validator effectiveness can be considered as a proxy for the effectiveness or “score” of that operator. However, this approach falls short when dealing with distributed validators (DVs) maintained by multiple operators.
Peer Score v0 addresses this limitation by introducing a method to evaluate the performance of individual operators within a DV. This enables a more granular assessment of contribution within a distributed setting.
## Key Concepts
* **Distributed Validator (DV):** A validator maintained by a group of operators in a fault-tolerant manner.
* **Peer:** An individual operator contributing to a DV.
* **Peer Score:** A metric reflecting the performance of a peer within a DV, calculated as the ratio of completed duties to expected duties.
* **Operator Score:** An aggregated metric representing the overall effectiveness of an operator across multiple DVs (planned for future iterations).
## Challenges with RAVER in DVs
RAVER assigns a single effectiveness score to the entire DV. This score doesn't reflect the individual contributions of operators within the group. For example, a DV with 95% effectiveness maintained by four operators (A, B, C, and D) doesn't guarantee that each operator has a 95% effectiveness score. It's possible that even if operator D is frequently offline, the remaining operators (A, B, and C) can maintain the overall DV effectiveness.
## Peer Score v0 Calculation
Peer Score v0 utilizes a straightforward formula:
`Peer Score = (Total duties completed by peer) / (Total duties expected by peer)`
This ratio reflects the peer's adherence to its assigned duties within the DV.
## Future Iterations
Peer Score v0 lays the foundation for a more comprehensive evaluation system. Planned advancements include:
* **Weighted Duties:** Assigning varying weights to different duties based on their significance to the network.
* **Decentralization Scores:** Integrating metrics that consider the decentralization of clients and operator locations.
* Peer rating: an anonymous rating peers can give to their other peers to grade their social co-ordination.
## Use Cases
Peer Score offers valuable insights for various stakeholders:
* **Staking/Restaking Protocols:** Peer Score is crucial component of Obol’s Techne Credential Program. LSPs and LRPs can utilize Techne Credentials ,and hence Peer Score, to identify efficient operators for expanding their operator sets.
* **DV Operators:** Forming operator collectives based on peer effectiveness and potentially removing underperforming peers from DVs (with Charon v2 cluster mutability).
* **DV Software Developers:** Establishing a standardized metric for evaluating operator performance across various DV software, enabling the development of new tools and services.
---
# Useful Links
URL: https://docs.obol.org/learn/further-reading/resources
# Useful Links
The following is a curated list of the best internal and external resources for using, creating, running, building, and researching Distributed Validators. To add to this list, please open a [pull request](https://github.com/ObolNetwork/obol-gitbook/pulls/).
## Deposit Interfaces
* [Chorus One](https://opus.chorus.one/pool/stake/)
* [Stakely](https://obol-portal.stakely.io/)
* [Mellow](https://app.mellow.finance/restake/ethereum-dvsteth)
## Launchers and Deployment Tooling
* [Dappnode](https://docs.dappnode.io/docs/user/staking/ethereum/dvt-technologies/obol-network/)
* [Stereum](https://stereum.net/)
* [Sedge](https://github.com/ObolNetwork/sedge/blob/develop/docs/docs/quickstart/charon.mdx)
* [Obol CDVN](https://github.com/ObolNetwork/charon-distributed-validator-node)
* [Obol K8s](https://github.com/ObolNetwork/charon-k8s-distributed-validator-node)
* [Obol Helm Charts](https://github.com/ObolNetwork/helm-charts)
* [Obol Ansible Playbooks](https://github.com/ObolNetwork/obol-ansible)
* [Terraform Charon Relay](https://github.com/ObolNetwork/terraform-charon-relay)
* [Terraform Grafana Charon dashboards](https://github.com/ObolNetwork/terraform-grafana-dashboards)
## Quickstart Guides
* [Run a DV alone](../../run-a-dv/start/create-a-dv-alone.mdx)
* [Run a DV as a group](../../run-a-dv/start/create-a-dv-with-a-group.mdx)
* [Run a DV using the SDK](../../advanced-and-troubleshooting/advanced/create-a-dv-using-the-sdk.mdx)
## Security and Best Practices
* [Audits](https://github.com/ObolNetwork/obol-security/tree/main/audits)
* [Security repo](https://github.com/ObolNetwork/obol-security)
* [Security Docs Page](../../advanced-and-troubleshooting/security/overview.md)
* [Best practices doc](../../run-a-dv/prepare/deployment-best-practices.md)
* [Status Page](https://status.obol.org/)
## Security Audits and Assessments
* A [review](../../advanced-and-troubleshooting/security/ev-assessment.md) of Obol Labs development processes by Ethereal Ventures
* A [security assessment](https://github.com/ObolNetwork/obol-security/blob/f9d7b0ad0bb8897f74ccb34cd4bd83012ad1d2b5/audits/Sigma_Prime_Obol_Network_Charon_Security_Assessment_Report_v2_1.pdf) of Charon by [Sigma Prime](https://sigmaprime.io/).
* A [solidity audit](../../advanced-and-troubleshooting/security/smart-contract-audit.md) of the Obol Splits contracts by [Zach Obront](https://zachobront.com/).
* [Charon Threat model](../../advanced-and-troubleshooting/security/threat_model.md)
* [QuantStamp Charon audit Q4 2023](https://obol.tech/charon_quantstamp_assessment.pdf)
* A [security assessment of Charon's editability features](https://github.com/ObolNetwork/charon/blob/main/docs/audit/2026%20-%20Charon%20V2%20Audit%20-%20TrailOfBits.pdf) by [Trail of Bits](https://www.trailofbits.com/).
## Research and Development
* Nethermind research papers via the [Obol Network Research Forum](https://community.obol.tech/?ref=blog.obol.org)
* [Publicly Verifiable Secret Sharing-based Distributed Key Generation](https://community.obol.tech/t/proposal-publicly-verifiable-secret-sharing-based-distributed-key-generation/94?ref=blog.obol.org)
* [Key Refresh Scheme for DV operators](https://community.obol.tech/t/proposal-key-refresh-scheme-for-dv-operators/97?ref=blog.obol.org)
* [BFT protocol that can mutate its operator set in a byzantine setting](https://community.obol.tech/t/proposal-bft-protocol-that-can-mutate-its-operator-set-in-a-byzantine-setting/106?ref=blog.obol.org)
* [Using DV clusters for encrypted transaction mempools](https://community.obol.tech/t/proposal-using-dv-clusters-for-encrypted-transaction-mempools/108?ref=blog.obol.org)
* Attributable Consensus Solution for DV Clusters [Part I](https://community.obol.org/t/proposal-attributable-consensus-solution-for-dv-clusters/104?ref=blog.obol.org), [Part II](https://community.obol.org/t/proposal-attributable-consensus-solution-for-dv-clusters-part-2/107?ref=blog.obol.org), [Part III](https://community.obol.org/t/proposal-attributable-consensus-solution-for-dv-clusters-part-3/109?ref=blog.obol.org), [Appendix](https://community.obol.org/t/proposal-attributable-consensus-solution-for-dv-clusters-appendix/110?ref=blog.obol.org)
* [Obol-Lido Splits Dune Dashboard](https://dune.com/obol_labs/lido-splits)
---
# Quickstart
URL: https://docs.obol.org/run-a-dv/start
# start
---
# Quickstart Overview
URL: https://docs.obol.org/run-a-dv/start/quickstart_overview
# Quickstart Overview
The quickstart guides are aimed at developers and stakers looking to deploy Distributed Validators in a single or multi-operator setup. To contribute to this documentation, head over to our [Github repository](https://github.com/ObolNetwork/obol-gitbook) and file a pull request.
There are two ways to set up a distributed validator and each comes with its own quickstart, within the "Getting Started" section:
1. Run a DV cluster as a [**group**](./create-a-dv-with-a-group.mdx), where several operators run the nodes that make up the cluster. In this setup, the key shares are created using a distributed key generation process, avoiding the full private keys being stored in full in any one place. This approach can also be used by single operators looking to manage all nodes of a cluster but wanting to create the key shares in a trust-minimized fashion.
2. Run a DV cluster [**alone**](./create-a-dv-alone.mdx), where a single operator runs all the nodes of the DV. Depending on trust assumptions, there is not necessarily the need to create the key shares via a DKG process. Instead the key shares can be created in a centralized manner, and distributed securely to the nodes.
## Cluster as a Service (CaaS)
If you want to integrate DVs but are not a node operator yourself, Obol offers **Cluster as a Service (CaaS)**: distributed validators operate deep in the staking stack and are compatible with different staking strategies, and with CaaS you can select your strategy, choose your node operators, and deploy and monitor clusters with confidence.
* [Read the Cluster as a Service offering](https://hubs.ly/Q03Y2Srl0)
* [Contact us](mailto:business@obol.tech)
## Need assistance?
If you have any questions about this documentation or are experiencing technical problems with any Obol-related projects, head on over to our [Discord](https://discord.gg/n6ebKsX46w) where a member of our team or the community will be happy to assist you.
---
# Create a DV Alone
URL: https://docs.obol.org/run-a-dv/start/create-a-dv-alone
# Create a DV Alone
:::info
It is possible for a single operator to manage all of the nodes of a DV cluster. The nodes can be run on a single machine, which is only suitable for testing, or the nodes can be run on multiple machines, which is expected for a production setup.
The private key shares can be created centrally and distributed securely to each node. Alternatively, the private key shares can be created in a lower-trust manner with a [Distributed Key Generation](../../learn/intro/key-concepts.md#distributed-validator-key-generation-ceremony) process, which avoids the validator private key being stored in full anywhere, at any point in its lifecycle. Follow the [group quickstart](create-a-dv-with-a-group.mdx) instead for this latter case.
:::
### Pre-requisites {#pre-requisites}
* A basic [knowledge](https://docs.ethstaker.cc/ethstaker-knowledge-base/) of Ethereum nodes and validators.
* Ensure you have [git](https://git-scm.com/downloads) installed.
* Ensure you have [docker](https://docs.docker.com/engine/install/) installed.
* Make sure `docker` is running before executing the commands below.
### Step 1: Create the key shares locally {#step-1-create-the-key-shares-locally}
Go to the [DV Launchpad](../../learn/intro/launchpad.md) and select `Create a distributed validator alone`. Follow the steps to configure your DV cluster. The Launchpad will give you a docker command to create your cluster.\
Before you run the command, clone the [CDVC repo](https://github.com/ObolNetwork/charon-distributed-validator-cluster.git) and `cd` into the directory.
```sh
# Clone the repo
git clone https://github.com/ObolNetwork/charon-distributed-validator-cluster.git
# Change directory
cd charon-distributed-validator-cluster/
# Run the command provided in the DV Launchpad "Create a cluster alone" flow
docker run -u $(id -u):$(id -g) --rm -v "$(pwd)/:/opt/charon" obolnetwork/charon:v1.10.3 create cluster --definition-file=...
```
After the `create cluster` command is run, you should have multiple subfolders within the newly created `./cluster/` folder, one for each node created.
**Backup the `./cluster/` folder, then move on to deploying the cluster.**
:::info
Make sure your backup is secure and private, someone with access to these files could get the validators slashed.
:::
1. Clone the [CDVC repo](https://github.com/ObolNetwork/charon-distributed-validator-cluster) and `cd` into the directory.
```sh
# Clone the repo
git clone https://github.com/ObolNetwork/charon-distributed-validator-cluster.git
# Change directory
cd charon-distributed-validator-cluster/
```
2. Run the cluster creation command, setting required flag values.
Run the below command to create the validator private key shares and cluster artifacts locally, replacing the example values for `nodes`, `network`, `num-validators`, `fee-recipient-addresses`, and `withdrawal-addresses`. Check the [Charon CLI reference](../../learn/charon/charon-cli-reference.md#create-a-full-cluster-locally) for additional, optional flags to set.
```sh
docker run --rm -v "$(pwd):/opt/charon" obolnetwork/charon:v1.10.3 create cluster \
--nodes=6 \
--network=hoodi \
--num-validators=1 \
--name="Quickstart Guide Cluster" \
--cluster-dir="cluster" \
--fee-recipient-addresses=0x000000000000000000000000000000000000dead \
--withdrawal-addresses=0x000000000000000000000000000000000000dead \
--publish
```
:::tip
If you would like your cluster to appear on the [DV Launchpad](../../learn/intro/launchpad.md), add the `--publish` flag to the command.
:::
After the `create cluster` command is run, you should have multiple subfolders within the newly created `./cluster/` folder, one for each node created.
**Backup the `./cluster/` folder, then move on to deploying the cluster.**
:::info
Make sure your backup is secure and private, someone with access to these files could get the validators slashed.
:::
### Step 2: Deploy and start the nodes {#step-1-create-the-key-shares-locally}
:::warning
This part of the guide only runs one Execution Client, one Consensus Client, and 6 Distributed Validator Charon Client + Validator Client pairs on a single docker instance, and **is not suitable for a mainnet deployment**. (If this machine fails, there will not be any fault tolerance - the cluster will also fail.)
For a production deployment with fault tolerance, follow the part of the guide instructing you how to distribute the nodes across multiple machines.
:::
Run this command to start your cluster containers if you deployed using the [CDVC repo](https://github.com/ObolNetwork/charon-distributed-validator-cluster).
```sh
# Start the distributed validator cluster
docker compose up --build -d
```
Check the monitoring dashboard and see if things look all right.
```sh
# Open Grafana
open http://localhost:3000/d/laEp8vupp
```
:::warning
To distribute your cluster across multiple machines, each node in the cluster needs one of the folders called `node*/` to be copied to it. Each folder should be copied to a [CDVN repo](https://github.com/ObolNetwork/charon-distributed-validator-node) and renamed from `node*` to `.charon`.
Right now, the `charon create cluster` command [used earlier to create the private keys](#step-1-create-the-key-shares-locally) outputs a folder structure like `cluster/node*/`. Make sure to grab the `./node*/` folders, _rename_ them to `.charon` and then move them to one of the single node repos below. Once all nodes are online, synced, and connected, you will be ready to activate your validator.
:::
This is necessary for the folder to be found by the default `charon run` command. Optionally, it is possible to override `charon run`'s default file locations by using `charon run --private-key-file="node0/charon-enr-private-key" --lock-file="node0/cluster-lock.json"` for each instance of Charon you start (substituting `node0` for each node number in your cluster as needed).
👉 Use the single node [docker compose](https://github.com/ObolNetwork/charon-distributed-validator-node), the kubernetes [manifests](https://github.com/ObolNetwork/charon-k8s-distributed-validator-node), or the [helm chart](https://github.com/ObolNetwork/helm-charts) example repos to get your nodes up and connected after loading the `.charon` folder artifacts into them appropriately.
Output from create cluster:
```
cluster
├── node0
│ ├── charon-enr-private-key
│ ├── cluster-lock.json
│ ├── deposit-data.json
│ └── validator_keys
│ ├── keystore-0.json
│ ├── keystore-0.txt
│ ├── ...
│ ├── keystore-N.json
│ └── keystore-N.txt
├── node1
│ ├── charon-enr-private-key
│ ├── cluster-lock.json
│ ├── deposit-data.json
│ └── validator_keys
│ ├── keystore-0.json
│ ├── keystore-0.txt
│ ├── ...
│ ├── keystore-N.json
│ └── keystore-N.txt
├── node2
│ ├── charon-enr-private-key
│ ├── cluster-lock.json
│ ├── deposit-data.json
│ └── validator_keys
│ ├── keystore-0.json
│ ├── keystore-0.txt
│ ├── ...
│ ├── keystore-N.json
│ └── keystore-N.txt
└── node3
├── charon-enr-private-key
├── cluster-lock.json
├── deposit-data.json
└── validator_keys
├── keystore-0.json
├── keystore-0.txt
├── ...
├── keystore-N.json
└── keystore-N.txt
```
Folder structure to be placed on each DV node:
```
└── .charon
├── charon-enr-private-key
├── cluster-lock.json
├── deposit-data.json
└── validator_keys
├── keystore-0.json
├── keystore-0.txt
├── ...
├── keystore-N.json
└── keystore-N.txt
```
:::info
Currently, the quickstart repo installs a node on the Hoodi testnet. It is possible to choose a different network (another testnet, or mainnet) by overriding the `.env` file.
`.env.sample` is a sample environment file that allows overriding default configuration defined in `docker-compose.yml`. Uncomment and set any variable to override its value.
Set up the desired inputs for the DV, including the network you wish to operate on. Check the [Charon CLI reference](../../learn/charon/charon-cli-reference.md) for additional optional flags to set. Once you have set the values you wish to use. Make a copy of this file called `.env`.
```sh
# Copy ".env.sample", renaming it ".env"
cp .env.sample .env
```
:::
---
# Create a DV With a Group
URL: https://docs.obol.org/run-a-dv/start/create-a-dv-with-a-group
# Create a DV With a Group
### Pre-requisites {#pre-requisites}
* A basic [knowledge](https://docs.ethstaker.cc/ethstaker-knowledge-base/) of Ethereum nodes and validators.
* A machine that meets the [minimum requirements](../prepare/deployment-best-practices.md#hardware-specifications) for the network you intend to validate.
* If you are taking part using a [DappNode](https://dappnode.com/):
* A computer with an up to date version of [DappNode](https://docs.dappnode.io/docs/user/install/overview/)'s software and an internet connection.
* If you are taking part using [Sedge](https://www.nethermind.io/sedge), or [Charon's Distributed Validator Node](https://github.com/ObolNetwork/lido-charon-distributed-validator-node) (CDVN) starter repo:
* Ensure you have [git](https://git-scm.com/downloads) installed.
* Ensure you have [docker](https://docs.docker.com/engine/install/) installed.
* Make sure `docker` is running before executing the commands below.
* If you are taking part using **Helm**:
* Ensure you have [kubectl](https://kubernetes.io/docs/tasks/tools/) installed and configured to communicate with your Kubernetes cluster.
* Ensure you have [Helm](https://helm.sh/docs/intro/install/) (v3+) installed.
* Ensure you have access to a running Kubernetes cluster.
### Step 1: Get your ENR {#step-1-get-your-enr}
In order to prepare for a distributed key generation ceremony, you need to create an ENR for your Charon client. This ENR is a public/private key pair that allows the other Charon clients in the DKG to identify and connect to your node. If you are creating a cluster but not taking part as a node operator in it, you can skip this step.
```sh
# Clone the repo
git clone https://github.com/ObolNetwork/charon-distributed-validator-node.git
# Change directory
cd charon-distributed-validator-node/
# Use docker to create an ENR. Backup the file `.charon/charon-enr-private-key`.
docker run --rm -v "$(pwd):/opt/charon" obolnetwork/charon:v1.10.3 create enr
```
You should expect to see a console output like this:
```sh
Created ENR private key: .charon/charon-enr-private-key
enr:-JG4QGQpV4qYe32QFUAbY1UyGNtNcrVMip83cvJRhw1brMslPeyELIz3q6dsZ7GblVaCjL_8FKQhF6Syg-O_kIWztimGAYHY5EvPgmlkgnY0gmlwhH8AAAGJc2VjcDI1NmsxoQKzMe_GFPpSqtnYl-mJr8uZAUtmkqccsAx7ojGmFy-FY4N0Y3CCDhqDdWRwgg4u
```
:::warning
Please make sure to create a backup of the private key at `.charon/charon-enr-private-key` Be careful not to commit it to git! **If you lose this file you won't be able to take part in the DKG ceremony nor start the DV cluster successfully.**
:::
:::tip
If instead of being shown your `enr` you see an error saying `permission denied` then you may need to [update your docker permissions](../../advanced-and-troubleshooting/troubleshooting/errors.md#how-to-fix-permission-denied-errors) to allow the command to run successfully.
:::
For Step 2 of the quickstart:
* Select the **Creator** tab if you are coordinating the creation of the cluster (this role holds no position of privilege in the cluster, it only sets the initial terms of the cluster that the other operators agree to).
* Select the **Operator** tab if you are accepting an invitation to operate a node in a cluster, proposed by the cluster creator.
**Prepare an Execution and Consensus client**
Before preparing the DappNode to take part in a Distributed Validator Cluster, you must ensure you have selected an execution client & consensus client on your DappNode under the 'Stakers' tab for the network you intend to validate.
1. Login to the DappNode Interface:
2. Click on the 'Stakers' tab on the left side, select an execution client (e.g. Geth) & consensus client (e.g. Lodestar) & click 'Apply changes'. This will start the syncing process which can take a number of hours.
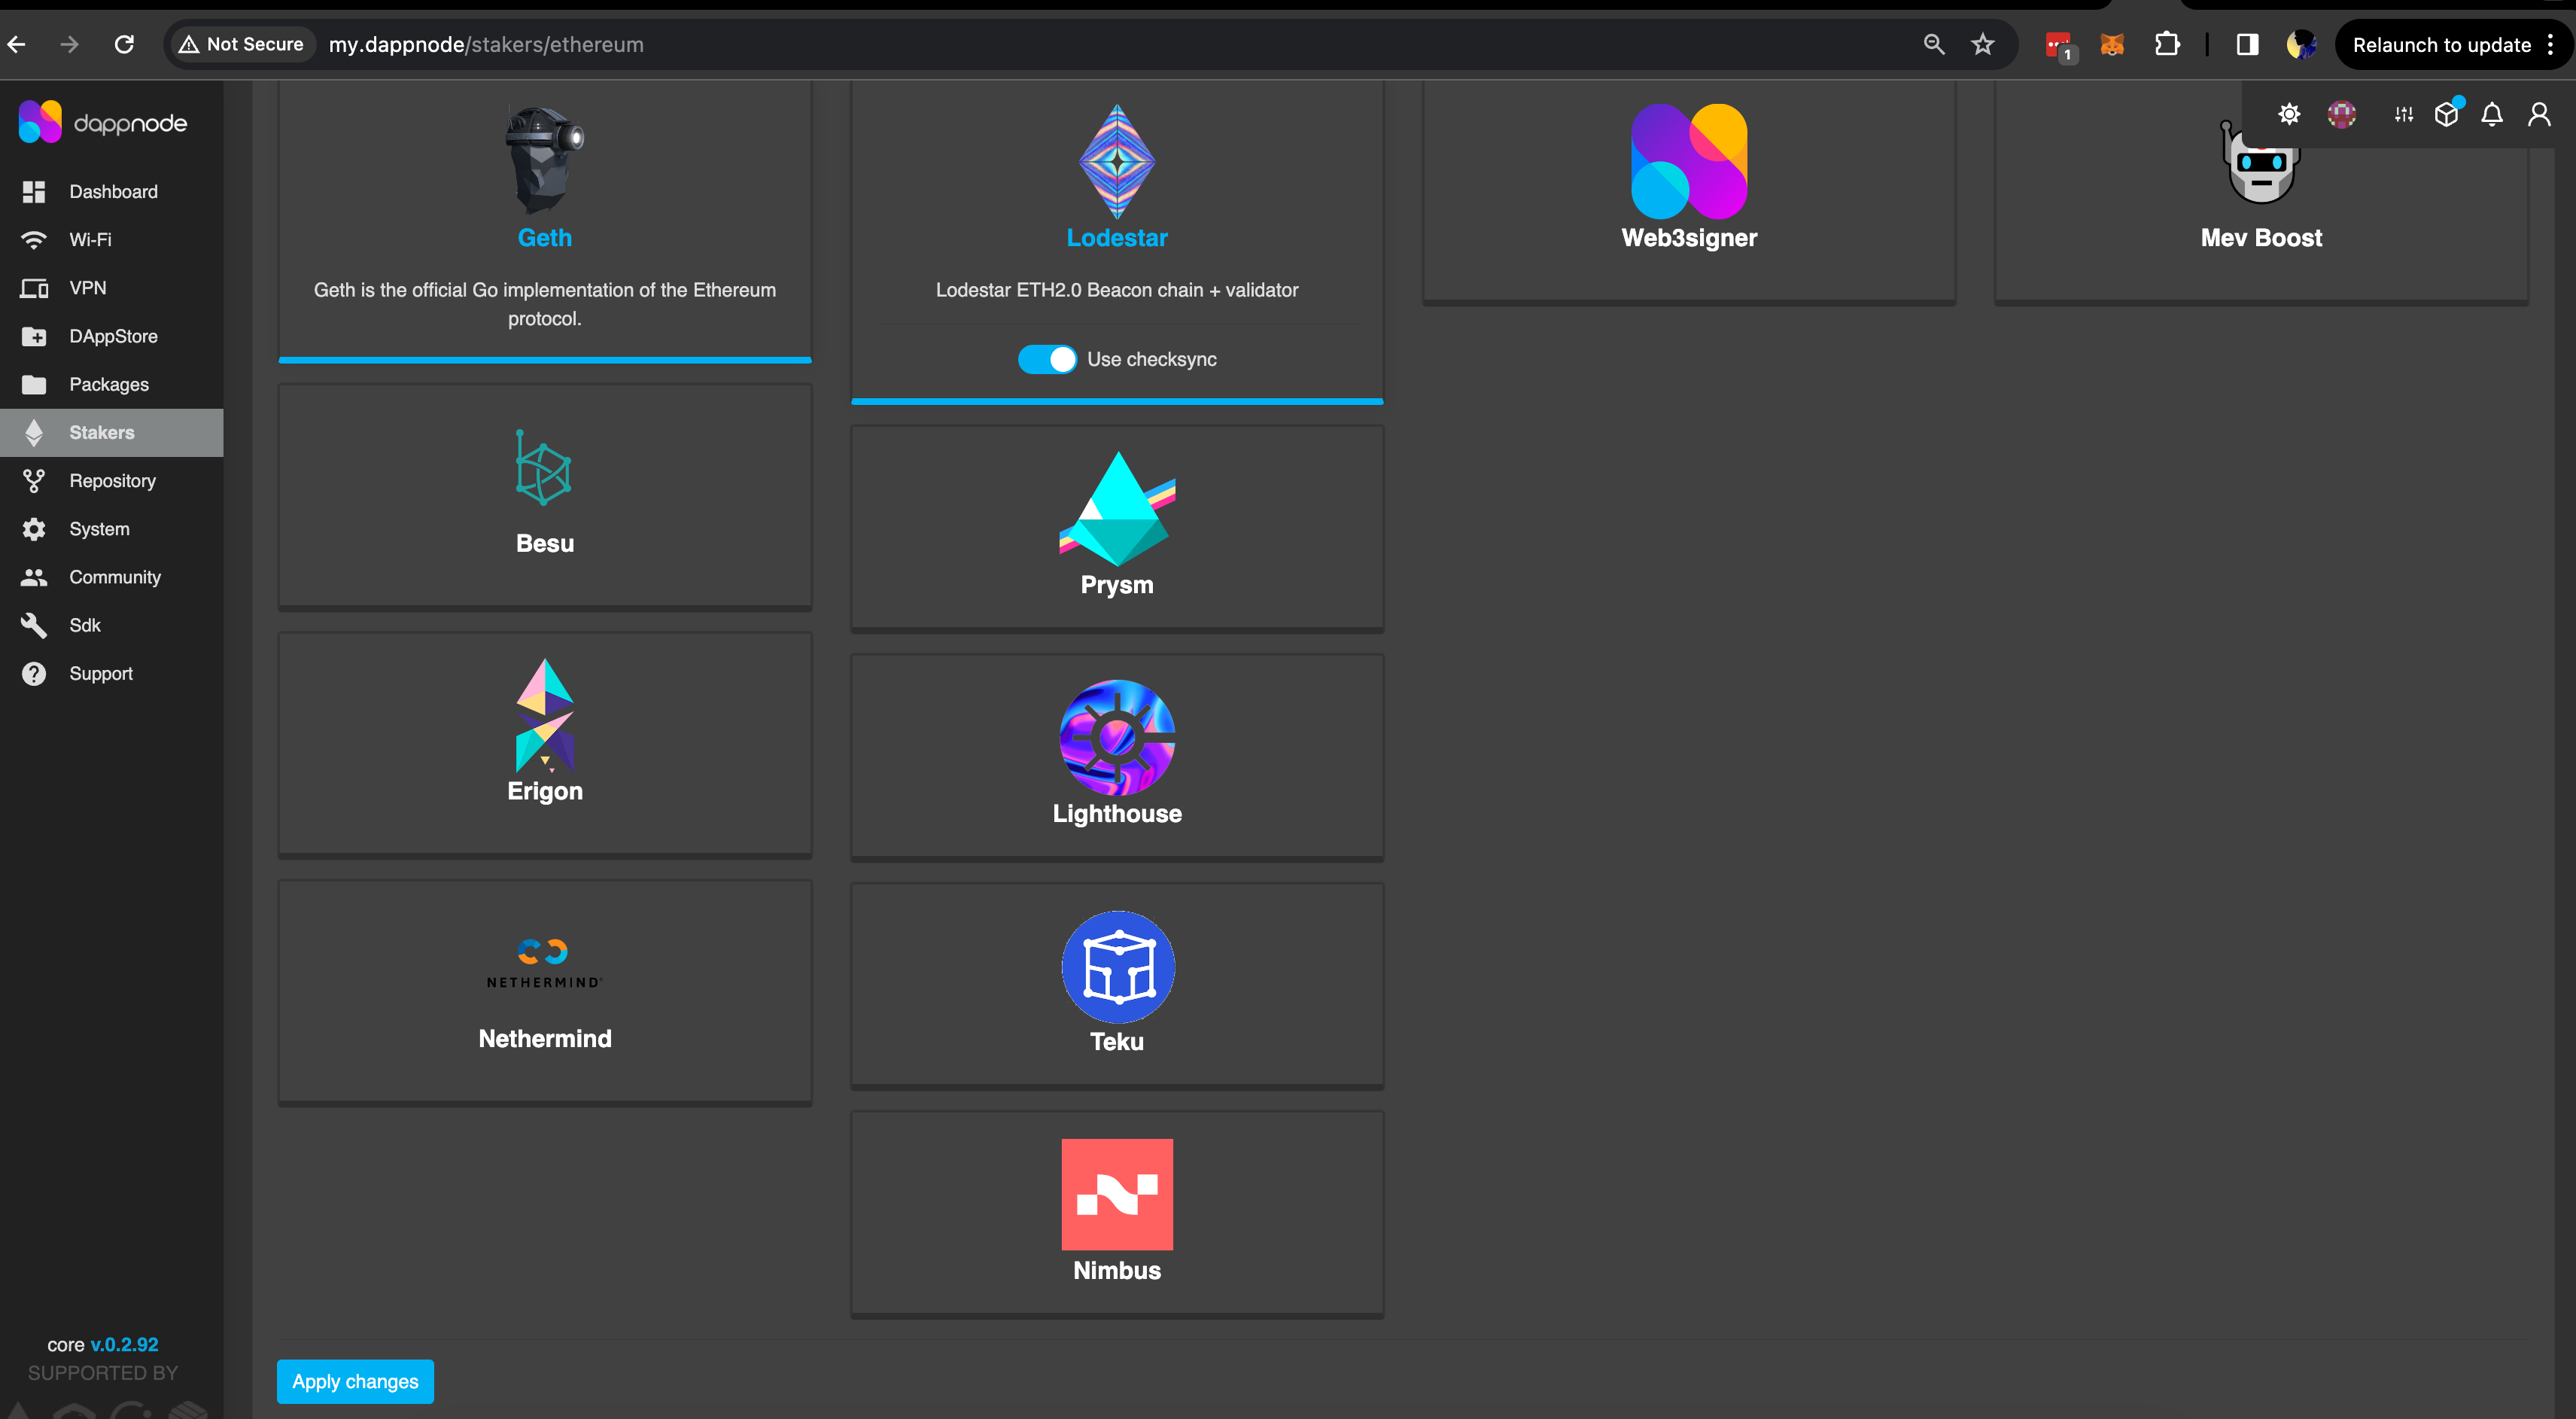
3. Once the clients are finished syncing, it should reflect on your 'Dashboard' as shown below.
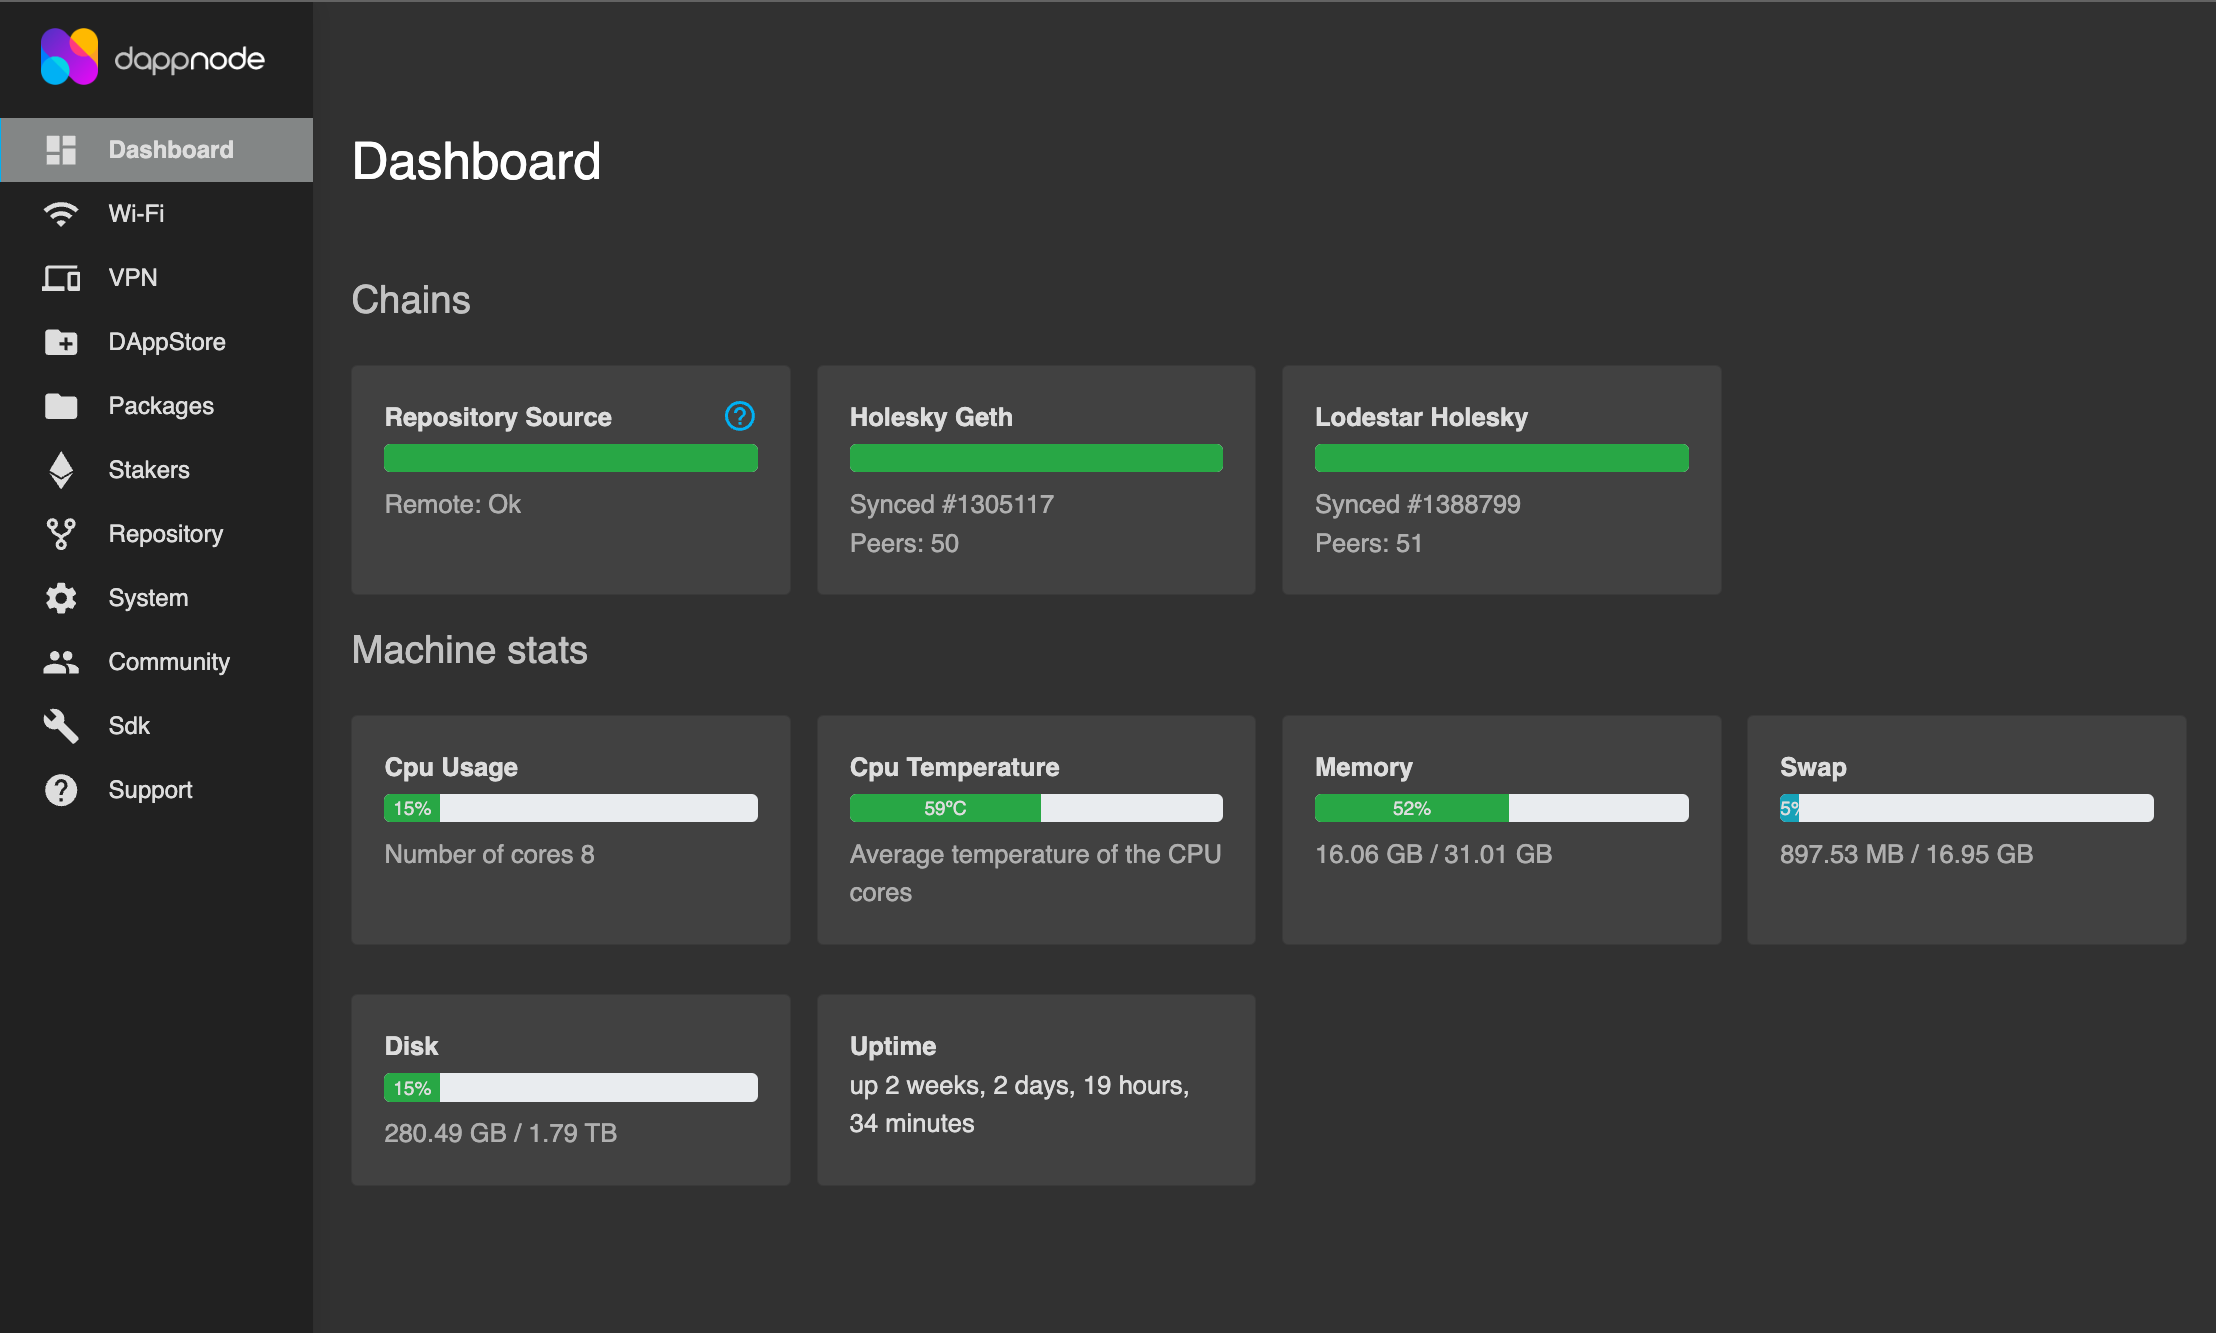
**Install the Obol DappNode package**
With a fully synced Ethereum node now running on the DappNode, the below steps will walk through installing the Obol package via an IPFS hash and preparing for a Distributed Key Generation ceremony. Future versions of this guide will download the package from the official DappNode DappStore once a stable 1.0 release is made.
1. Before installing the package, make sure you are installing the correct one for Mainnet. You can find the link to the package below:
* [Mainnet Repo](http://my.dappnode/installer/dnp/obol.dnp.dappnode.eth)
2. Copy the latest IPFS hash from the release details dropdown.
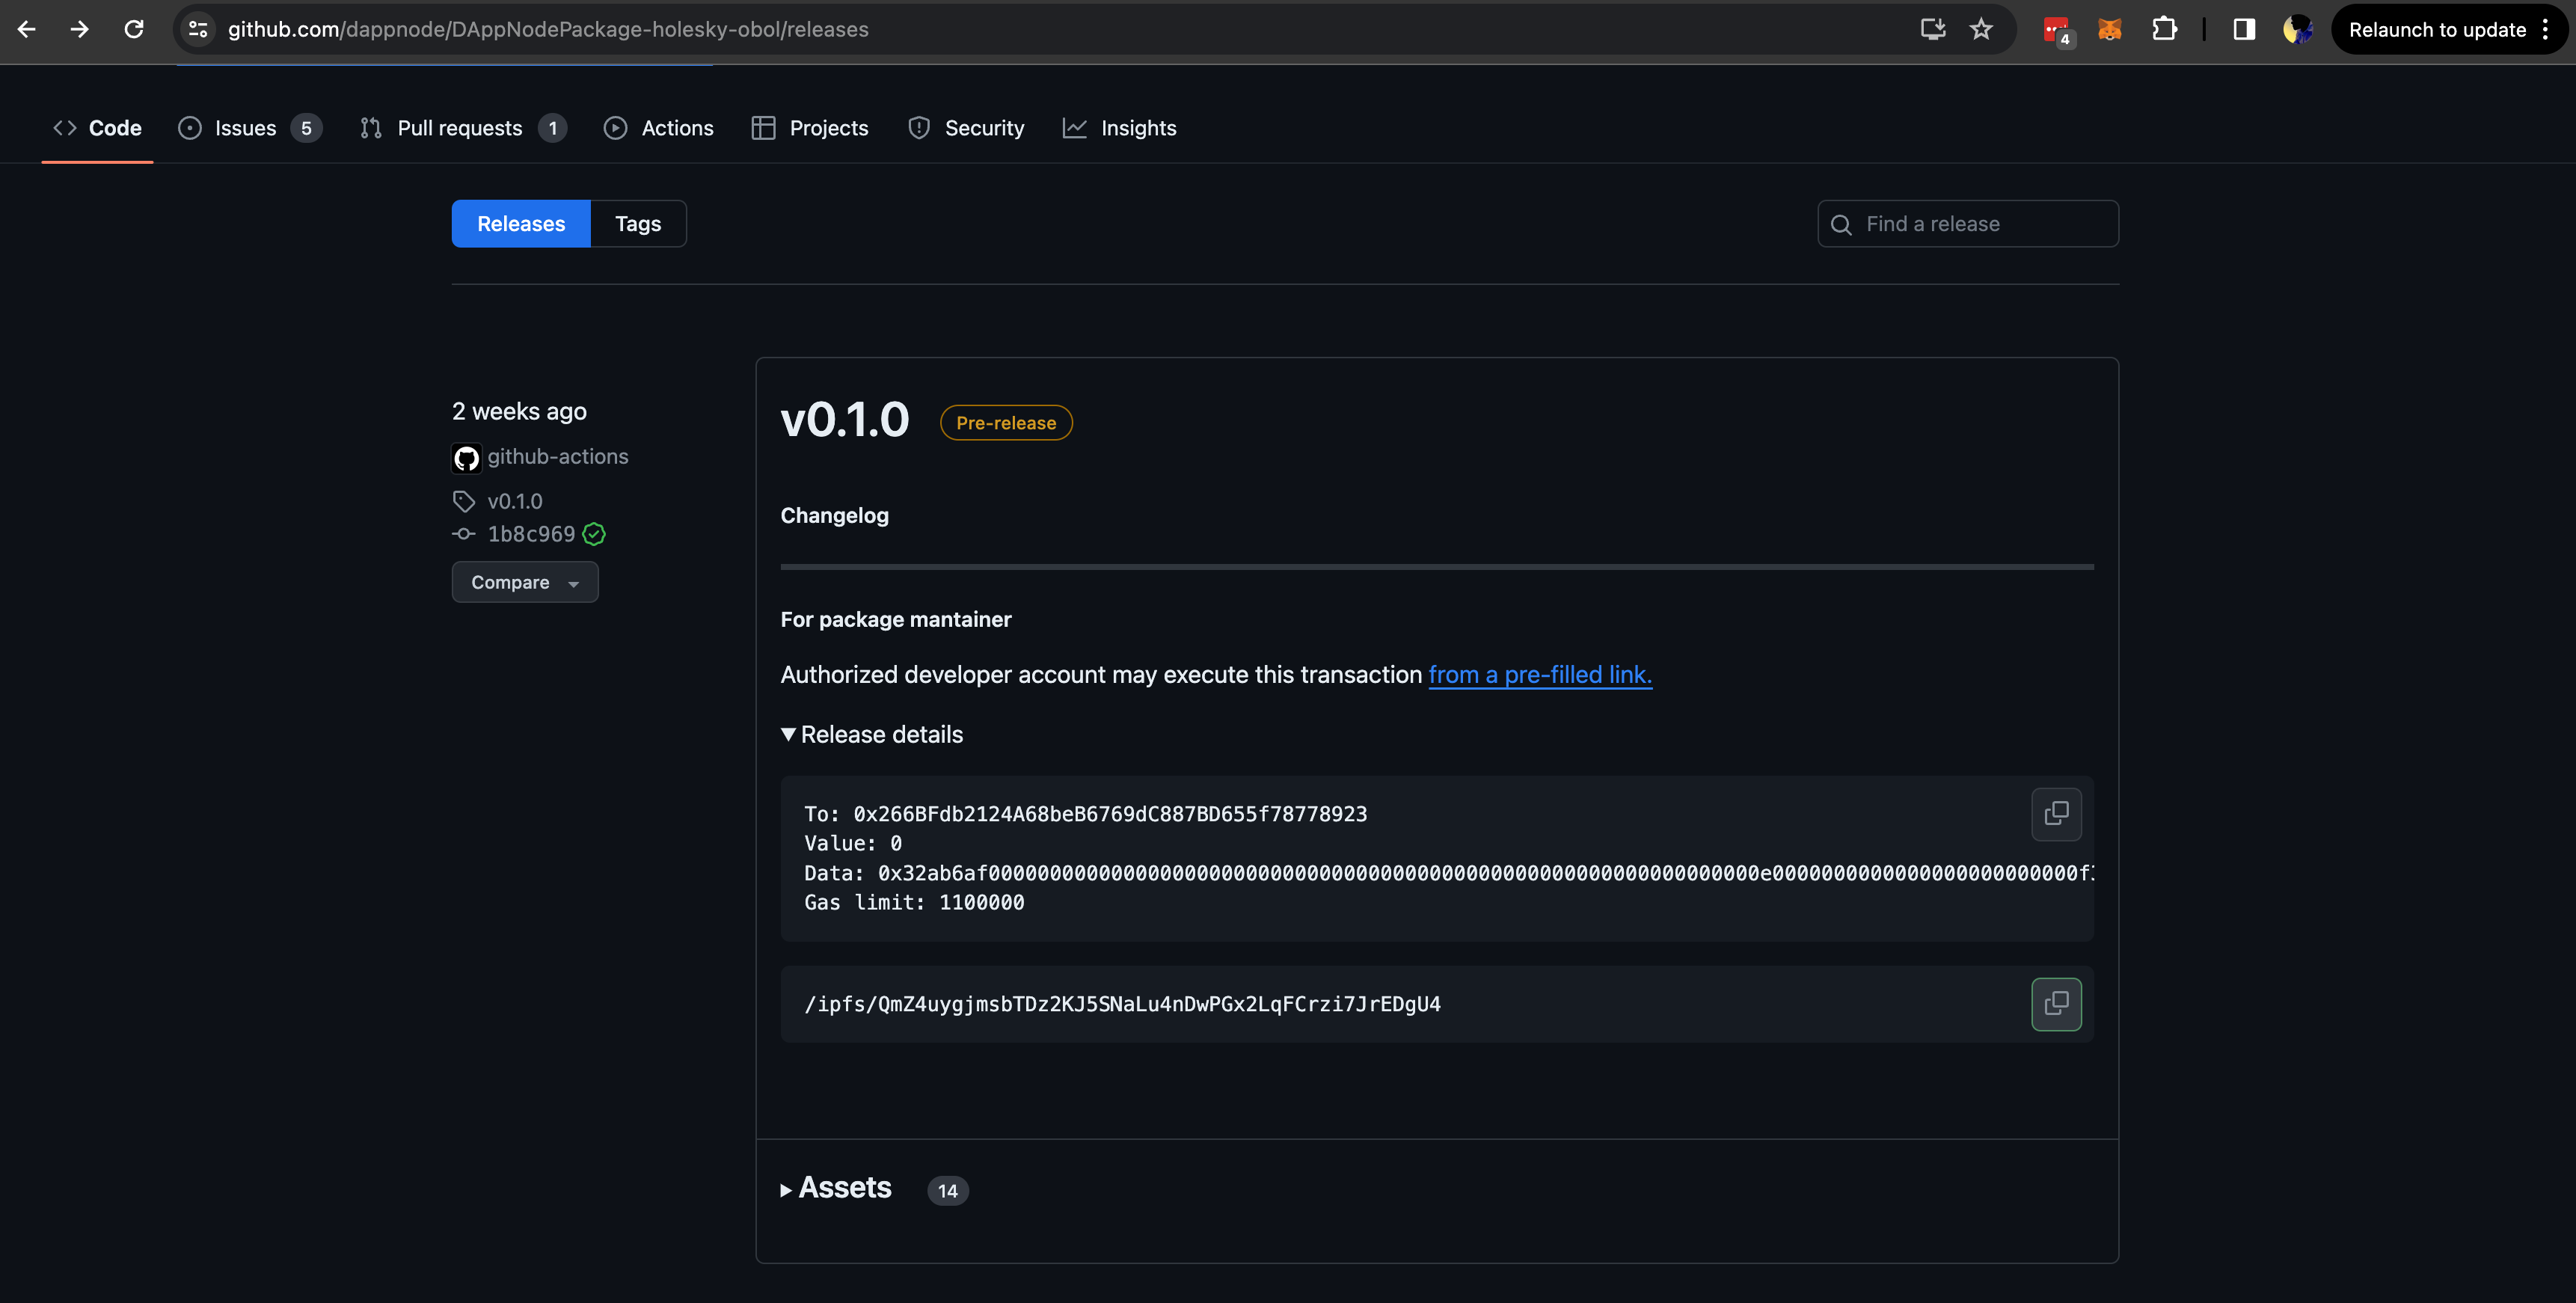
3. Go back to DappNode Dashboard > Dappstore, select the 'Public' tab, and accept the terms & conditions before proceeding.
4. Paste the IPFS hash you copied from Github and click 'Search' (It may take a minute for the package to be found.) You will then be presented with the package installation page. Under the blue 'Install' button, click on 'Advanced Options' & toggle the button to 'Bypass only signed safe restriction'.
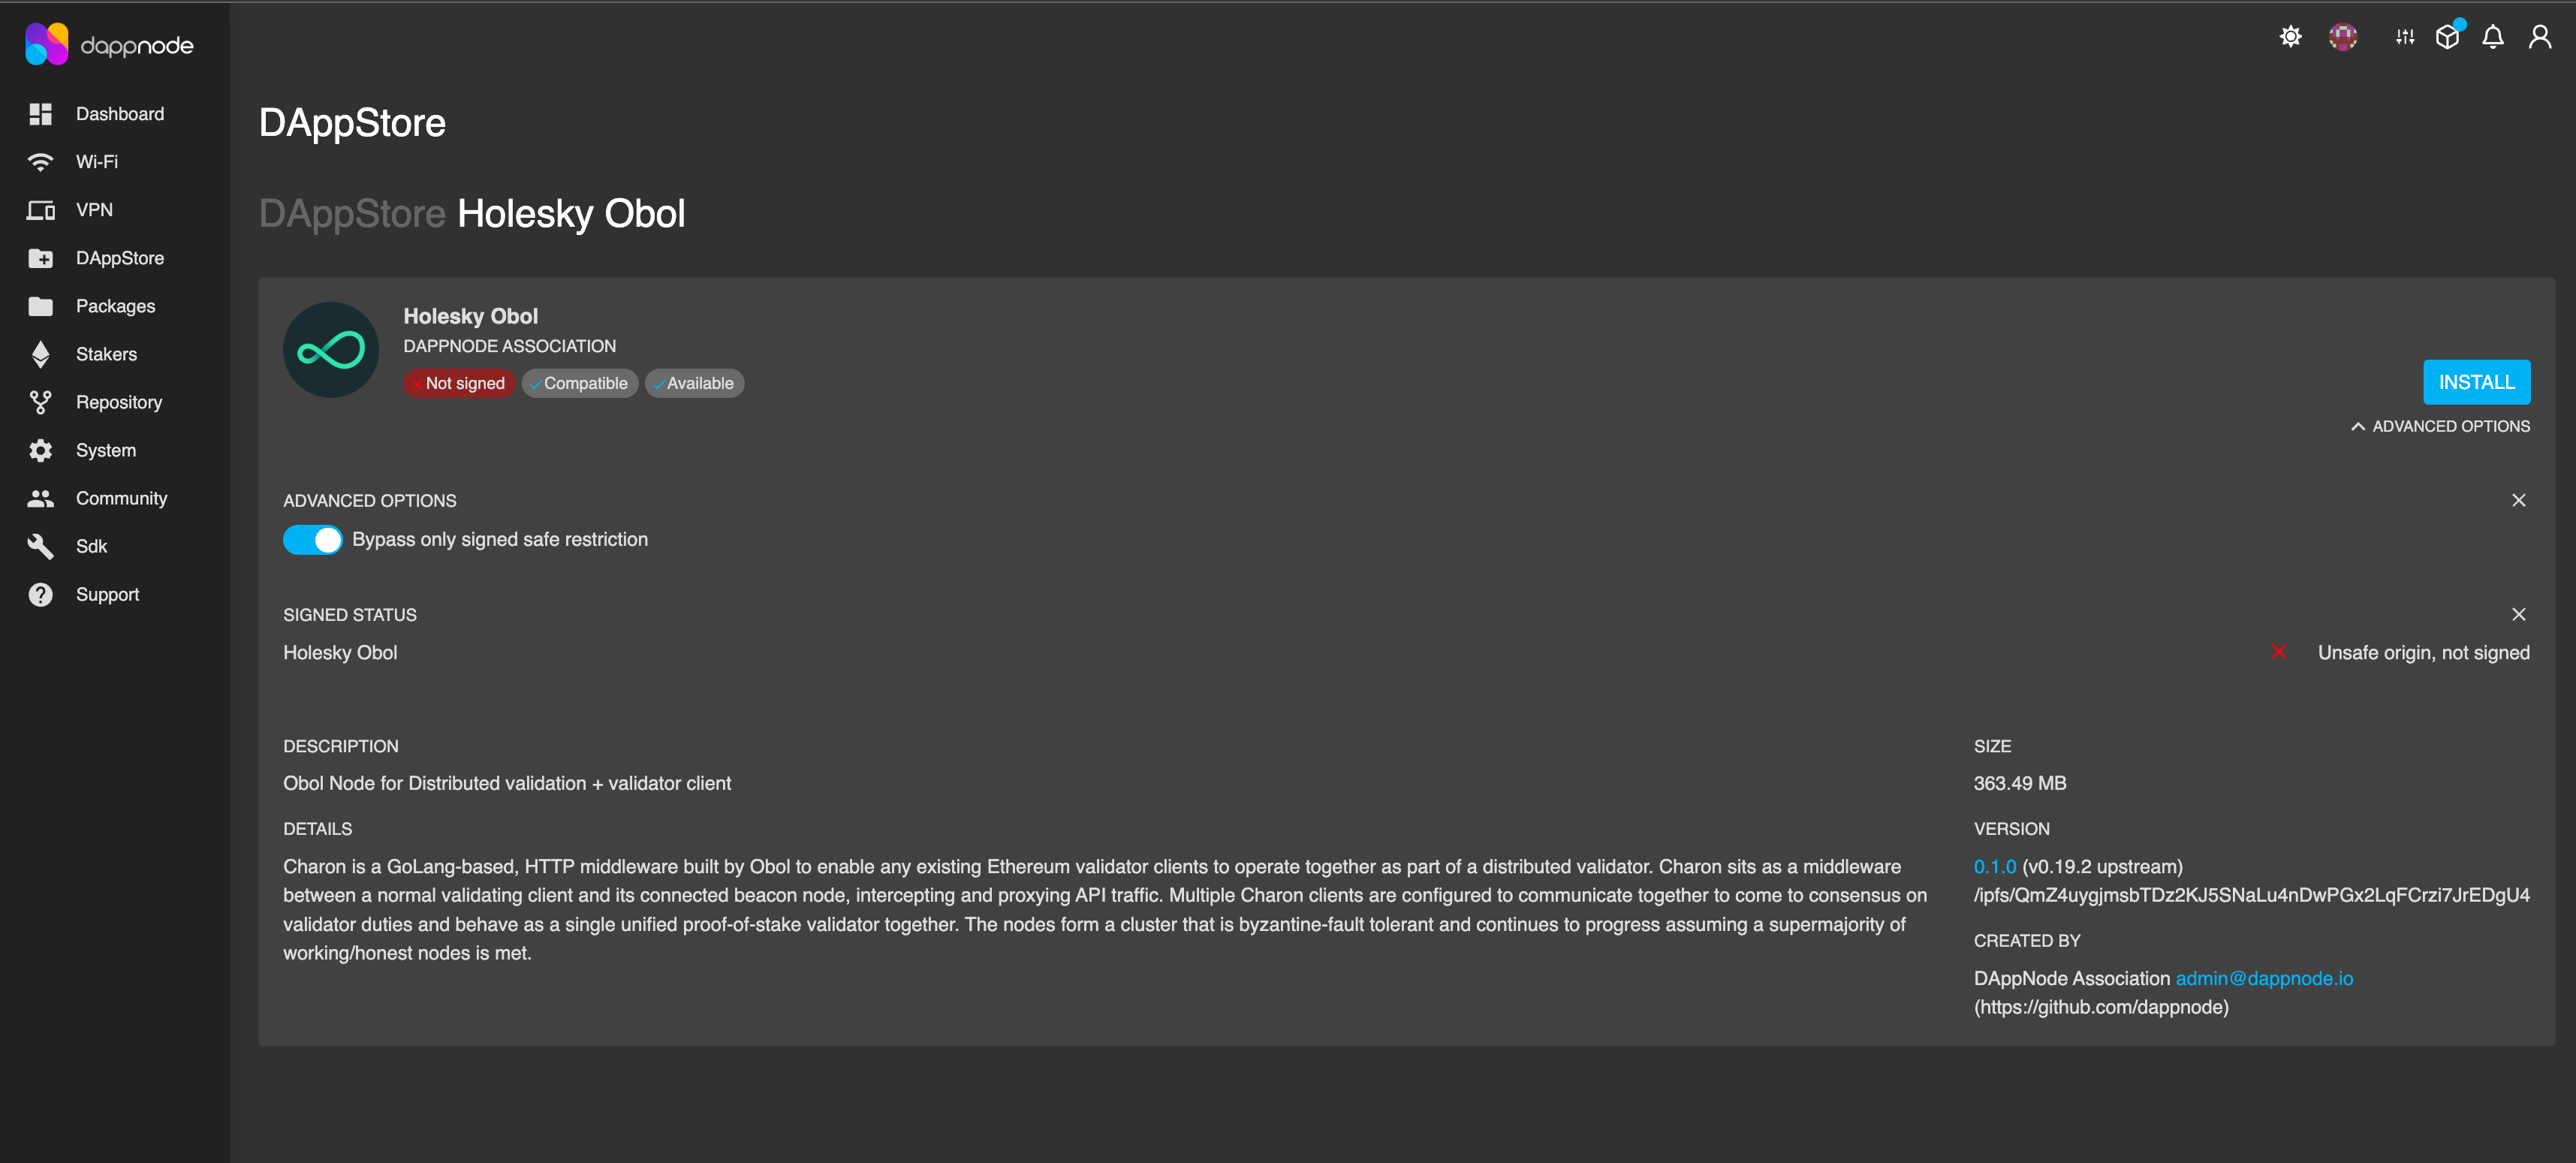
5. Click 'Install' & in the config mode page > select new cluster & submit. (if you already have the config URL, you can select URL option.)
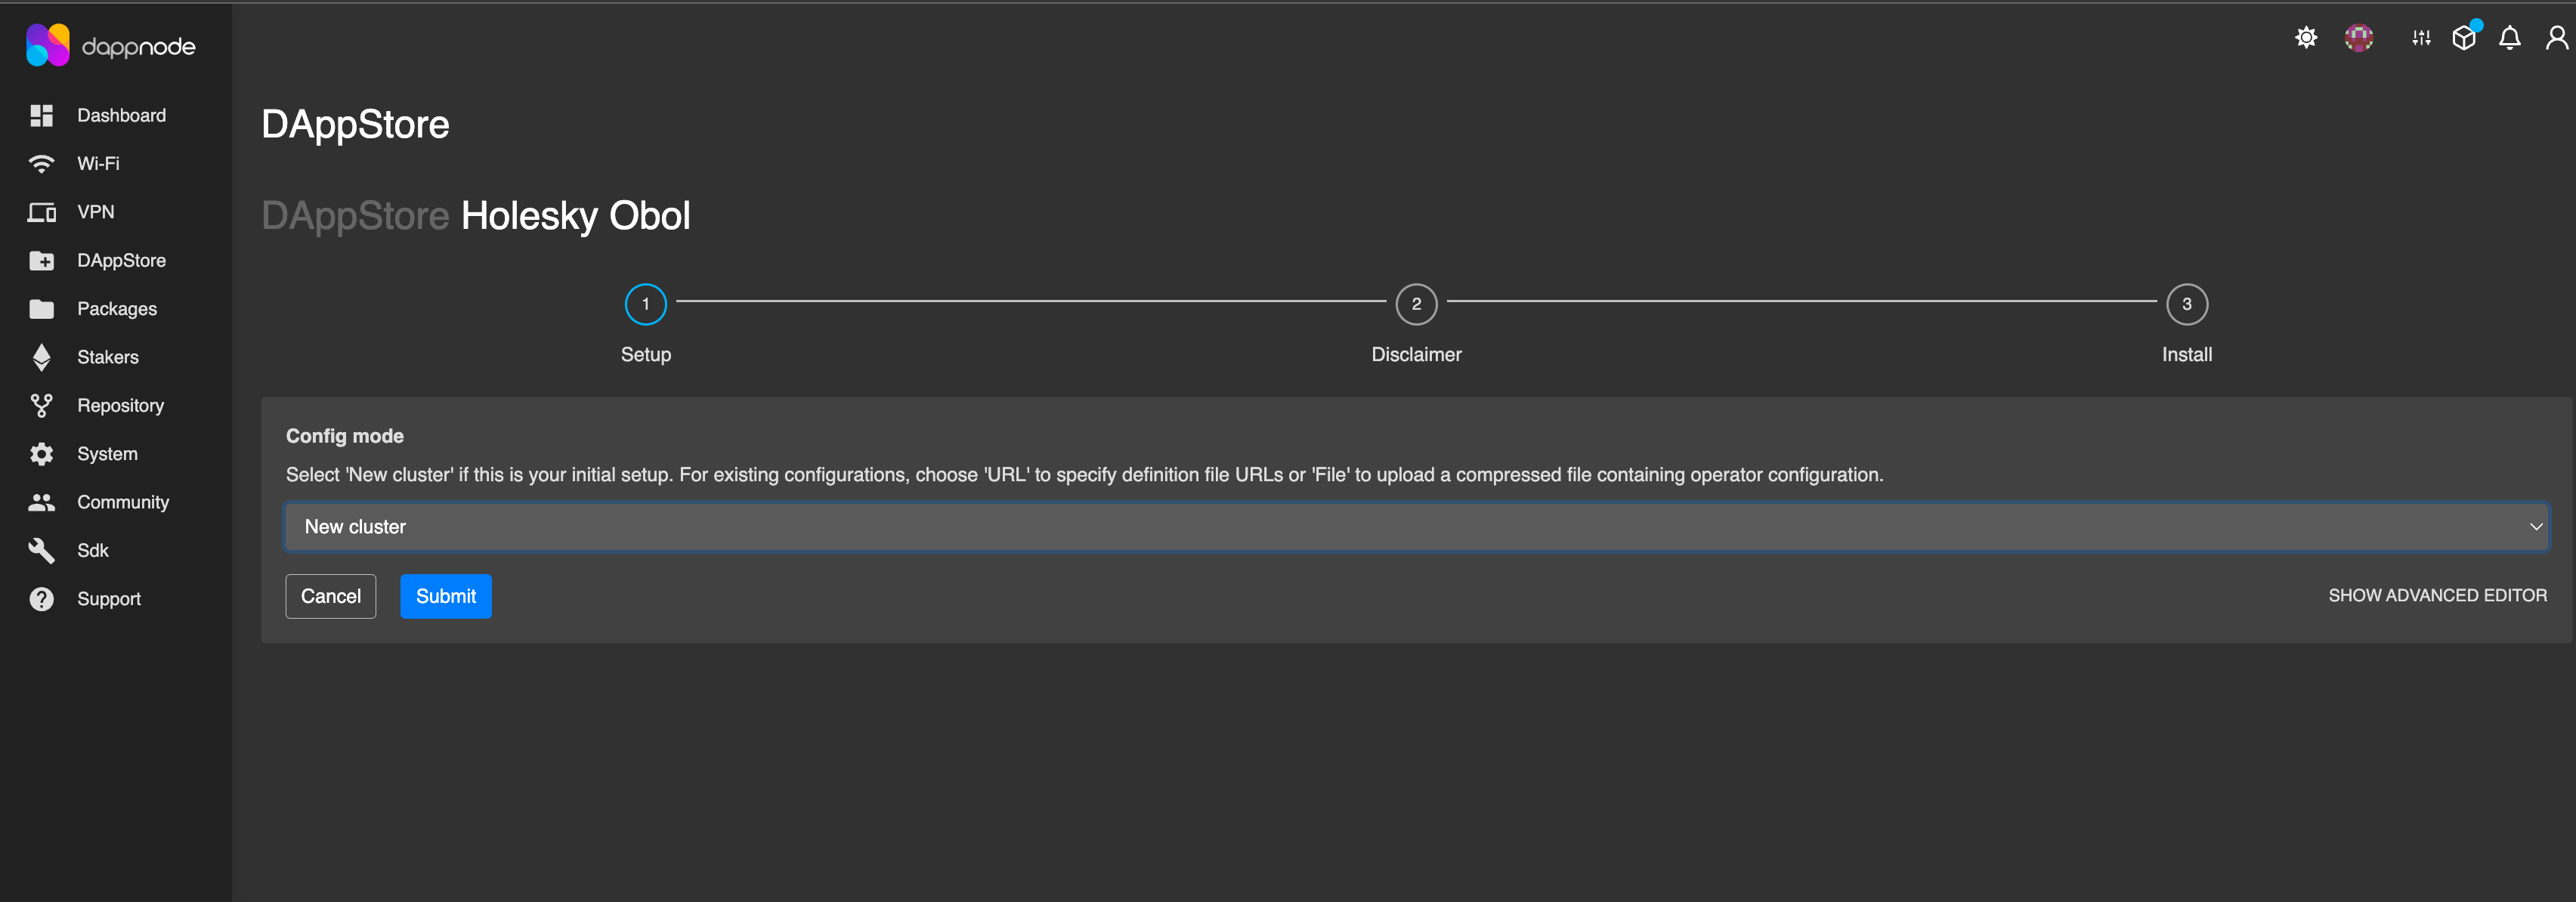
6. Accept the terms & conditions and the install process will begin.
7. You should now be able to see the Obol package under the 'Packages' tab. Click on the package to see important details.
8. Under the 'Info' tab, you will see pre-generated ENRs, along with information such as the status of all five distributed validator clusters, their docker volumes & other menu options.
9. Select any of the ENRs listed that are not already in use. This ENR will be used in the next step.
For Step 2 of the quickstart:
* Select the **Creator** tab if you are coordinating the creation of the cluster (this role holds no position of privilege in the cluster, it only sets the initial terms of the cluster that the other operators agree to).
* Select the **Operator** tab if you are accepting an invitation to operate a node in a cluster, proposed by the cluster creator.
**Installing Sedge**
First you must install Sedge, please refer to the [official Sedge installation guide](https://docs.sedge.nethermind.io/docs/quickstart/install-guide) to do so.
**Check the install was successful**
Run the below command to check if your have successfully installed sedge in your computer.
```
sedge
```
Expected output:
```sh
A tool to allow deploying validators with ease.
Usage:
sedge [command]
Available Commands:
cli Generate a node setup interactively
clients List supported clients
deps Manage dependencies
down Shutdown sedge running containers
generate Generate new setups according to selected options
help Help about any command
import-key Import validator keys
keys Generate keystore folder
logs Get running container logs
networks List supported networks
run Run services
show Show useful information about sedge running containers
slashing-export Export slashing protection data
slashing-import Import slashing protection data
version Print sedge version
Flags:
-h, --help help for sedge
--log-level string Set Log Level, e.g panic, fatal, error, warn, warning, info, debug, trace (default "info")
Use "sedge [command] --help" for more information about a command.
```
Create an ENR using charon:
```sh
# Use docker to create an ENR. Backup the file `.charon/charon-enr-private-key`.
docker run --rm -v "$(pwd):/opt/charon" obolnetwork/charon:v1.10.3 create enr
```
For Step 2 of the quickstart:
* Select the **Creator** tab if you are coordinating the creation of the cluster (this role holds no position of privilege in the cluster, it only sets the initial terms of the cluster that the other operators agree to).
* Select the **Operator** tab if you are accepting an invitation to operate a node in a cluster, proposed by the cluster creator.
In order to prepare for a distributed key generation ceremony, you need to create an ENR for your Charon client. When deploying with Helm, the chart can automatically generate an ENR and store it as a Kubernetes secret.
**1. Add the Obol Helm repository:**
```sh
helm repo add obol https://obolnetwork.github.io/helm-charts
helm repo update
```
**2. Install the chart with your operator address:**
```sh
helm install my-dv-pod obol/dv-pod \
--set='charon.operatorAddress=' \
--set='charon.beaconNodeEndpoints[0]='
```
The chart will automatically generate an ENR private key and store it as a Kubernetes secret. The DKG sidecar init container will then poll the Obol API for cluster invites associated with your operator address.
**3. Retrieve your ENR to share with the cluster creator:**
```sh
kubectl get secret -l app.kubernetes.io/name=dv-pod -o jsonpath='{.items[0].data.enr}' | base64 -d
```
:::warning
The ENR secret **must** be created in the same namespace where the Helm chart is installed. If the secret exists in a different namespace, the ENR job will regenerate a new key, potentially overriding your intended configuration.
:::
:::info
If you already have an ENR private key (e.g., generated via docker), you can provide it to the chart instead of auto-generating:
```sh
kubectl create secret generic charon-enr-private-key \
--from-file=charon-enr-private-key=.charon/charon-enr-private-key
```
The chart will detect this existing secret and use it rather than generating a new one.
:::
For Step 2 of the quickstart:
* Select the **Creator** tab if you are coordinating the creation of the cluster (this role holds no position of privilege in the cluster, it only sets the initial terms of the cluster that the other operators agree to).
* Select the **Operator** tab if you are accepting an invitation to operate a node in a cluster, proposed by the cluster creator.
### Step 2: Create a cluster or accept an invitation to a cluster {#step-2-create-a-cluster-or-accept-an-invitation-to-a-cluster}
**Collect addresses, configure the cluster, share the invitation**
Before starting the cluster creation process, you will need to collect an Ethereum address for each operator in the cluster. They will need to be able to sign messages through MetaMask with this address. _(Broader wallet support will be added in future.)_ With these addresses in hand, go through the cluster creation flow.
You will use the Launchpad to create an invitation, and share it with the operators. This video shows the flow within the [DV Launchpad](../../learn/intro/launchpad.md)
The following are the steps for creating a cluster.
1. Go to the [DV Launchpad](../../learn/intro/launchpad.md#dv-launchpad-links)
2. Connect your wallet
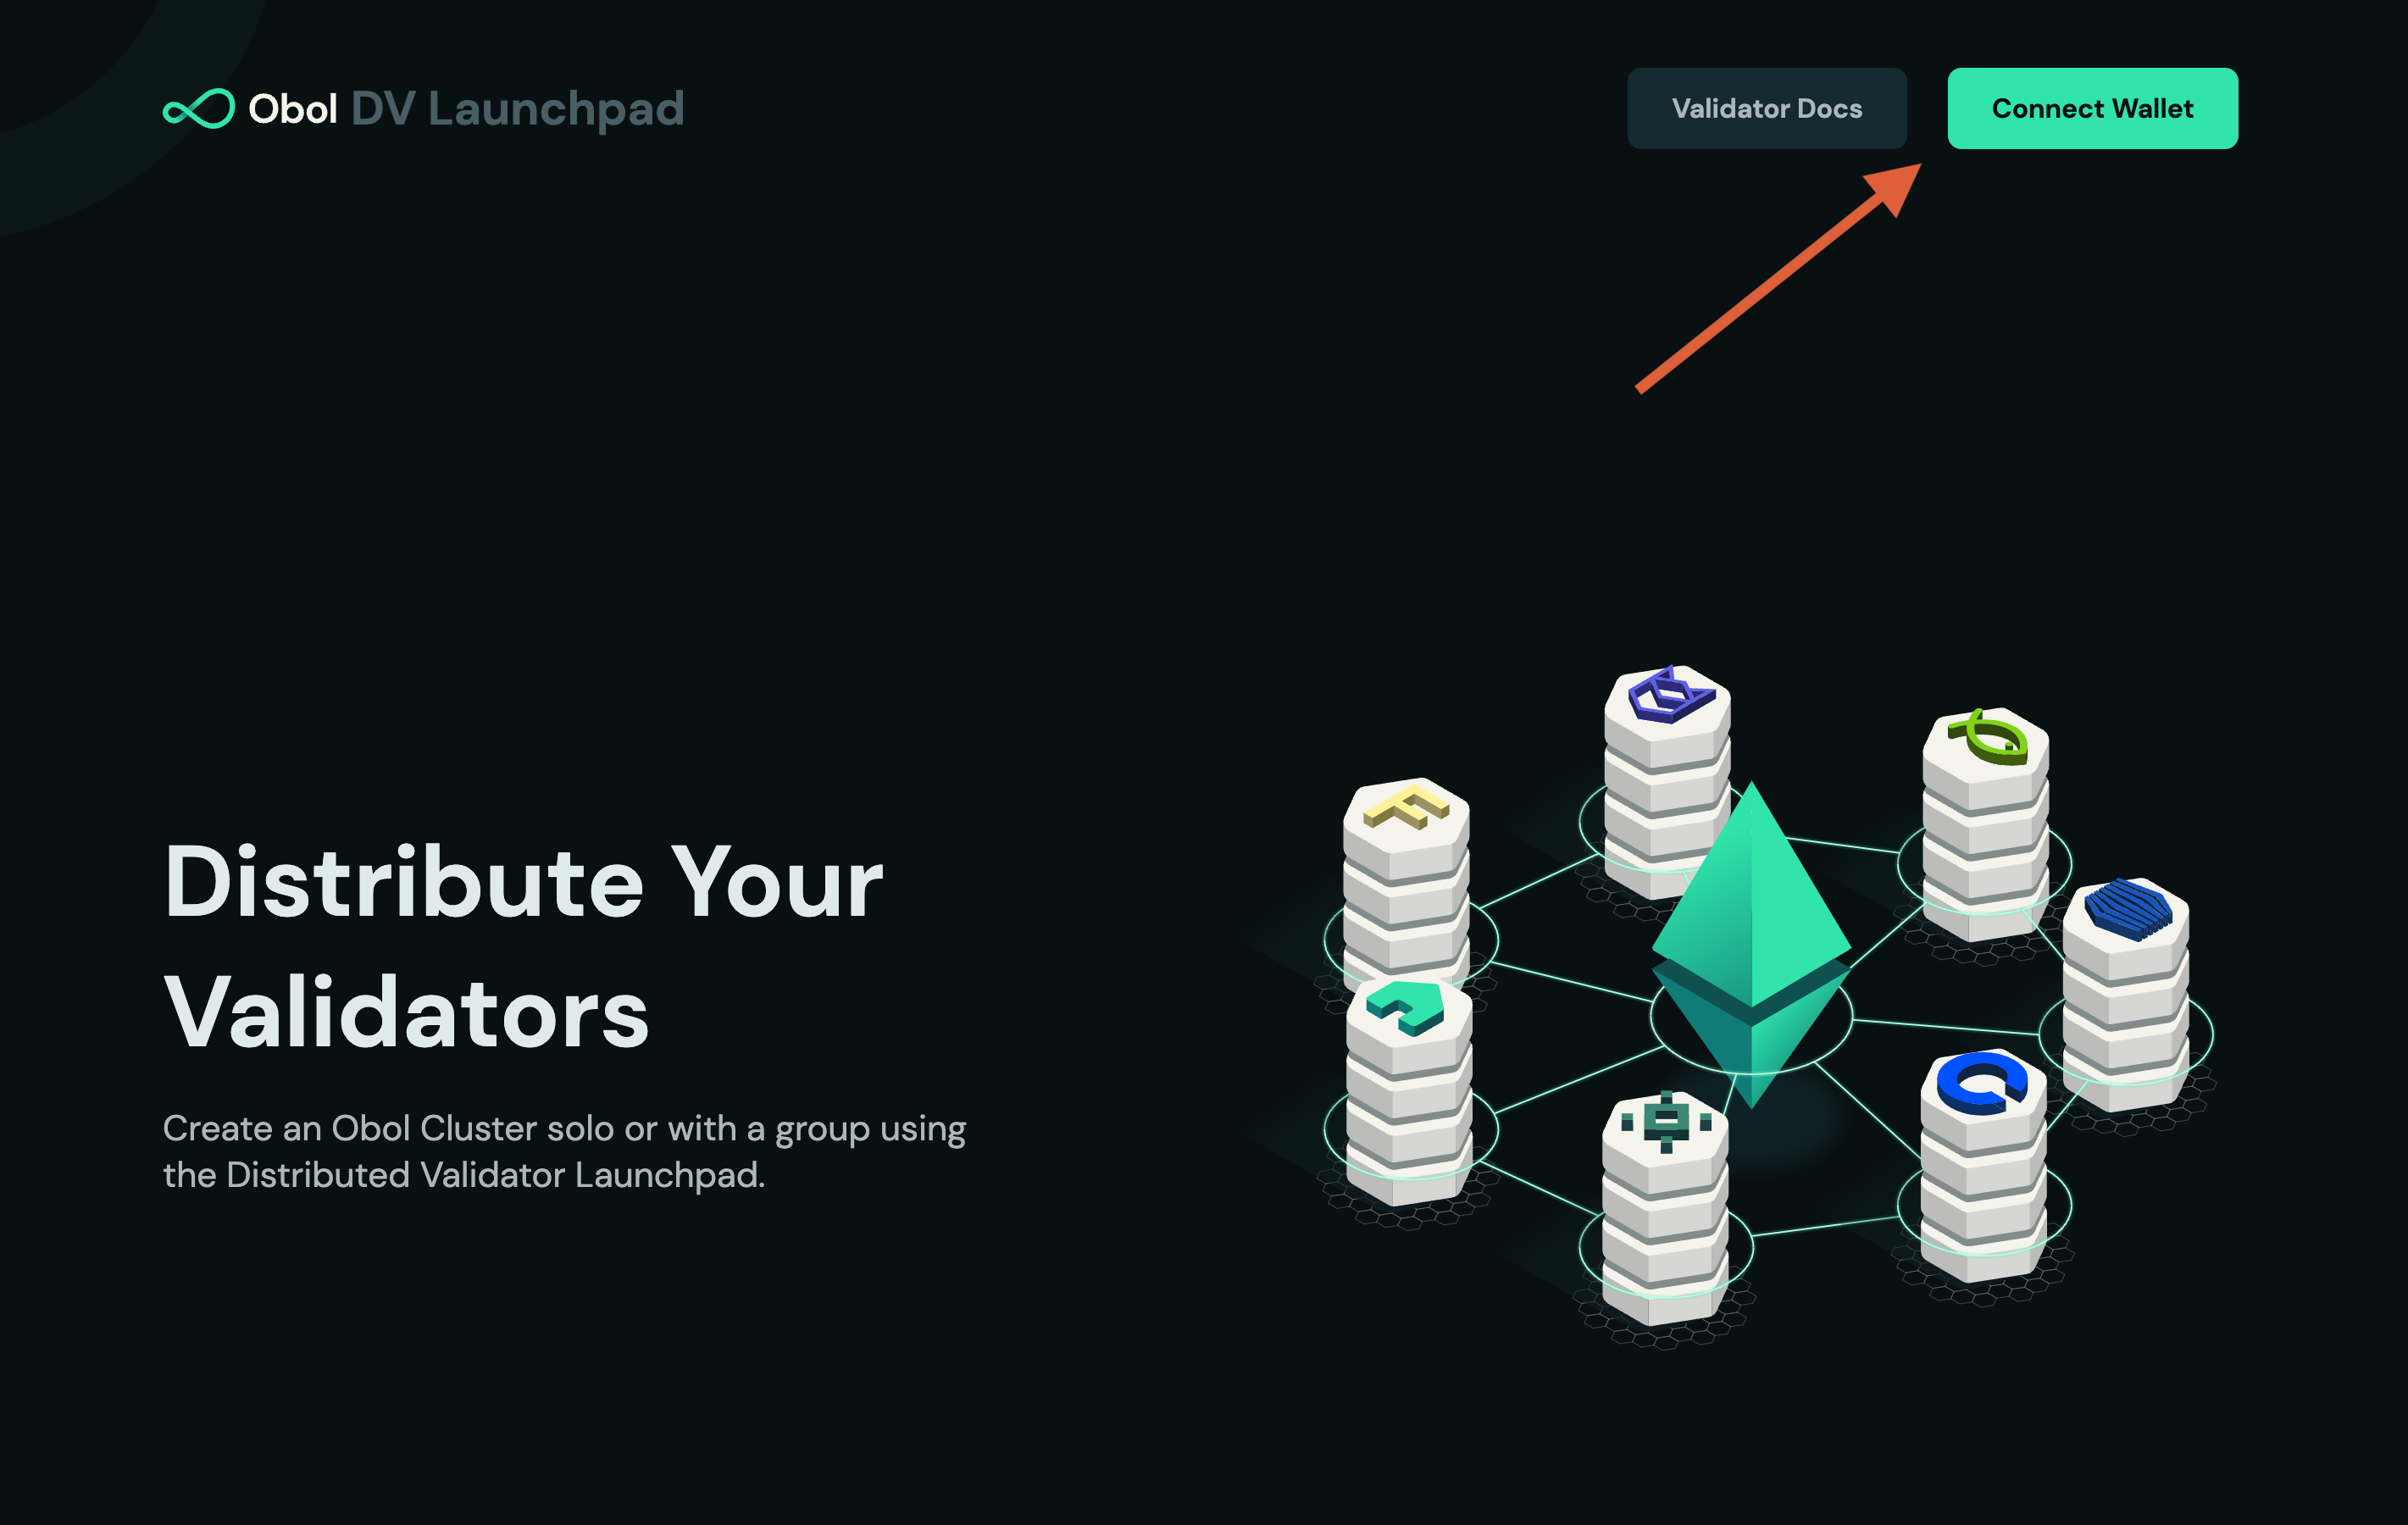
3. Select `Create a Cluster with a group` then `Get Started`.
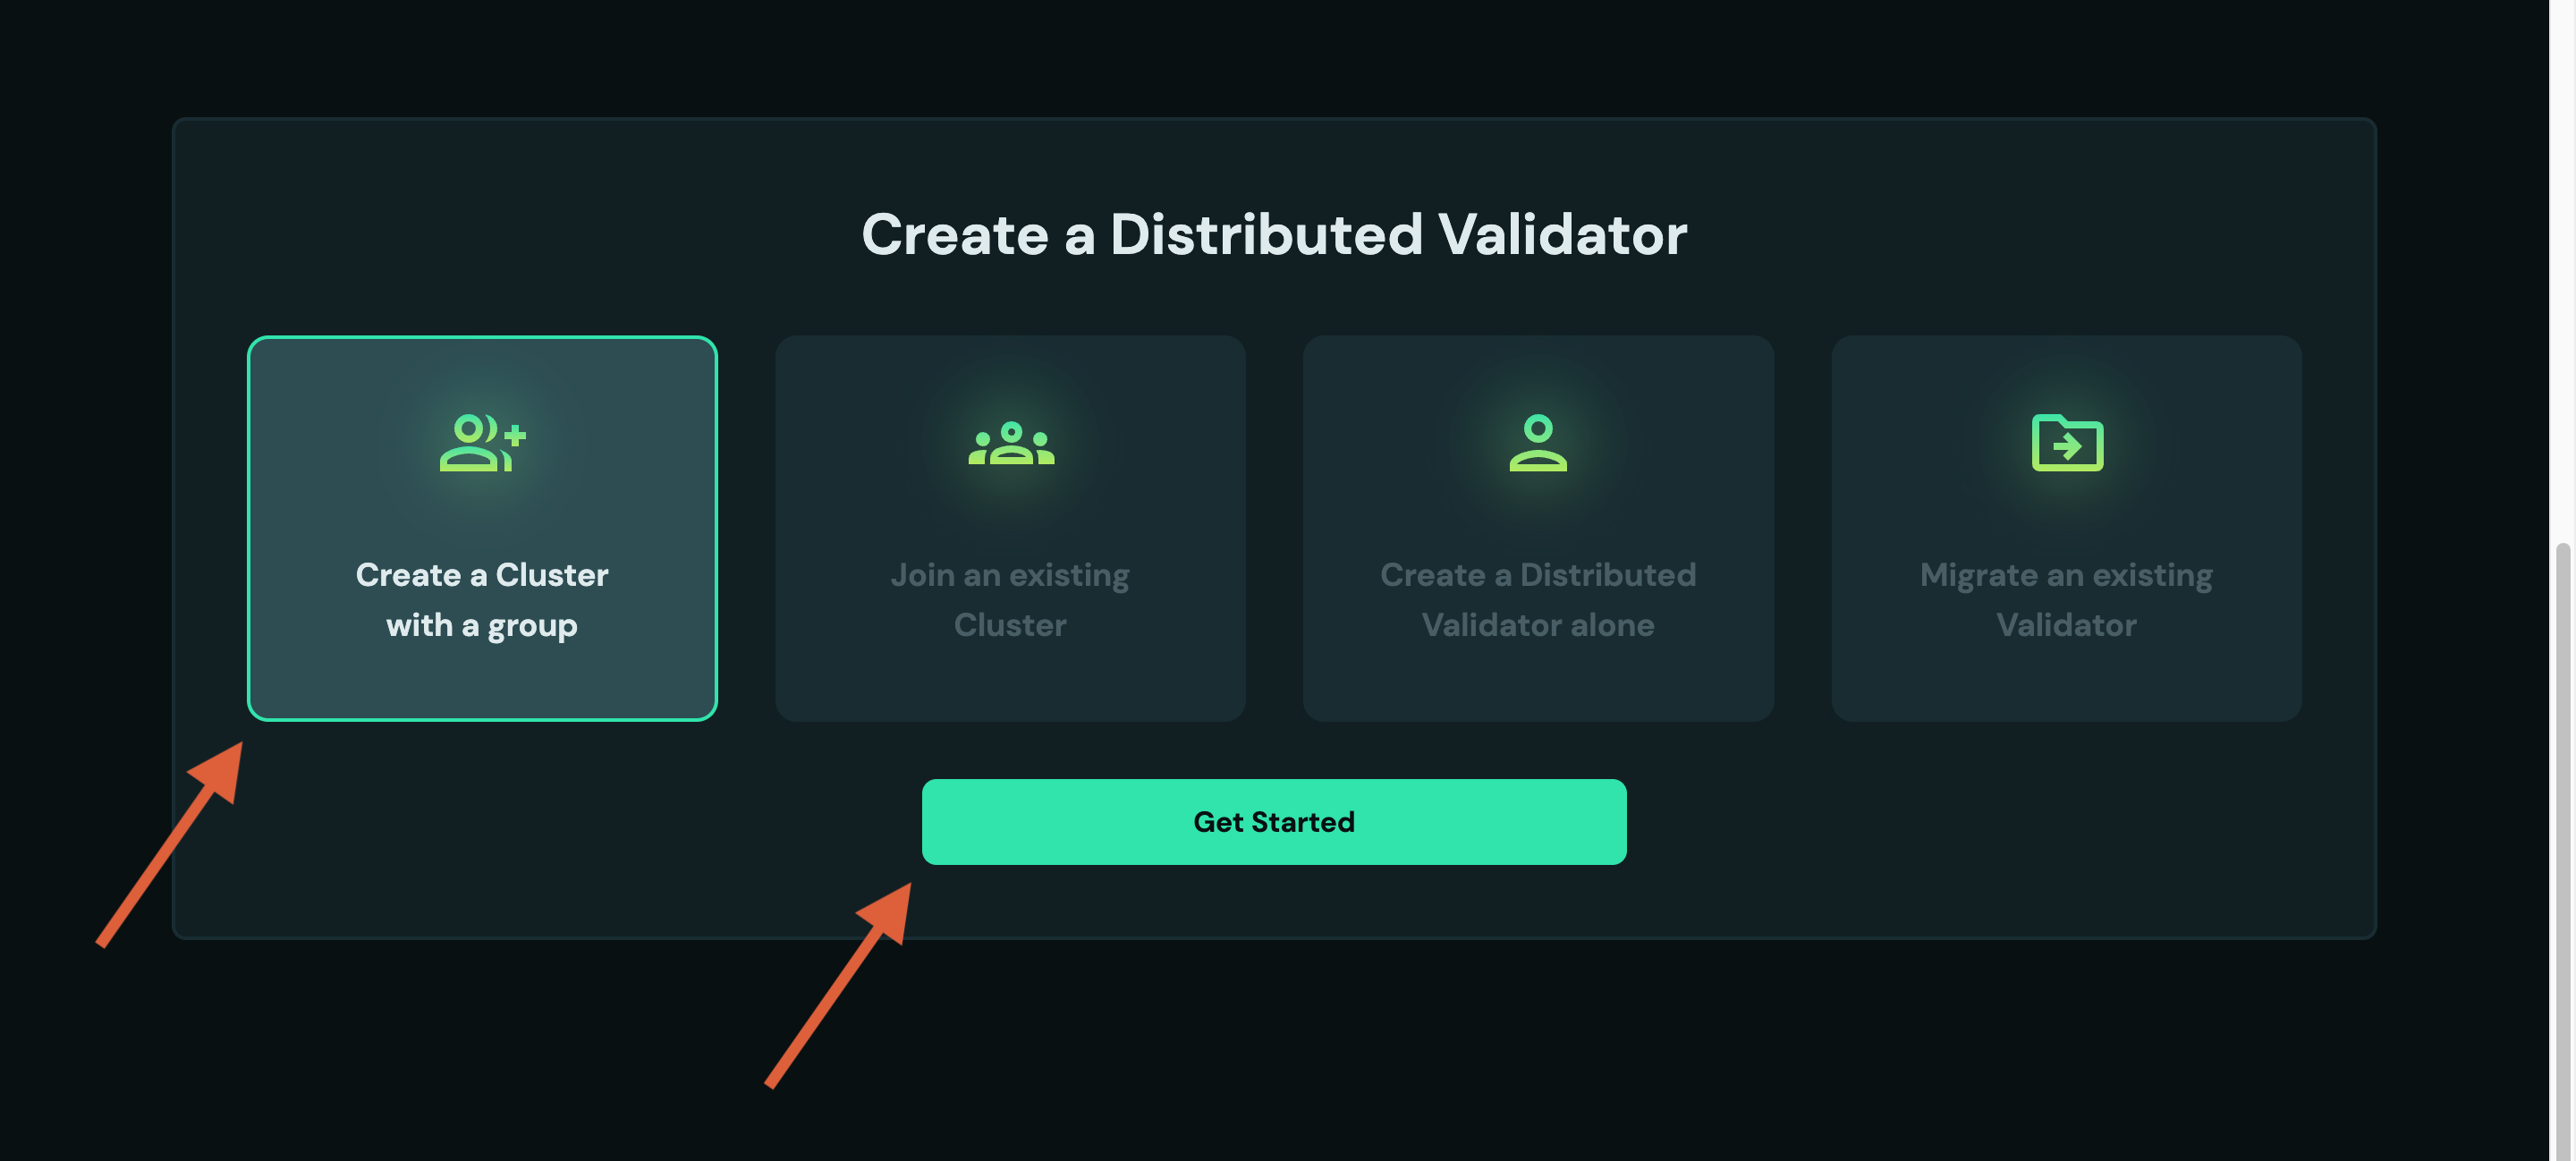
4. Follow the flow and accept the advisories.
5. Configure the Cluster
1. Input the `Cluster Name` & `Cluster Size` (i.e. number of operators in the cluster). The threshold will update automatically, it shows the number of nodes that need to be functioning for the validator(s) to stay active.
6. Input the Ethereum addresses for each operator that you collected previously. If you will be taking part as an operator, click the "Use My Address" button for Operator 1.
1. Select the desired amount of validators (32 ETH each) the cluster will run.
2. If you are taking part in the cluster, enter the ENR you generated in [step one](#step-1-get-your-enr) in the "What is your charon client's ENR?" field.
3. Choose the suitable withdrawal configuration:
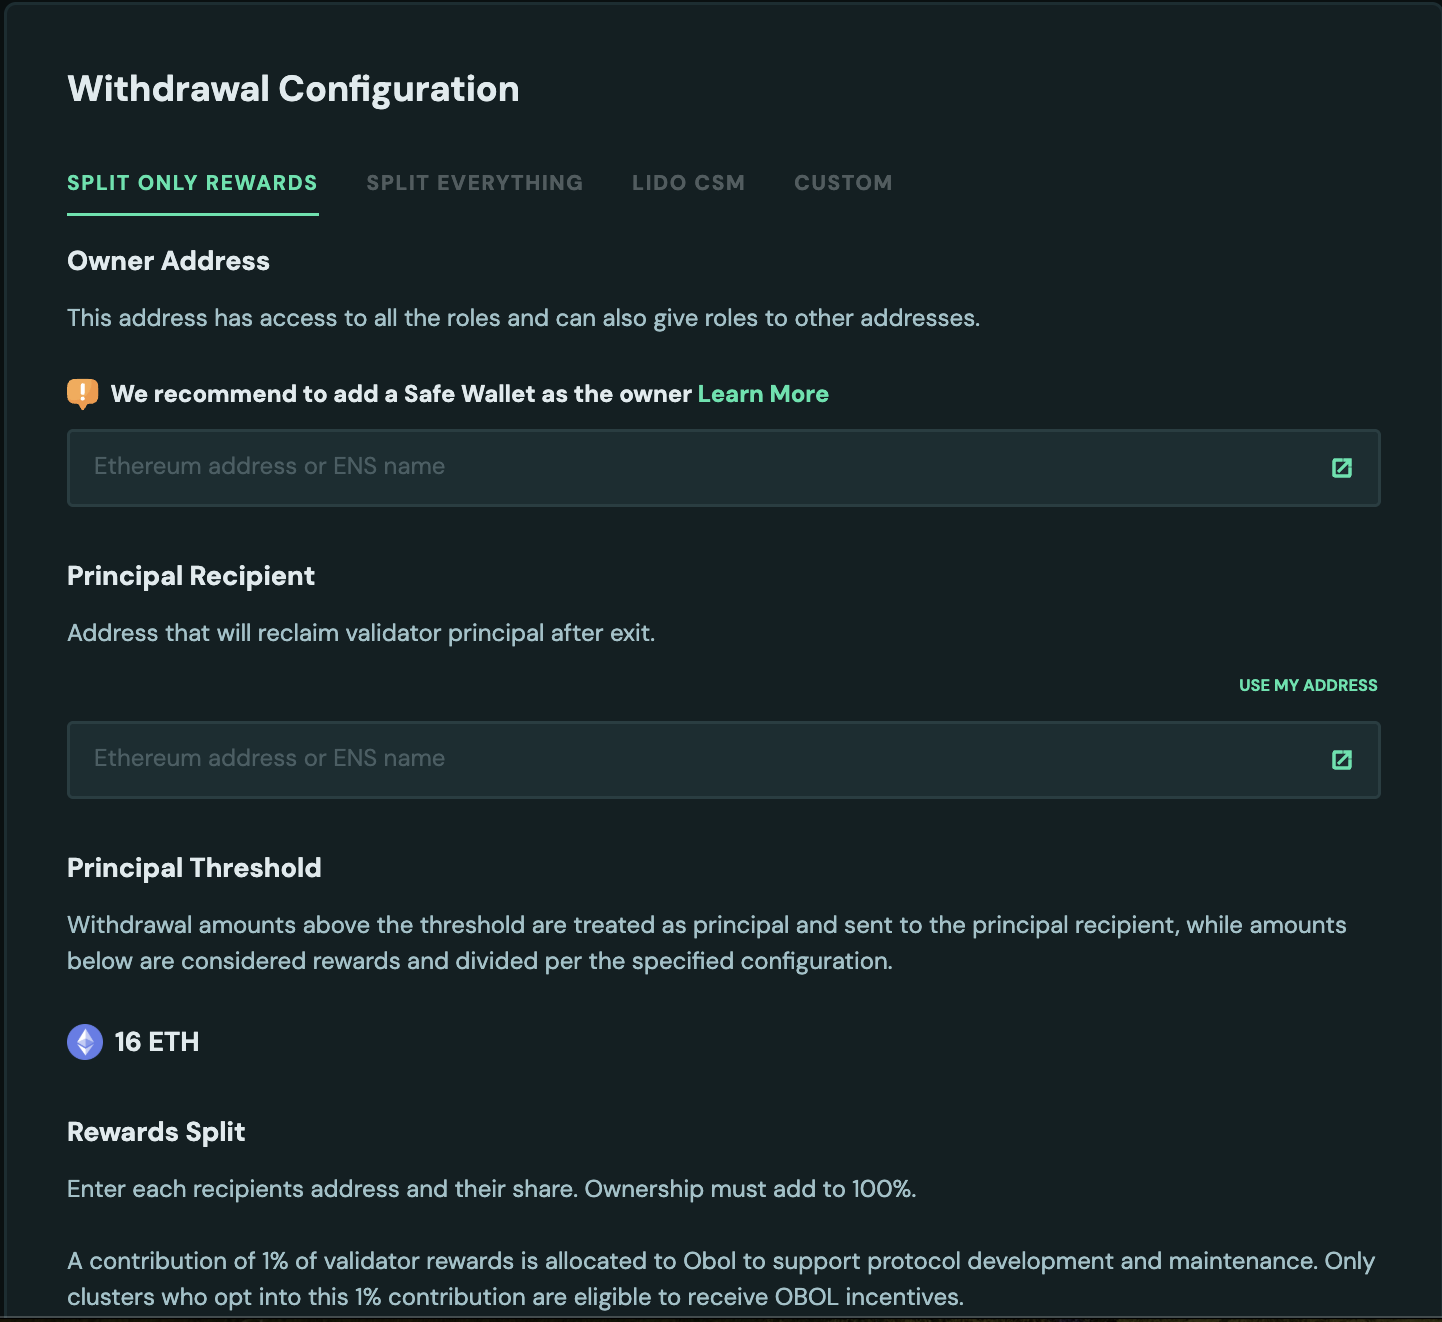
- **Split only rewards**: Deploys an OVM contract as withdrawal address to a principal address of your choice, and a splitter as fee recipient. OVM is used to distribute amounts to principal and fee recipient. It requires two inputs:
- **Owner address**: The Owner address is the super-admin of the OVM. It has access to all the roles - deposit, withdraw, distribute etc and it can also give roles to other addresses. For security purposes, it is recommended to either use a trusted address or a multi-sig wallet like [SAFE](https://app.safe.global/welcome/accounts) so all the transactions are approved by a quorum of addresses inside the SAFE. For testing purposes on Hoodi, [protofire](https://app.safe.protofire.io/home) can be used.
- **Principal address**: This is the address that will receive the amount after the principal threshold amount is crossed. Read more about it [here](../../learn/intro/obol-splits.md#obol-validator-managers) where it is explained.
- **Split Everything**: Deploys an OVM contract as withdrawal address, with principal and fee recipient addresses both as splitter contracts. In this case both principal and rewards are distributed. It just requires Owner address as input which is again recommended to be a SAFE wallet.
- **Lido CSM**: Deploys the clusters with Lido's withdrawal vault as withdrawal address and execution vault as fee recipient. Read more about the process to register CSM cluster [here](../integrations/lido-csm.mdx).
- **Custom**: Enter the `Principal address` which should receive the principal 32 ETH and the accrued consensus layer rewards when the validator is exited. This can optionally be set to the contract address of a multisig / splitter contract. Enter the `Fee Recipient address` to which the execution layer rewards will go. This can be the same as the principal address, or it can be a different address. This can optionally be set to the contract address of a multisig / splitter contract.
7. Click `Create Cluster Configuration`. Review that all the details are correct, and press `Confirm and Sign` You will be prompted to sign two or three transactions with your MetaMask wallet. These are:
1. The `config_hash`. This is a hashed representation of the details of this cluster, to ensure everyone is agreeing to an identical setup.
2. The `operator_config_hash`. This is your acceptance of the terms and conditions to participate as a node operator.
3. Your `ENR`. Signing your ENR authorizes the corresponding private key to act on your behalf in the cluster.
8. Share your cluster invite link with the operators. Following the link will show you a screen waiting for other operators to accept the configuration you created.
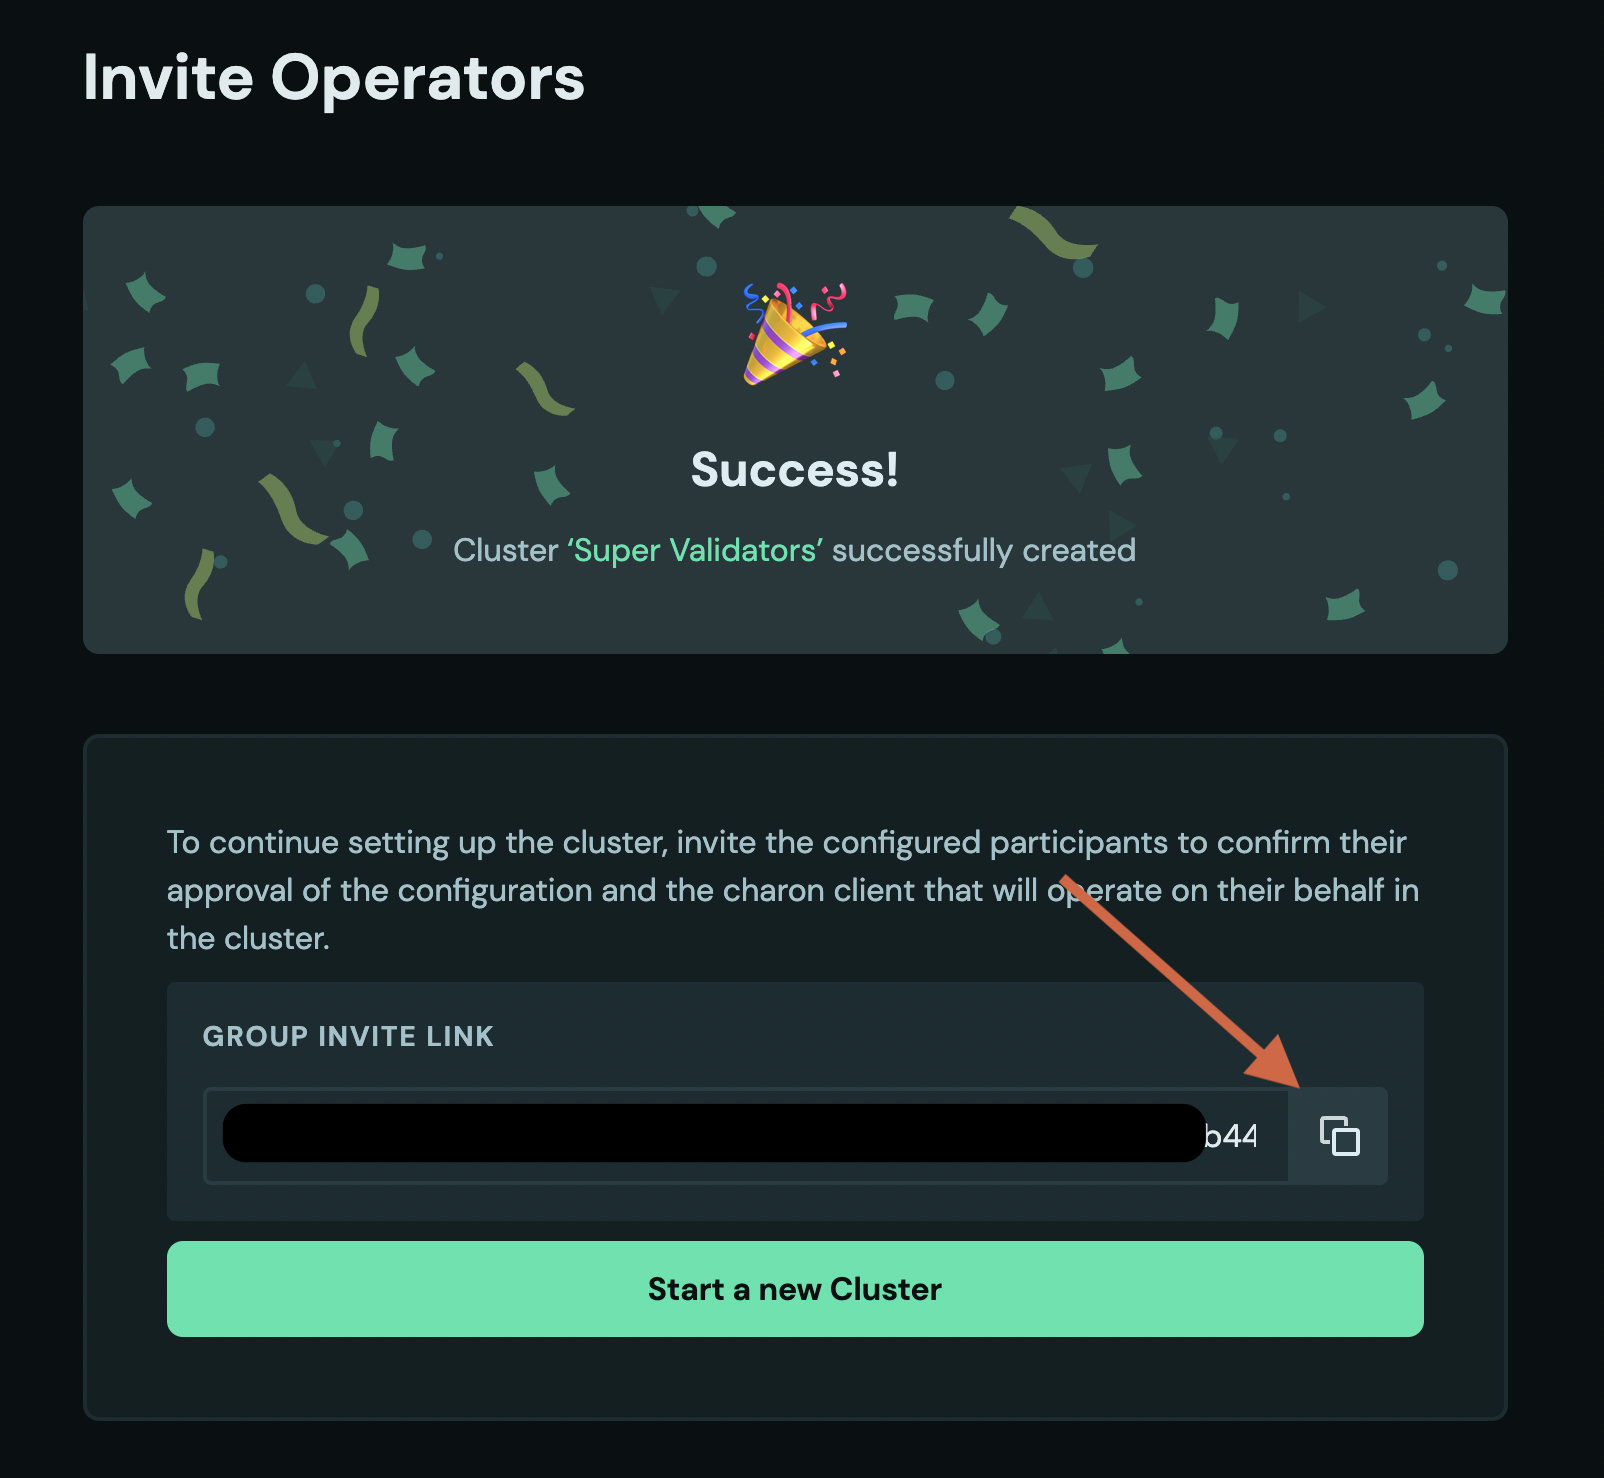
9. You can use the link to monitor how many of the operators have already signed their approval of the cluster configuration and submitted their ENR.
Once every participating operator is ready, the next step is the distributed key generation among the operators.
* If you are not planning on operating a node, and were only configuring the cluster for the operators, your journey ends here. Well done!
* If you are one of the cluster operators, continue to the next step.
You will use the CLI to create the cluster definition file, which you will distribute it to the operators manually.
1. The leader or creator of the cluster will prepare the `cluster-definition.json` file for the Distributed Key Generation ceremony using the `charon create dkg` command.
2. Populate the `charon create dkg` command with the appropriate flags including the `name`, the `num-validators`, the `fee-recipient-addresses`, the `withdrawal-addresses`, and the `operator-enrs` of all the operators participating in the cluster.
3. Run the `charon create dkg` command that generates DKG cluster-definition.json file.
```sh
docker run --rm -v "$(pwd):/opt/charon" obolnetwork/charon:v1.10.3 create dkg
--name="Quickstart"
--num-validators=1
--fee-recipient-addresses="0x0000000000000000000000000000000000000000"
--withdrawal-addresses="0x0000000000000000000000000000000000000000"
--operator-enrs="enr:-JG4QGQpV4qYe32QFUAbY1UyGNtNcrVMip83cvJRhw1brMslPeyELIz3q6dsZ7GblVaCjL_8FKQhF6Syg-O_kIWztimGAYHY5EvPgmlkgnY0gmlwhH8AAAGJc2VjcDI1NmsxoQKzMe_GFPpSqtnYl-mJr8uZAUtmkqccsAx7ojGmFy-FY4N0Y3CCDhqDdWRwgg4u"
```
This command should output a file at `.charon/cluster-definition.json` This file needs to be shared with the other operators in a cluster.
* The `.charon` folder is hidden by default. To view it, run `ls -al .charon` in your terminal. Else, if you are on `macOS`, press `Cmd + Shift + .` to view all hidden files in the Finder application.
Once every participating operator is ready, the next step is the distributed key generation among the operators.
* If you are not planning on operating a node, and were only configuring the cluster for the operators, your journey ends here. Well done!
* If you are one of the cluster operators, continue to the next step.
**Join the cluster prepared by the creator**
Use the Launchpad or CLI to join the cluster configuration generated by the creator:
Your cluster creator needs to configure the cluster, and send you an invite URL link to join the cluster on the Launchpad. Once you've received the Launchpad invite link, you can begin the cluster acceptance process.
1. Click on the DV launchpad link provided by the leader or creator. Make sure you recognize the domain and the person sending you the link, to ensure you are not being phished.
2. Connect your wallet using the Ethereum address the leader was provided.
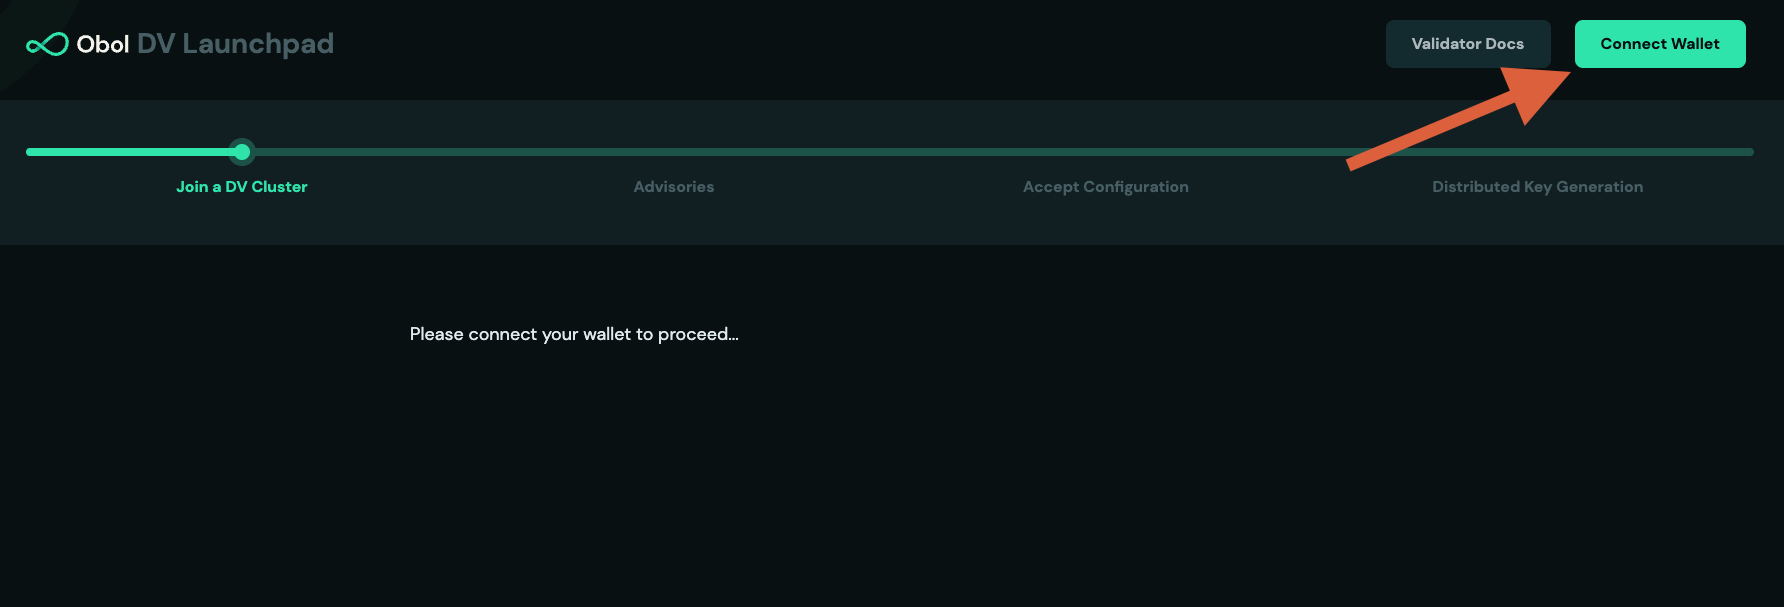
3. Review the operators addresses submitted and click `Get Started` to continue.
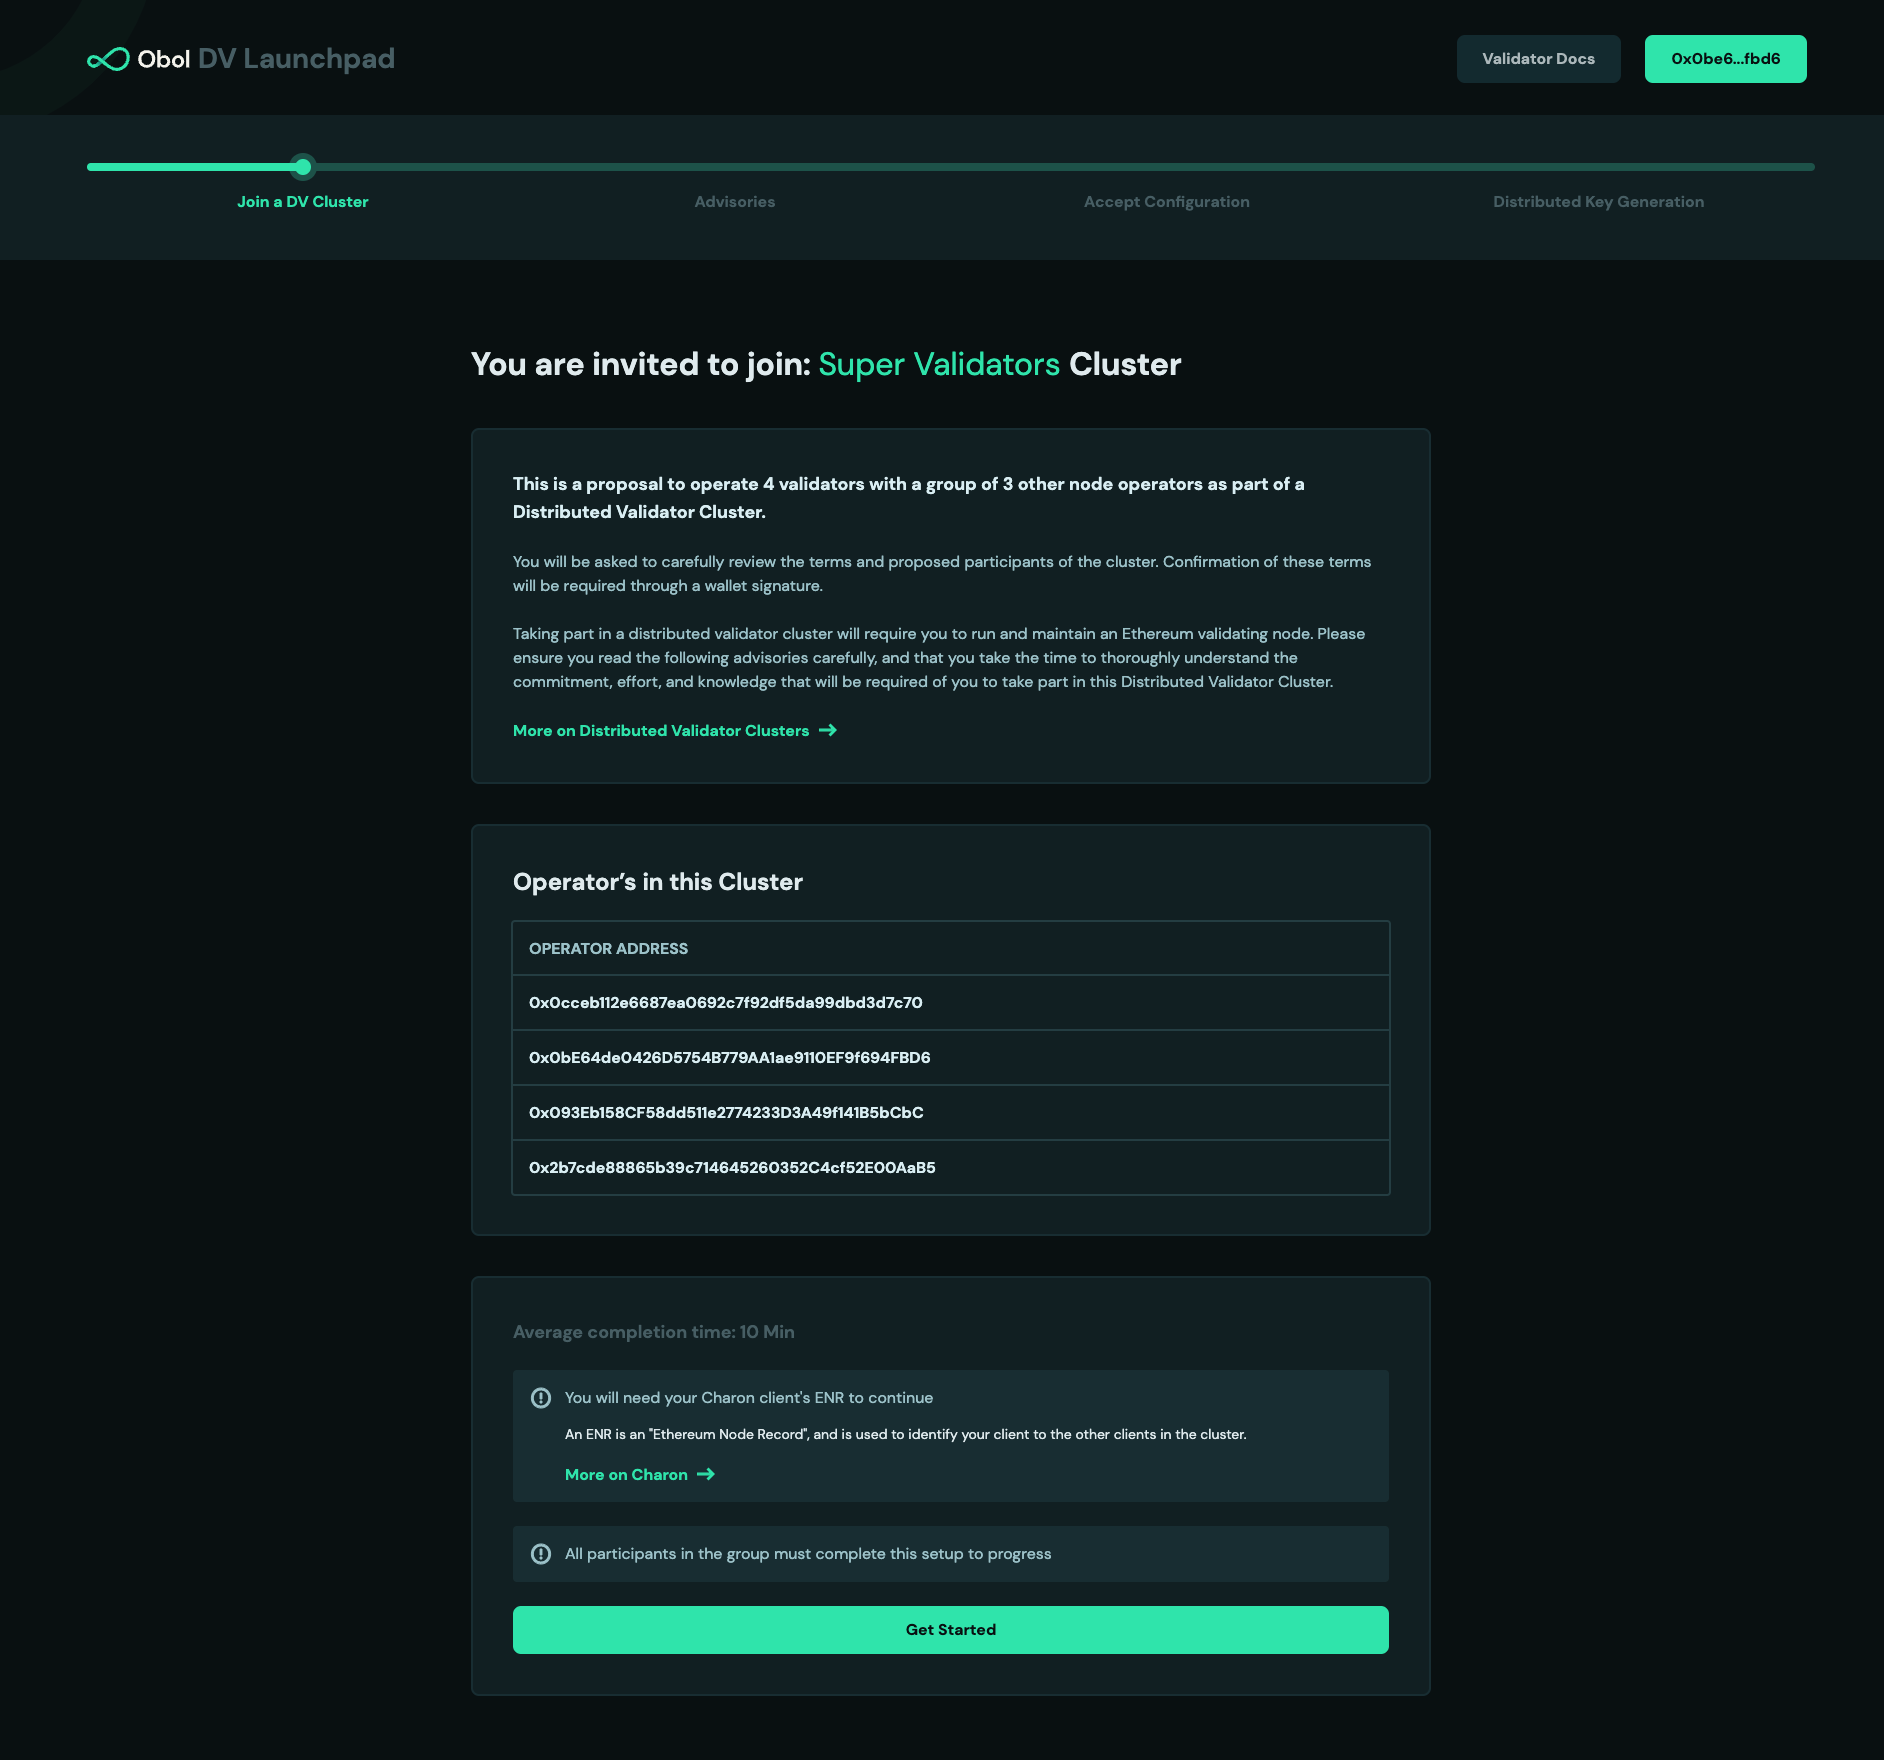
4. Review and accept the DV Launchpad terms & conditions and advisories.
5. Before accepting the invite and adding your ENR, ensure the following:
:::warning
**Important:** Review these details carefully before proceeding. Once you accept the cluster configuration, you'll be committed to the withdrawal and fee recipient addresses set by the creator.
:::
1. **Withdrawal address verification:**
- If the withdrawal address is an OVM (Obol Validator Manager):
1. Make sure it has the **OVM tag** to ensure it's the correct and official version of the audited contract.
2. Ensure the **OVM owner** is correct. If it's a SAFE contract, verify the SAFE and all addresses inside the SAFE are as expected.
3. Verify that all **roles are assigned correctly** if required. Note that the owner can edit roles even after accepting the cluster invite. If you require roles to be permanent, ensure ownership is renounced before accepting.
- For more information on OVM roles, see the [OVM role assignment guide](../../advanced-and-troubleshooting/advanced/assign-ovm-roles.md).
2. **Fee recipient verification:**
- If the fee recipient is a splitter contract, ensure the **percentage of fee splits are correct**.
- Just like OVM, fee recipient contracts also have an owner. Ensure that **ownership is revoked** if you want the shares to remain unchanged.
6. Review the cluster configuration set by the creator and add your `ENR` that you generated in [step 1](#step-1-get-your-enr).\
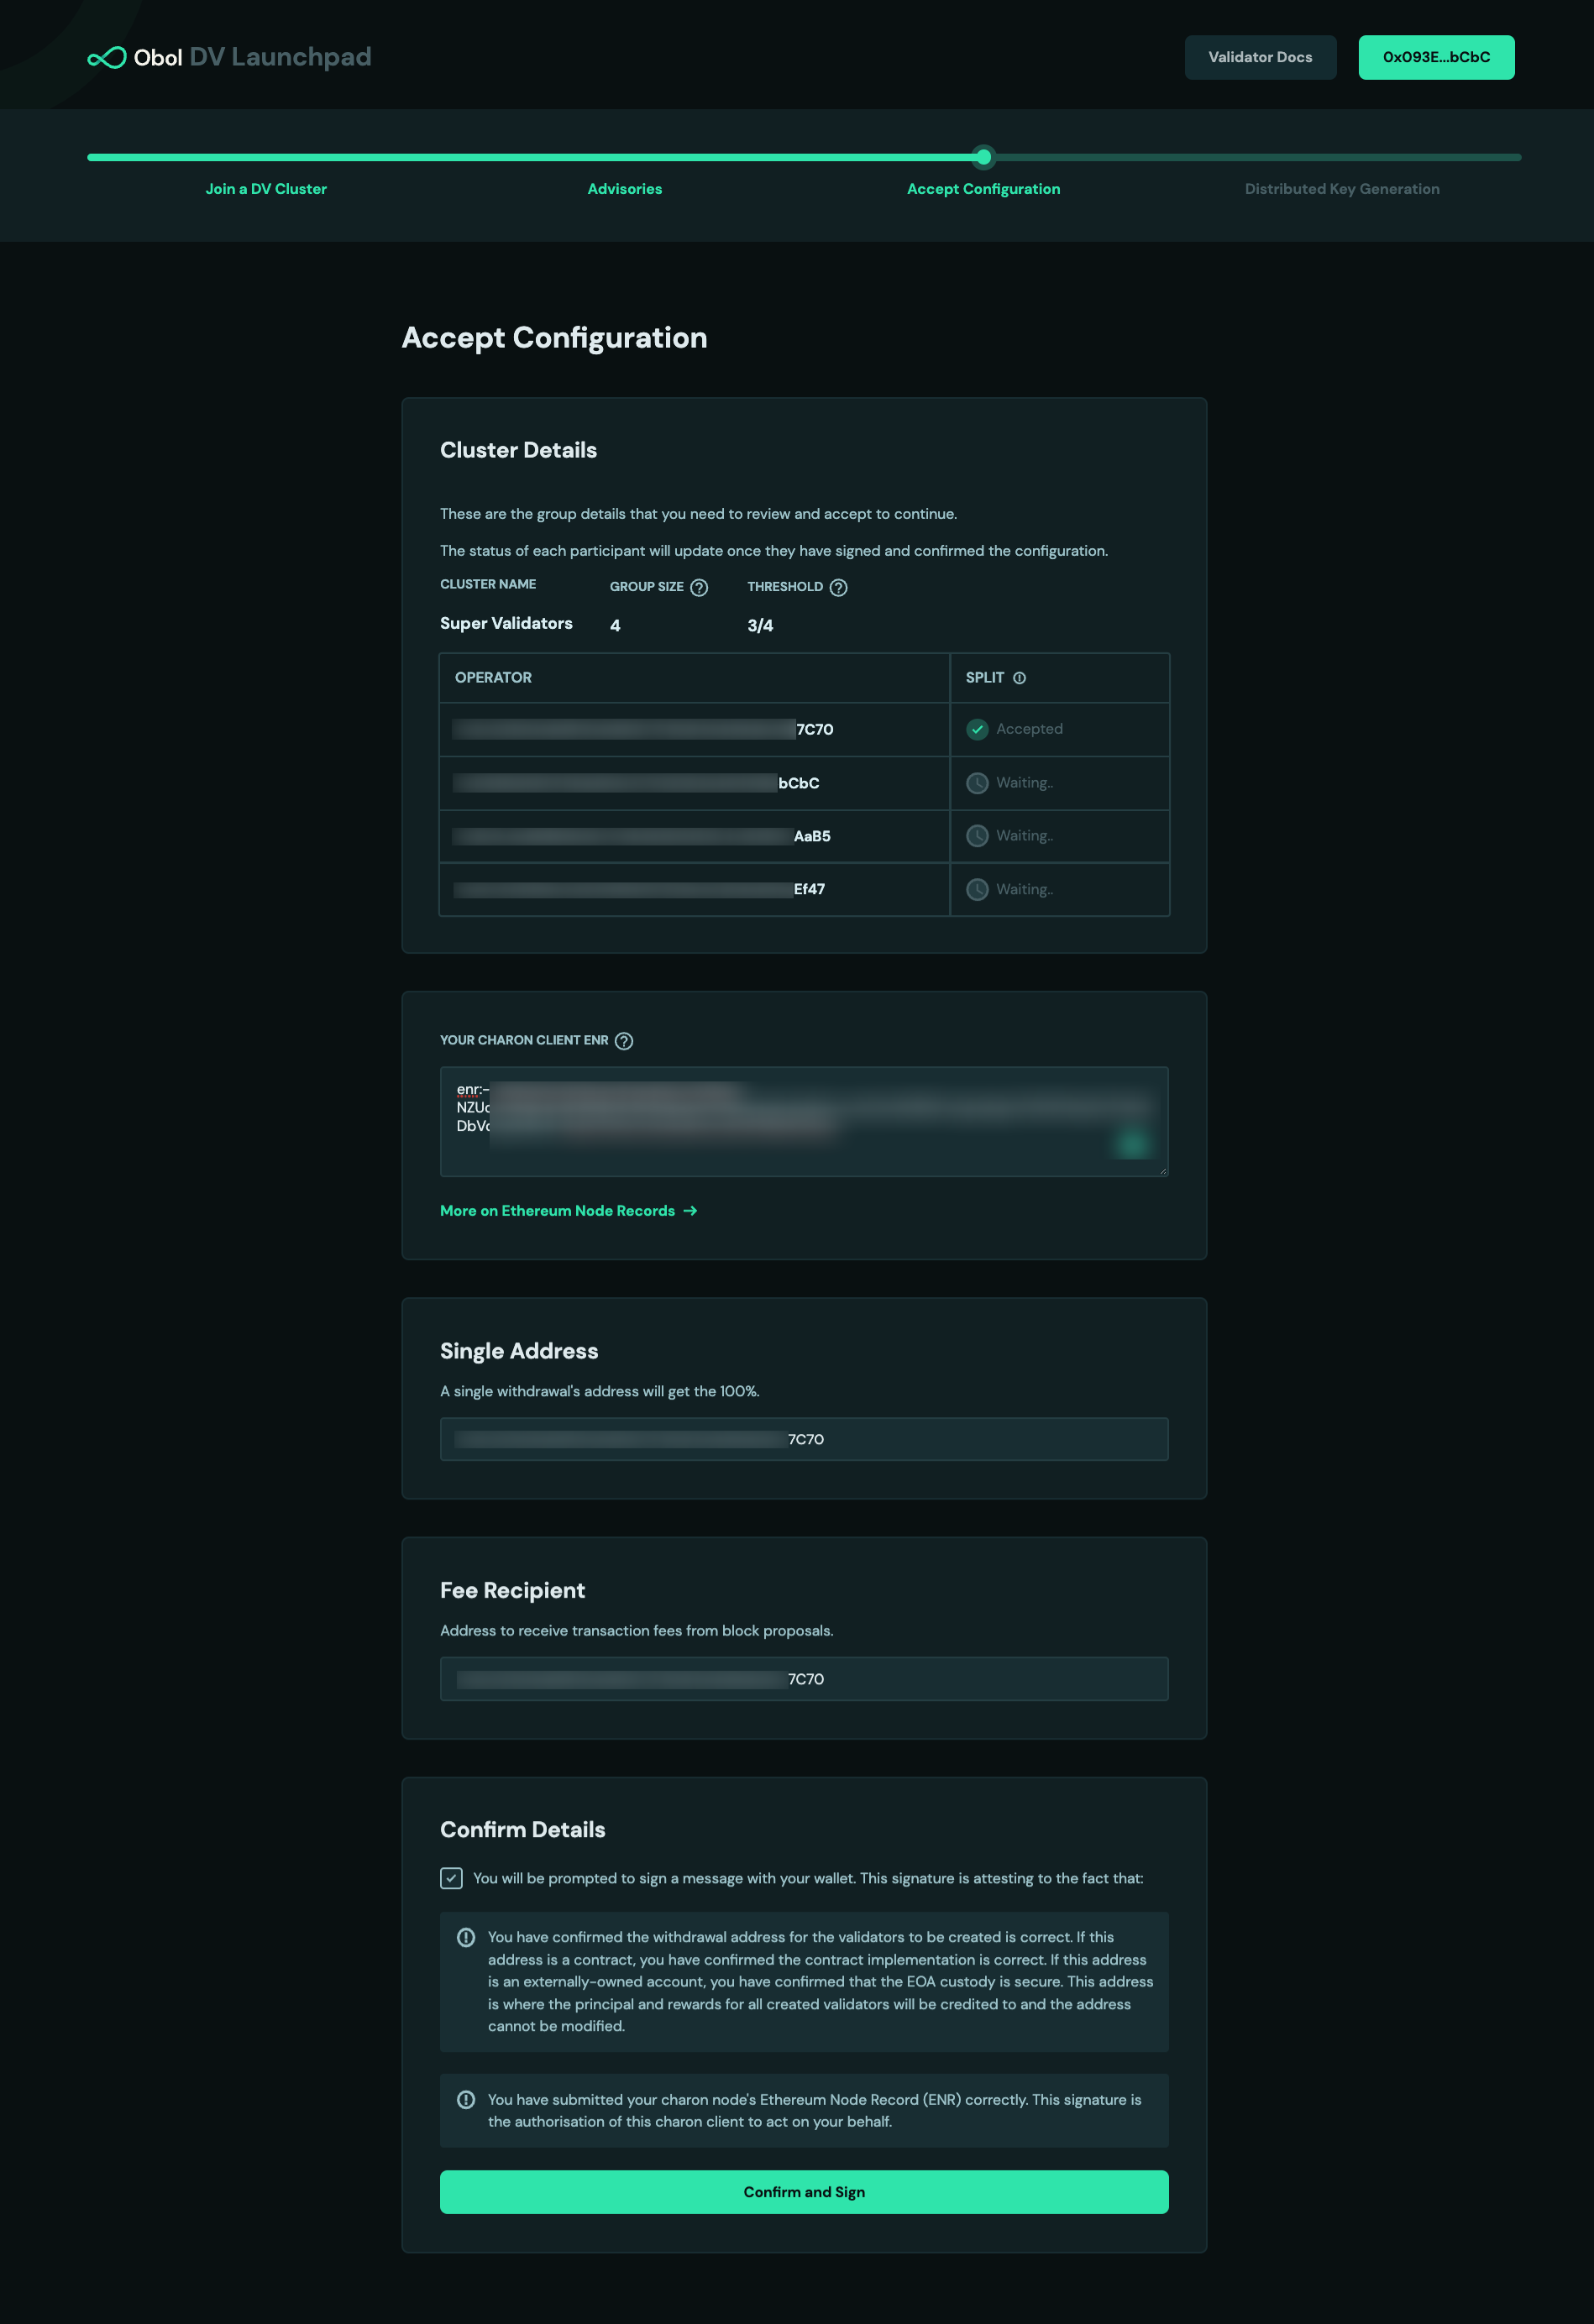
7. Sign the two transactions with your wallet, these are:
* The config hash. This is a hashed representation of all of the details for this cluster.
* Your own `ENR` This signature authorizes the key represented by this ENR to act on your behalf in the cluster.
8. Wait for all the other operators in your cluster to also finish these steps.
Once every participating operator is ready, the next step is the distributed key generation among the operators.
* If you are not planning on operating a node, and were only configuring the cluster for the operators, your journey ends here. Well done!
* If you are one of the cluster operators, continue to the next step.
You'll receive the `cluster-definition.json` file created by the leader/creator. You should save it in the `.charon/` folder that was created initially. (Alternatively, you can use the `--definition-file` flag to override the default expected location for this file.)
Once every participating operator is ready, the next step is the distributed key generation among the operators.
* If you are not planning on operating a node, and were only configuring the cluster for the operators, your journey ends here. Well done!
* If you are one of the cluster operators, continue to the next step.
### Step 3: Run the Distributed Key Generation (DKG) ceremony {#step-3-run-the-distributed-key-generation-dkg-ceremony}
:::tip
For the [DKG](../../learn/charon/dkg.md) to complete, all operators need to be running the command simultaneously. It helps if operators can agree on a certain time or schedule a video call for them to all run the command together.
:::
1. Once all operators successfully signed, your screen will automatically advance to the next step and look like this. Click `Continue`. (If you closed the tab, you can always go back to the invite link shared by the leader and connect your wallet.)
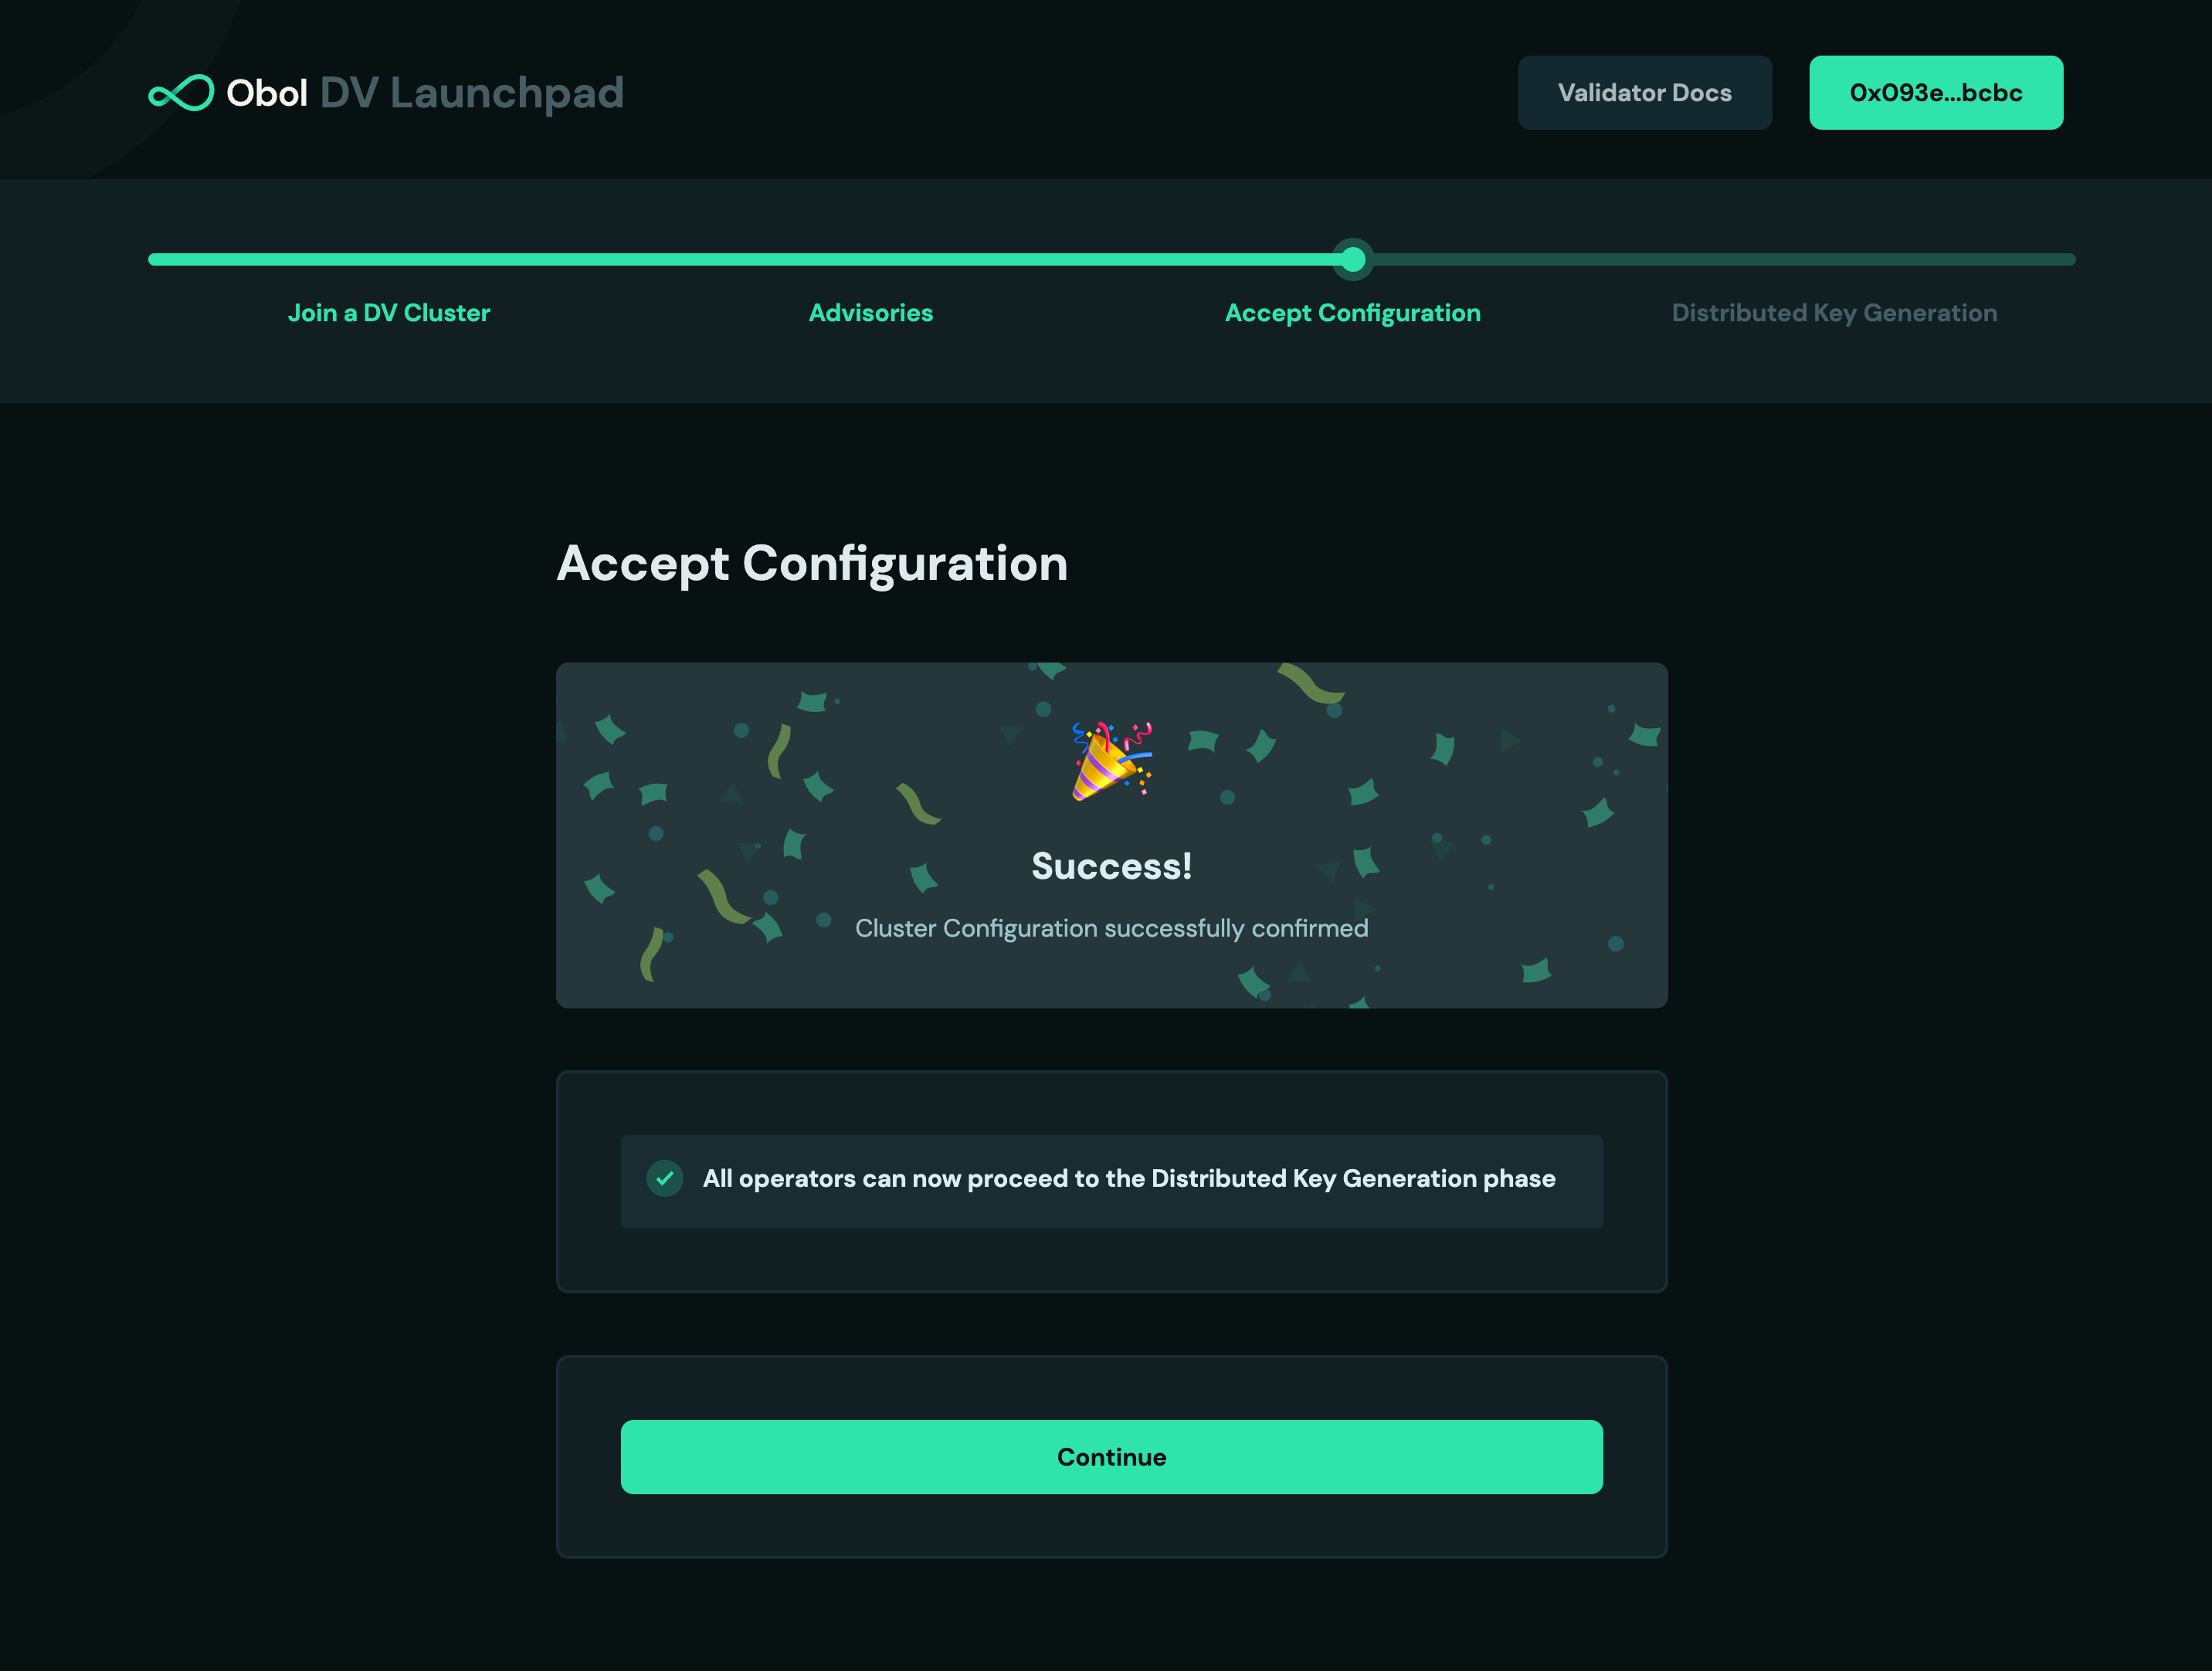
2. Copy and run the `docker` command on the screen into your terminal. It will retrieve the remote cluster details and begin the DKG process.
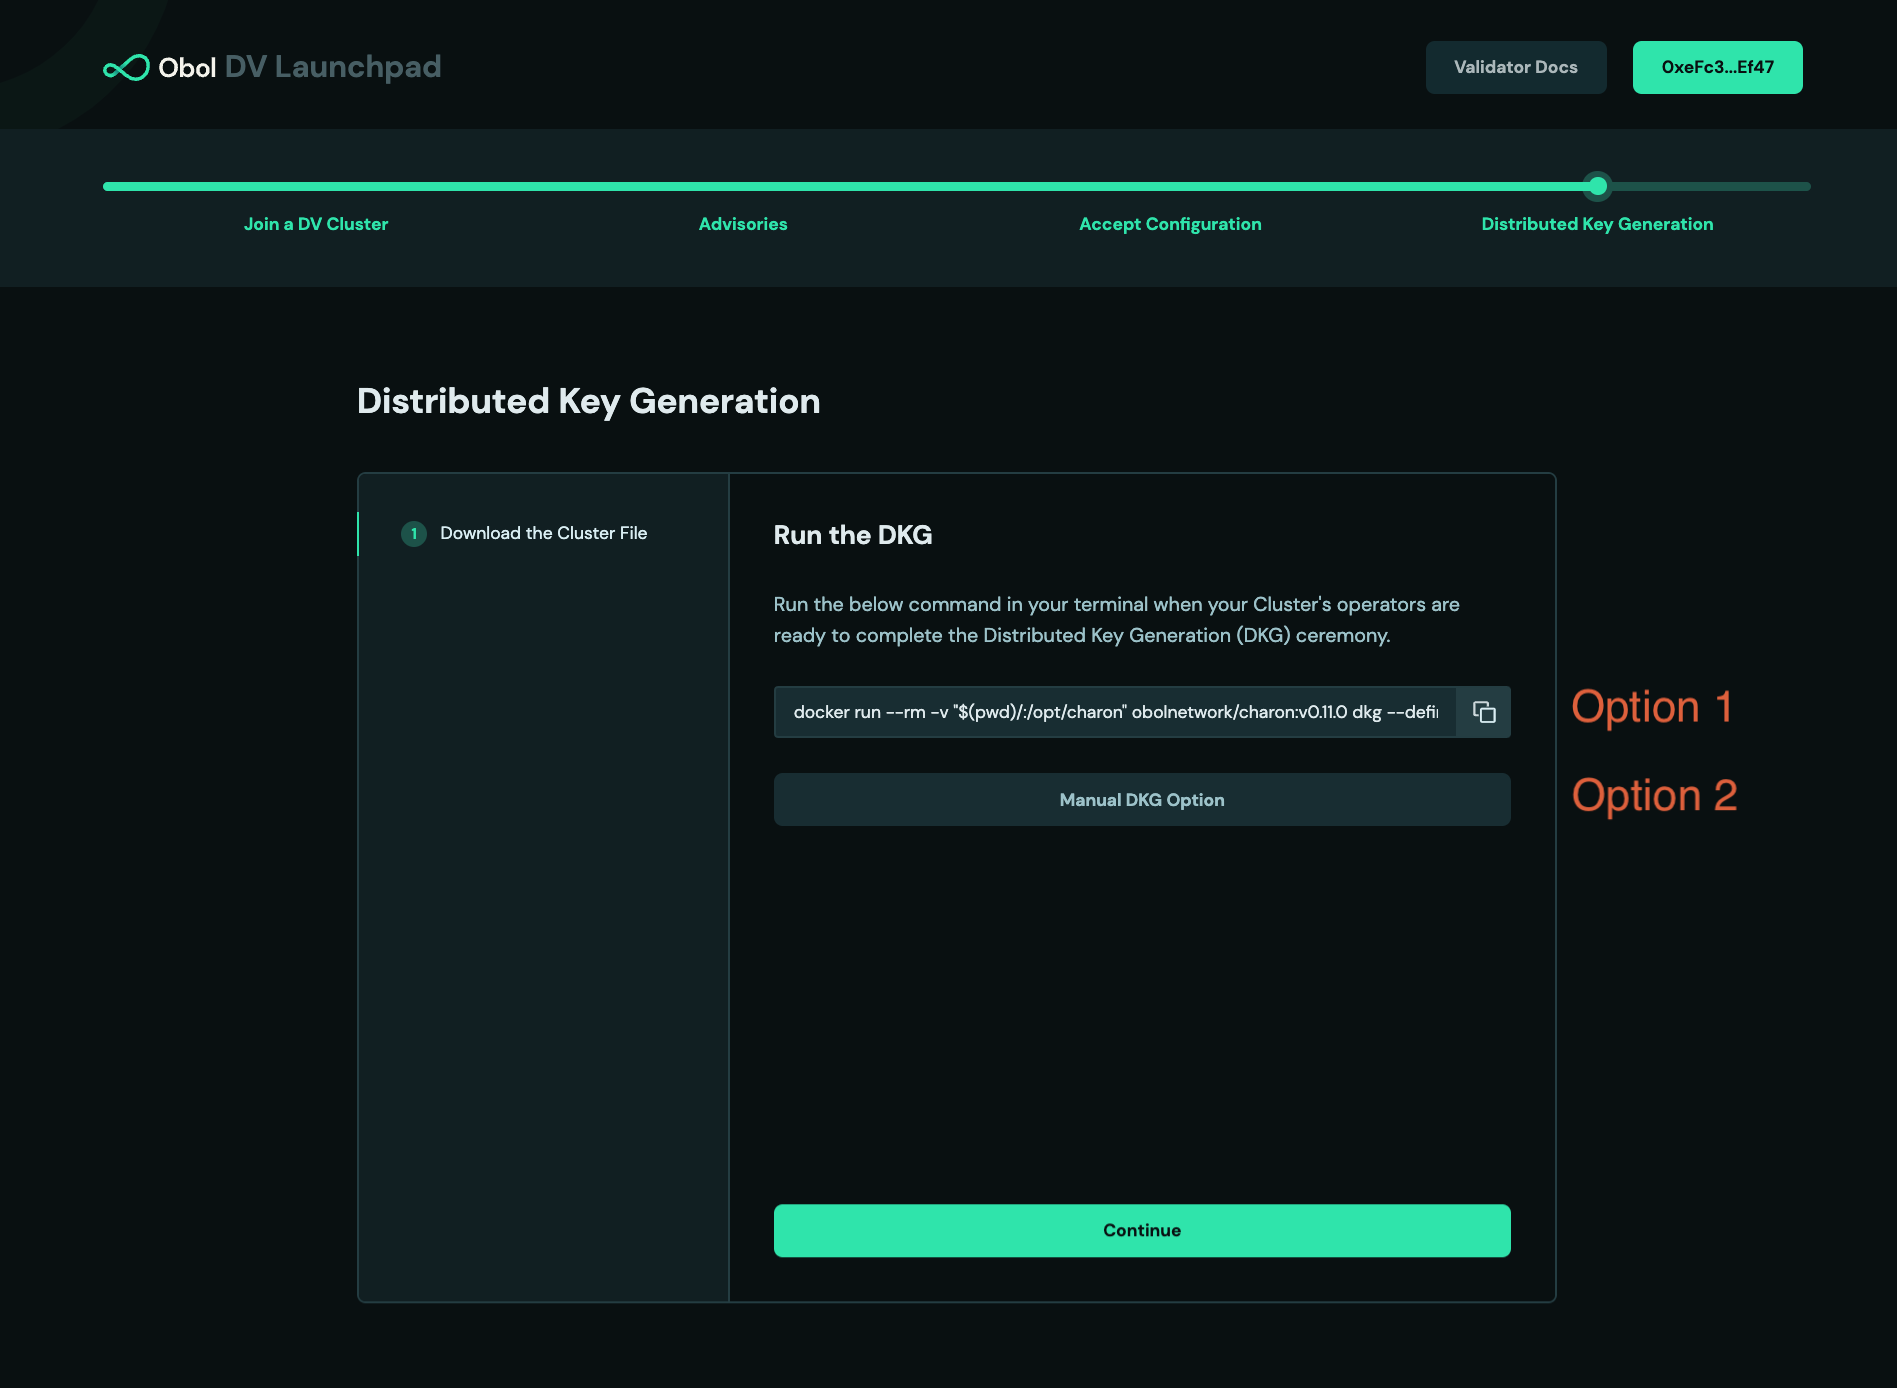
3. Assuming the DKG is successful, a number of artefacts will be created in the `.charon` folder of the node. These include:
* A `deposit-data.json` file. This contains the information needed to activate the validator on the Ethereum network.
* A `cluster-lock.json` file. This contains the information needed by Charon to operate the distributed validator cluster with its peers.
* A `validator_keys/` folder. This folder contains the private key shares and passwords for the created distributed validators.
Once the creator gives you the `cluster-definition.json` file and you place it in a `.charon` subdirectory, run:
```sh
docker run --rm -v "$(pwd):/opt/charon" obolnetwork/charon:v1.10.3 dkg --publish
```
and the DKG process should begin.
Follow this step if you are signing through the DV Launchpad, importing the cluster definition URL into the DappNode package's config & then running the DKG inside the DappNode, followed by cluster run.
1. After all operators have signed with their wallet and has provided an ENR from the DappNode info tab, the Launchpad will instruct operators to begin the DKG ceremony. Click continue & navigate to the 'Dappnode/Avado' tab where the cluster definition URL is presented.
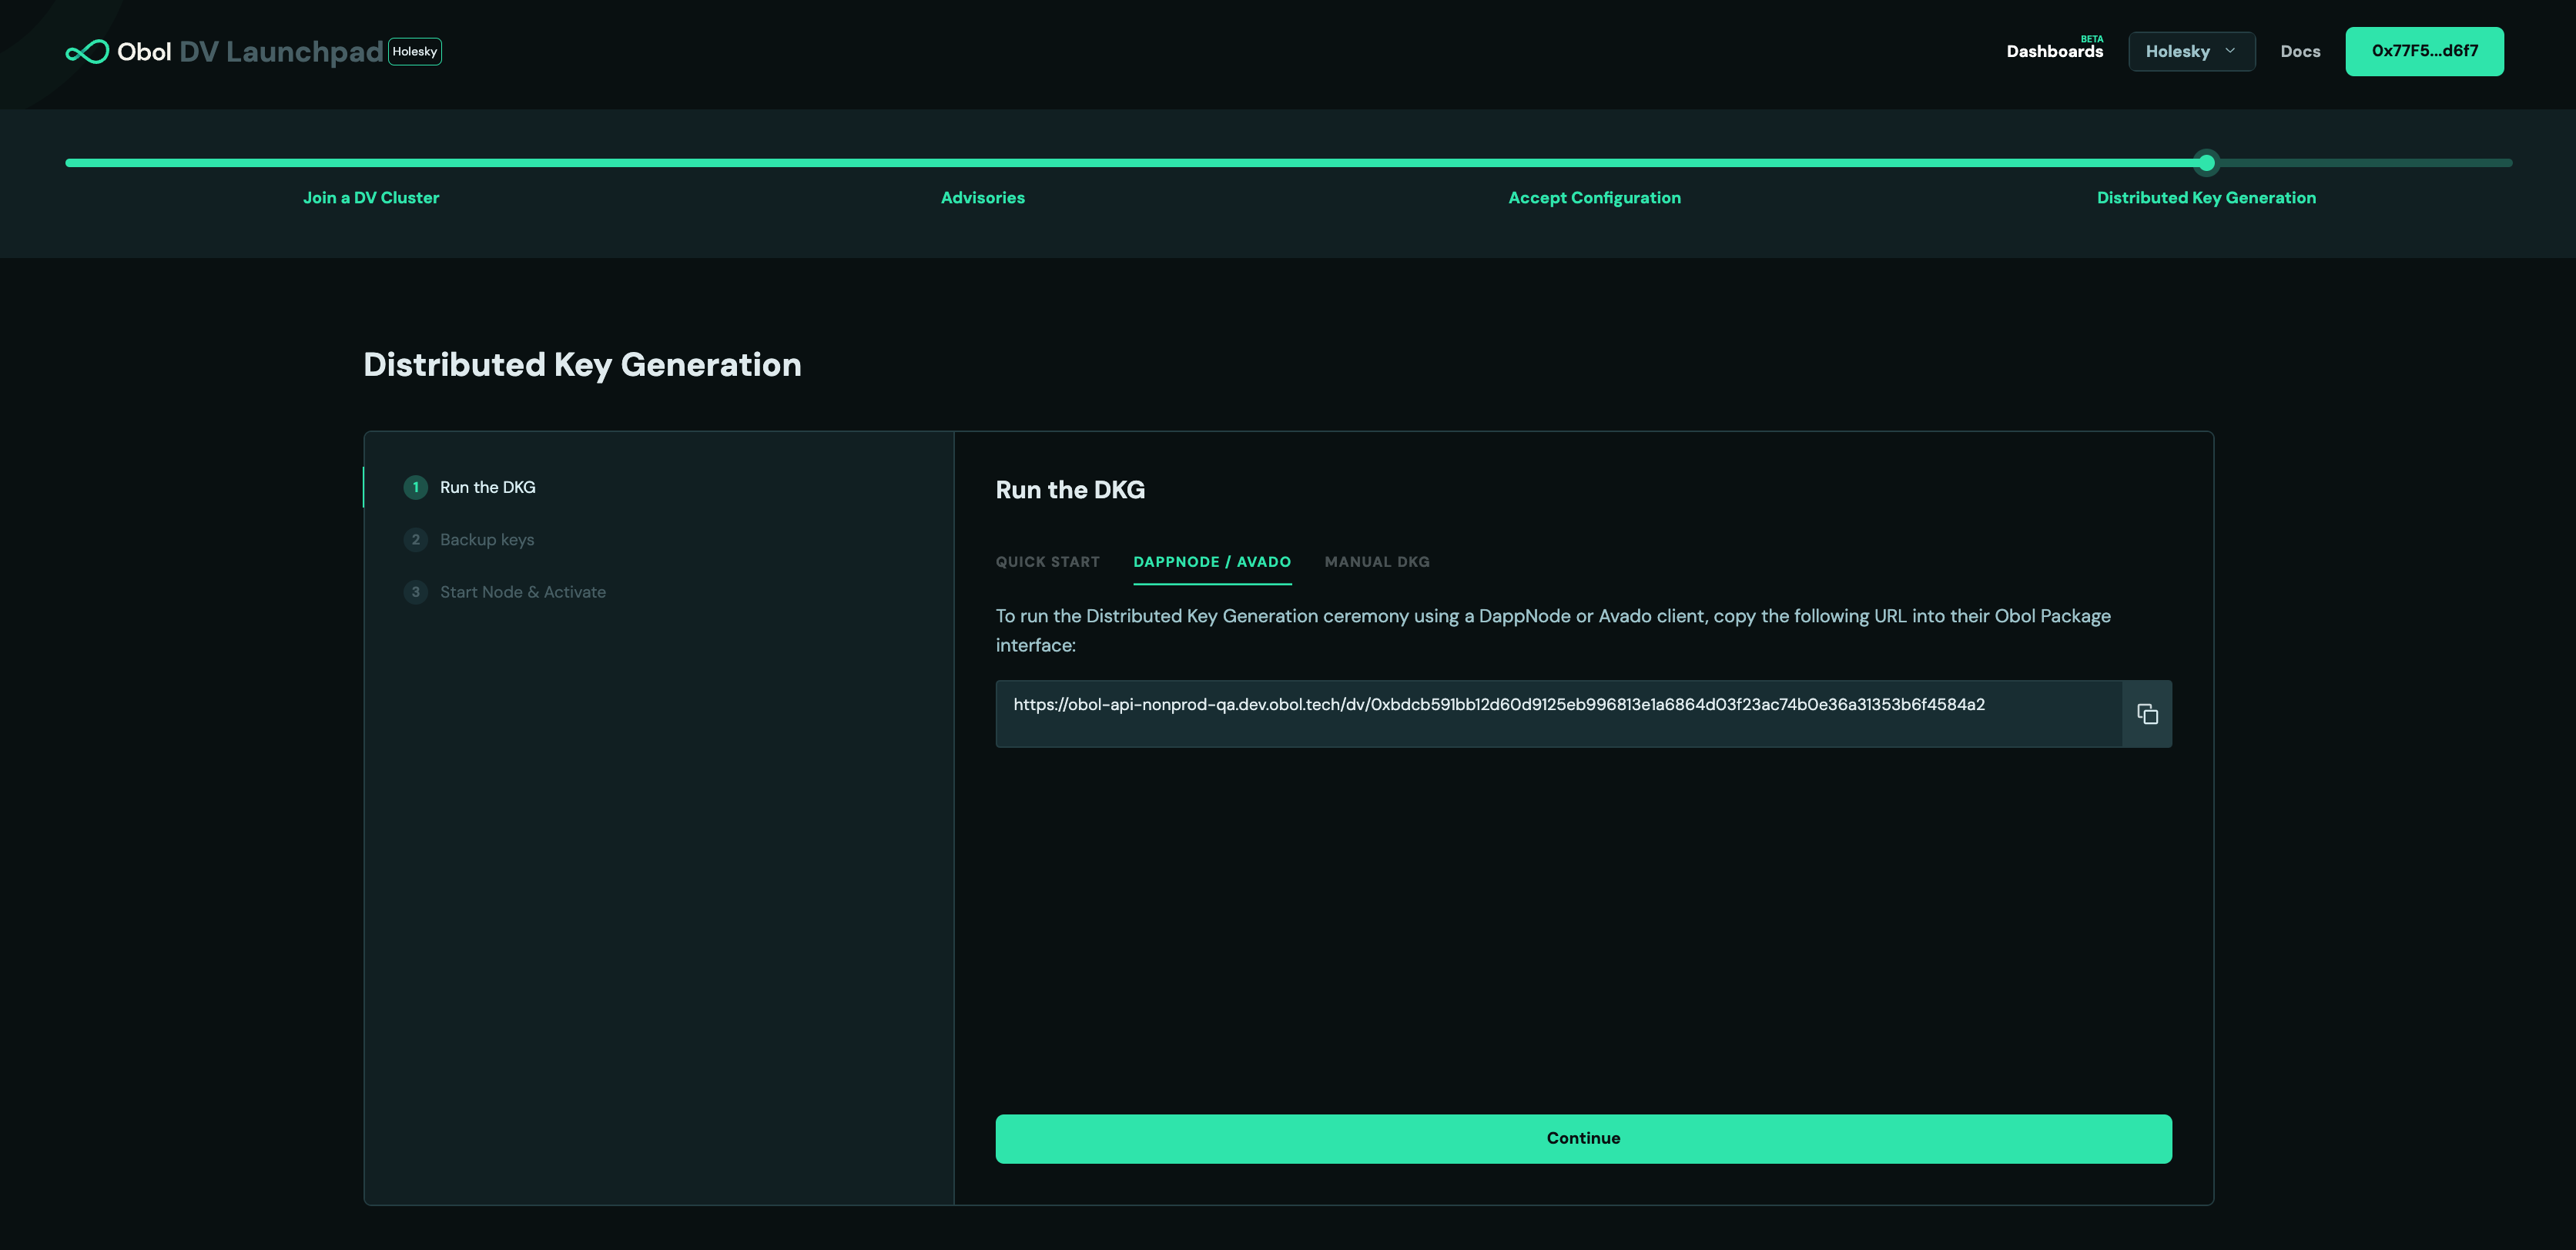
2. To run the Distributed Key Generation ceremony using a DappNode, you must paste the cluster definition URL into the Obol Package interface. Go to the 'Config' tab, select 'URL' from the dropdown menu, paste the cluster definition URL you retrieved from the launchpad, into the validator `cluster-*`field which matches the cluster you took the ENR from. Example: If you picked ENR1 for signing, then you should paste the URL into Cluster-1. Finally, click the 'Update' button at the bottom of the page.
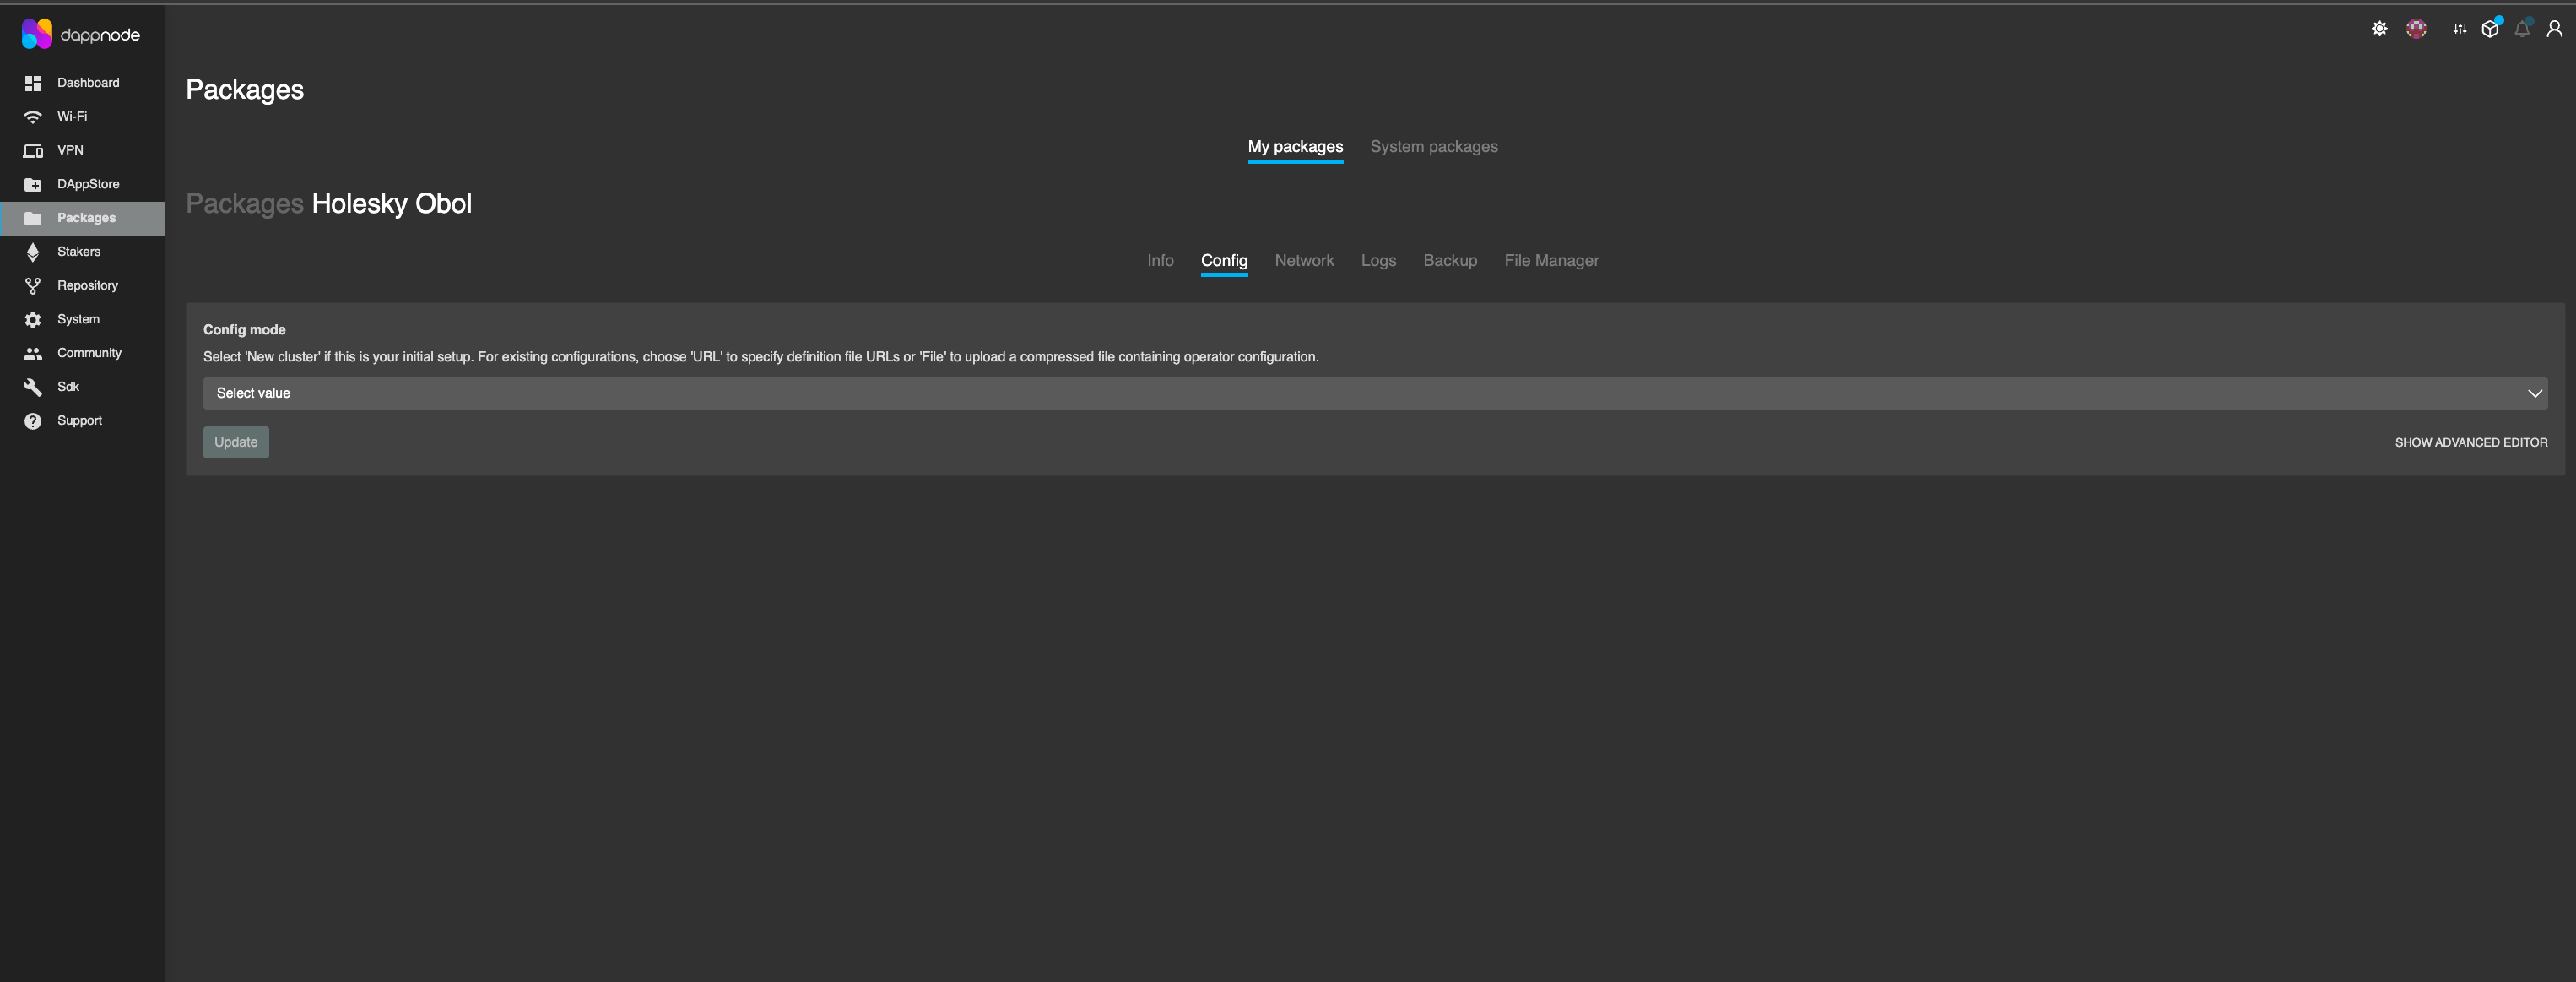
3. After DappNode records the cluster definition URL, go back to the 'Info' tab and restart the Charon container.
4. The node is now ready and will attempt to complete the DKG. You can monitor the DKG progress via the 'Logs' tab of the package. Once all clients in the cluster can establish a connection with one another and they each complete a handshake (confirm everyone has a matching `cluster_definition_hash`), the key generation ceremony begins.
5. Example of DKG ceremony competed log.
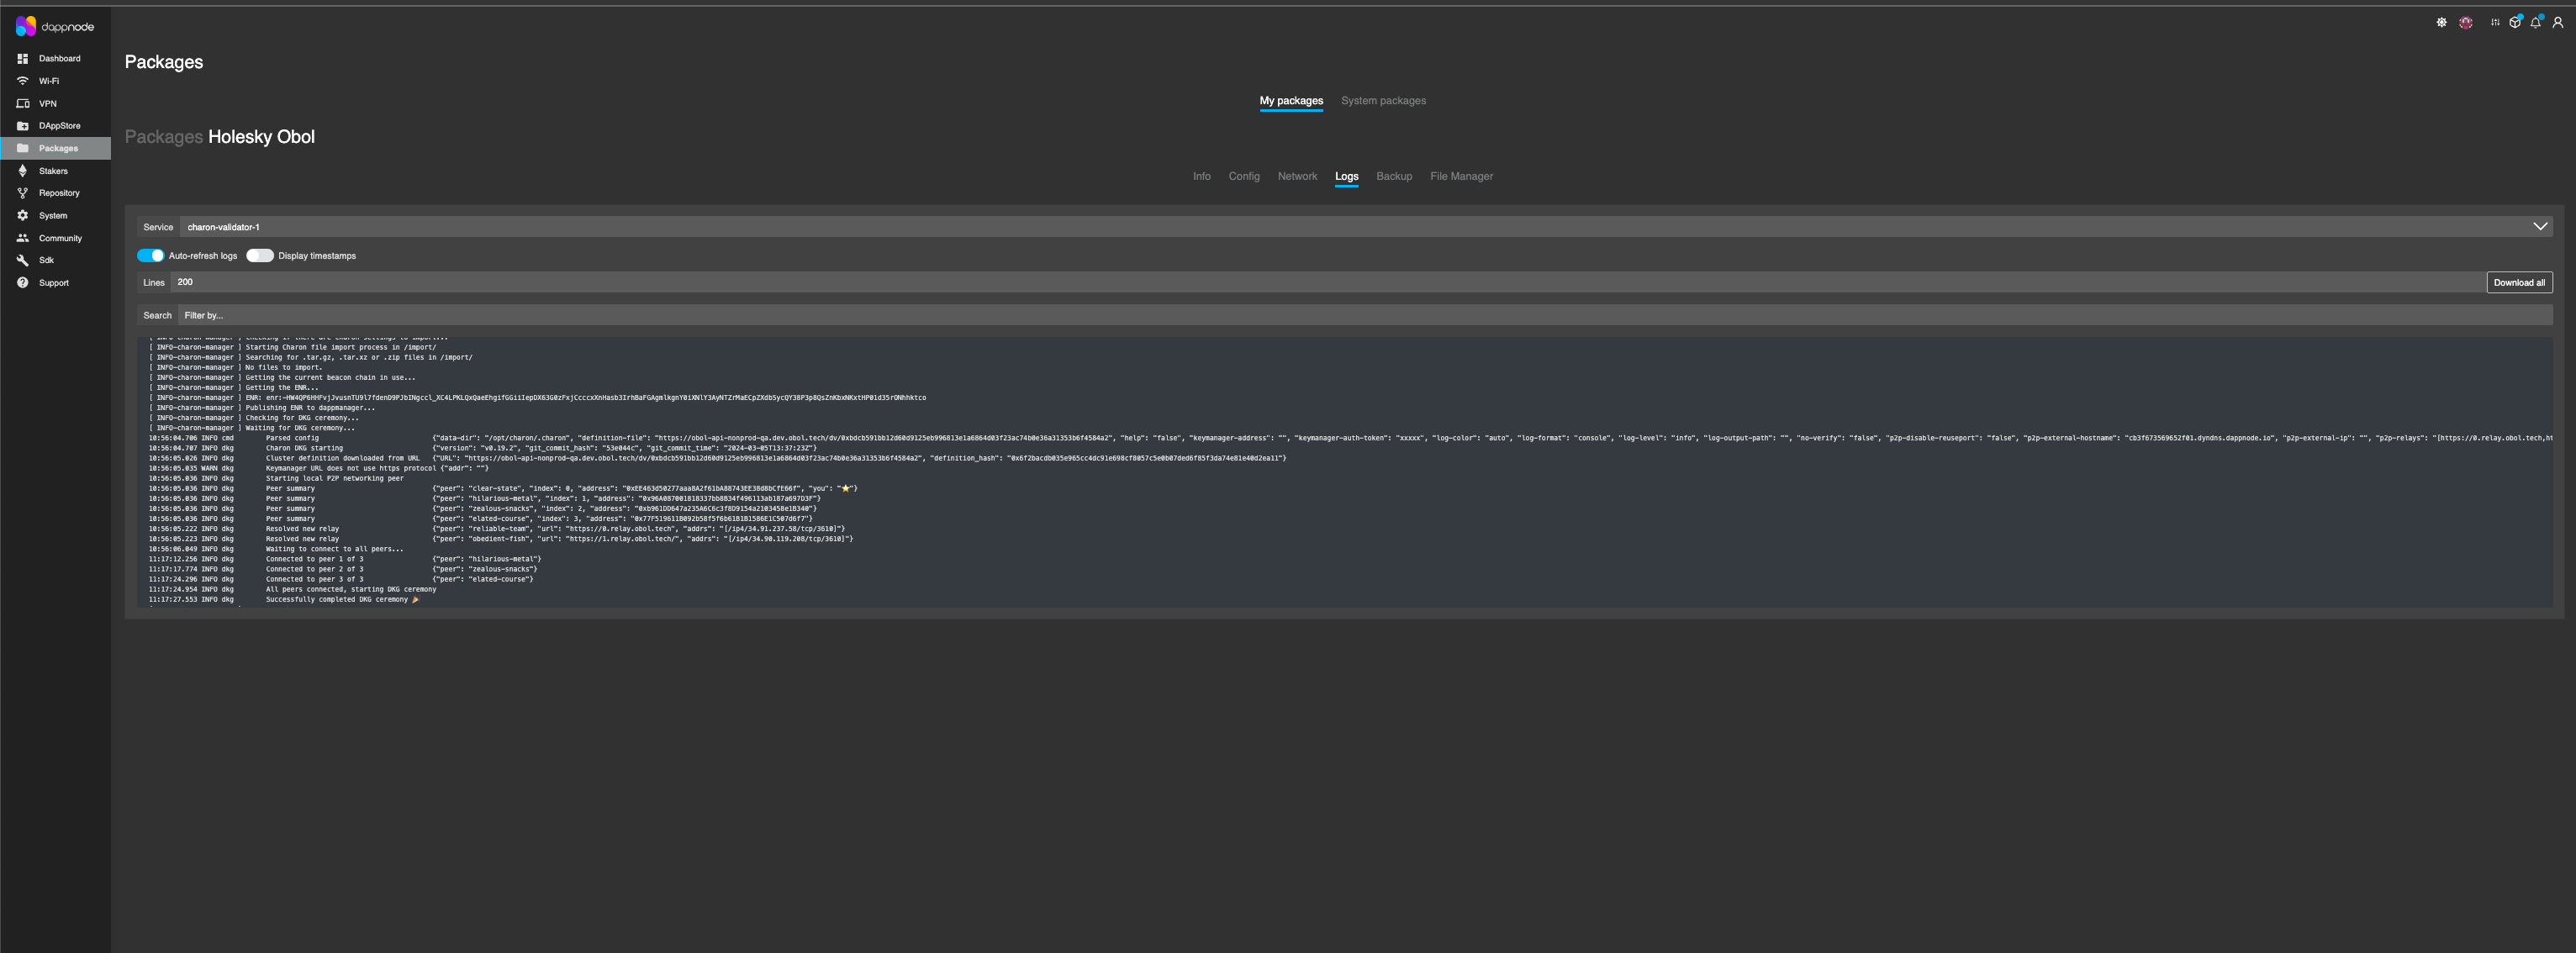
**Create a DV Node Backup**
It is important to back up all artefacts generated by the DKG ceremony, and your node ENR private key. The below steps will show you how to download your keys & node artefacts.
1. Navigate to the backup tab inside the Obol package.
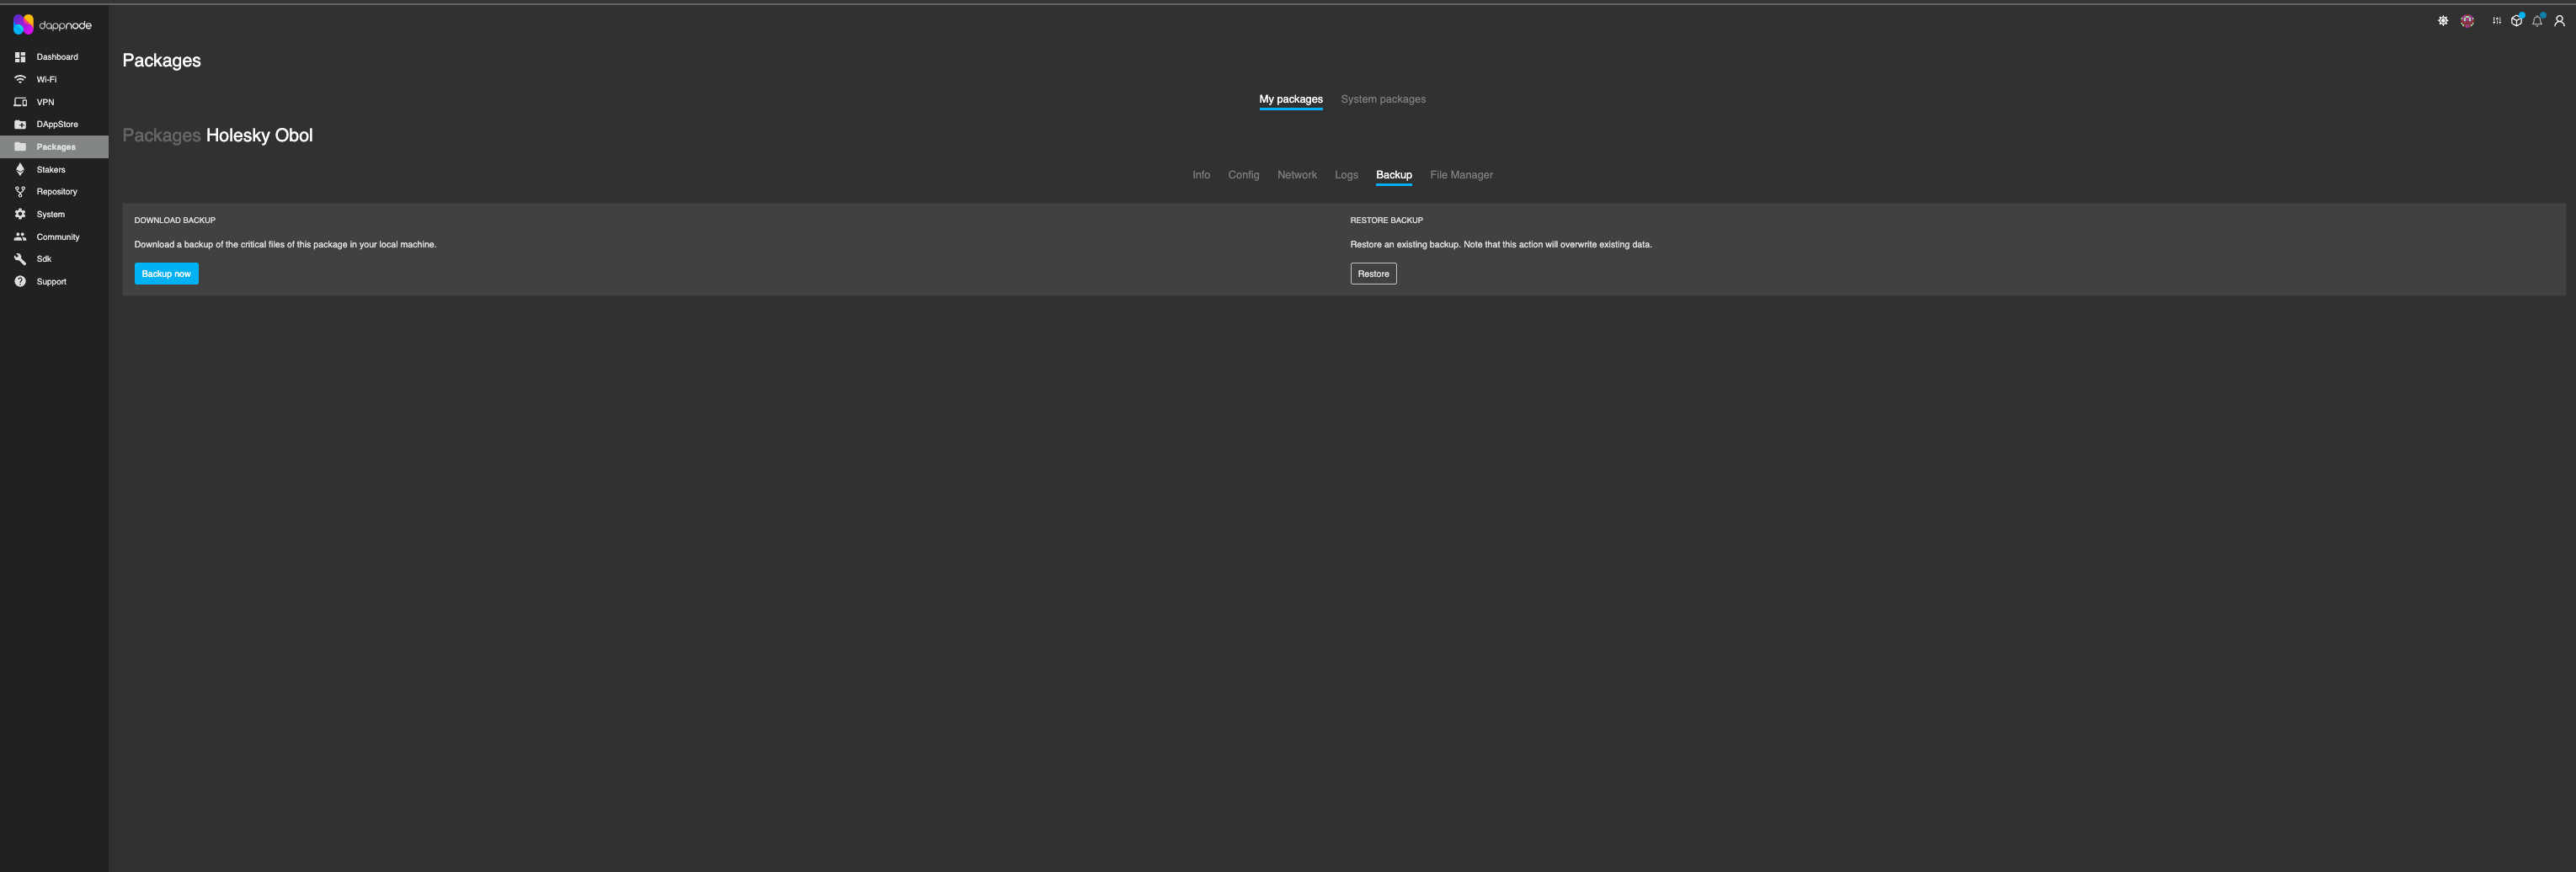
2. Click on the 'Backup now' button and it will open a new chrome window with a 'file save' option. Select the path where you want to save the Backup tar file.
3. Double click to extract the tar file. There will be folders for each charon node (max 5). Navigate to each node folder, and all artefacts related to each node will be present.
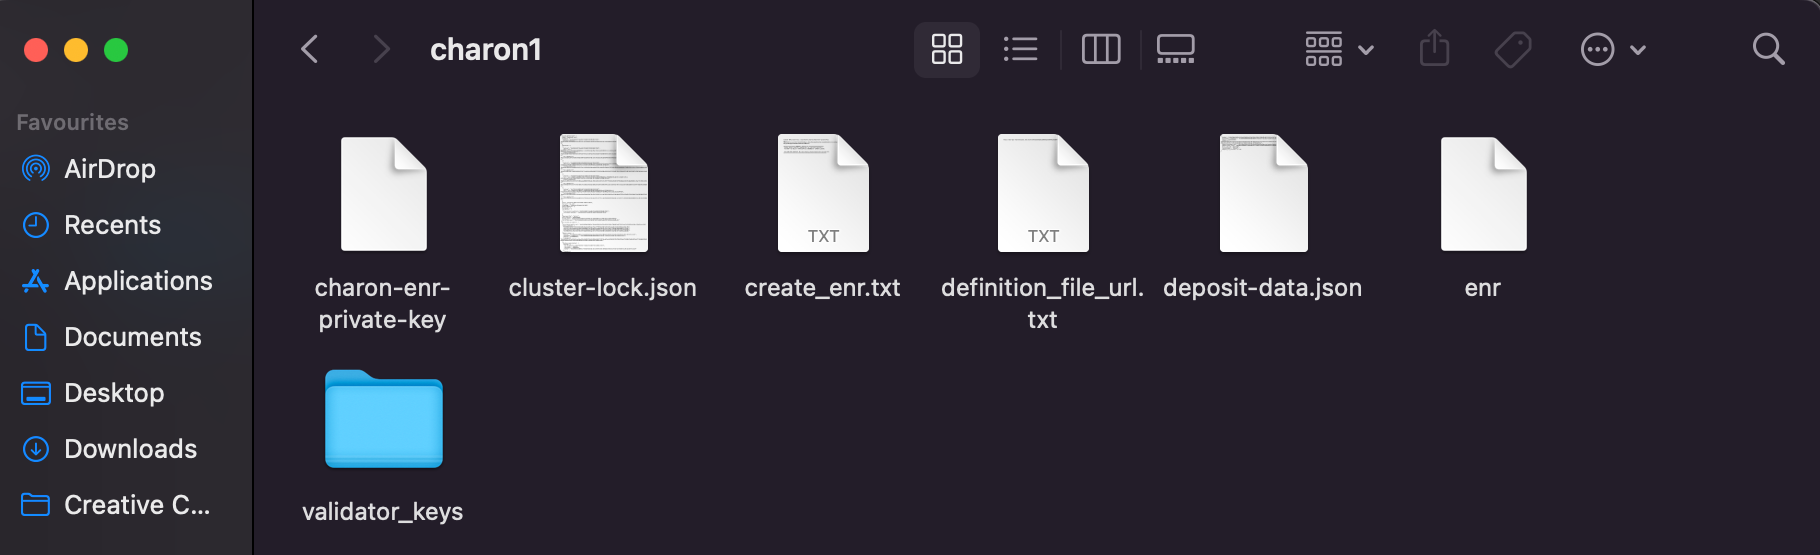
Sedge does not currently support taking part in a DKG. Follow the instructions for **Launchpad** to take part in the DKG with Charon, and in Step 4 you will import these keys into Sedge.
If you installed the Helm chart in Step 1 with the `charon.operatorAddress` parameter, the DKG sidecar will handle the ceremony automatically.
**Automatic DKG (recommended):**
The DKG sidecar init container continuously polls the Obol API for cluster invites associated with your operator address. Once all operators in the cluster have signed their approvals on the Launchpad, the sidecar will:
1. Detect the cluster invite
2. Run the DKG ceremony automatically
3. Store the generated artifacts (cluster-lock, validator keys) in the persistent volume
You can monitor the DKG progress by checking the pod logs:
```sh
kubectl logs my-dv-pod-0 -c dkg-sidecar -f
```
:::info
If you want the sidecar to target a specific cluster definition, you can set the `targetConfigHash` parameter:
```sh
helm upgrade my-dv-pod obol/dv-pod \
--reuse-values \
--set='charon.dkgSidecar.targetConfigHash=0x...'
```
:::
**Pre-existing artifacts:**
If you have already completed the DKG ceremony outside of Helm (e.g., via docker), you can provide the artifacts directly:
```sh
# Create a secret with the validator keystores
kubectl create secret generic validator-keys \
--from-file=.charon/validator_keys/keystore-0.json \
--from-file=.charon/validator_keys/keystore-0.txt
# Create a ConfigMap with the cluster lock file
kubectl create configmap cluster-lock \
--from-file=.charon/cluster-lock.json
# Install or upgrade the chart with the pre-existing artifacts
helm upgrade --install my-dv-pod obol/dv-pod \
--set='configMaps.clusterLock=cluster-lock' \
--set='validatorClient.keystores.secretName=validator-keys' \
--set='charon.beaconNodeEndpoints[0]='
```
:::info
For large cluster-lock files (>1MB), use the lock hash instead of a ConfigMap:
```sh
LOCK_HASH=$(jq -r '.lock_hash' .charon/cluster-lock.json)
helm upgrade my-dv-pod obol/dv-pod \
--reuse-values \
--set="charon.lockHash=$LOCK_HASH"
```
:::
:::danger
Please make sure to create a backup of your `.charon/` folder. **If you lose your private keys you won't be able to start the DV cluster successfully and may risk your validator deposit becoming unrecoverable.** Ensure every operator has their `.charon` folder securely and privately backed up before activating any validators.
:::
:::info
The `cluster-lock` and `deposit-data` files are identical for each operator, if lost, they can be copied from one operator to another.
:::
Now that the DKG has been completed, all operators can start their nodes.
### Step 4: Start your Distributed Validator Node {#step-4-start-your-distributed-validator-node}
With the DKG ceremony over, the last phase before activation is to prepare your node for validating over the long-term.
The [CDVN repository](https://github.com/ObolNetwork/charon-distributed-validator-node) is configured to sync an execution layer client (`Nethermind`) and a consensus layer client (`Lighthouse`) using Docker Compose. Further client combinations can be prepared using Sedge. You can also leverage alternative ways to run a node such as Ansible, Helm, or Kubernetes manifests.
:::info
Currently, the [CDVN repo](https://github.com/ObolNetwork/charon-distributed-validator-node) has defaults for the Hoodi testnet and for mainnet.
:::
Start by copying the appropriate `.env.sample.` file to `.env`, and modifying values as needed.
```sh
# To prepare the node for the Hoodi test network
# Copy ".env.sample.hoodi", renaming it ".env"
cp .env.sample.hoodi .env
# To prepare the node for the main Ethereum network
# Copy ".env.sample.mainnet", renaming it ".env"
cp .env.sample.mainnet .env
```
In the same folder where you created your ENR in Step 1, and ran the DKG in Step 3, start your node in the DV cluster with docker compose.
```sh
# To be run from the ./charon-distributed-validator-node folder
# Spin up a Distributed Validator Node with a Validator Client
docker compose up -d
```
:::danger
Do not start this node until the DKG is complete, as the charon container will interfere with the charon instance attempting to take part in the DKG ceremony.
:::
If at any point you need to turn off your node, you can run:
```sh
# Shut down the currently running Distributed Validator Node
docker compose down
```
You should use the Grafana dashboard that accompanies the quickstart repo to see whether your cluster is healthy.
```sh
# Open Grafana dashboard
open http://localhost:3000/d/charonoverview/
```
In particular you should check:
* That your Charon client can connect to the configured beacon client.
* That your Charon client can connect to all peers directly.
* That your validator client is connected to Charon, and has the private keys it needs loaded and accessible. Most components in the dashboard have some help text there to assist you in understanding your cluster performance. You might notice that there are logs indicating that a validator cannot be found and that APIs are returning 404. This is to be expected at this point, as the validator public keys listed in the lock file have not been deposited and acknowledged on the consensus layer yet (usually it takes \~16 hours after the deposit is made).
:::danger
Using a remote beacon node will impact the performance of your Distributed Validator and should be used sparingly.
:::
If you already have a beacon node running somewhere and you want to use that instead of running an EL (`nethermind`) & CL (`lighthouse`) as part of the example repo, you can disable these images. To do so, follow these steps:
1. Stop your docker compose
```sh
docker compose down
```
2. Uncomment and set the `CHARON_BEACON_NODE_ENDPOINTS` variable in the `.env` file to your beacon node's URL
```sh
...
# Connect to one or more external beacon nodes. Use a comma separated list excluding spaces.
CHARON_BEACON_NODE_ENDPOINTS=
...
```
:::info
If your existing beacon node is running in a another CDVN instance on the same Docker host, you can access it by specifying
`http://host.docker.internal:5052` as the endpoint. Note: You will need to change the charon p2p port in the .env file (`CHARON_PORT_P2P_TCP=`) of the second CDVN stack to avoid port conflict.
:::
3. Uncomment `EL=el-none` and `CL=cl-none` variables in the `.env` file and comment `EL=el-nethermind` and `CL=cl-lighthouse` variables:
```sh
...
#EL=el-nethermind
...
EL=el-none
...
#CL=cl-lighthouse
...
CL=cl-none
...
```
4. Start your docker compose
```sh
docker compose up -d
```
To prepare a Distributed Validator node using sedge, we will use the `sedge generate` command to prepare a docker-compose file of our preferred clients, `sedge import-key` to import the artifacts created during the DKG ceremony, and `sedge run` to begin running the node.
**Sedge generate**
With Sedge installed, and the DKG complete, it’s time to deploy a Distributed Validator. Using the `sedge generate` command and its subcommands, Sedge will create a Docker Compose file needed to run the validator node.
1. The following command generates the artifacts required to deploy a distributed validator on the Hoodi network, using Teku as the validator client, Prysm as the consensus client, and Geth as the execution client. For additional supported client combinations, [refer to the documentation here](https://github.com/NethermindEth/sedge?tab=readme-ov-file#supported-networks-and-clients).
```sh
sedge generate full-node --validator=teku --consensus=prysm --execution=geth --network=hoodi --distributed
```
You should be shown a long list of configuration outputs with the following endings:
```sh
2024-09-20 12:56:15 -- [INFO] Generation of files successfully, happy staking! You can use now 'sedge run' to start the setup.
```
2. Explore the config files.
You should now see a `sedge-data` directory created in the folder where you ran the `sedge generate` command. To view the directory contents, use the `ls` command.
```sh
ls sedge-data
> docker-compose.yml jwtsecret
```
**Sedge Import-key**
Use the following command to import keys from the directory where the `.charon` dir is located.
```sh
sedge import-key --from ./ hoodi teku
```
**Sedge Run**
After confirming the configurations and ensuring all files are in place, use the `sedge run` command to deploy the DV docker containers. Sedge will then begin pulling all the required Docker images.
```sh
> sedge run
2024-09-20 13:11:49 -- [INFO] [Logger Init] Log level: info
2024-09-20 13:11:49 -- [WARN] A new Version of sedge is available. Please update to the latest Version. See https://github.com/NethermindEth/sedge/releases for more information. Latest detected tag: fatal: not a git repository (or any of the parent directories): .git
2024-09-20 13:11:50 -- [INFO] Setting up containers
2024-09-20 13:11:50 -- [INFO] Running command: docker compose -f /sedge/sedge-data/docker-compose.yml build
2024-09-20 13:11:50 -- [INFO] Running command: docker compose -f /sedge-data/docker-compose.yml pull
[+] Pulling 16/44
⠇ consensus [⣀⠀⠀⠀⠀⠀⠀⠀⠀⠀⠀⠀⠀⠀⠀⠀⠀⠀⠀⠀⠀⠀⠀⠀] Pulling 20.8s
⠙ b003b463d750 Downloading [===============> ] 32.9kB/103.7kB 14.2s
⠙ fe5ca62666f0 Waiting 14.2s
⠙ b02a7525f878 Waiting 14.2s
⠙ fcb6f6d2c998 Waiting 14.2s
⠙ e8c73c638ae9 Waiting 14.2s
⠙ 1e3d9b7d1452 Waiting 14.2s
⠙ 4aa0ea1413d3 Waiting 14.2s
⠙ 7c881f9ab25e Waiting 14.2s
⠙ 5627a970d25e Waiting 14.2s
⠙ 5cf83054c259 Waiting 14.2s
⠙ fec68abcb14d Waiting 14.2s
⠙ 4d5ad547ce94 Waiting 14.2s
⠙ e1ea80853e89 Waiting 14.2s
⠙ 17b1d7e8d99a Waiting 14.2s
⠙ 841a2fc14521 Waiting 14.2s
⠙ 55b44d28dd62 Waiting 14.2s
⠙ f3e3115c6547 Pulling fs layer 14.2s
⠙ 3cec53649029 Waiting 14.2s
⠙ 01739568079a Waiting 14.2s
⠙ c6bd24b188db Waiting 14.2s
⠙ fe8d2e9c9467 Waiting 14.2s
⠙ c151008cbec0 Waiting 14.2s
⠙ de1ef6c90686 Waiting 14.2s
⠙ 03d09d97b125 Waiting 14.2s
✔ execution Pulled 9.3s
✔ a258b2a6b59a Pull complete 1.5s
✔ a2d6cf6afda3 Pull complete 1.7s
✔ a3dd8256fc41 Pull complete 6.9s
```
Once all docker images are pulled, sedge will create & start the containers to run all the required clients. See below for example output of the progress.
```sh
✔ 8db8b5d461a7 Pull complete 24.1s
✔ 2288b86b1d5f Pull complete 24.3s
✔ 4becb7b9a44b Pull complete 24.3s
✔ 4f4fb700ef54 Pull complete 24.3s
✔ 5c35e3728c84 Pull complete 35.1s
2024-09-20 13:12:45 -- [INFO] Running command: docker compose -f /sedge-data/docker-compose.yml create
[+] Creating 7/7
✔ Network sedge-network Created 0.1s
✔ Container sedge-dv-client Created 0.4s
✔ Container sedge-consensus-client Created 0.4s
✔ Container sedge-execution-client Created 0.4s
✔ Container sedge-mev-boost Created 0.4s
✔ Container sedge-validator-blocker Created 0.4s
✔ Container sedge-validator-client Created 0.1s
2024-09-20 13:12:45 -- [INFO] Running command: docker compose -f /sedge-data/docker-compose.yml up -d
[+] Running 4/5
✔ Container sedge-consensus-client Started 1.0s
⠧ Container sedge-validator-blocker Waiting 130.8s
✔ Container sedge-dv-client Started 1.0s
✔ Container sedge-execution-client Started 1.3s
✔ Container sedge-mev-boost Started
```
Given time, the execution and consensus clients should complete syncing, and if a Distributed Validator has already been activated, the node should begin to validate.
If you encounter issues with using Sedge as part of a DV cluster, consider consulting the [Sedge docs](https://docs.sedge.nethermind.io/) directly, or opening an [issue](https://github.com/NethermindEth/sedge/issues) or [pull request](https://github.com/NethermindEth/sedge/pulls) if appropriate.
Use an Ansible playbook to start your node. [See the repo here](https://github.com/ObolNetwork/obol-ansible) for further instructions.
If you installed the Helm chart in Step 1 and the DKG completed automatically in Step 3, your Distributed Validator node is already running. You can verify its status with:
```sh
kubectl get pods
kubectl logs my-dv-pod-0 -c charon -f
```
**Key configuration options:**
You can customize your deployment by upgrading the release with additional parameters:
```sh
helm upgrade my-dv-pod obol/dv-pod \
--reuse-values \
--set='network=mainnet' \
--set='charon.beaconNodeEndpoints[0]=' \
--set='charon.builderApi=true' \
--set='validatorClient.type=lighthouse'
```
The chart supports five validator client types: `lighthouse` (default), `teku`, `nimbus`, `lodestar`, and `prysm`.
**External validator client:**
If you prefer to run your own validator client outside the chart, disable the integrated one and point your external client at the Charon validator API:
```sh
helm upgrade my-dv-pod obol/dv-pod \
--reuse-values \
--set='validatorClient.enabled=false'
```
Your external validator client should connect to the Charon validator API as if it were a beacon node:
```
http://..svc.cluster.local:3600
```
**Monitoring:**
Enable Prometheus service monitoring:
```sh
helm upgrade my-dv-pod obol/dv-pod \
--reuse-values \
--set='serviceMonitor.enabled=true'
```
**Uninstalling:**
```sh
helm uninstall my-dv-pod
```
:::danger
Uninstalling the Helm release will remove all Kubernetes components. Ensure you have backed up your validator keys and cluster artifacts before uninstalling.
:::
If you encounter issues, consult the [Helm chart documentation](https://github.com/ObolNetwork/helm-charts/tree/main/charts/dv-pod) or open an [issue](https://github.com/ObolNetwork/helm-charts/issues).
Use Kubernetes manifests to start your Charon client and validator client. These manifests expect an existing Beacon Node Endpoint to connect to. [See the repo here](https://github.com/ObolNetwork/charon-k8s-distributed-validator-node) for further instructions.
:::tip
In a Distributed Validator Cluster, it is important to have a low latency connection to your peers. Charon clients will use the NAT protocol to attempt to establish a direct connection to one another automatically. If this doesn't happen, you should port forward Charon's p2p port to the public internet to facilitate direct connections. The default port to expose is `:3610`. Read more about Charon's networking [here](../../learn/charon/charon-networking.md).
:::
If you have gotten to this stage, every node is up, synced and connected, congratulations. You can now move forward to [activating your validator](../running/activate-a-dv.md) to begin staking.
### FAQ {#faq}
What happens if I lose my ENR private key?
If you lose your ENR private key (`.charon/charon-enr-private-key`), you won't be able to participate in the DKG ceremony or start the DV cluster successfully. It's critical to back up this file securely before proceeding with the cluster creation process.
Can I change the cluster configuration after it's been created?
Once a cluster configuration has been created and signed by all operators, it cannot be changed. If you need to modify the cluster settings, you'll need to create a new cluster configuration and have all operators sign the new configuration.
What if one operator doesn't show up for the DKG ceremony?
All operators must participate simultaneously in the DKG ceremony for it to complete successfully. If an operator is unable to participate, you'll need to wait for them or create a new cluster configuration without that operator. It's recommended to schedule the DKG ceremony at a time when all operators can participate.
How do I know if my node is properly connected to the cluster?
You can verify your node's connection status by checking the Grafana dashboard (if using CDVN) or monitoring the Charon logs. Your Charon client should be able to connect to all peers directly, and you should see successful handshakes in the logs. The dashboard will show connection status for each peer in the cluster.
What should I do if the DKG ceremony fails?
If the DKG ceremony fails, check the logs for error messages. Common issues include network connectivity problems, mismatched cluster definitions, or operators not running the command simultaneously. Ensure all operators have the correct `cluster-definition.json` file and are running the DKG command at the same time. You may need to restart the DKG process after resolving any issues.
Can I use different client combinations for different operators in the cluster?
Yes, each operator can use different execution and consensus clients. The Charon client handles the coordination between different client implementations, so operators can choose the clients that work best for their infrastructure while still participating in the same distributed validator cluster.
What happens if I need to replace an operator in the cluster?
Replacing an operator can be done using the `charon alpha edit replace-operator` command for a single operator swap, or via validator consolidation when making larger changes. For more information, see the [replacing operators guide](../../run-a-dv/editing/replace-operator.md).
How should I set the validator count for compounding rewards?
We recommend setting the validator count such that each validator's maxEB is capped at 1920 ETH, allowing rewards to compound for two years until it reaches 2048 ETH. [**Read more**](#step-1-get-your-enr)
Unlike a standard bank account where interest compounds daily, validator rewards follow a step-function. Your effective balance (which earns rewards) only increases when your real balance exceeds the current effective balance by 1.25 ETH. This "hysteresis" means growth is slightly slower than pure continuous compounding, as 'dust' rewards sit idle until they accumulate enough to trigger a balance update.
**Recommendation: The 1920 ETH Strategy**
To maximize compounding efficiency, avoid depositing the full 2048 ETH cap immediately. Leaving ~128 ETH of "headroom" allows your validators to compound rewards autonomously for approximately 2 years (at 3% APR) before hitting the 2048 ETH effective balance cap.
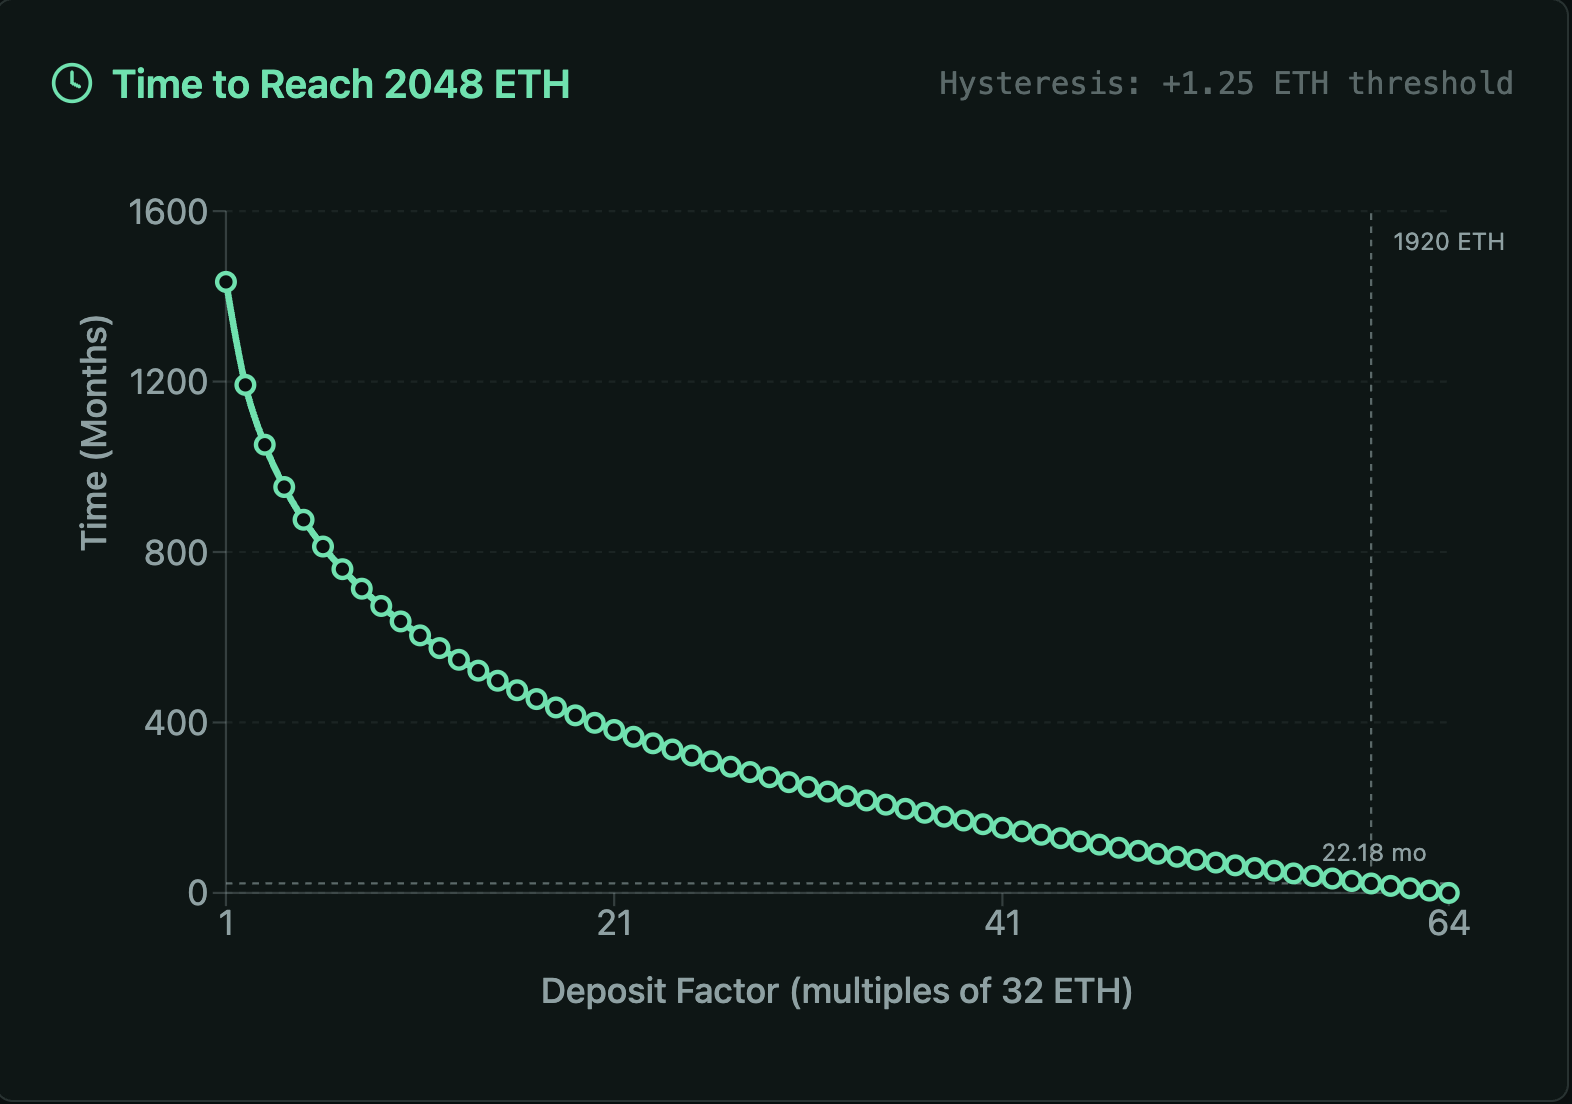
---
# Push Metrics and Logs to Obol
URL: https://docs.obol.org/run-a-dv/start/obol-monitoring
# Push Metrics and Logs to Obol
:::info
This is **optional but encouraged**, and does not confer any special privileges within Obol.
:::
## Metrics
Metrics are statistics that are gathered on a periodic basis and used to visualize the health and performance of your Charon node and DV cluster. These metrics power your local Grafana dashboard, as well as the hosted dashboards. Submitting metrics to the Obol Core team will allow you to see advanced performance analytics on Obol's hosted platform, as well as to opt into automated alerting whenever something goes wrong with your node.
This is for operators using the [example repo](https://github.com/ObolNetwork/charon-distributed-validator-node) from our [quickstart guide](./quickstart_overview.md) (or [Lido equivalent](https://github.com/ObolNetwork/charon-distributed-validator-node)), and have been provided with **Monitoring Credentials** used to push Distributed Validator metrics to Obol's central Prometheus cluster to monitor, analyze, and improve their Distributed Validator Cluster's performance. (For example, this is necessary to participate in the Obol [Techne](https://squadstaking.com/techne) credential program.)
#### Update the monitoring token in the `.env` file
* Inside your `.env` file, uncomment the `PROM_REMOTE_WRITE_TOKEN` line by removing the `#` symbol.
* Enter your monitoring token in the format shown below:
```shell
PROM_REMOTE_WRITE_TOKEN=your_monitoring_token
```
#### Save the `.env` file and restart Prometheus
Save the `.env` file, and run the `docker compose up -d` command, and prometheus will be restarted to apply the changes.
```shell
docker compose up -d
# Alternatively
docker compose restart prometheus
```
The last step in your DappNode setup is to add your Monitoring Credentials. This allows you to push distributed validator metrics to Obol’s central Prometheus cluster for monitoring, analysis, and performance optimization of your Distributed Validator Cluster. It also facilitates easier troubleshooting with the Obol team when needed.
1. Get Prometheus credentials from Obol, which will look like:
```
obol20tnt8UC...
```
2. Navigate to your Obol package in DappNode and go to the Config tab.
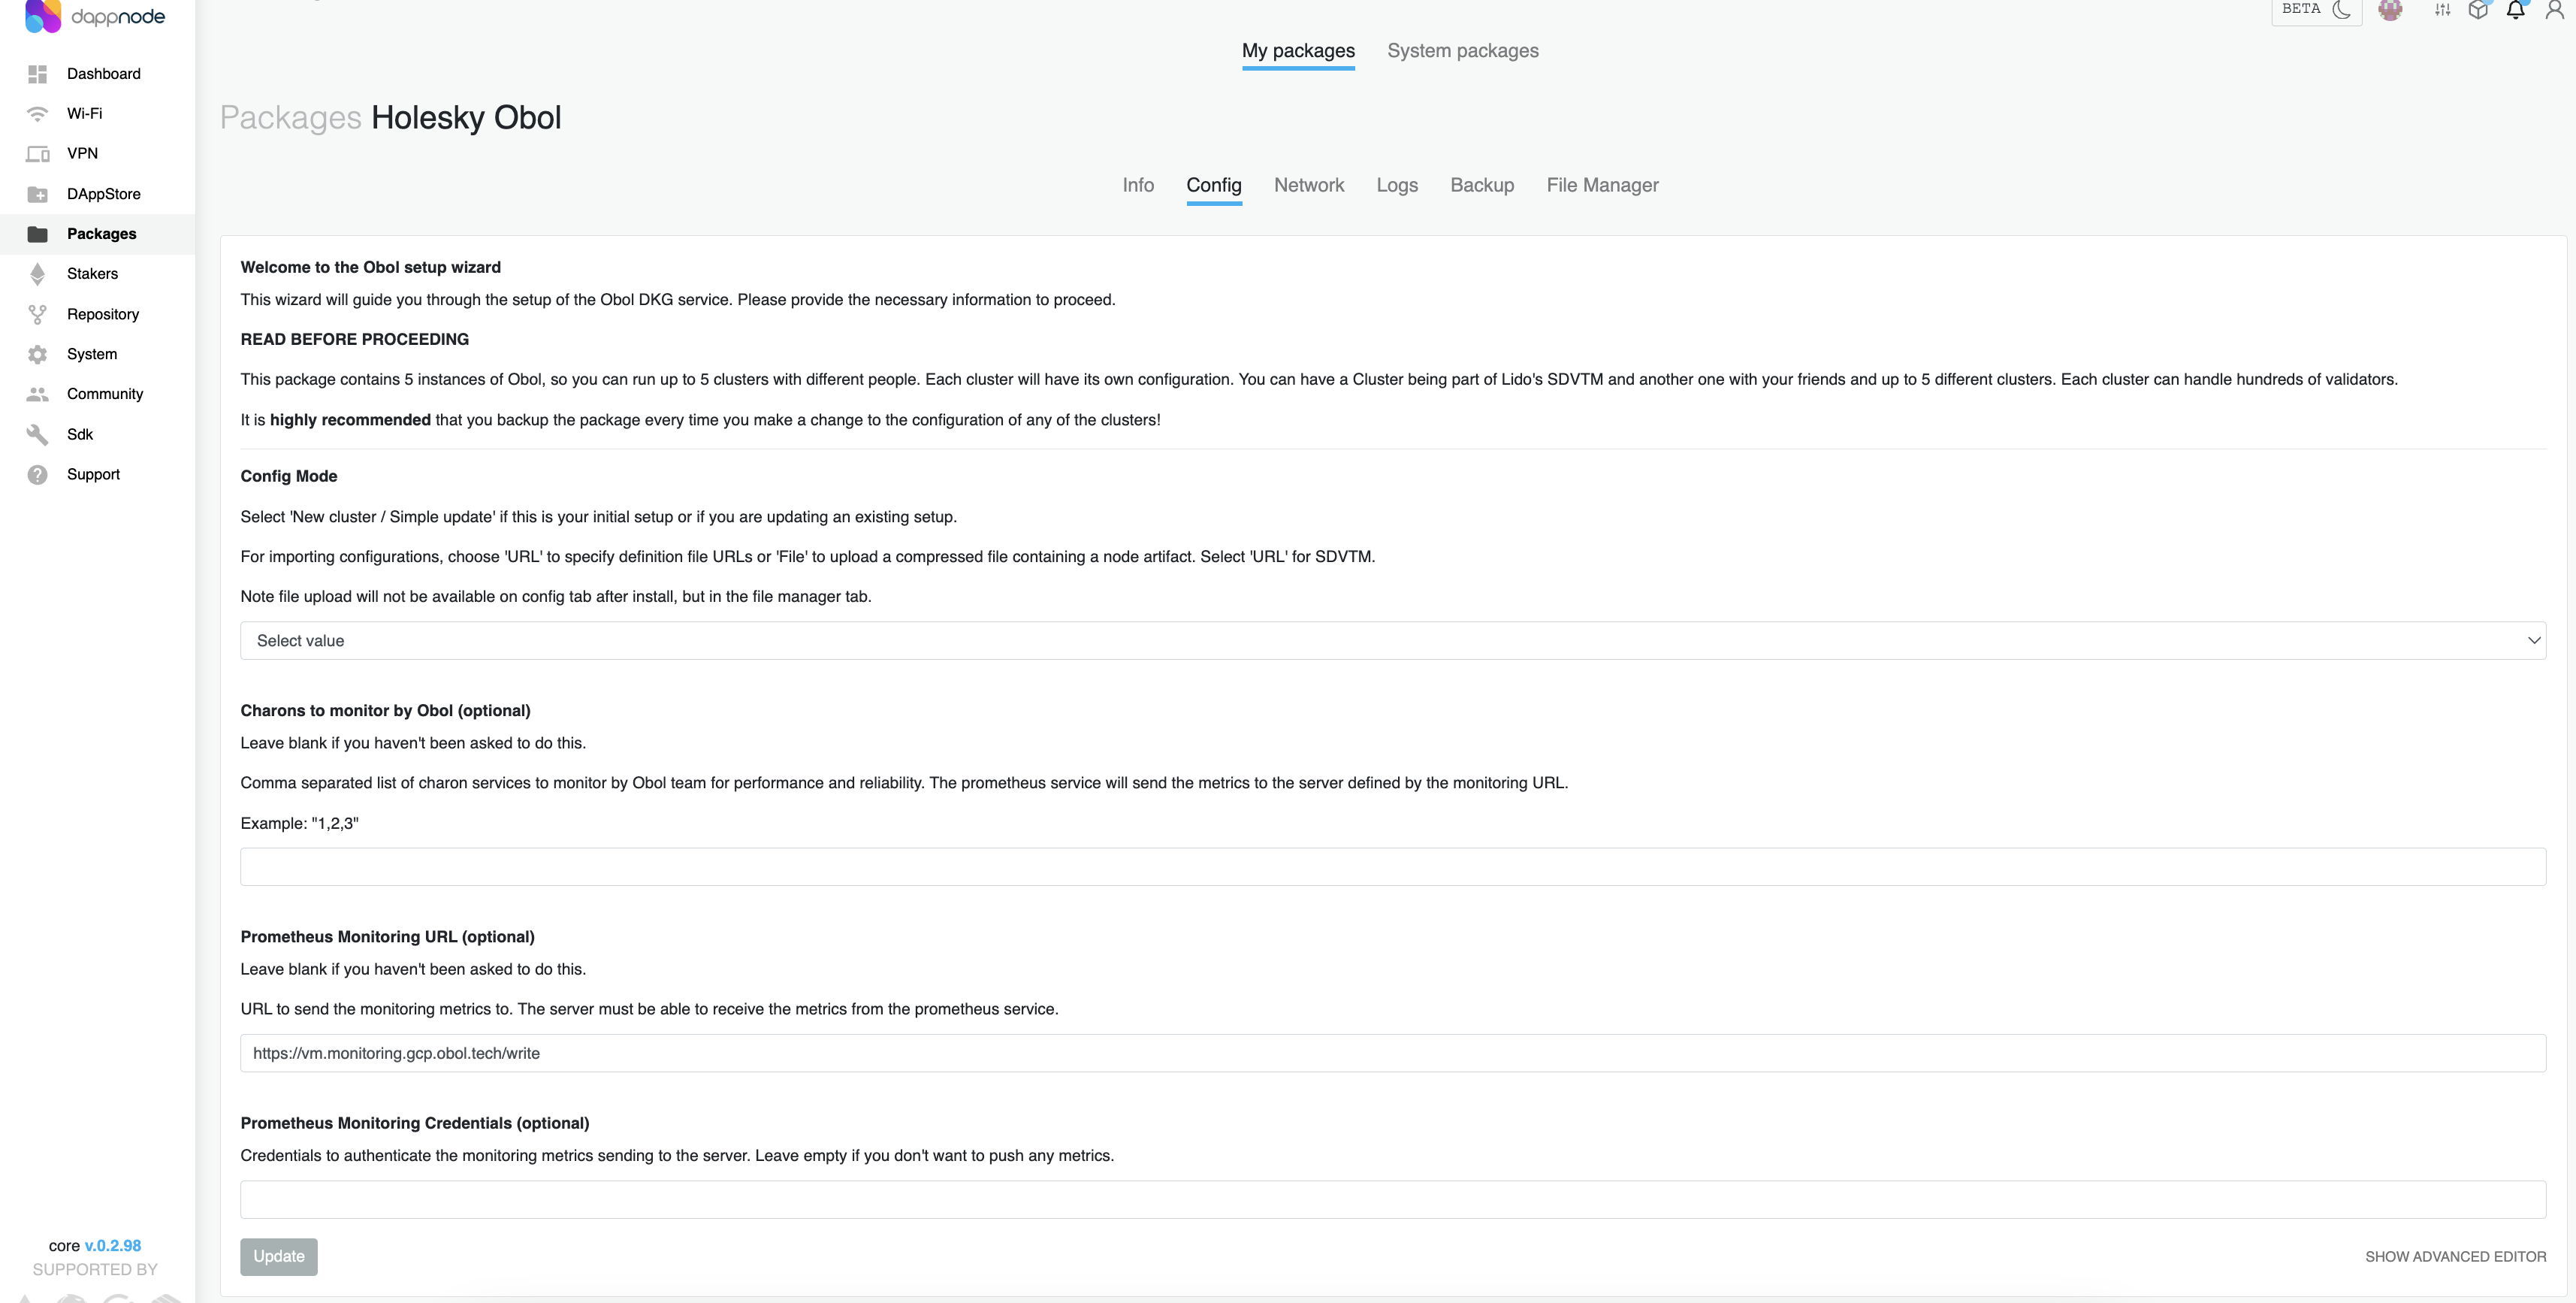
3. At the bottom of the page, add the credential token under **Prometheus Monitoring Credentials (optional)**, then click the **Update** button.
4. Return to the **Info** tab, scroll down to the Containers section, and click the down arrow to view all container statuses. If the Prometheus container is stopped, please restart it.
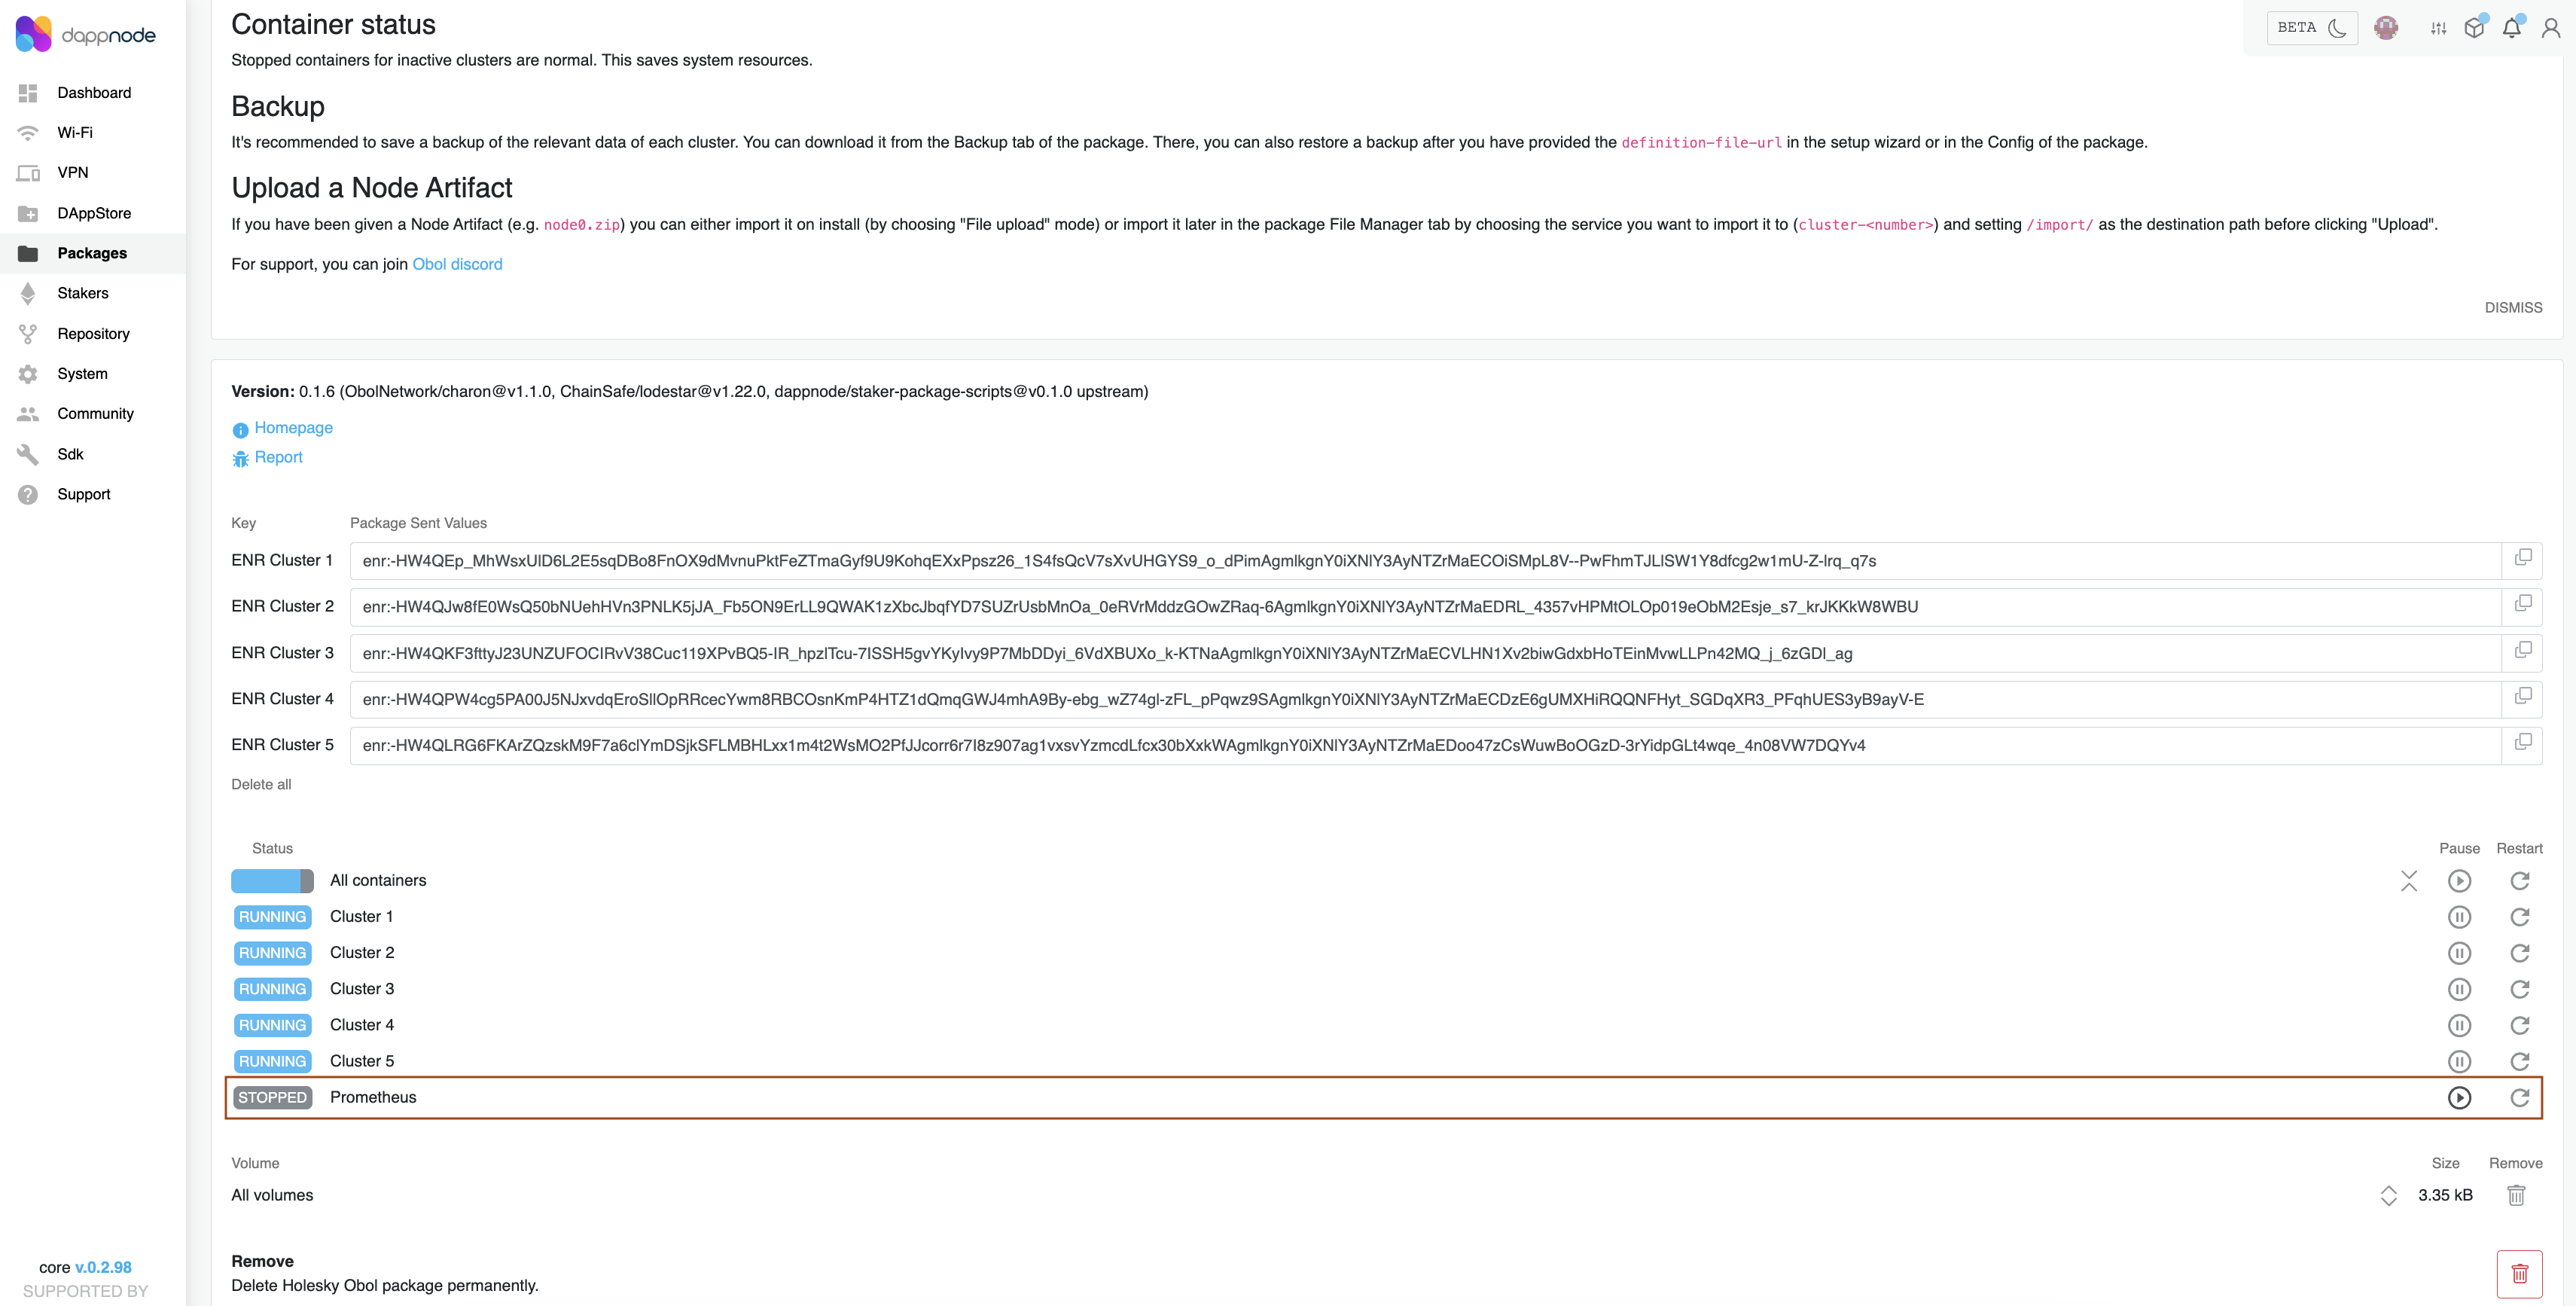
Get a Prometheus monitoring credential from the Obol core team, it will look like:
```log
obol20tnt8UC...
```
Then, either add `--set centralMonitoring.enabled=true --set-string centralMonitoring.token='YOUR_TOKEN_HERE'` to your `helm install` command, or if using a Values.yaml file, update `centralMonitoring.enabled` to `true`, and `centralMonitoring.token` to the monitoring credential you have been given, and then install/upgrade the chart.
```yaml
# -- Central Monitoring
centralMonitoring:
# -- Specifies whether central monitoring should be enabled
enabled: true
# -- https endpoint to obol central prometheus
promEndpoint: "https://vm.monitoring.gcp.obol.tech/write"
# -- The authentication token to the central Obol prometheus instance
token: "YOUR_TOKEN_HERE"
```
## Logs
Metrics show the performance of a cluster, but sometimes, there is reason to go into deeper detail of a clusters runtime, by reviewing its logs. Sometimes logs from the Charon client alone are sufficient, but often times (for example in the case of a missed proposal), the logs from other parts of the stack are necessary to debug a situation (e.g. a MEV-sidecar and a beacon node).
An Obol core team member will give you a URL to send your logs to, and if feasible, sending all logs is preferable to sending only Charon logs. In custom deployments that might not be convenient or feasible, and sending only Charon logs may suffice. Follow the instructions below to configure automated log submission.
If you are using one of our [Quickstart](https://github.com/ObolNetwork/charon-distributed-validator-node) [repos](https://github.com/ObolNetwork/lido-charon-distributed-validator-node), you should uncomment the `CHARON_LOKI_ADDRESSES` environment variable, and save the URL provided to you by the Obol team as the value, you should also uncomment `MONITORING=${MONITORING:-monitoring},monitoring-log-collector` to enable the [Alloy](https://grafana.com/docs/alloy/latest/) container, which collects logs from all containers and submits them to Obol. Once you've saved these changes to your `.env` file, you should run `docker compose up -d` to (re)start the containers as needed.
```env
# Uncomment and set the log URL
CHARON_LOKI_ADDRESSES="URL here"
# Uncomment both and set to the details of your node, otherwise the core team won't be able to isolate your logs among all the others
CLUSTER_NAME="The name of your cluster"
CLUSTER_PEER="The name of your peer. e.g. approachable-chair, unsightly-couch"
# Uncomment
MONITORING=${MONITORING:-monitoring},monitoring-log-collector
```
Given a URL, you can either pass it to Charon as an additional flag to `charon run`, or by setting an environment variable on the Charon container.
```sh
--loki-addresses="URL here"
```
Or:
```env
CHARON_LOKI_ADDRESSES="URL here"
```
---
# Prepare to Run a DV
URL: https://docs.obol.org/run-a-dv/prepare
# prepare
---
# How and Where To Run DVs
URL: https://docs.obol.org/run-a-dv/prepare/how_where_dvs
# How and Where To Run DVs
## Launchers and Deployment Tooling
* [Obol CDVN](https://github.com/ObolNetwork/charon-distributed-validator-node)
* [Obol K8s](https://github.com/ObolNetwork/charon-k8s-distributed-validator-node)
* [Obol Helm Charts](https://github.com/ObolNetwork/helm-charts)
* [Obol Ansible Playbooks](https://github.com/ObolNetwork/obol-ansible)
* [Dappnode](https://docs.dappnode.io/docs/user/staking/ethereum/dvt-technologies/obol-network/)
* [Stereum](https://stereum.net/)
* [Sedge](https://github.com/ObolNetwork/sedge/blob/develop/docs/docs/quickstart/charon.mdx)
* [Terraform Charon Relay](https://github.com/ObolNetwork/terraform-charon-relay)
* [Terraform Grafana Charon dashboards](https://github.com/ObolNetwork/terraform-grafana-dashboards)
## Quickstart Guides
* [Run a DV alone](../start/create-a-dv-alone.mdx)
* [Run a DV as a group](../start/create-a-dv-with-a-group.mdx)
## CL+VC Combinations:
**Legend**
* ✅: All duties succeed in testing
* 🟡: All duties succeed in testing, except non-penalized aggregation duties
* 🟠: Duties may fail for this combination
* 🔴: One or more duties fails consistently
| Validator 👉 Consensus 👇 | Teku v24.10.3 | Lighthouse v5.3.0 | Lodestar v1.23.0 | Nimbus v24.10.0 | Prysm v5.1.2 | Remarks |
| ------------------------- | ------------- | ----------------- | ---------------- | --------------- | ------------ | ----------------------------------------------------------------------------------------------------------------------------------------------------------------------------------------------------------------------------------------------------------------------------------- |
| Teku v24.10.3 | ✅ | 🟡 | ✅ | ✅ | 🟠 | Teku `beacon node` needs the `--validators-graffiti-client-append-format=DISABLED` flag in order to produce blocks properly. Teku `validator client` is only failing aggregation duties 50% of the time, which are not directly penalized but impact network density at high scale. |
| Lighthouse v5.3.0 | ✅ | 🟡 | ✅ | ✅ | ✅ | Lighthouse `validator client` is only failing aggregation duties, which are not directly penalized but impact network density at high scale. |
| Lodestar v1.23.0 | ✅ | 🟡 | ✅ | ✅ | 🟠 | |
| Nimbus v24.10.0 | ✅ | 🟡 | ✅ | ✅ | 🟠 | |
| Prysm v5.1.2 | ✅ | 🟡 | ✅ | ✅ | ✅ | Prysm `validator client` is failing aggregation duties 50% of the time, which are not directly penalized but impact network density at high scale. In some combinations rare failures of attestation and proposal duties were observed (0-2% per epoch). |
Note: for the most recent compatibility information, please see the [release notes](https://github.com/ObolNetwork/charon/releases/) from the most recent release of Charon.
---
# Deployment Best Practices
URL: https://docs.obol.org/run-a-dv/prepare/deployment-best-practices
# Deployment Best Practices
The following are a selection of best practices for deploying Distributed Validator Clusters at scale on mainnet.
## Hardware Specifications
The following specifications are recommended for bare metal machines for clusters intending to run a significant number of mainnet validators:
### Minimum Specs
* A CPU with 4+ cores, favoring high clock speed over more cores. ( >3.0GHz and higher or a cpubenchmark [single thread](https://www.cpubenchmark.net/singleThread.html) score of >2,500)
* 16GB of RAM
* 2TB+ free SSD disk space (for mainnet)
* 1000 read/write SSD IOPS
* 500MB/s read/write SSD speed
* 10Mbps internet bandwidth
### Recommended Specs for extremely large clusters
* A CPU with 8+ physical cores, with clock speeds >3.5Ghz
* 32GB+ RAM (depending on the EL+CL clients)
* 4TB+ NVMe storage
* 2000 read/write SSD IOPS
* 1000MB/s read/write SSD speed
* 25Mbps internet bandwidth
An NVMe storage device is **highly recommended for optimal performance**, offering nearly 10x more random read/writes per second than a standard SSD.
Inadequate hardware (low-performance virtualized servers and/or slow HDD storage) has been observed to hinder performance, indicating the necessity of provisioning adequate resources. **CPU clock speed and Disk throughput+latency are the most important factors for running a performant validator.**
Note that the Charon client itself takes less than 1GB of RAM and minimal CPU load. In order to optimize both performance and cost-effectiveness, it is recommended to prioritize physical over virtualized setups. Such configurations typically offer greater performance and minimize overhead associated with virtualization, contributing to improved efficiency and reliability.
When constructing a DV cluster, it is important to be conscious of whether a cluster runs across cloud providers or stays within a single provider's private networking. This likely can impact the bandwidth and latency of the connections between nodes, as well as the egress costs of the cluster (Charon has a relatively low communication with its peers, averaging 10s of kb/s in large mainnet clusters). Ideally, bare metal machines in different locations within the same continent and with at least two providers, balances redundancy and performance.
## Intra-cluster Latency
It is recommended to **keep peer ping latency below 235 milliseconds for all peers in a cluster**. Charon should report a consensus duration averaging under 1 second through its prometheus metric `core_consensus_duration_seconds_bucket` and associated grafana panel titled "Consensus Duration".
In cases where latencies exceed these thresholds, efforts should be made to reduce the physical distance between nodes or optimize Internet Service Provider (ISP) settings accordingly. Ensure all nodes are connecting to one another directly rather than through a relay.
For high-scale, performance deployments; inter-peer latency of < 25ms is optimal, along with an average consensus duration under 100ms.
## Peer Connections
Charon clients can establish connections with one another in two ways: either through a third publicly accessible server known as [a relay](../../learn/charon/charon-cli-reference.md#host-a-relay) or directly with one another if they can establish a connection. The former is known as a relay connection and the latter is known as a direct connection.
It is important that all nodes in a cluster be directly connected to one another - this can halve the latency between them and reduces bandwidth constraints significantly. Opening Charon’s p2p port (the default is `3610`) to the Internet, or configuring your routers NAT gateway to permit connections to your Charon client, are what are required to facilitate a direct connection between clients. Confirm direct peer reachability with `charon alpha test peers`.
## Node Locations
For optimal performance and high availability, it is recommended to provision machines or virtual machines (VMs) within the same continent. This practice helps minimize potential latency issues ensuring efficient communication and responsiveness. Consider maps of [undersea internet cables](https://www.submarinecablemap.com/) when selecting locations across oceans with low latency.
When operating multiple nodes within a cloud environment, care must be taken to distribute nodes across availability zones to avoid AZ outages becoming cluster outages.
## Instance Independence
Each node in the cluster should have its own independent beacon node (EL+CL) and validator client as well as Charon client. Sharing beacon nodes between the different nodes significantly hinders the benefits of running a Charon cluster by reintroducing a single point of failure to the distributed architecture.
## Beacon Node Redundancy
In cases where multiple beacon nodes are available to a node, Charon should be configured to use both in parallel by adding them to `--beacon-node-endpoints`. This will query each beacon node and use the fastest response, improving both performance and availability. Only in situations where this is not economically feasible should `--fallback-beacon-node-endpoints` be used instead, which will query beacon nodes sequentially. Sequential querying will decrease performance due to timeouts being required before failover.
## Placement of Charon clients
If you wish to divide a Distributed Validator node across multiple physical or virtual machines; locate the Charon client on the EL/CL machine instead of the VC machine. This setup reduces latency from Charon to the consensus layer, as well as keeping the public-internet connected clients separate from the clients that hold the validator private keys. If Charon and the VC connect over an untrusted network, the connection should be encrypted (VPN, Kubernetes [CNI](https://kubernetes.io/docs/concepts/extend-kubernetes/compute-storage-net/network-plugins/) etc).
## Node Configuration
Cluster sizes that allow for Byzantine Fault Tolerance are recommended as they are safer than clusters with simply Crash Fault Tolerance (See this guide for reference - [Cluster Size and Resilience](../../learn/charon/cluster-configuration.md#cluster-size-and-resilience)). A minimum of four Charon nodes is strongly recommended for this reason.
## MEV-Boost Relays
MEV relays are configured at the Consensus Layer or MEV-boost client level. Refer to our [guide](../../advanced-and-troubleshooting/advanced/enable-mev.mdx) to ensure all necessary configuration has been applied to your clients. As with all validators, low latency during proposal opportunities is extremely important. By default, MEV-Boost waits for all configured relays to return a bid, or will timeout if any have not returned a bid within 950ms. This default timeout is generally too slow for a distributed cluster (think of this time as additive to the time it takes the cluster to come to consensus, both of which need to happen within a 2 second window for optimal proposal broadcasting). It is likely better to only list relays that are located geographically near your node, so that once all relays respond (e.g. in < 50ms) your cluster will move forward with the proposal.
Use Charon's [`test mev` command](./test-a-cluster.mdx#test-mev-relay) to test a number of your preferred relays, and select the two or three relays with the lowest latency to your node(s), you do not need to have the same relays on each node in a cluster.
## Builder Block Selection
By default, most consensus clients apply a comparison factor or value boost when evaluating builder bids against locally-built blocks, which can cause a local block to be selected even when a builder bid is available. For at-scale deployments aiming to maximize MEV capture and consistent proposal behavior, configure your consensus client to never prefer locally-built blocks over builder bids.
The relevant flags vary by consensus client. The flags below either force builder-always selection or remove the default local-block bias, depending on what the client supports:
- **Teku**: `--builder-bid-compare-factor=BUILDER_ALWAYS` (set on the beacon node). Forces builder-always selection.
- **Lighthouse**: `--prefer-builder-proposals` (set on the validator client). Forces builder-always selection.
- **Lodestar**: `--builder.selection=builderalways` (set on the validator client). Forces builder-always selection.
- **Prysm**: `--local-block-value-boost=0` (set on the beacon node). Removes the default 10% local-block bias so builder and local bids compete on equal value, but a higher-value local block can still be selected. Prysm has no builder-always mode.
- **Nimbus**: `--local-block-value-boost=0` (set on the beacon node). Same caveat as Prysm. Note that the Nimbus team recommends a non-zero value to mitigate the risk of a relay failing to publish the advertised block.
Always preferring the builder maximizes MEV capture but increases the risk of a missed proposal if a relay is slow, returns a bad bid, or fails to publish the block. Operators that prioritize proposal reliability over MEV capture may instead keep a small local-block boost (e.g. `--local-block-value-boost=3` on Prysm/Nimbus, or a comparable percentage factor on Teku) as a liveness safety margin.
## Client Diversity
Obol clusters should consist of a mix of different consensus, execution, and validator clients. Charon can't [detect client failures](../../learn/further-reading/ethereum_and_dvt.md#deep-dive-into-dvt-and-charons-architecture) if all nodes are using the same client. At a minimum, no single client should comprise the [threshold](../../learn/charon/cluster-configuration.md#cluster-size-and-resilience) of nodes in the cluster.
For example:
A 7 node cluster with 4 Teku, 2 Lodestar and 1 Nimbus for validator clients **does not** have client error safety since the threshold (4) of votes can be met with just the Teku client.
A 7 node cluster with 3 Teku, 3 Lodestar and 1 Nimbus for validator clients **is safe against a single client bug** as the threshold is not met by any one client.
Keep in mind that client diversity includes EL, CL and VC clients and each layer needs an appropriate mix for optimal security.
Remote signers can be included as well, such as Web3signer or Dirk. A diversity of private key infrastructure setups further reduces the risk of total key compromise.
Tested client combinations can be found in the [release notes](https://github.com/ObolNetwork/charon/releases) for each Charon version.
As an additional safeguard against client bugs that could produce a chain split, Charon's `chain_split_halt` feature has peers compare the leader's source and target votes against attester data from their own beacon node before participating in QBFT consensus. If the votes disagree, the peer refuses to participate, preventing the cluster from signing an attestation on the wrong fork. This trades some liveness (peers may need to wait for their local beacon node, and contentious forks can result in no attestation) for stronger safety against signing through a chain split.
The feature is currently in alpha and is not enabled by default. To enable it, add `--feature-set-enable=chain_split_halt` to your `charon run` command.
## Execution Layer Configuration
When available on the EL client (e.g [Nethermind](../../advanced-and-troubleshooting/troubleshooting/client_configurations.md#nethermind)), blob inclusion for locally-built blocks should be set to 0. Setting blob count to 0 for locally-built blocks avoids the additional latency of gathering blob transactions, which matters when falling back from MEV relay blocks under time pressure.
For Nethermind:
```shell
--Blocks.BlockProductionBlobLimit 0
```
## Metrics Monitoring
Node operators should push [standard monitoring](../start/obol-monitoring.mdx) (Prometheus) and logging (Loki) data to Obol Labs' core team's cloud infrastructure for in-depth analysis of performance data and to assist during potential issues that may arise. The logging and metrics configuration values will be provided by the Obol team during onboarding.
It is recommended that operators independently store information on their node health over the course of the validator lifecycle as well as any information on validator performance that they collect during the normal life cycle of a validator.
## Obol Splits
Leveraging [Obol Splits](../../learn/intro/obol-splits.md) smart contracts allows for non-custodial fund handling and allows for net customer payouts in an ongoing manner. Obol Splits ensure no commingling of funds across customers, and maintain full non-custodial integrity. Read more about Obol Splits [here](../../learn/intro/frequently-asked-questions.mdx#obol-splits).
## Deposit Process
Deposit processes can be done via an automated script. This can be used for DV clusters until they reach the desired number of validators.
It is important to allow time for the validators to be activated (see current [queue](https://beaconcha.in/validators/queues)).
Consider using batching smart contracts to reduce the gas cost of a script, but take caution in their integration not to make an invalid deposit.
---
# Test a Cluster
URL: https://docs.obol.org/run-a-dv/prepare/test-a-cluster
# Test a Cluster
Charon test commands are designed to help you evaluate the performance and readiness of your candidate cluster. It allows you to test your connection to other Charon peers, the performance of your beacon node(s), the readiness of your validator client, the performance of the MEV relays you will be using and the infrastructure on which you will run the cluster. It prints a performance report to the standard output (which can be omitted with the `--quiet` flag) and a machine-readable JSON format of the report if the `--output-json` flag is set.
:::tip
Adding the `--publish` flag to the below commands, and running the command from the directory containing your `.charon` folder, will submit the test results to the [Obol API](../../api/what-is-this-api.md). Publishing your performance reports grows the staking node dataset, and allows Obol and Ethereum development teams to make data-driven choices regarding the required specs for validating Ethereum. We hope you will consider opting in.
:::
#### Test all
Intended for running tests across all categories. Each flag should have a prefix for its category (i.e.: the flag `--endpoints` from the beacon tests becomes `--beacon-endpoints`). For details about each category refer to their respective sections.
Regular tests intended for relatively fast run, without putting any major load on any tested system. Based on which stage you are with your cluster creation, some steps are eased.
**Pre-requisites**
* [ENR private key](../../learn/charon/charon-cli-reference.md#creating-an-enr-for-charon).
* Peers' ENRs, supplied to the `--peers-enrs` flag.
* Running beacon node(s) towards which tests will be executed, supplied to `--beacon-endpoints` flag.
* Running validator client towards which tests will be executed.
* Running MEV relay(s) towards which tests will be executed, supplied to `--mev-endpoints` flag.
**Example run**
```sh
charon alpha test all \
--peers-enrs="enr:-HW4QMno_MB_ID6GFVxoIQAHHVHZZZjzFctxtX2tm9D95tvaPbHathi8YUP8jh8v2YUAVu2fYWEOB_BT14pt8QgiGg2AgmlkgnY0iXNlY3AyNTZrMaECdpnK83s0dbBwCaEfDIkQ-3nJkkC93STvv6Vmi0bYlzg,enr:-HW4QO2vefLueTBEUGly5hkcpL7NWdMKWx7Nuy9f7z6XZInCbFAc0IZj6bsnmj-Wi4ElS6jNa0Mge5Rkc2WGTVemas2AgmlkgnY0iXNlY3AyNTZrMaECR9SmYQ_1HRgJmNxvh_ER2Sxx78HgKKgKaOkCROYwaDY" \
--beacon-endpoints="https://ethereum-hoodi-beacon-api.publicnode.com" \
--mev-endpoints="\
https://0x98f0ef62f00780cf8eb06701a7d22725b9437d4768bb19b363e882ae87129945ec206ec2dc16933f31d983f8225772b6@hoodi-helix.aestus.live,\
https://0x821f2a65afb70e7f2e820a925a9b4c80a159620582c1766b1b09729fec178b11ea22abb3a51f07b288be815a1a2ff516@bloxroute.hoodi.blxrbdn.com,\
https://0xafa4c6985aa049fb79dd37010438cfebeb0f2bd42b115b89dd678dab0670c1de38da0c4e9138c9290a398ecd9a0b3110@boost-relay-hoodi.flashbots.net,\
https://0xb1559beef7b5ba3127485bbbb090362d9f497ba64e177ee2c8e7db74746306efad687f2cf8574e38d70067d40ef136dc@relay-hoodi.ultrasound.money,\
https://0xaa58208899c6105603b74396734a6263cc7d947f444f396a90f7b7d3e65d102aec7e5e5291b27e08d02c50a050825c2f@hoodi.titanrelay.xyz"
```
**Pre-requisites**
* Cluster definition file, supplied to the `--peers-definition-file` flag.
* Running beacon node(s) towards which tests will be executed, supplied to `--beacon-endpoints` flag.
* Running validator client towards which tests will be executed.
* Running MEV relay(s) towards which tests will be executed, supplied to `--mev-endpoints` flag.
**Example run**
```sh
charon alpha test all \
--peers-definition-file="./.charon/cluster-definition.json" \
--beacon-endpoints="https://ethereum-hoodi-beacon-api.publicnode.com" \
--mev-endpoints="\
https://0x98f0ef62f00780cf8eb06701a7d22725b9437d4768bb19b363e882ae87129945ec206ec2dc16933f31d983f8225772b6@hoodi-helix.aestus.live,\
https://0x821f2a65afb70e7f2e820a925a9b4c80a159620582c1766b1b09729fec178b11ea22abb3a51f07b288be815a1a2ff516@bloxroute.hoodi.blxrbdn.com,\
https://0xafa4c6985aa049fb79dd37010438cfebeb0f2bd42b115b89dd678dab0670c1de38da0c4e9138c9290a398ecd9a0b3110@boost-relay-hoodi.flashbots.net,\
https://0xb1559beef7b5ba3127485bbbb090362d9f497ba64e177ee2c8e7db74746306efad687f2cf8574e38d70067d40ef136dc@relay-hoodi.ultrasound.money,\
https://0xaa58208899c6105603b74396734a6263cc7d947f444f396a90f7b7d3e65d102aec7e5e5291b27e08d02c50a050825c2f@hoodi.titanrelay.xyz"
```
**Pre-requisites**
* Cluster lock file, supplied to the `--peers-lock-file` flag.
* Running beacon node(s) towards which tests will be executed, supplied to `--beacon-endpoints` flag.
* Running validator client towards which tests will be executed.
* Running MEV relay(s) towards which tests will be executed, supplied to `--mev-endpoints` flag.
**Example run**
```sh
charon alpha test all \
--peers-lock-file="./.charon/cluster-lock.json" \
--beacon-endpoints="https://ethereum-hoodi-beacon-api.publicnode.com" \
--mev-endpoints="\
https://0x98f0ef62f00780cf8eb06701a7d22725b9437d4768bb19b363e882ae87129945ec206ec2dc16933f31d983f8225772b6@hoodi-helix.aestus.live,\
https://0x821f2a65afb70e7f2e820a925a9b4c80a159620582c1766b1b09729fec178b11ea22abb3a51f07b288be815a1a2ff516@bloxroute.hoodi.blxrbdn.com,\
https://0xafa4c6985aa049fb79dd37010438cfebeb0f2bd42b115b89dd678dab0670c1de38da0c4e9138c9290a398ecd9a0b3110@boost-relay-hoodi.flashbots.net,\
https://0xb1559beef7b5ba3127485bbbb090362d9f497ba64e177ee2c8e7db74746306efad687f2cf8574e38d70067d40ef136dc@relay-hoodi.ultrasound.money,\
https://0xaa58208899c6105603b74396734a6263cc7d947f444f396a90f7b7d3e65d102aec7e5e5291b27e08d02c50a050825c2f@hoodi.titanrelay.xyz"
```
Load tests intended for more time consuming run. Beacon nodes are put under heavy load. MEV relays are required to create real blocks. Based on which stage you are with your cluster creation, some steps are eased.
**Pre-requisites**
* [ENR private key](../../learn/charon/charon-cli-reference.md#creating-an-enr-for-charon).
* Peers' ENRs, supplied to the `--peers-enrs` flag.
* Running beacon node(s) towards which tests will be executed, supplied to `--beacon-endpoints` flag. It is important that the node is expecting to handle huge load and that it is **not** a publicly accessible one, which can block you.
* Running validator client towards which tests will be executed.
* Running MEV relay(s) towards which tests will be executed, supplied to `--mev-endpoints` flag.
* Running beacon node which will be used for fetching data required by the MEV relay for block creation, supplied to `--mev-beacon-node-endpoint`. There is no restrictions on the node and a public one can be used.
**Example run**
```sh
charon alpha test all \
--peers-enrs="enr:-HW4QMno_MB_ID6GFVxoIQAHHVHZZZjzFctxtX2tm9D95tvaPbHathi8YUP8jh8v2YUAVu2fYWEOB_BT14pt8QgiGg2AgmlkgnY0iXNlY3AyNTZrMaECdpnK83s0dbBwCaEfDIkQ-3nJkkC93STvv6Vmi0bYlzg,enr:-HW4QO2vefLueTBEUGly5hkcpL7NWdMKWx7Nuy9f7z6XZInCbFAc0IZj6bsnmj-Wi4ElS6jNa0Mge5Rkc2WGTVemas2AgmlkgnY0iXNlY3AyNTZrMaECR9SmYQ_1HRgJmNxvh_ER2Sxx78HgKKgKaOkCROYwaDY" \
--beacon-endpoints="http://127.0.0.1:5052/" \
--beacon-load-test \
--mev-endpoints="\
https://0xa15b52576bcbf1072f4a011c0f99f9fb6c66f3e1ff321f11f461d15e31b1cb359caa092c71bbded0bae5b5ea401aab7e@aestus.live,\
https://0xa7ab7a996c8584251c8f925da3170bdfd6ebc75d50f5ddc4050a6fdc77f2a3b5fce2cc750d0865e05d7228af97d69561@agnostic-relay.net,\
https://0x8b5d2e73e2a3a55c6c87b8b6eb92e0149a125c852751db1422fa951e42a09b82c142c3ea98d0d9930b056a3bc9896b8f@bloxroute.max-profit.blxrbdn.com,\
https://0xac6e77dfe25ecd6110b8e780608cce0dab71fdd5ebea22a16c0205200f2f8e2e3ad3b71d3499c54ad14d6c21b41a37ae@boost-relay.flashbots.net,\
https://0xa1559ace749633b997cb3fdacffb890aeebdb0f5a3b6aaa7eeeaf1a38af0a8fe88b9e4b1f61f236d2e64d95733327a62@relay.ultrasound.money,\
https://0x8c4ed5e24fe5c6ae21018437bde147693f68cda427cd1122cf20819c30eda7ed74f72dece09bb313f2a1855595ab677d@regional.titanrelay.xyz,\
https://0x8c4ed5e24fe5c6ae21018437bde147693f68cda427cd1122cf20819c30eda7ed74f72dece09bb313f2a1855595ab677d@global.titanrelay.xyz" \
--mev-beacon-node-endpoint="https://ethereum-beacon-api.publicnode.com" \
--mev-load-test
```
**Pre-requisites**
* Cluster definition file, supplied to the `--peers-definition-file` flag.
* Running beacon node(s) towards which tests will be executed, supplied to `--beacon-endpoints` flag. It is important that the node is expecting to handle huge load and that it is **not** a publicly accessible one, which can block you.
* Running validator client towards which tests will be executed.
* Running MEV relay(s) towards which tests will be executed, supplied to `--mev-endpoints` flag.
* Running beacon node which will be used for fetching data required by the MEV relay for block creation, supplied to `--mev-beacon-node-endpoint`. There is no restrictions on the node and a public one can be used.
**Example run**
```sh
charon alpha test all \
--peers-definition-file="./.charon/cluster-definition.json" \
--beacon-endpoints="http://127.0.0.1:5052/" \
--beacon-load-test \
--mev-endpoints="\
https://0xa15b52576bcbf1072f4a011c0f99f9fb6c66f3e1ff321f11f461d15e31b1cb359caa092c71bbded0bae5b5ea401aab7e@aestus.live,\
https://0xa7ab7a996c8584251c8f925da3170bdfd6ebc75d50f5ddc4050a6fdc77f2a3b5fce2cc750d0865e05d7228af97d69561@agnostic-relay.net,\
https://0x8b5d2e73e2a3a55c6c87b8b6eb92e0149a125c852751db1422fa951e42a09b82c142c3ea98d0d9930b056a3bc9896b8f@bloxroute.max-profit.blxrbdn.com,\
https://0xac6e77dfe25ecd6110b8e780608cce0dab71fdd5ebea22a16c0205200f2f8e2e3ad3b71d3499c54ad14d6c21b41a37ae@boost-relay.flashbots.net,\
https://0xa1559ace749633b997cb3fdacffb890aeebdb0f5a3b6aaa7eeeaf1a38af0a8fe88b9e4b1f61f236d2e64d95733327a62@relay.ultrasound.money,\
https://0x8c4ed5e24fe5c6ae21018437bde147693f68cda427cd1122cf20819c30eda7ed74f72dece09bb313f2a1855595ab677d@regional.titanrelay.xyz,\
https://0x8c4ed5e24fe5c6ae21018437bde147693f68cda427cd1122cf20819c30eda7ed74f72dece09bb313f2a1855595ab677d@global.titanrelay.xyz" \
--mev-beacon-node-endpoint="https://ethereum-beacon-api.publicnode.com" \
--mev-load-test
```
**Pre-requisites**
* Cluster lock file, supplied to the `--peers-lock-file` flag.
* Running beacon node(s) towards which tests will be executed, supplied to `--beacon-endpoints` flag. It is important that the node is expecting to handle huge load and that it is **not** a publicly accessible one, which can block you.
* Running validator client towards which tests will be executed.
* Running MEV relay(s) towards which tests will be executed, supplied to `--mev-endpoints` flag.
* Running beacon node which will be used for fetching data required by the MEV relay for block creation, supplied to `--mev-beacon-node-endpoint`. There is no restrictions on the node and a public one can be used.
**Example run**
```sh
charon alpha test all \
--peers-lock-file="./.charon/cluster-lock.json" \
--beacon-endpoints="http://127.0.0.1:5052/" \
--beacon-load-test \
--mev-endpoints="\
https://0xa15b52576bcbf1072f4a011c0f99f9fb6c66f3e1ff321f11f461d15e31b1cb359caa092c71bbded0bae5b5ea401aab7e@aestus.live,\
https://0xa7ab7a996c8584251c8f925da3170bdfd6ebc75d50f5ddc4050a6fdc77f2a3b5fce2cc750d0865e05d7228af97d69561@agnostic-relay.net,\
https://0x8b5d2e73e2a3a55c6c87b8b6eb92e0149a125c852751db1422fa951e42a09b82c142c3ea98d0d9930b056a3bc9896b8f@bloxroute.max-profit.blxrbdn.com,\
https://0xac6e77dfe25ecd6110b8e780608cce0dab71fdd5ebea22a16c0205200f2f8e2e3ad3b71d3499c54ad14d6c21b41a37ae@boost-relay.flashbots.net,\
https://0xa1559ace749633b997cb3fdacffb890aeebdb0f5a3b6aaa7eeeaf1a38af0a8fe88b9e4b1f61f236d2e64d95733327a62@relay.ultrasound.money,\
https://0x8c4ed5e24fe5c6ae21018437bde147693f68cda427cd1122cf20819c30eda7ed74f72dece09bb313f2a1855595ab677d@regional.titanrelay.xyz,\
https://0x8c4ed5e24fe5c6ae21018437bde147693f68cda427cd1122cf20819c30eda7ed74f72dece09bb313f2a1855595ab677d@global.titanrelay.xyz" \
--mev-beacon-node-endpoint="https://ethereum-beacon-api.publicnode.com" \
--mev-load-test
```
:::info
If you are running Charon using the [charon-distributed-validator-node repository](https://github.com/ObolNetwork/charon-distributed-validator-node/), services like the beacon node and validator client are hosted locally. To run the `beacon` node and `validator` client tests, you need to point them toward the correct Docker container, this includes specifying the Docker container’s network. Check your docker networks with the command `docker network ls`. When you run the test command, specify the Docker network with `--network `.
Read more about docker networking [here](https://docs.docker.com/engine/network/).
:::
#### Test all
Intended for running tests across all categories. Each flag should have a prefix for its category (i.e.: the flag `--endpoints` from the beacon tests becomes `--beacon-endpoints`). For details about each category refer to their respective sections.
Regular tests intended for relatively fast run, without putting any major load on any tested system. Based on which stage you are with your cluster creation, some steps are eased.
**Pre-requisites**
* [ENR private key](../../learn/charon/charon-cli-reference.md#creating-an-enr-for-charon).
* Peers' ENRs, supplied to the `--peers-enrs` flag.
* Running beacon node(s) towards which tests will be executed, supplied to `--beacon-endpoints` flag.
* Running validator client towards which tests will be executed.
* Running MEV relay(s) towards which tests will be executed, supplied to `--mev-endpoints` flag.
**Example run**
```sh
docker run -u $(id -u):$(id -g) --rm -v "$(pwd):/opt/charon/test" obolnetwork/charon:v1.10.3 alpha test all \
--peers-enrs="enr:-HW4QMno_MB_ID6GFVxoIQAHHVHZZZjzFctxtX2tm9D95tvaPbHathi8YUP8jh8v2YUAVu2fYWEOB_BT14pt8QgiGg2AgmlkgnY0iXNlY3AyNTZrMaECdpnK83s0dbBwCaEfDIkQ-3nJkkC93STvv6Vmi0bYlzg,enr:-HW4QO2vefLueTBEUGly5hkcpL7NWdMKWx7Nuy9f7z6XZInCbFAc0IZj6bsnmj-Wi4ElS6jNa0Mge5Rkc2WGTVemas2AgmlkgnY0iXNlY3AyNTZrMaECR9SmYQ_1HRgJmNxvh_ER2Sxx78HgKKgKaOkCROYwaDY" \
--peers-private-key-file="/opt/charon/test/.charon/charon-enr-private-key" \
--beacon-endpoints="https://ethereum-hoodi-beacon-api.publicnode.com" \
--mev-endpoints="\
https://0x98f0ef62f00780cf8eb06701a7d22725b9437d4768bb19b363e882ae87129945ec206ec2dc16933f31d983f8225772b6@hoodi-helix.aestus.live,\
https://0x821f2a65afb70e7f2e820a925a9b4c80a159620582c1766b1b09729fec178b11ea22abb3a51f07b288be815a1a2ff516@bloxroute.hoodi.blxrbdn.com,\
https://0xafa4c6985aa049fb79dd37010438cfebeb0f2bd42b115b89dd678dab0670c1de38da0c4e9138c9290a398ecd9a0b3110@boost-relay-hoodi.flashbots.net,\
https://0xb1559beef7b5ba3127485bbbb090362d9f497ba64e177ee2c8e7db74746306efad687f2cf8574e38d70067d40ef136dc@relay-hoodi.ultrasound.money,\
https://0xaa58208899c6105603b74396734a6263cc7d947f444f396a90f7b7d3e65d102aec7e5e5291b27e08d02c50a050825c2f@hoodi.titanrelay.xyz" \
--infra-disk-io-test-file-dir="/opt/charon/test"
```
**Pre-requisites**
* Cluster definition file, supplied to the `--peers-definition-file` flag.
* Running beacon node(s) towards which tests will be executed, supplied to `--beacon-endpoints` flag.
* Running validator client towards which tests will be executed.
* Running MEV relay(s) towards which tests will be executed, supplied to `--mev-endpoints` flag.
**Example run**
```sh
docker run -u $(id -u):$(id -g) --rm -v "$(pwd):/opt/charon/test" obolnetwork/charon:v1.10.3 alpha test all \
--peers-definition-file="/opt/charon/test/.charon/cluster-definition.json" \
--peers-private-key-file="/opt/charon/test/.charon/charon-enr-private-key" \
--beacon-endpoints="https://ethereum-hoodi-beacon-api.publicnode.com" \
--mev-endpoints="\
https://0x98f0ef62f00780cf8eb06701a7d22725b9437d4768bb19b363e882ae87129945ec206ec2dc16933f31d983f8225772b6@hoodi-helix.aestus.live,\
https://0x821f2a65afb70e7f2e820a925a9b4c80a159620582c1766b1b09729fec178b11ea22abb3a51f07b288be815a1a2ff516@bloxroute.hoodi.blxrbdn.com,\
https://0xafa4c6985aa049fb79dd37010438cfebeb0f2bd42b115b89dd678dab0670c1de38da0c4e9138c9290a398ecd9a0b3110@boost-relay-hoodi.flashbots.net,\
https://0xb1559beef7b5ba3127485bbbb090362d9f497ba64e177ee2c8e7db74746306efad687f2cf8574e38d70067d40ef136dc@relay-hoodi.ultrasound.money,\
https://0xaa58208899c6105603b74396734a6263cc7d947f444f396a90f7b7d3e65d102aec7e5e5291b27e08d02c50a050825c2f@hoodi.titanrelay.xyz" \
--infra-disk-io-test-file-dir="/opt/charon/test"
```
**Pre-requisites**
* Cluster lock file, supplied to the `--peers-lock-file` flag.
* Running beacon node(s) towards which tests will be executed, supplied to `--beacon-endpoints` flag.
* Running validator client towards which tests will be executed.
* Running MEV relay(s) towards which tests will be executed, supplied to `--mev-endpoints` flag.
**Example run**
```sh
docker run -u $(id -u):$(id -g) --rm -v "$(pwd):/opt/charon/test" obolnetwork/charon:v1.10.3 alpha test all \
--peers-lock-file="/opt/charon/test/.charon/cluster-lock.json" \
--peers-private-key-file="/opt/charon/test/.charon/charon-enr-private-key" \
--beacon-endpoints="https://ethereum-hoodi-beacon-api.publicnode.com" \
--mev-endpoints="\
https://0x98f0ef62f00780cf8eb06701a7d22725b9437d4768bb19b363e882ae87129945ec206ec2dc16933f31d983f8225772b6@hoodi-helix.aestus.live,\
https://0x821f2a65afb70e7f2e820a925a9b4c80a159620582c1766b1b09729fec178b11ea22abb3a51f07b288be815a1a2ff516@bloxroute.hoodi.blxrbdn.com,\
https://0xafa4c6985aa049fb79dd37010438cfebeb0f2bd42b115b89dd678dab0670c1de38da0c4e9138c9290a398ecd9a0b3110@boost-relay-hoodi.flashbots.net,\
https://0xb1559beef7b5ba3127485bbbb090362d9f497ba64e177ee2c8e7db74746306efad687f2cf8574e38d70067d40ef136dc@relay-hoodi.ultrasound.money,\
https://0xaa58208899c6105603b74396734a6263cc7d947f444f396a90f7b7d3e65d102aec7e5e5291b27e08d02c50a050825c2f@hoodi.titanrelay.xyz" \
--infra-disk-io-test-file-dir="/opt/charon/test"
```
Load tests intended for more time consuming run. Beacon nodes are put under heavy load. MEV relays are required to create real blocks. Based on which stage you are with your cluster creation, some steps are eased.
**Pre-requisites**
* [ENR private key](../../learn/charon/charon-cli-reference.md#creating-an-enr-for-charon).
* Peers' ENRs, supplied to the `--peers-enrs` flag.
* Running beacon node(s) towards which tests will be executed, supplied to `--beacon-endpoints` flag. It is important that the node is expecting to handle huge load and that it is **not** a publicly accessible one, which can block you.
* Running validator client towards which tests will be executed.
* Running MEV relay(s) towards which tests will be executed, supplied to `--mev-endpoints` flag.
* Running beacon node which will be used for fetching data required by the MEV relay for block creation, supplied to `--mev-beacon-node-endpoint`. There is no restrictions on the node and a public one can be used.
**Example run**
```sh
docker run --network="charon-distributed-validator-node_dvnode" -u $(id -u):$(id -g) --rm -v "$(pwd):/opt/charon/test" obolnetwork/charon:v1.10.3 alpha test all \
--peers-enrs="enr:-HW4QMno_MB_ID6GFVxoIQAHHVHZZZjzFctxtX2tm9D95tvaPbHathi8YUP8jh8v2YUAVu2fYWEOB_BT14pt8QgiGg2AgmlkgnY0iXNlY3AyNTZrMaECdpnK83s0dbBwCaEfDIkQ-3nJkkC93STvv6Vmi0bYlzg,enr:-HW4QO2vefLueTBEUGly5hkcpL7NWdMKWx7Nuy9f7z6XZInCbFAc0IZj6bsnmj-Wi4ElS6jNa0Mge5Rkc2WGTVemas2AgmlkgnY0iXNlY3AyNTZrMaECR9SmYQ_1HRgJmNxvh_ER2Sxx78HgKKgKaOkCROYwaDY" \
--peers-private-key-file="/opt/charon/test/.charon/charon-enr-private-key" \
--beacon-endpoints="http://lighthouse:5052/" \
--beacon-simulation-file-dir="/opt/charon/test" \
--beacon-load-test \
--validator-api-address="lodestar:5064" \
--mev-endpoints="\
https://0xa15b52576bcbf1072f4a011c0f99f9fb6c66f3e1ff321f11f461d15e31b1cb359caa092c71bbded0bae5b5ea401aab7e@aestus.live,\
https://0xa7ab7a996c8584251c8f925da3170bdfd6ebc75d50f5ddc4050a6fdc77f2a3b5fce2cc750d0865e05d7228af97d69561@agnostic-relay.net,\
https://0x8b5d2e73e2a3a55c6c87b8b6eb92e0149a125c852751db1422fa951e42a09b82c142c3ea98d0d9930b056a3bc9896b8f@bloxroute.max-profit.blxrbdn.com,\
https://0xac6e77dfe25ecd6110b8e780608cce0dab71fdd5ebea22a16c0205200f2f8e2e3ad3b71d3499c54ad14d6c21b41a37ae@boost-relay.flashbots.net,\
https://0xa1559ace749633b997cb3fdacffb890aeebdb0f5a3b6aaa7eeeaf1a38af0a8fe88b9e4b1f61f236d2e64d95733327a62@relay.ultrasound.money,\
https://0x8c4ed5e24fe5c6ae21018437bde147693f68cda427cd1122cf20819c30eda7ed74f72dece09bb313f2a1855595ab677d@regional.titanrelay.xyz,\
https://0x8c4ed5e24fe5c6ae21018437bde147693f68cda427cd1122cf20819c30eda7ed74f72dece09bb313f2a1855595ab677d@global.titanrelay.xyz" \
--mev-beacon-node-endpoint="https://ethereum-beacon-api.publicnode.com" \
--mev-load-test \
--infra-disk-io-test-file-dir="/opt/charon/test"
```
**Pre-requisites**
* Cluster definition file, supplied to the `--peers-definition-file` flag.
* Running beacon node(s) towards which tests will be executed, supplied to `--beacon-endpoints` flag. It is important that the node is expecting to handle huge load and that it is **not** a publicly accessible one, which can block you.
* Running validator client towards which tests will be executed.
* Running MEV relay(s) towards which tests will be executed, supplied to `--mev-endpoints` flag.
* Running beacon node which will be used for fetching data required by the MEV relay for block creation, supplied to `--mev-beacon-node-endpoint`. There is no restrictions on the node and a public one can be used.
**Example run**
```sh
docker run --network="charon-distributed-validator-node_dvnode" -u $(id -u):$(id -g) --rm -v "$(pwd):/opt/charon/test" obolnetwork/charon:v1.10.3 alpha test all \
--peers-definition-file="/opt/charon/test/.charon/cluster-definition.json" \
--peers-private-key-file="/opt/charon/test/.charon/charon-enr-private-key" \
--beacon-endpoints="http://lighthouse:5052/" \
--beacon-simulation-file-dir="/opt/charon/test" \
--beacon-load-test \
--validator-api-address="lodestar:5064" \
--mev-endpoints="\
https://0xa15b52576bcbf1072f4a011c0f99f9fb6c66f3e1ff321f11f461d15e31b1cb359caa092c71bbded0bae5b5ea401aab7e@aestus.live,\
https://0xa7ab7a996c8584251c8f925da3170bdfd6ebc75d50f5ddc4050a6fdc77f2a3b5fce2cc750d0865e05d7228af97d69561@agnostic-relay.net,\
https://0x8b5d2e73e2a3a55c6c87b8b6eb92e0149a125c852751db1422fa951e42a09b82c142c3ea98d0d9930b056a3bc9896b8f@bloxroute.max-profit.blxrbdn.com,\
https://0xac6e77dfe25ecd6110b8e780608cce0dab71fdd5ebea22a16c0205200f2f8e2e3ad3b71d3499c54ad14d6c21b41a37ae@boost-relay.flashbots.net,\
https://0xa1559ace749633b997cb3fdacffb890aeebdb0f5a3b6aaa7eeeaf1a38af0a8fe88b9e4b1f61f236d2e64d95733327a62@relay.ultrasound.money,\
https://0x8c4ed5e24fe5c6ae21018437bde147693f68cda427cd1122cf20819c30eda7ed74f72dece09bb313f2a1855595ab677d@regional.titanrelay.xyz,\
https://0x8c4ed5e24fe5c6ae21018437bde147693f68cda427cd1122cf20819c30eda7ed74f72dece09bb313f2a1855595ab677d@global.titanrelay.xyz" \
--mev-beacon-node-endpoint="https://ethereum-beacon-api.publicnode.com" \
--mev-load-test \
--infra-disk-io-test-file-dir="/opt/charon/test"
```
**Pre-requisites**
* Cluster lock file, supplied to the `--peers-lock-file` flag.
* Running beacon node(s) towards which tests will be executed, supplied to `--beacon-endpoints` flag. It is important that the node is expecting to handle huge load and that it is **not** a publicly accessible one, which can block you.
* Running validator client towards which tests will be executed.
* Running MEV relay(s) towards which tests will be executed, supplied to `--mev-endpoints` flag.
* Running beacon node which will be used for fetching data required by the MEV relay for block creation, supplied to `--mev-beacon-node-endpoint`. There is no restrictions on the node and a public one can be used.
**Example run**
```sh
docker run --network="charon-distributed-validator-node_dvnode" -u $(id -u):$(id -g) --rm -v "$(pwd):/opt/charon/test" obolnetwork/charon:v1.10.3 alpha test all \
--peers-lock-file="/opt/charon/test/.charon/cluster-lock.json" \
--peers-private-key-file="/opt/charon/test/.charon/charon-enr-private-key" \
--beacon-endpoints="http://lighthouse:5052/" \
--beacon-simulation-file-dir="/opt/charon/test" \
--beacon-load-test \
--validator-api-address="lodestar:5064" \
--mev-endpoints="\
https://0xa15b52576bcbf1072f4a011c0f99f9fb6c66f3e1ff321f11f461d15e31b1cb359caa092c71bbded0bae5b5ea401aab7e@aestus.live,\
https://0xa7ab7a996c8584251c8f925da3170bdfd6ebc75d50f5ddc4050a6fdc77f2a3b5fce2cc750d0865e05d7228af97d69561@agnostic-relay.net,\
https://0x8b5d2e73e2a3a55c6c87b8b6eb92e0149a125c852751db1422fa951e42a09b82c142c3ea98d0d9930b056a3bc9896b8f@bloxroute.max-profit.blxrbdn.com,\
https://0xac6e77dfe25ecd6110b8e780608cce0dab71fdd5ebea22a16c0205200f2f8e2e3ad3b71d3499c54ad14d6c21b41a37ae@boost-relay.flashbots.net,\
https://0xa1559ace749633b997cb3fdacffb890aeebdb0f5a3b6aaa7eeeaf1a38af0a8fe88b9e4b1f61f236d2e64d95733327a62@relay.ultrasound.money,\
https://0x8c4ed5e24fe5c6ae21018437bde147693f68cda427cd1122cf20819c30eda7ed74f72dece09bb313f2a1855595ab677d@regional.titanrelay.xyz,\
https://0x8c4ed5e24fe5c6ae21018437bde147693f68cda427cd1122cf20819c30eda7ed74f72dece09bb313f2a1855595ab677d@global.titanrelay.xyz" \
--mev-beacon-node-endpoint="https://ethereum-beacon-api.publicnode.com" \
--mev-load-test \
--infra-disk-io-test-file-dir="/opt/charon/test"
```
:::info
For Helm deployments, exec into your Charon pod to run test commands. Replace the namespace and pod name if you used different values during installation.
```sh
# Find your Charon pod (default namespace: dv-pod, default release: my-dv-pod)
kubectl get pods -n dv-pod -l app.kubernetes.io/instance=my-dv-pod
```
:::
#### Test all
Intended for running tests across all categories. Each flag should have a prefix for its category (i.e.: the flag `--endpoints` from the beacon tests becomes `--beacon-endpoints`). For details about each category refer to their respective sections.
Regular tests intended for relatively fast run, without putting any major load on any tested system. Based on which stage you are with your cluster creation, some steps are eased.
**Pre-requisites**
* [ENR private key](../../learn/charon/charon-cli-reference.md#creating-an-enr-for-charon).
* Peers' ENRs, supplied to the `--peers-enrs` flag.
* Running beacon node(s) towards which tests will be executed, supplied to `--beacon-endpoints` flag.
* Running validator client towards which tests will be executed.
* Running MEV relay(s) towards which tests will be executed, supplied to `--mev-endpoints` flag.
**Example run**
```sh
kubectl exec -it -n dv-pod my-dv-pod-0 -- charon alpha test all \
--peers-enrs="enr:-HW4QMno_MB_ID6GFVxoIQAHHVHZZZjzFctxtX2tm9D95tvaPbHathi8YUP8jh8v2YUAVu2fYWEOB_BT14pt8QgiGg2AgmlkgnY0iXNlY3AyNTZrMaECdpnK83s0dbBwCaEfDIkQ-3nJkkC93STvv6Vmi0bYlzg,enr:-HW4QO2vefLueTBEUGly5hkcpL7NWdMKWx7Nuy9f7z6XZInCbFAc0IZj6bsnmj-Wi4ElS6jNa0Mge5Rkc2WGTVemas2AgmlkgnY0iXNlY3AyNTZrMaECR9SmYQ_1HRgJmNxvh_ER2Sxx78HgKKgKaOkCROYwaDY" \
--beacon-endpoints="https://ethereum-hoodi-beacon-api.publicnode.com" \
--mev-endpoints="\
https://0x98f0ef62f00780cf8eb06701a7d22725b9437d4768bb19b363e882ae87129945ec206ec2dc16933f31d983f8225772b6@hoodi-helix.aestus.live,\
https://0x821f2a65afb70e7f2e820a925a9b4c80a159620582c1766b1b09729fec178b11ea22abb3a51f07b288be815a1a2ff516@bloxroute.hoodi.blxrbdn.com,\
https://0xafa4c6985aa049fb79dd37010438cfebeb0f2bd42b115b89dd678dab0670c1de38da0c4e9138c9290a398ecd9a0b3110@boost-relay-hoodi.flashbots.net,\
https://0xb1559beef7b5ba3127485bbbb090362d9f497ba64e177ee2c8e7db74746306efad687f2cf8574e38d70067d40ef136dc@relay-hoodi.ultrasound.money,\
https://0xaa58208899c6105603b74396734a6263cc7d947f444f396a90f7b7d3e65d102aec7e5e5291b27e08d02c50a050825c2f@hoodi.titanrelay.xyz"
```
**Pre-requisites**
* Cluster definition file, supplied to the `--peers-definition-file` flag.
* Running beacon node(s) towards which tests will be executed, supplied to `--beacon-endpoints` flag.
* Running validator client towards which tests will be executed.
* Running MEV relay(s) towards which tests will be executed, supplied to `--mev-endpoints` flag.
**Example run**
```sh
kubectl exec -it -n dv-pod my-dv-pod-0 -- charon alpha test all \
--peers-definition-file="./.charon/cluster-definition.json" \
--beacon-endpoints="https://ethereum-hoodi-beacon-api.publicnode.com" \
--mev-endpoints="\
https://0x98f0ef62f00780cf8eb06701a7d22725b9437d4768bb19b363e882ae87129945ec206ec2dc16933f31d983f8225772b6@hoodi-helix.aestus.live,\
https://0x821f2a65afb70e7f2e820a925a9b4c80a159620582c1766b1b09729fec178b11ea22abb3a51f07b288be815a1a2ff516@bloxroute.hoodi.blxrbdn.com,\
https://0xafa4c6985aa049fb79dd37010438cfebeb0f2bd42b115b89dd678dab0670c1de38da0c4e9138c9290a398ecd9a0b3110@boost-relay-hoodi.flashbots.net,\
https://0xb1559beef7b5ba3127485bbbb090362d9f497ba64e177ee2c8e7db74746306efad687f2cf8574e38d70067d40ef136dc@relay-hoodi.ultrasound.money,\
https://0xaa58208899c6105603b74396734a6263cc7d947f444f396a90f7b7d3e65d102aec7e5e5291b27e08d02c50a050825c2f@hoodi.titanrelay.xyz"
```
**Pre-requisites**
* Cluster lock file, supplied to the `--peers-lock-file` flag.
* Running beacon node(s) towards which tests will be executed, supplied to `--beacon-endpoints` flag.
* Running validator client towards which tests will be executed.
* Running MEV relay(s) towards which tests will be executed, supplied to `--mev-endpoints` flag.
**Example run**
```sh
kubectl exec -it -n dv-pod my-dv-pod-0 -- charon alpha test all \
--peers-lock-file="./.charon/cluster-lock.json" \
--beacon-endpoints="https://ethereum-hoodi-beacon-api.publicnode.com" \
--mev-endpoints="\
https://0x98f0ef62f00780cf8eb06701a7d22725b9437d4768bb19b363e882ae87129945ec206ec2dc16933f31d983f8225772b6@hoodi-helix.aestus.live,\
https://0x821f2a65afb70e7f2e820a925a9b4c80a159620582c1766b1b09729fec178b11ea22abb3a51f07b288be815a1a2ff516@bloxroute.hoodi.blxrbdn.com,\
https://0xafa4c6985aa049fb79dd37010438cfebeb0f2bd42b115b89dd678dab0670c1de38da0c4e9138c9290a398ecd9a0b3110@boost-relay-hoodi.flashbots.net,\
https://0xb1559beef7b5ba3127485bbbb090362d9f497ba64e177ee2c8e7db74746306efad687f2cf8574e38d70067d40ef136dc@relay-hoodi.ultrasound.money,\
https://0xaa58208899c6105603b74396734a6263cc7d947f444f396a90f7b7d3e65d102aec7e5e5291b27e08d02c50a050825c2f@hoodi.titanrelay.xyz"
```
Load tests intended for more time consuming run. Beacon nodes are put under heavy load. MEV relays are required to create real blocks. Based on which stage you are with your cluster creation, some steps are eased.
**Pre-requisites**
* [ENR private key](../../learn/charon/charon-cli-reference.md#creating-an-enr-for-charon).
* Peers' ENRs, supplied to the `--peers-enrs` flag.
* Running beacon node(s) towards which tests will be executed, supplied to `--beacon-endpoints` flag. It is important that the node is expecting to handle huge load and that it is **not** a publicly accessible one, which can block you.
* Running validator client towards which tests will be executed.
* Running MEV relay(s) towards which tests will be executed, supplied to `--mev-endpoints` flag.
* Running beacon node which will be used for fetching data required by the MEV relay for block creation, supplied to `--mev-beacon-node-endpoint`. There is no restrictions on the node and a public one can be used.
**Example run**
```sh
kubectl exec -it -n dv-pod my-dv-pod-0 -- charon alpha test all \
--peers-enrs="enr:-HW4QMno_MB_ID6GFVxoIQAHHVHZZZjzFctxtX2tm9D95tvaPbHathi8YUP8jh8v2YUAVu2fYWEOB_BT14pt8QgiGg2AgmlkgnY0iXNlY3AyNTZrMaECdpnK83s0dbBwCaEfDIkQ-3nJkkC93STvv6Vmi0bYlzg,enr:-HW4QO2vefLueTBEUGly5hkcpL7NWdMKWx7Nuy9f7z6XZInCbFAc0IZj6bsnmj-Wi4ElS6jNa0Mge5Rkc2WGTVemas2AgmlkgnY0iXNlY3AyNTZrMaECR9SmYQ_1HRgJmNxvh_ER2Sxx78HgKKgKaOkCROYwaDY" \
--beacon-endpoints="http://lighthouse:5052/" \
--beacon-load-test \
--validator-api-address="lodestar:5064" \
--mev-endpoints="\
https://0xa15b52576bcbf1072f4a011c0f99f9fb6c66f3e1ff321f11f461d15e31b1cb359caa092c71bbded0bae5b5ea401aab7e@aestus.live,\
https://0xa7ab7a996c8584251c8f925da3170bdfd6ebc75d50f5ddc4050a6fdc77f2a3b5fce2cc750d0865e05d7228af97d69561@agnostic-relay.net,\
https://0x8b5d2e73e2a3a55c6c87b8b6eb92e0149a125c852751db1422fa951e42a09b82c142c3ea98d0d9930b056a3bc9896b8f@bloxroute.max-profit.blxrbdn.com,\
https://0xac6e77dfe25ecd6110b8e780608cce0dab71fdd5ebea22a16c0205200f2f8e2e3ad3b71d3499c54ad14d6c21b41a37ae@boost-relay.flashbots.net,\
https://0xa1559ace749633b997cb3fdacffb890aeebdb0f5a3b6aaa7eeeaf1a38af0a8fe88b9e4b1f61f236d2e64d95733327a62@relay.ultrasound.money,\
https://0x8c4ed5e24fe5c6ae21018437bde147693f68cda427cd1122cf20819c30eda7ed74f72dece09bb313f2a1855595ab677d@regional.titanrelay.xyz,\
https://0x8c4ed5e24fe5c6ae21018437bde147693f68cda427cd1122cf20819c30eda7ed74f72dece09bb313f2a1855595ab677d@global.titanrelay.xyz" \
--mev-beacon-node-endpoint="https://ethereum-beacon-api.publicnode.com" \
--mev-load-test
```
**Pre-requisites**
* Cluster definition file, supplied to the `--peers-definition-file` flag.
* Running beacon node(s) towards which tests will be executed, supplied to `--beacon-endpoints` flag. It is important that the node is expecting to handle huge load and that it is **not** a publicly accessible one, which can block you.
* Running validator client towards which tests will be executed.
* Running MEV relay(s) towards which tests will be executed, supplied to `--mev-endpoints` flag.
* Running beacon node which will be used for fetching data required by the MEV relay for block creation, supplied to `--mev-beacon-node-endpoint`. There is no restrictions on the node and a public one can be used.
**Example run**
```sh
kubectl exec -it -n dv-pod my-dv-pod-0 -- charon alpha test all \
--peers-definition-file="./.charon/cluster-definition.json" \
--beacon-endpoints="http://lighthouse:5052/" \
--beacon-load-test \
--validator-api-address="lodestar:5064" \
--mev-endpoints="\
https://0xa15b52576bcbf1072f4a011c0f99f9fb6c66f3e1ff321f11f461d15e31b1cb359caa092c71bbded0bae5b5ea401aab7e@aestus.live,\
https://0xa7ab7a996c8584251c8f925da3170bdfd6ebc75d50f5ddc4050a6fdc77f2a3b5fce2cc750d0865e05d7228af97d69561@agnostic-relay.net,\
https://0x8b5d2e73e2a3a55c6c87b8b6eb92e0149a125c852751db1422fa951e42a09b82c142c3ea98d0d9930b056a3bc9896b8f@bloxroute.max-profit.blxrbdn.com,\
https://0xac6e77dfe25ecd6110b8e780608cce0dab71fdd5ebea22a16c0205200f2f8e2e3ad3b71d3499c54ad14d6c21b41a37ae@boost-relay.flashbots.net,\
https://0xa1559ace749633b997cb3fdacffb890aeebdb0f5a3b6aaa7eeeaf1a38af0a8fe88b9e4b1f61f236d2e64d95733327a62@relay.ultrasound.money,\
https://0x8c4ed5e24fe5c6ae21018437bde147693f68cda427cd1122cf20819c30eda7ed74f72dece09bb313f2a1855595ab677d@regional.titanrelay.xyz,\
https://0x8c4ed5e24fe5c6ae21018437bde147693f68cda427cd1122cf20819c30eda7ed74f72dece09bb313f2a1855595ab677d@global.titanrelay.xyz" \
--mev-beacon-node-endpoint="https://ethereum-beacon-api.publicnode.com" \
--mev-load-test
```
**Pre-requisites**
* Cluster lock file, supplied to the `--peers-lock-file` flag.
* Running beacon node(s) towards which tests will be executed, supplied to `--beacon-endpoints` flag. It is important that the node is expecting to handle huge load and that it is **not** a publicly accessible one, which can block you.
* Running validator client towards which tests will be executed.
* Running MEV relay(s) towards which tests will be executed, supplied to `--mev-endpoints` flag.
* Running beacon node which will be used for fetching data required by the MEV relay for block creation, supplied to `--mev-beacon-node-endpoint`. There is no restrictions on the node and a public one can be used.
**Example run**
```sh
kubectl exec -it -n dv-pod my-dv-pod-0 -- charon alpha test all \
--peers-lock-file="./.charon/cluster-lock.json" \
--beacon-endpoints="http://lighthouse:5052/" \
--beacon-load-test \
--validator-api-address="lodestar:5064" \
--mev-endpoints="\
https://0xa15b52576bcbf1072f4a011c0f99f9fb6c66f3e1ff321f11f461d15e31b1cb359caa092c71bbded0bae5b5ea401aab7e@aestus.live,\
https://0xa7ab7a996c8584251c8f925da3170bdfd6ebc75d50f5ddc4050a6fdc77f2a3b5fce2cc750d0865e05d7228af97d69561@agnostic-relay.net,\
https://0x8b5d2e73e2a3a55c6c87b8b6eb92e0149a125c852751db1422fa951e42a09b82c142c3ea98d0d9930b056a3bc9896b8f@bloxroute.max-profit.blxrbdn.com,\
https://0xac6e77dfe25ecd6110b8e780608cce0dab71fdd5ebea22a16c0205200f2f8e2e3ad3b71d3499c54ad14d6c21b41a37ae@boost-relay.flashbots.net,\
https://0xa1559ace749633b997cb3fdacffb890aeebdb0f5a3b6aaa7eeeaf1a38af0a8fe88b9e4b1f61f236d2e64d95733327a62@relay.ultrasound.money,\
https://0x8c4ed5e24fe5c6ae21018437bde147693f68cda427cd1122cf20819c30eda7ed74f72dece09bb313f2a1855595ab677d@regional.titanrelay.xyz,\
https://0x8c4ed5e24fe5c6ae21018437bde147693f68cda427cd1122cf20819c30eda7ed74f72dece09bb313f2a1855595ab677d@global.titanrelay.xyz" \
--mev-beacon-node-endpoint="https://ethereum-beacon-api.publicnode.com" \
--mev-load-test
```
### Test connection to peers
Run tests towards other Charon peers to evaluate the effectiveness of a potential cluster setup. The command sets up a libp2p node, similarly to what Charon normally does. This test command **has to be run simultaneously with the other peers**. After the node is up it waits for other peers to get their nodes up and running, retrying the connection every 3 seconds. The libp2p node connects to relays (configurable with `p2p-relays` flag) and to other libp2p nodes via TCP. Other peer nodes are discoverable by using their ENRs. Note that for a peer to be successfully discovered, it needs to be connected to the same relay. After completion of the test suite the libp2p node stays alive (duration configurable with `keep-alive` flag) for other peers to continue testing against it. The node can be forcefully stopped as well.
To be able to establish direct connection, you have to ensure:
* Your machine is publicly accessible on the internet or at least a specific port is.
* You add flag `p2p-tcp-address` (i.e.: `127.0.0.1:9001`) flag and the port specified in it is free and publicly accessible.
* You add the flag `p2p-external-ip` (i.e.: `8.8.8.8`) and specify your public IP.
If all points are satisfied by you and the other peers, you should be able to establish a direct TCP connection between each other. Note that a relay is still required, as it is used for peer discovery.
Based on which stage you are with your cluster creation, some steps are eased.
**Pre-requisites**
* [ENR private key](../../learn/charon/charon-cli-reference.md#creating-an-enr-for-charon).
* Peers' ENRs, supplied to the `--enrs` flag.
**Example run**
```sh
charon alpha test peers \
--enrs="enr:-HW4QMno_MB_ID6GFVxoIQAHHVHZZZjzFctxtX2tm9D95tvaPbHathi8YUP8jh8v2YUAVu2fYWEOB_BT14pt8QgiGg2AgmlkgnY0iXNlY3AyNTZrMaECdpnK83s0dbBwCaEfDIkQ-3nJkkC93STvv6Vmi0bYlzg,enr:-HW4QO2vefLueTBEUGly5hkcpL7NWdMKWx7Nuy9f7z6XZInCbFAc0IZj6bsnmj-Wi4ElS6jNa0Mge5Rkc2WGTVemas2AgmlkgnY0iXNlY3AyNTZrMaECR9SmYQ_1HRgJmNxvh_ER2Sxx78HgKKgKaOkCROYwaDY"
```
**Pre-requisites**
* Cluster definition file, supplied to the `--definition-file` flag.
**Example run**
```sh
charon alpha test peers \
--definition-file="./.charon/cluster-definition.json"
```
**Pre-requisites**
* Cluster lock file, supplied to the `--lock-file` flag.
**Example run**
```sh
charon alpha test peers \
--lock-file="./.charon/cluster-lock.json"
```
**Pre-requisites**
* [ENR private key](../../learn/charon/charon-cli-reference.md#creating-an-enr-for-charon).
* Peers' ENRs, supplied to the `--enrs` flag.
**Example run**
```sh
docker run --rm -u $(id -u):$(id -g) -v "$(pwd):/opt/charon" obolnetwork/charon:v1.10.3 alpha test peers \
--enrs="enr:-HW4QMno_MB_ID6GFVxoIQAHHVHZZZjzFctxtX2tm9D95tvaPbHathi8YUP8jh8v2YUAVu2fYWEOB_BT14pt8QgiGg2AgmlkgnY0iXNlY3AyNTZrMaECdpnK83s0dbBwCaEfDIkQ-3nJkkC93STvv6Vmi0bYlzg,enr:-HW4QO2vefLueTBEUGly5hkcpL7NWdMKWx7Nuy9f7z6XZInCbFAc0IZj6bsnmj-Wi4ElS6jNa0Mge5Rkc2WGTVemas2AgmlkgnY0iXNlY3AyNTZrMaECR9SmYQ_1HRgJmNxvh_ER2Sxx78HgKKgKaOkCROYwaDY" \
--private-key-file="/opt/charon/.charon/charon-enr-private-key"
```
**Pre-requisites**
* Cluster definition file, supplied to the `--definition-file` flag.
**Example run**
```sh
docker run --rm -u $(id -u):$(id -g) -v "$(pwd):/opt/charon" obolnetwork/charon:v1.10.3 alpha test peers \
--definition-file="/opt/charon/.charon/cluster-definition.json" \
--private-key-file="/opt/charon/.charon/charon-enr-private-key"
```
**Pre-requisites**
* Cluster lock file, supplied to the `--lock-file` flag.
**Example run**
```sh
docker run --rm -u $(id -u):$(id -g) -v "$(pwd):/opt/charon" obolnetwork/charon:v1.10.3 alpha test peers \
--lock-file="/opt/charon/.charon/cluster-lock.json" \
--private-key-file="/opt/charon/.charon/charon-enr-private-key"
```
**Pre-requisites**
* [ENR private key](../../learn/charon/charon-cli-reference.md#creating-an-enr-for-charon).
* Peers' ENRs, supplied to the `--enrs` flag.
**Example run**
```sh
kubectl exec -it -n dv-pod my-dv-pod-0 -- charon alpha test peers \
--enrs="enr:-HW4QMno_MB_ID6GFVxoIQAHHVHZZZjzFctxtX2tm9D95tvaPbHathi8YUP8jh8v2YUAVu2fYWEOB_BT14pt8QgiGg2AgmlkgnY0iXNlY3AyNTZrMaECdpnK83s0dbBwCaEfDIkQ-3nJkkC93STvv6Vmi0bYlzg,enr:-HW4QO2vefLueTBEUGly5hkcpL7NWdMKWx7Nuy9f7z6XZInCbFAc0IZj6bsnmj-Wi4ElS6jNa0Mge5Rkc2WGTVemas2AgmlkgnY0iXNlY3AyNTZrMaECR9SmYQ_1HRgJmNxvh_ER2Sxx78HgKKgKaOkCROYwaDY"
```
**Pre-requisites**
* Cluster definition file, supplied to the `--definition-file` flag.
**Example run**
```sh
kubectl exec -it -n dv-pod my-dv-pod-0 -- charon alpha test peers \
--definition-file="./.charon/cluster-definition.json"
```
**Pre-requisites**
* Cluster lock file, supplied to the `--lock-file` flag.
**Example run**
```sh
kubectl exec -it -n dv-pod my-dv-pod-0 -- charon alpha test peers \
--lock-file="./.charon/cluster-lock.json"
```
### Test beacon node
Run tests on beacon node(s), to evaluate their effectiveness for a Distributed Validator cluster. The beacon node is usually the client doing the most work in a validating stack, especially with a high number of validators being serviced by the validator client(s) and Charon(s) that depend on it.
Regular tests intended for relatively fast run, without putting any major load on any tested system.
**Pre-requisites**
* Running beacon node(s) towards which tests will be executed, supplied to `--endpoints` flag.
**Example run**
```sh
charon alpha test beacon \
--endpoints="https://ethereum-hoodi-beacon-api.publicnode.com"
```
Load tests intended for more time consuming run. Beacon nodes are put under heavy load.
These tests include simulated workloads for an increasing number of validators, and the process takes some time (approximately \~33 minutes). It is normal to observe some warnings during the simulations.
A file with detailed results about simulations done is saved at the current working directory (configurable by `--simulation-file-dir` flag).
**Pre-requisites**
* Running beacon node(s) towards which tests will be executed, supplied to `--endpoints` flag. It is important that the node is expecting to handle huge load and that it is **not** a publicly accessible one, which can block you.
**Example run**
```sh
charon alpha test beacon \
--endpoints="http://127.0.0.1:5052/" \
--load-test
```
**Pre-requisites**
* Running beacon node(s) towards which tests will be executed, supplied to `--endpoints` flag.
**Example run**
```sh
docker run --rm obolnetwork/charon:v1.10.3 alpha test beacon \
--endpoints="https://ethereum-hoodi-beacon-api.publicnode.com"
```
**Pre-requisites**
* Running beacon node(s) towards which tests will be executed, supplied to `--endpoints` flag. It is important that the node is expecting to handle huge load and that it is **not** a publicly accessible one, which can block you.
**Example run**
```sh
docker run --rm -v "$(pwd):/opt/charon/test" obolnetwork/charon:v1.10.3 alpha test beacon \
--endpoints="http://127.0.0.1:5052/" \
--load-test \
--simulation-file-dir="/opt/charon/test"
```
**Pre-requisites**
* Running beacon node(s) towards which tests will be executed, supplied to `--endpoints` flag.
**Example run**
```sh
kubectl exec -it -n dv-pod my-dv-pod-0 -- charon alpha test beacon \
--endpoints="https://ethereum-hoodi-beacon-api.publicnode.com"
```
**Pre-requisites**
* Running beacon node(s) towards which tests will be executed, supplied to `--endpoints` flag. It is important that the node is expecting to handle huge load and that it is **not** a publicly accessible one, which can block you.
**Example run**
```sh
kubectl exec -it -n dv-pod my-dv-pod-0 -- charon alpha test beacon \
--endpoints="http://lighthouse:5052/" \
--load-test
```
### Test validator client
Run tests towards your validator client, to evaluate its effectiveness for a Distributed Validator cluster.
Default endpoint for validator and port is used at `127.0.0.1:3600`. This can be changed by supplying different endpoint to the `--validator-api-address` flag.
**Pre-requisites**
* Running validator client towards which tests will be executed.
**Example run**
```sh
charon alpha test validator
```
**Pre-requisites**
* Running validator client towards which tests will be executed.
**Example run**
```sh
docker run --rm obolnetwork/charon:v1.10.3 alpha test validator \
--validator-api-address=":3600"
```
**Pre-requisites**
* Running validator client towards which tests will be executed.
**Example run**
```sh
kubectl exec -it -n dv-pod my-dv-pod-0 -- charon alpha test validator
```
### Test MEV relay
Run tests towards MEV relays, to evaluate their effectiveness for a Distributed Validator cluster. If MEV-Boost clients are configured for the distributed validator nodes, it is of utmost importance that the relays they connect to are fast and reliable. If not, the chance of missing a block proposal increases significantly. Supplying `--beacon-node-endpoint` and `--load-test` flags allows the test to ask relays for real MEV headers, increasing the accuracy (and duration) of this test.
At least 1 endpoint is required to be supplied to the `--endpoints` flag.
**Pre-requisites**
* Running MEV relay(s) towards which tests will be executed.
**Example run**
```sh
charon alpha test mev \
--endpoints="\
https://0xa15b52576bcbf1072f4a011c0f99f9fb6c66f3e1ff321f11f461d15e31b1cb359caa092c71bbded0bae5b5ea401aab7e@aestus.live,\
https://0xa7ab7a996c8584251c8f925da3170bdfd6ebc75d50f5ddc4050a6fdc77f2a3b5fce2cc750d0865e05d7228af97d69561@agnostic-relay.net,\
https://0x8b5d2e73e2a3a55c6c87b8b6eb92e0149a125c852751db1422fa951e42a09b82c142c3ea98d0d9930b056a3bc9896b8f@bloxroute.max-profit.blxrbdn.com,\
https://0xac6e77dfe25ecd6110b8e780608cce0dab71fdd5ebea22a16c0205200f2f8e2e3ad3b71d3499c54ad14d6c21b41a37ae@boost-relay.flashbots.net,\
https://0xa1559ace749633b997cb3fdacffb890aeebdb0f5a3b6aaa7eeeaf1a38af0a8fe88b9e4b1f61f236d2e64d95733327a62@relay.ultrasound.money,\
https://0x8c4ed5e24fe5c6ae21018437bde147693f68cda427cd1122cf20819c30eda7ed74f72dece09bb313f2a1855595ab677d@regional.titanrelay.xyz,\
https://0x8c4ed5e24fe5c6ae21018437bde147693f68cda427cd1122cf20819c30eda7ed74f72dece09bb313f2a1855595ab677d@global.titanrelay.xyz"
```
**Pre-requisites**
* Running MEV relay(s) towards which tests will be executed.
* Running beacon node which will be used for fetching data required by the MEV relay for block creation, supplied to `--beacon-node-endpoint`. There is no restrictions on the node and a public one can be used.
**Example run**
```sh
charon alpha test mev \
--endpoints="\
https://0xa15b52576bcbf1072f4a011c0f99f9fb6c66f3e1ff321f11f461d15e31b1cb359caa092c71bbded0bae5b5ea401aab7e@aestus.live,\
https://0xa7ab7a996c8584251c8f925da3170bdfd6ebc75d50f5ddc4050a6fdc77f2a3b5fce2cc750d0865e05d7228af97d69561@agnostic-relay.net,\
https://0x8b5d2e73e2a3a55c6c87b8b6eb92e0149a125c852751db1422fa951e42a09b82c142c3ea98d0d9930b056a3bc9896b8f@bloxroute.max-profit.blxrbdn.com,\
https://0xac6e77dfe25ecd6110b8e780608cce0dab71fdd5ebea22a16c0205200f2f8e2e3ad3b71d3499c54ad14d6c21b41a37ae@boost-relay.flashbots.net,\
https://0xa1559ace749633b997cb3fdacffb890aeebdb0f5a3b6aaa7eeeaf1a38af0a8fe88b9e4b1f61f236d2e64d95733327a62@relay.ultrasound.money,\
https://0x8c4ed5e24fe5c6ae21018437bde147693f68cda427cd1122cf20819c30eda7ed74f72dece09bb313f2a1855595ab677d@regional.titanrelay.xyz,\
https://0x8c4ed5e24fe5c6ae21018437bde147693f68cda427cd1122cf20819c30eda7ed74f72dece09bb313f2a1855595ab677d@global.titanrelay.xyz" \
--load-test \
--beacon-node-endpoint="https://ethereum-beacon-api.publicnode.com"
```
**Pre-requisites**
* Running MEV relay(s) towards which tests will be executed.
**Example run**
```sh
docker run obolnetwork/charon:v1.10.3 alpha test mev \
--endpoints="\
https://0xa15b52576bcbf1072f4a011c0f99f9fb6c66f3e1ff321f11f461d15e31b1cb359caa092c71bbded0bae5b5ea401aab7e@aestus.live,\
https://0xa7ab7a996c8584251c8f925da3170bdfd6ebc75d50f5ddc4050a6fdc77f2a3b5fce2cc750d0865e05d7228af97d69561@agnostic-relay.net,\
https://0x8b5d2e73e2a3a55c6c87b8b6eb92e0149a125c852751db1422fa951e42a09b82c142c3ea98d0d9930b056a3bc9896b8f@bloxroute.max-profit.blxrbdn.com,\
https://0xac6e77dfe25ecd6110b8e780608cce0dab71fdd5ebea22a16c0205200f2f8e2e3ad3b71d3499c54ad14d6c21b41a37ae@boost-relay.flashbots.net,\
https://0xa1559ace749633b997cb3fdacffb890aeebdb0f5a3b6aaa7eeeaf1a38af0a8fe88b9e4b1f61f236d2e64d95733327a62@relay.ultrasound.money,\
https://0x8c4ed5e24fe5c6ae21018437bde147693f68cda427cd1122cf20819c30eda7ed74f72dece09bb313f2a1855595ab677d@regional.titanrelay.xyz,\
https://0x8c4ed5e24fe5c6ae21018437bde147693f68cda427cd1122cf20819c30eda7ed74f72dece09bb313f2a1855595ab677d@global.titanrelay.xyz"
```
**Pre-requisites**
* Running MEV relay(s) towards which tests will be executed.
* Running beacon node which will be used for fetching data required by the MEV relay for block creation, supplied to `--beacon-node-endpoint`. There is no restrictions on the node and a public one can be used.
**Example run**
```sh
docker run obolnetwork/charon:v1.10.3 alpha test mev \
--endpoints="\
https://0xa15b52576bcbf1072f4a011c0f99f9fb6c66f3e1ff321f11f461d15e31b1cb359caa092c71bbded0bae5b5ea401aab7e@aestus.live,\
https://0xa7ab7a996c8584251c8f925da3170bdfd6ebc75d50f5ddc4050a6fdc77f2a3b5fce2cc750d0865e05d7228af97d69561@agnostic-relay.net,\
https://0x8b5d2e73e2a3a55c6c87b8b6eb92e0149a125c852751db1422fa951e42a09b82c142c3ea98d0d9930b056a3bc9896b8f@bloxroute.max-profit.blxrbdn.com,\
https://0xac6e77dfe25ecd6110b8e780608cce0dab71fdd5ebea22a16c0205200f2f8e2e3ad3b71d3499c54ad14d6c21b41a37ae@boost-relay.flashbots.net,\
https://0xa1559ace749633b997cb3fdacffb890aeebdb0f5a3b6aaa7eeeaf1a38af0a8fe88b9e4b1f61f236d2e64d95733327a62@relay.ultrasound.money,\
https://0x8c4ed5e24fe5c6ae21018437bde147693f68cda427cd1122cf20819c30eda7ed74f72dece09bb313f2a1855595ab677d@regional.titanrelay.xyz,\
https://0x8c4ed5e24fe5c6ae21018437bde147693f68cda427cd1122cf20819c30eda7ed74f72dece09bb313f2a1855595ab677d@global.titanrelay.xyz" \
--load-test \
--beacon-node-endpoint="https://ethereum-beacon-api.publicnode.com"
```
**Pre-requisites**
* Running MEV relay(s) towards which tests will be executed.
**Example run**
```sh
kubectl exec -it -n dv-pod my-dv-pod-0 -- charon alpha test mev \
--endpoints="\
https://0xa15b52576bcbf1072f4a011c0f99f9fb6c66f3e1ff321f11f461d15e31b1cb359caa092c71bbded0bae5b5ea401aab7e@aestus.live,\
https://0xa7ab7a996c8584251c8f925da3170bdfd6ebc75d50f5ddc4050a6fdc77f2a3b5fce2cc750d0865e05d7228af97d69561@agnostic-relay.net,\
https://0x8b5d2e73e2a3a55c6c87b8b6eb92e0149a125c852751db1422fa951e42a09b82c142c3ea98d0d9930b056a3bc9896b8f@bloxroute.max-profit.blxrbdn.com,\
https://0xac6e77dfe25ecd6110b8e780608cce0dab71fdd5ebea22a16c0205200f2f8e2e3ad3b71d3499c54ad14d6c21b41a37ae@boost-relay.flashbots.net,\
https://0xa1559ace749633b997cb3fdacffb890aeebdb0f5a3b6aaa7eeeaf1a38af0a8fe88b9e4b1f61f236d2e64d95733327a62@relay.ultrasound.money,\
https://0x8c4ed5e24fe5c6ae21018437bde147693f68cda427cd1122cf20819c30eda7ed74f72dece09bb313f2a1855595ab677d@regional.titanrelay.xyz,\
https://0x8c4ed5e24fe5c6ae21018437bde147693f68cda427cd1122cf20819c30eda7ed74f72dece09bb313f2a1855595ab677d@global.titanrelay.xyz"
```
**Pre-requisites**
* Running MEV relay(s) towards which tests will be executed.
* Running beacon node which will be used for fetching data required by the MEV relay for block creation, supplied to `--beacon-node-endpoint`. There is no restrictions on the node and a public one can be used.
**Example run**
```sh
kubectl exec -it -n dv-pod my-dv-pod-0 -- charon alpha test mev \
--endpoints="\
https://0xa15b52576bcbf1072f4a011c0f99f9fb6c66f3e1ff321f11f461d15e31b1cb359caa092c71bbded0bae5b5ea401aab7e@aestus.live,\
https://0xa7ab7a996c8584251c8f925da3170bdfd6ebc75d50f5ddc4050a6fdc77f2a3b5fce2cc750d0865e05d7228af97d69561@agnostic-relay.net,\
https://0x8b5d2e73e2a3a55c6c87b8b6eb92e0149a125c852751db1422fa951e42a09b82c142c3ea98d0d9930b056a3bc9896b8f@bloxroute.max-profit.blxrbdn.com,\
https://0xac6e77dfe25ecd6110b8e780608cce0dab71fdd5ebea22a16c0205200f2f8e2e3ad3b71d3499c54ad14d6c21b41a37ae@boost-relay.flashbots.net,\
https://0xa1559ace749633b997cb3fdacffb890aeebdb0f5a3b6aaa7eeeaf1a38af0a8fe88b9e4b1f61f236d2e64d95733327a62@relay.ultrasound.money,\
https://0x8c4ed5e24fe5c6ae21018437bde147693f68cda427cd1122cf20819c30eda7ed74f72dece09bb313f2a1855595ab677d@regional.titanrelay.xyz,\
https://0x8c4ed5e24fe5c6ae21018437bde147693f68cda427cd1122cf20819c30eda7ed74f72dece09bb313f2a1855595ab677d@global.titanrelay.xyz" \
--load-test \
--beacon-node-endpoint="https://ethereum-beacon-api.publicnode.com"
```
### Test machine and network performance
Run tests of your machine and network, to evaluate their effectiveness for a Distributed Validator cluster. Distributed Validators need stable, low-latency, internet, a reasonable amount of RAM, and a highly performant disk drive for storage. This test aims to analyze these requirements to give an overview of the systems suitability.
#### Pre-requisites
The executable storage tests require `fio` to be installed on your host machine. Read more about `fio` [here](https://fio.readthedocs.io/en/latest/fio_doc.html).
#### Example run
```sh
charon alpha test infra
```
#### Example run
```sh
docker run -u $(id -u):$(id -g) --rm -v "$(pwd):/opt/charon/test" obolnetwork/charon:v1.10.3 alpha test infra \
--disk-io-test-file-dir=/opt/charon/test
```
#### Example run
```sh
kubectl exec -it -n dv-pod my-dv-pod-0 -- charon alpha test infra
```
---
# Running a DV
URL: https://docs.obol.org/run-a-dv/running
# running
---
# Activate a DV
URL: https://docs.obol.org/run-a-dv/running/activate-a-dv
# Activate a DV
If you have successfully created a distributed validator and you are ready to activate it, congratulations! 🎉
Once you have connected all of your Charon clients together, synced all of your Ethereum nodes such that the monitoring indicates that they are all healthy and ready to operate, **ONE operator** may proceed to deposit and activate the validator(s).
The `deposit-data.json` to be used to deposit will be located in each operator's `.charon` folder. The copies across every node should be identical and any of them can be uploaded.
:::danger
If you are being given a `deposit-data.json` file that you didn't generate yourself, please take extreme care to ensure this operator has not given you a malicious `deposit-data.json` file that is not the one you expect. Cross reference the files from multiple operators if there is any doubt. Activating the wrong validator or an invalid deposit could result in complete theft or loss of funds.
:::
The Ethereum Pectra upgrade enables validators with `0x02` Compounding Withdrawal Credentials to hold balances exceeding 32 ETH and automatically reap the benefits of compounding rewards. The Launchpad provides an intuitive interface to manage these extended balances.
***
## 1. New Deposit Experience Overview
This new flow supports deposits to validators with any standard withdrawal address, including **EOA (Externally Owned Account)** addresses, and streamlines the activation and top-up process.
### A. Critical Distinction (OVM Users MUST Use This Flow)
| Withdrawal Address Type | Recommended Flow | Reason |
| ---------------------------- | --------------------------------------------------------- | ------------------------------------------------------------------------------------------------------------------------------------------------------------------------------------------------ |
| **OVM (Obol Vault Manager)** | **MANDATORY:** Deposit via the Cluster Details Page flow. | This ensures the OVM smart contract correctly tracks the deposited amount as principal stake and manages subsequent reward accounting. Bypassing the OVM requires manual accounting adjustments. |
| **EOA (Standard Wallet)** | RECOMMENDED: Deposit via the Cluster Details Page flow. | Allows direct deposit without needing to manually upload a deposit data file. Also supports top-ups. |
:::danger
🚨 In OVMs, only addresses with `DEPOSIT_ROLE` can perform deposits for activation and top-ups. Read more about how to assign roles [here](../../advanced-and-troubleshooting/advanced/assign-ovm-roles.md).
:::
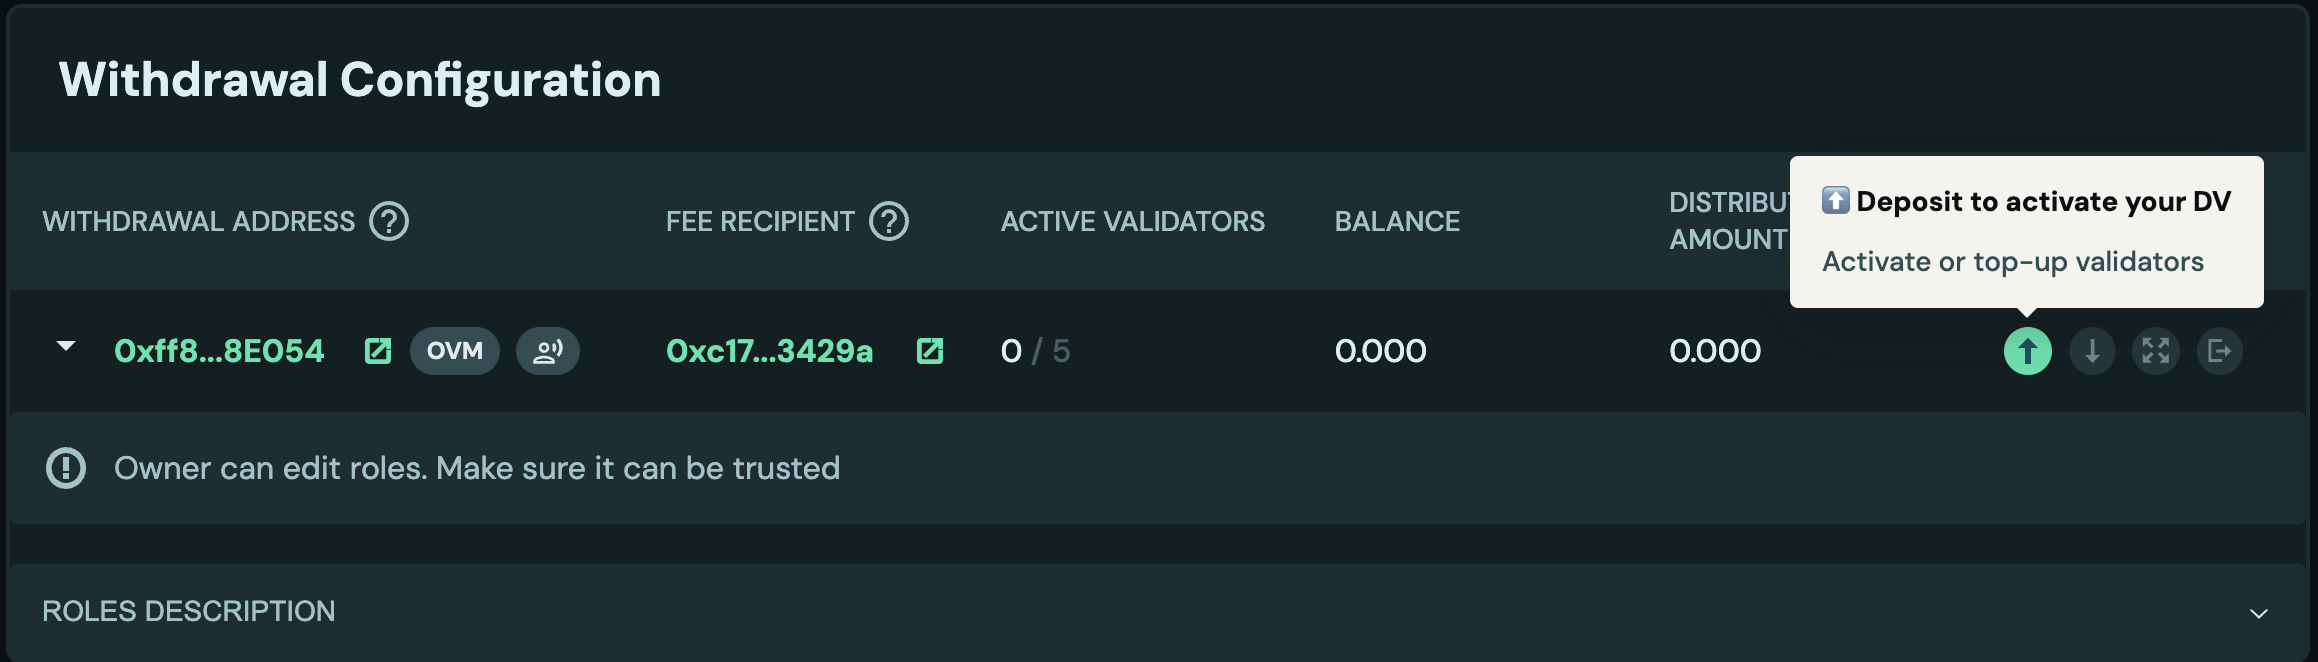
### B. Initial Deposit Options
There are three strategic ways to break down a large deposit (e.g., 1000 ETH) for activation, all of which use compounding validators:
| Option | Strategy | Pros | Cons |
| ------ | -------------------------------------------------------- | ---------------------------------------------------------------------------------------------------------------------------------------------------- | ------------------------------------------------------------------------------------------------------------------ |
| **1** | **32 ETH + Top-Up** (e.g., 32 ETH + 968 ETH) | Allows any amount, even decimals. Simple, two distinct transactions. | The 968 ETH top-up transaction **must wait** for the initial 32 ETH validator to become Active (opportunity cost). |
| **2** | **Single Activation (>32 ETH)** (e.g., 1000 ETH) | Multiple deposits are bundled into a single multi-call transaction. This eliminates opportunity cost and ensures all ETH yields rewards immediately. | Decimal amounts of ETH are not supported. Transaction gas cost could be high depending upon the amount chosen. |
| **3** | **Activate Multiple Validators** (distributing 1000 ETH) | Similar to Option 2, but leaves more room for individual top-ups later. | Creates more load on nodes due to the higher validator count. |
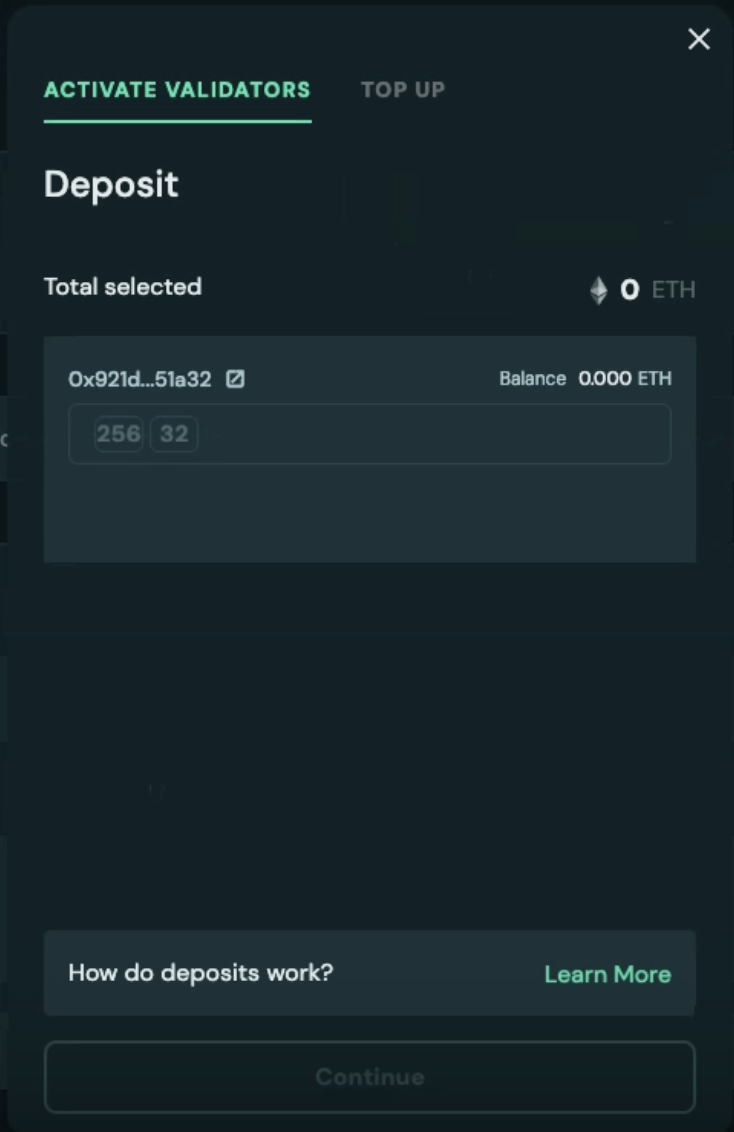
## 2. Allocation & Submission
After choosing a deposit option, the user specifies the total amount. Pressing continue provides two allocation options:
* **Recommended Allocation:** A suggestion for where the deposit amount should be staked based on an optimization strategy (see Section 3).
* **Manual Allocation:** If the recommendation doesn't fit your preference, you can allocate deposits manually.
Once the allocation is solidified, users review and send transactions. The amount is sent to the deposit queue for activation or top-up based on the chosen strategy.
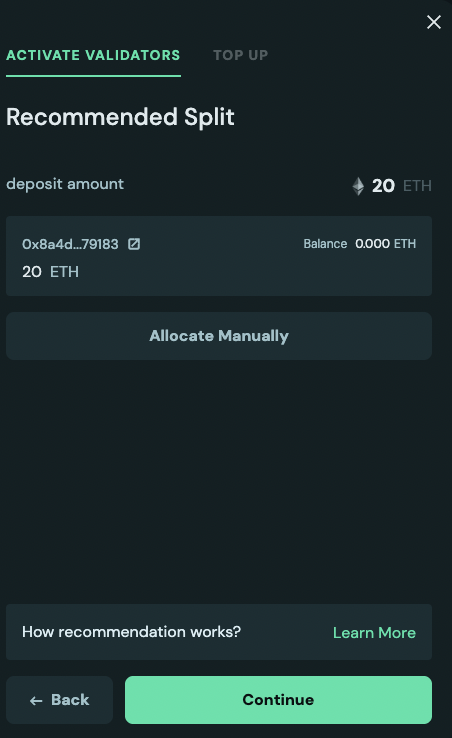
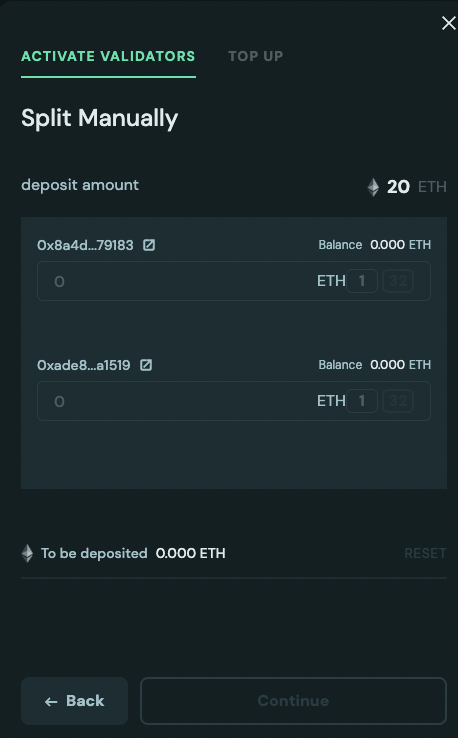
## 3. Technical Details
### A. How Large Activations (>32 ETH) are Made (Option 2)
When a compounding (`0x02`) validator is created with an amount greater than 32 ETH (e.g., 40 ETH), Charon generates the following deposit files (1 ETH, 8 ETH, 32 ETH, 256 ETH). When performing the initial deposit through OVM, the launchpad **bundles multiple deposits into a single multi-call transaction.** When deposits are made via EOA, the batching is done using deposit contracts built by [Pier Two](https://docs.piertwo.com/docs/batch-deposit-contract). Batching results in a slightly higher gas cost than a single 32 ETH deposit. While doing top-ups, any deposit amount can be used.
### B. Recommended Allocation Strategy
The recommended allocation follows this rule - always deposit in validator with highest effective balance less than 1920 ETH. This is to keep the validator count low and benefit from compounding rewards. For example, to deposit 1000 ETH:
* If there is no active validator, we recommend activating with 1000 ETH in a single validator. Or 32 ETH first and 968 ETH later in the same validator.
* If there is an active validator with balance of 920 ETH or less, we recommend depositing in the same validator to reach suggested cap of 1920 ETH or less.
* If there is an active validator with balance of more than 920 ETH, let's say 1200 ETH, we recommend filling this validator to 1920 ETH by adding 720 ETH and using remaining 280 ETH to activate a new validator.
### C. Troubleshooting Top-Ups
If a top-up fails, check the following reasons:
* **Validator Type:** The validator is **not a `0x02` type** and therefore does not support top-ups.
* **Maximum Balance:** The validator has already **reached the maximum suggested balance cap of 1920 ETH**.
* **Status:** There is **no active validator** to receive the top-up amount.
### D. How to Adjust Principal Inside the OVM
When a user bypasses deposits via OVM and deposits directly, the amount of principal stake will not be accrued inside the OVM. This can create problems in the distribute flow which needs principal and rewards to be correctly accounted. OVM allows the Owner to set the correct principal using `setAmountOfPrincipalStake`. Finding the correct amount to set is a manual process. For example, a user deposited 1782 ETH into 3 validators and forgot the amount deposited. If the validators are active or deposits are successful, the user can check on the beacon chain to find deposits into each validator. The total should sum up to 1782 ETH.

## 4. Legacy Deposit Flow (To be Deprecated)
The Legacy Flow is the pre-Pectra experience and should be avoided, especially by OVM users.
* This flow is best suited for activating older `0x01` (BLS) validators.
* It **does not support top-ups** with arbitrary amounts into compounding (`0x02`) validators.
* The user must select the number of validators first, and the total deposit amount is calculated after (Amount \* Number of Validators).
* It lacks the integrated Recommended Allocation strategy - it is manually governed by the user.
* If one of the withdrawal addresses is OVM, a warning is displayed with strong suggestions to use the new deposit flow in the cluster page to avoid accounting issues of principal and rewards inside the OVM. Legacy flow will bypass deposits via OVM and directly to validators. As a result, the user will have to manually adjust principal and rewards after. Read more about [how to adjust the principal inside the OVM](activate-a-dv.md#d-how-to-adjust-principal-inside-the-ovm).
### Legacy Deposit Tools
If you need to use the legacy flow (not recommended for OVM users), you can use:
* [Obol Distributed Validator Launchpad](https://launchpad.obol.org/deposit/advisories/)
* [ethereum.org Staking Launchpad](https://launchpad.ethereum.org/)
:::info
The activation process can take a minimum of 16 hours, with the maximum time to activation being dictated by the length of the activation queue, which can be weeks.
:::
---
# Request Withdrawal
URL: https://docs.obol.org/run-a-dv/running/request-withdrawal
# Request Withdrawal
Post-Pectra update, a new type of validator with 0x02 withdrawal credentials type are supported that can have more than 32 ETH of effective balance. Unlike the validators with a `0x01` withdrawal credentials type, which go through periodic skimming of their consensus rewards through a withdrawal sweep, `0x02` rewards are added to the balance to enable auto-compounding. As a result, there is no automatic skimming of rewards. Users have to explicitly send a transaction to request a withdrawal of their rewards to the beacon chain. OVM simplifies requesting a withdrawal by:
1. Supporting batching of withdrawal requests across multiple validators
2. Helping users distinguish between rewards and principal as long as all deposits are done through OVM's and reward amounts are below the principal threshold
The following steps guide you through how to request a withdrawal from your validators:
## Step-by-Step Withdrawal Process
1. On the cluster details page, go to the validators table. In the actions column, click on the withdraw icon. If the withdrawal address is an OVM, the connected address must have the `WITHDRAWAL_ROLE` to request a withdrawal. If the withdrawal address is an EOA, make sure you are connected with the correct EOA. **Read more about how to assign roles** [**here**](../../advanced-and-troubleshooting/advanced/assign-ovm-roles.md)**.**

1. If the user has sufficient permissions, the withdrawal address is an EOA or an OVM, and the validator is with `0x02` withdrawal credentials, a modal opens allowing the user to specify the total withdrawal amount. The fields in this modal mean the following:
1. **Validator Balance:** Total balance of all validators under this OVM or EOA
2. **Withdrawal Limit:** The maximum amount a user can withdraw without triggering an exit. For example, if the validator balance is 100 ETH and 2 validators are active, the withdrawal limit is 100 - (2 × 32) = 36 ETH
:::info
💡 When deciding the amount to withdraw, users must pay attention to the amount of ETH in their OVM's balance, pending withdrawals and OVM's principal threshold. These fields together help decide how much to withdraw to reach the principal threshold. Read more about this in the [FAQ section](request-withdrawal.md#3-how-to-decide-initial-withdrawal-amount).
:::
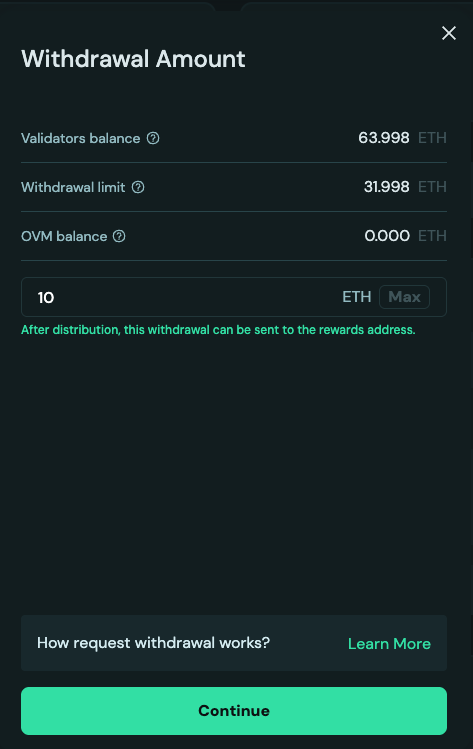
3. Once an amount has been selected, the UI recommends how the withdrawal amount should be split across validators. Read more in the [FAQ section](request-withdrawal.md#2-how-recommendation-for-requesting-withdrawal-works). If you would prefer to allocate specific amounts manually, click on `Allocate Manually`.
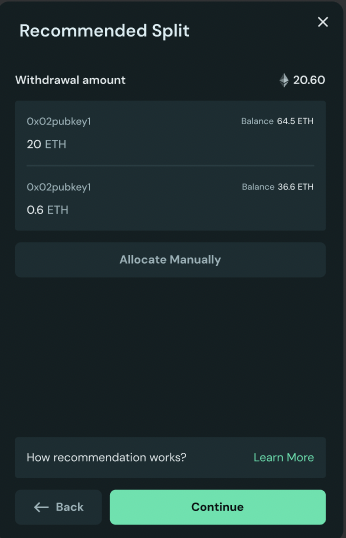
4. For manually allocating, users must stay below the withdrawal limit. Users can also choose to exit a validator by withdrawing its entire available balance.
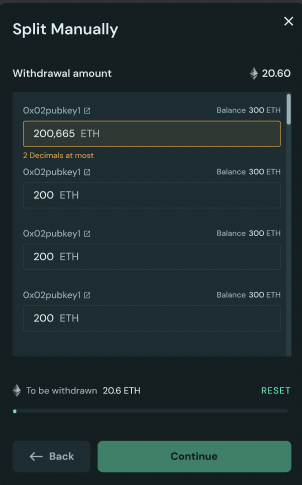
5. Before you confirm, review the post-withdrawal balances of the validators and whether any validators will exit. Upon confirmation, withdrawal request transactions are sent. Once the transaction is accepted, the validator enters the queue awaiting a withdrawal sweep. The waiting period depends on the validator’s position in the current withdrawal queue.
## FAQ
### 1. Why can I not see the ETH in my wallet after I sent a withdrawal request?
If you have successfully sent a transaction to the Ethereum Withdrawal Contract to trigger a partial withdrawal or an exit for your **0x02 validator**, but the ETH is not yet in your wallet, it is usually due to one of the following protocol-level steps.
#### 1. Is your request still in the Partial Withdrawal Queue"?
Unlike older 0x01 validators that are automatically "swept" by the protocol, 0x02 withdrawals are **triggered manually** and therefore enter a First-In-First-Out (FIFO) queue.
* **The Delay:** If many stakers are withdrawing at once, your request must wait its turn.
* **How to check:** Visit a block explorer like [beaconcha.in](https://beaconcha.in/) and look for the **"Partial Withdrawal Queue"** status.
#### 2. Are you in the "27-Hour Cooldown" period?
Every withdrawal request—even after it clears the initial queue—is subject to a mandatory security delay.
* **The Delay:** Approximately **27 hours and 50 minutes** (256 epochs).
* **Why?** This is a safety protocol to prevent rapid "stake-grinding" attacks and ensure network stability. Your ETH will remain on the validator and **continue earning rewards** during this specific window.
#### 3. Did you leave at least 32 ETH in the validator?
For 0x02 validators, you can only withdraw the "excess" balance.
* **The Rule:** You cannot partially withdraw a validator's balance below **32 ETH** while keeping it active. If you requested an amount that would drop your balance below 32 ETH, the protocol may reject the request or only process the amount available above the 32 ETH limit.
#### 4. Is the network experiencing a "Mass Exit" or "High Churn"?
If you are performing a **Full Exit** and not just a partial withdrawal, you are subject to the **Churn Limit**.
* **The Delay:** Ethereum only allows a certain amount of ETH (approximately 256 ETH per epoch) to exit the network at once. During periods of high volatility or institutional exits, this queue can stretch from a few days to **several weeks**.
* **0x01 vs 0x02:** While 0x02 partial withdrawals are usually faster because they skip the "sweep cycle," full exits for both 0x01 and 0x02 validators remain in the same global exit line.
#### 5. Are you checking the right "Arrival" type?
Withdrawals do not arrive as a standard "Transfer" transaction.
* **What to look for:** ETH withdrawals are **"Balance Increases"** provided directly by the protocol. They will appear in the **"Withdrawals"** tab of your address on a block explorer, rather than the "Transactions" or "Internal Txns" tab. Your wallet balance will increase, but you may not see a "Received" notification in some apps.
### 2. How recommendation for requesting withdrawal works?
The recommended approach is to withdraw ETH from the active validator that has the **lowest current ETH balance** until that validator's withdrawal limit is reached.
| **Scenario** | **Example** | **Recommendation** |
| -------------- | -------------------- | ------------------------------------------- |
| **Goal** | Withdraw 10 ETH | Withdraw 10 ETH from the 100 ETH validator. |
| **Validators** | Validator A: 100 ETH | **NOT** the 200 ETH validator. |
| | Validator B: 200 ETH | |
While the difference in rewards is usually minimal, this strategy helps to **optimize the effective balance** of your highest-earning validator:
* **Effective Balance:** Validator rewards are calculated based on the "effective balance," which is rounded down to the nearest whole ETH, capped at 32 ETH. The protocol has a **0.5 ETH hysteresis limit** for rounding to the _next_ whole integer. For example, a validator must reach **32.5 ETH** to be treated as having a 33 ETH effective balance (capped at 32 ETH).
* **The Goal:** By withdrawing from the validator with **less ETH**, you ensure the higher-balance validator (the **200 ETH** one in your example) keeps as much stake as possible. Since the 200 ETH validator is already earning more rewards, keeping its balance high gives it the best chance to quickly cross the next **0.5 ETH threshold** needed to potentially boost its effective balance (and therefore its rewards) sooner.
### 3. How to decide initial withdrawal amount?
When initiating a withdrawal, the OVM (Obol Validator Manager) uses the **Principal Threshold** (Tp) to determine whether the withdrawn ETH will be classified as **Principal** or **Rewards** upon the next distribution event.
The key calculation users must understand is the **Projected OVM Balance**—the total ETH that will reside in the OVM once all current and pending transactions are complete. The amount you input in the withdrawal field is the only variable you can control to govern this outcome. Based on your input, the UI provides warnings indicating where the withdrawal will be routed once it succeeds.
#### Core Withdrawal Principle
The decision is based on a comparison between the **Projected OVM Balance** and the **Principal Threshold** (Tp).
**Projected OVM Balance = B\_ovm + W\_pending + W\_current**
Where:
* **B\_ovm:** Current OVM Balance (ETH already in the contract).
* **W\_pending:** Pending Withdrawals (ETH from previous successful transactions that are known to be en route to the OVM).
* **W\_current:** Currently Withdrawing amount (the value the user is inputting).
* **Tp:** Principal Threshold (a fixed ETH value).
#### The Distribution Rules
The OVM classifies the withdrawal based on the **Projected OVM Balance**:
| **Condition** | **Formula (Plain Text)** | **Outcome (Upon Distribution)** | **Destination** |
| ------------------------------------------- | -------------------------------------- | --------------------------------------- | ------------------------------------ |
| **Principal Rule** (Threshold Met/Exceeded) | B\_ovm + W\_pending + W\_current >= Tp | The amount is treated as **Principal**. | Sent to the **Principal Recipient**. |
| **Rewards Rule** (Below Threshold) | B\_ovm + W\_pending + W\_current < Tp | The amount is treated as **Rewards**. | Sent to the **Reward Recipient(s)**. |
#### Example
Assume **Tp = 16 ETH**, **B\_ovm = 10 ETH**, and **W\_pending = 2 ETH**. The current base is 10 + 2 = 12 ETH.
| **Withdrawal Amount (W\_current)** | **Projected OVM Balance** | **Result** | **Destination** |
| ---------------------------------- | ------------------------- | ------------------------------------- | ------------------- |
| **4 ETH** (or more) | 10 + 2 + 4 = 16 ETH | 16 ETH >= 16 ETH **(Principal Rule)** | Principal Recipient |
| **3 ETH** (or less) | 10 + 2 + 3 = 15 ETH | 15 ETH < 16 ETH **(Rewards Rule)** | Reward Recipient(s) |
#### Action for Rewards Recipients
If the withdrawal is classified as Rewards:
* **Splitter Contract:** The distribution will trigger a function in the splitter to share the rewards among the configured addresses.
* **EOA (Externally Owned Account):** The amount will be sent directly to the EOA address.
---
# Distribute Rewards
URL: https://docs.obol.org/run-a-dv/running/distribute-rewards
# How Does Distribution Work?
The distribution action allows the user to distribute funds from their OVM and splitters to the claim address. As a result, the distribution action is only available when either the withdrawal address is an OVM or the fee recipient of the withdrawal configuration is a splitter address. Once amounts are distributed, they can be claimed on the operator page or home page of the launchpad.
## Overview
1. The distribution action allows users to transfer the distributable amount as principal or rewards. It comprises of two actions in a single click:
1. Transfer the amount from OVM balance to Principal recipient or Rewards Recipient, depending on whether the OVM's Balance has crossed the Principal Threshold.
2. If the Rewards Recipient is a splitter contract, split the amount according to respective share of addresses in the splitter config and transfer it to the warehouse contract where the amount is ready to be claimed. The amount from all the various splitter warehouses can be claimed from the main Operator Dashboard.
2. The distribution applies to the full available amount. On clicking distribute, the user will see the following modal:
1. The fields are explained below:
1. **You are distributing:** This is the sum of your OVM Balance + Splitter's Balance that will be distributed. First the OVM is distributed and then the splitter.
2. **Total Validator Balance:** Total Validator Balance of all the validators associated to this OVM - principal + rewards
3. **Principal Threshold:** Amount of ETH required in your OVM balance to be classified as Principal in order for it to be sent to the Principal Recipient. To cross the threshold, withdraw more ETH using the withdrawal flow or exit the validators.
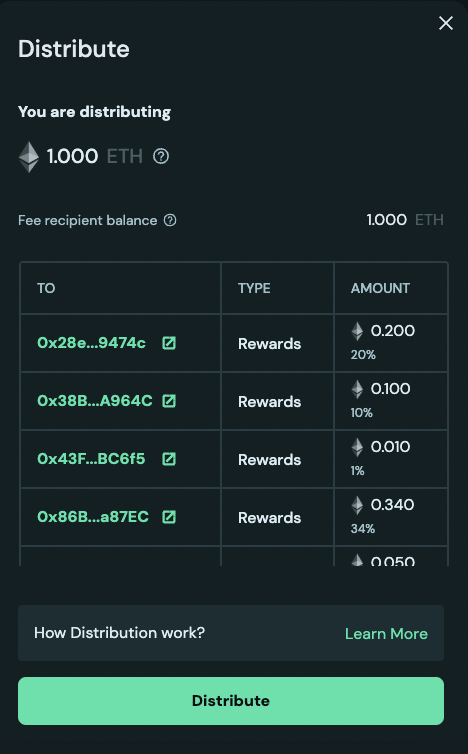
2. The table shows where the principal or rewards flow to after distribution. When the reward recipient is a splitter, rewards are not sent directly to the addresses in the splitter configuration. Instead, they become available to claim from the operator distributions page. If a user is part of multiple splitter configurations, it is recommended to distribute across all of them and claim all at once to optimize for gas fees paid. To learn more about the logic of distribution, read the [Understanding Distribution in Detail](#understanding-distribution-in-detail) section.
3. After the distribute transaction is successfully sent, the success page shows a summary of the amount distributed and the new principal + rewards. If rewards were distributed, they will be ready to claim on the dashboard page.
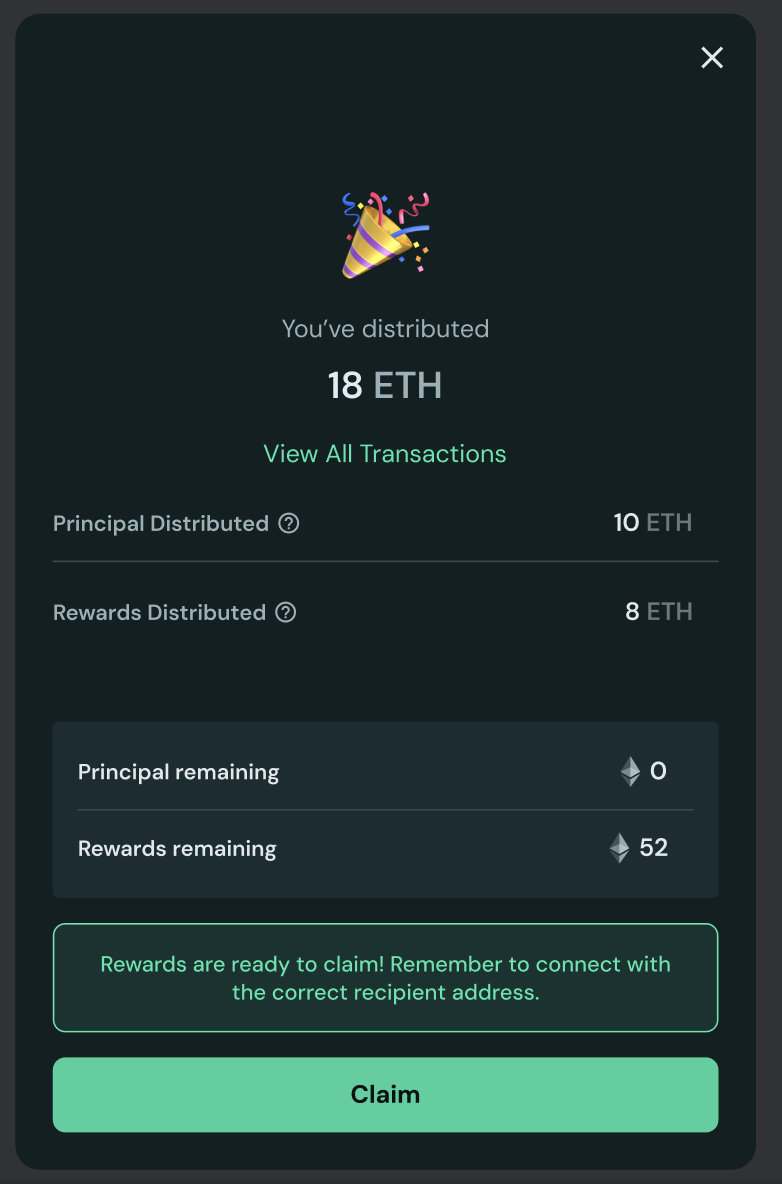
## Understanding Distribution in Detail
1. The distribution starts by looking at the total distributable amount (`DA`) that is comprised of OVM's balance (`OB`) and Splitter's balance (`SB`).
2. Upon sending the distribute transaction:
1. `OB` balance is checked against principal threshold (`PT`) and current principal (`CP`), both of which are tracked in the OVM contract.
1. **If `OB` > `PT` and `CP` > `OB`:** All of `OB` is transferred to principal recipient and tracked principal is debited by `OB`, in other words, the new principal in OVM is `CP` - `OB`
2. **If `OB` > `PT` and `CP` < `OB`:** Since there is not sufficient principal for distributing all of `OB`, only `CP` will be distributed as principal and will be sent to the principal recipient. The remainder of `OB` - `CP` will be sent to the reward recipient as rewards. The reward recipient could be a splitter contract, therefore a new splitter contract balance can be `SBnew` = `SB` + `OB` - `CP`. Current Principal will be set to 0 as no principal is remaining.
3. **If `OB` < `PT`:** All of `OB` will be sent to reward recipient as rewards. This reward recipient could be a splitter contract so the new splitter contract balance can be `SBnew` = `SB` + `OB`
2. If the reward recipient is a splitter, `SBnew` balance (Previous splitter balance + new ETH from the OVM if it was rewards) will be distributed and all of the addresses in splitter config can now claim their reward on the dashboard.
### Distribution Flow Summary
| Condition | OVM Balance (`OB`) vs Principal Threshold (`PT`) | Current Principal (`CP`) vs `OB` | Distribution Result |
| --- | --- | --- | --- |
| **Case 1** | `OB` > `PT` | `CP` > `OB` | All `OB` → Principal Recipient
New Principal = `CP` - `OB` |
| **Case 2** | `OB` > `PT` | `CP` < `OB` | `CP` → Principal Recipient
`OB` - `CP` → Reward Recipient
New Principal = 0 |
| **Case 3** | `OB` < `PT` | N/A | All `OB` → Reward Recipient |
:::info
💡 Remember: If the reward recipient is a splitter contract, the distributed rewards will be available to claim on the Operator Dashboard, not sent directly to individual addresses in the splitter configuration.
:::
---
# Claim Rewards
URL: https://docs.obol.org/run-a-dv/running/claim-rewards
# Claim Rewards
For every epoch, active validators earn ETH rewards from both the consensus layer and the execution layer. The consensus layer rewards are derived from validator duties such as attestation, proposals, and sync committees. These rewards are accumulated in the validator's withdrawal address. Execution rewards, which are earned from MEV and transaction priority tips, are accumulated in the fee recipient address.
---
## New Claim Rewards Process (0x02 Validators)
Whether your cluster is created with OVMs as withdrawal address or EOA as withdrawal address, the process is similar. There are three steps:
### 1. Withdraw Rewards / Principal
WWith the introduction of compounding, `0x02` validators no longer support automatic withdrawal sweeps to compound rewards. As a result, rewards are not sent directly to the withdrawal address. Instead, the withdrawal address must send a withdrawal request.
1. Refer to the following documentation to withdraw rewards:
- If the withdrawal address is an **EOA**: See the [Request Withdrawal guide](./request-withdrawal.md) for EOA-specific instructions.
- If the withdrawal address is an **OVM**: See the [Request Withdrawal guide](./request-withdrawal.md) for OVM-specific instructions.
:::warning
Be very careful about the amount of ETH you withdraw, as it will govern whether the amount will be treated as principal or rewards. Read more about this in the [withdrawal request FAQ](./request-withdrawal.md#3-how-to-decide-initial-withdrawal-amount).
:::
2. If there are already undistributed rewards, make sure to distribute them before the withdrawal is processed (unless you want to send them to the principal recipient). BThis is because, after the withdrawal is processed, the new withdrawal amount and any previously undistributed rewards may combine and cross the principal threshold.
:::info
💡 In case of `0x01` validators, no withdrawal is required. Withdrawal skimming happens on a regular basis and will be sent to OVM balance. If you are using legacy Obol splits contracts with `0x01` validators, also called OWRs, then you can jump to the distribute stage (see [Legacy OWR Flow](#legacy-owr-flow-deprecated) below).
:::
### 2. Distribute the Rewards
If you are using OVM, distribute the ETH that has been withdrawn from the validators. Upon distribution, it will be sent to either the principal recipient or will be sent as rewards and ready to be claimed on the operator page.
:::info
💡 The amount of ETH withdrawn in the previous step will be sent to OVM. If the OVM balance is greater than the principal threshold, upon distribution the ETH from OVM balance will be sent to the principal address. If the OVM balance is below the principal threshold, it will be sent to the fee recipient splitter. If rewards are sent to the fee recipient splitter, they will be distributed again according to split configuration. But all of these multiple distributions are batched together under a single distribute action.
:::
:::info
💡 For legacy `0x01` validators with OWR withdrawal addresses, distribute works just like before. Click the distribute icon to trigger the distribution.
:::
### 3. Claim
Once the funds are distributed, go to the [Operator Dashboard](https://launchpad.obol.org/) to claim the rewards.
---
## Legacy OWR Flow (Deprecated)
:::warning
This section documents the legacy OWR (Optimistic Withdrawal Recipient) flow for older `0x01` validators. For new clusters with `0x02` validators, please use the [New Claim Rewards Process](#new-claim-rewards-process-0x02-validators) above.
:::
The method for claiming rewards depends on the cluster's withdrawal configuration, whether it's an [**OWR**](../../learn/intro/obol-splits.md#optimistic-withdrawal-recipient) or an [**Exitable Withdrawal Configuration**](../../learn/intro/obol-splits.md#exitable-withdrawal-recipient). The table below outlines the latest details on how and where to claim rewards.
### Claim Status {#claim-status}
| Withdrawal Configuration | Subcategory Description | Is supported on Launchpad? | Where to claim? |
| ----------------------------------------------------------------------- | ----------------------------------------------------------------------------------------- | -------------------------- | ----------------------------------------------------------------------------------------------------------------------------------------------------------------------------------------------------- |
| 1. Claim principal + rewards without splits - Exit and get rewards | To claim principal or rewards without splits, users currently have to exit the validator. | ✅ | Cluster details page in the Operator Dashboard. For example, [here](https://hoodi.launchpad.obol.org/cluster/details/?lockHash=0x42833298f3c767b866615814dd9f86ce35ed2f89bf3d397d5f353a0ad5a38013). |
| 2. Splits only rewards using OWR - ETH | For all clusters with ETH rewards. Requires two steps: (1) Distribute on cluster details page, (2) Claim on operator page. | ✅ | Step 1: Cluster details page - Click **Distribute** button for each OWR. Step 2: Operator page - Claim your share. For example, [here](https://hoodi.launchpad.obol.org/cluster/details/?lockHash=0x42833298f3c767b866615814dd9f86ce35ed2f89bf3d397d5f353a0ad5a38013). |
| 3. Split principal + rewards - ETH | For clusters configured to split both principal and rewards. | ✅ | Operators currently need to use the UI provided by Splits.org. For example, a [Lido Split](https://app.splits.org/accounts/0x845aF36663a9908D9E46101e3CC658FbCEB783a8/?chainId=1). |
| 4. Splits non-ETH rewards using any withdrawal config - wstETH or weETH | For Lido and EtherFi clusters earning rewards in protocol-specific tokens. | In Progress ➡️ | Operators currently need to use the UI provided by Splits.org. For example, a [Lido Split](https://app.splits.org/accounts/0x845aF36663a9908D9E46101e3CC658FbCEB783a8/?chainId=1). |
| 5. Lido CSM rewards - wstETH | For all Lido CSM clusters earning wstETH rewards. | In Progress ➡️ | Similar to row number 3, use the Splits UI. More details can be found at the bottom of [this page](../integrations/lido-csm.mdx). |
### Claim Flow {#claim-flow}
To understand how claims via Launchpad work, it is highly recommended to first understand how splits work. More details are available [**here**](../../learn/intro/obol-splits.md). The flowchart below summarizes how an operator and a non-operator can interact with split contracts to facilitate claims:
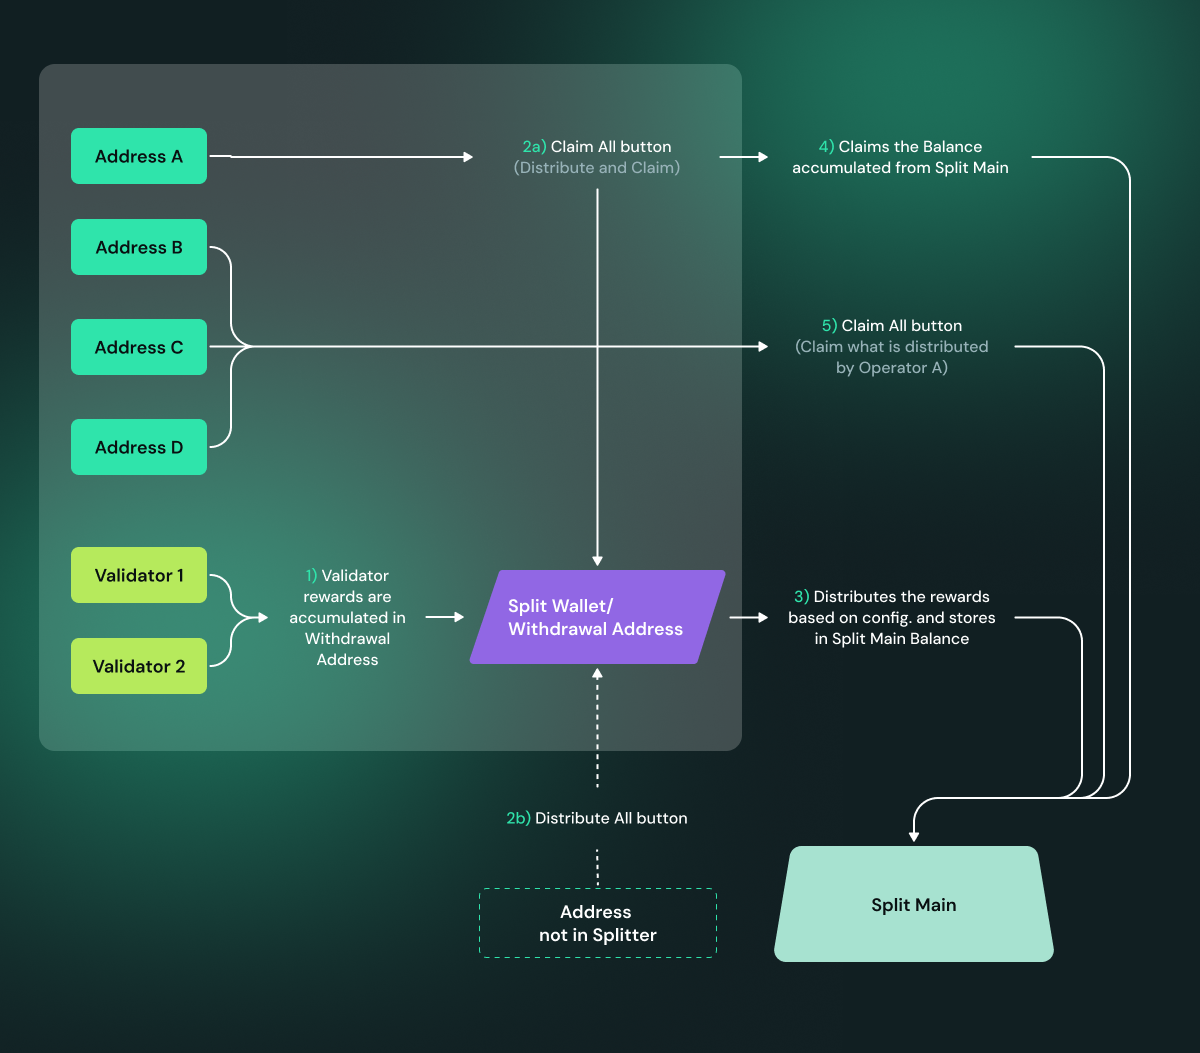
**Updated OWR Process:**
1. All validator rewards are accumulated in the validator's withdrawal address, which is an OWR (Optimistic Withdrawal Recipient) contract.
2. **Distribute on Cluster Details Page**: On the cluster details page, you will see a **Distribute** button for each OWR. Click the Distribute button to send rewards from the OWR to the Split Main contract. This step must be completed before claiming.
3. **Claim on Operator Page**: After distribution is complete, navigate to the operator page to claim your share of the rewards. The rewards will be distributed according to the split configuration set at cluster creation.
4. The Split Main contract sends proportional rewards to each operator based on their configured split percentage.
:::info
Note: There is no longer a "Claim All" button on the cluster details page. The process now requires two steps: first distribute in the cluster details page, then claim at the operator page.
:::
### Launchpad Edge Cases {#launchpad-edge-cases}
We are constantly improving the user experience. Below are some edge cases to avoid confusion:
#### Case 1: You need to distribute before claiming
Make sure you have clicked the **Distribute** button for each OWR in the cluster details page before attempting to claim rewards at the operator page. If you try to claim before distributing, there may be no rewards available to claim.
#### Case 2: Multiple OWRs in a cluster
If your cluster has multiple OWRs (one per validator), you will see a separate **Distribute** button for each OWR. You need to distribute from each OWR individually before claiming your rewards. After all distributions are complete, you can claim your total share from the operator page.
#### Case 3: You just created a new cluster with no active validators or rewards, but it shows claimable amounts
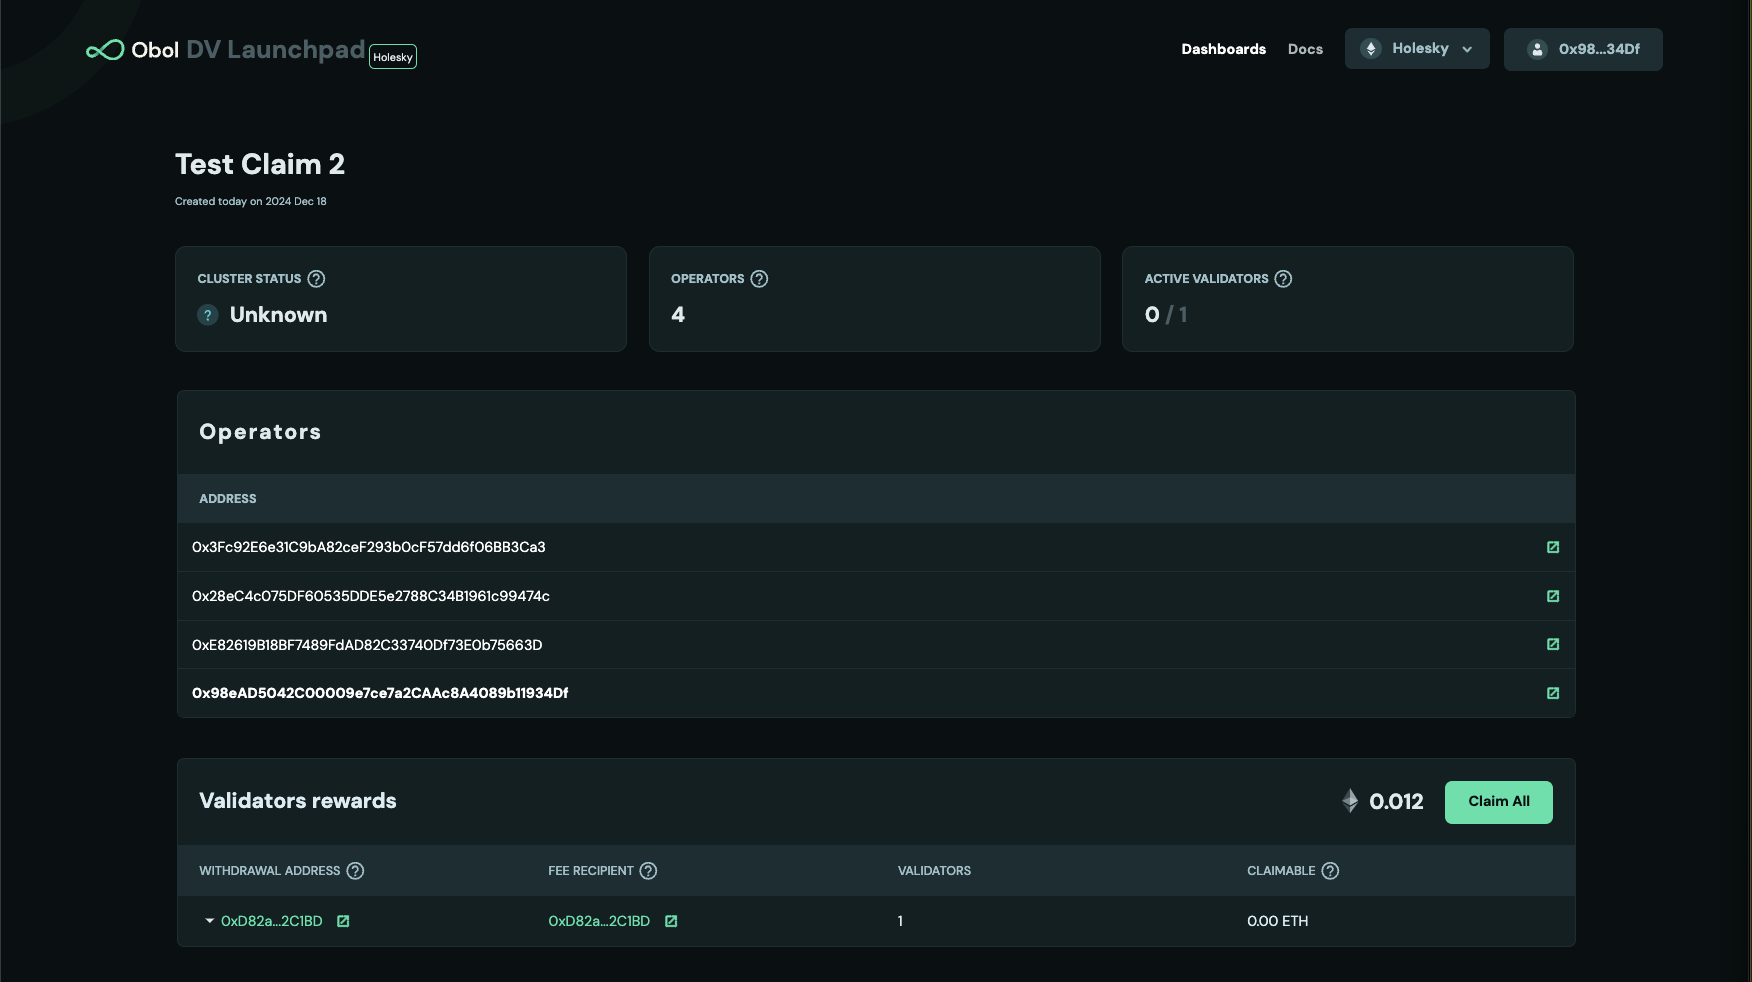
The amount shown here is from a previous case and is now sitting in the Split Main, ready to be claimed. Unfortunately, it is not possible to associate the Split Main balance of an address with a specific cluster. If you are part of multiple clusters, your Split Main balance will appear next to all claim buttons, regardless of the cluster. We are working on a fix to avoid this confusion.
---
# Update a DV
URL: https://docs.obol.org/run-a-dv/running/update-a-dv
# Update a DV
It is highly recommended to upgrade your DV stack from time to time. This ensures that your node is secure, performant, up-to-date and you don't miss important hard forks.
To do this, follow these steps:
```sh
cd charon-distributed-validator-node
```
#### Pull latest changes to the repo {#pull-latest-changes-to-the-repo}
```sh
git pull
```
#### Create (or recreate) your DV stack {#create-or-recreate-your-dv-stack}
```sh
docker compose up -d --build
```
:::danger
If you run more than one node in a DV Cluster, please take caution upgrading them simultaneously. Particularly if you are updating or changing the validator client used or recreating disks. It is recommended to update nodes on a sequential basis to minimize liveness and safety risks.
:::
#### Conflicts {#conflicts}
You may get a `git conflict` error similar to this:
```sh
error: Your local changes to the following files would be overwritten by merge:
prometheus/prometheus.yml
Please commit your changes or stash them before you merge.
```
This is probably because you have made some changes to some of the files, for example to the `prometheus/prometheus.yml` file.
To resolve this error, you can either:
* Stash and reapply changes if you want to keep your custom changes:
```sh
git stash # Stash your local changes
git pull # Pull the latest changes
git stash apply # Reapply your changes from the stash
docker-compose up -d --build # Recreate your DV stack
```
After reapplying your changes, manually resolve any conflicts that may arise between your changes and the pulled changes using a text editor or Git's conflict resolution tools.
* Override changes and recreate configuration if you don't need to preserve your local changes and want to discard them entirely:
```sh
git reset --hard # Discard all local changes and override with the pulled changes
git pull # Pull the latest changes
docker-compose up -d --build # Recreate your DV stack
```
After overriding the changes, you will need to recreate your DV stack using the updated files. By following one of these approaches, you should be able to handle Git conflicts when pulling the latest changes to your repository, either preserving your changes or overriding them as per your requirements.
```sh
cd charon-distributed-validator-cluster
```
#### Pull latest changes to the repo {#pull-latest-changes-to-the-repo}
```sh
git pull
```
#### Create (or recreate) your DV stack {#create-or-recreate-your-dv-stack}
```sh
docker compose up -d --build
```
:::danger
If you run more than one node in a DV Cluster, please take caution upgrading them simultaneously. Particularly if you are updating or changing the validator client used or recreating disks. It is recommended to update nodes on a sequential basis to minimize liveness and safety risks.
:::
#### Conflicts {#conflicts}
You may get a `git conflict` error similar to this:
```sh
error: Your local changes to the following files would be overwritten by merge:
prometheus/prometheus.yml
Please commit your changes or stash them before you merge.
```
This is probably because you have made some changes to some of the files, for example to the `prometheus/prometheus.yml` file.
To resolve this error, you can either:
* Stash and reapply changes if you want to keep your custom changes:
```sh
git stash # Stash your local changes
git pull # Pull the latest changes
git stash apply # Reapply your changes from the stash
docker-compose up -d --build # Recreate your DV stack
```
After reapplying your changes, manually resolve any conflicts that may arise between your changes and the pulled changes using a text editor or Git's conflict resolution tools.
* Override changes and recreate configuration if you don't need to preserve your local changes and want to discard them entirely:
```sh
git reset --hard # Discard all local changes and override with the pulled changes
git pull # Pull the latest changes
docker-compose up -d --build # Recreate your DV stack
```
After overriding the changes, you will need to recreate your DV stack using the updated files. By following one of these approaches, you should be able to handle Git conflicts when pulling the latest changes to your repository, either preserving your changes or overriding them as per your requirements.
#### Update the Helm repository
```sh
helm repo update obol
```
#### Upgrade the release
```sh
helm upgrade my-dv-pod obol/dv-pod --reuse-values
```
This will upgrade your Charon and validator client containers to the latest chart version while preserving your existing configuration values.
:::info
Check the [chart changelog](https://github.com/ObolNetwork/helm-charts/releases) before upgrading to review any breaking changes or new configuration options.
:::
:::danger
If you run more than one node in a DV Cluster, please take caution upgrading them simultaneously. Particularly if you are updating or changing the validator client used or recreating disks. It is recommended to update nodes on a sequential basis to minimize liveness and safety risks.
:::
---
# Monitoring Your Node
URL: https://docs.obol.org/run-a-dv/running/monitoring
# Monitoring Your Node
This comprehensive guide will assist you in effectively monitoring your Charon clusters and setting up alerts by running your own Prometheus and Grafana server. If you want to use Obol’s [public dashboard](https://grafana.monitoring.gcp.obol.tech/d/d895e47a-3c2d-46b7-9b15-8f31202681af/clusters-aggregate-view?orgId=6) instead of running your servers, refer to [this section](../start/obol-monitoring.mdx) in Obol docs that teaches you how to push Prometheus metrics to Obol.
To explain quickly, Prometheus generates the metrics and Grafana visualizes them. To learn more about Prometheus and Grafana, visit [here](https://grafana.com/docs/grafana/latest/getting-started/get-started-grafana-prometheus/). If you are using [**CDVN repository**](https://github.com/ObolNetwork/charon-distributed-validator-node) or [**CDVC repository**](https://github.com/ObolNetwork/charon-distributed-validator-cluster), then Prometheus and Grafana are part of docker compose file and will be installed when you run `docker compose up`.
The local Grafana server will have a few pre-built dashboards:
1. Charon Overview
This is the main dashboard that provides all the relevant details about the Charon node, for example - peer connectivity, duty completion, health of beacon node and downstream validator, etc. To open, navigate to `charon-distributed-validator-node` directory and open the following `uri` in the browser `http://localhost:3000/d/charonoverview/`.
2. Single Charon Node Dashboard (deprecated)
This is an older dashboard Charon node monitoring which is now deprecated. If you are still using it, we would highly recommend to move to Charon Overview for most up to date panels.
3. Charon Log Dashboard
This dashboard can be used to query the logs emitted while running your Charon node. It utilizes [Grafana Loki](https://grafana.com/oss/loki/). This dashboard is not active by default and should only be used in debug mode. Refer to [advanced docker config](../../advanced-and-troubleshooting/advanced/adv-docker-configs.md) section on how to set up a debug mode.
| Alert Name | Description | Troubleshoot |
| ------------------------------- | ------------------------------------------------------------------------------------------------------------------------------------------------------------------------------------------------------------------------------------------------------------------------------------------------------------------------------- | ------------------------------------------------------------------------------------------------------------------------------------------------------------------------------------------------------------------------------------------------------------------------- |
| ClusterBeaconNodeDown | This alert is activated when the beacon node in a the cluster is offline. The beacon node is crucial for validating transactions and producing new blocks. Its unavailability could disrupt the overall functionality of the cluster. | Most likely data is corrupted. Wipe data from the point you know data was corrupted and restart beacon node so it can be synced again. |
| ClusterMissedAttestations | This alert indicates that there have been missed attestations in the cluster. Missed attestations may suggest that validators are not operating correctly, compromising the security and efficiency of the cluster. | This alert is triggered when 3 attestations are missed in 2 minutes. Check if the minimum threshold of peers are online. If correct, check for beacon node API errors and downstream validator errors using Loki. Lastly, debug from Docker using `docker compose debug`. |
| ClusterInUnknownStatus | This alert is designed to activate when a node within the cluster is detected to be in an unknown state. The condition is evaluated by checking whether the maximum of the `app_monitoring_readyz` metric is 0. | This is most likely a bug in Charon. Report to us via [Discord](https://discord.com/channels/849256203614945310/970759460693901362). |
| ClusterInsufficientPeers | This alert is set to activate when the number of peers for a node in the cluster is insufficient. The condition is evaluated by checking whether the maximum of the `app_monitoring_readyz` equals 4. | If you are running group cluster, check with other peers to troubleshoot the issue. If you are running solo cluster, look into other machines running the DVs to find the problem. |
| ClusterFailureRate | This alert is activated when the failure rate of the cluster exceeds a certain threshold, more specifically - more than 5% failures in duties in the last 6 hours. | Check the upstream and downstream dependencies, latency and hardware issues. |
| ClusterVCMissingValidators | This alert is activated if any validators in the cluster are missing. This happens when validator client cannot load validator keys in the past 10 minutes. | Find if validator keys are missing and load them. |
| ClusterHighPctFailedSyncMsgDuty | This alert is activated if a high percentage of sync message duties failed in the cluster. The alert is activated if the sum of the increase in failed duties tagged with "sync\_message" in the last hour divided by the sum of the increase in total duties tagged with "sync\_message" in the last hour is greater than 10%. | This may be due to limitations in beacon node performance on nodes within the cluster. In charon, this duty is the most demanding, however, an increased failure rate does not impact rewards. |
| ClusterNumConnectedRelays | This alert is activated if the number of connected relays in the cluster falls to 0. | Make sure correct relay is configured. If you still get the error report to us via [Discord](https://discord.com/channels/849256203614945310/970759460693901362). |
| PeerPingLatency | This alert is activated if the 90th percentile of the ping latency to the peers in a cluster exceeds 400ms within 2 minutes. | Make sure to set up stable and high speed internet connection. If you have geographically distributed nodes, make sure latency does not go over 250 ms. |
| ClusterBeaconNodeZeroPeers | This alert is activated when beacon node cannot find peers. | Go to docs of beacon node client to troubleshoot. Make sure there is no port overlap and p2p discovery is open. |
## Setting Up a Contact Point
When alerts are triggered, they are routed to contact points according notification policies. For this, contact points must be added. Grafana supports several kind of contact points like email, PagerDuty, Discord, Slack, Telegram etc. This document will teach how to add Discord channel as contact point.
1. On left nav bar in Grafana console, under `Alerts` section, click on contact points.
2. Click on `+ Add contact point`. It will show the following page. Choose Discord in the `Integration` drop down.
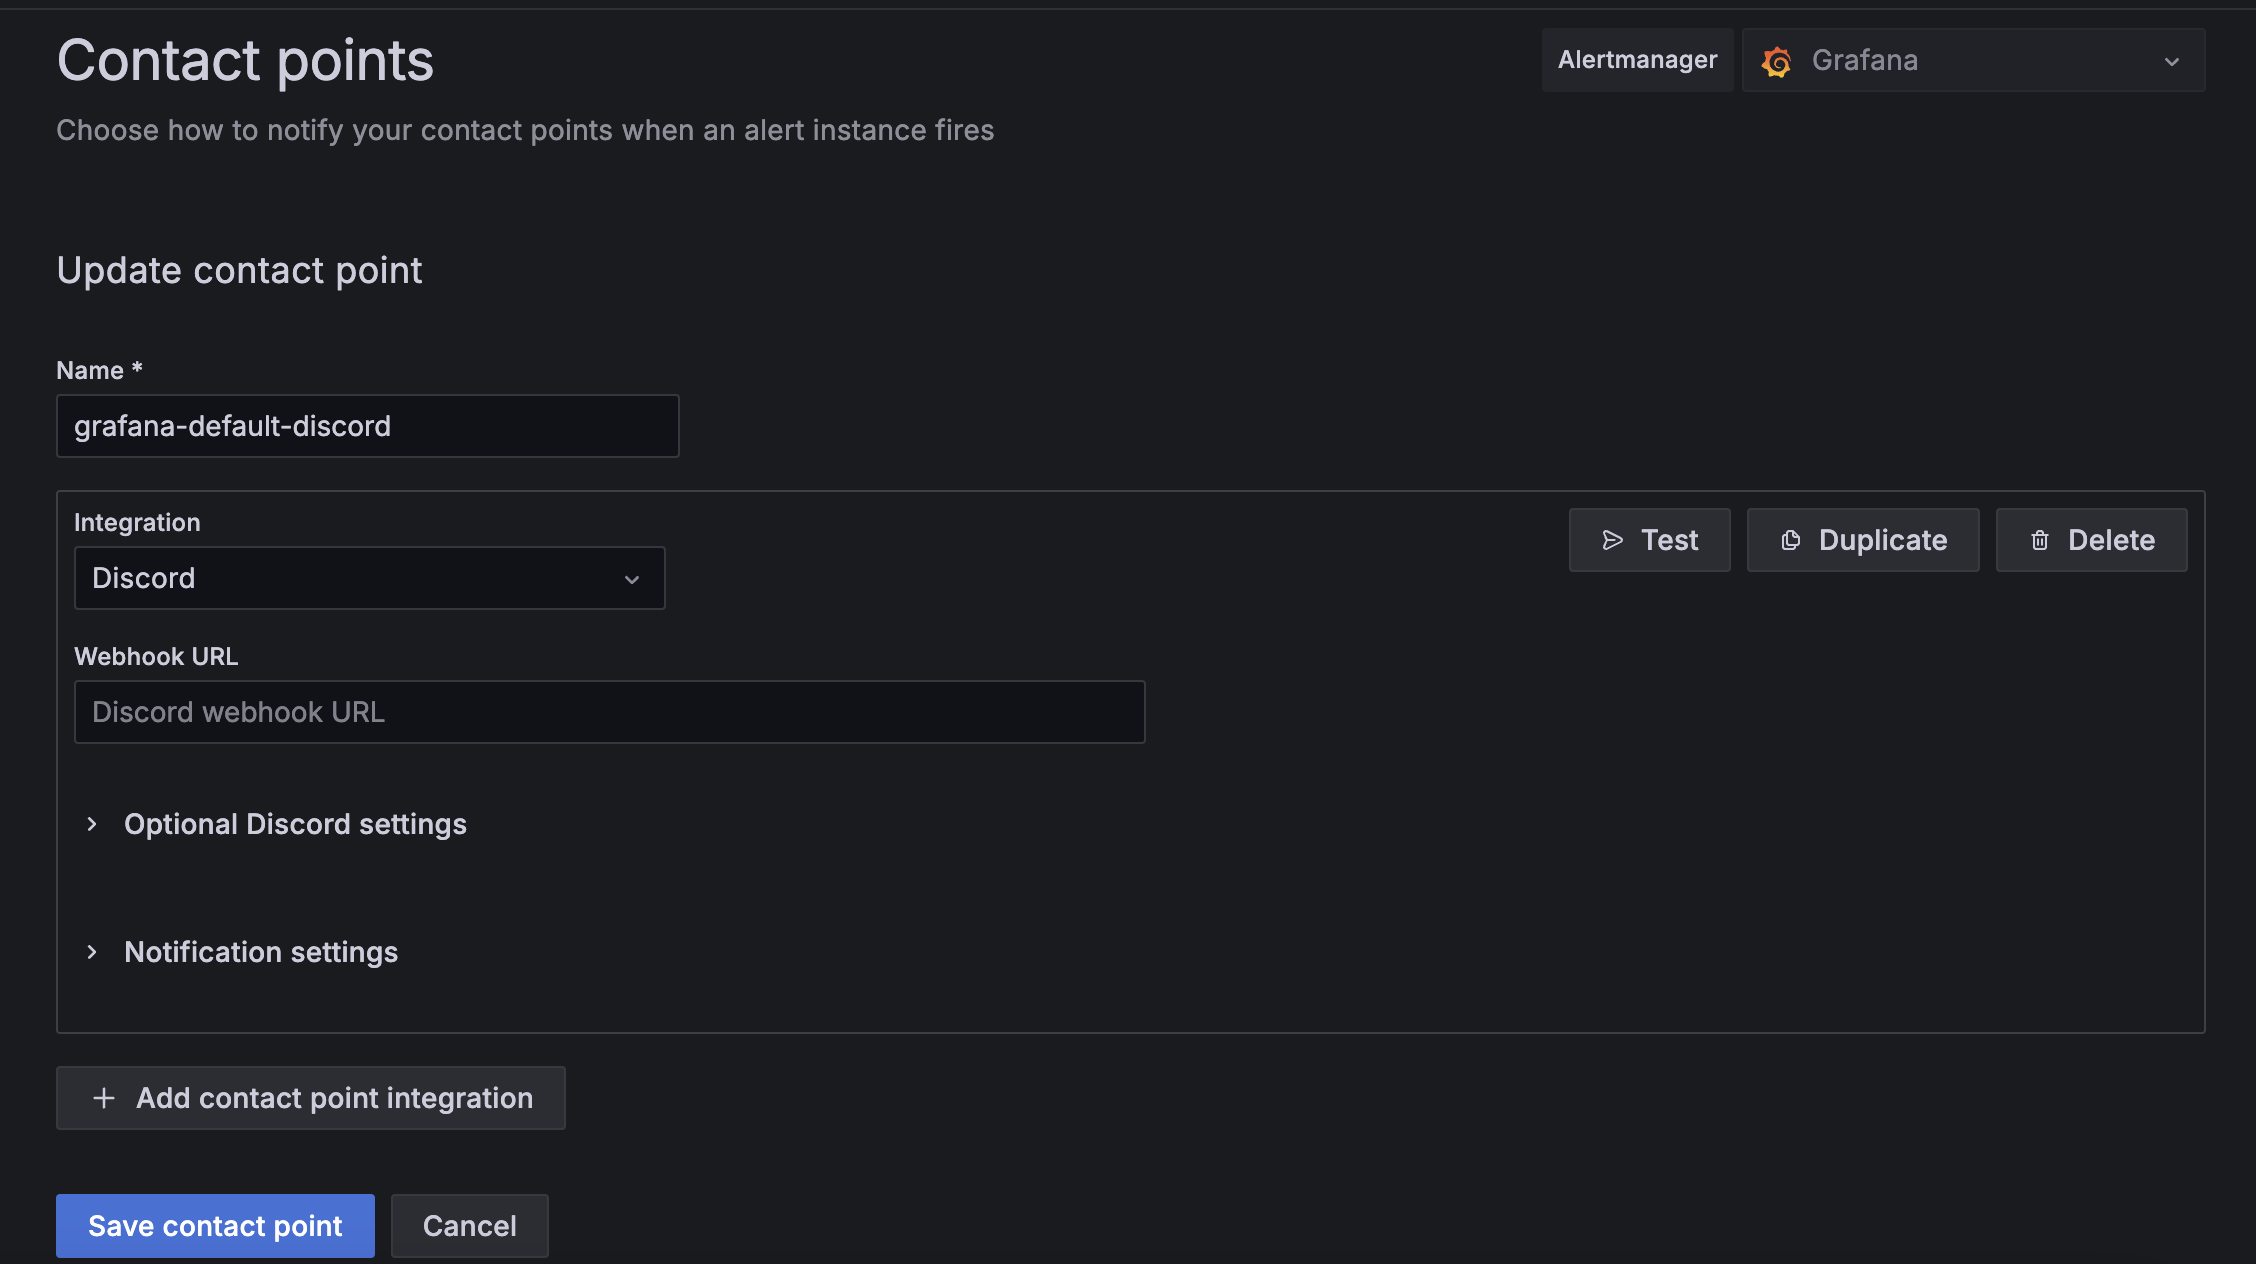
3. Give a descriptive name to the alert. Create a channel in Discord and copy its `webhook url`. Once done, click `Save contact point` to finish.
4. When the alerts are fired, it will send without filling in the variables for cluster detail. For example, `cluster_hash` variable is missing here `cluster_hash = {{.cluster_hash}}`. This is done to save disk space. To find the details, use `docker compose -f docker-compose.yml -f compose-debug.yml up`. More description [**here**](../../advanced-and-troubleshooting/advanced/adv-docker-configs.md).
## Best Practices for Monitoring Charon Nodes & Cluster
* **Establish Baselines**: Familiarize yourself with the normal operation metrics like CPU, memory, and network usage. This will help you detect anomalies.
* **Define Key Metrics**: Set up alerts for essential metrics, encompassing both system-level and Charon-specific ones.
* **Configure Alerts**: Based on these metrics, set up actionable alerts.
* **Monitor Network**: Regularly assess the connectivity between nodes and the network.
* **Perform Regular Health Checks**: Consistently evaluate the status of your nodes and clusters.
* **Monitor System Logs**: Keep an eye on logs for error messages or unusual activities.
* **Assess Resource Usage**: Ensure your nodes are neither over- nor under-utilized.
* **Automate Monitoring**: Use automation to ensure no issues go undetected.
* **Conduct Drills**: Regularly simulate failure scenarios to fine-tune your setup.
* **Update Regularly**: Keep your nodes and clusters updated with the latest software versions.
## Third-Party Services for Uptime Testing
* [updown.io](https://updown.io/)
* [Grafana synthetic Monitoring](https://grafana.com/grafana/plugins/grafana-synthetic-monitoring-app/)
## Key metrics to watch to verify node health based on jobs
**CPU Usage**: High or spiking CPU usage can be a sign of a process demanding more resources than it should.
**Memory Usage**: If a node is consistently running out of memory, it could be due to a memory leak or simply under-provisioning.
**Disk I/O**: Slow disk operations can cause applications to hang or delay responses. High disk I/O can indicate storage performance issues or a sign of high load on the system.
**Network Usage**: High network traffic or packet loss can signal network configuration issues, or that a service is being overwhelmed by requests.
**Disk Space**: Running out of disk space can lead to application errors and data loss.
**Uptime**: The amount of time a system has been up without any restarts. Frequent restarts can indicate instability in the system.
**Error Rates**: The number of errors encountered by your application. This could be 4xx/5xx HTTP errors, exceptions, or any other kind of error your application may log.
**Latency**: The delay before a transfer of data begins following an instruction for its transfer.
It is also important to check:
* NTP clock skew;
* Process restarts and failures (eg. through `node_systemd`);
* Alert on high error and panic log counts.
---
# Exit a DV
URL: https://docs.obol.org/run-a-dv/running/exit-a-dv
# Exit a DV
### Introduction {#introduction}
Users looking to exit staking entirely and withdraw their full balance back have two options:
1. **Exit via Withdrawal Address (Recommended for Post-Pectra):** If your cluster's withdrawal address is an EOA or OVM, you can trigger an EL exit directly from the Launchpad without needing validator keys or operator coordination. This is the simplest method and is described in the [Exit via Withdrawal Address](exit-a-dv.mdx#exit-via-withdrawal-address-post-pectra) section below.
2. **Exit via Validator Keys (Traditional Method):** This method requires signing and broadcasting a "voluntary exit" message with validator keys. In the case of a DV, Charon nodes need to broadcast a partial exit to the other nodes of the cluster. Once a threshold of partial exits has been received by any node, the full voluntary exit will be sent to the beacon chain. This process will take 27 hours or longer depending on the current length of the exit queue. Once the validator is exited, the principal plus unclaimed rewards will go to the withdrawal address of the validator. Depending on the cluster's withdrawal configuration, users can claim their proportion of principal and rewards.
For the traditional validator key-based method, there are two ways to sign the partial exit and broadcast the full exit. Neither solution requires gas:
1. **Using Charon's exit solution** - It is an Obol hosted solution which is facilitated by Obol APIs. It provides several benefits such as signing partial exits for multiple validators at once, live monitoring of partial exits status via Launchpad and ability to download partial exits and broadcast them later as required. Users don't have to worry about the intricacies of validator clients. Charon Exit abstracts all the complexity.
2. **Using the Validator Clients directly** - Users can also directly use the validator client that is connected to your Charon client to submit partial exits, as the client only signs a partial exit message using its share of the private key. Charon will combine the partial exit messages from the other operators. Once the threshold is reached, they are submitted to the beacon node. All of this is usually wrapped under a single command and hence users cannot download full exit signatures for broadcasting it later. In this case, users cannot use Launchpad to monitor exit status and will have to use Grafana to query the partial exit status.
:::info
**For the traditional validator key-based exit method:**
* A threshold of operators need to run the exit command for the exit to succeed. This is the same threshold as is specified during cluster creation.
* **Ensure that all operators within a cluster consistently use either the hosted solution (Charon Exit) or the non-hosted solution (Validator Client Exit). Mixing both solutions within the same cluster—where some operators use Charon Exit while others use Validator Client Exit—is not allowed.**
* In case of validator client native exits, partial exits can be broadcast by any validator client as long as the threshold for the cluster is reached.
* If a Charon client restarts after the exit command is run but before the threshold is reached, it will lose the partial exits it has received from the other nodes. If all Charon clients restart and thus all partial exits are lost before the required threshold of exit messages are received, operators will have to rebroadcast their partial exit messages.
* All operators need to use the same `EXIT_EPOCH` for the exit to be successful. Assuming you want to exit as soon as possible, the default epochs included in the below commands should be sufficient for the respective network.
:::
***
## Exit via Withdrawal Address (Post-Pectra)
Post-Pectra fork, withdrawal addresses of validators can trigger an EL (Execution Layer) exit directly. This method allows the withdrawal address (EOA or OVM) to initiate exits without requiring validator keys or coordination between operators. This is an alternative to the validator key-based exit methods described below.
:::info
**When to use this method:** If your cluster's withdrawal address is an EOA or OVM, you can use this simpler method to exit validators directly from the Launchpad, without needing to coordinate with other operators or use validator keys.
:::
### How to Trigger an EL Exit
In the Launchpad, you can initiate an EL exit using the Exit validator button in the actions column of the validators table. To trigger an EL exit, you must meet one of the following conditions:
* **Connected with the withdrawal address:** If the withdrawal address is an EOA (Externally Owned Account), you must be connected with that EOA wallet.
* **Have WITHDRAWAL\_ROLE:** If the withdrawal address of the validator is an OVM, you must have `WITHDRAWAL_ROLE` in that OVM. Read more about how to assign roles [here](../../advanced-and-troubleshooting/advanced/assign-ovm-roles.md).

### Step-by-Step Process
1. **Initiate Exit:** Upon clicking the Exit validator button, you can multi-select the active validators you would like to exit. In the example below, there is only one active validator, so only one can be selected for the exit.
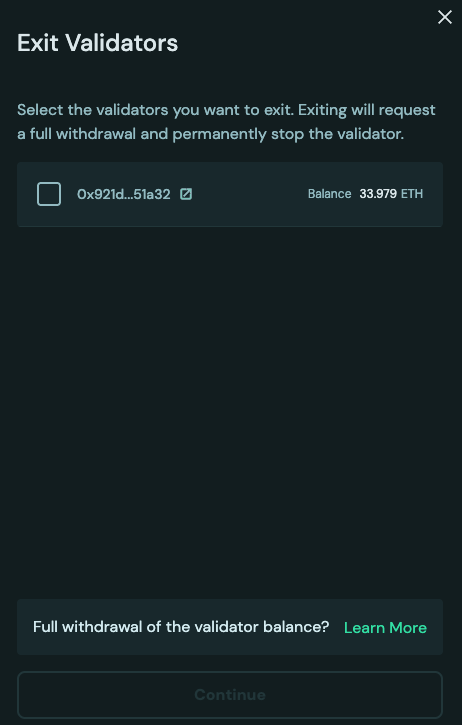
1. **Review and Confirm:** You will see a confirmation page showing the validators that will be exited. If you are sending exits via EOA, it will require exiting validators one by one. In the future, we will use EIP-7702 to perform a single-click exit for all validators.
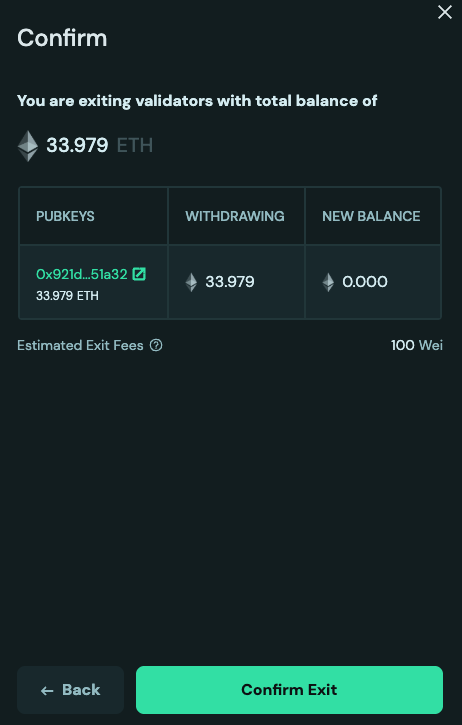
1. **Transaction Submission:** Once the exit is submitted, a transaction will be sent with `0` as the withdrawal amount. This signals the beacon chain to exit the validator. Once the transaction is processed, validators will enter the `Active Exiting` stage.
:::warning
**Important:** You must keep the nodes up as validators have only entered the exit queue. Once the exit is processed and there are no more active validators on the node, you can bring the node down.
:::
4. **Exit Completion:** After the exit is complete, the total balance will be sent to the OVM after the required on-chain withdrawal sweep has finished. At this point, you can distribute the principal and rewards, which are then claimed via the operator page.
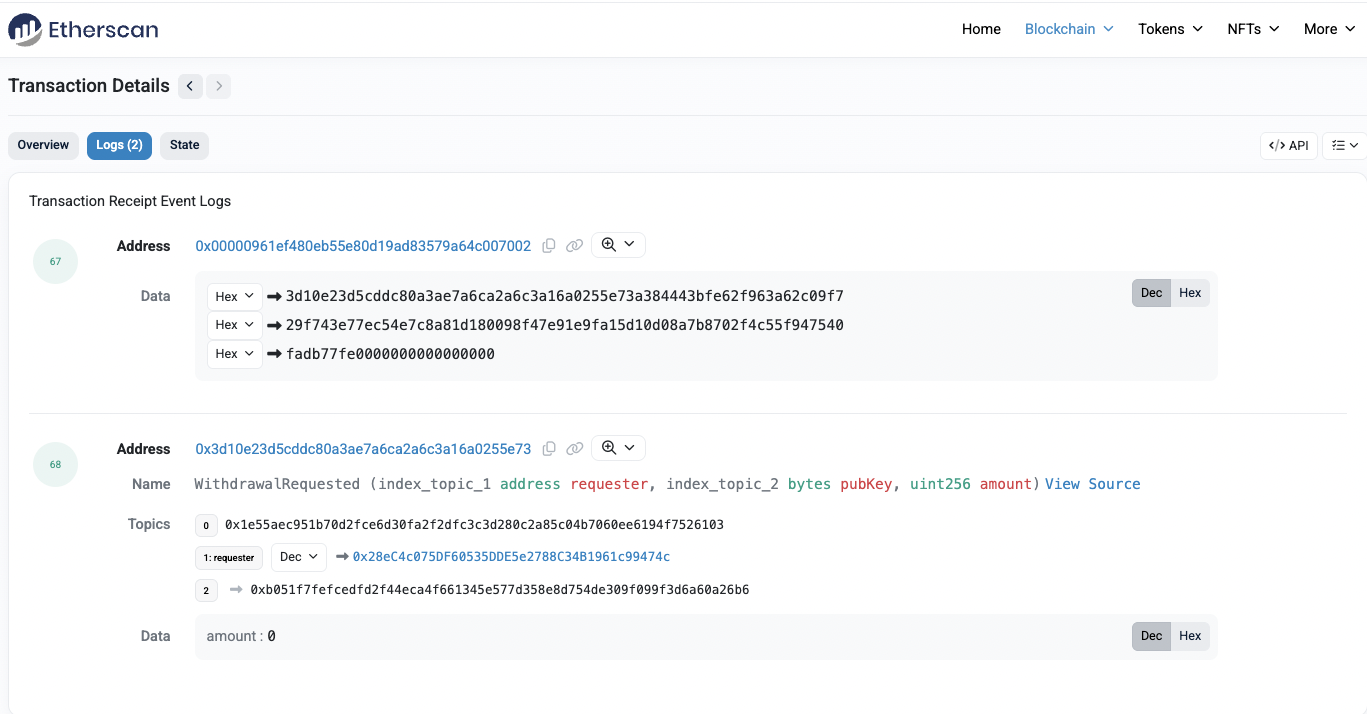
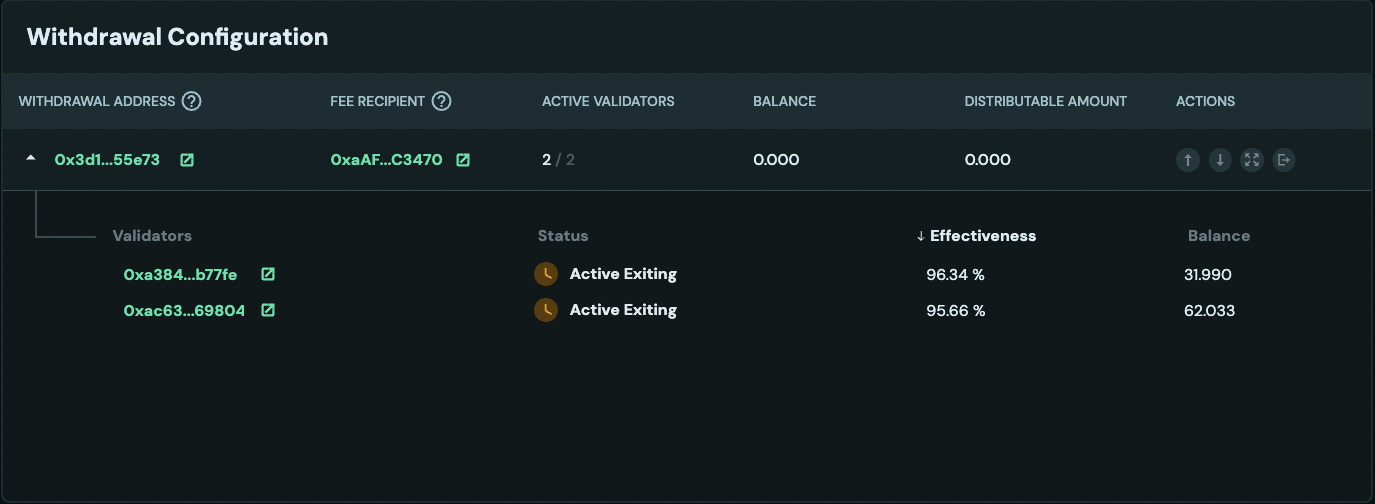
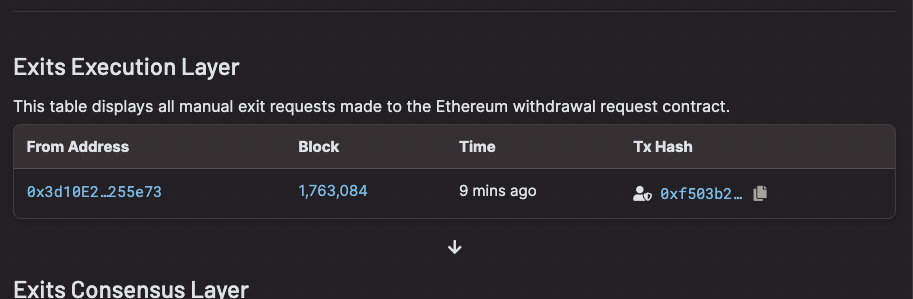
:::danger
🚨 **Crucial Warning:** You **must** distribute any existing undistributed rewards _before_ the exit process finishes. If you do not perform this distribution beforehand, the exiting principal amount will be combined with the remaining rewards upon completion. This combined value will then incorrectly exceed the principal distribution threshold, which will cause the rewards to be mistakenly sent to the principal recipient when you initiate the final distribution.
For more information on distribution, see the [Distribution guide](distribute-rewards.md).
:::
***
## Exit via Validator Keys (Traditional Method)
The following sections describe the traditional method of exiting validators using validator keys, which requires coordination between operators in the cluster.
Choose the correct combination of:
1. **Network** : Mainnet or Hoodi
2. **Exit Type** : Hosted (Charon) or Non-hosted (Validator client)
3. **Validator Quantity**: Exit single or Exit all validators:
Voluntary exit can be submitted directly through Charon. This approach is validator client agnostic as Charon abstracts validator client's native exit commands underneath.
**Step 1: Submit partial exit**
Following command signs a partial exit for a specific validator pubkey.
```sh
docker exec -it charon-distributed-validator-node-charon-1 /bin/sh -c 'charon exit sign \
--beacon-node-endpoints="http://lighthouse:5052" \
--validator-public-key="" \
--exit-epoch=256'
```
Replace `` with the validator's full pubkey (as visible in Ethereum).
Following command signs partial exits for all validators.
```sh
docker exec -it charon-distributed-validator-node-charon-1 /bin/sh -c 'charon exit sign \
--beacon-node-endpoints="http://lighthouse:5052" \
--all \
--exit-epoch=256'
```
**Step 2: Monitor the Partial Exits' status**
After a threshold of signed partial exits from node operators in the cluster is accumulated, a full (complete) exit can be created. For example, in the cluster below, only 2 out of 4 clusters have reached the threshold. Operators will have to wait for one more partial exit signature, either from operator 1 or 3 to create a full exit message.
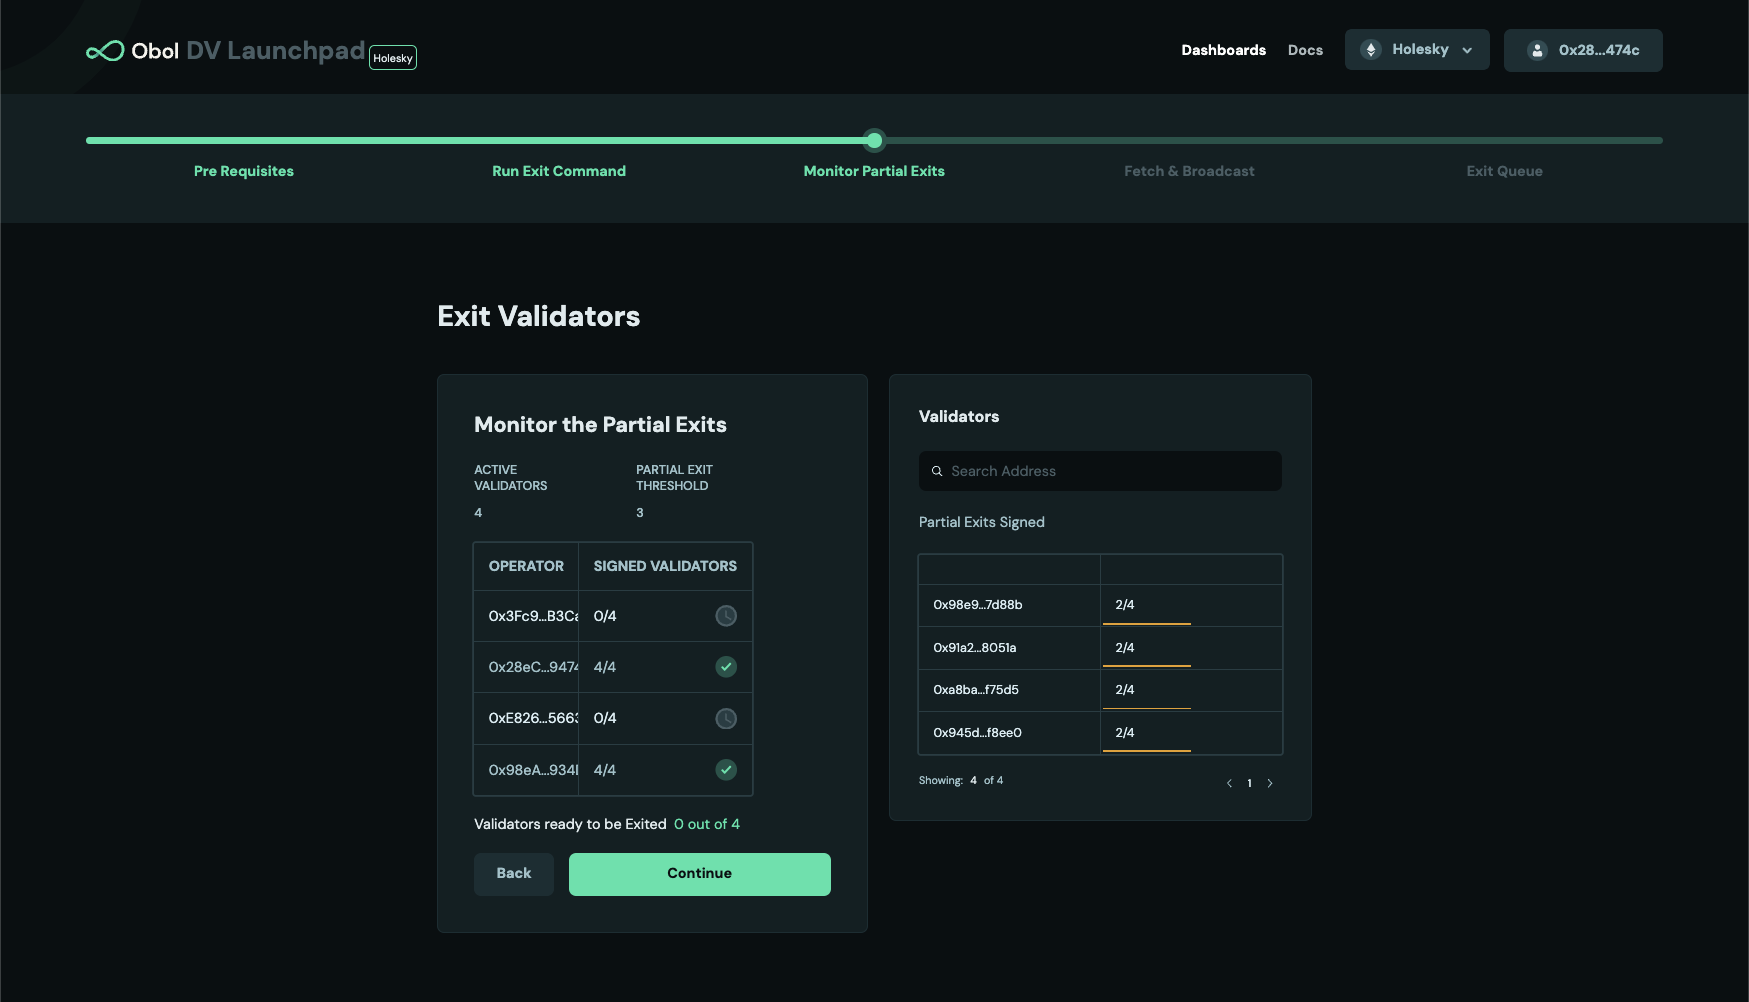
**Step 3: Broadcast the full exit**
Once the partial exit threshold is reached, a full exit can be broadcasted from any of the operators. There are two options to do it, depending on your use-case
1. **Fetch the full exit and broadcast instantaneously (Broadcast directly)** - users can choose it for a single validator or all validators in the cluster.
2. **Fetch the full exit and broadcast it later(Fetch & Broadcast later)** - users can choose it for a single validator or all validators in the cluster.
Following command fetches full exit and broadcasts it instantaneously for a specific validator.
```sh
docker exec -it charon-distributed-validator-node-charon-1 /bin/sh -c 'charon exit broadcast \
--beacon-node-endpoints="http://lighthouse:5052" \
--validator-public-key=""'
```
:::tip
Once a validator has broadcasted an exit message, it must continue to validate for at least 27 hours or longer. Do not shut off your distributed validator nodes until your validator is fully exited.
:::
Following command fetches full exits and broadcasts them instantaneously for all the validators that have reached a partial exit threshold.
```sh
docker exec -it charon-distributed-validator-node-charon-1 /bin/sh -c 'charon exit broadcast \
--beacon-node-endpoints="http://lighthouse:5052" \
--all'
```
:::tip
Once a validator has broadcasted an exit message, it must continue to validate for at least 27 hours or longer. Do not shut off your distributed validator nodes until your validator is fully exited.
:::
**Download Exits** : The following command downloads the full exit signature for a specific public key and stores it in a file.
```
docker exec -it charon-distributed-validator-node-charon-1 /bin/sh -c 'charon exit fetch \
--validator-public-key="" \
--fetched-exit-path="/opt/charon/.charon"'
```
**Broadcast Exits** : The following command uses the full exit signature for a specific public key from the file and broadcasts it to the network.
```
docker exec -it charon-distributed-validator-node-charon-1 /bin/sh -c 'charon exit broadcast \
--beacon-node-endpoints="http://lighthouse:5052" \
--exit-from-file="/opt/charon/.charon/"''
```
:::tip
Once a validator has broadcasted an exit message, it must continue to validate for at least 27 hours or longer. Do not shut off your distributed validator nodes until your validator is fully exited.
:::
**Download Exits** : The following command downloads the full exit signature for all the active public keys and stores it in a directory.
```sh
docker exec -it charon-distributed-validator-node-charon-1 /bin/sh -c 'charon exit fetch \
--all \
--fetched-exit-path="/opt/charon/.charon"'
```
**Broadcast Exits** : The following command uses the full exit signatures from the directory and broadcasts it to the network.
```sh
docker exec -it charon-distributed-validator-node-charon-1 /bin/sh -c 'charon exit broadcast \
--all \
--beacon-node-endpoints="http://lighthouse:5052" \
--exit-from-dir="/opt/charon/.charon"'
```
:::tip
Once a validator has broadcasted an exit message, it must continue to validate for at least 27 hours or longer. Do not shut off your distributed validator nodes until your validator is fully exited.
:::
**Step 1: Submit partial exit**
Following command signs a partial exit for a specific validator pubkey and broadcasts it instantaneously as soon as full exit can be created.
```sh
docker exec -it charon-distributed-validator-node-teku-1 /opt/teku/bin/teku voluntary-exit \
--beacon-node-api-endpoint="http://charon:3600/" \
--validator-public-keys= \
--network=hoodi \
--epoch=256 \
--confirmation-enabled=false
```
Replace `` with the partial pubkey found in the keystores in `.charon/validator_keys/`, under `pubkey` field. To which full pubkey a partial pubkey corresponds (as visible in Ethereum), can be looked up in the `.charon/cluster-lock.json`, under `distributed_validators` field.
Following command signs partial exits for all validator pubkeys and broadcast them instantaneously as soon as a full exit can be created.
```sh
docker exec -it charon-distributed-validator-node-teku-1 /opt/teku/bin/teku voluntary-exit \
--beacon-node-api-endpoint="http://charon:3600/" \
--validator-keys="/opt/charon/validator_keys:/opt/charon/validator_keys" \
--network=hoodi \
--epoch=256 \
--confirmation-enabled=false
```
**Step 2: Monitor partial exit for all active validators**
Consult the examples below and compare them to your validator's monitoring to verify that exits from each operator in the cluster are being received. This example is a cluster of 4 nodes with 2 validators and threshold of 3 nodes broadcasting exits are needed.
1. Operator 1 broadcasts an exit on validator client 1.
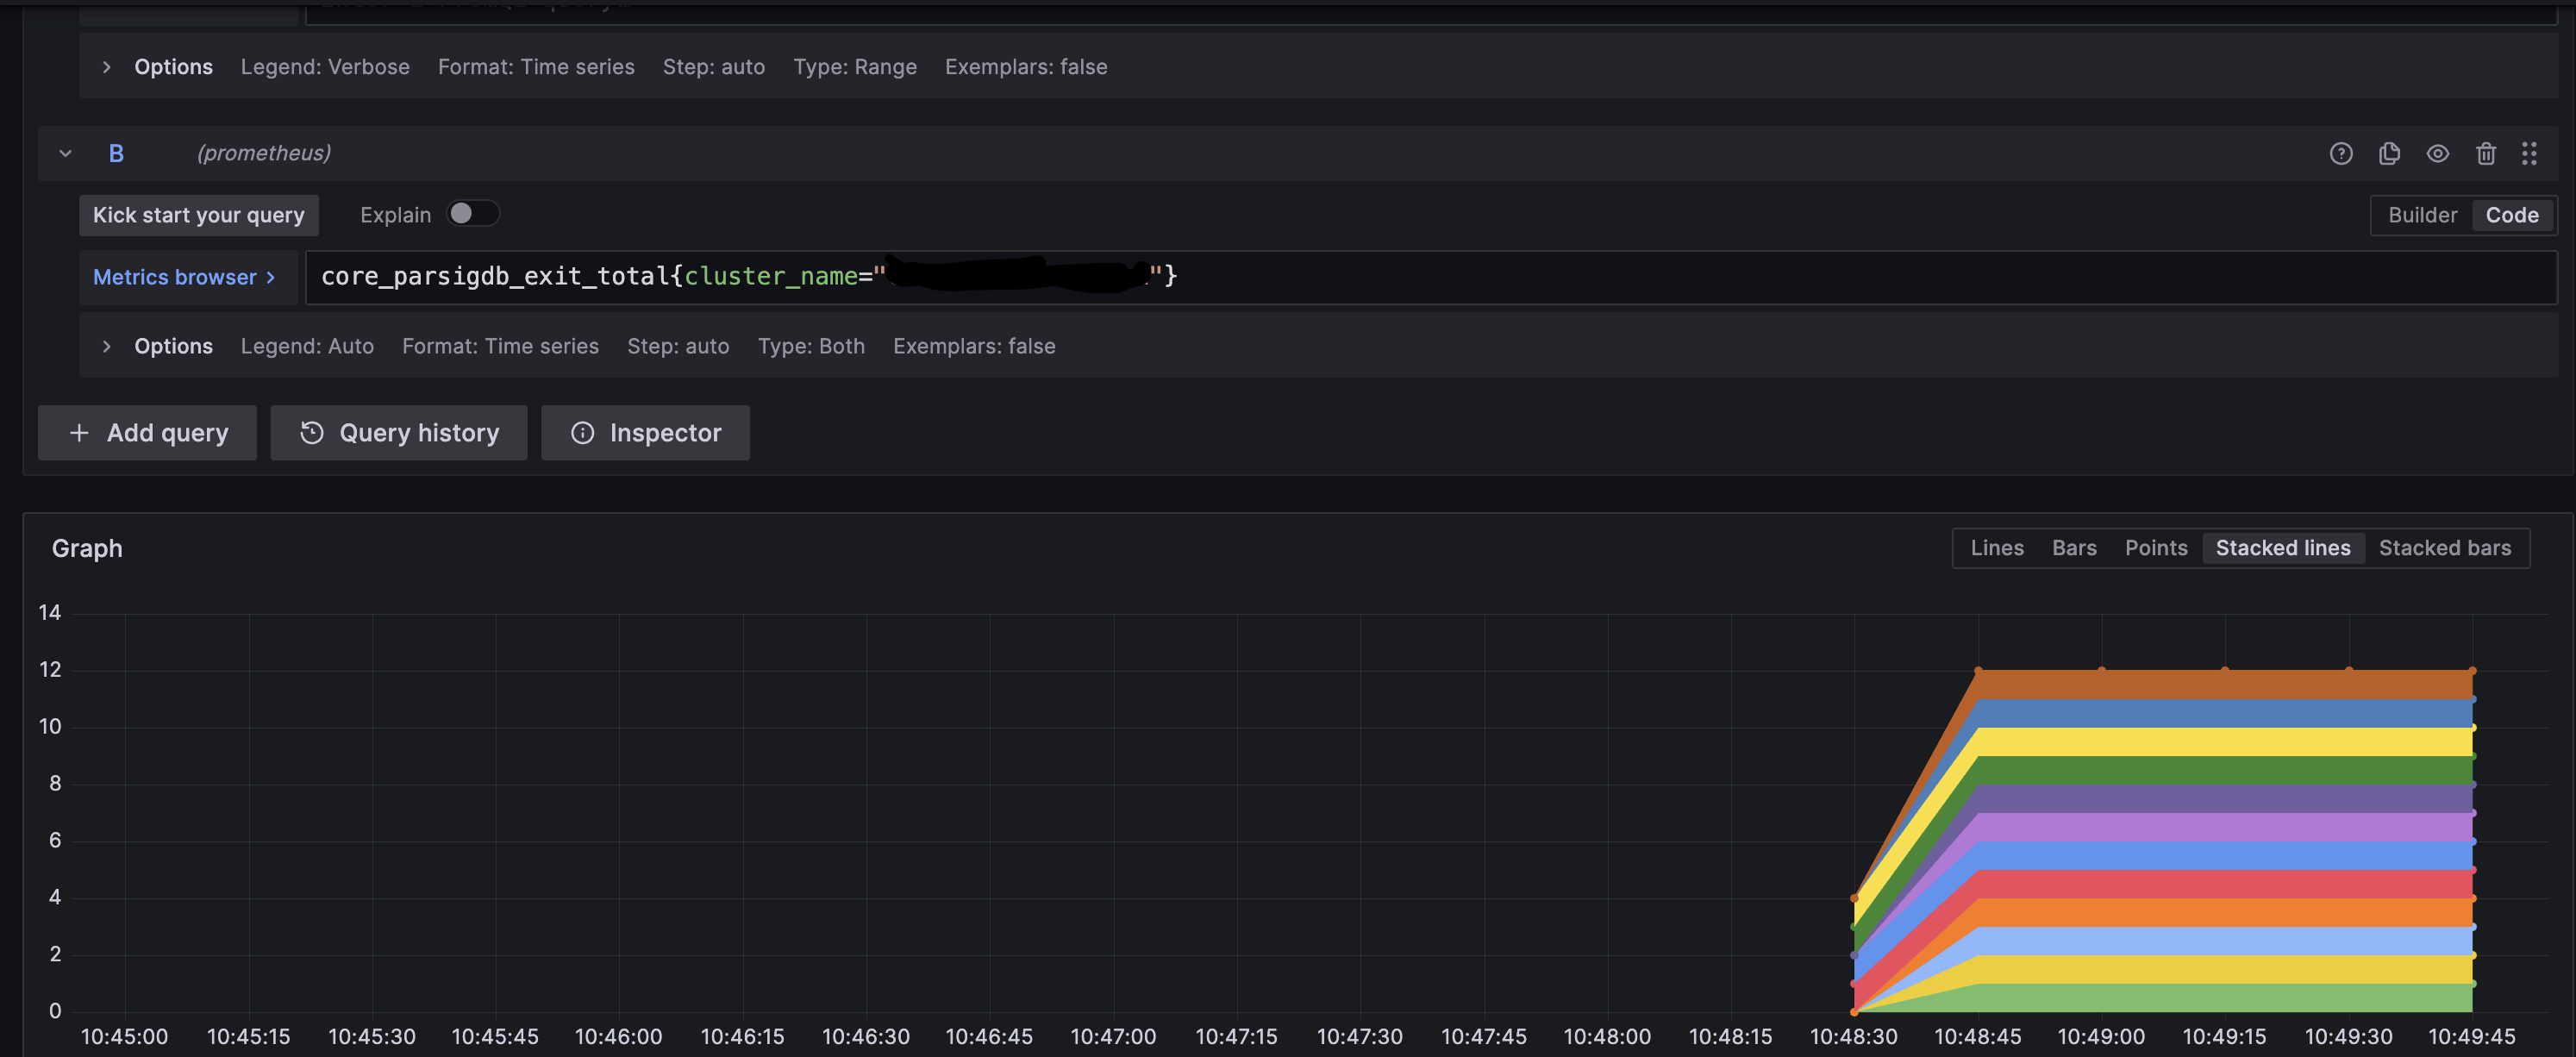
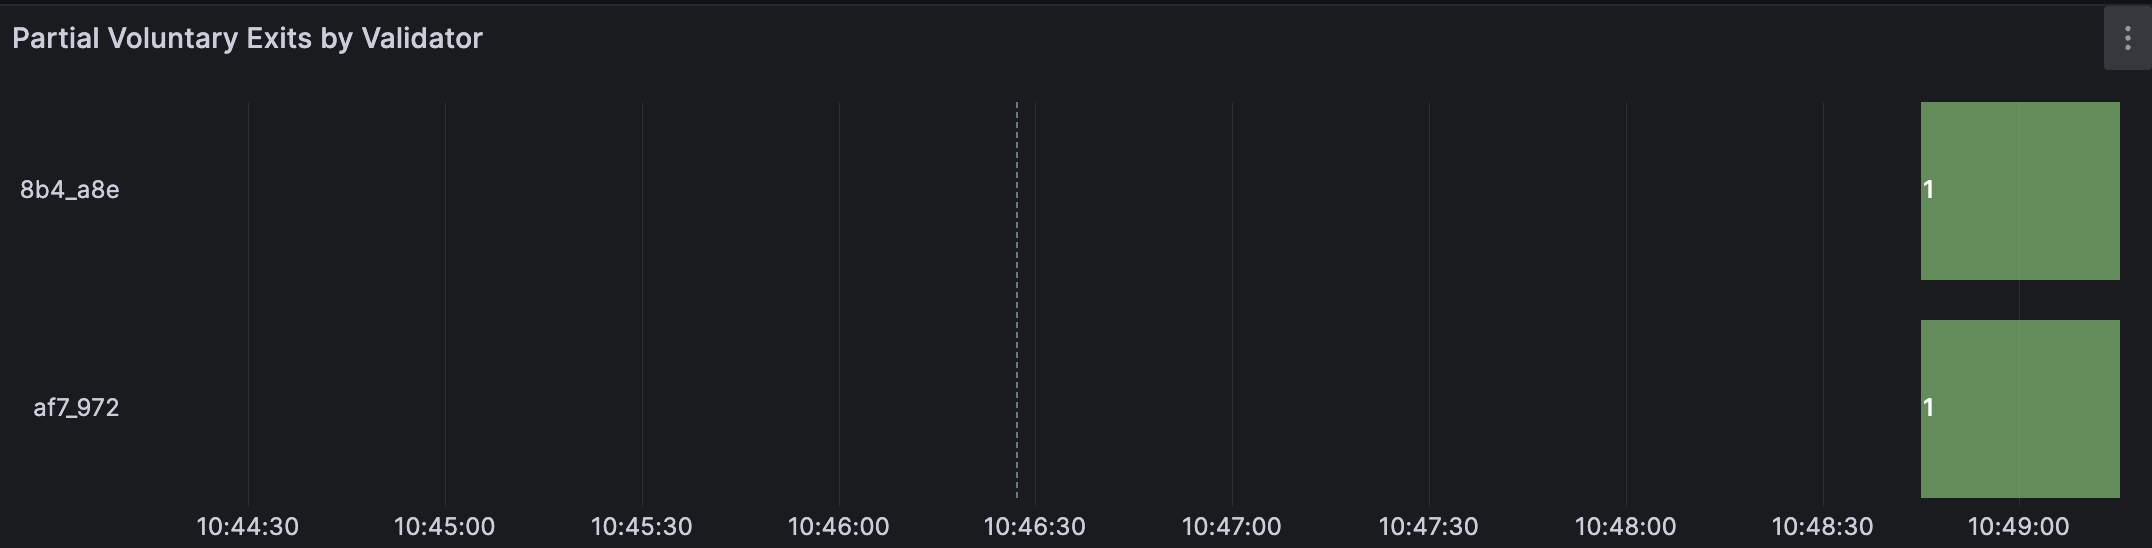
2. Operator 2 broadcasts an exit on validator client 2.
3. Operator 3 broadcasts an exit on validator client 3.
At this point, the threshold of 3 has been reached and the validator exit process will start. The logs will show the following:

:::tip
Once a validator has broadcasted an exit message, it must continue to validate for at least 27 hours or longer. Do not shut off your distributed validator nodes until your validator is fully exited.
:::
**Step 1: Submit partial exit**
Following command signs a partial exit for a specific validator pubkey and broadcasts it instantaneously as soon as full exit can be created. It copies all files and directories from the keystore path `/home/user/data/charon` to the newly created `/home/user/data/wd` directory. The directory referenced here as `/home/user/data/node0/` is the data directory specified on start of Nimbus. [As an example in CDVC](https://github.com/ObolNetwork/charon-distributed-validator-cluster/blob/4faf38a1fc20ad241a2672021b32c90bf7ac9eb9/nimbus/run.sh#L40) the `/home/user/data/node2/` and `/home/user/data/node5/` are used.
```sh
docker exec -it charon-distributed-validator-node-nimbus-1 /bin/bash -c "\
mkdir -p /home/user/data/wd; \
cp -r /home/user/data/node0/ /home/user/data/wd/; \
cat /home/user/data/wd/node0/secrets/ | /home/user/nimbus_beacon_node deposits exit \
--rest-url=http://charon:3600/ \
--validator=/home/user/data/wd/node0/validators//keystore.json \
--epoch=256 \
--data-dir=/home/user/data/wd/node0/;"
```
Replace `` with the partial pubkey found in the keystores in `.charon/validator_keys/`, under `pubkey` field. To which full pubkey a partial pubkey corresponds (as visible in Ethereum), can be looked up in the `.charon/cluster-lock.json`, under `distributed_validators` field.
Following command executes an interactive command inside the Nimbus VC container. It copies all files and directories from the keystore path `/home/user/data/charon` to the newly created `/home/user/data/wd` directory. The directory referenced here as `/home/user/data/node0/` is the data directory specified on start of Nimbus. [As an example in CDVC](https://github.com/ObolNetwork/charon-distributed-validator-cluster/blob/4faf38a1fc20ad241a2672021b32c90bf7ac9eb9/nimbus/run.sh#L40) the `/home/user/data/node2/` and `/home/user/data/node5/` are used.
```sh
docker exec -it charon-distributed-validator-node-nimbus-1 /bin/bash -c "\
mkdir -p /home/user/data/wd; \
cp -r /home/user/data/node0/ /home/user/data/wd/; \
/home/user/nimbus_beacon_node deposits exit \
--rest-url=http://charon:3600/ \
--all \
--epoch=256 \
--data-dir=/home/user/data/wd/node0/;"
```
**Step 2: Monitor partial exit for all active validators**
Consult the examples below and compare them to your validator's monitoring to verify that exits from each operator in the cluster are being received. This example is a cluster of 4 nodes with 2 validators and threshold of 3 nodes broadcasting exits are needed.
1. Operator 1 broadcasts an exit on validator client 1.
2. Operator 2 broadcasts an exit on validator client 2.
3. Operator 3 broadcasts an exit on validator client 3.
At this point, the threshold of 3 has been reached and the validator exit process will start. The logs will show the following:

:::tip
Once a validator has broadcasted an exit message, it must continue to validate for at least 27 hours or longer. Do not shut off your distributed validator nodes until your validator is fully exited.
:::
**Step 2: Monitor partial exit for all active validators**
Consult the examples below and compare them to your validator's monitoring to verify that exits from each operator in the cluster are being received. This example is a cluster of 4 nodes with 2 validators and threshold of 3 nodes broadcasting exits are needed.
1. Operator 1 broadcasts an exit on validator client 1.
2. Operator 2 broadcasts an exit on validator client 2.
3. Operator 3 broadcasts an exit on validator client 3.
At this point, the threshold of 3 has been reached and the validator exit process will start. The logs will show the following:

:::tip
Once a validator has broadcasted an exit message, it must continue to validate for at least 27 hours or longer. Do not shut off your distributed validator nodes until your validator is fully exited.
:::
**Step 1: Submit partial exit**
Following command signs a partial exit for a specific validator pubkey and broadcasts it instantaneously as soon as full exit can be created.
```sh
docker exec -it charon-distributed-validator-node-lodestar-1 node /usr/app/packages/cli/bin/lodestar validator voluntary-exit \
--beaconNodes="http://charon:3600" \
--pubkeys= \
--network=hoodi \
--exitEpoch=256 \
--dataDir=/opt/data \
--yes
```
Replace `` with the partial pubkey found in the keystores in `.charon/validator_keys/`, under `pubkey` field. To which full pubkey a partial pubkey corresponds (as visible in Ethereum), can be looked up in the `.charon/cluster-lock.json`, under `distributed_validators` field.
Following command signs partial exits for all validator pubkeys and broadcast them instantaneously as soon as a full exit can be created.
```sh
docker exec -it charon-distributed-validator-node-lodestar-1 node /usr/app/packages/cli/bin/lodestar validator voluntary-exit \
--beaconNodes="http://charon:3600" \
--network=hoodi \
--exitEpoch=256 \
--dataDir=/opt/data \
--yes
```
**Step 2: Monitor partial exit for all active validators**
Consult the examples below and compare them to your validator's monitoring to verify that exits from each operator in the cluster are being received. This example is a cluster of 4 nodes with 2 validators and threshold of 3 nodes broadcasting exits are needed.
1. Operator 1 broadcasts an exit on validator client 1.


2. Operator 2 broadcasts an exit on validator client 2.


3. Operator 3 broadcasts an exit on validator client 3.


At this point, the threshold of 3 has been reached and the validator exit process will start. The logs will show the following:

:::tip
Once a validator has broadcasted an exit message, it must continue to validate for at least 27 hours or longer. Do not shut off your distributed validator nodes until your validator is fully exited.
:::
**Step 1: Submit partial exit**
:::info
Lighthouse VC cannot perform an exit for custom epoch and always uses the current one. This means you should coordinate your efforts between cluster peers, in order to sign the same payload. If you sign exit messages in different epochs, signatures will not be aggregated as they will mismatch and new signing of exit messages needs to be done.
:::
Following command signs a partial exit for a specific validator pubkey and broadcasts it instantaneously as soon as full exit can be created.
```sh
docker exec -it charon-distributed-validator-node-lighthouse-1 /bin/bash -c '\
file="/opt/charon/keys/keystore-.json"; \
filename=$(basename $file);
keystore=${filename%.*};
lighthouse account validator exit \
--beacon-node http://charon:3600 \
--keystore /opt/charon/keys/$keystore.json \
--network hoodi \
--password-file /opt/charon/keys/$keystore.txt \
--no-confirmation \
--no-wait;'
```
Replace `` with the keystore index. Keystore indices can be found in `.charon/validator_keys/`. Each JSON file has a `pubkey` field corresponding to the partial pubkey. To which full pubkey this partial pubkey corresponds (as visible in Ethereum), can be looked up in the `.charon/cluster-lock.json`, under `distributed_validators` field.
Following command executes an interactive command inside the Lighthouse VC container.
```sh
docker exec -it charon-distributed-validator-node-lighthouse-1 /bin/bash -c '\
for file in /opt/charon/keys/*; do \
filename=$(basename $file);
if [[ $filename == *".json"* ]]; then
keystore=${filename%.*};
lighthouse account validator exit \
--beacon-node http://charon:3600 \
--keystore /opt/charon/keys/$keystore.json \
--network hoodi \
--password-file /opt/charon/keys/$keystore.txt \
--no-confirmation \
--no-wait;
fi;
done;'
```
**Step 2: Monitor partial exit for all active validators**
Consult the examples below and compare them to your validator's monitoring to verify that exits from each operator in the cluster are being received. This example is a cluster of 4 nodes with 2 validators and threshold of 3 nodes broadcasting exits are needed.
1. Operator 1 broadcasts an exit on validator client 1.


2. Operator 2 broadcasts an exit on validator client 2.


3. Operator 3 broadcasts an exit on validator client 3.


At this point, the threshold of 3 has been reached and the validator exit process will start. The logs will show the following:

:::tip
Once a validator has broadcasted an exit message, it must continue to validate for at least 27 hours or longer. Do not shut off your distributed validator nodes until your validator is fully exited.
:::
Currently voluntary exits through Prysm are not supported. This is because [Prysm support voluntary exits only if both the validator client and the beacon node are running on Prysm](https://docs.prylabs.network/docs/wallet/exiting-a-validator). Note that this is incompatible with Charon, as the Charon client intercepts the communication between the validator client and the consensus layer.
:::tip
Once a validator has broadcasted an exit message, it must continue to validate for at least 27 hours or longer. Do not shut off your distributed validator nodes until your validator is fully exited.
:::
**Exit a distributed validator using DappNode**
1. Navigate to the config tab of your Obol DappNode package. Click 'Packages', then click 'My Packages', and enter the Obol package. Go to the config tab. At the bottom right corner of the page, click on 'Show Advanced Editor'.
2. The advanced editor config page provides ENV configs for each validator. Scroll to the validator number you want to exit and type “true” in the column opposite SIGN\_EXIT.
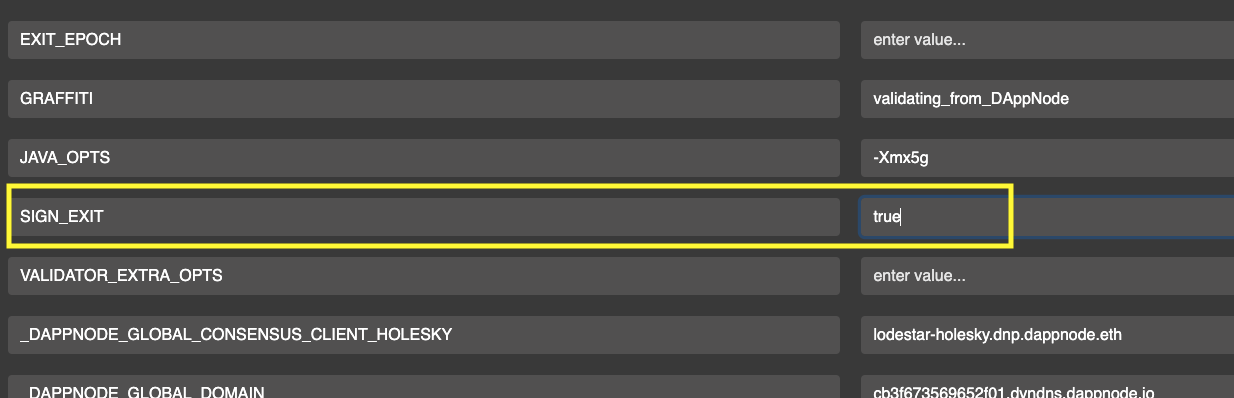
3. Scroll to the bottom of the page and click the 'update' button for the changes to take effect.

4. Check your logs to confirm the exit process has started.
:::tip
Once a validator has broadcasted an exit message, it must continue to validate for at least 27 hours or longer. Do not shut off your distributed validator nodes until your validator is fully exited.
:::
Voluntary exit can be submitted directly through Charon. This approach is validator client agnostic as Charon abstracts validator client's native exit commands underneath.
**Step 1: Submit partial exit**
Following command signs a partial exit for a specific validator pubkey.
```sh
docker exec -it charon-distributed-validator-node-charon-1 /bin/sh -c 'charon exit sign \
--beacon-node-endpoints="http://lighthouse:5052" \
--validator-public-key="" \
--exit-epoch=194048'
```
Replace `` with the validator's full pubkey (as visible in Ethereum).
Following command signs partial exits for all validators.
```sh
docker exec -it charon-distributed-validator-node-charon-1 /bin/sh -c 'charon exit sign \
--beacon-node-endpoints="http://lighthouse:5052" \
--all \
--exit-epoch=194048'
```
**Step 2: Monitor the Partial Exits' status**
After a threshold of signed partial exits from node operators in the cluster is accumulated, a full (complete) exit can be created. For example, in the cluster below, only 2 out of 4 clusters have reached the threshold. Operators will have to wait for one more partial exit signature, either from operator 1 or 3 to create a full exit message.
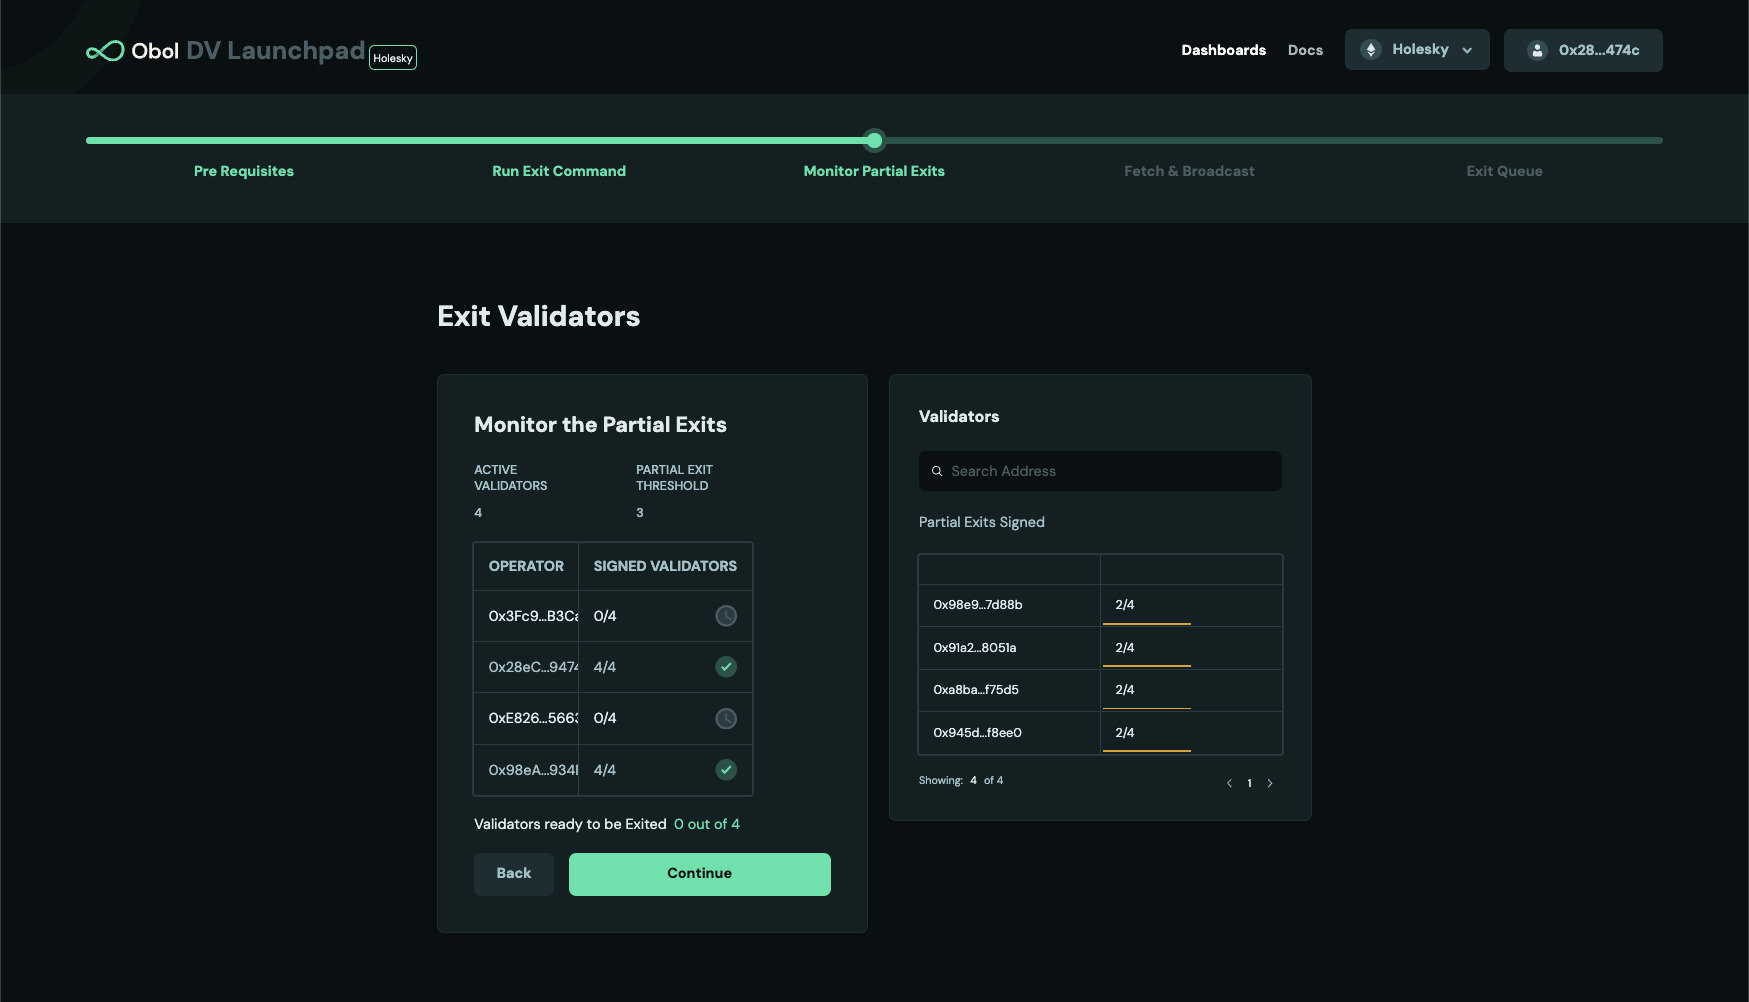
**Step 3: Broadcast the full exit**
Once the partial exit threshold is reached, a full exit can be broadcasted from any of the operator. There are two options to do it, depending on your use-case
1. **Fetch the full exit and broadcast instantaneously (Broadcast directly )** - users can choose it for a single validator or all validators in the cluster.
2. **Fetch the full exit and broadcast it later(Fetch & Broadcast later )** - users can choose it for a single validator or all validators in the cluster.
Following command fetches full exit and broadcasts it instantaneously for a specific validator.
```
docker exec -it charon-distributed-validator-node-charon-1 /bin/sh -c 'charon exit broadcast \
--beacon-node-endpoints="http://lighthouse:5052" \
--validator-public-key=""'
```
:::tip
Once a validator has broadcasted an exit message, it must continue to validate for at least 27 hours or longer. Do not shut off your distributed validator nodes until your validator is fully exited.
:::
Following command fetches full exits and broadcasts them instantaneously for all the validators that have reached a partial exit threshold.
```
docker exec -it charon-distributed-validator-node-charon-1 /bin/sh -c 'charon exit broadcast \
--beacon-node-endpoints="http://lighthouse:5052" \
--all'
```
:::tip
Once a validator has broadcasted an exit message, it must continue to validate for at least 27 hours or longer. Do not shut off your distributed validator nodes until your validator is fully exited.
:::
**Download Exits** : The following command downloads the full exit signature for a specific public key and stores it in a file.
```
docker exec -it charon-distributed-validator-node-charon-1 /bin/sh -c 'charon exit fetch \
--validator-public-key="" \
--fetched-exit-path="/opt/charon/.charon"'
```
**Broadcast Exits** : The following command uses the full exit signature for a specific public key from the file and broadcasts it to the network.
```
docker exec -it charon-distributed-validator-node-charon-1 /bin/sh -c 'charon exit broadcast \
--beacon-node-endpoints="http://lighthouse:5052" \
--exit-from-file="/opt/charon/.charon/"''
```
:::tip
Once a validator has broadcasted an exit message, it must continue to validate for at least 27 hours or longer. Do not shut off your distributed validator nodes until your validator is fully exited.
:::
**Download Exits** : The following command downloads the full exit signature for all the active public keys and stores it in a directory.
```
docker exec -it charon-distributed-validator-node-charon-1 /bin/sh -c 'charon exit fetch \
--all \
--fetched-exit-path="/opt/charon/.charon"'
```
**Broadcast Exits** : The following command uses the full exit signatures from the directory and broadcasts it to the network.
```
docker exec -it charon-distributed-validator-node-charon-1 /bin/sh -c 'charon exit broadcast \
--all \
--beacon-node-endpoints="http://lighthouse:5052" \
--exit-from-dir="/opt/charon/.charon"'
```
:::tip
Once a validator has broadcasted an exit message, it must continue to validate for at least 27 hours or longer. Do not shut off your distributed validator nodes until your validator is fully exited.
:::
**Step 1: Submit partial exit**
Following command signs a partial exit for a specific validator pubkey and broadcasts it instantaneously as soon as full exit can be created.
```sh
docker exec -it charon-distributed-validator-node-teku-1 /opt/teku/bin/teku voluntary-exit \
--beacon-node-api-endpoint="http://charon:3600/" \
--validator-public-keys= \
--network=mainnet \
--epoch=194048 \
--confirmation-enabled=false
```
Replace `` with the partial pubkey found in the keystores in `.charon/validator_keys/`, under `pubkey` field. To which full pubkey a partial pubkey corresponds (as visible in Ethereum), can be looked up in the `.charon/cluster-lock.json`, under `distributed_validators` field.
Following command signs partial exits for all validator pubkeys and broadcast them instantaneously as soon as a full exit can be created.
```sh
docker exec -it charon-distributed-validator-node-teku-1 /opt/teku/bin/teku voluntary-exit \
--beacon-node-api-endpoint="http://charon:3600/" \
--validator-keys="/opt/charon/validator_keys:/opt/charon/validator_keys" \
--network=mainnet \
--epoch=194048 \
--confirmation-enabled=false
```
**Step 2: Monitor partial exit for all active validators**
Consult the examples below and compare them to your validator's monitoring to verify that exits from each operator in the cluster are being received. This example is a cluster of 4 nodes with 2 validators and threshold of 3 nodes broadcasting exits are needed.
1. Operator 1 broadcasts an exit on validator client 1.


2. Operator 2 broadcasts an exit on validator client 2.


3. Operator 3 broadcasts an exit on validator client 3.


At this point, the threshold of 3 has been reached and the validator exit process will start. The logs will show the following:

:::tip
Once a validator has broadcasted an exit message, it must continue to validate for at least 27 hours or longer. Do not shut off your distributed validator nodes until your validator is fully exited.
:::
**Step 1: Submit partial exit**
Following command signs a partial exit for a specific validator pubkey and broadcasts it instantaneously as soon as full exit can be created. It copies all files and directories from the keystore path `/home/user/data/charon` to the newly created `/home/user/data/wd` directory. The directory referenced here as `/home/user/data/node0/` is the data directory specified on start of Nimbus. [As an example in CDVC](https://github.com/ObolNetwork/charon-distributed-validator-cluster/blob/4faf38a1fc20ad241a2672021b32c90bf7ac9eb9/nimbus/run.sh#L40) the `/home/user/data/node2/` and `/home/user/data/node5/` are used.
```sh
docker exec -it charon-distributed-validator-node-nimbus-1 /bin/bash -c "\
mkdir -p /home/user/data/wd; \
cp -r /home/user/data/node0/ /home/user/data/wd/; \
cat /home/user/data/wd/node0/secrets/ | /home/user/nimbus_beacon_node deposits exit \
--rest-url=http://charon:3600/ \
--validator=/home/user/data/wd/node0/validators//keystore.json \
--epoch=194048 \
--data-dir=/home/user/data/wd/node0/;"
```
Replace `` with the partial pubkey found in the keystores in `.charon/validator_keys/`, under `pubkey` field. To which full pubkey a partial pubkey corresponds (as visible in Ethereum), can be looked up in the `.charon/cluster-lock.json`, under `distributed_validators` field.
Following command executes an interactive command inside the Nimbus VC container. It copies all files and directories from the keystore path `/home/user/data/charon` to the newly created `/home/user/data/wd` directory. The directory referenced here as `/home/user/data/node0/` is the data directory specified on start of Nimbus. [As an example in CDVC](https://github.com/ObolNetwork/charon-distributed-validator-cluster/blob/4faf38a1fc20ad241a2672021b32c90bf7ac9eb9/nimbus/run.sh#L40) the `/home/user/data/node2/` and `/home/user/data/node5/` are used.
```sh
docker exec -it charon-distributed-validator-node-nimbus-1 /bin/bash -c "\
mkdir -p /home/user/data/wd; \
cp -r /home/user/data/node0/ /home/user/data/wd/; \
/home/user/nimbus_beacon_node deposits exit \
--rest-url=http://charon:3600/ \
--all \
--epoch=194048 \
--data-dir=/home/user/data/wd/node0/;"
```
**Step 2: Monitor partial exit for all active validators**
Consult the examples below and compare them to your validator's monitoring to verify that exits from each operator in the cluster are being received. This example is a cluster of 4 nodes with 2 validators and threshold of 3 nodes broadcasting exits are needed.
1. Operator 1 broadcasts an exit on validator client 1.


2. Operator 2 broadcasts an exit on validator client 2.


3. Operator 3 broadcasts an exit on validator client 3.


At this point, the threshold of 3 has been reached and the validator exit process will start. The logs will show the following:

:::tip
Once a validator has broadcasted an exit message, it must continue to validate for at least 27 hours or longer. Do not shut off your distributed validator nodes until your validator is fully exited.
:::
**Step 1: Submit partial exit**
Following command signs a partial exit for a specific validator pubkey and broadcasts it instantaneously as soon as full exit can be created.
```sh
docker exec -it charon-distributed-validator-node-lodestar-1 node /usr/app/packages/cli/bin/lodestar validator voluntary-exit \
--beaconNodes="http://charon:3600" \
--pubkeys= \
--network=mainnet \
--exitEpoch=194048 \
--dataDir=/opt/data \
--yes
```
Replace `` with the partial pubkey found in the keystores in `.charon/validator_keys/`, under `pubkey` field. To which full pubkey a partial pubkey corresponds (as visible in Ethereum), can be looked up in the `.charon/cluster-lock.json`, under `distributed_validators` field.
Following command signs partial exits for all validator pubkeys and broadcast them instantaneously as soon as a full exit can be created.
```sh
docker exec -it charon-distributed-validator-node-lodestar-1 node /usr/app/packages/cli/bin/lodestar validator voluntary-exit \
--beaconNodes="http://charon:3600" \
--network=mainnet \
--exitEpoch=194048 \
--dataDir=/opt/data \
--yes
```
**Step 2: Monitor partial exit for all active validators**
Consult the examples below and compare them to your validator's monitoring to verify that exits from each operator in the cluster are being received. This example is a cluster of 4 nodes with 2 validators and threshold of 3 nodes broadcasting exits are needed.
1. Operator 1 broadcasts an exit on validator client 1.


2. Operator 2 broadcasts an exit on validator client 2.


3. Operator 3 broadcasts an exit on validator client 3.


At this point, the threshold of 3 has been reached and the validator exit process will start. The logs will show the following:

:::tip
Once a validator has broadcasted an exit message, it must continue to validate for at least 27 hours or longer. Do not shut off your distributed validator nodes until your validator is fully exited.
:::
**Step 1: Submit partial exit**
:::info
Lighthouse VC cannot perform an exit for custom epoch and always uses the current one. This means you should coordinate your efforts between cluster peers, in order to sign the same payload. If you sign exit messages in different epochs, signatures will not be aggregated as they will missmatch and new signing of exit messages needs to be done.
:::
Following command signs a partial exit for a specific validator pubkey and broadcasts it instantaneously as soon as full exit can be created.
```sh
docker exec -it charon-distributed-validator-node-lighthouse-1 /bin/bash -c '\
file="/opt/charon/keys/keystore-.json"; \
filename=$(basename $file);
keystore=${filename%.*};
lighthouse account validator exit \
--beacon-node http://charon:3600 \
--keystore /opt/charon/keys/$keystore.json \
--network mainnet \
--password-file /opt/charon/keys/$keystore.txt \
--no-confirmation \
--no-wait;'
```
Replace `` with the keystore index. Keystore indeces can be found in `.charon/validator_keys/`. Each JSON file has a `pubkey` field corresponding to the partial pubkey. To which full pubkey this partial pubkey corresponds (as visible in Ethereum), can be looked up in the `.charon/cluster-lock.json`, under `distributed_validators` field.
Following command executes an interactive command inside the Lighthouse VC container.
```sh
docker exec -it charon-distributed-validator-node-lighthouse-1 /bin/bash -c '\
for file in /opt/charon/keys/*; do \
filename=$(basename $file);
if [[ $filename == *".json"* ]]; then
keystore=${filename%.*};
lighthouse account validator exit \
--beacon-node http://charon:3600 \
--keystore /opt/charon/keys/$keystore.json \
--network mainnet \
--password-file /opt/charon/keys/$keystore.txt \
--no-confirmation \
--no-wait;
fi;
done;'
```
**Step 2: Monitor partial exit for all active validators**
Consult the examples below and compare them to your validator's monitoring to verify that exits from each operator in the cluster are being received. This example is a cluster of 4 nodes with 2 validators and threshold of 3 nodes broadcasting exits are needed.
1. Operator 1 broadcasts an exit on validator client 1.


2. Operator 2 broadcasts an exit on validator client 2.


3. Operator 3 broadcasts an exit on validator client 3.


At this point, the threshold of 3 has been reached and the validator exit process will start. The logs will show the following:

:::tip
Once a validator has broadcasted an exit message, it must continue to validate for at least 27 hours or longer. Do not shut off your distributed validator nodes until your validator is fully exited.
:::
Currently voluntary exits through Prysm are not supported. This is because [Prysm support voluntary exits only if both the validator client and the beacon node are running on Prysm](https://docs.prylabs.network/docs/wallet/exiting-a-validator). Note that this is incompatible with Charon, as the Charon client intercepts the communication between the validator client and the consensus layer.
**Exit a distributed validator using DappNode**
1. Navigate to the config tab of your Obol DappNode package. Click 'Packages', then click 'My Packages', and enter the Obol package. Go to the config tab. At the bottom right corner of the page, click on 'Show Advanced Editor'.
2. The advanced editor config page provides ENV configs for each validator. Scroll to the validator number you want to exit and type “true” in the column opposite SIGN\_EXIT.
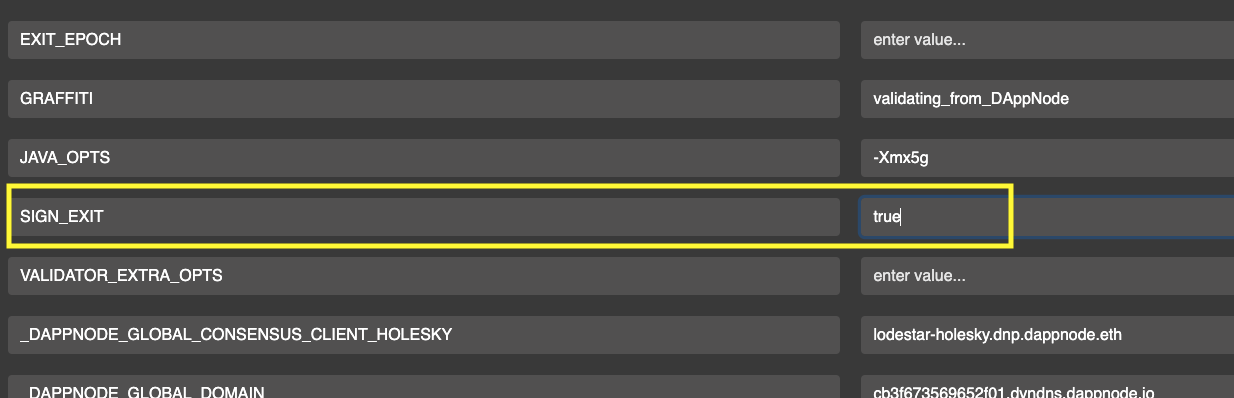
3. Scroll to the bottom of the page and click the 'update' button for the changes to take effect.

4. Check your logs to confirm the exit process has started.
:::tip
Once a validator has broadcasted an exit message, it must continue to validate for at least 27 hours or longer. Do not shut off your distributed validator nodes until your validator is fully exited.
:::
### Exit epoch and withdrawable epoch {#exit-epoch-and-withdrawable-epoch}
The process of a validator exiting from staking takes variable amounts of time, depending on how many others are exiting at the same time.
Immediately upon broadcasting a signed voluntary exit message, the exit epoch and withdrawable epoch values are calculated based off the current epoch number. These values determine exactly when the validator will no longer be required to be online performing validation, and when the validator is eligible for a full withdrawal respectively.
1. Exit epoch - epoch at which your validator is no longer active, no longer earning rewards, and is no longer subject to slashing rules.
:::warning
Up until this epoch (while "in the queue") your validator is expected to be online and is held to the same slashing rules as always. Do not turn your DV node off until this epoch is reached.
:::
2. Withdrawable epoch - epoch at which your validator funds are eligible for a full withdrawal during the next validator sweep. This occurs 256 epochs after the exit epoch, which takes \~27.3 hours.
---
# Edit a Cluster
URL: https://docs.obol.org/run-a-dv/editing
# editing
---
# Adding Validators
URL: https://docs.obol.org/run-a-dv/editing/add-validators
# Adding Validators
You can add validators to your cluster using the `charon alpha edit add-validators` command. The example below is designed for the [CDVN repository](https://github.com/ObolNetwork/charon-distributed-validator-node) and assumes a Lodestar validator, but the process is similar for other setups.
## Prerequisites
1. Review the `edit add-validators` command [CLI reference](../../learn/charon/charon-cli-reference.md#add-validators-to-a-cluster).
2. Keep the DV node running during the process and ensure you have a copy of the current cluster lock file and validator private key shares (or use `--unverified` if validator keys are not accessible).
:::info
The command uses a different set of p2p-relays to `charon run` to avoid conflicts with your running cluster.
:::
## Adding Validators Process
The examples below are for adding 10 validators. You can use them with any number of validators you would like to add. Run the following command to collectively generate and add 10 new validators with other node operators (similar to DKG):
```bash
# If you prefer running a pre-built charon binary
charon alpha edit add-validators --num-validators 10 --withdrawal-addresses=0x --fee-recipient-addresses=0x --output-dir=output
# Or, if you prefer running it in Docker
# (replace 'latest' with the most recent version if needed: https://hub.docker.com/r/obolnetwork/charon/tags)
docker run --rm -v "$(pwd):/opt/charon" -w "/opt/charon" obolnetwork/charon:v1.10.3 alpha edit add-validators --num-validators 10 --withdrawal-addresses=0x --fee-recipient-addresses=0x --output-dir=/opt/charon/output
```
This command will create a new cluster configuration that includes both existing and new validators. It will also generate the necessary keys for the new validators and deposit data files. The new configuration will be saved in the `output` directory.
## Making the DV Stack Use the New Validators
The example below is designed for the [CDVN repository](https://github.com/ObolNetwork/charon-distributed-validator-node), but the process is similar for other setups.
1. To start using the new configuration (with the added validators), stop the current Charon and validator client instances:
```bash
# Stop the containers
docker compose stop charon lodestar
```
2. Back up and remove the existing `.charon` directory, then move the `output` directory to `.charon`:
```bash
# Put the original artifacts in a backup location
mv .charon .charon-backup
# Copy the output from the add-validators command into the location of the original files
mv output .charon
```
3. Restart the Charon and validator client instances:
```bash
# Restart charon and the validator client with the new data
docker compose up -d charon lodestar
```
Lodestar's boot script (`lodestar/run.sh`) will automatically import all keys, removing any existing keys and cache. Charon will load the new `cluster-lock.json` and recognize all validators in the cluster.
:::info
Steps 1–3 must be performed independently by all node operators, likely at different times. During this process, some nodes will use the old configuration and others the new one. Once the number of upgraded nodes reaches the BFT threshold, the newly added validators will begin participating in the cluster.
:::
## Current Considerations
- The new cluster configuration will not be reflected on the Obol Launchpad.
- The new cluster configuration will have a new cluster hash, so the observability stack will display new cluster under a different identifier.
- If Charon has no access to the existing validator keys (for example, if they're stored in a remote KeyManager), you must use the `--unverified` flag. This flag allows the addition to proceed but skips hashing and signing the new cluster lock data. However when using cluster artifacts created with this flag, you must start `charon run` with the `--no-verify` flag or set the `CHARON_NO_VERIFY=true` environment variable.
- If you use different validator clients, review the keys import script. The old keys in `.charon/validator_keys` remain unchanged, so verify that importing the same keys will not disrupt the validator client's state.
---
# Adding Operators
URL: https://docs.obol.org/run-a-dv/editing/add-operators
# Adding Operators
You can add operators to your cluster using the `charon alpha edit add-operators` command. This operation keeps all distributed validator public keys unchanged while adding new operators to the cluster.
## Prerequisites
1. Review the `edit add-operators` command [CLI reference](../../learn/charon/charon-cli-reference.md#add-operators-to-a-cluster).
2. **For existing operators**: Keep the DV node running during the process and ensure you have a copy of the current [cluster lock file](../../learn/charon/cluster-configuration#cluster-lock-file) and validator private key shares.
3. **For new operators**: Obtain a copy of the existing cluster lock file from the existing operators and have your Charon ENR private key file ready.
4. Obtain the Charon ENR addresses of all new operators being added to the cluster.
:::info
The command uses a different set of p2p-relays to `charon run` to avoid conflicts with your running cluster.
:::
## Adding Operators Process
The examples below demonstrate adding new operators to an existing cluster. All existing operators must run this command, along with the new operators being added.
### For Existing Operators
```bash
# If you prefer running a pre-built charon binary
charon alpha edit add-operators --new-operator-enrs=enr:-JG4QH... --output-dir=output
# Or, if you prefer running it in Docker
# (replace 'latest' with the most recent version if needed: https://hub.docker.com/r/obolnetwork/charon/tags)
docker run --rm -v "$(pwd):/opt/charon" -w "/opt/charon" obolnetwork/charon:v1.10.3 alpha edit add-operators --new-operator-enrs=enr:-JG4QH... --output-dir=/opt/charon/output
```
### For New Operators
New operators being added should run the same command but only need to provide their private key file and the cluster lock file (they won't have validator keys yet):
```bash
# If you prefer running a pre-built charon binary
charon alpha edit add-operators --new-operator-enrs=enr:-JG4QH... --output-dir=output --lock-file=cluster-lock.json --private-key-file=charon-enr-private-key
# Or, if you prefer running it in Docker
docker run --rm -v "$(pwd):/opt/charon" obolnetwork/charon:v1.10.3 alpha edit add-operators --new-operator-enrs=enr:-JG4QH... --private-key-file=/opt/charon/charon-enr-private-key --lock-file=/opt/charon/cluster-lock.json --output-dir=/opt/charon/output
```
:::info
To add multiple operators at once, provide a comma-separated list: `--new-operator-enrs=enr:-JG4QH...,enr:-JG4QK...,enr:-JG4QL...`
:::
This command will create a new cluster configuration with the additional operators while keeping all validator public keys unchanged. The new configuration will be saved in the `output` directory.
## Making the DV Stack Use the New Configuration
The example below is designed for the [CDVN repository](https://github.com/ObolNetwork/charon-distributed-validator-node), but the process is similar for other setups.
1. To start using the new configuration (with the added operators), stop the current Charon and validator client instances:
```bash
# Stop the containers
docker compose stop charon lodestar
```
2. Back up and remove the existing `.charon` directory, then move the `output` directory to `.charon`:
```bash
# Put the original artifacts in a backup location
mv .charon .charon-backup
# Copy the output from the add-operators command into the location of the original files
mv output .charon
```
3. Restart the Charon and validator client instances:
```bash
# Restart charon and the validator client with the new data
docker compose up -d charon lodestar
```
Lodestar's boot script (`lodestar/run.sh`) will automatically import all keys, removing any existing keys and cache. Charon will load the new `cluster-lock.json` and recognize all validators in the cluster with the updated operator set.
:::warning
All existing operators must fully shut down their cluster nodes before starting with the new configuration. The old cluster must be completely stopped before the new cluster with the expanded operator set can begin operating. Unlike add-validators, this is not a gradual migration.
It is advisable to shut the cluster down for at least two epochs, to minimize any risk of unintended double signing during the controlled restart.
:::
## Current Considerations
- The new cluster configuration will not yet be reflected on the Obol Launchpad.
- The new cluster configuration will have a new cluster hash, so the observability stack will display new cluster data under a different identifier.
- All operators (both existing and new) must participate in the add-operators ceremony for it to complete successfully.
- The cluster's threshold value remains unchanged after adding operators because the existing set of operators already possesses enough shares to create full signatures.
---
# Removing Operators
URL: https://docs.obol.org/run-a-dv/editing/remove-operators
# Removing Operators
You can remove operators from your cluster using the `charon alpha edit remove-operators` command. This operation leaves all validators intact while removing specified operators from the cluster.
## Prerequisites
1. Review the `edit remove-operators` command [CLI reference](../../learn/charon/charon-cli-reference.md#remove-operators-from-a-cluster).
2. **For remaining operators**: Keep the DV node running during the process and ensure you have a copy of the current cluster lock file and validator private key shares.
3. **For operators being removed**: A copy of the cluster lock file is required to participate in the ceremony (if participating).
4. Identify the Charon ENR addresses of the operators you wish to remove from the cluster.
:::info
The ceremony uses a different p2p relay from your running cluster to avoid conflicts. The default relay address is already configured differently, so no special action is required.
:::
## Understanding Fault Tolerance
Before removing operators, it's crucial to understand your cluster's fault tolerance:
- **Fault tolerance (f)** = `number of operators - threshold`
- If you're removing **more operators than the fault tolerance**, you must use the `--participating-operator-enrs` flag to specify which operators will participate in the ceremony.
For example, if your cluster has 4 operators with a threshold of 3 (f=1), removing 2 operators requires specifying at least 3 participating operators.
## Removing Operators Process
### Standard Removal (Within Fault Tolerance)
If you're removing operators within the fault tolerance, all remaining operators can participate automatically:
```bash
# For remaining operators
charon alpha edit remove-operators --operator-enrs-to-remove=enr:-JG4QH... --output-dir=output
# Docker version
docker run --rm -v "$(pwd):/opt/charon" -w "/opt/charon" obolnetwork/charon:v1.10.3 alpha edit remove-operators --operator-enrs-to-remove=enr:-JG4QH... --output-dir=/opt/charon/output
```
### Advanced Removal (Exceeding Fault Tolerance)
If you're removing more operators than the fault tolerance allows, you must specify participating operators:
```bash
# For participating operators (both remaining and being removed)
charon alpha edit remove-operators --operator-enrs-to-remove=enr:-JG4QH...,enr:-JG4QK... --participating-operator-enrs=enr:-JG4QL...,enr:-JG4QM...,enr:-JG4QN... --output-dir=output
# Docker version
docker run --rm -v "$(pwd):/opt/charon" -w "/opt/charon" obolnetwork/charon:v1.10.3 alpha edit remove-operators --operator-enrs-to-remove=enr:-JG4QH...,enr:-JG4QK... --participating-operator-enrs=enr:-JG4QL...,enr:-JG4QM...,enr:-JG4QN... --output-dir=/opt/charon/output
```
:::info
When using `--participating-operator-enrs`, you must have at least `threshold` number of operators participating. Operators being removed can participate if explicitly included in this list.
:::
### For Operators Being Removed
Operators being removed have two options:
1. **If participating** (when explicitly included in `--participating-operator-enrs`): Run the same command as other participants with the `--output-dir` flag
2. **If not participating**: Do not run the command at all; simply ignore the ceremony
```bash
# For removed operators who are participating in the ceremony
charon alpha edit remove-operators --operator-enrs-to-remove=enr:-JG4QH... --participating-operator-enrs=enr:-JG4QH...,enr:-JG4QK...,enr:-JG4QL... --private-key-file=.charon/charon-enr-private-key --lock-file=.charon/cluster-lock.json --validator-keys-dir=.charon/validator_keys --output-dir=output
```
## Customizing the Threshold
By default, the new threshold is calculated as `ceil(n * 2 / 3)`, where `n` is the new number of operators. You can override this with the `--new-threshold` flag:
```bash
charon alpha edit remove-operators --operator-enrs-to-remove=enr:-JG4QH... --new-threshold=3 --output-dir=output
```
:::danger
Using a non-default threshold value decreases security. All operators must use the same value. Only override this if you fully understand the implications.
:::
## Making the DV Stack Use the New Configuration
The example below is designed for the [CDVN repository](https://github.com/ObolNetwork/charon-distributed-validator-node), but the process is similar for other setups.
### For Remaining Operators
1. Stop the current Charon and validator client instances:
```bash
docker compose stop charon lodestar
```
2. Back up and remove the existing `.charon` directory, then move the `output` directory to `.charon`:
```bash
mv .charon .charon-backup
mv output .charon
```
3. Restart the Charon and validator client instances:
```bash
docker compose up -d charon lodestar
```
:::warning
All remaining operators must fully shut down their existing cluster nodes before starting with the new configuration. The old cluster must be completely stopped before the new cluster with the reduced operator set can begin operating.
:::
### For Removed Operators
Operators who have been removed can safely shut down their nodes after the ceremony completes:
```bash
docker compose down
```
## Current Limitations
- The new cluster configuration will not be reflected on the Launchpad.
- The new cluster configuration will have a new cluster hash, so the observability stack will display new cluster data under a different identifier.
- All remaining operators must have valid validator keys to participate in the removal ceremony.
- When removing more operators than the fault tolerance, at least `threshold` operators must participate in the ceremony.
---
# Replacing Operators
URL: https://docs.obol.org/run-a-dv/editing/replace-operator
# Replacing Operators
There are two methods for changing the operators in a distributed validator cluster:
1. **Edit command** (`charon alpha edit replace-operator`) — Best for swapping a single operator in an existing cluster. This is an in-place, atomic operation that preserves all validators and cluster configuration.
2. **Validator consolidation** — Best when making majority operator changes or merging multiple clusters. This method creates a new target cluster and transfers stake from the source via Pectra consolidation.
## Method 1: Edit Command (Replace Operator)
You can replace an operator in your cluster using the `charon alpha edit replace-operator` command. This operation keeps all validators intact while swapping one operator for another in the cluster.
### Prerequisites
1. Review the `edit replace-operator` command [CLI reference](../../learn/charon/charon-cli-reference.md#replace-an-operator-in-a-cluster).
2. **For continuing operators**: Keep the DV node running during the process and ensure you have a copy of the current cluster lock file and validator private key shares.
3. **For the new operator**: Obtain a copy of the existing cluster lock file from the continuing operators and have your Charon ENR private key file ready.
4. **For the old operator being replaced**: The operator being replaced should NOT participate in the ceremony.
5. Identify the Charon ENR address of the operator you wish to replace and have the new operator's ENR ready.
:::info
The ceremony uses a different p2p relay from your running cluster to avoid conflicts. The default relay address is already configured differently, so no special action is required.
:::
### Understanding the Replacement Process
The replace-operator ceremony performs a one-for-one swap:
- The **old operator** is completely removed from the cluster and does not participate in the ceremony
- The **new operator** takes over at the same index position as the old operator
- All **continuing operators** must participate with their existing validator keys
- All validator public keys remain unchanged
This is more convenient than `remove-operators` followed by `add-operators`, as it maintains the cluster size and threshold in a single atomic operation.
### Running the Replace Command
All continuing operators and the new operator must run this command. The old operator being replaced should NOT run the command.
#### For Continuing Operators
```bash
# Standard usage
charon alpha edit replace-operator --old-operator-enr=enr:-JG4QH... --new-operator-enr=enr:-JG4QK...
# Docker version
docker run -u $(id -u):$(id -g) --rm -v "$(pwd):/opt/charon" -w "/opt/charon" obolnetwork/charon:v1.10.3 alpha edit replace-operator --old-operator-enr=enr:-JG4QH... --new-operator-enr=enr:-JG4QK...
```
#### For the New Operator
The new operator being added should run the same command but only needs to provide their private key file and the cluster lock file (they won't have validator keys yet):
```bash
# Standard usage
charon alpha edit replace-operator --old-operator-enr=enr:-JG4QH... --new-operator-enr=enr:-JG4QK... --output-dir=output --lock-file=cluster-lock.json --private-key-file=charon-enr-private-key
# Docker version
docker run -u $(id -u):$(id -g) --rm -v "$(pwd):/opt/charon" -w "/opt/charon" obolnetwork/charon:v1.10.3 alpha edit replace-operator --old-operator-enr=enr:-HW4...UVM --new-operator-enr=enr:-HW4QB-SH7cQ....2A0g6y0
```
#### For the Old Operator Being Replaced
The old operator **should not participate** in the ceremony. Simply do not run the command.
:::warning
The old operator's ENR and new operator's ENR must be different. The command will fail if they are the same.
:::
### Making the DV Stack Use the New Configuration
The example below is designed for the [CDVN repository](https://github.com/ObolNetwork/charon-distributed-validator-node), but the process is similar for other setups.
:::danger
The old cluster **must be shut down for at least two epochs**. If you're not sure of the epoch boundary, wait 18 minutes from the original cluster going offline until you turn on the modified cluster. **Failure to heed this warning may result in slashing**.
:::
#### For Continuing Operators and New Operator
1. Stop the current Charon and validator client instances:
```bash
docker compose down
```
2. Back up and remove the existing `.charon` directory, then move the `distributed_validator` directory to `.charon`:
```bash
mv .charon .charon-backup
mv distributed_validator .charon
```
3. Restart the Charon and validator client instances **once at least two epochs of downtime have passed**:
```bash
docker compose up -d
```
#### For the Old Operator Being Replaced
The operator who has been replaced can safely shut down their node after the ceremony completes:
```bash
docker compose down
```
### Edit Command Limitations
- The new cluster configuration will not be reflected on the Launchpad.
- The new cluster configuration will have a new cluster hash, so the observability stack will display new cluster data under a different identifier.
- All continuing operators must have valid validator keys to participate in the replacement ceremony.
- The cluster's threshold value remains unchanged after replacing an operator.
- The new operator's ENR must not already exist in the cluster.
- The old operator's ENR must exist in the current cluster.
---
## Method 2: Validator Consolidation
Validator consolidation is a feature for the Ethereum network, introduced with the **Pectra** network upgrade. It allows a user to "consolidate" multiple validators into a single, new validator. When applied to Obol clusters, this enables transferring staked ETH from a **source cluster** (with its original operators) to a **target cluster** (with a new set of operators).
This method is best suited when:
- You need to replace a majority of operators in a cluster
- You want to merge validators from multiple source clusters into one target cluster
- The change should be driven by the withdrawal address holder (e.g. an ETH allocator) rather than the operators themselves
### How Consolidation Works
- Consolidations can only be performed when the source validator has `0x01` or `0x02` withdrawal credentials and the target validator must be `0x02`. The consolidation transaction must be sent from the withdrawal address defined in the source credentials. The target withdrawal credentials can be any address of choice.
- This process transfers the staked ETH from the old validators to the new one while the stake never leaves the beacon chain. The only partial downtime for the source validator is the standard 27-hour waiting period on the beacon chain before the withdrawal. When compared to fully exiting and re-depositing, consolidation avoids the sweep delay required in that option.
In this guide, we focus on source and target validators that have the same withdrawal address (EOA or contract). Other scenarios supporting differing withdrawal addresses are in development.
**Pros:**
- Can be performed by a withdrawal address holder (who can be a non-operator such as an ETH allocator), without requiring technical knowledge of node operation.
- Very minimal downtime of ~27 hours (256 epochs) on the stake with source validators. Missed rewards are estimated to be around 0.00296 ETH per validator.
**Cons:**
- If the number of validators is very high, even a single day of downtime (even though small) can add up.
- Target validators need to be active. This requires an additional 32 ETH for each target validator the cluster wishes to set up.
This guide assumes you are starting with a source cluster with four existing operators and want to consolidate their validators into a new target cluster with four new operators.
### 1. Prepare the Target Cluster
- **Create a New Cluster:** As the user, first create a new Obol cluster for four new operators of your choice. More details can be found [here](../../run-a-dv/start/create-a-dv-with-a-group.mdx).
- **Set Withdrawal Address:** Set the withdrawal address for this new cluster to be the same EOA address you used for the source cluster. In future this can be changed to a withdrawal address of your choice.
- **Deploy a New Splitter:** Deploy a new splitter contract dedicated to the new operators of the target cluster.
- **Configure Validators:** Ensure the validators in the new cluster are configured as **compounding validators** with the `0x02` credential type. To enable this make sure to turn the compound toggle on or use the `--compounding` flag if using the CLI directly.
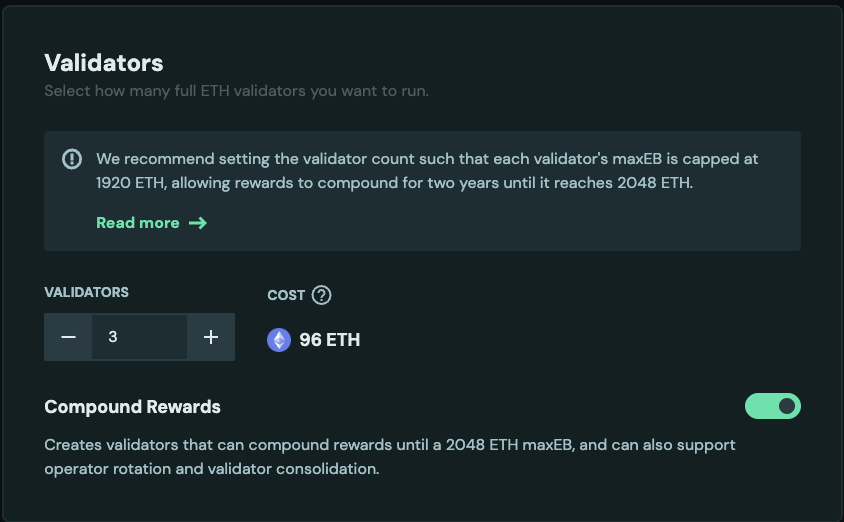
- **Run Nodes:** Start the Charon nodes for all operators in the new target cluster. Make sure all the nodes are healthy and ready for deposits. More details [here](../../run-a-dv/running/monitoring.md).
- **Activate Validators:** Activate the target validators by depositing 32 ETH for each. More details [here](../../run-a-dv/running/activate-a-dv.md). The image shows a new operator `0x493...9b1`.
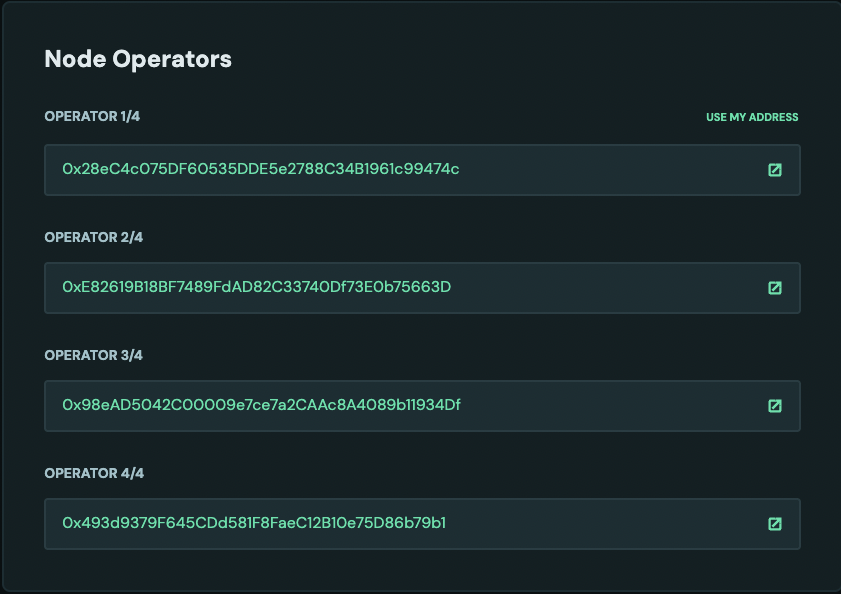
### 2. Finalize the Source Cluster
- Have a source cluster ready. Make sure you are connected with the correct withdrawal address. In this case, the operator [`0x28eC4c075DF60535DDE5e2788C34B1961c99474c`](https://hoodi.launchpad.obol.org/operator/0x28eC4c075DF60535DDE5e2788C34B1961c99474c/) is also the withdrawal address.
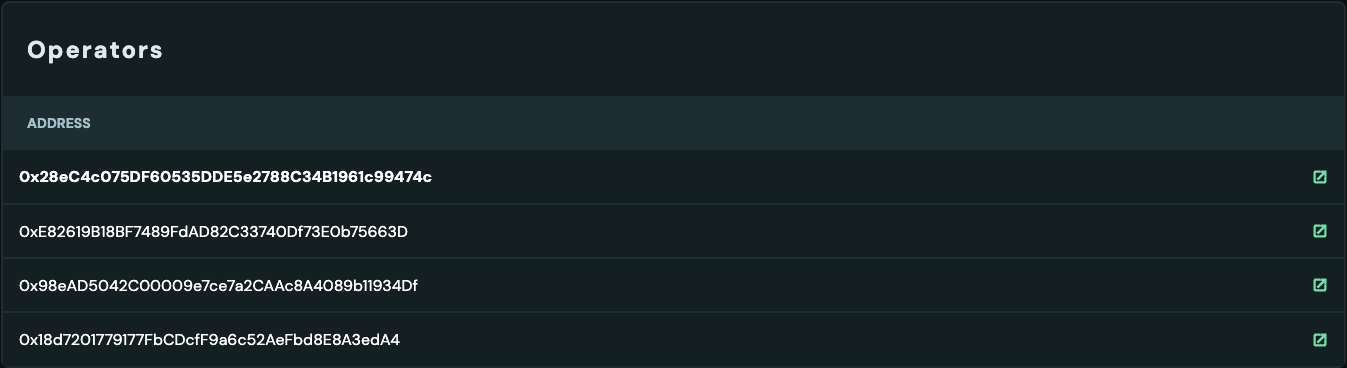

- **Distribute Rewards:** Before proceeding, distribute all pending rewards from the source cluster's splitter contract to ensure all financial obligations are settled with the original operators. The rewards should be 0 after rewards are distributed and claimed.

### 3. Initiate the Consolidation
- **Access the Migration Tool:** Navigate to the Obol Launchpad migration page by using a URL such as `https://hoodi.launchpad.obol.org/migrate/?withdrawalAddress=your_withdrawal_address`. Alternatively, click the **Migrate** button on a target validator's page within the target cluster dashboard. This **Migrate** button is only clickable for validators where the connected address is the withdrawal address. Make sure the correct address is connected.

- **Select Validators:** On the migration page, select the source validators from the original cluster that you wish to consolidate.
- **Confirm and Consolidate:** Click the **Migrate** button to send the consolidation request.
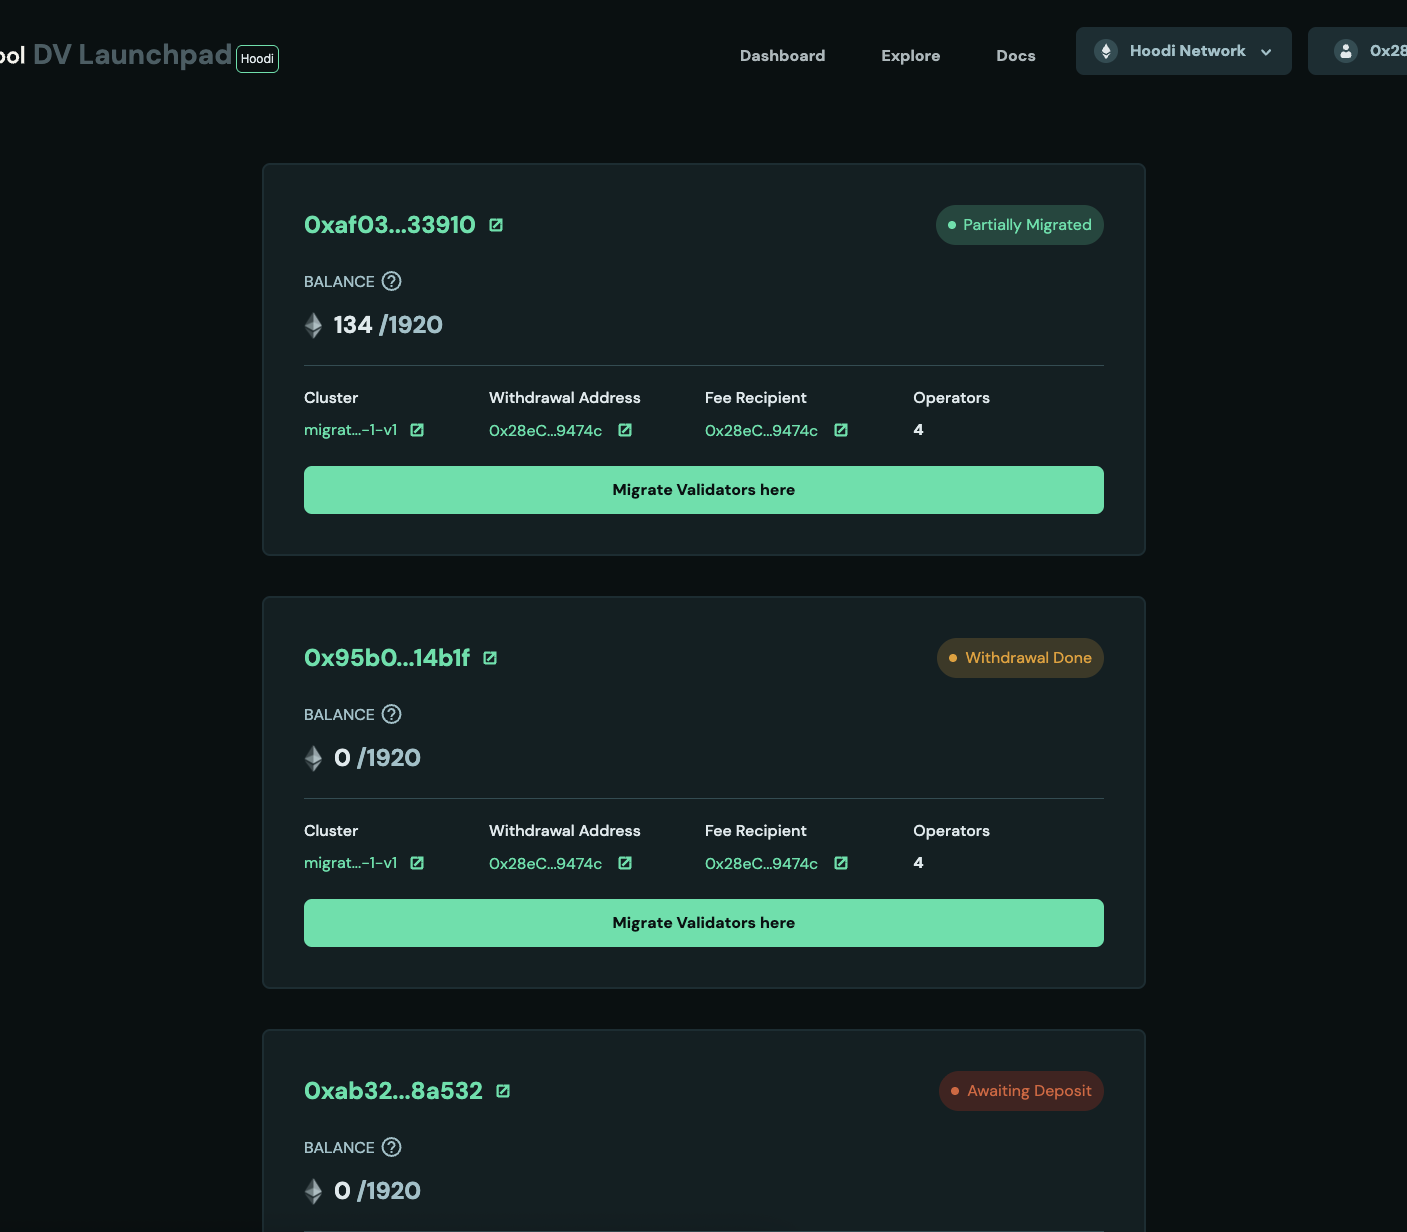
### 4. Post-Consolidation Actions
:::info
Screenshots are for reference only, your validator balances and performance will differ.
:::
- **Source Validator Exit:** Once the consolidation request is processed by the Ethereum network, the source validators will be set to exit automatically. On [beaconcha.in](https://beaconcha.in) the validator pubkey will show an **exiting** status with consolidation in progress.
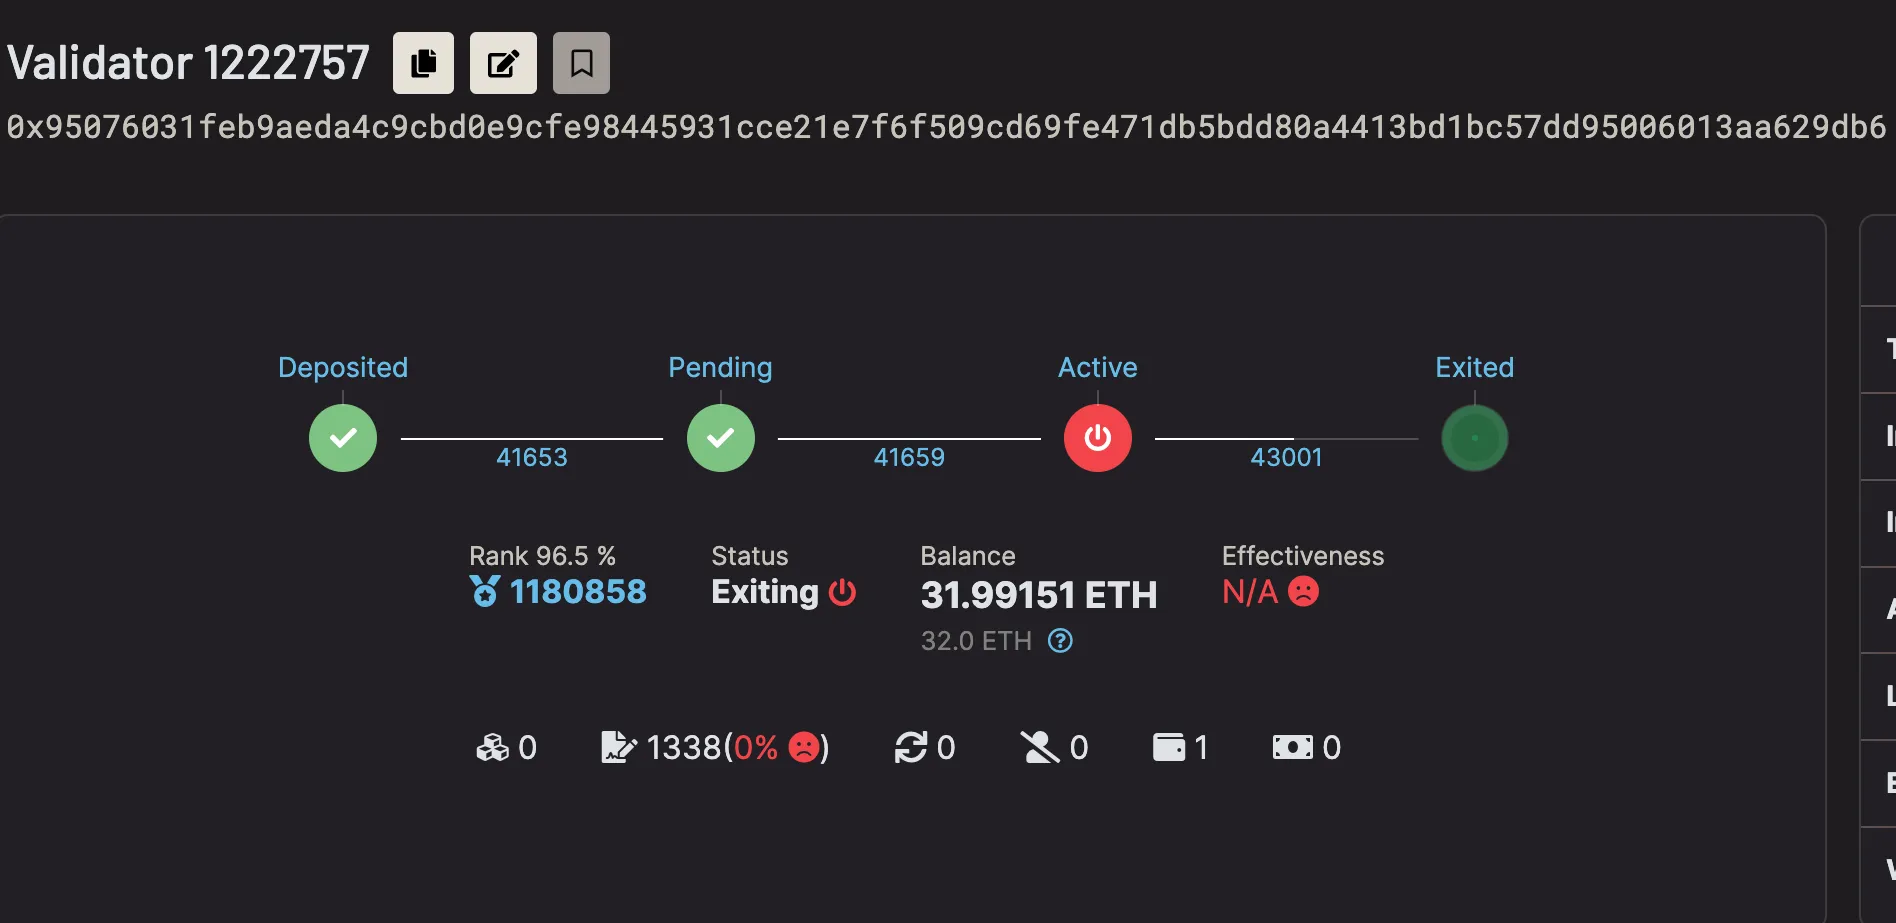
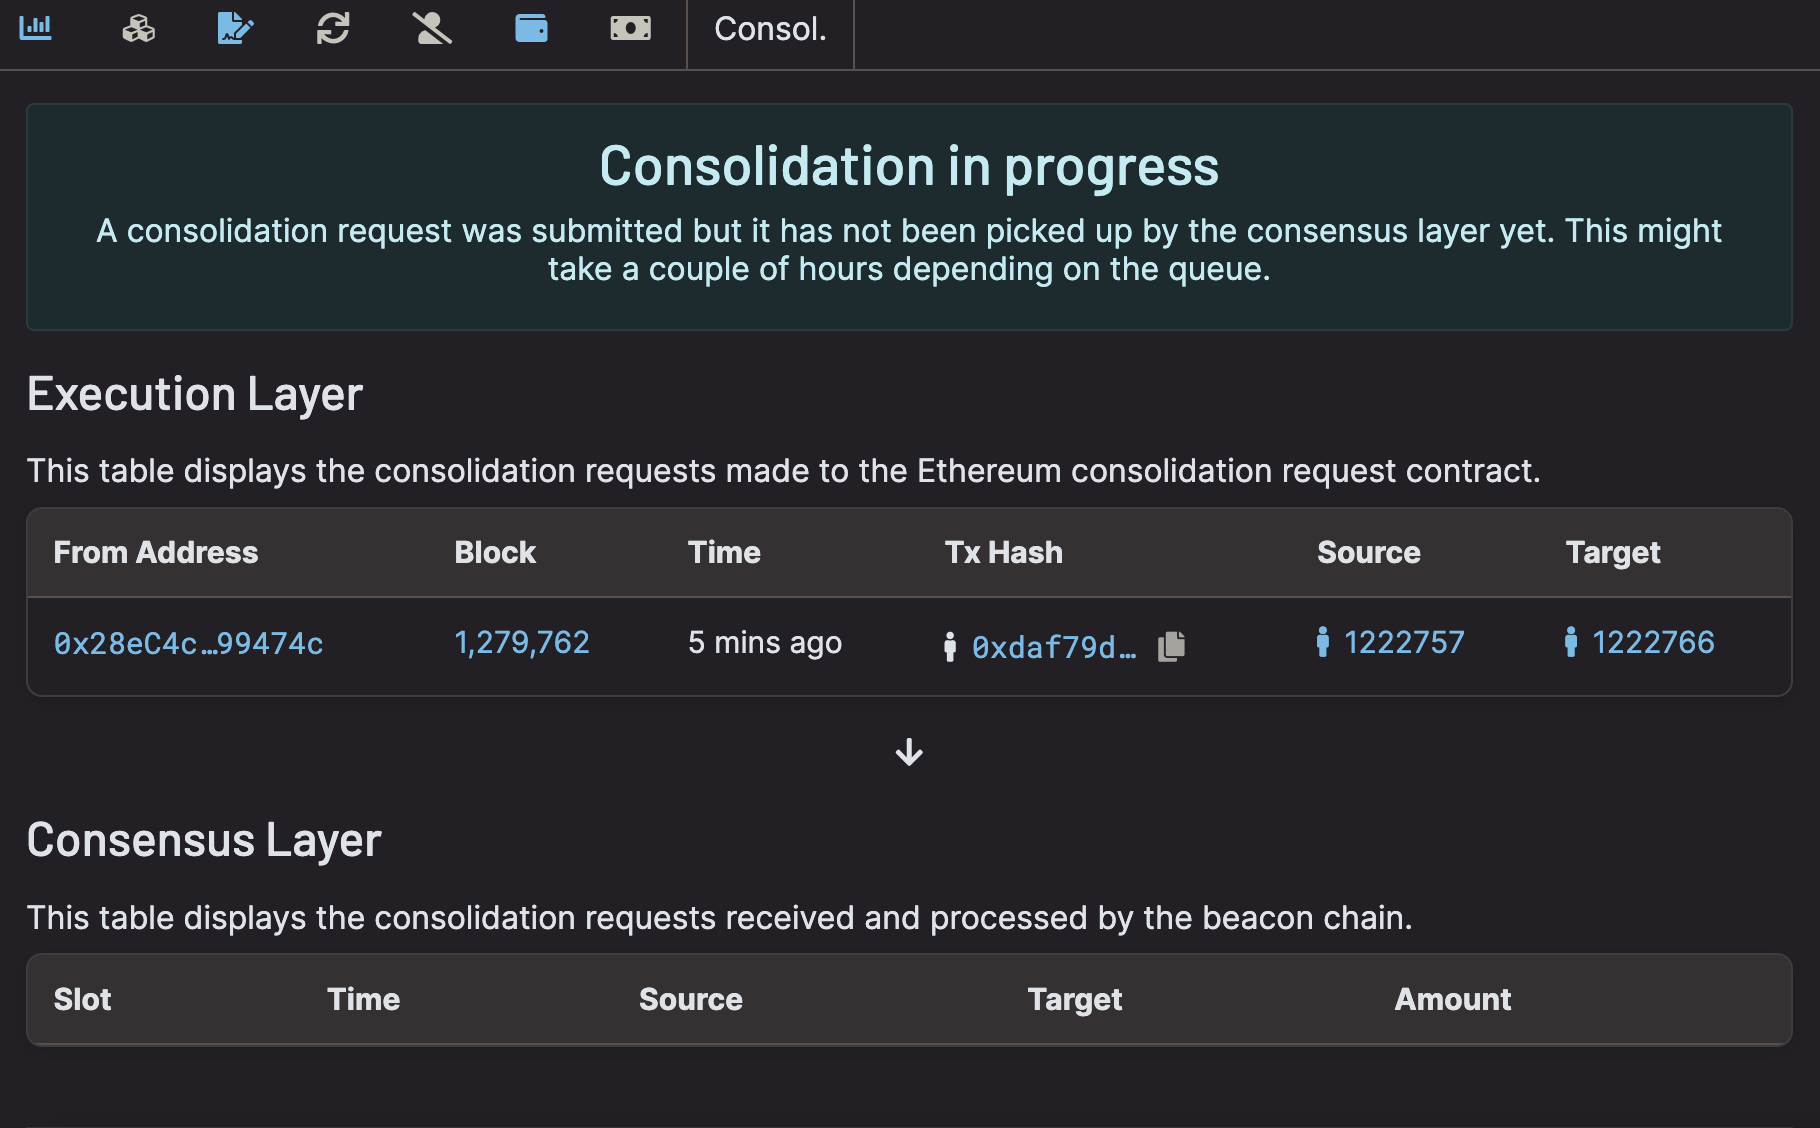
- **Waiting Period:** After the exit is complete, the validator enters a ~27 hour waiting period (256 epochs). In the example below the validator is marked **exited** while the withdrawable epoch remains in the future (43257). Once the withdrawable epoch is reached, ETH will be consolidated to the target validator.
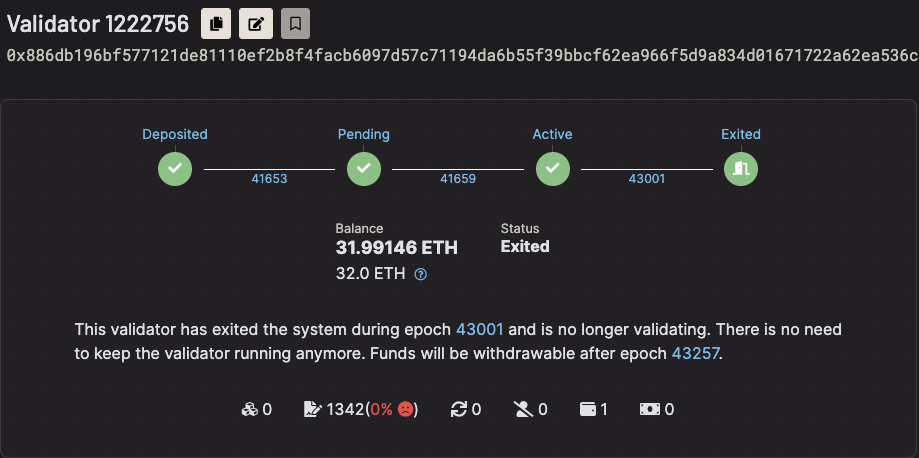
- **ETH Transfer:** After the waiting period, the staked ETH from the source validators is automatically consolidated and credited to the target validators in the new cluster.
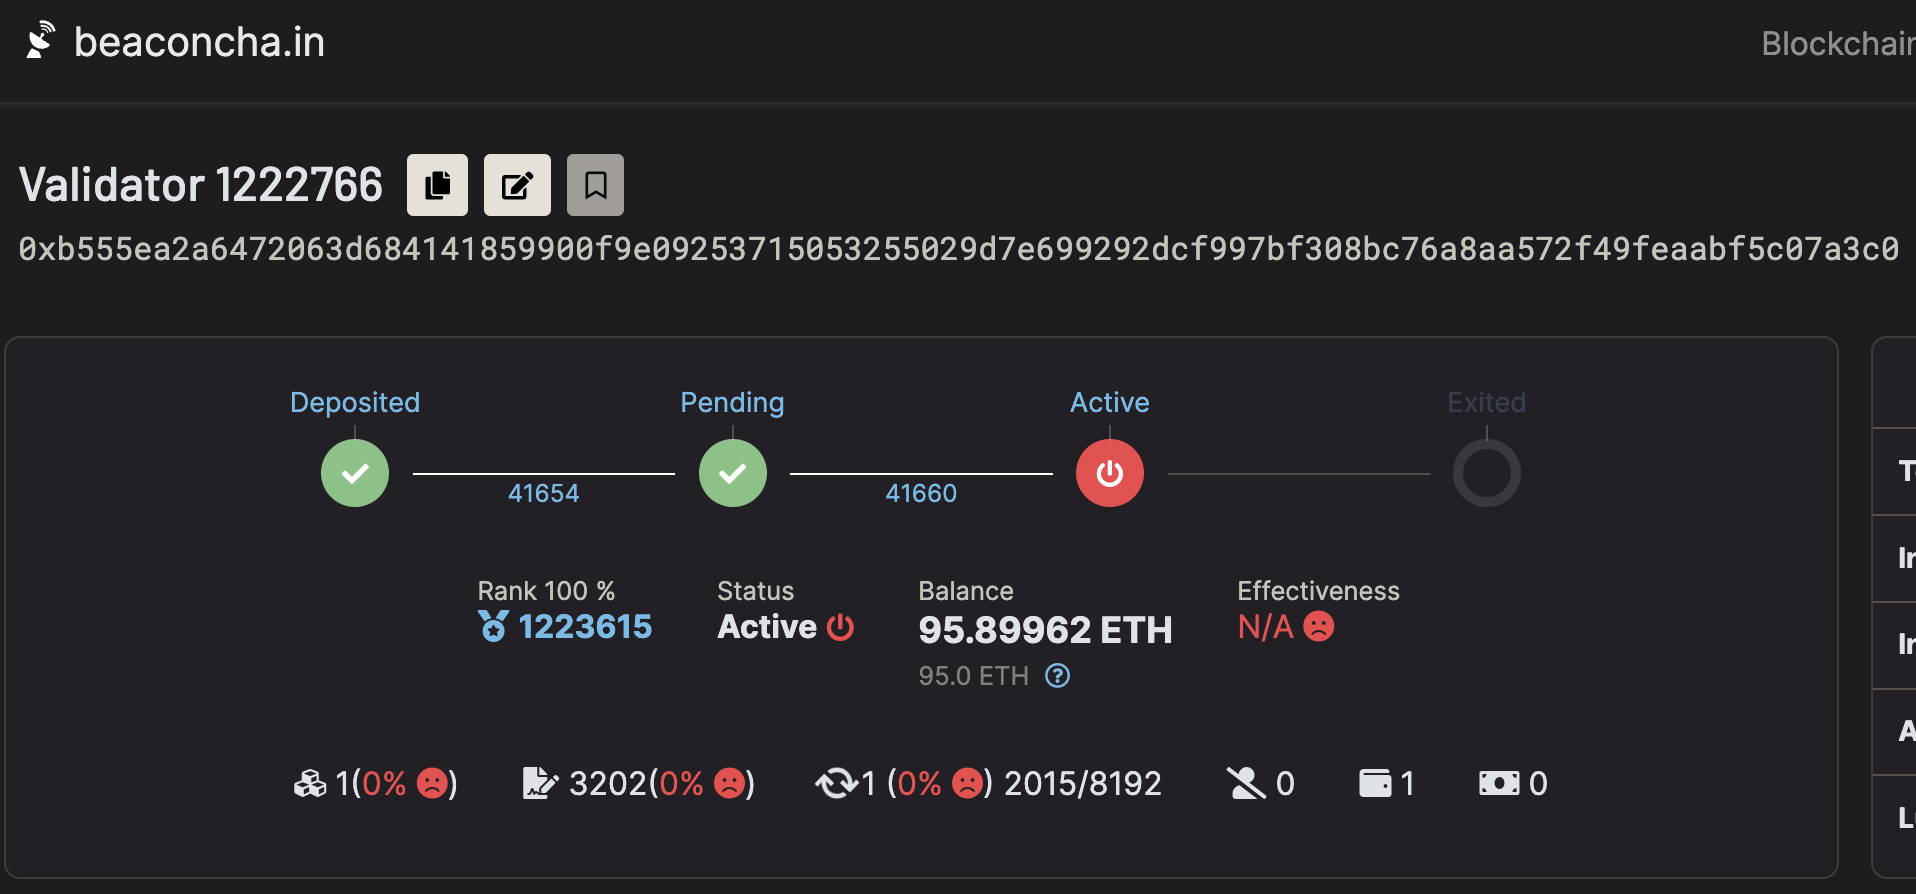
- **Wind Down Source Clusters:** Once the source validators have fully exited and funds have settled with the target cluster, you can wind down the original operators.
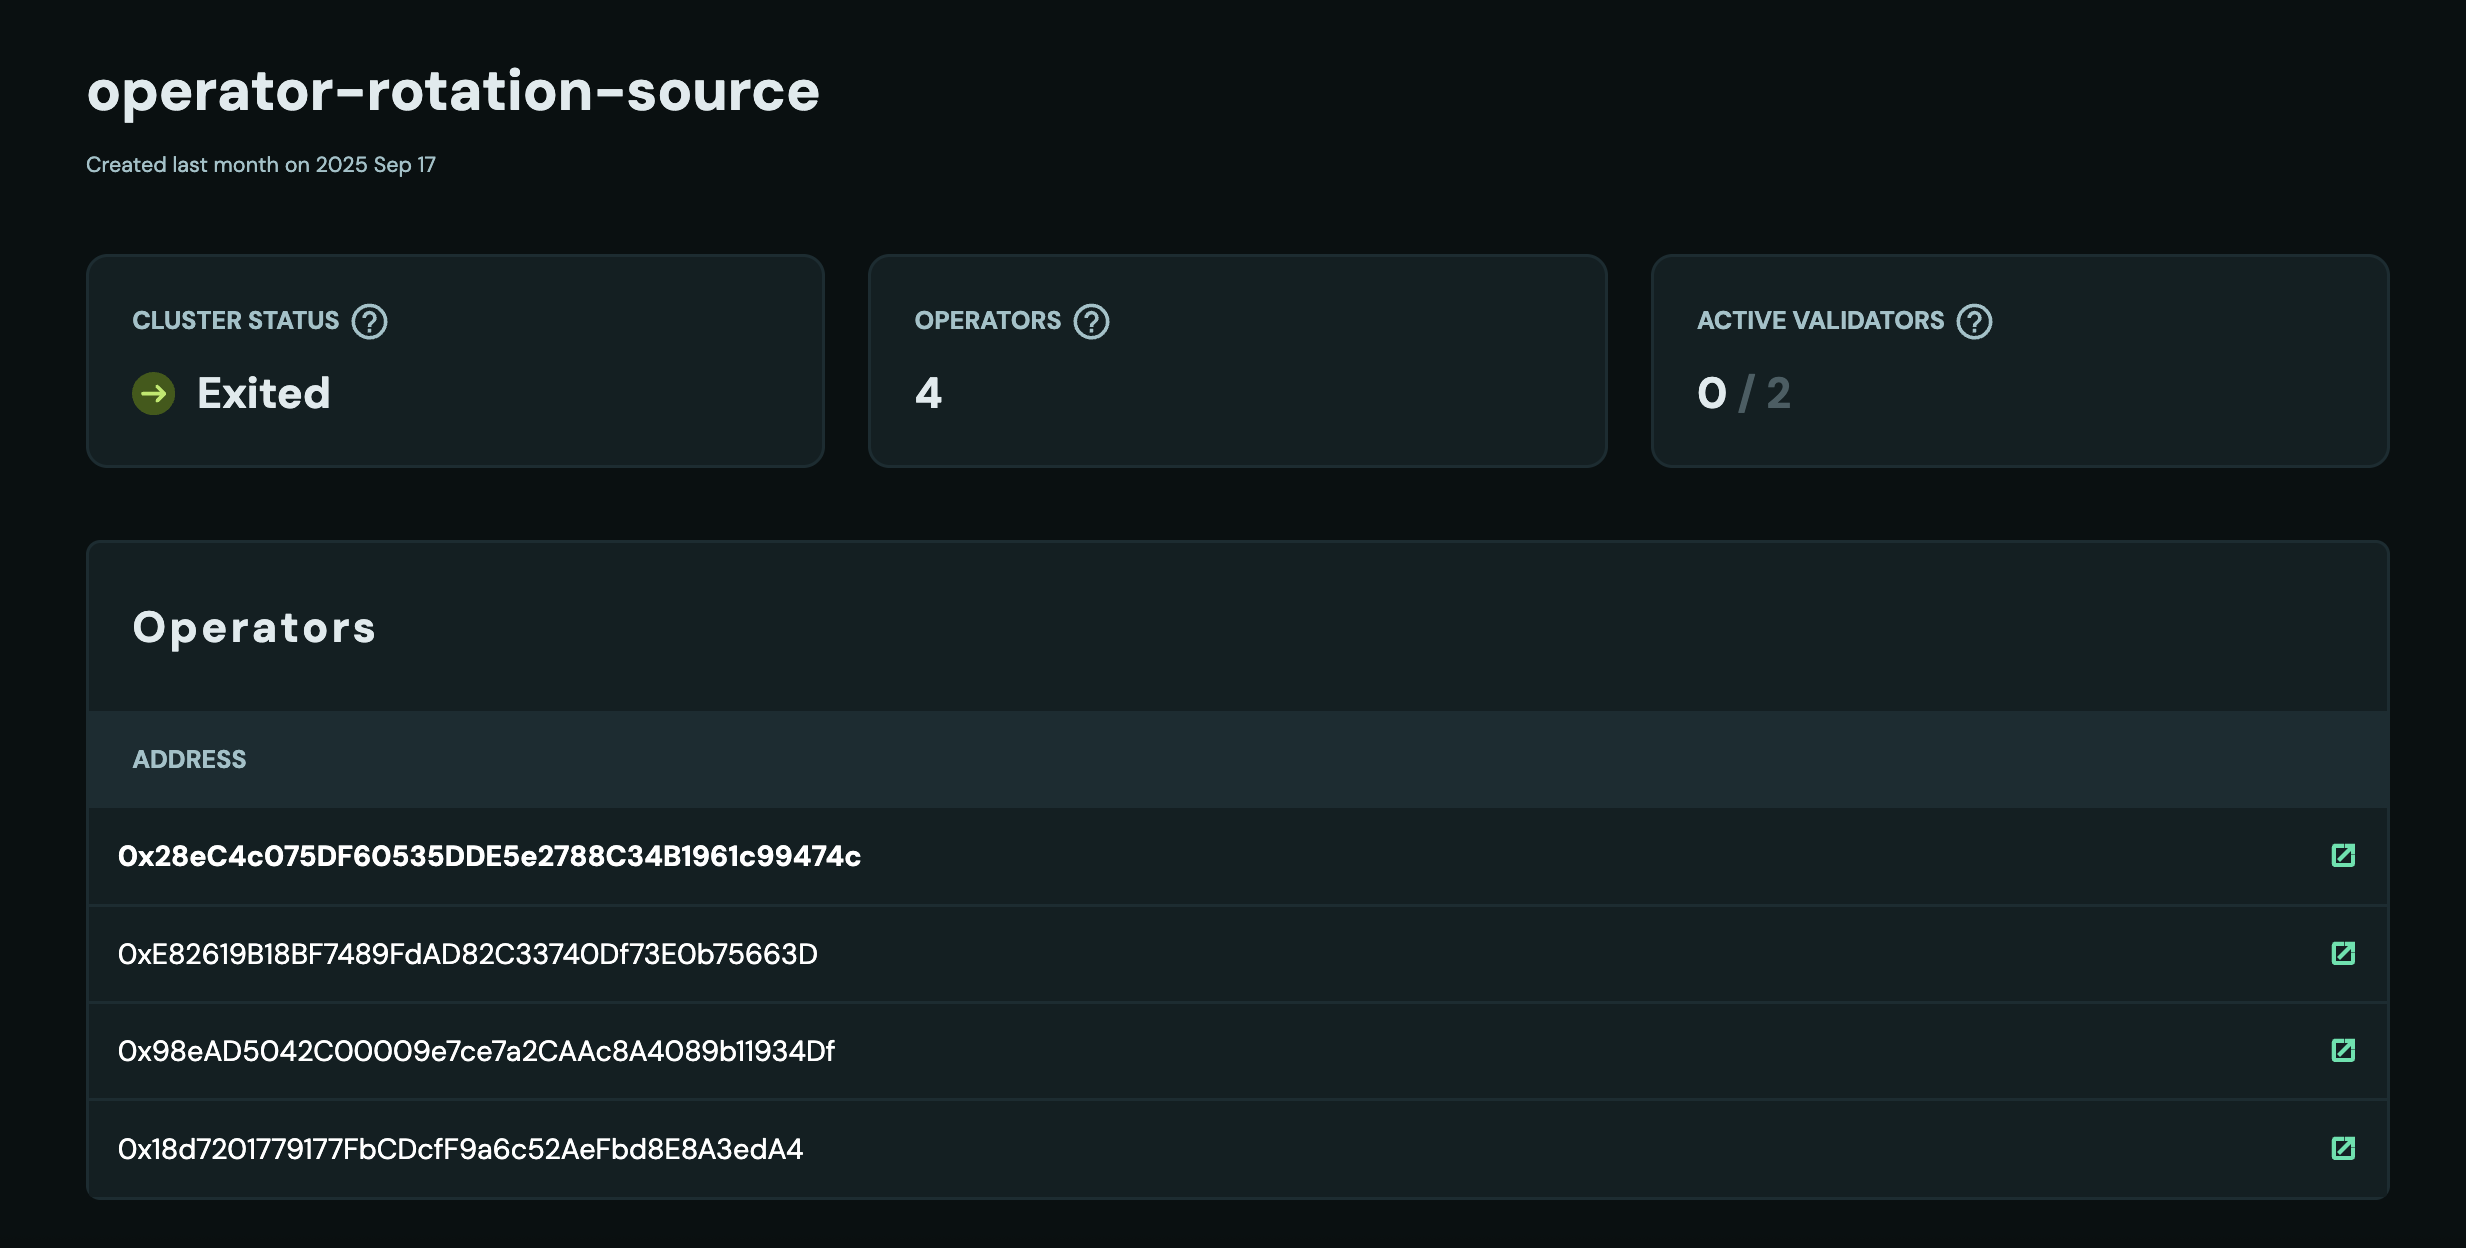
**Example clusters used in screenshots:**
- Target cluster: [0x15d1…9e32](https://hoodi.launchpad.obol.org/cluster/details/?lockHash=0x15d113c8c3e3ca1ec24bbdd5c5d8f9065c36f07d9d70c13e9a4efba8a35b9e32)
- Source cluster: [0xF321…2885](https://hoodi.launchpad.obol.org/cluster/details/?lockHash=0xF321443022ABA165FF5635CF71DC9DA0FC29EE91D03117055E97A1F92B5C2885)
---
# Recreating Private Keys
URL: https://docs.obol.org/run-a-dv/editing/recreate-private-keys
# Recreating Private Keys
You can recreate the private key shares for your cluster using the `charon alpha edit recreate-private-keys` command. This operation creates new private key shares to replace the existing validator private keys while retaining the same operator identities and validator public keys.
## When to Use This Feature
You might need to recreate private key shares in several scenarios:
- **Security concerns**: If you suspect that private key shares may have been compromised
- **Key rotation**: As part of regular security practices to rotate cryptographic material
- **Recovery**: After a security incident where you want to refresh all key material
- **Compliance**: Meeting organisational policies that require periodic key rotation
:::info
This operation maintains the same validator public keys, so your validators remain registered on the beacon chain without any changes. Only the underlying private key shares held by operators are refreshed.
:::
## Prerequisites
1. Review the `edit recreate-private-keys` command [CLI reference](../../learn/charon/charon-cli-reference.md#recreate-private-key-shares).
2. Keep the DV node running during the process and ensure you have a copy of the current cluster lock file and validator private key shares.
3. All operators in the cluster must participate in this ceremony.
4. Each operator must have their current validator private key shares available.
:::info
The ceremony uses a different p2p relay from your running cluster to avoid conflicts. The default relay address is already configured differently, so no special action is required.
:::
## Recreating Private Keys Process
All operators must run this command simultaneously. The ceremony will coordinate between all operators to generate new private key shares.
```bash
# If you prefer running a pre-built charon binary
charon alpha edit recreate-private-keys --output-dir=output
# Or, if you prefer running it in Docker
# (replace 'latest' with the most recent version if needed: https://hub.docker.com/r/obolnetwork/charon/tags)
docker run --rm -v "$(pwd):/opt/charon" -w "/opt/charon" obolnetwork/charon:v1.10.3 alpha edit recreate-private-keys --output-dir=/opt/charon/output
```
This command will:
1. Use the existing cluster configuration and operator identities
2. Generate new private key shares for all validators
3. Create a new cluster lock file with updated key shares
4. Save the new configuration in the `output` directory
:::info
The ceremony requires all operators to participate. If any operator is unavailable, the ceremony cannot complete.
:::
## Making the DV Stack Use the New Keys
The example below is designed for the [CDVN repository](https://github.com/ObolNetwork/charon-distributed-validator-node), but the process is similar for other setups.
:::danger
**Critical Security Step**: All operators must coordinate to switch to the new keys at approximately the same time to avoid validation failures. Plan a maintenance window and communicate clearly with all operators.
:::
1. To start using the new keys, stop the current Charon and validator client instances:
```bash
docker compose stop charon lodestar
```
2. Back up and remove the existing `.charon` directory, then move the `output` directory to `.charon`:
```bash
mv .charon .charon-backup
mv output .charon
```
3. Restart the Charon and validator client instances:
```bash
docker compose up -d charon lodestar
```
Lodestar's boot script (`lodestar/run.sh`) will automatically import all keys, removing any existing keys and cache. Charon will load the new `cluster-lock.json` with the recreated private key shares.
:::warning
All operators must fully shut down their existing cluster nodes before starting with the new configuration. The old cluster must be completely stopped before the new cluster with the recreated private keys can begin operating. Steps 1–3 must be performed by all node operators within a coordinated maintenance window to minimize downtime.
:::
## Verifying the New Configuration
After all operators have restarted with the new keys, verify that:
1. All Charon nodes are connected and healthy
2. The cluster is successfully producing attestations
3. No error messages appear in the logs related to signature verification
```bash
# Check Charon logs
docker compose logs -f charon
# Verify cluster health in the monitoring dashboard
# Check that all validators are attesting normally
```
## Security Best Practices
- **Secure deletion**: After successfully transitioning to the new keys and verifying operation, securely delete the old key shares
- **Coordination**: Ensure all operators are prepared and available during the planned maintenance window
- **Communication**: Maintain clear communication channels between all operators throughout the process
- **Backup**: Keep the backup until you've verified that the cluster is operating normally with the new keys for at least several epochs
## Current Limitations
- The new cluster configuration will not be reflected on the Launchpad.
- The new cluster configuration will have a new cluster hash, so the observability stack will display new cluster data under a different identifier.
- All operators must participate in the ceremony; there is no option for partial participation.
- All operators must have their current validator private key shares available for the ceremony to succeed.
- The transition period requires coordination to minimize validator downtime.
---
# Partner Integrations
URL: https://docs.obol.org/run-a-dv/integrations
# integrations
---
# Create an EigenLayer DV
URL: https://docs.obol.org/run-a-dv/integrations/create-an-eigenlayer-dv
# Create an EigenLayer DV
:::warning
The Obol-SDK is in a beta state and should be used with caution. Ensure you validate all important data.
:::
This is a walkthrough of creating a distributed validator cluster pointing to an [EigenLayer](https://eigenlayer.xyz/) [EigenPod](https://docs.eigenlayer.xyz/eigenlayer/restaking-guides/restaking-user-guide/native-restaking/create-eigenpod-and-set-withdrawal-credentials/), using the [DV Launchpad](../../learn/intro/launchpad.md) and other applications.
### Pre-requisites {#pre-requisites}
* The Ethereum addresses or ENS names for the node operators in the cluster. (Currently the DV Launchpad only supports Metamask or equivalent injected web3 browser wallets.)
* If creating more than one validator, the ability to use the [obol-sdk](../../advanced-and-troubleshooting/advanced/create-a-dv-using-the-sdk.mdx) is required.
### Create a SAFE to own the EigenPod {#create-a-safe-to-own-the-eigenpod}
Deploy a [SAFE](https://app.safe.global/) with the addresses of the node operators as signers. A reasonable signing threshold is the same as a cluster (>2/3rds) but use good judgement if a different threshold or signer set suits your use case. The principal ether for these validators will be returned to this address.
### Create an EigenPod {#create-an-eigenpod}
Select the "Create EigenPod" option on the [EigenLayer App](https://app.eigenlayer.xyz/)'s 'Restake' page, using the created SAFE account via WalletConnect. Note the EigenPod's address.
### Create a Splitter for the block reward {#create-a-splitter-for-the-block-reward}
Create a Splitter on [splits.org](https://app.splits.org/), to divide the block reward and MEV among the operators. Note the split's address.
:::tip
To be recognized as a part of Obol's [1% for Decentralization](https://blog.obol.tech/1-percent-for-decentralisation/) campaign, you must contribute 3% of execution layer rewards by setting [this address](https://etherscan.io/address/0xDe5aE4De36c966747Ea7DF13BD9589642e2B1D0d) as a recipient on your split. Upcoming Obol EigenPods will support contributing 1% of total rewards instead of 3% of only execution rewards.
:::
### Create the DV cluster invite {#create-the-dv-cluster-invite}
With these contracts deployed, you can now create the DV cluster invitation to send to Node Operators, this can be done through the DV Launchpad or the Obol SDK.
* Use the "Create a cluster with a group" [flow](../start/create-a-dv-with-a-group.mdx) on the [DV Launchpad](../../learn/intro/launchpad.md).
* Choose a cluster name and invite your operator's addresses.
* When setting the withdrawal credentials, select "Custom".
* For "Withdrawal Address", set the EigenPod contract address.
* For "Fee Recipient", set the Split contract address.
* Continue the process of creating a cluster normally, share the invitation link with the operators and have them complete the Distributed Key Generation ceremony.
* If you are creating a cluster with more than one validator, you will need to craft the cluster invitation with the [SDK](https://www.npmjs.com/package/@obolnetwork/obol-sdk).
* Follow the [Create a cluster using the SDK](../../advanced-and-troubleshooting/advanced/create-a-dv-using-the-sdk.mdx) guide.
* For `withdrawal_address`, set the EigenPod contract address.
* For `fee_recipient_address`, set the Split contract address.
* Continue the process of creating the cluster as per the guide, share the invitation link with the operators and have them complete the Distributed Key Generation ceremony.
### Deposit and restake your Distributed Validator {#deposit-and-restake-your-distributed-validator}
Once you have completed the DKG ceremony, you can continue the flow on the EigenLayer app to activate these validators and restake them. Consult the EigenLayer [documentation](https://docs.eigenlayer.xyz/eigenlayer/restaking-guides/restaking-user-guide/native-restaking/create-eigenpod-and-set-withdrawal-credentials/enable-restaking) to continue the process.
---
# Create a Lido CSM DV
URL: https://docs.obol.org/run-a-dv/integrations/lido-csm
# Create a Lido CSM DV
This is a guide on taking part in Lido's [Community Staking Module](https://lido.fi/csm) (CSM) with a squad as part of a [Distributed Validator Cluster](../../learn/intro/key-concepts.md#distributed-validator-cluster).
To start, this guide makes a couple assumptions:
1. You're running a Linux distribution and you've installed [Git](https://git-scm.com/downloads) and [Docker](https://docs.docker.com/engine/install/) (as a [non-root user](https://docs.docker.com/engine/install/linux-postinstall/#manage-docker-as-a-non-root-user)).
2. You will be deploying on Ethereum mainnet. Some screenshots in this guide are from a previous testnet; use Hoodi for testing. They are kept for demonstration purposes, so please verify you are using the correct [mainnet addresses](https://operatorportal.lido.fi/modules/community-staking-module#block-d8e94f551b2e47029a54e6cedea914a7).
## Getting started
This guide is broken down into 3 parts:
Part 1: Creating a shared [SAFE](https://safe.global/) wallet for the cluster, and a [Splits.org](https://splits.org) reward splitting contract
Part 2: Using the [Obol DV Launchpad](https://launchpad.obol.org/) + CLI to create the cluster
Part 3: Deploying the validator to Lido's CSM using their UI.
:::tip
In this guide we'll be using the CSM widget and expanding `Specify Custom Addresses` to set the `Manager Address` to the cluster multi-sig (SAFE) and the `Rewards Address` to the Splits.org splitting contract. Finally, we'll be selecting `Extended` permissions type which grants `Manager Address` ultimate control over the Node Operator.
:::
## Part 1: Creating the Cluster SAFE + Splitter Contract
### Deploy the SAFE
Detailed instructions on how to create a SAFE Wallet can be found [here](https://help.safe.global/en/articles/40868-creating-a-safe-on-a-web-browser).
The squad leader should obtain signing addresses for all the cluster members, to create a new SAFE with the operators all as owners.
After giving the Safe a name and selecting the appropriate network, continue by clicking the **Next** button.
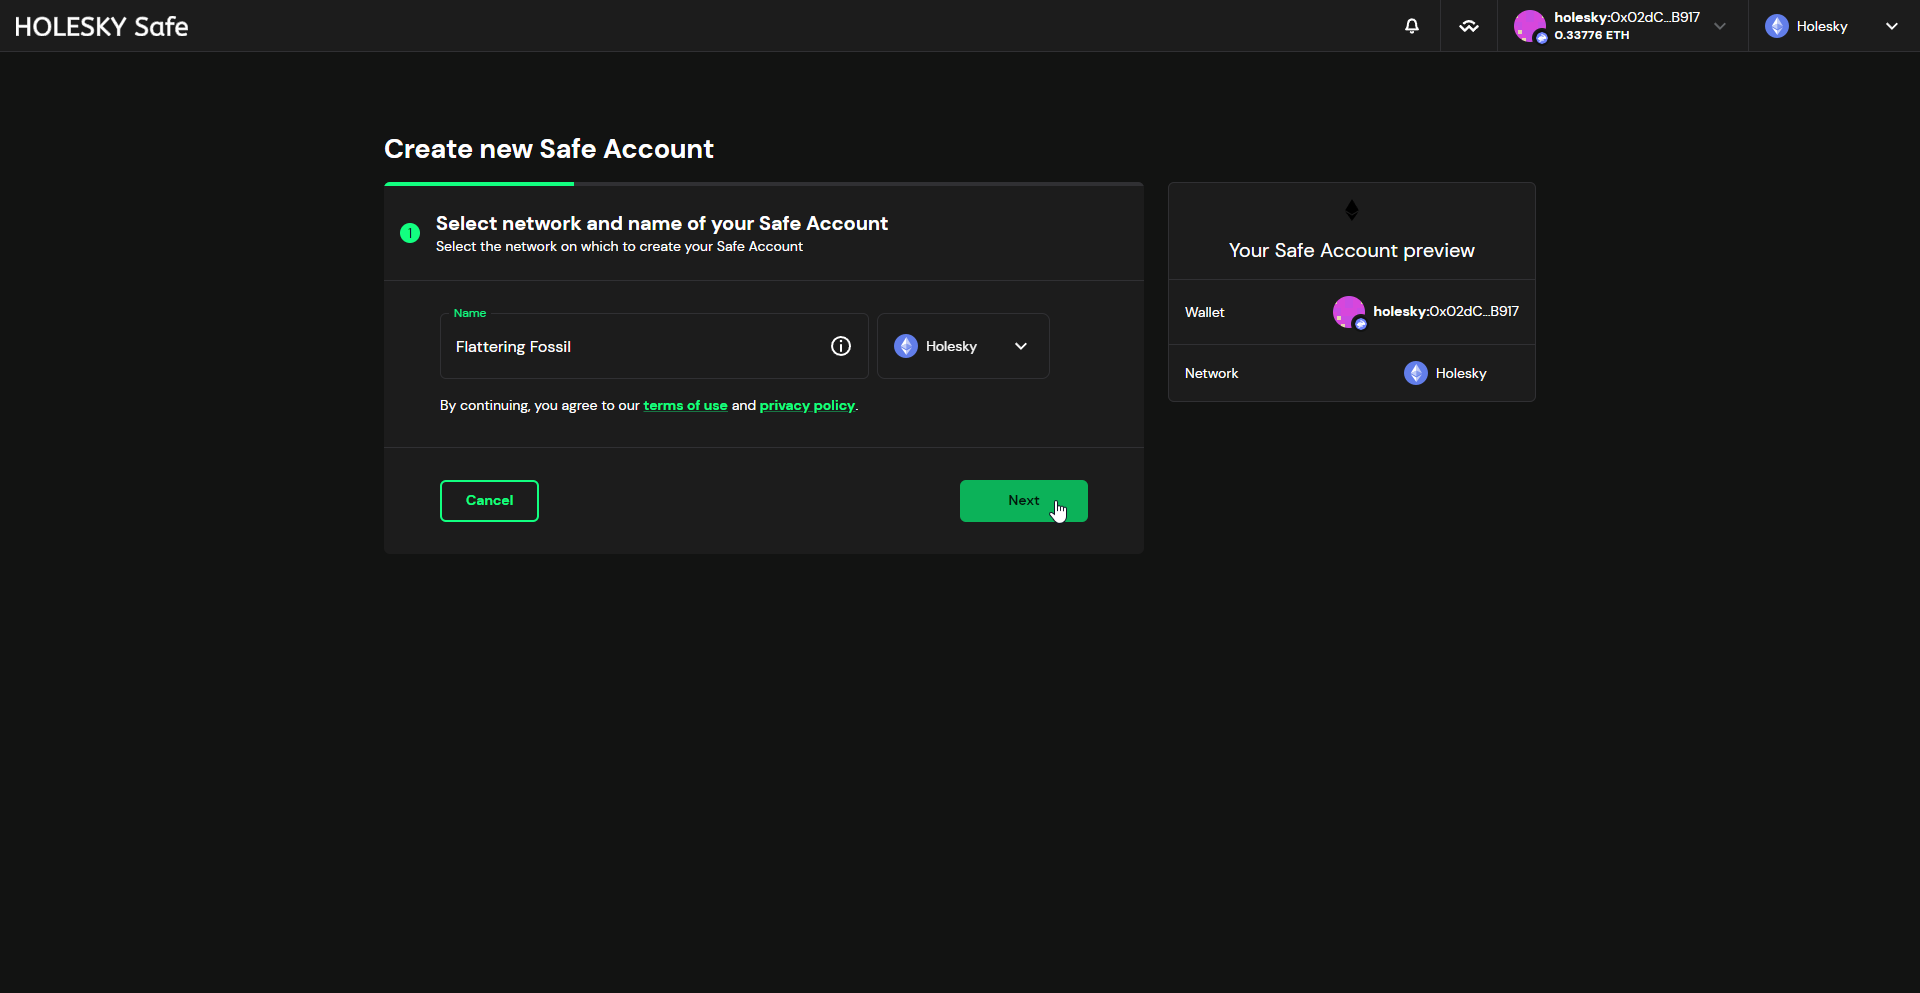
Add all the signer addresses of the cluster members, select a threshold, and proceed to the final step by clicking the **Next** button.
:::info
Don't require 100% of signers to approve transactions, in case someone loses access to their address. Using the same [threshold](../../learn/intro/key-concepts.md#distributed-validator-threshold) as your cluster will use is a reasonable starting point.
:::
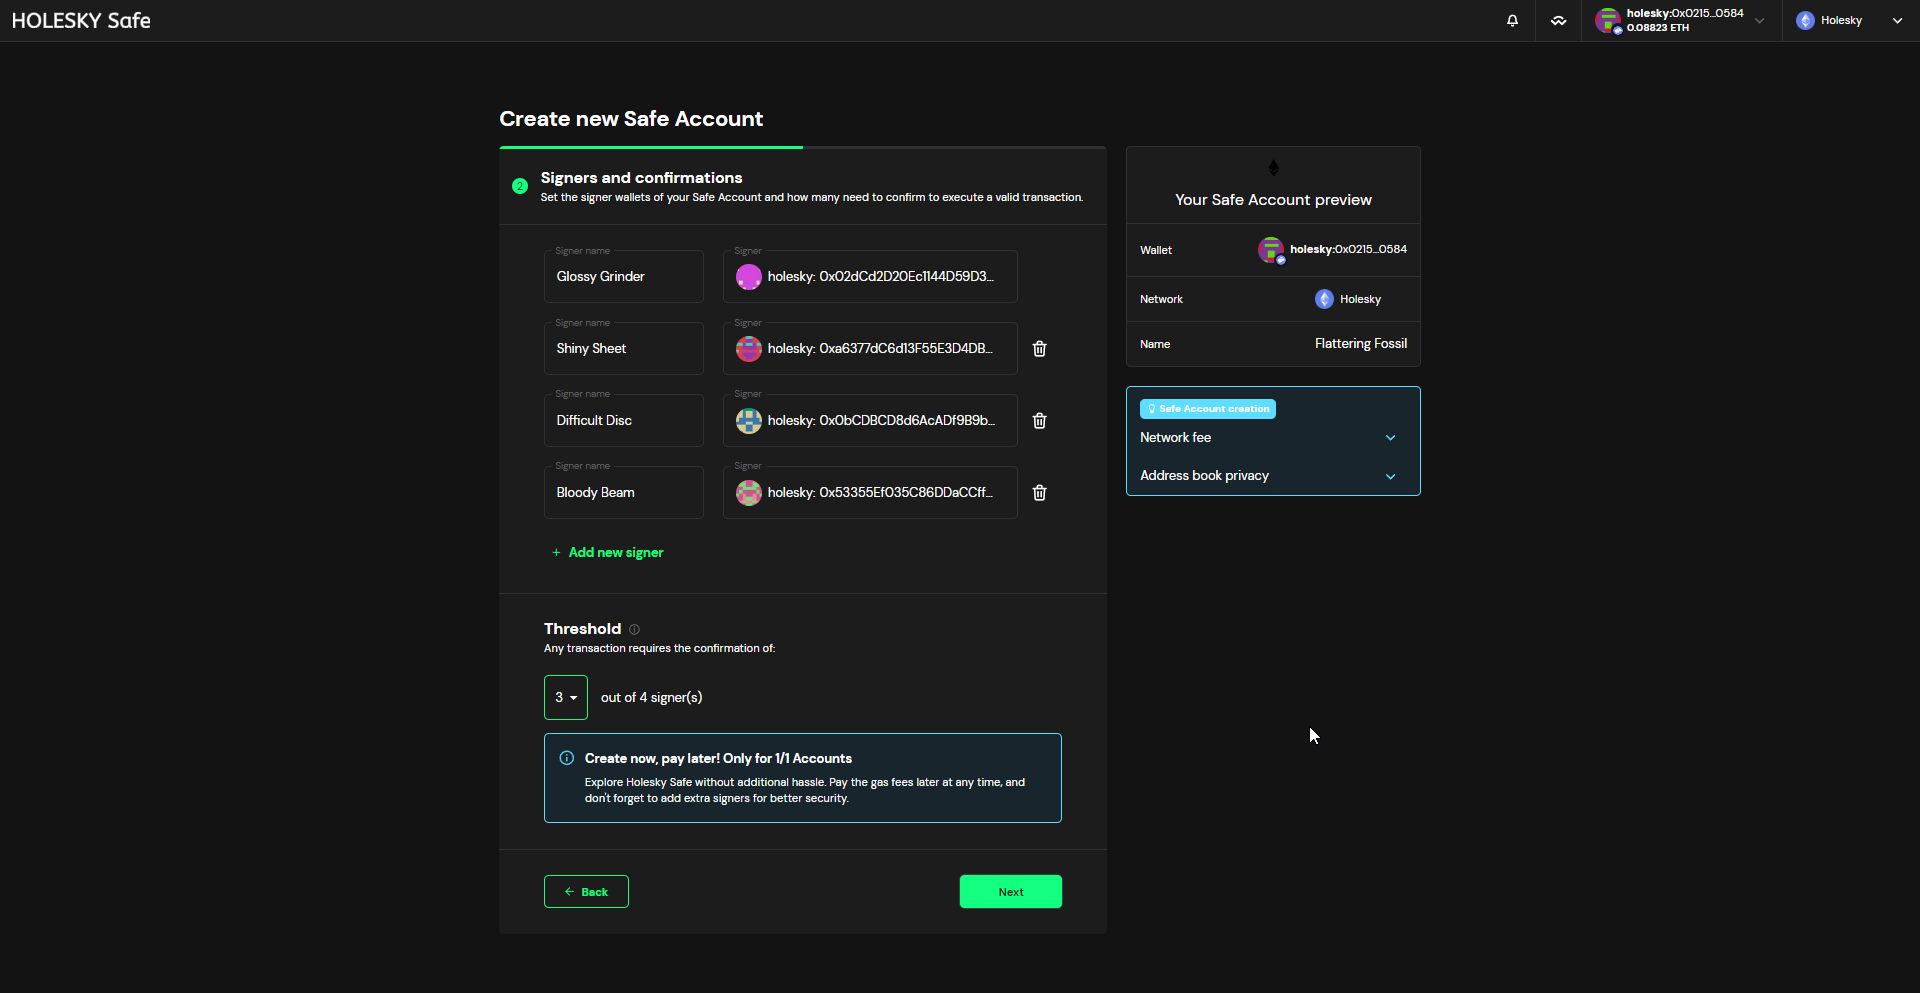
Finally, submit the transaction to create the Safe by clicking on the **Create** button.
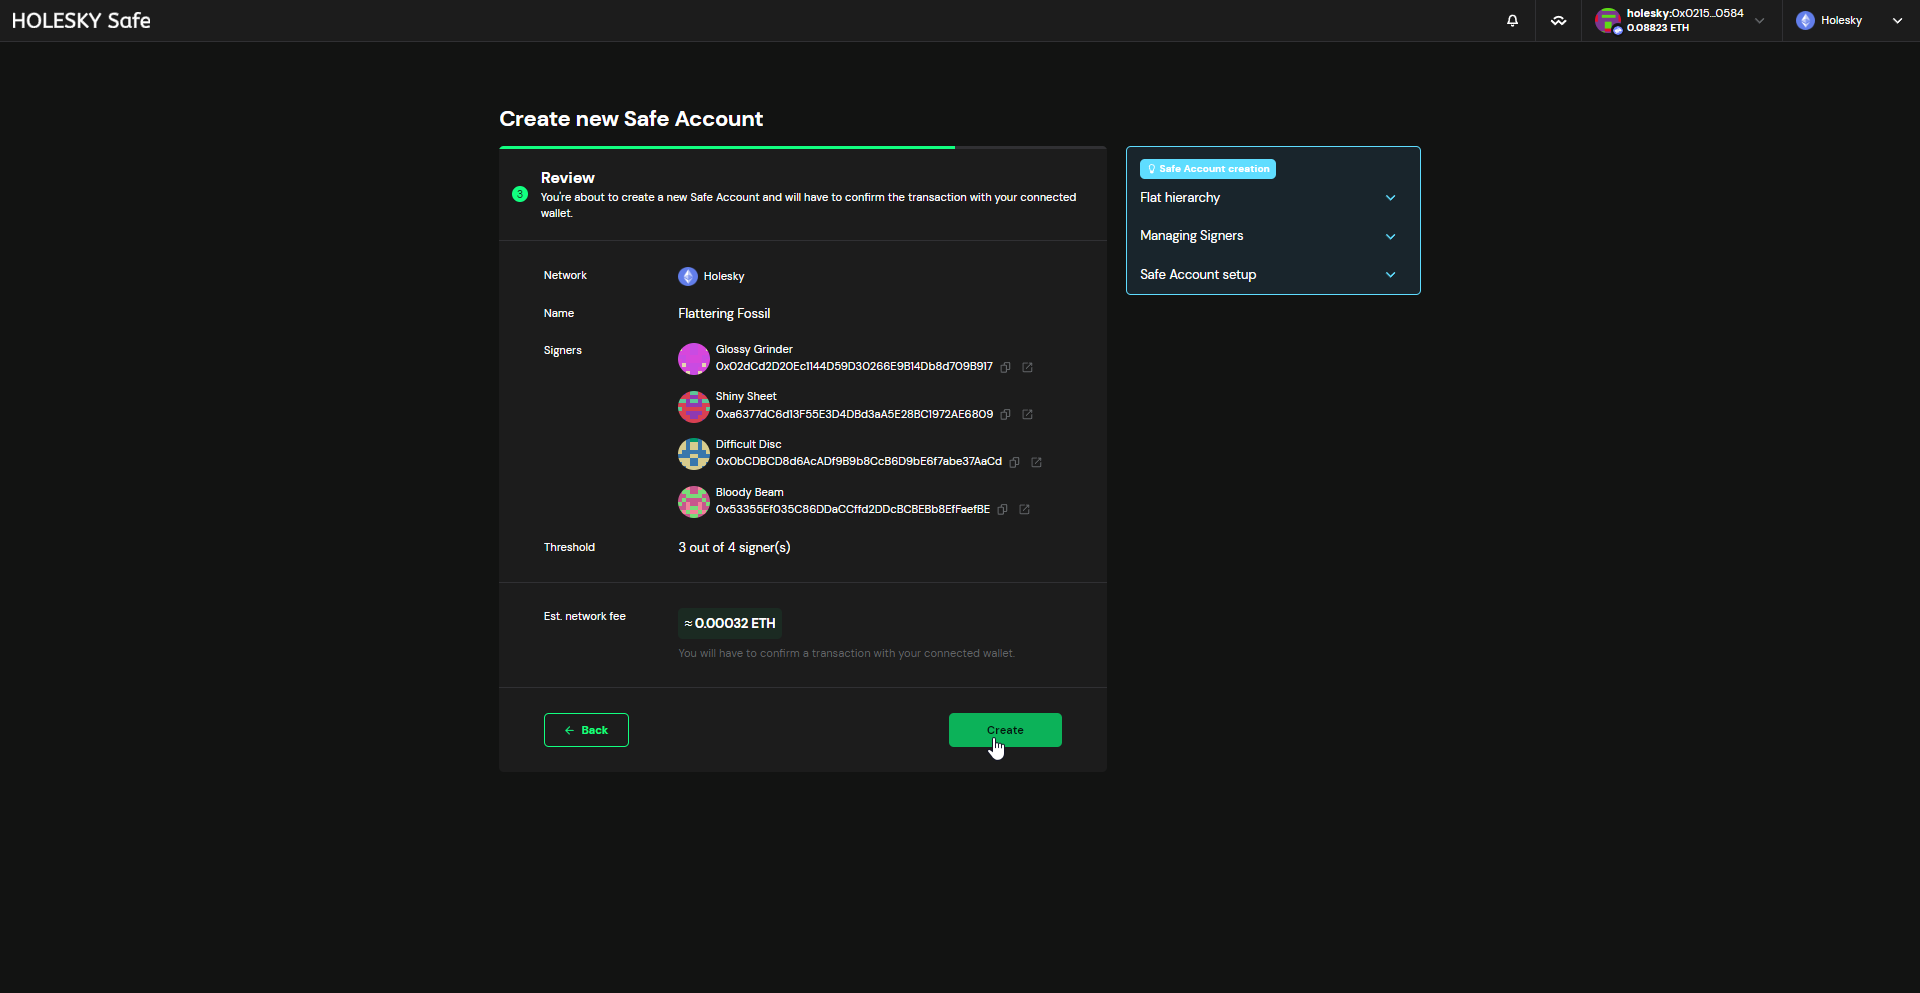
### Deploy the Splitter Contract
The squad leader should obtain the reward addresses from all the cluster members (this can be the same address used in the SAFE contract). Open https://app.splits.org and create a `New contract`. Make sure to select the appropriate network.
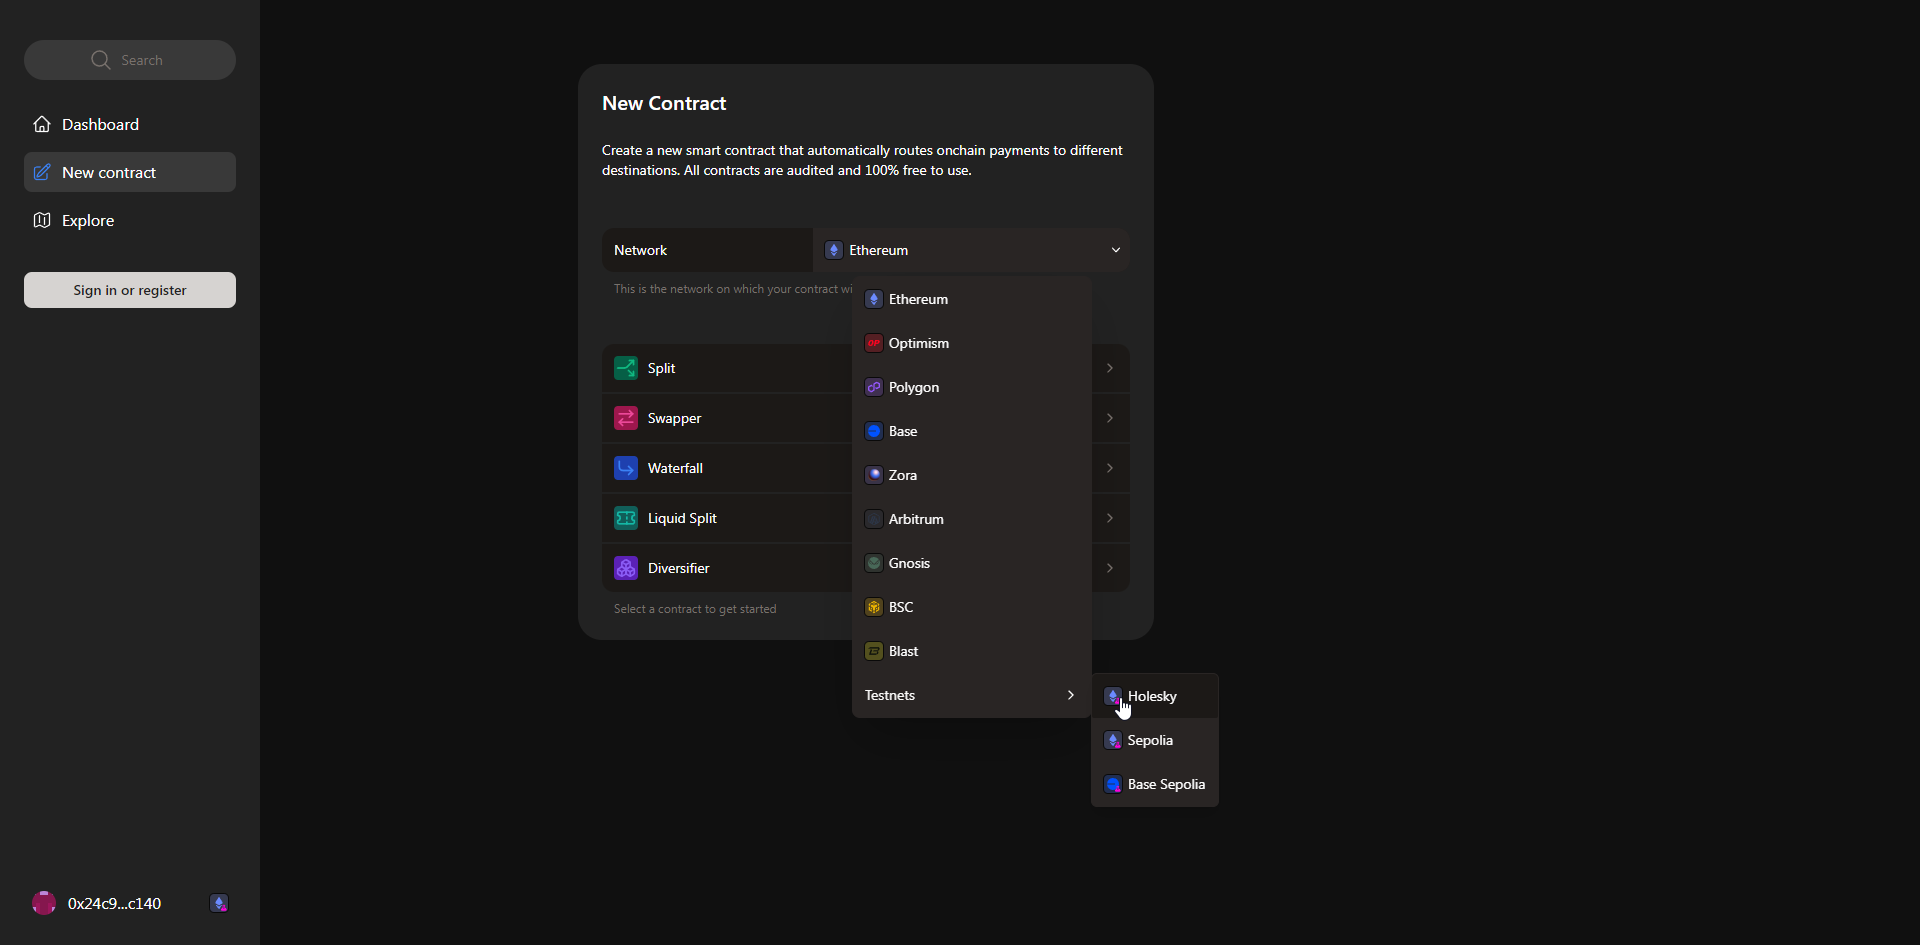
Select `Split` for the contract type.
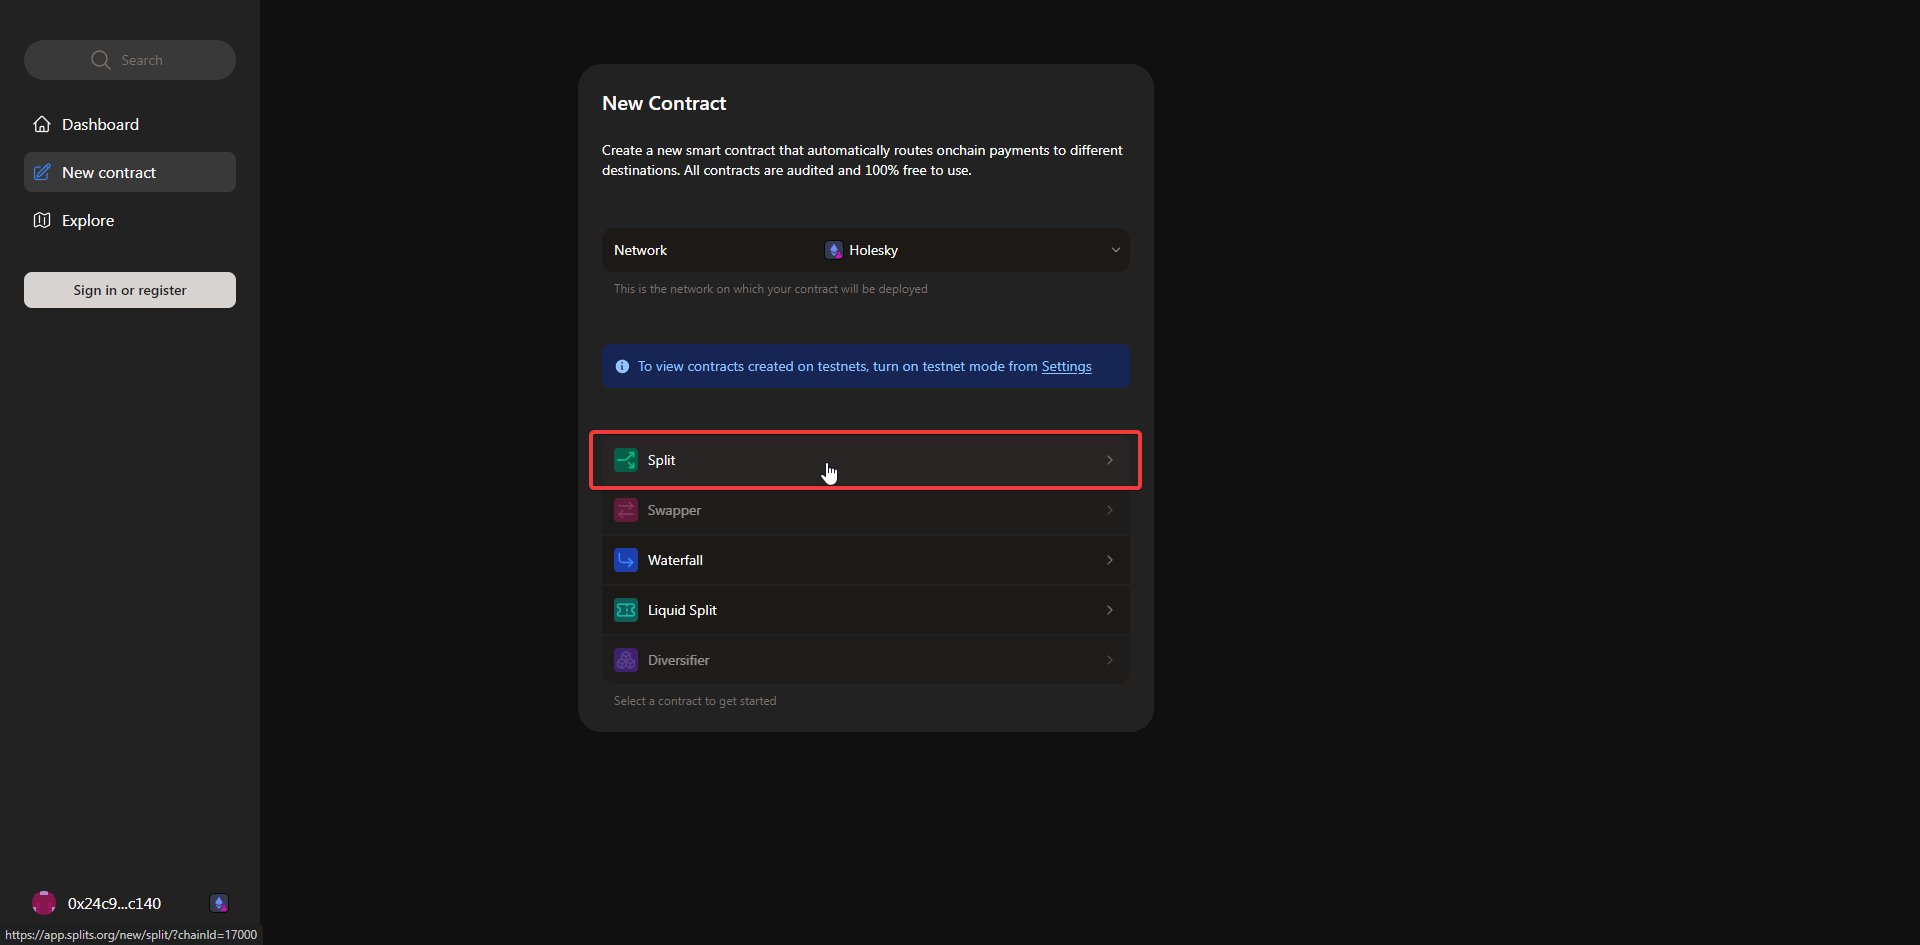
Add the reward addresses of all cluster members. Choose whether the contract is immutable (recommended option), whether to sponsor the maintainers of [splits.org](https://splits.org), and optionally whether to set a distribution bounty such that third parties could pay the gas costs of distributing the accrued rewards in exchange for a small fee.
:::tip
If your cluster would like to contribute a portion of its rewards to Obol protocol development, thereby earning [Obol Incentives](https://obol.org/incentives) as part of Lido's [integration of CSM](https://research.lido.fi/t/integrate-csm-into-the-decentralized-validator-vault/8621) into the DV Vault, you must add [protocoldevelopmentfee.obol.eth](https://etherscan.io/address/0xDe5aE4De36c966747Ea7DF13BD9589642e2B1D0d) as a recipient of 0.1% of the splitter contract. This will contribute 0.1% of rewards **and your CSM bond** to Obol protocol development. Future versions of CSM integrations will enable contributing exactly 1% of accruing CSM rewards
:::
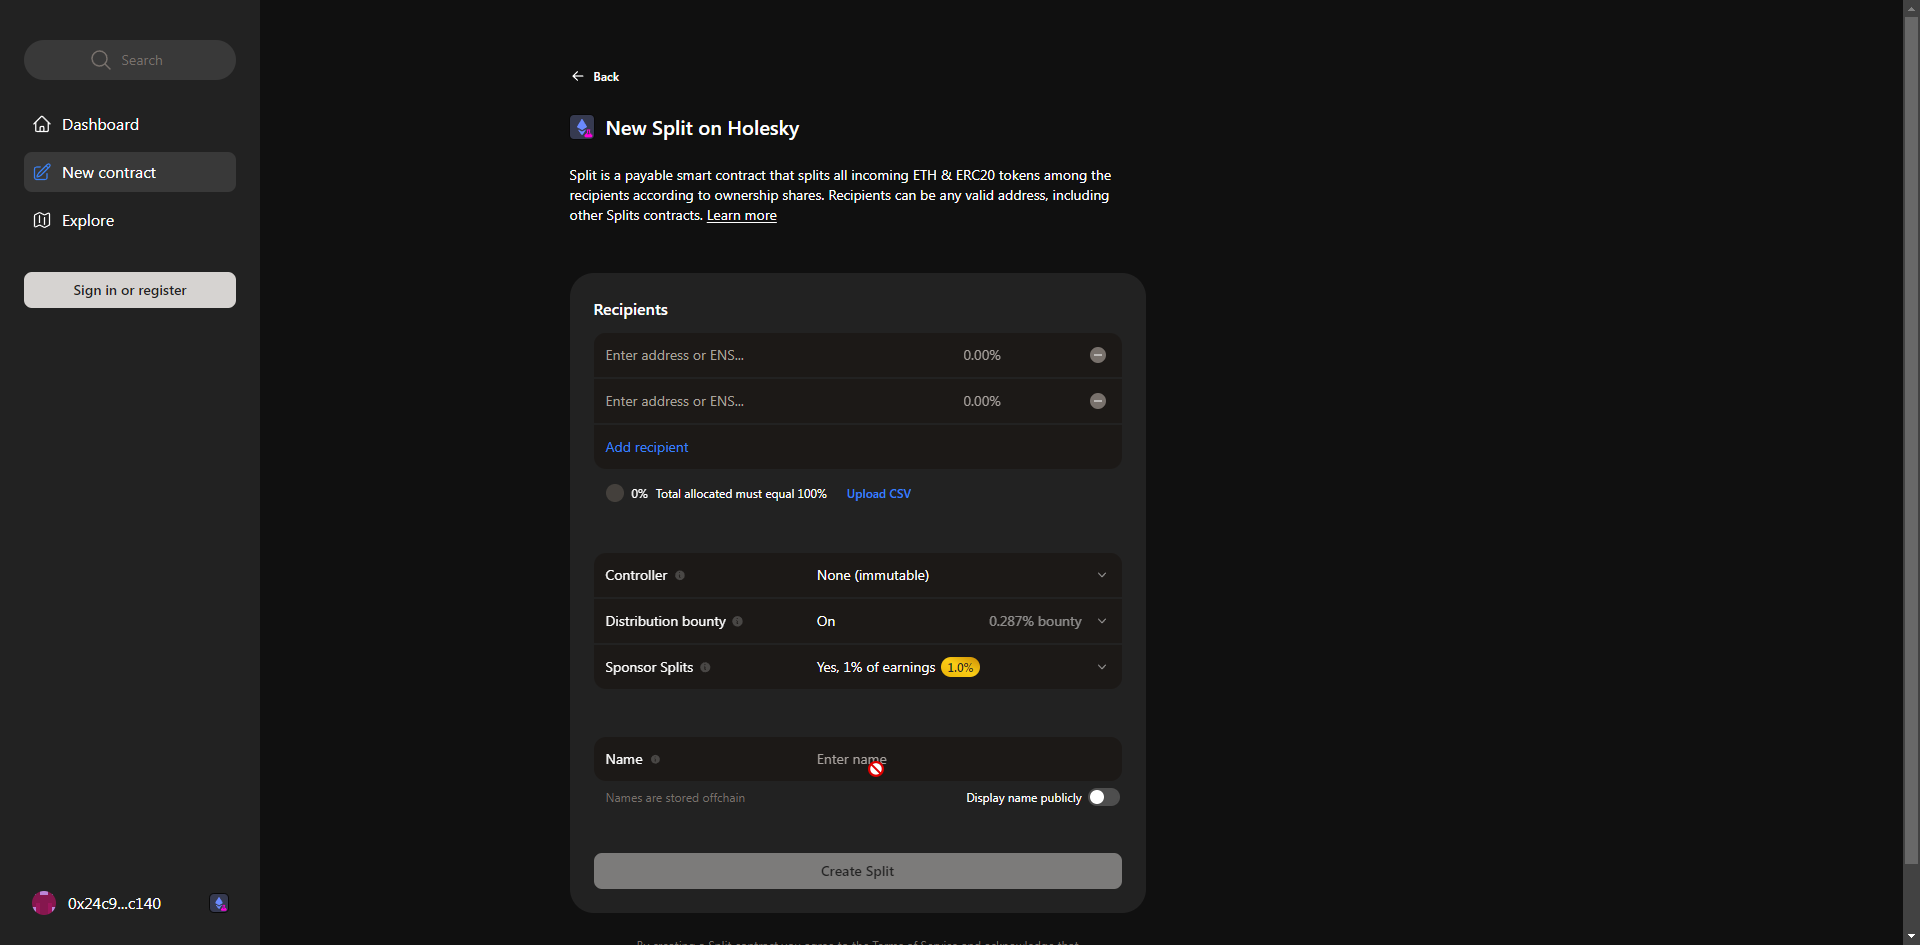
Finally, click the **Create Split** button, execute the transaction and share the created split contract with all cluster members for review.
## Part 2: Use the DV Launchpad + CLI to create the cluster keys
`Charon` is the middleware client that enables validators to be run by a group of independent node operators - a cluster or squad. A complete multi-container `Docker` setup including execution client, consensus client, validator client, MEV-Boost, the `Charon` client and monitoring tools can be found in [this repository](https://github.com/ObolNetwork/charon-distributed-validator-node).
### Step 1: Clone the repo
```sh
git clone https://github.com/ObolNetwork/charon-distributed-validator-node.git
```
### Step 2: Create ENR and Backup your Private Key
Enter the CDVN directory:
```sh
cd charon-distributed-validator-node
```
Use docker to create an ENR
```sh
docker run --rm -v "$(pwd):/opt/charon" obolnetwork/charon:v1.10.3 create enr
```
### Back up the private key located in `.charon/charon-enr-private-key`
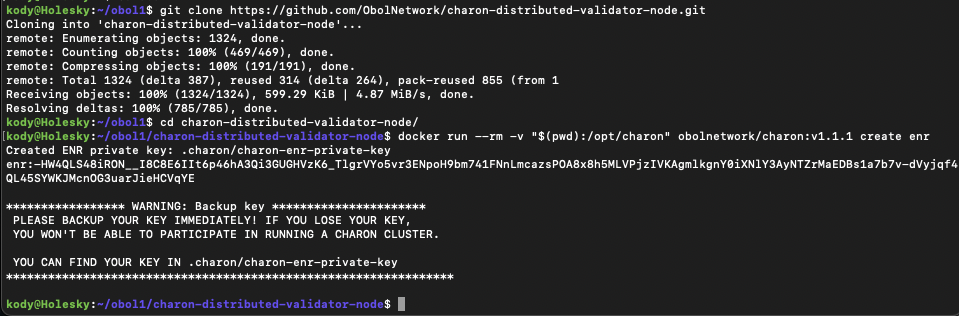
:::warning
What you see in the console starting with `enr:-` is the **public key** for your Charon node (known as an ENR). The **private key** is in the file `.charon/charon-enr-private-key`, be sure to back it up securely.
:::
### Step 3: Create the DV cluster configuration using the Launchpad
Obol has integrated the CSM details into the DV Launchpad. Choosing the "Lido CSM" withdrawal configuration allows you to create validator keys with Lido's required withdrawal and fee recipient addresses.
To start, the squad leader opens the [DV Launchpad](https://launchpad.obol.org), then connects their wallet and chooses **Create a cluster with a group**.
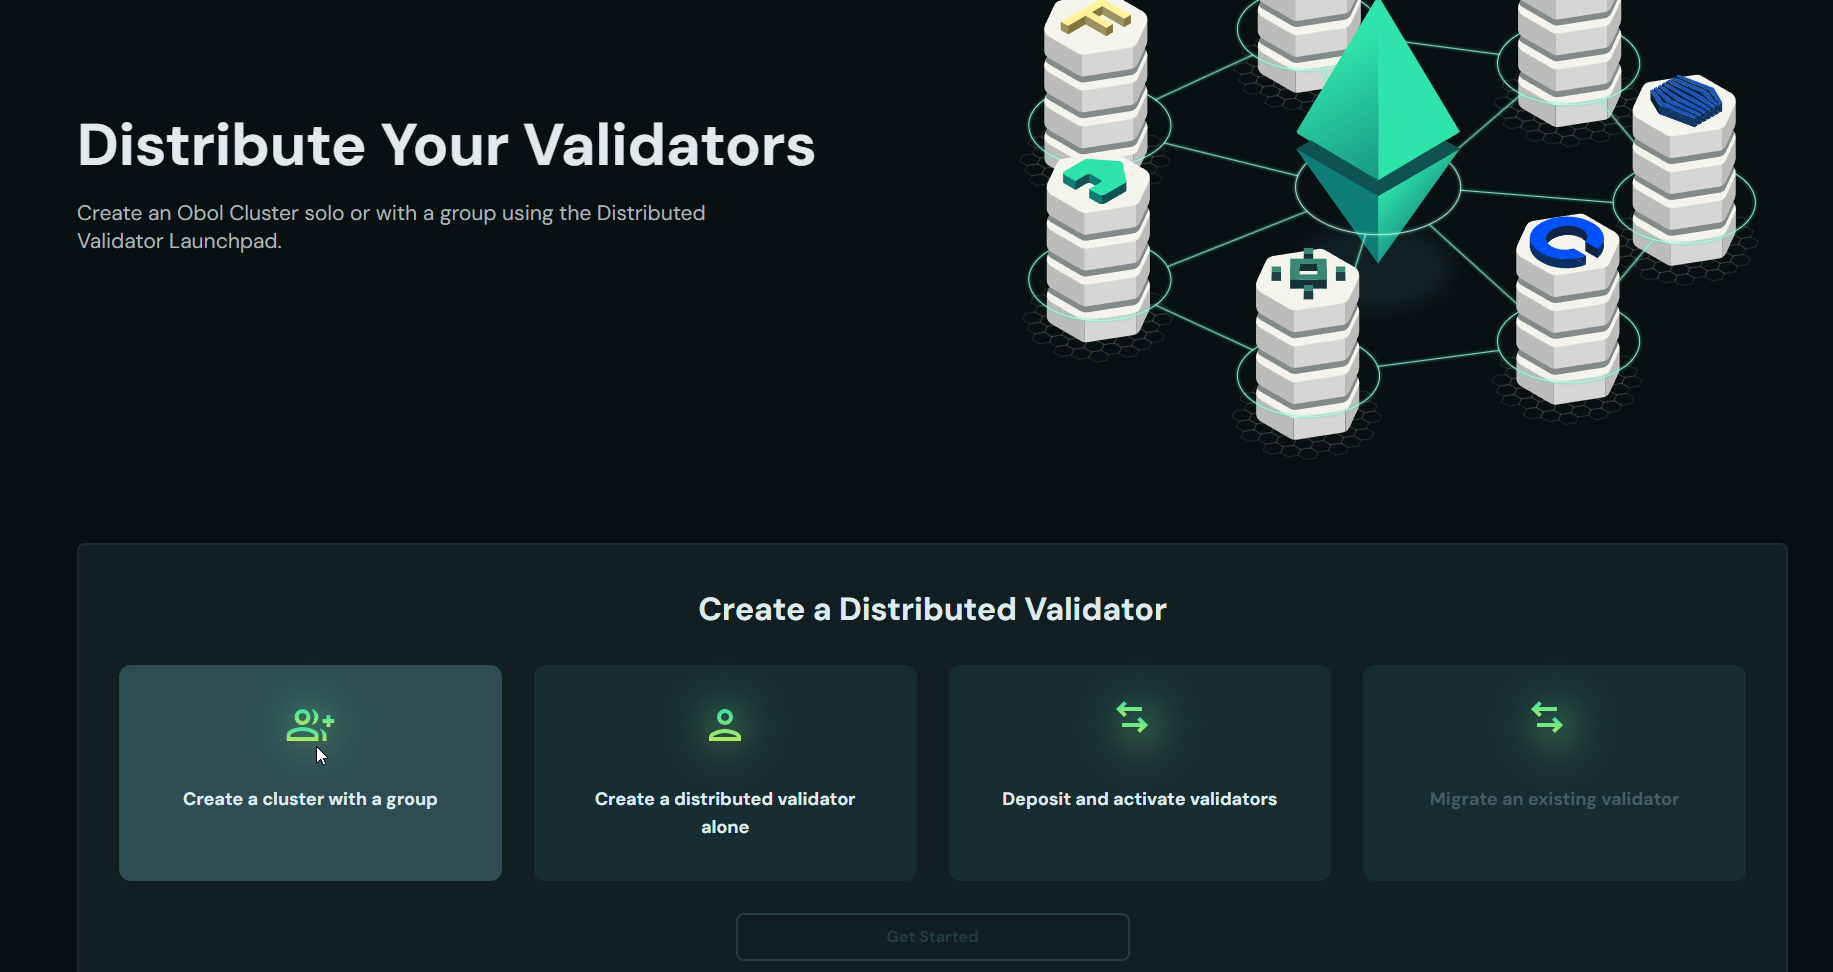
Then click **Get Started**.
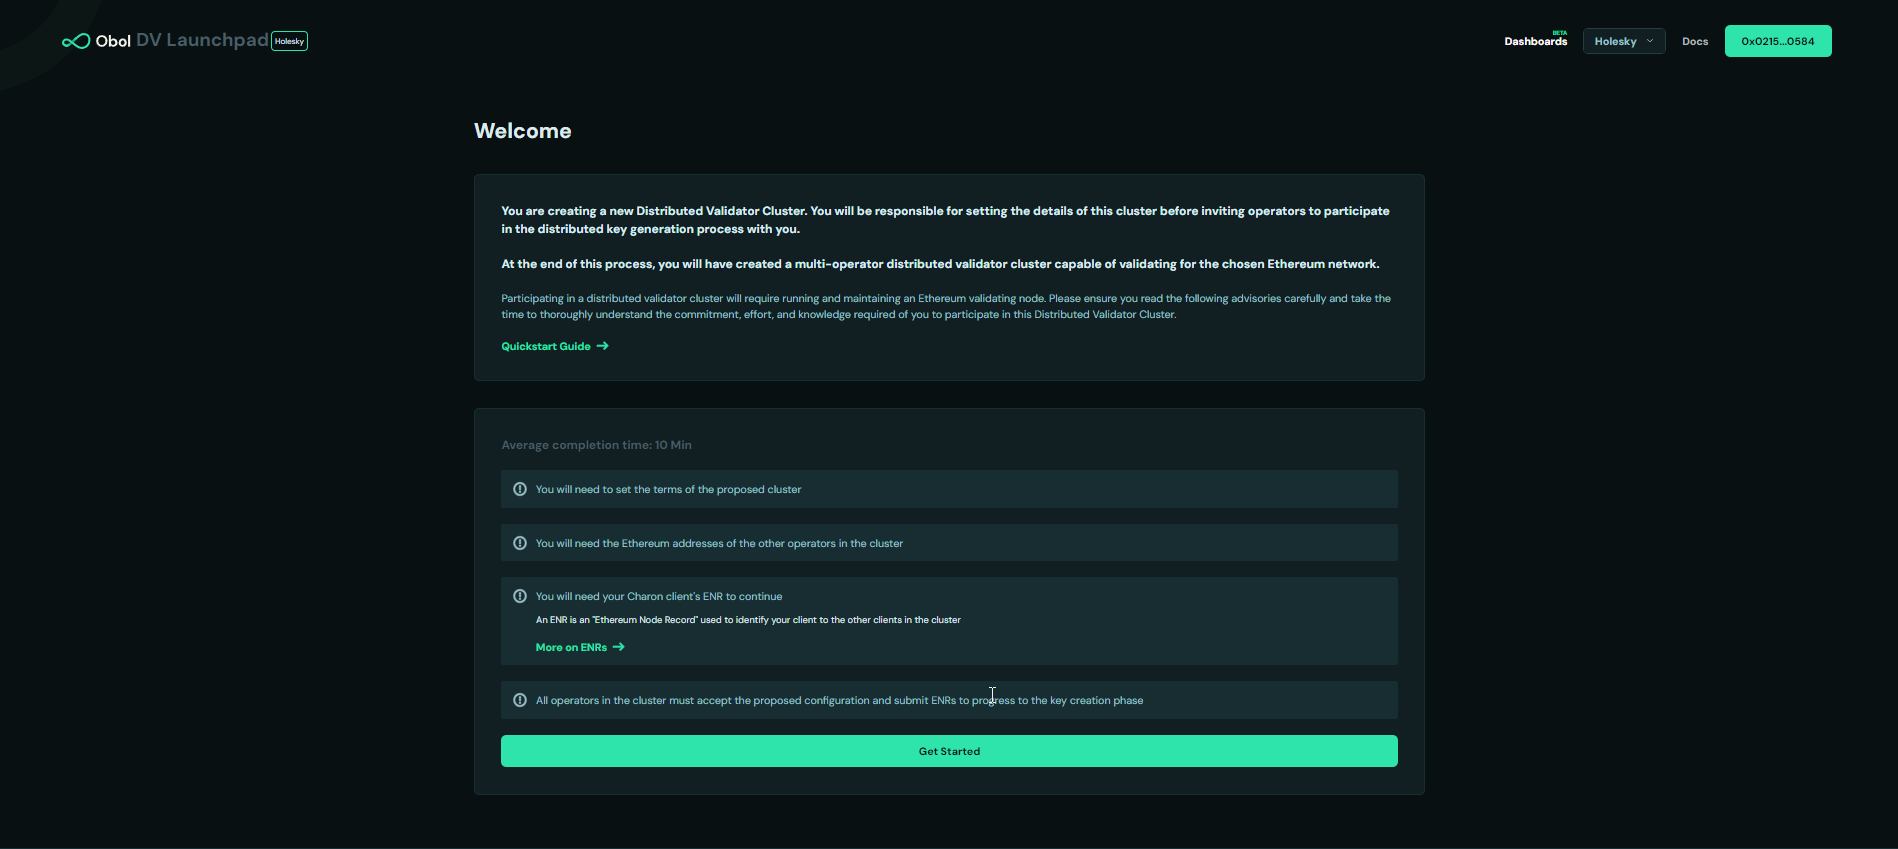
Accept all the necessary advisories and sign to confirm.
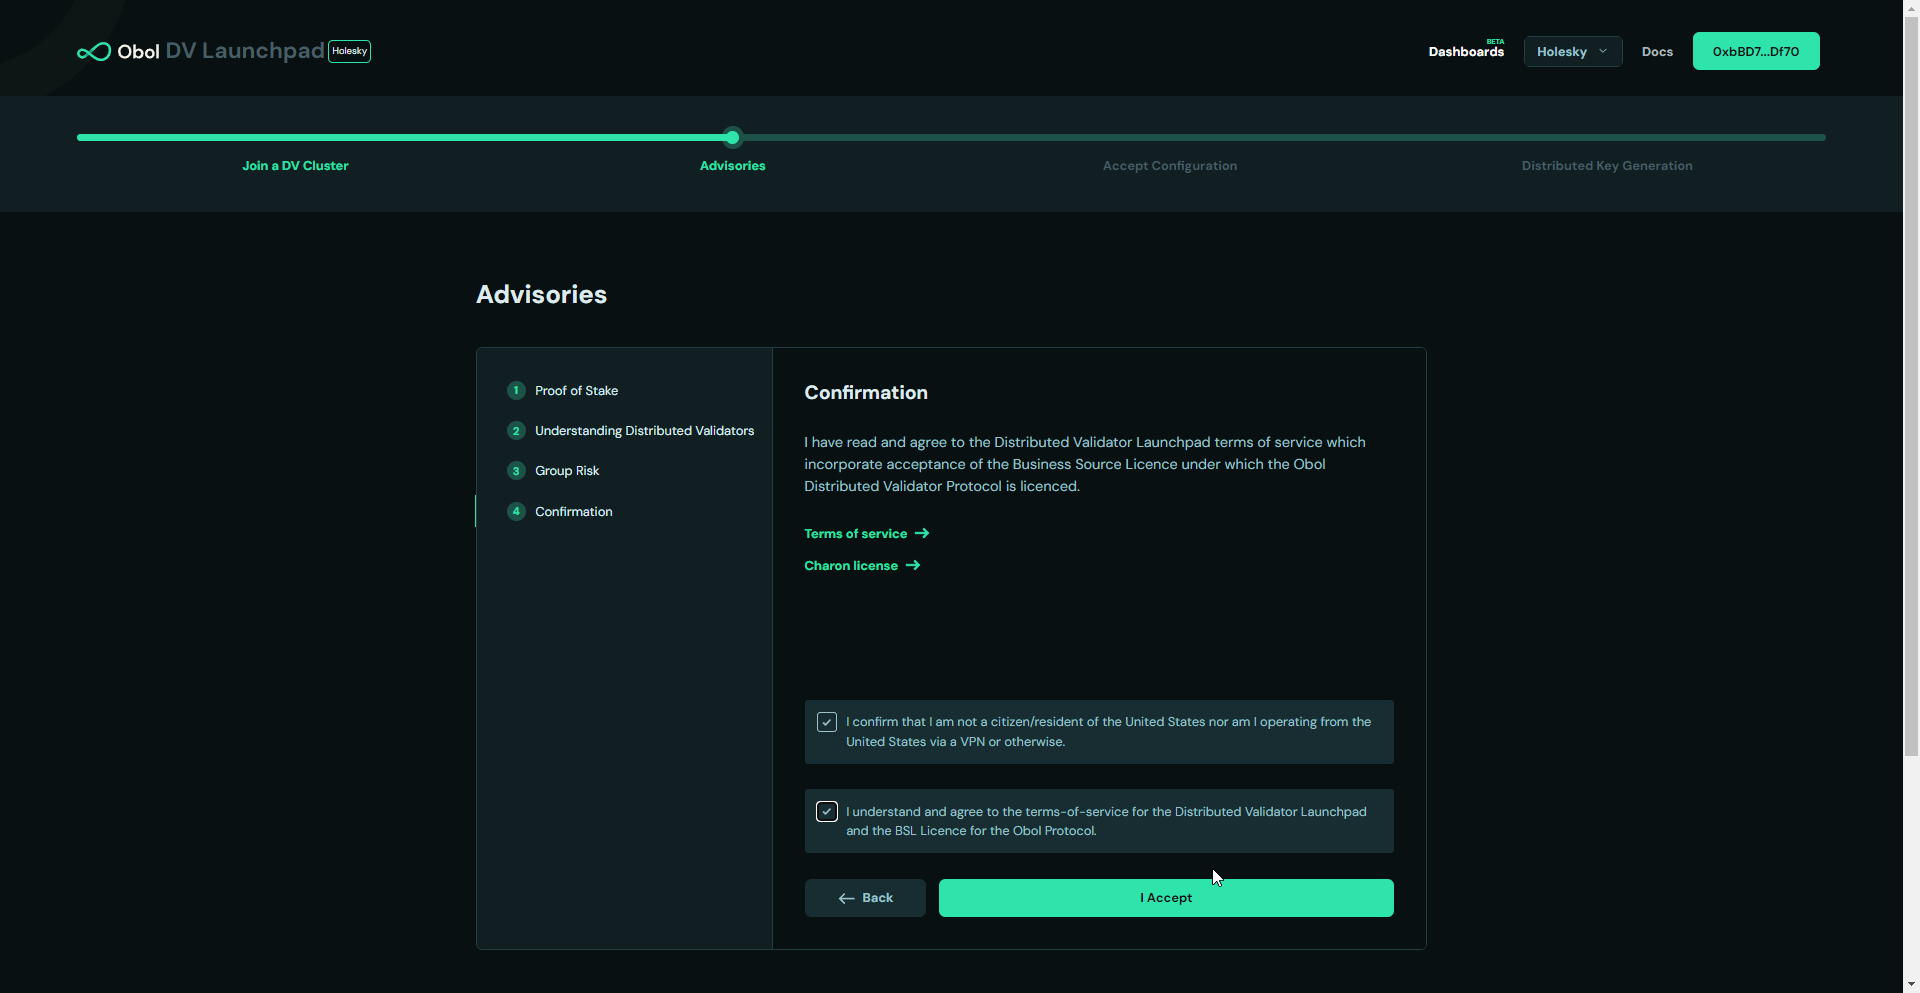
Cluster configuration begins next. First, select the cluster name and size, then enter all cluster members signer addresses.
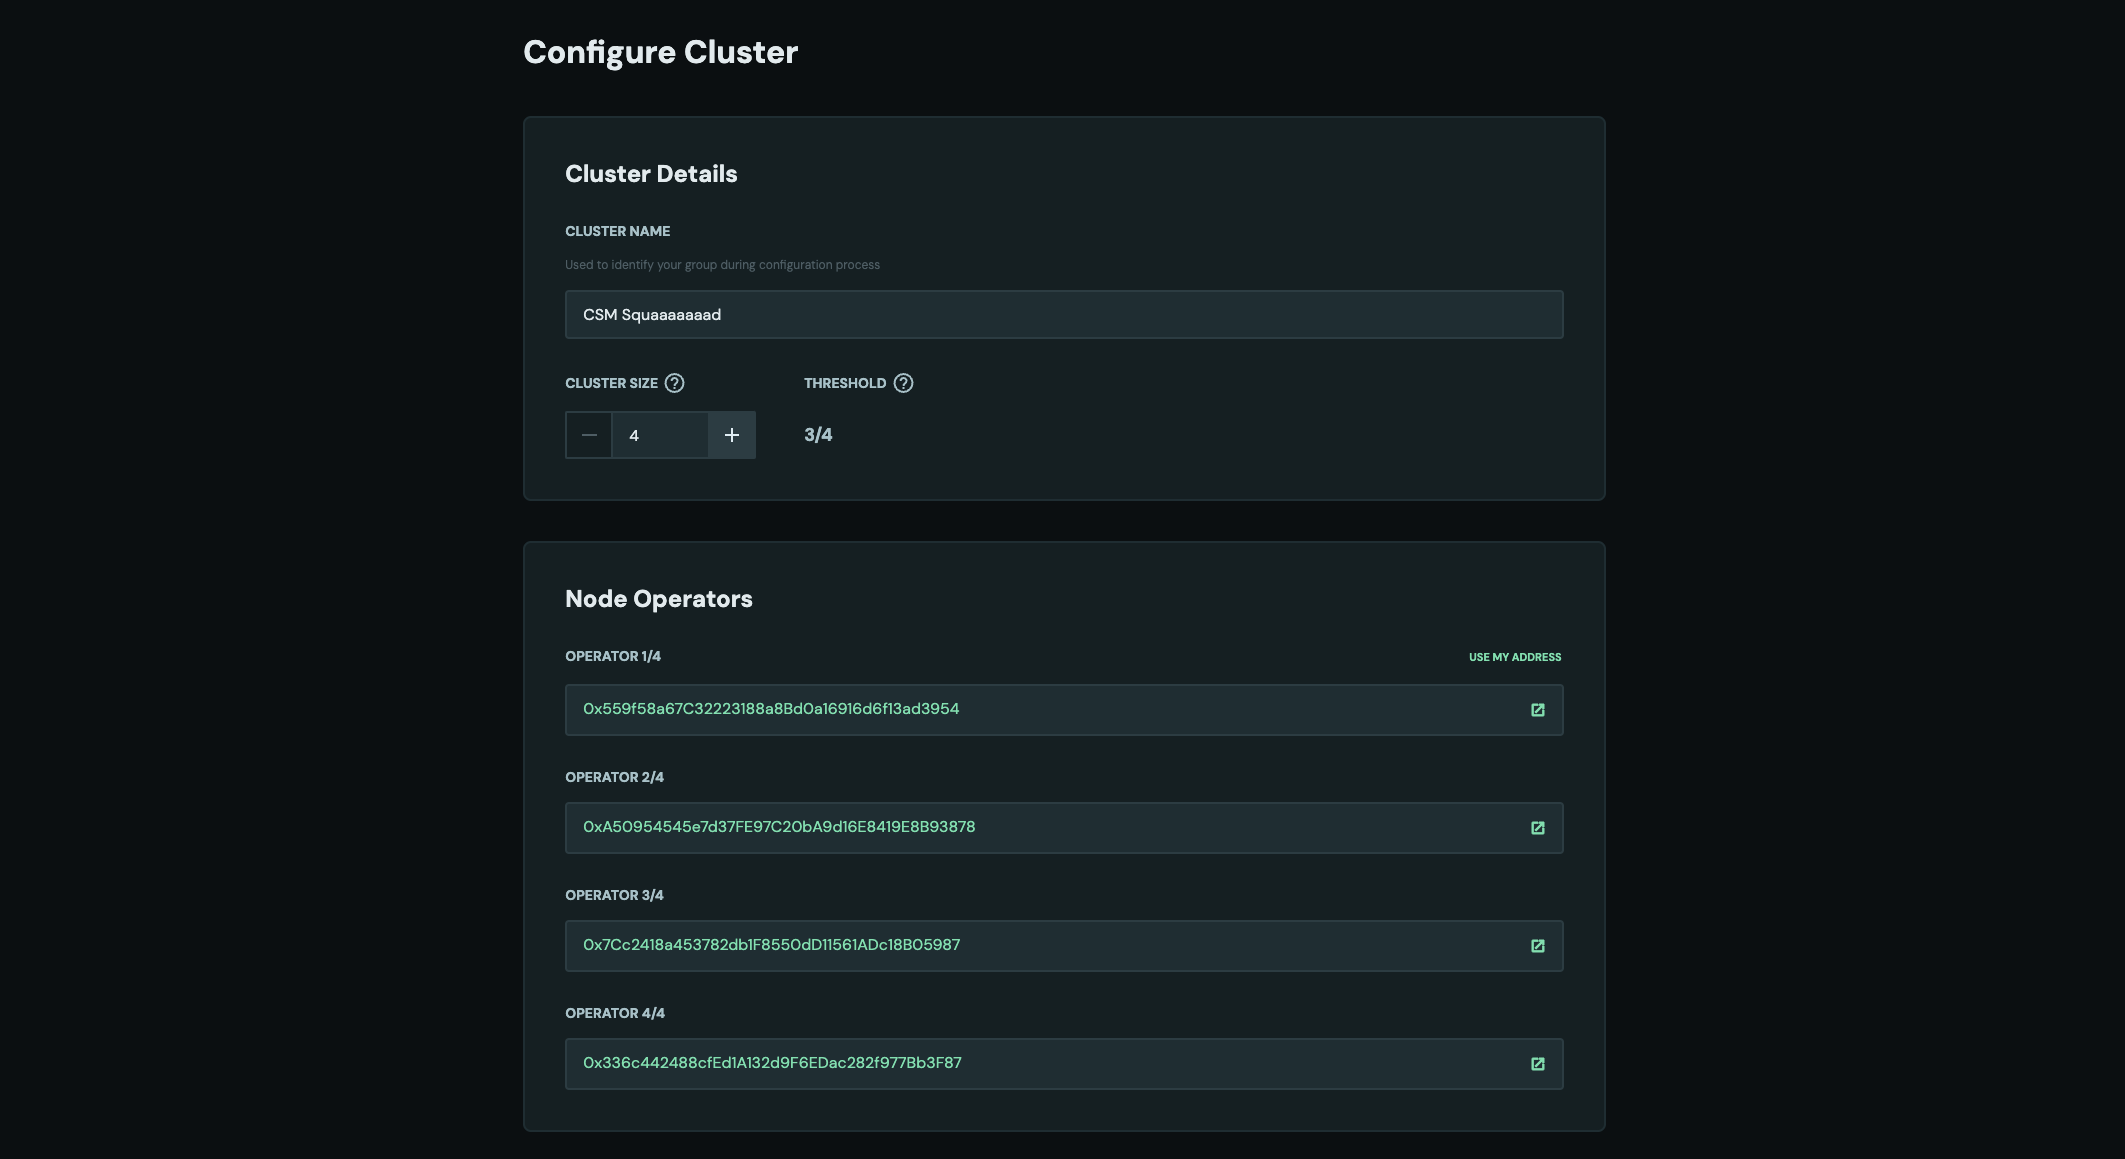
* Select the number of validators to create.
* (If the cluster creator is taking part in the cluster) Enter your Charon node's ENR which was generated during [step 2](lido-csm.mdx#step-2-create-enr-and-backup-your-private-key) above.
* In the **Withdrawal Configuration** field, select `LIDO CSM`. This will automatically fill the required Withdrawal Address and Fee Recipient Addresss per [Lido's Documentation](https://operatorportal.lido.fi/modules/community-staking-module#block-d8e94f551b2e47029a54e6cedea914a7).
* Finally, click on the **Create Cluster Configuration** button.
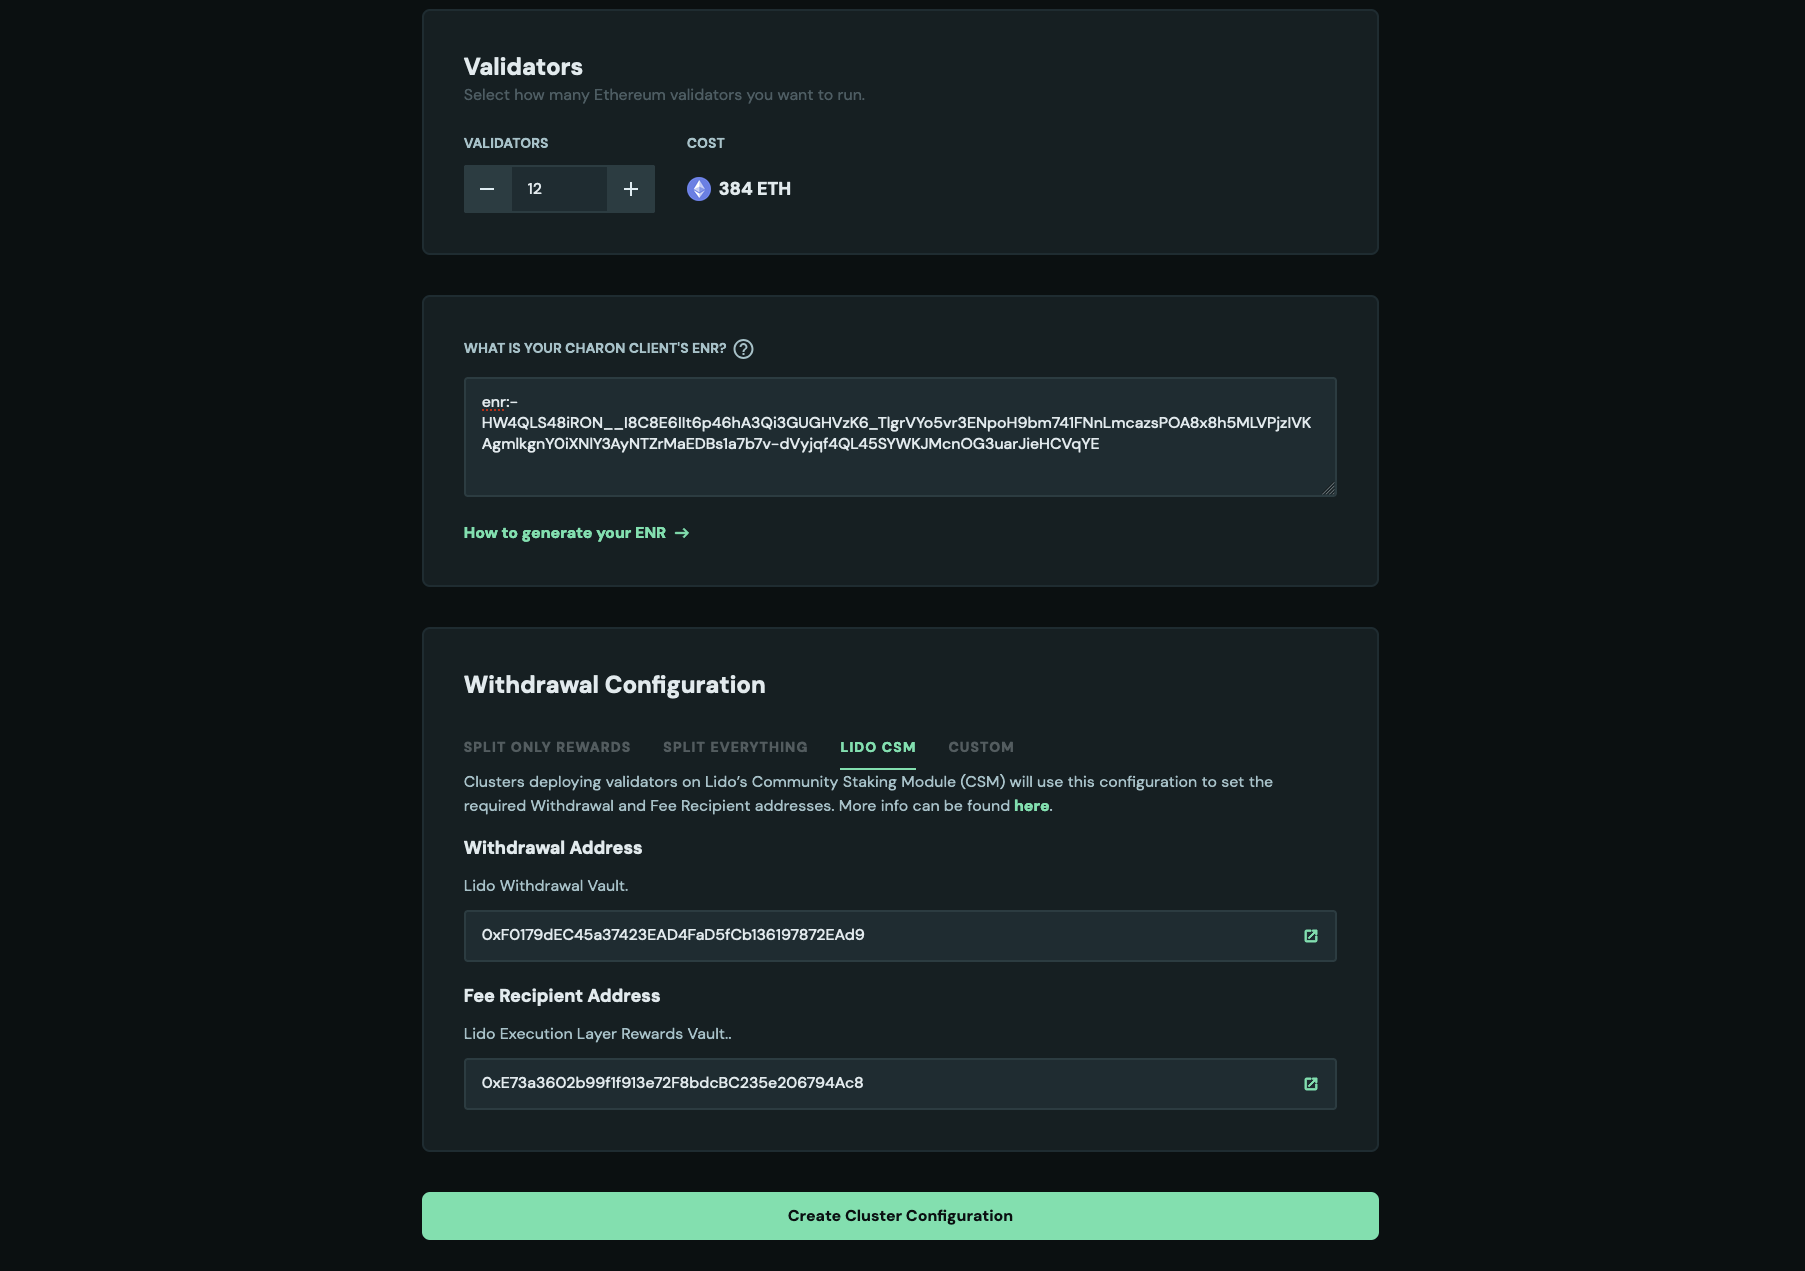
Lastly, share the cluster invite link with the other cluster members.
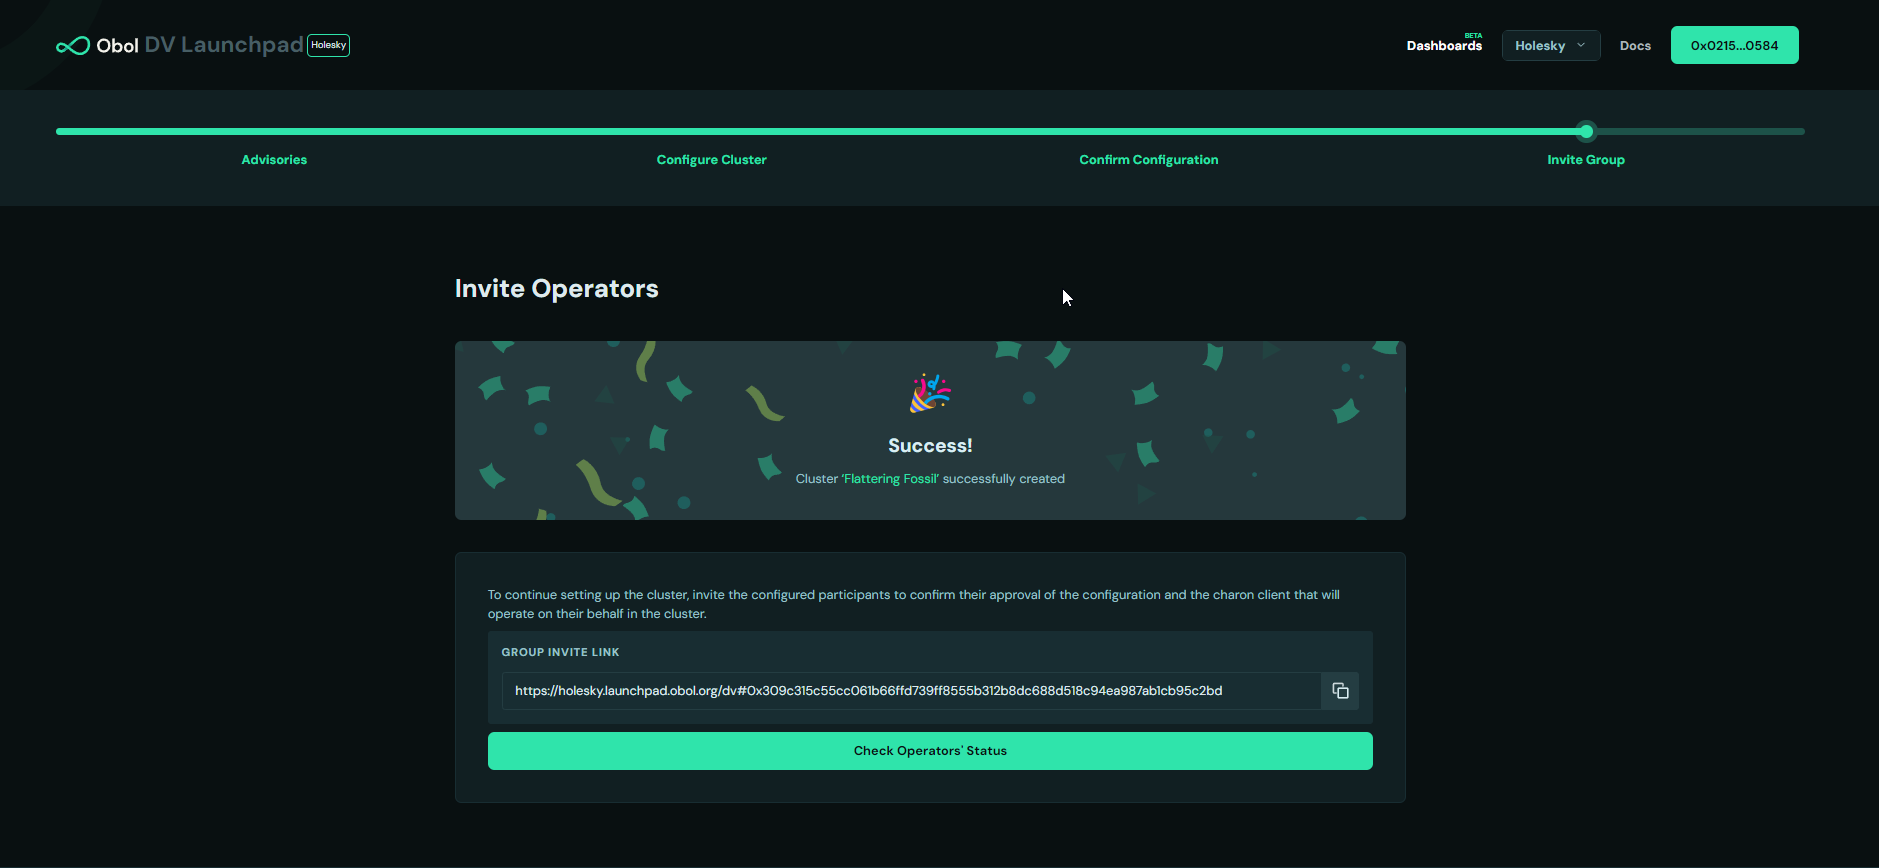
### Step 4: Distributed Key Generation (DKG)
All squad members need to open the cluster invitation link, connect their wallet, accept all necessary advisories, and to verify the cluster configuration is correct with a signature. Each squad member will also need to upload and sign an ENR to represent their charon client, so see [steps 1](lido-csm.mdx#step-1-clone-the-repo) and [2](lido-csm.mdx#step-2-create-enr-and-backup-your-private-key) above.
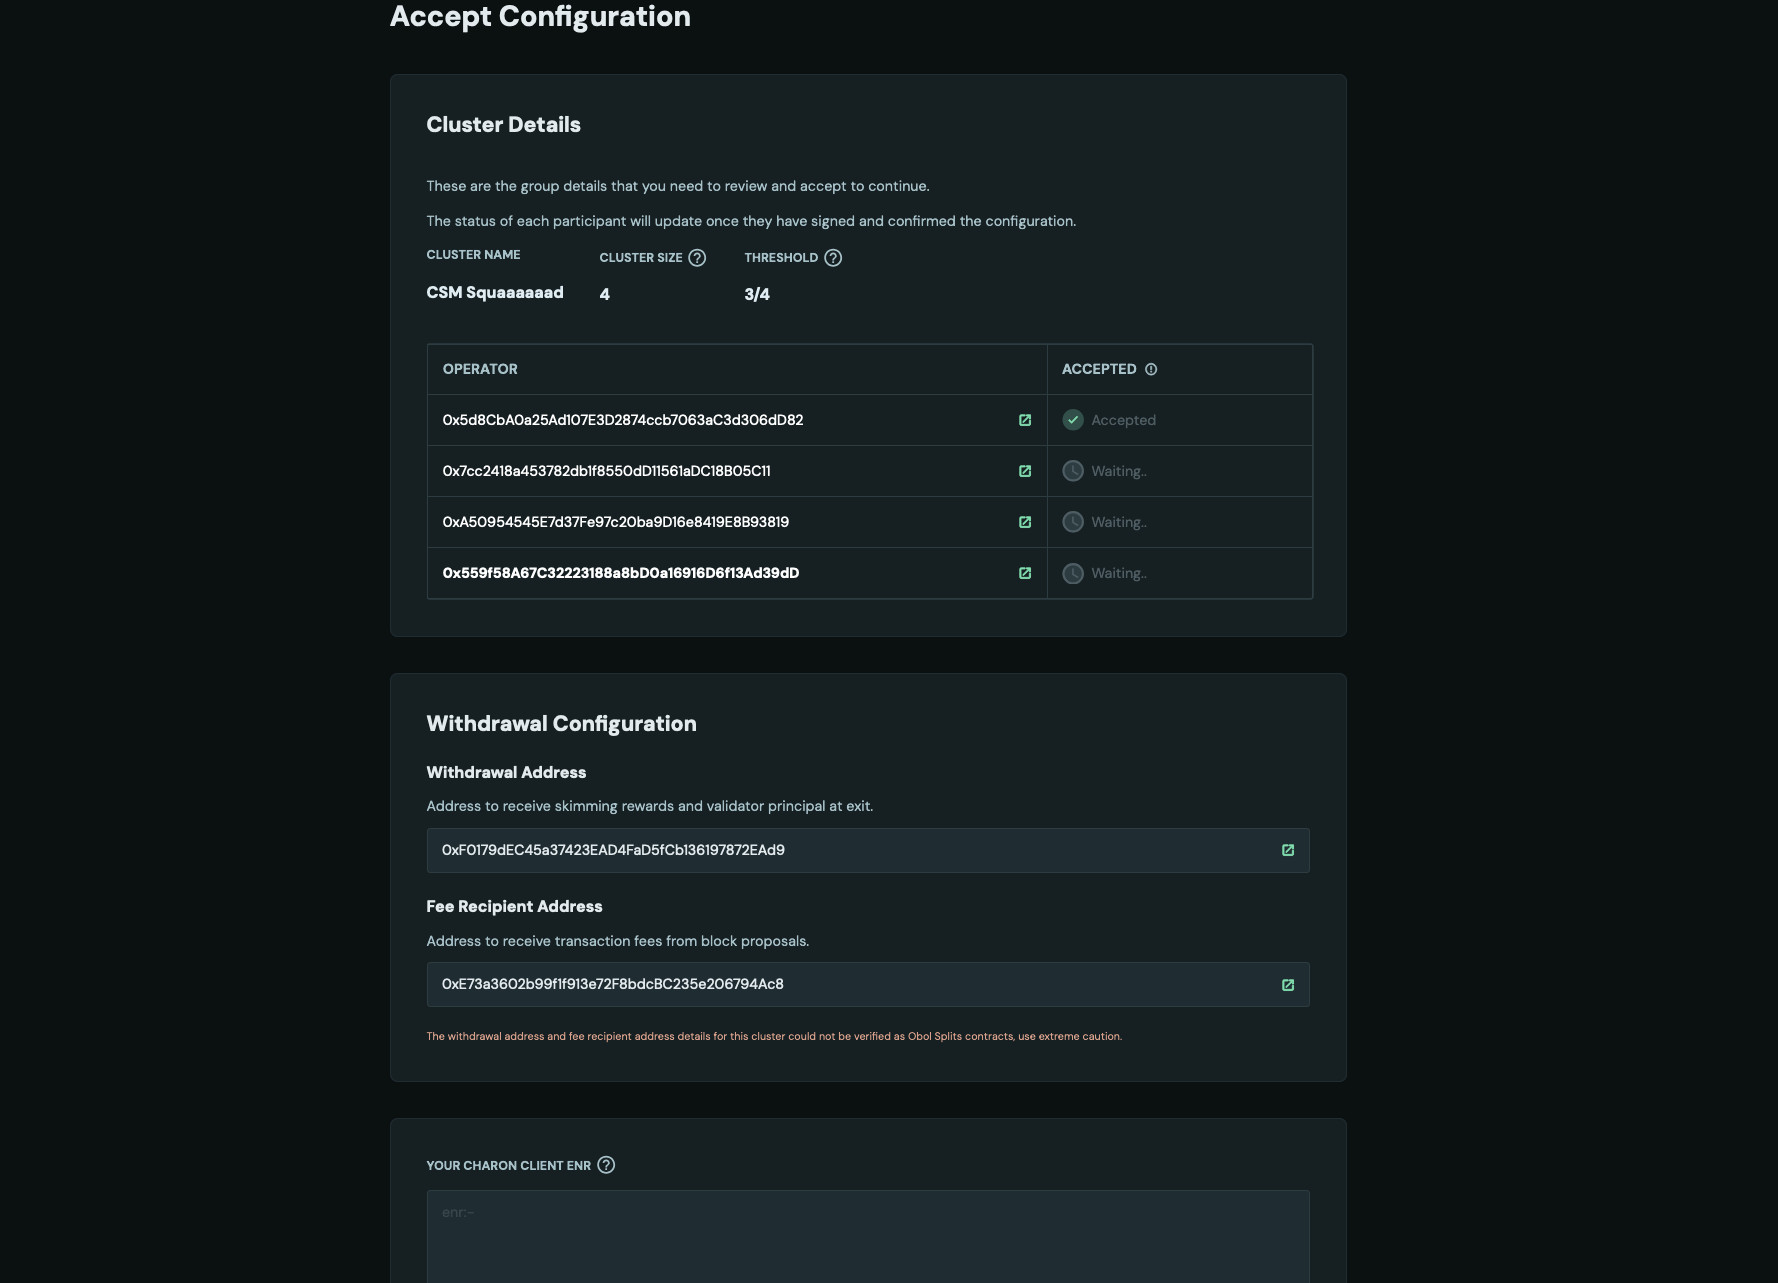
Once all members confirm the configuration they will see the **Continue** button.
On the next page, they will find a CLI command which is used to begin the Distributed Key Generation (DKG) ceremony. All members need to synchronously complete this step.
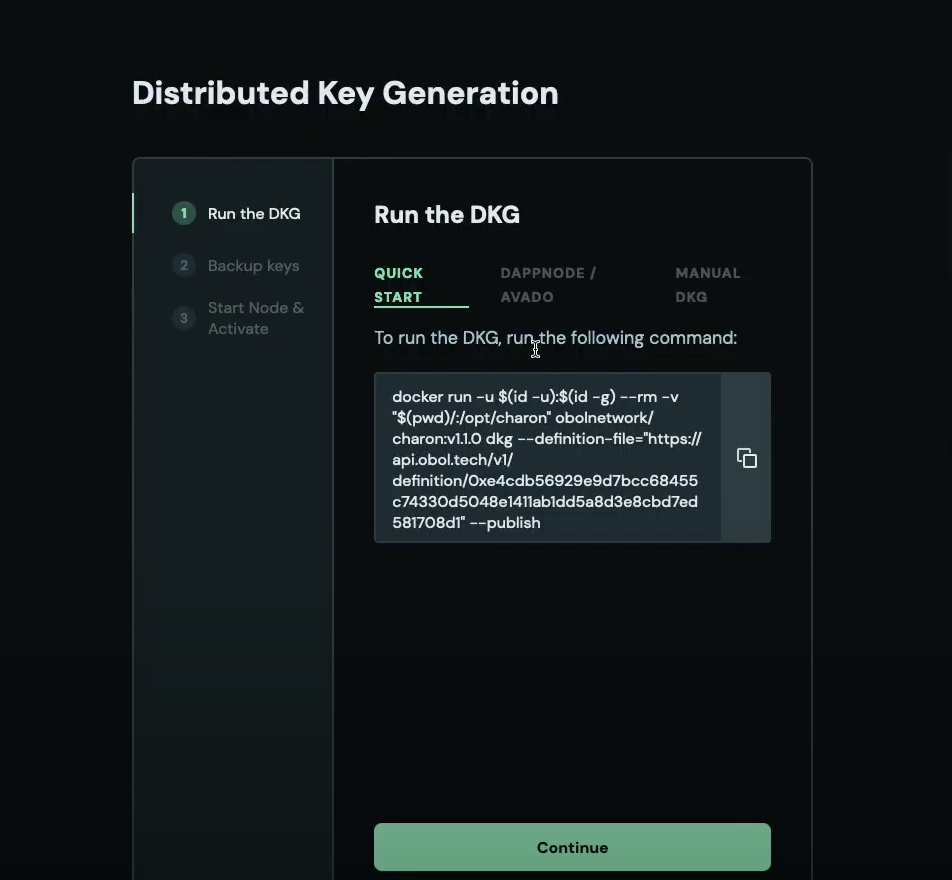
:::tip
Go back to the terminal and make sure you're in the `charon-distributed-validator-node` directory before running the DKG command:
```sh
pwd
```
If you are not, navigate to it using the `cd` command.
:::
Paste the DKG command into your terminal and wait for all the other squad members to connect and complete the DKG ceremony.
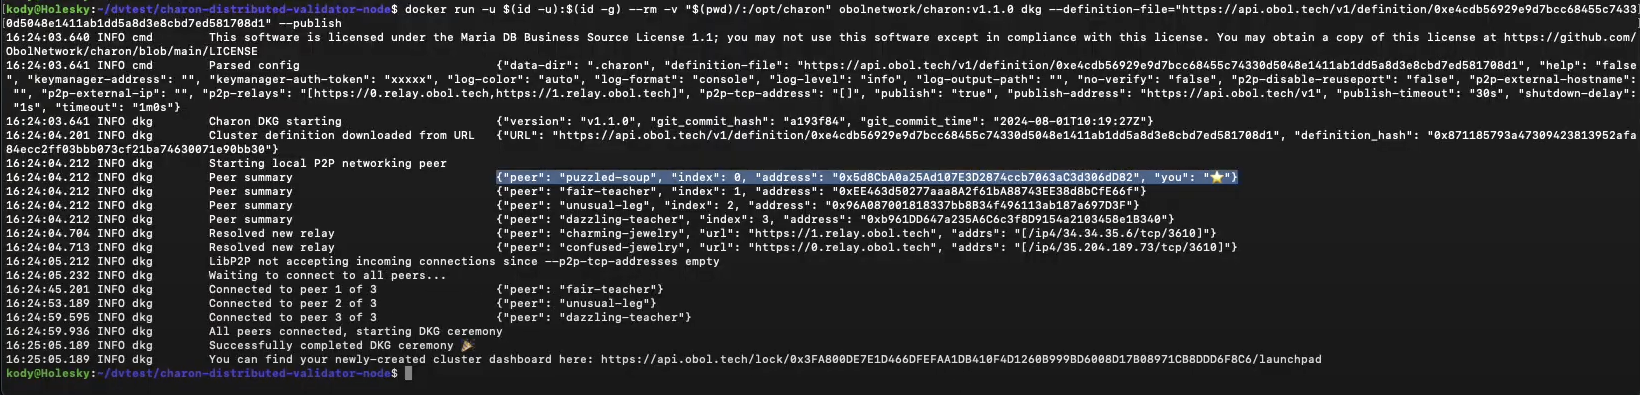
New files were generated: `cluster-lock.json`, `deposit-data.json`, `validator_keys` are all found in the `.charon` folder (hidden by default). This contains each operator's partial key signatures for the validators.
:::danger
At this point, **each operator must make a backup of the `.charon` folder and keep it safe, as validator keys cannot be recreated if lost**.
:::
### Step 5: Create a `.env` file for Mainnet
Copy and rename the `.env.sample.mainnet` file to `.env`
```sh
cp .env.sample.mainnet .env
```
Open the `.env` file using your favorite editor:
```sh
nano .env
```
Uncomment and set `BUILDER_API_ENABLED=true`.
Uncomment `MEVBOOST_RELAYS=` and set it to the URL of at least one of Lido's approved MEV relays [here](https://enchanted-direction-844.notion.site/6d369eb33f664487800b0dedfe32171e?v=8e5d1f1276b0493caea8a2aa1517ed65). Multiple relays must be separated by a comma. Consult our [deployment best practices](../prepare/deployment-best-practices.md#mev-boost-relays) for further info on MEV relay selection.
### Step 6: Starting the Node
Each cluster member should start the node with the following command:
```sh
docker compose up -d
```
At this point, execution and consensus clients should start syncing. Charon and the validator client should start waiting for the consensus client to be synced and the validator to be activated.
## Part 3: Upload the public keys and deposit to Lido CSM
CSM V3 introduces a new operator type, **Identified DVT Cluster (IDVTC)**, that is purpose-built for distributed validator clusters. An IDVTC cluster must have exactly four operators (no more, no less), and every operator must already hold the [Identified Community Staker (ICS)](https://blog.lido.fi/unlock-exclusive-benefits-as-an-identified-community-staker/) operator type. See [Lido's IDVTC description page](https://csm.lido.fi/type/idvtc-description) for full eligibility and rules.
Choose the tab below that matches how your cluster will deposit. Both flows continue with the shared [Create the Node Operator](#create-the-node-operator) section once any pre-deposit steps are complete.
A single squad member who holds ICS should be the one to create the node through the CSM widget. Doing so ensures the cluster's validators receive [ICS benefits](https://blog.lido.fi/unlock-exclusive-benefits-as-an-identified-community-staker/).
There are no additional pre-deposit steps for ICS clusters. Proceed to [Create the Node Operator](#create-the-node-operator) below.
Before depositing, your cluster must be approved as an Identified DVT Cluster. The squad leader submits a single application on behalf of all four operators.
:::info
The squad leader connects to the Lido CSM UI using the **SAFE multisig** wallet (created in [Part 1](#deploy-the-safe)) via WalletConnect. WalletConnect sessions can drop if the initiator disconnects, so **keep the browser tab and WalletConnect session open** while you collect the threshold of SAFE signatures needed to connect.
:::
### Step 1: Open the IDVTC Application Form
The squad leader navigates to [csm.lido.fi](https://csm.lido.fi/), connects the SAFE multisig via WalletConnect, then in the left sidebar clicks **Operator Type** followed by **Apply for IDVTC**. You can also navigate directly to [csm.lido.fi/type/idvtc-apply](https://csm.lido.fi/type/idvtc-apply).
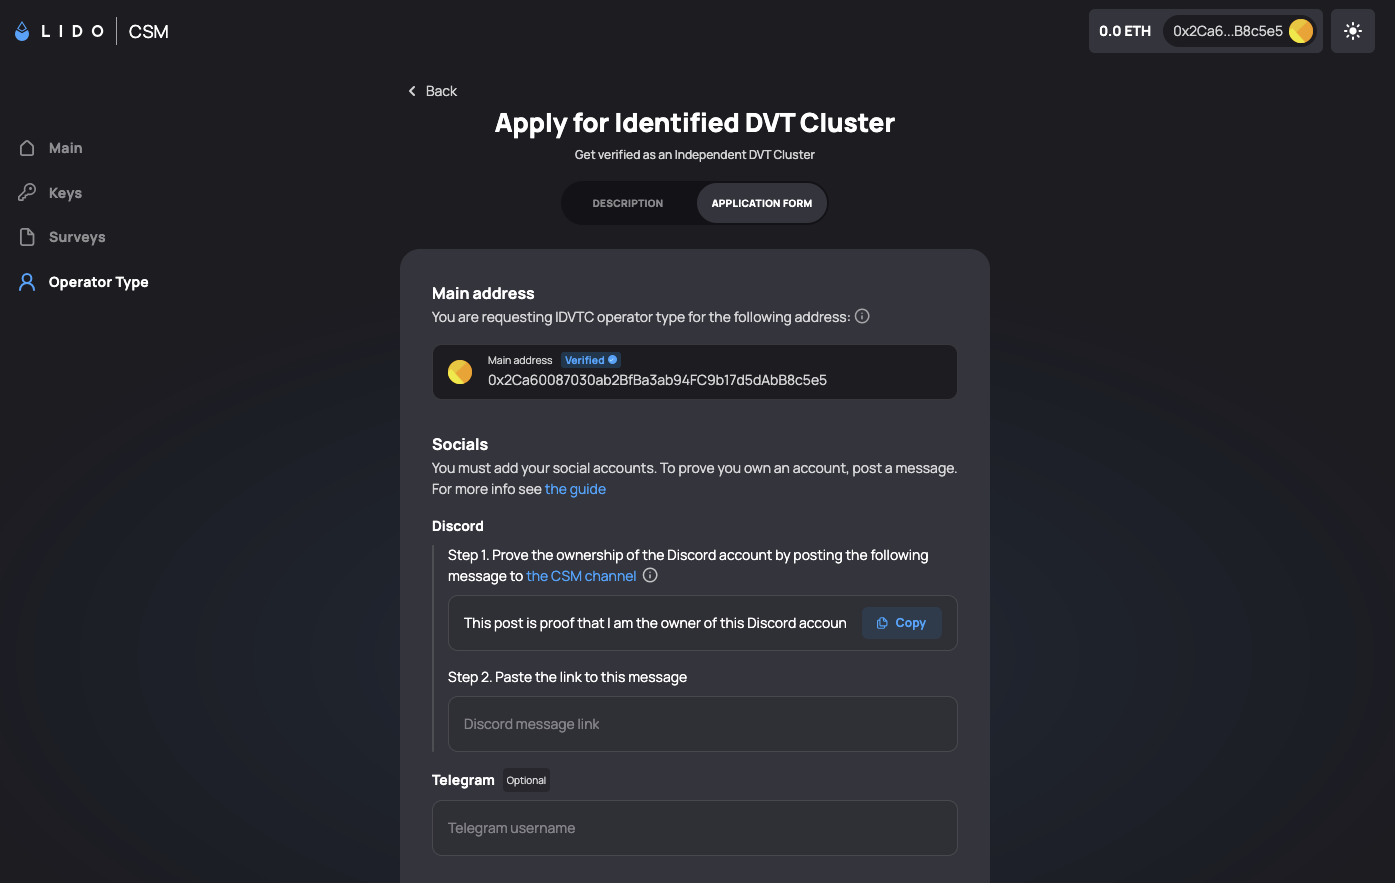
The **Main address** shown on the form will be the connected SAFE multisig.
### Step 2: Prove Discord Ownership
1. In the **Discord** section, click **Copy** to copy the generated proof message.
2. Post the message in the [Lido CSM Discord channel](https://discord.gg/lido). The application form links directly to the correct channel.
3. Copy the link to your posted message and paste it into the **Discord message link** field.
Optionally, add a Telegram username in the **Telegram** field for follow-up communication from the Lido team.
### Step 3: Verify the Four Cluster Member Addresses
This section requires coordination with your three teammates. Each cluster member must prove ownership of their ICS-verified Ethereum address by signing a message on Etherscan.
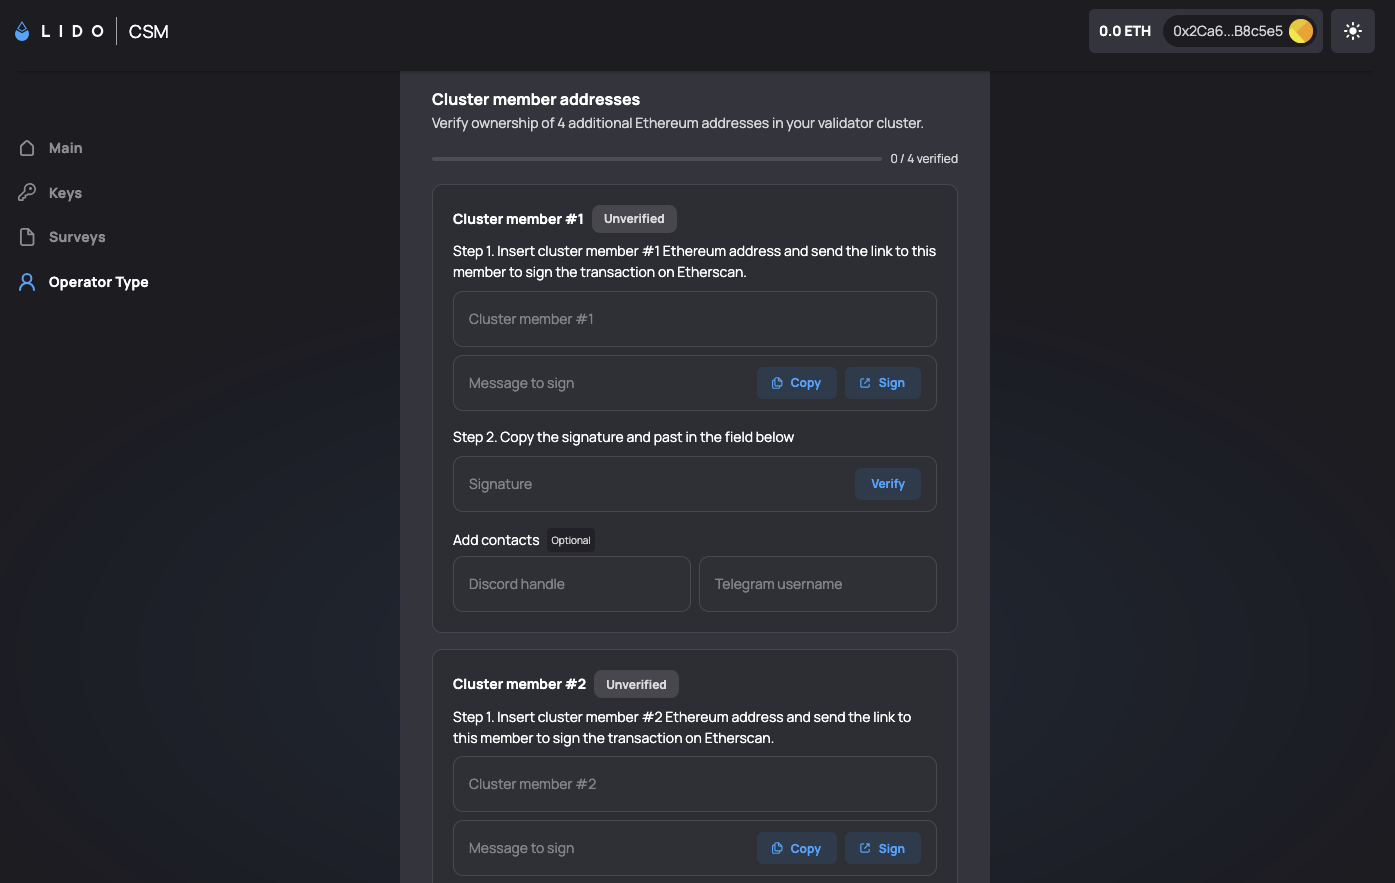
Starting with **Cluster member #1** (typically the squad leader), and then for each remaining member:
1. Enter the member's ICS-verified Ethereum address into the **Cluster member #N** field. The form generates a unique **Message to sign** for that address.
2. Click **Sign** next to the message. This opens Etherscan's [Verified Signatures](https://etherscan.io/verifiedsignatures) tool in a new tab.
3. The member whose address is being verified connects their wallet to Etherscan, pastes the generated message into the **Message** field, clicks **Sign Message**, and then **Publish**.
4. Etherscan returns a signature. Paste the signature into the **Signature** field in the application form and click **Verify**.
5. When the signature is valid, the member's status flips from **Unverified** to **Verified**.
Repeat for cluster members #2, #3, and #4.
:::info
The squad leader does not need to be physically co-located with the other members. Send each teammate the generated message and the Etherscan signing link, then collect the resulting signature from them to paste into the form on their behalf.
:::
### Step 4: Submit the Application
Once all four cluster members show as **Verified**, tick the confirmation checkbox at the bottom of the form, then click **Submit application**.
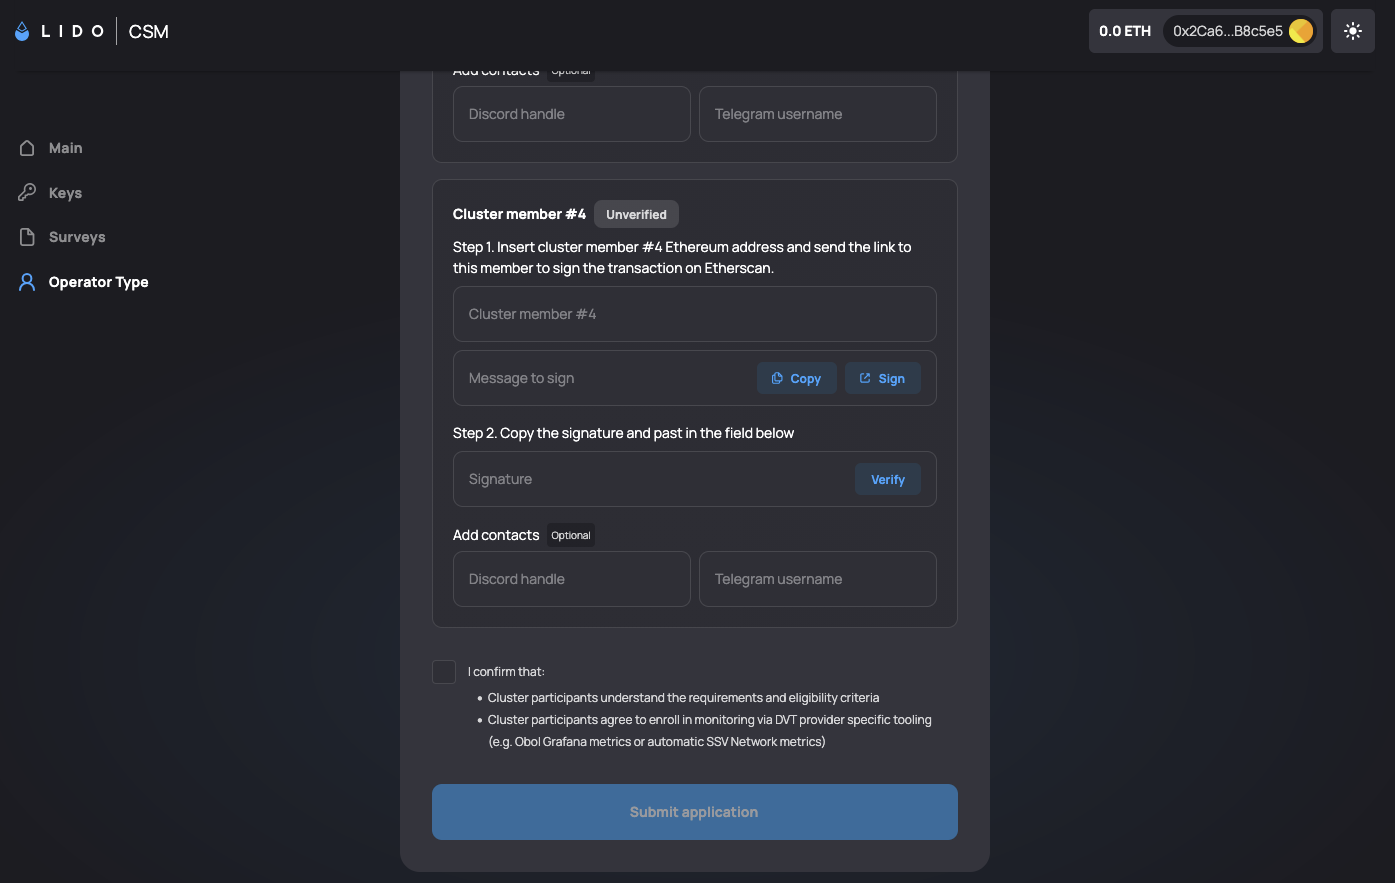
:::warning
At time of writing, the Lido IDVTC application review and approval flow has not yet been finalized publicly. Once Lido publishes the post-submission process (including how applicants are notified of approval and how to proceed with depositing as an IDVTC), this section will be updated.
:::
Once your IDVTC application is approved, proceed to [Create the Node Operator](#create-the-node-operator) below.
### Create the Node Operator
An ICS member of the cluster heads to [csm.lido.fi](https://csm.lido.fi/) and connects their wallet.
Click the **Create Node Operator** button.
* Paste the contents of the `deposit-data.json` file into the **Upload deposit data** field. The member submitting the transaction should have enough ETH/stETH/wstETH to cover the bond.
* Expand the **Specify custom addresses** section.
* Set the **Reward Address** field to the `Split` contract address and the **Manager Address** field to the `Safe` wallet address. (These were created previously in [part 1](lido-csm.mdx#part-1-creating-the-cluster-safe--splitter-contract))
* Verify that the **Extended** box is outlined. This ensures that the `Safe` address has the ability to change the reward address if necessary.
* Check that the correct addresses are set and click the **Create Node Operator** button.
Sign the transaction. The cluster is ready for deposit from Lido CSM. At this point, your job is finished.
:::warning
When claiming your cluster's rewards, **be sure to claim in wstETH**. Claiming native ETH will result in loss of funds. Rebasing tokens like stETH may not receive the incremental yield you’re expecting. More information can be found in the [splits.org documentation](https://docs.splits.org/core/split#how-it-works).
:::
---
# Create a Lido stVault
URL: https://docs.obol.org/run-a-dv/integrations/lido-v3-stvault-integration-kit
# Create a Lido stVault
:::info
💡
Lido V3 introduces **stVaults** — customizable staking vaults that unlock stETH liquidity for institutional stakers and asset managers. **Obol Distributed Validators offer the most capital-efficient way to deploy an stVault**, unlocking the **highest minting capacity** and the end game staking configuration.
:::
## Create a Lido stVault
**Target audience:** Node operators and capital allocators looking to deploy stVaults with **maximum capital efficiency** and institutional-grade security.
:::info
**I'm a Node Operator**\
Show me how to implement a DV-backed stVault.\
[Open the Node Operator Guide](lido-v3-stvault-for-node-operator.md)
:::
:::info
**I'm a Capital Allocator**\
Why should I use DV as infrastructure for my stVault.\
[Open the Capital Allocator Guide](lido-v3-stvault-for-capital-allocators.md)
:::
:::info
**I Want Help from Obol**\
[Connect with the Obol team](mailto:lido@obol.tech) or explore our [Cluster-as-a-Service](https://hubs.ly/Q03Y2Srl0) offering.
:::
### Who This Kit Is For
**Node operators** who are:
* Being asked to **deploy, and operate** an stVault for a fund, DAO, protocol, or other allocator
* Building that vault on top of a **multi-operator Obol DV** rather than a single operator / single client setup
**Capital allocators** who:
* Need to understand **why** a DV-backed stVault can support more favorable risk assessments and reserve ratios
* Want a clear checklist for vetting operators and understanding what strong DV cluster operations look like
### Why Obol DVs Are the Best Way to Deploy an stVault
Lido V3's stVault design unlocks new levels of **capital efficiency** for node operators and institutional stakers. Obol Distributed Validators are **the most capital-efficient way to run a vault on Lido V3**.
One of Lido V3's key innovations is the **Reserve Ratio (RR)**, which determines how much ETH must be kept as a reserve buffer relative to minted stETH. Lido is proposing a **2% Reserve Ratio tier for verified multi-operator DV vaults**, allowing up to **98% stETH minting capacity**. This is the most favorable tier. By comparison, the next-highest default tier for identified operators proposes a 5% RR with only 95% minting capacity.
**Obol Distributed Validators unlock the highest minting capacity available on Lido V3.**
#### Key Benefits
* **Unlock the highest capital efficiency**\
Multi-operator DV vaults qualify for the 2% Reserve Ratio tier, offering 98% stETH minting capacity, the most capital-efficient configuration on Lido V3.
* **Distribute responsibility across multiple operators**\
Reduce reliance on any single infrastructure provider, company, or jurisdiction. Multi-operator setups distribute private key shares across many entities.
* **Maximize client and implementation diversity**\
Run multiple consensus and execution client combinations inside the same vault, strengthening the vault's resilience and reducing correlation risks.
* **Superior liveness and fault tolerance**\
Obol's fault-tolerant infrastructure means your validators keep performing even if individual operators experience downtime or failures.
* **Enterprise-grade security**\
Leverage best-in-class security that institutional stakers and asset managers require for managing significant stake.
### 📚 How This Integration Kit Is Organized
#### For Node Operators – Implementation Guide
A practical guide to designing, deploying, and operating an stVault using Obol DVs, including:
* What to collect from the vault owner
* How to design your DV cluster (operators, clients, geos)
* How to rehearse on testnet and prepare for mainnet launch
* How this integrates into the Lido V3 stVault flow
👉 [**Read the Node Operator Guide →**](lido-v3-stvault-for-node-operator.md)
#### For Capital Allocators – Design & Risk Overview
A higher-level walkthrough of:
* What you are optimizing for (safety, yield, minting capacity, counterparty risk)
* Why multi-operator DVs are different from "just another node operator"
* How Obol's [**Cluster-as-a-Service**](https://hubs.ly/Q03Y2Srl0) offering can help guide your decisions
* What to ask from your operators or from Obol directly
👉 [**Read the Capital Allocator Guide →**](lido-v3-stvault-for-capital-allocators.md)
#### Support & Services for stVault Builders
How to:
* [Get in touch with the Obol team](mailto:lido@obol.tech) for guidance and design help
* Leverage Obol's [**Cluster-as-a-Service**](https://hubs.ly/Q03Y2Srl0) offering to get set up
### 🔗 Quick Links
* [**Default risk assessment framework**](https://research.lido.fi/t/default-risk-assessment-framework-and-fees-parameters-for-lido-v3-stvaults/10504) — Explore how Tiers within Identified Node Operators effect the reserve ratio of the vault
* [**DV Cluster identification and assessment**](https://docs.lido.fi/run-on-lido/stvaults/node-operators-identification/#dvt-cluster-identification-and-assessment) — See the identification requirements for each node operator in a cluster in order to qualify for improved Tiering
* [**stVaults Doc Center**](https://docs.lido.fi/run-on-lido/stvaults/) — View Lido's comprehensive guides which detail how to create any product powered by stVaults
#### Future Extensions
As Lido's [**DeFi wrapper**](https://hackmd.io/@lido/lido-v3-wrapper-design) and more advanced strategies roll out, we will extend this kit with:
* End-to-end reference architectures that combine stVaults, wrappers, and multi-operator DV clusters
* Config and deployment examples taken from real-world vaults
* Case studies, including the "Ethereum client team vault", once it is live
**For now, this page gives you the map. The linked sections show you how to actually build and run the vaults behind it.**
---
# For Node Operators
URL: https://docs.obol.org/run-a-dv/integrations/lido-v3-stvault-integration-kit/lido-v3-stvault-for-node-operator
# Node Operator Guide – Operating a Lido V3 stVault with an Obol DV Cluster
:::info
**Scope:** This guide is for node operators who operate a **Lido V3 stVault** with an **Obol Distributed Validator (DV) cluster**.
It assumes:
- stVault creation is done via **Lido's stVault UI** or **Lido's stVault CLI**, and
- validator operations (deposit, exit, withdrawal, etc.) are performed using **Lido stVault CLI or Lido's stVault UI** only.
Reserve ratio benefits require **multi-operator DV vaults**. Single-operator setups do not qualify you for improved reserve ratios (though may qualify you for Obol's [Incentive](https://obol.org/incentives) program).
:::
---
## 1. High-Level Flow (Multi-Operator Obol DV Vaults)
At a high level, the lifecycle for a multi-operator Obol DV stVault is:
1. **Create the stVault**
– via **Lido stVault UI** (recommended where available) or **Lido stVault CLI**.
2. **Set up governance & fee routing**
– Configure a `GOVERNANCE_SAFE` and `NODE_OPERATOR_SAFE` using Gnosis's [Safe UI](https://app.safe.global/) as well as a `FEE_SPLIT_CONTRACT` using the [splits.org](http://splits.org) UI.
3. **Create and publish the Obol DV cluster**
– Use the `charon create dkg --publish` command or the [DV Launchpad](https://launchpad.obol.org/) to create a multi-operator DV cluster with the vault as both the withdrawal and fee recipient addresses. Use the `--operator-addresses` flag to invite the Node Operators to complete the DKG ceremony.
4. **Run and monitor the DV cluster**
– using Obol’s observability stack.
5. **Monitor the vault**
– using **Lido stVault CLI** (`contracts dashboard` and `vo` read commands) plus the stVault UI.
6. **Distribute rewards and fees**
– from the vault to the split contract, and from the split contract to participants (including Obol).
---
## 2. Creating the Vault (UI vs CLI)
You can create a stVault in two ways:
- **Lido stVault UI (recommended)**
- Hoodi testnet UI: `https://stvaults-hoodi.testnet.fi/`
- Mainnet stVault UI link will follow Lido’s official docs once live.
- **Lido stVault CLI**
- Main docs and command reference:
`https://lidofinance.github.io/lido-staking-vault-cli/`
The CLI exposes two main entry points you will use:
- `vo` – **vault-oriented commands** (lower-level, contract-centric).
- `contracts dashboard` – **dashboard-oriented commands** (product/UX layer, usually nicer for day-to-day).
**Practical split:**
- Use **`contracts dashboard r overview / health / info` as your primary monitoring entrypoint** (per vault “product”).
- Use **`vo r overview / health / info / roles`** when you need contract-level detail, addresses, or role debugging.
:::warning
For beacon-chain deposits, validator exits, withdrawals and other stVault operations, use the Lido stVault UI or Lido stVault CLI only.
Do **not** use the Obol Launchpad UI for these validators.
:::
For the rest of this guide we assume a **multi-operator DV vault** with, for example:
- **Cluster size:** 4 operators
- **Cluster limit:** up to ~1,000,000 ETH (subject to Lido risk / tier approvals)
- **Validator max stake:** 1,920 ETH per validator (allowing space for compounding)
- **Total validators:** ~520–600 in a full configuration
These values are **illustrative**; actual limits depend on your and your depositor’s risk framework and governance.
---
## 3. Core On-Chain Addresses & Safes
Before (or alongside) vault creation, set up three core components.
### 3.1 Governance Safe (`GOVERNANCE_SAFE`)
- **Role:** vault owner / governance multi-sig.
- **Where to create:**
- Mainnet: `https://safe.global/`
- Hoodi testnet: Protofire Safe UI – `https://app.safe.protofire.io/`
- **Example policy:**
- 3/4 multi-sig across:
- client / treasury signers and/or
- operator representatives.
- Typically used as:
- **Vault Owner**
- **Default Admin / Node Operator Manager**
---
### 3.2 Node Operator Safe (`NODE_OPERATOR_SAFE`)
- **Role:** operational multi-sig for day-to-day validator + vault actions.
- **Where to create:**
- Mainnet: `https://safe.global/`
- Hoodi: `https://app.safe.protofire.io/`
- **Example policy:**
- 3/4 multi-sig across node operators and/or client infra.
- **Typical responsibilities:**
- Funding the vault
- Depositing to beacon chain
- Requesting validator exits
- Triggering withdrawals
- Initiating rebalances
- Minting/burning stETH if allowed by governance
- Interacting with Lido stVault contracts via CLI
---
### 3.3 Fee Split Contract (`FEE_SPLIT_CONTRACT`)
On **mainnet**, Obol’s protocol fee is enforced via a fee splitting contract:
- Create via the **Splits.org UI**: `https://app.splits.org/`
- Configure:
- **1% of validator rewards → Obol protocol fee address**
`0xDe5aE4De36c966747Ea7DF13BD9589642e2B1D0d`
- Remaining percentage split between operators according to your commercial terms.
On **Hoodi**, Splits may not be available or may not support that network:
- You may **skip the split contract** on testnet.
- On mainnet, **using a split contract that routes 1% of validator rewards to Obol is required** to earn Obol's incentive rewards. If this vault will be extremely significant, consider reaching out to the Obol core team to discuss the potential for a custom arrangement.
The image below shows using the splits UI to create a split contract where 5% of validator rewards will be distributed equally across the 4 node operators and Obol.
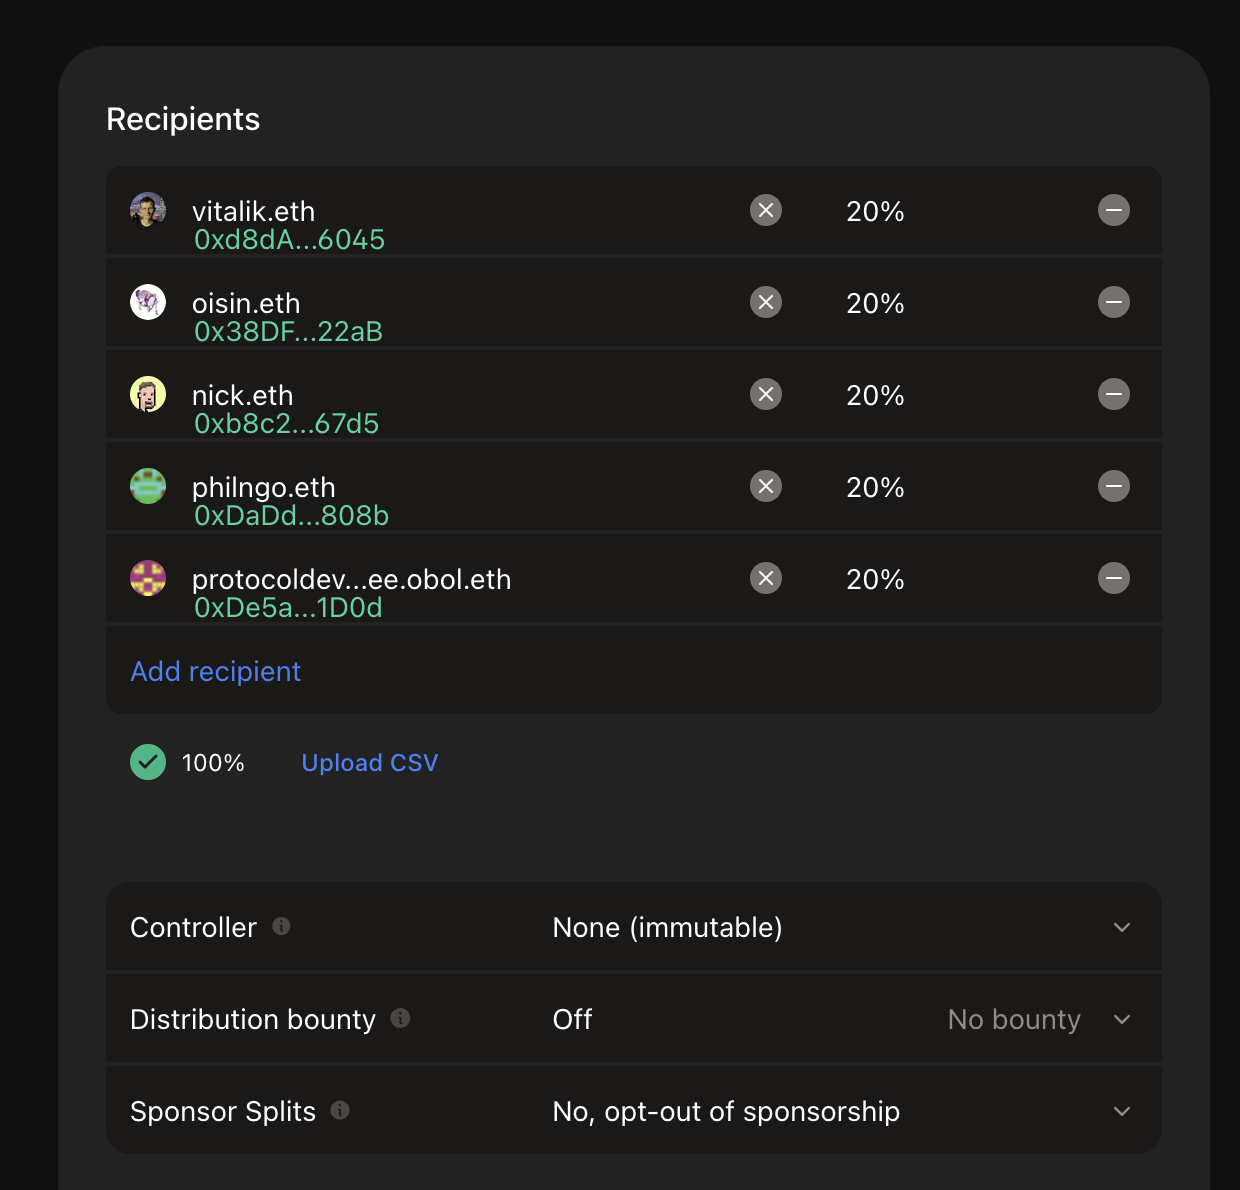
Example split contract configuration
:::info
Consider setting the controller for this split contract to `NODE_OPERATOR_SAFE` or `GOVERNANCE_SAFE` to retain the ability to modify it at a later date.
:::
---
## 4. Recommended Vault Parameters & Roles
When creating the vault via UI or CLI, we recommend the following mapping.
### 4.1 Main Settings (Vault Parameters)
- **Node Operator:** `NODE_OPERATOR_SAFE`
Entity responsible for validator operations and day-to-day vault actions.
- **Vault Owner:** `GOVERNANCE_SAFE`
Controls vault ownership, high-level parameters, and emergency controls.
- **Node Operator Manager:** `GOVERNANCE_SAFE`
Oversees the Node Operator; can be a separate address if required by governance.
- **Node Operator Fee Recipient:** `FEE_SPLIT_CONTRACT`
Set **after vault creation** so all node-operator fees route through the splitter.
- **Node Operator Fee:** typically **3–10%** (expressed in basis points in the UI / CLI).
- **Confirmation Lifetime:** e.g. **48 hours**
Relevant if `Vault Owner` and `Node Operator Manager` differ; defines how long confirmations are valid for sensitive operations.
For the latest flags and options when creating a vault, refer to:
**Lido stVault CLI – `vo` commands**
`https://lidofinance.github.io/lido-staking-vault-cli/commands/vault-operations`
---
### 4.2 Role Assignments & Responsibilities (Recommended)
| Address | Type | Permissions (examples) | Duties (examples) | Notes |
| --- | --- | --- | --- | --- |
| `GOVERNANCE_SAFE` | Multi-sig (e.g. 4/5) | Grant / revoke roles, transfer vault ownership, set confirmation expiry, pause / resume deposits, recover stuck assets, change node operator, set fee rates. | Strategic governance, emergency handling, fee structure oversight, monitoring node-operator performance, asset recovery. | Primary governance. Often also the node operator manager and vault owner. |
| `NODE_OPERATOR_SAFE` | Multi-sig (e.g. 3/4) | Deposit ETH to beacon chain, manage validator operations, trigger withdrawals, request exits, rebalance vault, monitor performance, claim node-operator fees. | Day-to-day vault and validator operations, responding to alerts, maintaining uptime and SLAs. | Single operational entry-point; should follow strict runbooks and operational policies. |
| `FEE_SPLIT_CONTRACT` | Smart contract | Anyone can call **distribute** to disburse the funds. | Receive node-operator fee rewards, splits across participants. | Obol gets 1% fee share via its protocol address; or as per commercial agreement. |
These are **recommendations**, not stVault requirements; adapt to your own governance needs and risk appetite.
---
## 5. Obol DV Cluster Setup (Multi-Operator Only)
After the vault and core addresses exist, you can set up the **Obol DV cluster**.
Follow Obol’s docs for **multi-operator DV setup**:
- **Cluster size:** minimum 4 independent operators recommended
- **Compounding validators:** `true` (recommended for vault integrations).
- **Withdrawal address:** vault withdrawal address.
- **Fee recipient address:** vault / dashboard address.
- **Number of validators:** sized to your capacity and Lido-approved tier.
Obol cluster creation docs:
[Create a DV With a Group](../start/create-a-dv-with-a-group.mdx)
:::info
When generating the cluster lock, use the --publish flag so the cluster lock is published and verifiable by:
- DV participants,
- Lido risk review & DV tier evaluation, and for
- Better support by the Obol Team in troubleshooting cluster issues.
:::
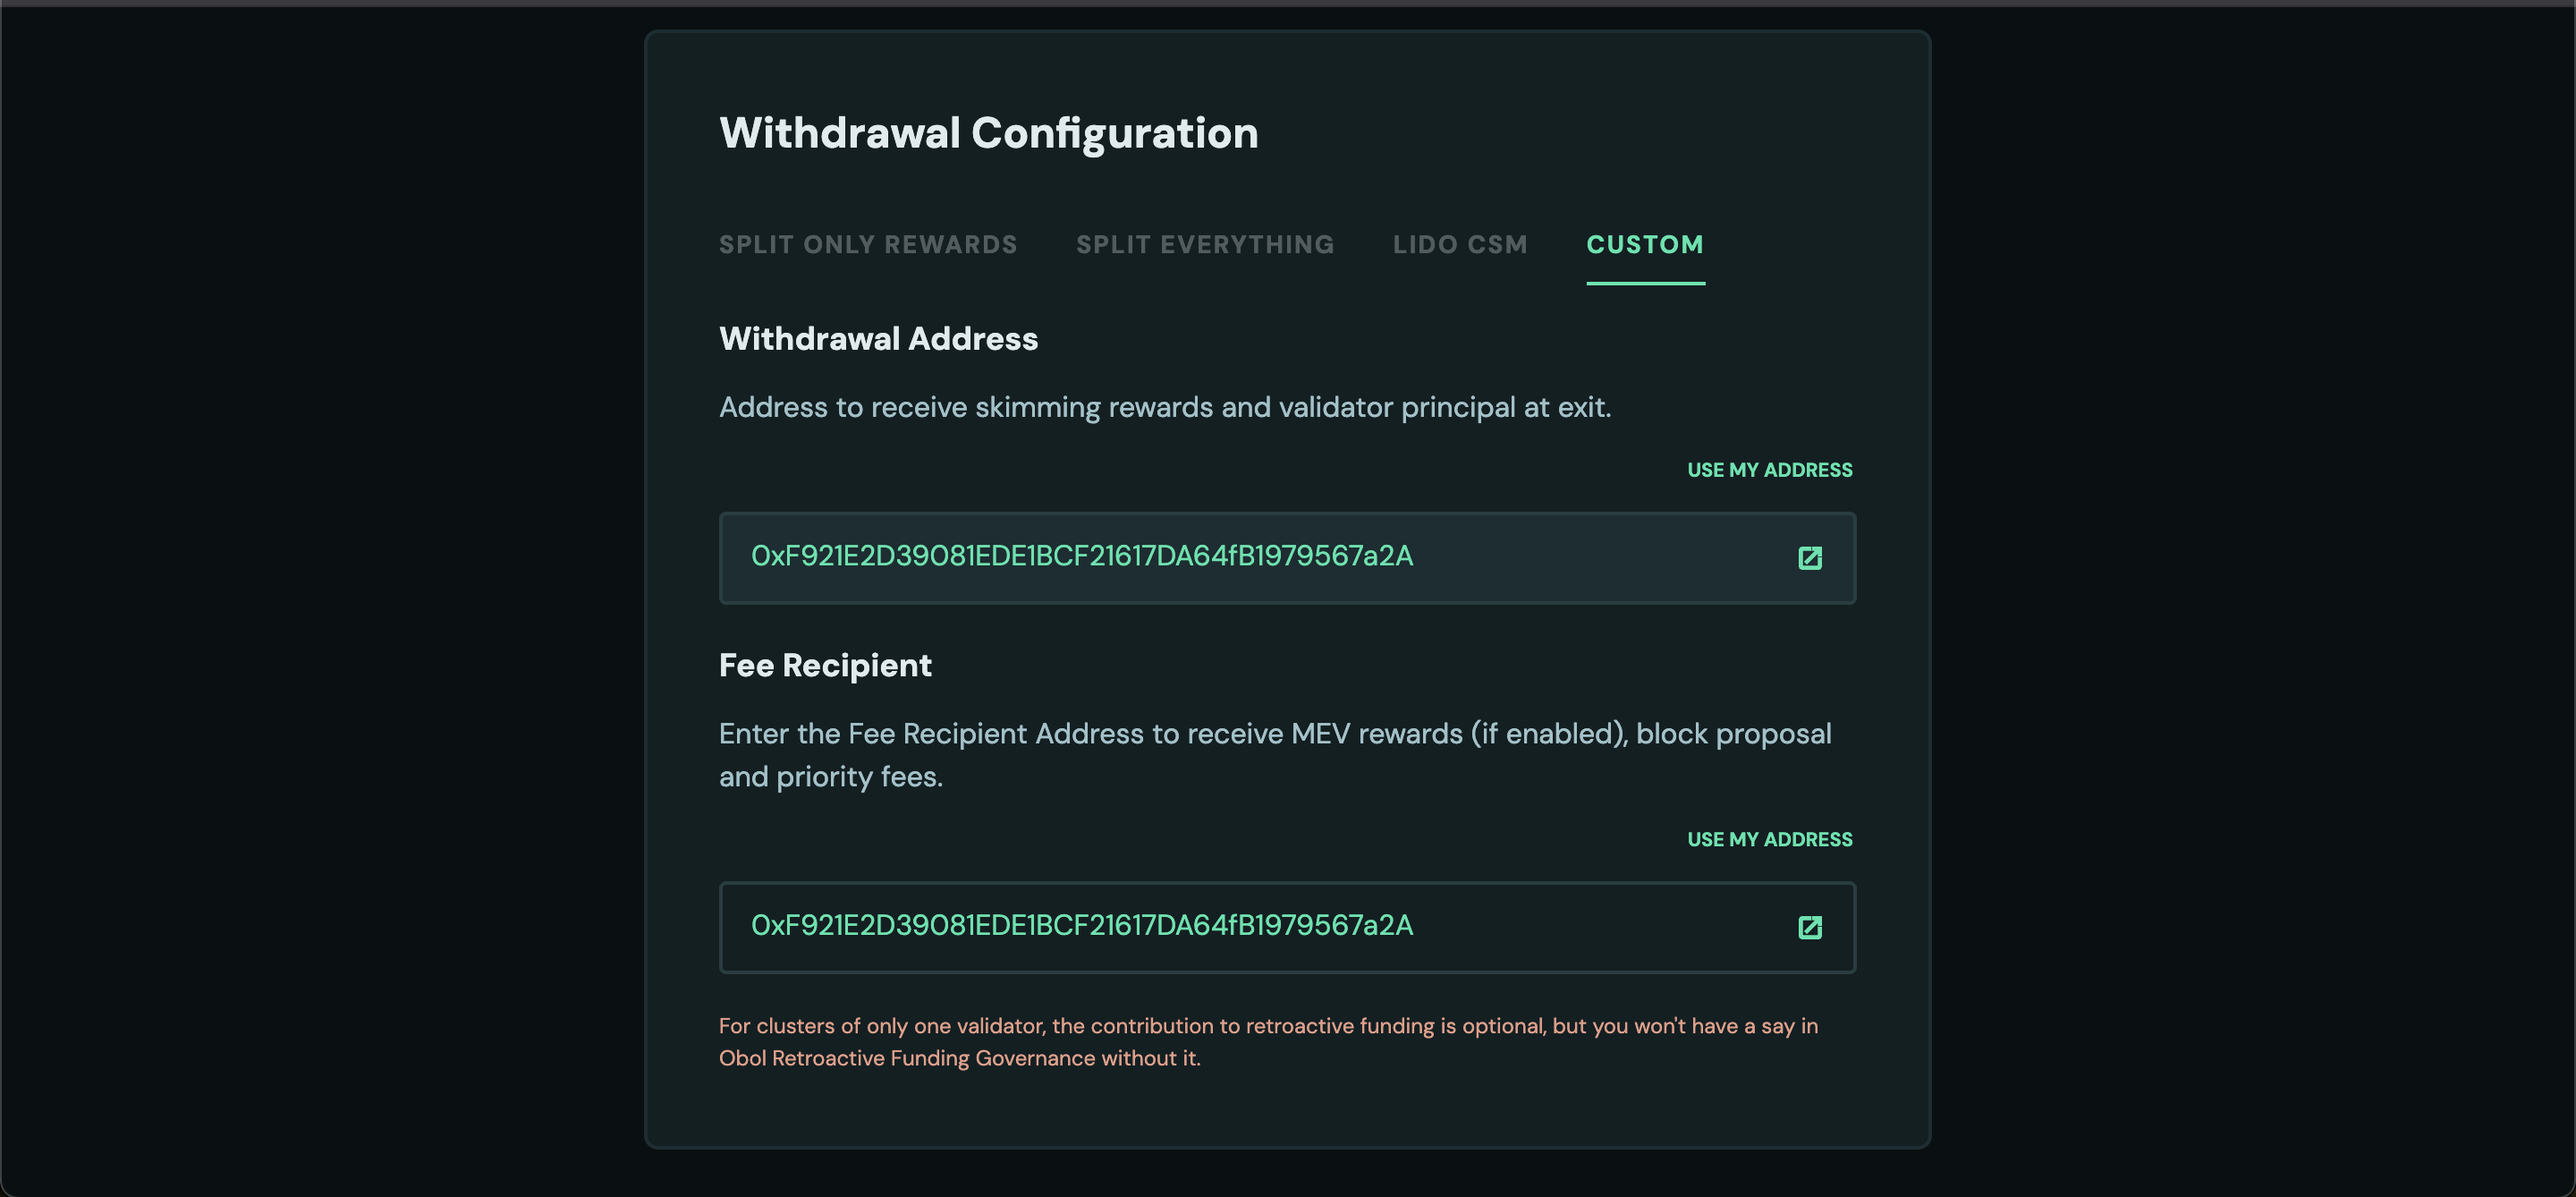
### 5.1 DV Cluster Identification Process
After creating and publishing your Obol DV cluster, you must go through **Lido's identification process** to be classified as an **Obol DV cluster** and qualify for DV-specific tiers with improved Reserve Ratio (RR) and stETH minting limits.
**Why identification matters:**
- **Unidentified clusters** default to the **Default tier** with only a **50% Reserve Ratio** and limited stETH minting capacity.
- **Identified DV clusters** can qualify for **DV tiers** with **Reserve Ratios as low as 2-4%** and significantly higher stETH minting limits.
For detailed tier breakdowns and capital efficiency benefits, see the [Capital Allocator Guide](lido-v3-stvault-for-capital-allocators.md#dvt-tiers).
**The identification process:**
1. Each individual Node Operator in the cluster must complete the identification process (post on Lido Research Forum, complete identification forms).
2. A cluster representative posts a **DV Cluster identification request** on the Lido Research Forum.
3. The representative completes the **DV Cluster Questionnaire** with technical and business information.
4. The stVaults Committee assesses your cluster and assigns a **category and tier grid**.
5. Once identified, your cluster can access DV-specific tiers with improved economics.
**How Obol can help:**
- Obol provides guidance and support throughout the identification process.
- We can help coordinate the cluster identification request and questionnaire completion.
- We assist with technical documentation and cluster structure details required for the assessment.
For detailed information about the identification process, requirements, and tier structures, refer to [Lido's Node Operators Identification documentation](https://docs.lido.fi/run-on-lido/stvaults/node-operators-identification).
---
## 6. Monitoring (DV Cluster & Vault)
### 6.1 Obol DV Monitoring
For DV-specific monitoring (RAVER, attestations, client health, etc.), use Obol’s monitoring stack:
Obol monitoring docs: [Monitoring Your Own Node](../running/monitoring.md), [Sending metrics to Obol](../start/obol-monitoring.mdx)
Typical components:
- Metrics (e.g. Prometheus) for:
- attestation success
- proposer success
- Charon peer connectivity
- execution and consensus client health
- Alerts for:
- missed duties
- insufficient peers
- clients offline
- RAVER dropping below your target (e.g. 98%, if that’s your internal standard)
Operators should agree on:
- shared alert channels (Slack / Telegram / Discord), and
- explicit SLAs (who responds, how quickly, escalation path).
---
### 6.2 Vault Monitoring (Using Lido stVault CLI)
The **Lido stVault CLI** exposes read-only commands that are essential for operators and vault managers.
CLI docs root:
`https://lidofinance.github.io/lido-staking-vault-cli/`
You will typically use:
- **`contracts dashboard` read commands** for primary monitoring, and
- **`vo` read commands** for lower-level details and role inspection.
### 6.2.1 Dashboard-Centric View (Recommended UX)
For everyday operations, prefer the **dashboard** read commands:
```bash
# Dashboard overview
yarn start contracts dashboard r overview
# Dashboard health
yarn start contracts dashboard r health
# Dashboard info (addresses, parameters, vault bindings)
yarn start contracts dashboard r info
```
These provide a product-level view of:
- vault health & status
- key parameters and addresses
- high-level metrics relevant to the specific “vault product”
Docs:
`https://lidofinance.github.io/lido-staking-vault-cli/commands/contracts/dashboard`
---
### 6.2.2 Vault-Level View (`vo` – Advanced / Low-Level)
For underlying vault configuration and debugging, use `vo`:
```bash
# Vault overview (contract-level)
yarn start vo r overview -v
# Quick health check
yarn start vo r health -v
# Roles and permissions
yarn start vo r roles -v
# Core vault info (fee parameters, limits, addresses, etc.)
yarn start vo r info -v
```
Docs:
`https://lidofinance.github.io/lido-staking-vault-cli/commands/vault-operations`
In practice:
- **Dashboard commands** → main UX surface for operators.
- **`vo` commands** → used when you need full contract detail or to diagnose odd behavior.
---
### 6.2.3 Performance Metrics (`metrics` namespace)
Use the `metrics` namespace for APR and rewards analysis:
```bash
# Comprehensive statistics (APR & rewards)
yarn start metrics r statistic
# APR history (simplified text mode)
yarn start metrics r charts-apr --simplified
# Rewards distribution charts
yarn start metrics r charts-rewards
```
Docs:
`https://lidofinance.github.io/lido-staking-vault-cli/commands/metrics`
Use these for:
- performance reviews
- sanity-checking expected vs realized APR
- understanding the effect of DV tiers and any strategy layer
---
### 6.3 Example Alerting Rules (Non-Canonical)
:::info
The thresholds below are illustrative only.
They are not official Lido nor Obol requirements and should be tuned to your vault's risk profile, product design, and the latest protocol guidance.
:::
Examples of vault-level alerts you might configure:
- **Health factor approaching 100%**
- Trigger an alert when health factor trends down into a “warning band” you define (for example, somewhere below x% according to your strategy), so you have time to respond before it reaches unsafe levels.
- **High utilization of mint capacity**
- Alert when utilization ratio is close to full (for example, above your internal high-water mark), indicating the vault is near its minting / leverage limit.
- **Low immediate liquidity**
- Alert when “available to withdraw” ETH falls below an internal buffer — for instance, less than one or two validators’ worth of ETH, depending on how your product handles withdrawals.
- **Sustained underperformance vs expectation**
- Alert when net staking APR stays materially below your internal target range for multiple reporting periods (e.g. several `metrics r statistic` runs in a row).
- **Low operational efficiency**
- Alert when net APR / gross APR (efficiency) drops below your chosen target, signalling that penalties, slashing, or high costs are eroding returns more than expected.
**Cadence (example only):**
- Health & dashboard checks: **at least daily**, ideally via automated alerts.
- Performance statistics (`metrics r statistic`): **weekly**.
- APR / rewards charts (`metrics r charts-apr / charts-rewards`): **monthly or quarterly** reviews.
---
## 7. Deposits, Exits, Withdrawals (Pointers Only)
This guide intentionally **does not duplicate** the full stVault operations surface. For:
- **Beacon-chain deposits** (funding validators),
- **Validator exits**,
- **Triggering withdrawals**,
- **Withdrawing ETH from the vault to treasury**,
- **Minting / burning stETH or wstETH**,
use the **Lido stVault CLI** docs:
- Dashboard write commands (deposits, exits, etc.):
[`https://lidofinance.github.io/lido-staking-vault-cli/commands/contracts/dashboard#write`](https://lidofinance.github.io/lido-staking-vault-cli/commands/contracts/dashboard#write)
- Vault / VaultHub / additional commands:
[`https://lidofinance.github.io/lido-staking-vault-cli/category/commands/`](https://lidofinance.github.io/lido-staking-vault-cli/category/commands/)
This keeps your operational runbooks aligned with the latest Lido contracts and CLI behavior.
---
## 8. Fees, Splits & Obol Incentives
### 8.1 From Vault to Fee Splitter
Step 1: disburse **node operator fees** from the vault/dashboard to `FEE_SPLIT_CONTRACT` using the Lido CLI.
1. (Optional) Inspect vault info:
```bash
yarn start vo r info -v
```
2. Disburse node-operator fees to the configured `feeRecipient` (your splitter) using the **dashboard write** command:
```bash
yarn start contracts dashboard w disburse-node-operator-fee \
```
Dashboard write docs:
[`https://lidofinance.github.io/lido-staking-vault-cli/commands/contracts/dashboard#write`](https://lidofinance.github.io/lido-staking-vault-cli/commands/contracts/dashboard#write)
This moves accrued node-operator fees from the vault to your `FEE_SPLIT_CONTRACT`.
Hoodi link: https://stvaults-hoodi.testnet.fi/vaults/your_vault_address/claim
---
### 8.2 From Splitter to Participants
Step 2: **distribute and claim** via Splits.org:
1. Open the **Splits.org UI**: [`https://app.splits.org/`](https://app.splits.org/)
2. Navigate to the page for your `FEE_SPLIT_CONTRACT` address.
3. Connect your wallet and choose either to:
- **Distribute** – moves the contract’s balance into recipients’ claimable balances.
- **Distribute and Withdraw** – moves the contract's balance into each participant's own address or Safe. Skipping their requirement to claim.
Hoodi Link: Not available
Mainnet Link: `https://app.splits.org/accounts/`
---
### 8.3 Obol Rewards (Protocol Incentives)
If the split contract is configured correctly with Obol’s share of validator rewards, **Obol incentives** can be claimed proportionally via the [Obol DV Launchpad](https://launchpad.obol.org/) by the other addresses in the split:
Process:
1. Connect the **recipient wallet / Safe** that's entitled to the reward on the [DV Launchpad](https://launchpad.obol.org/).
2. Click the "Dashboard" button.
3. Claim any available Obol incentives.
:::info
The DV Launchpad can also be used by Operators to claim their outstanding wstEth rewards once someone has distributed them from the split contract to make them claimable.
:::
Hoodi Link: [https://hoodi.launchpad.obol.org/cluster/list/](https://hoodi.launchpad.obol.org/cluster/list/)
Mainnet Link: [https://launchpad.obol.org/cluster/list/](https://launchpad.obol.org/cluster/list/)
---
# For Capital Allocators
URL: https://docs.obol.org/run-a-dv/integrations/lido-v3-stvault-integration-kit/lido-v3-stvault-for-capital-allocators
# Capital Allocator Guide – Lido V3 stVault with Obol DVs
---
## Quick Overview
**Target audience:** ETH capital allocators – retail, treasuries, funds, ETF/ETP issuers, institutions.
:::info
Obol's [Cluster-as-a-Service](https://hubs.ly/Q03Y2Srl0) offering can get you started quickly: we act as a trusted advisor, connect you with top node operators, and help guide decisions around validator sidecars and MEV strategies.
:::
For a capital allocator, a **Lido stVault** provides a way to create a **dedicated, siloed ETH staking vault**:
- you choose the **node operator set** (e.g. by geography, infrastructure used, reputation),
- you agree on **additional reward arrangements** (e.g. [ETH gas](https://www.ethgas.com/), [Primev](https://www.ethgas.com/), other DV compatible incentives),
- and you retain the option to tap into **stETH liquidity** at the vault level.
That liquidity can then be used by a curator or strategy provider for things like **boosted APR via looping**, **restaking**, or other structured strategies – while the underlying validators are run by an **Obol Distributed Validator (DV) cluster** for operational resilience.
---
## Definitions
**stVaults** are Lido's staking "building blocks": isolated vaults that hold ETH, run validators, and (optionally) mint stETH under a configurable risk framework. Each vault has its own operator set and parameters, so risk and behavior are compartmentalized rather than shared across the entire protocol.
On top of this, Obol provides **Distributed Validator Technology (DVT)**: validator keys and duties are spread across multiple independent operators/nodes rather than being concentrated on a single computer.
### stVault terminology
- **stVault**
A Lido V3 vault that:
- accepts ETH,
- funds validators on the beacon chain, and
- can optionally mint stETH under a specific tier configuration (Reserve Ratio + minting cap) for DeFi / strategy use.
- **Reserve Ratio (RR)**
The percentage of vault value that must remain reserved as collateral when minting stETH.
- No stETH can be minted for this reserved portion.
- Higher RR ⇒ more conservative, less minting capacity.
- Lower RR ⇒ more capital efficient, more minting capacity (within caps).
- **Tier**
A risk configuration assigned to a Node Operator. A tier defines:
- a **Reserve Ratio (RR)**, and
- a **maximum stETH minting cap** for vaults attached to that tier.
- **Default tier**
The tier applied to vaults created by **non-identified** node operators:
- fixed **RR = 50%**,
- conservative minting behavior, especially in early rollout phases.
- **DVT tiers**
Tiers designed for vaults operated by **multi-operator DV clusters** (e.g. Obol). The current default DV vault schedule proposed in Lido's risk framework is:
- **Tier 1** – up to 50,000 ETH used for minting capacity, **RR = 2%** → max ~49,000 stETH
- **Tier 2** – up to 50,000 ETH, **RR = 2%** → max ~49,000 stETH
- **Tier 3** – up to 200,000 ETH, **RR = 2%** → max ~196,000 stETH
- **Tier 4** – up to 300,000 ETH, **RR = 3%** → max ~291,000 stETH
- **Tier 5** – up to 400,000 ETH, **RR = 4%** → max ~384,000 stETH
In total, these DVT tiers allow up to **969,000 stETH** to be minted on **1,000,000 ETH** of "mintable" value, reflecting higher capital efficiency than the Default 50% RR, while still enforcing explicit per-tier caps.
- **Total Value**
The sum of:
- ETH staked in validators (including rewards), and
- ETH held in the vault's balance.
- **stETH Liability / Minting Capacity / Utilization / Health Factor**
Core metrics Lido uses to track vault safety and usage:
- **stETH liability** – how much stETH the vault has minted,
- **minting capacity** – how much more could be minted given RR and caps,
- **utilization** – what fraction of capacity is in use,
- **health factor** – how safely the vault is collateralized.
### Obol terminology
- **Distributed Validator (DV)**
A validator whose signing key is split across multiple operator nodes. Duties are executed collaboratively through DV middlewares (for example, Obol's Charon or Nethermind's Pluto), so no single node holds the full key or can unilaterally control the validator.
- **DVT (Distributed Validator Technology)**
The underlying cryptographic and networking stack that makes DVs possible: threshold BLS signatures, distributed key generation, signature aggregation, peer to peer communication, and consensus components.
- **DV cluster**
A group of independent node operators jointly running one or more DVs.
In the Lido stVault context, DVT categories typically assume:
- **4 or more independent operators**, and
- validator keys generated via a DKG ceremony.
- **DKG (Distributed Key Generation)**
A protocol that generates validator private keys collaboratively such that:
- no single operator ever knows the full validator private key, and
- key shares can be used jointly to produce valid signatures.
- **Curator / Strategy provider**
An entity responsible for the *economic* behavior of the vault:
- deciding whether the vault is staking only, or using minted liquid staked tokens to generate further yield.
- designing and managing these further strategies (e.g., looping, hedging price risk, or other structured approaches).
Obol can help connect depositors with suitable curators where an end-to-end solution is desired.
---
## Comparison: Lido Core vs non-DV Vault vs Vault on Obol DVs
| Dimension | Staking via Lido Core (no vault) | Staking with a Vault (no DV) | Staking with an Obol DV and a Vault |
| --- | --- | --- | --- |
| **What it is** | Stake directly through Lido Core; ETH is pooled and allocated across Lido's curated operator set. | ETH is deposited into a **dedicated stVault** with a chosen single node operator; vault can optionally mint stETH under a tier (RR + cap). | ETH is deposited into a **dedicated stVault** whose validators are run by a **multi-operator Obol DV cluster**; vault can target DVT-specific tiers over time. |
| **Risk isolation & scope** | Risk is **global** at the protocol level; underperformance or slashing impacts the broader Lido Core pool. | Each stVault is a **siloed risk container**; failures or misconfigurations are contained to that vault, not the global pool. But failure risk is higher due to lack of diversity of operators and clients. | Same per-vault isolation as a non-DV vault, **plus** risk is mitigated due to multiple operators inside the DV cluster sharing the staking duties. |
| **Operator model** | Operators are selected by Lido and managed via governance; you do **not** choose specific operators for your stake. | You select a **specific operator** (or operator entity) per vault and rely on them for security and resilience. But even the biggest operators can be [subject to attacks](https://www.theblock.co/post/370141/kiln-exits-ethereum-validators) despite their best practices. | You select or approve a **set of independent operators** forming a DV cluster. No one holds the entire private key, protecting your stake even when an operator is compromised. |
| **Operational resilience** | Resilience comes from Lido's **diversified operator set** at protocol scale, but each validator is still run by a single operator in the majority of cases. | Validator duties are typically run on a **single operator's stack**. A misconfig, hardware failure, or outage can significantly impact that vault's uptime and rewards. | Duties are distributed across a **DV cluster** (multiple operators/machines, often across geographies). The system is not down with one node/operator going offline. |
| **Tiers & Reserve Ratio (RR)** | You don't see or control tiers directly; you simply receive stETH and its yield. | Vault uses a **tier** (RR + cap). Non-identified operator vaults default to **50% RR** (Default tier) with conservative minting behavior. | Vault can qualify for **DVT tiers**: RR as low as **2–4%** with explicit per-tier minting caps (e.g. 5 tiers totalling 1,000,000 ETH "mintable" with 969,000 max stETH). It is 10+ times better than non-identified, non-DV vaults |
| **Access to DVT tiers** | No direct access: there's no per-vault DVT tier concept since you're staking into the global Lido Core pool. | Not DVT by design, so **no DVT tier** access; can only move from Default 50% RR to other non-DVT identified tiers (if/when operator qualifies). | DV cluster can be **identified** via Lido's Identified Node Operator process and attached to **DVT tiers**, providing a path from Default 50% RR to lower-RR, higher-efficiency tiers. |
| **Capital efficiency & strategies** | stETH/wstETH is liquid and can be used in DeFi, but there is no per-vault RR control; strategies are entirely external to Lido Core. | Vault can mint stETH subject to its RR and caps; with **50% RR**, leverage for looping/restaking is limited, so APR uplift over baseline staking is modest. | Low-RR DVT tiers enable **much higher minting capacity** for the same TVL, making looping/restaking strategies more capital efficient (e.g. meaningful APR uplift vs Default RR 50%). |
| **Strategy surface (looping, etc.)** | Strategy design is off-protocol; you use stETH in external DeFi venues. | Strategies can be layered at the vault level (via a curator), but constrained by higher RR if the operator isn't DVT-qualified. | Vault becomes a **strategy-friendly substrate**: DVT tiers with low RR + health metrics + multi-op resilience make it a natural base for looping, restaking, and structured products. |
| **Governance & customization** | Governance is at the Lido protocol level; you cannot customize per-pool economics or operator sets for your specific capital. | You can customize **governance, fees, and operator choice** per vault using roles (e.g. fund-specific or ETF-specific vaults with bespoke controls). | Same per-vault governance/customization but roles can be given to a multisig-Safe wallet for extra security across operators. |
| **Typical user / use case** | Users who want **simple, liquid staking** and are comfortable with protocol-wide diversification instead of bespoke vaults. They would like to actively manage their own strategies and calculate risks associated with it. | Capital allocators wanting **dedicated infrastructure** and configurable fees/parameters, but willing to accept **single-operator slashing and downtime risks**. | Capital allocators who want **dedicated vaults**, **multi-operator resilience**, a **governed path to DVT tiers (lower RR)**, and the option to run advanced strategies on top. |
## Understanding impact of RR with an Example
To illustrate how DVT RR if utilized properly can yield boosted APR, we compare three cases:
1. **No looping** (pure staking)
2. **Looping on non-DVT vault** (50% mintable capacity)
3. **Looping on DVT vault** (98% mintable capacity)
It must be noted that following calculations are only for illustrative purpose and numbers will vary with market conditions and risk appetite. To understand the calculations, refer to the appendix.
**High-level outcomes**
| Case | Mintable fraction | Effective leverage (≈ TVL / capital) | Approx. TVL in vault | Approx. total borrow | User APR (net) |
| --- | --- | --- | --- | --- | --- |
| No looping | 0% (no minting) | **1.0×** | 10,000 | 0 | **≈ 2.84%** |
| Looping – non-DVT vault (default RR) | 50% | **≈ 1.87×** | ≈ 18,687 | ≈ 8,687 | **≈ 3.16%** |
| Looping – DVT vault (DVT tier) | 98% | **≈ 7.22×** | ≈ 72,188 | ≈ 62,188 | **≈ 5.19%** |
Where:
- **Effective leverage** ≈ `Total vault value / Initial capital`
- **Total borrow** is the cumulative ETH borrowed from Aave and re-deposited into the vault.
:::warning
Eth Staking APR and Eth borrow cost are variable. Borrowing cost can be higher than the staking APR, resulting in a negative APR from looping. Consult the appendix below for more information.
:::
---
## How Should I Stake? – High-Level Decision Tree
```
Start
├─→ Are you a retail user or an allocator who does NOT need a dedicated, isolated vault?
│ │
│ ├─→ YES → Use a shared vault such as the Ethereum Client Team Vault
│ │ (pooled vault, boosted strategies, Primev rewards)
│ │
│ └─→ NO → Continue ↓
│
└─→ Are you an ETF issuer, fund, DAO treasury, or institution that
requires segregation of ETH and custom governance/controls?
│
├─→ YES → Create a dedicated DVT stVault with Obol
│ (per-vault operators, governance, strategies)
│
└─→ NO → Consider whether a DeFi-wrapper enabled vault already meets
your requirements; if in doubt, talk to Obol.
```
---
## Path A: Shared DeFi-Wrapper Vault (Retail / Non-Dedicated)
**Who this is for**
- Retail users, DAOs, funds, or smaller treasuries that:
- don't need their **own dedicated vault**, and
- want exposure to **pooled strategies** with boosted rewards.
**What you get**
- A **DeFi-wrapper vault** (launching in January 2026) that:
- pools ETH from multiple users into an underlying stVault,
- is **run by Ethereum client teams** and curated by **Nethermind**,
- implements **boosted strategies** (e.g. looping, restaking),
- leverages **Primev** for additional rewards where applicable.
**What you do**
- Deposit ETH into the 'Ethereum Client Team Boosted Vault'.
- Receive the wrapper's token / position representing your share.
- Monitor:
- published strategy,
- net APR after fees,
- risk disclosures (health/LTV-style metrics where available).
You **do not** need to handle:
- vault creation,
- node operator selection,
- Obol DV cluster formation.
All of that is handled by the client teams + Nethermind (strategy), with Obol DVT under the hood.
---
## Path B: Dedicated DVT stVault with Obol (ETF / Treasury / Institutional)
If you are an ETF issuer, large fund, DAO treasury, or any allocator that **does not want to pool ETH with other users** or have specific choice of operators, you will create a **dedicated DV stVault**.
Obol will assist along the way: from design → DV cluster → identification → strategy.
### Step 1 — Define the Vault and Its Controls
**Who this is for**
- Capital allocators that require:
- **segregated ETH**,
- specific governance (e.g. ETF board / DAO / foundation),
- audit-friendly parameterization (fees, roles, permissions).
**Decisions you make**
- **Product scope**
- *Staking-only*, or
- *Staking + optional liquidity/strategies* (e.g. looping, restaking, Primev, etc.).
- **RR / tier posture**
- Start at **Default 50% RR** (non-identified), with a plan to move to DVT tiers later, or
- Aim directly for DVT tiers via early alignment with Lido's DVT category.
- **Governance model**
- Multisig composition for:
- vault owner / governance safe,
- node operator safe,
- fee recipient / accounting.
- Emergency powers (pauses, exits).
- Fee parameters (node operator fee, any additional service/strategy fees).
**What happens technically**
- A **stVault** is deployed with:
- roles and permissions matching the above,
- a designated Node Operator entity (which will represent the DV cluster),
- initial tier attachment (typically defaults to 50% RR at launch).
**How Obol helps**
- Co-design of roles, safes, and failure modes.
- Helps you move from normal tier to a DVT tier through [Lido's identification process](https://docs.lido.fi/run-on-lido/stvaults/node-operators-identification/).
- Templates / examples for:
- governance policies,
- incident playbooks,
- fee configurations.
- Introduction to **curators / strategy providers** if you want an economic layer on top (beyond pure staking).
:::info
For detailed identification process steps, see the [Node Operator Guide](lido-v3-stvault-for-node-operator.md#51-dv-cluster-identification-process).
:::
---
### Step 2 — Assemble the DV Operators
**Objective**
Build a **DV cluster** that can qualify for Lido's **DVT category** and DVT tiers, while meeting your internal constraints (jurisdiction, infra diversity, etc.).
**Requirements (high-level)**
- **≥ 4 independent operators** (distinct entities).
- Validators run as **DVs**, not single-operator keys.
- Validator keys generated via **DKG**, so no single party ever sees the full key.
- Operational standards:
- monitoring,
- upgrade processes,
- on-call / incident response,
- SLAs.
**What happens technically**
- Candidate operators are selected and agree on operational expectations.
- An **Obol DV cluster** is created:
- DKG ceremony for validator keys,
- cluster configuration (Charon, clients, networking),
- metrics and alerting wired up.
- The DV cluster's structure and operational procedures are documented as part of the material needed for **Lido's Identified Node Operator process** (to attach DVT tiers later).
**How Obol helps**
- Maintains an ecosystem view of potential operators.
- Proposes **operator sets** that match:
- geography / jurisdiction preferences,
- infrastructure diversity (cloud vs bare metal, client diversity, etc.).
- Coordinates:
- DKG,
- cluster bootstrapping,
- best practices on monitoring and upgrades.
- Prepares technical input for the **Identified Node Operator** submission (DVT category).
For detailed steps on the identification process, see the [Node Operator Guide](lido-v3-stvault-for-node-operator.md#51-dvt-cluster-identification-process).
---
### Step 3 — Strategies and Additional Rewards (Optional)
This step is optional and only applies if you want more than the **baseline staking yield**.
**Decisions you make**
- Whether to:
- keep the vault **staking-only**, or
- allow **minted stETH** to be used in strategies (looping, hedged positions, restaking, Primev, etc.).
- Your comfort with:
- leverage/looping levels,
- borrow rate risk,
- extra smart contract and integration risk.
**What happens technically**
- A **curator / strategy provider** designs a strategy that:
- respects the vault's RR and DVT tier caps,
- stays within safe **health / utilization** bounds,
- integrates any sidecars (e.g. Primev) for extra rewards.
- The strategy is executed at the vault level:
- minting stETH (within capacity),
- routing it into external protocols,
- managing rebalances and unwinds.
- Health metrics (utilization, health factor) are monitored; corrective actions are defined in advance.
**How Obol helps**
- Connects you with **curators** who have relevant experience (looping, restaking, market-neutral, etc.).
- Provides **operational constraints** from the validator side:
- how often it is safe to rebalance without stressing infra,
- how exits/redemptions map to validator exit queues.
- Works alongside the curator to ensure the strategy is compatible with:
- cluster operations,
- Lido's risk framework,
- your internal risk policies.
## Appendix
### Parameters Used
| Category | Parameter | Value |
| --- | --- | --- |
| User | Initial capital | **10,000** |
| stVault economics | stVault gross yield | **3.15%** |
| | Node operator fee | **2.0%** (of staking yield) |
| | Obol fee | **0.5%** (of staking yield) |
| Lido fees | Lido infra fee | **1.0%** (of staking yield) |
| | Lido liquidity fee | **6.5%** (of staking yield) |
| | Total fee share | **10.0%** of staking yield |
| | **Net base APR to user** | **≈ 2.84%** (no looping) |
| stETH reference | stETH gross yield | **3.0%** (context only) |
| Vault tier | Mintable capacity (DVT) | **98%** of vault value |
| | Mintable capacity (non-DVT) | **50%** of vault value |
| Aave / looping | Loops | **10** |
| | wstETH LTV | **93%** |
| | wstETH supply APY | **0.04%** |
| | ETH borrow cost | **2.5%** |
For the example we compress all staking-side fees into a single **net base yield**:
```
stVault gross yield = 3.15%
Total fee share on yield = 1.0% + 6.5% + 2.0% + 0.5% = 10.0%
Net base APR to user (no looping)
r_base_net = 3.15% × (1 − 10%) ≈ 2.835%
```
So with *no looping*, a 10,000 deposit would earn ≈ 2.84% APR.
---
### How the APR Is Calculated (Conceptual)
For each case with looping we approximate:
```
Profit ≈ TV × r_base_net + minted_stETH × r_supply − borrowed_ETH × r_borrow
(staking on TV) (Aave supply APY) (borrow cost)
User APR ≈ Profit / Initial capital
```
Using:
- `r_base_net ≈ 2.835%` (net staking APR to user, from the stVault)
- `r_supply = 0.04%` (wstETH supply APY on Aave)
- `r_borrow = 2.5%` (ETH borrow cost)
### Case B – Non-DVT vault (50% mintable)
After 10 loops:
- `TV ≈ 18,687`
- `minted_stETH ≈ 9,341`
- `borrowed_ETH ≈ 8,687`
Approximate annual profit:
- Base staking: `18,687 × 2.835% ≈ 530`
- Aave supply: `9,341 × 0.04% ≈ 3.7`
- Borrow cost: `8,687 × 2.5% ≈ 217`
```
Profit ≈ 530 + 3.7 − 217 ≈ 316
APR_default ≈ 316 / 10,000 ≈ 3.16%
```
### Case C – DVT vault (98% mintable)
After 10 loops:
- `TV ≈ 72,188`
- `minted_stETH ≈ 66,869`
- `borrowed_ETH ≈ 62,188`
Approximate annual profit:
- Base staking: `72,188 × 2.835% ≈ 2,046`
- Aave supply: `66,869 × 0.04% ≈ 26.7`
- Borrow cost: `62,188 × 2.5% ≈ 1,555`
```
Profit ≈ 2,046 + 26.7 − 1,555 ≈ 518.6
APR_DVT ≈ 518.6 / 10,000 ≈ 5.19%
```
---
# Run a DV on a DappNode
URL: https://docs.obol.org/run-a-dv/integrations/dappnode
# DappNode
For setup, see quickstart guide:
For set-up of a DV using DappNode, see the quickstart guide [Create a DV Alone](../start/create-a-dv-alone.mdx), and select the appropriate tab for "DappNode".
### Frequently asked questions {#frequently-asked-questions}
#### If an operator uses an ENR to join a cluster, then exits the validator key, do they need to clean up the validator and Charon volumes to use the same ENR for another cluster? {#if-an-operator-uses-an-enr-to-join-a-cluster-then-exits-the-validator-key-do-they-need-to-clean-up-t}
Yes, they need to clean up the Charon and validator volumes. However, instead of deleting everything, the operator can:
1. Download a backup (keep a copy just in case).
2. Edit the backup, keeping only the necessary files from the specific cluster (see image below)
3. Recompress the edited backup and upload it again after removing the Charon and validator volumes.
#### Does an operator need to use the `VALIDATOR_EXTRA_OPTS` to pass the `builderonly` or `builderalways` flag for Lodestar VC? {#does-an-operator-need-to-use-the-validator_extra_opts-to-pass-the-builderonly-or-builderalways-flag}
No, if `ENABLE_MEV_BOOST` is set to `true`, these flags will be added automatically.

#### How can users running two clusters (e.g., one for EtherFi solo stakers and another for Techne) on the same Dappnode machine push monitoring data from both clusters to Obol? {#how-can-users-running-two-clusters-eg-one-for-etherfi-solo-stakers-and-another-for-techne-on-the-sam}
In the Config tab, there is a field called "Charons to monitor by Obol (optional)". You just need to enter the cluster numbers you are using in Dappnode. For example, if you’re running three nodes on clusters 1, 2, and 3, you would enter “1,2,3”.
---
# Advanced Guides
URL: https://docs.obol.org/advanced-and-troubleshooting/advanced
# advanced
---
# Swapping Clients
URL: https://docs.obol.org/advanced-and-troubleshooting/advanced/client-swap
# Client swap
If you are using CDVN, the default stack is:
| Execution layer | Consensus layer | Distributed validator | Validator client | MEV |
| --------------- | --------------- | --------------------- | ---------------- | --------- |
| Nethermind | Lighthouse | Charon | Lodestar | MEV boost |
However, to achieve greater resilience through client diversity, it is preferred to run a variety of clients across your cluster, ideally ensuring no single EL/CL/VC runs on one third of the nodes or more. CDVN supports changing from the default clients.
Currently supported client options are:
| Execution layer | Consensus layer | Distributed validator | Validator client | MEV |
| --------------- | --------------- | --------------------- | ---------------- | ------------ |
| Nethermind | Lighthouse | Charon | Lodestar | MEV boost |
| Reth | Grandine | | Nimbus | Commit boost |
| | Lodestar | | Prysm | |
| | Teku | | Teku | |
For support between different combinations, refer to Charon's compatibility matrix, found in the [prepare section of the docs](../../run-a-dv/prepare/how_where_dvs.md) or under [release notes](https://github.com/ObolNetwork/charon/releases/) for each release.
:::info
As CDVN natively supports more clients, the number of possible combinations grows quickly.
We test extensively, but cannot guarantee the performance of all possible client combos.
If you run a mixed-client cluster, monitor performance and be ready to swap to another client if you observe issues.
:::
:::info
There is currently an incompatibility between validator clients that may cause attestation aggregation duties to fail. Aggregation duties are not economically rewarded nor punished for their completion.
To ensure aggregations succeed; have at least threshold of nodes in the cluster running one of Lodestar, Lighthouse, and Nimbus, or alternatively; have a threshold of nodes in the cluster running one of Teku and Prysm. This incompatibility will be remediated in upcoming client releases.
:::
:::warning
**Lodestar's validator** client's default behavior is to skip the next slot if it fails an attestation or aggregation. This can impact your cluster's performance, particularly if you have more than the fault tolerance threshold of your cluster running Lodestar's validator client, and many validators running in the cluster.
If your cluster is not successfully aggregating, you should ideally swap to a set of compatible validator clients listed above, along with ensuring your clients have the appropriate [`--distributed` flag](../troubleshooting/client_configurations.md) set to enable distributed aggregation mode. Failing that, you can add the flag `--slotSkip false` to your `lodestar vc` process, (requires lodestar to be version `v1.37.0` and newer) or set `VC_LODESTAR_DISABLE_SLOT_SKIP=true` in your `.env` file if you're using (L)[CDVN](https://github.com/ObolNetwork/charon-distributed-validator-node). This disables the slot skipping feature.
:::
## Choosing clients in fresh cluster
In order to choose which clients to use in a new cluster, simply leave uncommented (only) the desired `EL`, `CL`, `MEV` or `VC` variables in the `.env` file. There must be only one client per component. The cluster will use the respective client for each component.
## Swapping clients in an already running cluster
:::warning
For ([L](https://github.com/obolNetwork/lido-charon-distributed-validator-node))[CDVN](https://github.com/obolNetwork/charon-distributed-validator-node) users who created their `.env` file before the release of charon `v1.8.0`, there are breaking changes between then and the current multi-client `.env` file setup.
The minimal addition to an older version of the `.env` file compatible with the current versions of the repos is to add `COMPOSE_PROFILES=el_nethermind,cl_lighthouse,dv_charon,vc_lodestar,mev_mevboost` to your existing `.env` file.
Some environment variables were renamed in order to be client-agnostic. **If you had set these environment variables to custom values in your `.env`, you need to set the new variables to your custom values**. They serve the same purpose.
| Old | New |
|-------------------------------|--------------------------------- |
| NETHERMIND_PORT_P2P | EL_PORT_P2P |
| NETHERMIND_IP_HTTP | EL_IP_HTTP |
| NETHERMIND_PORT_HTTP | EL_PORT_HTTP |
| NETHERMIND_IP_ENGINE | EL_IP_ENGINE |
| NETHERMIND_PORT_ENGINE | EL_PORT_ENGINE |
| LIGHTHOUSE_PORT_P2P | CL_PORT_P2P |
| LODESTAR_PORT_METRICS | VC_PORT_METRICS |
| MEVBOOST_TIMEOUT_GETHEADER | MEV_TIMEOUT_GETHEADER |
| MEVBOOST_TIMEOUT_GETPAYLOAD | MEV_TIMEOUT_GETPAYLOAD |
| MEVBOOST_TIMEOUT_REGVAL | MEV_TIMEOUT_REGVAL |
| MEVBOOST_RELAYS | MEV_RELAYS |
| NETHERMIND_PROMTAIL_MONITORED | EL_NETHERMIND_PROMTAIL_MONITORED |
| LIGHTHOUSE_PROMTAIL_MONITORED | CL_LIGHTHOUSE_PROMTAIL_MONITORED |
| LODESTAR_PROMTAIL_MONITORED | VC_LODESTAR_PROMTAIL_MONITORED |
| MEV_BOOST_PROMTAIL_MONITORED | MEV_MEV_BOOST_PROMTAIL_MONITORED |
:::
1. Copy the new `.env.sample.` file to `.env`.
2. Comment or uncomment your preferred Execution, Consensus, Validator, and MEV clients and save the file.
3. Stop the existing cluster that uses the old environment file.
```sh
docker compose --profile "" down
```
3. Start the node again to pick up the changes to the `.env` file.
```sh
docker compose up -d
```
Your node should start up with the new clients.
### Swap Consensus layer
:::info
The code snippets under those steps are assuming you are swapping from Lighthouse CL to Grandine CL and you.
:::
1. Stop the existing consensus layer client container.
:::info
If you do not want to experience downtime while the new beacon node is syncing, you can set a fallback beacon node for Charon (`CHARON_FALLBACK_BEACON_NODE_ENDPOINTS` env variable) that will be used while the new BN is syncing.
Note that you need to restart Charon as well in order for it to take effect.
:::
```sh
docker compose down cl-lighthouse
```
1. Comment out the currently set `CL` environment variable in `.env` (i.e.: `CL=cl-lighthouse` -> `#CL=cl-lighthouse`). Uncomment the desired CL (i.e.: `#CL=cl-grandine` -> `CL=cl-grandine`).
2. Start the new consensus layer client container.
```sh
docker compose up cl-grandine -d
```
4. Restart Charon in order to update the CL client it's querying.
```sh
docker compose down charon
docker compose up charon -d
```
5. After the new consensus layer client is synced and you are assured the new setup is working, you can delete the previous CL client's data in order to save resources.
```sh
rm -rf ./data/lighthouse
```
### Swap Validator client
:::info
The code snippets under those steps are assuming you are swapping from Lodestar VC to Teku VC.
:::
1. Stop the existing validator client container.
```sh
docker compose down vc-lodestar
```
2. Comment out the currently set `VC` environment variable in `.env` (i.e.: `VC=vc-lodestar` -> `#VC=vc-lodestar`). Uncomment the desired VC (i.e.: `#VC=vc-teku` -> `VC=vc-teku`).
3. Start the new validator client container.
```sh
docker compose up vc-teku -d
```
4. After the new validator client is started and you are assured the new setup is working, you can delete the previous VC's data in order to save resources
```sh
rm -rf ./data/lodestar
```
### SWAP MEV client
:::info
The code snippets under those steps are assuming you are swapping from MEV Boost to Commit Boost and you are using Lighthouse CL.
:::
:::info
If switching to Commit Boost, you will need to copy a Commit Boost TOML config `commit-boost/config.toml.sample.` to `commit-boost/config.toml`, as it does not support `.env` configurations yet. Make sure the configuration matches what you have had set for mev-boost, in terms of relays and timeouts.
:::
1. Stop the existing MEV client container.
```sh
docker compose down mev-mevboost
```
2. Comment out the currently set `MEV` environment variable in `.env` (i.e.: `MEV=mev-mevboost` -> `#MEV=mev-mevboost`). Uncomment the desired MEV (i.e.: `#MEV=mev-commitboost` -> `MEV=mev-commitboost`).
3. Start the new MEV client container.
```sh
docker compose up mev-commitboost -d
```
4. Restart the beacon node in order to update the MEV it's querying.
```sh
docker compose down cl-lighthouse
docker compose up cl-lighthouse -d
```
---
# Migrate an Existing Validator
URL: https://docs.obol.org/advanced-and-troubleshooting/advanced/quickstart-split
# Migrate an Existing Validator
:::warning
This process should only be used if you want to split an _existing validator private key_ into multiple private key shares for use in a Distributed Validator Cluster. **If your existing validator is not properly shut down before the Distributed Validator starts, your validator may be slashed**.
If you are starting a new validator, you should follow a [quickstart guide](../../run-a-dv/start/quickstart_overview.md) instead.
:::
Split an existing Ethereum validator key into multiple key shares for use in an [Obol Distributed Validator Cluster](../../learn/intro/key-concepts.md#distributed-validator-cluster).
## Pre-requisites
* Ensure you have the existing validator keystores (the ones to split) and passwords.
* Ensure you have [docker](https://docs.docker.com/engine/install/) installed.
* Make sure `docker` is running before executing the commands below.
* If you use MEV-Boost, you must either:
* Turn off your MEV-Boost client before you split your keys, or;
* Temporarily use a relay you won't be using when running the Distributed Validator; to prevent registering for MEV with a timestamp more recent than the one Charon prepares at the moment of key splitting.
## Step 1. Prepare the existing keystore files
:::info
Starting with Charon v1.8.0, you may not need to manually prepare the keystore files as described below. Charon can recursively search for keystore files in the specified directory and attempt to match the corresponding password files. The only case where this does not work is when you specify an exact list of withdrawal addresses; in that case, you must prepare the files manually and ensure the keystore indices match the order of the specified withdrawal addresses.
:::
Create a folder to hold the encrypted keystores, along with the passwords to decrypt them.
```shell
# Create a folder
mkdir split_keys
```
Copy the existing validator `keystore.json` files into this new folder. Alongside them, with a matching filename but ending with `.txt` should be the password to the keystore (e.g.: `keystore-0.json`, `keystore-0.txt`). The files must start with `keystore*`.
At the end of this process, you should have a tree like this:
```shell
├── split_keys
│ ├── keystore-0.json
│ ├── keystore-0.txt
│ ├── keystore-1.json
│ ├── keystore-1.txt
│ ...
│ ├── keystore-N.json
│ ├── keystore-N.txt
```
## Step 2. Split the keys using the charon docker command
Run the following docker command to split the keys (for mainnet):
```shell
CHARON_VERSION= # E.g. v1.10.3
CLUSTER_NAME= # The name of the cluster you want to create.
WITHDRAWAL_ADDRESS= # The address you want to use for withdrawals (this is just for accuracy in your lock file, you can't change a withdrawal address for a validator that has already been deposited)
FEE_RECIPIENT_ADDRESS= # The address you want to use for block reward and MEV payments.
NODES= # The number of nodes in the cluster.
docker run --rm -v $(pwd):/opt/charon obolnetwork/charon:${CHARON_VERSION} create cluster \
--name="${CLUSTER_NAME}" \
--withdrawal-addresses="${WITHDRAWAL_ADDRESS}" \
--fee-recipient-addresses="${FEE_RECIPIENT_ADDRESS}" \
--split-existing-keys \
--split-keys-dir=/opt/charon/split_keys \
--nodes ${NODES} \
--network mainnet \
--publish
```
The above command will create `validator_keys` along with `cluster-lock.json` in `./cluster` for each node.
Command output:
```shell
***************** WARNING: Splitting keys **********************
Please make sure any existing validator has been shut down for
at least 2 finalized epochs before starting the Charon cluster,
otherwise slashing could occur.
****************************************************************
Created Charon cluster:
--split-existing-keys=true
./cluster/
├─ node[0-*]/ # Directory for each node
│ ├─ charon-enr-private-key # Charon networking private key for node authentication
│ ├─ cluster-lock.json # Cluster lock defines the cluster lock file which is signed by all nodes
│ ├─ validator_keys # Validator keystores and password
│ │ ├─ keystore-*.json # Validator private share key for duty signing
│ │ ├─ keystore-*.txt # Keystore password files for keystore-*.json
```
These split keys can now be used to start a Charon cluster.
## Step 3. (Optional) Encrypt artifacts for distribution
Within each folder are the encrypted [private key shares](../../learn/intro/key-concepts.md#distributed-validator-key-share), along with the decryption passwords. To transmit these folders to the operators/machines where they will run, it might be prudent to encrypt the folder as a `.zip` to transport them.
```shell
# For each folder in ./cluster/ encrypt it with a different password
zip -er node1.zip ./cluster/node1/
# Repeat for node2,...,nodeN.
```
---
# Create a DV Using the SDK
URL: https://docs.obol.org/advanced-and-troubleshooting/advanced/create-a-dv-using-the-sdk
# Create a DV Using the SDK
This is a walkthrough of using the [Obol-SDK](https://www.npmjs.com/package/@obolnetwork/obol-sdk) to propose a four-node distributed validator cluster for creation using the [DV Launchpad](../../learn/intro/launchpad.md).
### Pre-requisites {#pre-requisites}
* You have [node.js](https://nodejs.org/en) installed.
### Install the package {#install-the-package}
Install the Obol-SDK package into your development environment
```sh
npm install --save @obolnetwork/obol-sdk
```
```sh
yarn add @obolnetwork/obol-sdk
```
### Instantiate the client {#instantiate-the-client}
The first thing you need to do is create an instance of the Obol SDK client. The client takes two constructor parameters:
* The `chainID` for the chain you intend to use.
* An ethers.js [signer](https://docs.ethers.org/v6/api/providers/#Signer-signTypedData) object.
```sh
// Create a dummy ethers signer object with a throwaway private key
const mnemonic = ethers.Wallet.createRandom().mnemonic?.phrase || "";
const privateKey = ethers.Wallet.fromPhrase(mnemonic).privateKey;
const wallet = new ethers.Wallet(privateKey);
const signer = wallet.connect(null);
// Instantiate the Obol Client for Hoodi
const obol = new Client({ chainId: 560048 }, signer);
```
### Propose the cluster {#propose-the-cluster}
List the Ethereum addresses of participating operators, along with withdrawal and fee recipient address data for each validator you intend for the operators to create.
```sh
// A config hash is a deterministic hash of the proposed DV cluster configuration
const configHash = await obol.createClusterDefinition({
name: "SDK Demo Cluster",
operators: [
{ address: "0xC35CfCd67b9C27345a54EDEcC1033F2284148c81" },
{ address: "0x33807D6F1DCe44b9C599fFE03640762A6F08C496" },
{ address: "0xc6e76F72Ea672FAe05C357157CfC37720F0aF26f" },
{ address: "0x86B8145c98e5BD25BA722645b15eD65f024a87EC" },
],
validators: [
{
fee_recipient_address: "0x3CD4958e76C317abcEA19faDd076348808424F99",
withdrawal_address: "0xE0C5ceA4D3869F156717C66E188Ae81C80914a6e",
},
],
});
console.log(
`Direct the operators to https://hoodi.launchpad.obol.org/dv?configHash=${configHash} to complete the key generation process`
);
```
### Invite the Operators to complete the DKG {#invite-the-operators-to-complete-the-dkg}
Once the Obol-API returns a `configHash` string from the `createClusterDefinition` method, you can use this identifier to invite the operators to the [Launchpad](../../learn/intro/launchpad.md) to complete the process
1. Operators navigate to `https://.launchpad.obol.org/dv?configHash=` and complete the [run a DV with others](../../run-a-dv/start/create-a-dv-with-a-group.mdx) flow.
2. Once the DKG is complete, and operators are using the `--publish` flag, the created cluster details will be posted to the Obol API.
3. The creator will be able to retrieve this data with `obol.getClusterLock(configHash)`, to use for activating the newly created validator.
### Retrieve the created Distributed Validators using the SDK {#retrieve-the-created-distributed-validators-using-the-sdk}
Once the DKG is complete, the proposer of the cluster can retrieve key data such as the validator public keys and their associated deposit data messages.
```sh
const clusterLock = await obol.getClusterLock(configHash);
```
Reference lock files can be found [here](https://github.com/ObolNetwork/charon/tree/main/cluster/testdata).
### Activate the DVs using the deposit contract {#activate-the-dvs-using-the-deposit-contract}
In order to activate the distributed validators, the cluster operator can retrieve the validators' associated deposit data from the lock file and use it to craft transactions to the `deposit()` method on the deposit contract.
```sh
const validatorDepositData =
clusterLock.distributed_validators[validatorIndex].deposit_data;
const depositContract = new ethers.Contract(
DEPOSIT_CONTRACT_ADDRESS, // 0x00000000219ab540356cBB839Cbe05303d7705Fa for Mainnet, 0xff50ed3d0ec03aC01D4C79aAd74928BFF48a7b2b for Goerli
depositContractABI, // https://etherscan.io/address/0x00000000219ab540356cBB839Cbe05303d7705Fa#code for Mainnet, and replace the address for Goerli
signer
);
const TX_VALUE = ethers.parseEther("32");
const tx = await depositContract.deposit(
validatorDepositData.pubkey,
validatorDepositData.withdrawal_credentials,
validatorDepositData.signature,
validatorDepositData.deposit_data_root,
{ value: TX_VALUE }
);
const txResult = await tx.wait();
```
### Usage Examples {#usage-examples}
Examples of how our SDK can be used are found [here](https://github.com/ObolNetwork/obol-sdk-examples).
---
# Pre-Create a DV with an OVM
URL: https://docs.obol.org/advanced-and-troubleshooting/advanced/ovm-predeploy
# Validator Pre-Deploy Workflow
A customer opting into staking at an unknown time, is a key trigger for enterprise staking deployments. There are two primary ways these ad-hoc demands are programatically fulfilled, using smart contracts or using/generating the private keys.
- Smart contracts such as an [Obol Validator Manager](../../learn/intro/obol-splits.md#obol-validator-managers) (OVM) can re-assign their (beneficial) ownership; allowing a customer to activate a pre-created deposit for this smart contract.
- A fresh DV cluster can be [created](../../run-a-dv/start/create-a-dv-alone.mdx), a [DKG invite](../../run-a-dv/start/create-a-dv-with-a-group.mdx) can be created for waiting [DV-pods](https://github.com/ObolNetwork/helm-charts/tree/main/charts/dv-pod) ready to partake, a [`charon add-validators`](../../run-a-dv/editing/add-validators.md) command could be triggered to add extra keys to a running cluster, or [`charon deposit sign`](./alter-withdrawal-addresses.md) could be used to alter an unused validator's withdrawal address.
This guide will focus on the former, managing validators using Obol smart contracts, and their role based access control. This approach requires less coordination for multi-operator setups, and is simpler than creating or interacting with private key material on the fly by a remote trigger.
This guide will demonstrate the key steps in preparing a DV cluster for this type of scenario. A blank OVM will be created and assigned validator keys, along with a splitter contract for distributing rewards. Adjust the number of OVMs, splitters, and their key counts for your use case. Administratorship of the OVMs and splitters will be given to a private key that will sit in a secure back end API server, and when a customer triggers an allocation of an OVM, the API server private key will make the necessary updates to an unallocated OVM, and then revoke its control over the smart contracts, leaving them ready for the customer's deposit.
The Hoodi testnet will be used for all examples.
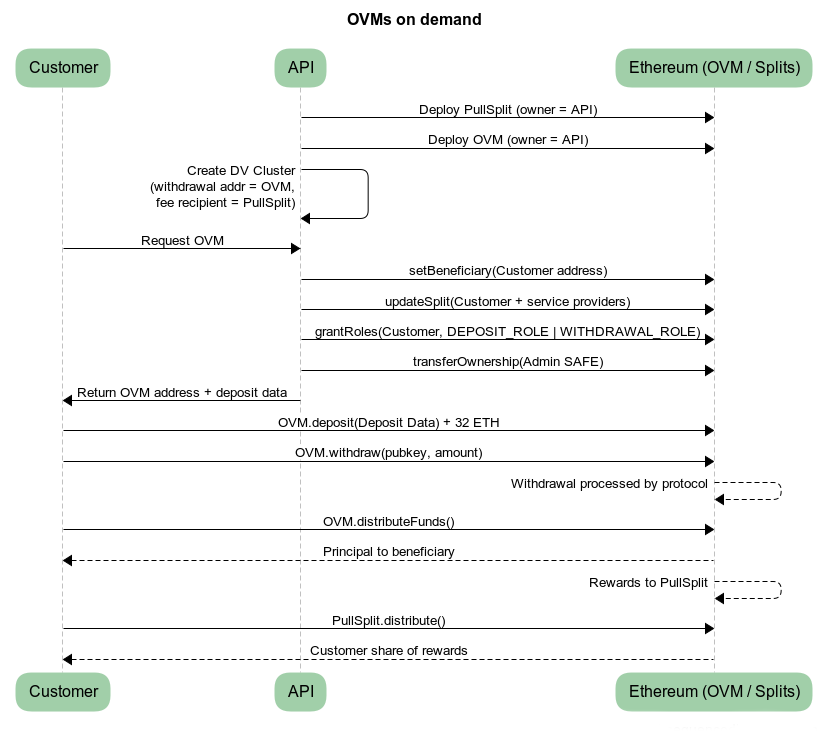
:::warning
The following code snippets are minimal examples for the purpose of achieving the desired functionality. These should not be run in production without thorough testing and review.
:::
#### OVM roles at a glance
The OVM uses a [bitwise role system](./assign-ovm-roles.md) for permissioned actions. The `owner` (set in the constructor) holds all powers and can `grantRoles()` to other addresses. The table is an operational summary; see [Obol Validator Manager](../../learn/intro/obol-splits.md#obol-validator-managers) for the full conceptual reference.
| Role | Hex | Authorizes |
| --- | --- | --- |
| `owner` | — | Every gated method below, plus `grantRoles`, `revokeRoles`, `transferOwnership`, `renounceOwnership`, and the combined `transfer(newBeneficiary, newOwner)` shortcut. |
| `WITHDRAWAL_ROLE` | `0x01` | `withdraw()` — initiate partial or full validator withdrawals (EIP-7002). |
| `CONSOLIDATION_ROLE` | `0x02` | `consolidate()` — merge validators or upgrade a `0x01` validator to `0x02` via self-consolidation. |
| `SET_BENEFICIARY_ROLE` | `0x04` | `setBeneficiary()` (change principal recipient) and `setAmountOfPrincipalStake()` (correct principal accounting). |
| `RECOVER_FUNDS_ROLE` | `0x08` | `recoverFunds()` — sweep stuck **ERC20** balances. ETH cannot be recovered through this method. |
| `SET_REWARD_ROLE` | `0x10` | `setRewardRecipient()` — change the reward destination. |
| `DEPOSIT_ROLE` | `0x20` | `deposit()` — fund a validator through the OVM so principal accounting updates. |
`distributeFunds()`, `distributeFundsPull()`, and `withdrawPullBalance()` are permissionless. `principalThreshold` is set at deployment and is **immutable** — if a different threshold is needed, deploy a fresh OVM.
:::warning
`DEPOSIT_ROLE` only gates `OVM.deposit()`. The canonical Ethereum deposit contract (`0x00000000219ab540356cBB839Cbe05303d7705Fa`) is permissionless — anyone holding the validator pubkey can submit a deposit directly to it with the OVM as withdrawal credentials, bypassing the OVM's principal accounting. Use `setAmountOfPrincipalStake()` to correct the recorded principal in that case.
:::
#### Pre-requisites
To keep the `cast` examples neat, we'll declare the key addresses upfront here, and refer to them as environment variables in each `cast` command.
```sh
# You need an RPC for your commands to reach the Ethereum network. Use one for the correct chain.
export RPC_URL=https://ethereum-hoodi-rpc.publicnode.com
#export RPC_URL=https://ethereum-rpc.publicnode.com
# This address will be the in case of emergency break glass address for all OVMs.
# This address has custody of the funds and can modify all roles.
# Consider if this address should be the end user, burned outright,
# or a trusted, high threshold SAFE account in case of issue.
export ADMIN_SAFE_ADDRESS=0xFallbackSafeAddressHere
# The private key corresponding to this address should run in your API service
# This address will have temporary control over the OVM until a User requests it
# Create a keypair with `cast wallet new` and send it some Ether for transaction fees.
export BACKEND_API_ADDRESS=0xPublicAddressForAPIWallet
# The corresponding private key. (Make sure you don't commit it to version control!)
export BACKEND_API_PRIVATE_KEY=0xPrivateKeyForAnAPIWallet
# The address of the OVM factory on Hoodi
export OBOL_VALIDATOR_MANAGER_FACTORY_ADDRESS=0x5754C8665B7e7BF15E83fCdF6d9636684B782b12
# The address of the OVM factory address on **Mainnet**
#export OBOL_VALIDATOR_MANAGER_FACTORY_ADDRESS=0x2c26B5A373294CaccBd3DE817D9B7C6aea7De584
# Pull Split Factory Address
export PULL_SPLIT_FACTORY_ADDRESS=0x6B9118074aB15142d7524E8c4ea8f62A3Bdb98f1
# https://etherscan.io/address/0x6B9118074aB15142d7524E8c4ea8f62A3Bdb98f1#code
```
#### Fee Splitting
A key decision when it comes to preparing a Distributed Validator is how Node Operators and Service providers can be non-custodially compensated for their services. Obol Validator Managers are built to leverage [Splits.org](https://splits.org) split contracts. For this demo, split contracts will be pre-created with the unallocated OVMs, and edited for customers as they appear. You may want to consider smoothing MEV across your customers using a pair of nested splitters. This is described in more detail at the end of the [guide](#appendix-mev-smoothing).
### Contract Deployment
A safe and convenient way to deploy an OVM contract is through the [existing contract factory](https://docs.obol.org/next/learn/readme/obol-splits#obol-validator-manager-factory-deployment). A splitter contract can be deployed in a similar fashion.
```sh
# Create a PullSplit owned by the backend API
cast send $PULL_SPLIT_FACTORY_ADDRESS \
"createSplit((address[],uint256[],uint256,uint16),address,address)" \
"([$BACKEND_API_ADDRESS],[1000000],1000000,0)" $BACKEND_API_ADDRESS $BACKEND_API_ADDRESS \
--rpc-url $RPC_URL \
--private-key $BACKEND_API_PRIVATE_KEY
# Create an OVM owned by the backend API, with placeholder beneficiary
cast send $OBOL_VALIDATOR_MANAGER_FACTORY_ADDRESS \
"createObolValidatorManager(address,address,address,uint64)" \
$BACKEND_API_ADDRESS $BACKEND_API_ADDRESS 0xYourRecentlyDeployedPullSplit 16000000000 \
--rpc-url $RPC_URL \
--private-key $BACKEND_API_PRIVATE_KEY
```
```solidity
// SPDX-License-Identifier: MIT
pragma solidity ^0.8.19;
interface IPullSplitFactory {
function createSplit(
SplitParams calldata params,
address owner,
address creator
) external returns (address split);
}
struct SplitParams {
address[] recipients;
uint256[] allocations;
uint256 totalAllocation;
uint16 distributionIncentive;
}
interface IObolValidatorManagerFactory {
function createObolValidatorManager(
address owner,
address beneficiary,
address rewardRecipient,
uint64 principalThreshold
) external returns (address ovm);
}
contract DeployOVMAndSplit is Script {
address constant OBOL_VALIDATOR_MANAGER_FACTORY_ADDRESS = 0x5754C8665B7e7BF15E83fCdF6d9636684B782b12;
address constant PULL_SPLIT_FACTORY_ADDRESS = 0x6B9118074aB15142d7524E8c4ea8f62A3Bdb98f1;
address constant BACKEND_API_ADDRESS = 0xPublicAddressForAPIWallet;
function run() external {
vm.startBroadcast();
// Step 1: Deploy the PullSplit via the factory
address[] memory recipients = new address[](1);
recipients[0] = BACKEND_API_ADDRESS;
uint256[] memory allocations = new uint256[](1);
allocations[0] = 1_000_000;
address pullSplit = IPullSplitFactory(PULL_SPLIT_FACTORY_ADDRESS).createSplit(
SplitParams({
recipients: recipients,
allocations: allocations,
totalAllocation: 1_000_000,
distributionIncentive: 0
}),
BACKEND_API_ADDRESS, // owner
BACKEND_API_ADDRESS // creator
);
console.log("PullSplit deployed at:", pullSplit);
// Step 2: Deploy the OVM via the factory, with the PullSplit as rewardRecipient
address ovm = IObolValidatorManagerFactory(OBOL_VALIDATOR_MANAGER_FACTORY_ADDRESS).createObolValidatorManager(
BACKEND_API_ADDRESS, // owner (API wallet)
BACKEND_API_ADDRESS, // beneficiary (placeholder, updated during onboarding)
pullSplit, // rewardRecipient (the PullSplit we just deployed)
16_000_000_000 // 16 ETH in gwei (recommended principal threshold)
);
console.log("ObolValidatorManager deployed at:", ovm);
vm.stopBroadcast();
}
}
```
```ts
import {
createWalletClient,
createPublicClient,
http,
parseAbi,
parseEventLogs,
} from "viem";
// Factory contract addresses (already deployed)
const OBOL_VALIDATOR_MANAGER_FACTORY_ADDRESS = "0x5754C8665B7e7BF15E83fCdF6d9636684B782b12";
const PULL_SPLIT_FACTORY_ADDRESS = "0x6B9118074aB15142d7524E8c4ea8f62A3Bdb98f1";
const BACKEND_API_ADDRESS = "0xPublicAddressForAPIWallet";
// Minimal ABIs for the factories
const splitFactoryAbi = parseAbi([
"function createSplit((address[],uint256[],uint256,uint16),address,address) external returns (address split)",
]);
const ovmFactoryAbi = parseAbi([
"function createObolValidatorManager(address owner, address beneficiary, address rewardRecipient, uint64 principalThreshold) external returns (address ovm)",
"event CreateObolValidatorManager(address indexed ovm, address indexed owner, address beneficiary, address rewardRecipient, uint64 principalThreshold)",
]);
// Set up account from private key (the backend API key)
const account = privateKeyToAccount("0x...");
const walletClient = createWalletClient({
account,
chain: hoodi,
transport: http("https://ethereum-hoodi-rpc.publicnode.com"),
});
const publicClient = createPublicClient({
chain: hoodi,
transport: http("https://ethereum-hoodi-rpc.publicnode.com"),
});
// Step 1: Deploy the PullSplit via the factory
const splitHash = await walletClient.writeContract({
address: PULL_SPLIT_FACTORY_ADDRESS,
abi: splitFactoryAbi,
functionName: "createSplit",
args: [
{
recipients: [BACKEND_API_ADDRESS],
allocations: [1_000_000n],
totalAllocation: 1_000_000n,
distributionIncentive: 0,
},
BACKEND_API_ADDRESS, // owner
BACKEND_API_ADDRESS, // creator
],
});
console.log("PullSplit deploy tx:", splitHash);
const splitReceipt = await publicClient.waitForTransactionReceipt({ hash: splitHash });
// Extract the PullSplit address from the transaction logs
// (adjust based on the factory's event signature)
const pullSplitAddress = splitReceipt.logs[0].address;
console.log("PullSplit deployed at:", pullSplitAddress);
// Step 2: Deploy the OVM via the factory, with the PullSplit as rewardRecipient
const ovmHash = await walletClient.writeContract({
address: OBOL_VALIDATOR_MANAGER_FACTORY_ADDRESS,
abi: ovmFactoryAbi,
functionName: "createObolValidatorManager",
args: [
BACKEND_API_ADDRESS, // owner (API wallet)
BACKEND_API_ADDRESS, // beneficiary (placeholder, updated during onboarding)
pullSplitAddress, // rewardRecipient (the PullSplit we just deployed)
16_000_000_000n, // 16 ETH in gwei (recommended principal threshold)
],
});
console.log("OVM deploy tx:", ovmHash);
const ovmReceipt = await publicClient.waitForTransactionReceipt({ hash: ovmHash });
const logs = parseEventLogs({
abi: ovmFactoryAbi,
logs: ovmReceipt.logs,
eventName: "CreateObolValidatorManager",
});
const ovmAddress = logs[0].args.ovm;
console.log("ObolValidatorManager deployed at:", ovmAddress);
```
After you have deployed an Obol Validator Manager contract, let's save its address and an example customer address as environment variables to make the rest of the `cast` demo easier.
```sh
# The created OVM from the factory
export EXAMPLE_OVM_ADDRESS=0xYourRecentlyDeployedOVM
# The created PullSplit from the factory
export EXAMPLE_PULL_SPLIT_ADDRESS=0xYourRecentlyDeployedPullSplit
# An address of a hypothetical new customer
export EXAMPLE_CUSTOMER_ADDRESS=0xCustomerAddress
# A private key of a new customer. (Demo Only. Don't use raw customer private keys in practice)
export EXAMPLE_CUSTOMER_PRIVATE_KEY=0xCustomerPrivateKey
```
### Create the DV Cluster
At this point, you can prepare a DV cluster pointed at these OVMs and split contracts. Use the [`charon create cluster ... --publish`](../../learn/charon/charon-cli-reference.md#create-a-full-cluster-locally) command if you are controlling the validator keys centrally, or [`charon create dkg ... ---publish`](../../learn/charon/charon-cli-reference.md#creating-the-configuration-for-a-dkg-ceremony) if you have a group of operators taking part in the cluster. Comma separate the `--withdrawal-addresses` and `--fee-recipient-addresses` flags with your created OVMs and Pull Splits. Once you complete the key creation, you can load these artifacts into your nodes and get the cluster online and ready for deposits. At this point the last remaining action will be with the API key, which will change the ownership of an OVM to make it ready for deposits.
### Assigning the Contracts to Customers
When a capital allocator (customer) is onboarding, the pre-created contracts can be assigned to that entity. The principal beneficiary address is updated to the entity's preferred address, permissions are allocated to the customer and backend's addresses as needed, and then ownership of the OVMs are transferred or burned.
```sh
# Set the beneficiary address to the customer
cast send $EXAMPLE_OVM_ADDRESS \
"setBeneficiary(address)" \
$EXAMPLE_CUSTOMER_ADDRESS \
--rpc-url $RPC_URL \
--private-key $BACKEND_API_PRIVATE_KEY
# Modify the splitter to include the customer and service providers (example is 90/10 split customer/admin address)
cast send $EXAMPLE_PULL_SPLIT_ADDRESS \
"updateSplit(address[],uint256[],uint256,uint16)" \
"[$EXAMPLE_CUSTOMER_ADDRESS,$ADMIN_SAFE_ADDRESS]" "[900000,100000]" 1000000 0 \
--rpc-url $RPC_URL \
--private-key $BACKEND_API_PRIVATE_KEY
# Grant the customer the DEPOSIT_ROLE and WITHDRAWAL_ROLE
# 0x21 = DEPOSIT_ROLE (0x20) | WITHDRAWAL_ROLE (0x01) = 33 in decimal
cast send $EXAMPLE_OVM_ADDRESS \
"grantRoles(address,uint256)" \
$EXAMPLE_CUSTOMER_ADDRESS 0x21 \
--rpc-url $RPC_URL \
--private-key $BACKEND_API_PRIVATE_KEY
# [OPTIONAL] If the backend service needs the ability to trigger
# partial (or full) withdrawals, grant it the WITHDRAWAL_ROLE.
# Warning; This allows this address to selectively charge fees on principal
cast send $EXAMPLE_OVM_ADDRESS \
"grantRoles(address,uint256)" \
$BACKEND_API_ADDRESS 1 \
--rpc-url $RPC_URL \
--private-key $BACKEND_API_PRIVATE_KEY
```
```solidity
// SPDX-License-Identifier: MIT
pragma solidity ^0.8.19;
interface IObolValidatorManager {
function setBeneficiary(address newBeneficiary) external;
function grantRoles(address user, uint256 roles) external payable;
}
interface IPullSplit {
function updateSplit(
address[] calldata recipients,
uint256[] calldata allocations,
uint256 totalAllocation,
uint16 distributionIncentive
) external;
}
contract AssignToCustomer is Script {
address constant OVM_ADDRESS = 0xYourOVMAddress;
address constant PULL_SPLIT_ADDRESS = 0xYourPullSplitAddress;
address constant CUSTOMER_ADDRESS = 0xCustomerAddress;
address constant ADMIN_SAFE_ADDRESS = 0xFallbackSafeAddressHere;
uint256 constant WITHDRAWAL_ROLE = 0x01;
uint256 constant DEPOSIT_ROLE = 0x20;
function run() external {
vm.startBroadcast();
IObolValidatorManager ovm = IObolValidatorManager(OVM_ADDRESS);
// Set the beneficiary to the customer address
ovm.setBeneficiary(CUSTOMER_ADDRESS);
console.log("Beneficiary set to:", CUSTOMER_ADDRESS);
// Update the splitter to include the customer and service providers (90/10 split)
address[] memory recipients = new address[](2);
recipients[0] = CUSTOMER_ADDRESS;
recipients[1] = ADMIN_SAFE_ADDRESS;
uint256[] memory allocations = new uint256[](2);
allocations[0] = 900_000;
allocations[1] = 100_000;
IPullSplit(PULL_SPLIT_ADDRESS).updateSplit(recipients, allocations, 1_000_000, 0);
console.log("PullSplit updated with customer and service provider shares");
// Grant the customer deposit and withdrawal roles
ovm.grantRoles(CUSTOMER_ADDRESS, WITHDRAWAL_ROLE | DEPOSIT_ROLE);
console.log("Customer assigned deposit and withdrawal roles");
vm.stopBroadcast();
}
}
```
```ts
// The deployed OVM and PullSplit addresses
const OVM_ADDRESS = "0xYourOVMAddress";
const PULL_SPLIT_ADDRESS = "0xYourPullSplitAddress";
// The customer address to receive principal deposits
const CUSTOMER_ADDRESS = "0xCustomerAddress";
// Admin safe for service provider fee share
const ADMIN_SAFE_ADDRESS = "0xFallbackSafeAddressHere";
// Role bitmasks from the contract
const WITHDRAWAL_ROLE = 0x01n;
const DEPOSIT_ROLE = 0x20n;
// Combine roles using bitwise OR
const ROLES_TO_GRANT = WITHDRAWAL_ROLE | DEPOSIT_ROLE; // 0x21
const ovmAbi = parseAbi([
"function setBeneficiary(address newBeneficiary) external",
"function grantRoles(address user, uint256 roles) external payable",
]);
const pullSplitAbi = parseAbi([
"function updateSplit(address[],uint256[],uint256,uint16) external",
]);
// Use the backend API key
const account = privateKeyToAccount("0xBackendAPIPrivateKey...");
const walletClient = createWalletClient({
account,
chain: hoodi,
transport: http("https://ethereum-hoodi-rpc.publicnode.com"),
});
const publicClient = createPublicClient({
chain: hoodi,
transport: http("https://ethereum-hoodi-rpc.publicnode.com"),
});
// Step 1: Set the beneficiary to the customer address
const hash1 = await walletClient.writeContract({
address: OVM_ADDRESS,
abi: ovmAbi,
functionName: "setBeneficiary",
args: [CUSTOMER_ADDRESS],
});
console.log("Set beneficiary tx:", hash1);
await publicClient.waitForTransactionReceipt({ hash: hash1 });
console.log("Beneficiary set to:", CUSTOMER_ADDRESS);
// Step 2: Update the splitter to include customer and service providers (90/10 split)
const hash2 = await walletClient.writeContract({
address: PULL_SPLIT_ADDRESS,
abi: pullSplitAbi,
functionName: "updateSplit",
args: [
[CUSTOMER_ADDRESS, ADMIN_SAFE_ADDRESS],
[900_000n, 100_000n],
1_000_000n,
0,
],
});
console.log("Update split tx:", hash2);
await publicClient.waitForTransactionReceipt({ hash: hash2 });
console.log("PullSplit updated with customer and service provider shares");
// Step 3: Grant the customer deposit and withdrawal roles
const hash3 = await walletClient.writeContract({
address: OVM_ADDRESS,
abi: ovmAbi,
functionName: "grantRoles",
args: [CUSTOMER_ADDRESS, ROLES_TO_GRANT],
});
console.log("Grant roles tx:", hash3);
await publicClient.waitForTransactionReceipt({ hash: hash3 });
console.log("Deposit and withdrawal role assigned to customer");
```
### Transferring Ownership
:::warning
This is a crucial step, and failure to adequately secure the ownership of an OVM could lead to a loss or theft of funds. Ensure you trust the `owner()` address of an OVM before making a deposit.
:::
The last step before the OVM is ready for activation is to transfer the ownership of the OVM away from the backend, to either the customer, or an extremely well secured administrative multi-sig wallet like a [SAFE](https://safe.global) that can intervene to update key values in future if needed. Consider that the owner of an OVM has custodial control over it.
```sh
cast send $EXAMPLE_OVM_ADDRESS \
"transferOwnership(address)" \
$ADMIN_SAFE_ADDRESS \
--rpc-url $RPC_URL \
--private-key $BACKEND_API_PRIVATE_KEY
```
```solidity
// SPDX-License-Identifier: MIT
pragma solidity ^0.8.19;
interface IObolValidatorManager {
function transferOwnership(address newOwner) external payable;
}
contract TransferOwnership is Script {
address constant OVM_ADDRESS = 0xYourOVMAddress;
address constant SAFE_ADDRESS = 0xYourSafeAddress;
function run() external {
vm.startBroadcast();
IObolValidatorManager(OVM_ADDRESS).transferOwnership(SAFE_ADDRESS);
console.log("Ownership transferred to SAFE:", SAFE_ADDRESS);
vm.stopBroadcast();
}
}
```
```ts
// The deployed OVM address
const OVM_ADDRESS = "0xYourOVMAddress";
// The SAFE wallet address to transfer ownership to
const SAFE_ADDRESS = "0xYourSafeAddress";
const ovmAbi = parseAbi([
"function transferOwnership(address newOwner) external payable",
]);
// The backend API address that currently owns the OVM
const account = privateKeyToAccount("0x...");
const walletClient = createWalletClient({
account,
chain: hoodi,
transport: http("https://ethereum-hoodi-rpc.publicnode.com"),
});
const publicClient = createPublicClient({
chain: hoodi,
transport: http("https://ethereum-hoodi-rpc.publicnode.com"),
});
// Transfer ownership to the SAFE
const hash = await walletClient.writeContract({
address: OVM_ADDRESS,
abi: ovmAbi,
functionName: "transferOwnership",
args: [SAFE_ADDRESS],
});
console.log("Transfer ownership tx:", hash);
await publicClient.waitForTransactionReceipt({ hash: hash });
console.log("Ownership transferred to SAFE:", SAFE_ADDRESS);
```
### Handling Deposits
The capital allocator can now deposit the validators that point to this withdrawal address. The validator keys are held by the [provisioned DV cluster](../../run-a-dv/start/) operators and the deposit data was created during cluster creation.
This step would normally be through a wallet and web interface. This example using raw private keys is for demo purposes only.
:::info
To accurately differentiate reward from principal in an OVM, the OVM contract needs to be invoked during the deposit call. Each OVM has a `deposit()` function exactly matching and wrapping the official deposit smart contract, and should be used for that purpose.
If a deposit is made not through the OVM, the OVM can be updated with the `setAmountOfPrincipalStake()` method by the `owner` or an address with the `SET_BENEFICIARY_ROLE`.
:::
```sh
cast send $EXAMPLE_OVM_ADDRESS \
"deposit(bytes,bytes,bytes,bytes32)" \
0x \
0x \
0x \
0x \
--value 32ether \
--rpc-url $RPC_URL \
--private-key $EXAMPLE_CUSTOMER_PRIVATE_KEY
```
```solidity
// SPDX-License-Identifier: MIT
pragma solidity ^0.8.19;
interface IObolValidatorManager {
function deposit(
bytes calldata pubkey,
bytes calldata withdrawal_credentials,
bytes calldata signature,
bytes32 deposit_data_root
) external payable;
}
contract Deposit is Script {
address constant OVM_ADDRESS = 0xYourOVMAddress;
function run() external {
// Deposit data (parsed from deposit-data.json)
bytes memory pubkey = hex"..."; // 48 bytes
bytes memory withdrawal_credentials = hex"..."; // 32 bytes
bytes memory signature = hex"..."; // 96 bytes
bytes32 deposit_data_root = hex"..."; // 32 bytes
vm.startBroadcast();
// Deposit 32 ETH to activate a validator
IObolValidatorManager(OVM_ADDRESS).deposit{value: 32 ether}(
pubkey,
withdrawal_credentials,
signature,
deposit_data_root
);
console.log("Deposit complete - validator activation pending");
vm.stopBroadcast();
}
}
```
```ts
// The deployed OVM address
const OVM_ADDRESS = "0xYourOVMAddress";
// Deposit data (parsed from deposit-data.json)
const pubkey = "0x..."; // 48 bytes
const withdrawal_credentials = "0x..."; // 32 bytes
const signature = "0x..."; // 96 bytes
const deposit_data_root = "0x..."; // 32 bytes
const ovmAbi = parseAbi([
"function deposit(bytes calldata pubkey, bytes calldata withdrawal_credentials, bytes calldata signature, bytes32 deposit_data_root) external payable",
]);
// Use the customer key (has DEPOSIT_ROLE), normally do this via wallet connection
const account = privateKeyToAccount("0xCustomerPrivateKey...");
const walletClient = createWalletClient({
account,
chain: hoodi,
transport: http("https://ethereum-hoodi-rpc.publicnode.com"),
});
const publicClient = createPublicClient({
chain: hoodi,
transport: http("https://ethereum-hoodi-rpc.publicnode.com"),
});
// Deposit 32 ETH to activate a validator
const hash = await walletClient.writeContract({
address: OVM_ADDRESS,
abi: ovmAbi,
functionName: "deposit",
args: [pubkey, withdrawal_credentials, signature, deposit_data_root],
value: 32_000_000_000_000_000_000n, // 32 ETH in wei
});
console.log("Deposit tx:", hash);
await publicClient.waitForTransactionReceipt({ hash: hash });
console.log("Deposit complete - validator activation pending");
```
The validator(s) will enter the activation queue and the `amountOfPrincipalStake` value on the contract will track how much of the balance is considered the principal (owed to the beneficiary). The EL and CL rewards from any targeting validators will be sent to the OVM contract and Pull Split.
### Upgrading a 0x01 validator to 0x02 (self-consolidation)
If a validator pointing at the OVM was deposited with `0x01` withdrawal credentials, its effective-balance ceiling is 32 ETH. Calling `consolidate()` with the validator's pubkey as both the source and the target upgrades it to `0x02` in place, raising the effective-balance ceiling to 2048 ETH and enabling reward compounding. The validator continues attesting through the upgrade — it is not exited.
:::info
The validator must be active with a balance greater than 32 ETH for the consolidation to succeed. The call must come from the OVM `owner` or an address holding `CONSOLIDATION_ROLE` (`0x02`). Self-consolidation is the only path that converts an existing `0x01` validator to `0x02` — a fresh deposit cannot do it.
:::
EIP-7251 consolidation requests carry a small fee that scales with mempool pressure. Send enough ETH as `msg.value` to cover the fee; any excess is refunded to the `excessFeeRecipient` address.
```sh
cast send $EXAMPLE_OVM_ADDRESS \
"consolidate((bytes[],bytes)[],uint256,address)" \
"[([0x],0x)]" \
1000000000000000 \
$BACKEND_API_ADDRESS \
--value 0.001ether \
--rpc-url $RPC_URL \
--private-key $BACKEND_API_PRIVATE_KEY
```
```solidity
// SPDX-License-Identifier: MIT
pragma solidity ^0.8.19;
interface IObolValidatorManager {
struct ConsolidationRequest {
bytes[] srcPubKeys;
bytes targetPubKey;
}
function consolidate(
ConsolidationRequest[] calldata requests,
uint256 maxFeePerConsolidation,
address excessFeeRecipient
) external payable;
}
contract SelfConsolidate is Script {
address constant OVM_ADDRESS = 0xYourOVMAddress;
// Validator public key (48 bytes) of the 0x01 validator to upgrade
bytes constant VALIDATOR_PUBKEY = hex"abc123YourValidatorPubkey";
// Maximum fee willing to pay per consolidation request
uint256 constant MAX_FEE_PER_CONSOLIDATION = 0.001 ether;
function run() external {
vm.startBroadcast();
bytes[] memory srcPubKeys = new bytes[](1);
srcPubKeys[0] = VALIDATOR_PUBKEY;
IObolValidatorManager.ConsolidationRequest[] memory requests =
new IObolValidatorManager.ConsolidationRequest[](1);
requests[0] = IObolValidatorManager.ConsolidationRequest({
srcPubKeys: srcPubKeys,
targetPubKey: VALIDATOR_PUBKEY
});
IObolValidatorManager(OVM_ADDRESS).consolidate{value: MAX_FEE_PER_CONSOLIDATION}(
requests,
MAX_FEE_PER_CONSOLIDATION,
msg.sender // Excess fee refunded here
);
console.log("Self-consolidation requested - validator upgrading from 0x01 to 0x02");
vm.stopBroadcast();
}
}
```
```ts
// The deployed OVM address
const OVM_ADDRESS = "0xYourOVMAddress";
// Validator public key (48 bytes) of the 0x01 validator to upgrade
const VALIDATOR_PUBKEY = "0xabc123YourValidatorPubkey";
// Maximum fee willing to pay per consolidation request
const MAX_FEE_PER_CONSOLIDATION = 1_000_000_000_000_000n; // 0.001 ETH
const ovmAbi = parseAbi([
"struct ConsolidationRequest { bytes[] srcPubKeys; bytes targetPubKey; }",
"function consolidate(ConsolidationRequest[] requests, uint256 maxFeePerConsolidation, address excessFeeRecipient) external payable",
]);
// Use a key with CONSOLIDATION_ROLE (or the owner)
const account = privateKeyToAccount("0xBackendAPIPrivateKey...");
const walletClient = createWalletClient({
account,
chain: hoodi,
transport: http("https://ethereum-hoodi-rpc.publicnode.com"),
});
const publicClient = createPublicClient({
chain: hoodi,
transport: http("https://ethereum-hoodi-rpc.publicnode.com"),
});
// Self-consolidation: source and target are the same pubkey
const hash = await walletClient.writeContract({
address: OVM_ADDRESS,
abi: ovmAbi,
functionName: "consolidate",
args: [
[{ srcPubKeys: [VALIDATOR_PUBKEY], targetPubKey: VALIDATOR_PUBKEY }],
MAX_FEE_PER_CONSOLIDATION,
account.address, // Excess fee refunded here
],
value: MAX_FEE_PER_CONSOLIDATION,
});
console.log("Self-consolidation tx:", hash);
await publicClient.waitForTransactionReceipt({ hash: hash });
console.log("Self-consolidation requested - validator upgrading from 0x01 to 0x02");
```
Once the beacon chain processes the request, the validator's withdrawal type flips to `0x02` and its effective-balance ceiling rises. Subsequent top-up deposits up to 2048 ETH are then retained on the validator rather than being swept as partial withdrawals.
### Withdrawing Validator Balance
Compounding validators (0x02 type) can have part of their principal withdrawn from active stake, or be fully exited, via the same `withdraw()` call. Specifying a nonzero value for `amounts` will initiate a partial withdrawal, while 0 will fully exit the validator. You cannot specify an amount that will leave the validator with less than 32 ether in active stake remaining.
:::warning
There is an important nuance when it comes to partial withdrawals. With an OVM (on the default settings), it will treat a withdrawal of less than 16 ether as rewards rather than principal. **A customer should not withdraw less than this amount of principal or they may be charged fees on it**. Similarly, care must be taken with the `WITHDRAWAL_ROLE`; although it does not allow the changing of who gets rewards, it can cause this 'over-charging' behavior by doing repeated small withdrawals.
:::
```sh
cast send $EXAMPLE_OVM_ADDRESS \
"withdraw(bytes[],uint64[],uint256,address)" \
"[0x]" \
"[16000000000]" \
1000000000000000 \
0xYourRefundAddress \
--value 0.001ether \
--rpc-url $RPC_URL \
--private-key $BACKEND_API_PRIVATE_KEY
```
```solidity
// SPDX-License-Identifier: MIT
pragma solidity ^0.8.19;
interface IObolValidatorManager {
function withdraw(
bytes[] calldata pubKeys,
uint64[] calldata amounts,
uint256 maxFeePerWithdrawal,
address excessFeeRecipient
) external payable;
}
contract PartialWithdrawal is Script {
address constant OVM_ADDRESS = 0xYourOVMAddress;
// Validator public key (48 bytes)
bytes constant VALIDATOR_PUBKEY = hex"abc123YourValidatorPubkey";
// Amount to withdraw in gwei (16 ETH)
uint64 constant WITHDRAWAL_AMOUNT = 16_000_000_000;
// Maximum fee willing to pay per withdrawal request
uint256 constant MAX_FEE_PER_WITHDRAWAL = 0.001 ether;
function run() external {
vm.startBroadcast();
bytes[] memory pubKeys = new bytes[](1);
pubKeys[0] = VALIDATOR_PUBKEY;
uint64[] memory amounts = new uint64[](1);
amounts[0] = WITHDRAWAL_AMOUNT;
IObolValidatorManager(OVM_ADDRESS).withdraw{value: MAX_FEE_PER_WITHDRAWAL}(
pubKeys,
amounts,
MAX_FEE_PER_WITHDRAWAL,
msg.sender // Excess fee refunded here
);
console.log("Partial withdrawal requested for 16 ETH");
vm.stopBroadcast();
}
}
```
```ts
// The deployed OVM address
const OVM_ADDRESS = "0xYourOVMAddress";
// Validator public key (48 bytes)
const VALIDATOR_PUBKEY = "0xabc123YourValidatorPubkey";
// Amount to withdraw in gwei (16 ETH = 16,000,000,000 gwei)
const WITHDRAWAL_AMOUNT = 16_000_000_000n;
// Maximum fee willing to pay per withdrawal request
const MAX_FEE_PER_WITHDRAWAL = 1_000_000_000_000_000n; // 0.001 ETH
const ovmAbi = parseAbi([
"function withdraw(bytes[] calldata pubKeys, uint64[] calldata amounts, uint256 maxFeePerWithdrawal, address excessFeeRecipient) external payable",
]);
// Use the secondary key (has WITHDRAWAL_ROLE)
const account = privateKeyToAccount("0xSecondaryKeyPrivateKey...");
const walletClient = createWalletClient({
account,
chain: hoodi,
transport: http("https://ethereum-hoodi-rpc.publicnode.com"),
});
const publicClient = createPublicClient({
chain: hoodi,
transport: http("https://ethereum-hoodi-rpc.publicnode.com"),
});
// Request partial withdrawal of 16 ETH
const hash = await walletClient.writeContract({
address: OVM_ADDRESS,
abi: ovmAbi,
functionName: "withdraw",
args: [
[VALIDATOR_PUBKEY],
[WITHDRAWAL_AMOUNT],
MAX_FEE_PER_WITHDRAWAL,
account.address, // Excess fee refunded here
],
value: MAX_FEE_PER_WITHDRAWAL, // Send enough to cover the fee
});
console.log("Partial withdrawal tx:", hash);
await publicClient.waitForTransactionReceipt({ hash: hash });
console.log(
"Partial withdrawal requested - funds will arrive after protocol processes it"
);
```
### Reward Distribution and Splitters
When withdrawals requested eventually exit the beacon chain, they appear on the OVM contract, and should be distributed to the `rewardRecipient` or `principalRecipient` (depending on if they amount to above or below the `principalThreshold` of 16 eth). Calling `distributeFunds()` will push the Ether to the correct address. Split contracts as principal or reward addresses will also need to be distributed from for the funds to land in their ultimate recipients addresses.
```sh
cast send $EXAMPLE_OVM_ADDRESS \
"distributeFunds()" \
--rpc-url $RPC_URL \
--private-key $BACKEND_API_PRIVATE_KEY
```
```solidity
// SPDX-License-Identifier: MIT
pragma solidity ^0.8.19;
interface IObolValidatorManager {
function distributeFunds() external;
}
contract DistributeFunds is Script {
address constant OVM_ADDRESS = 0xYourOVMAddress;
function run() external {
vm.startBroadcast();
IObolValidatorManager(OVM_ADDRESS).distributeFunds();
console.log("Funds distributed to beneficiary and reward recipient");
vm.stopBroadcast();
}
}
```
```ts
// The deployed OVM address
const OVM_ADDRESS = "0xYourOVMAddress";
const ovmAbi = parseAbi(["function distributeFunds() external"]);
// Anyone can call distributeFunds - no special role required
const account = privateKeyToAccount("0x...");
const walletClient = createWalletClient({
account,
chain: hoodi,
transport: http("https://ethereum-hoodi-rpc.publicnode.com"),
});
const publicClient = createPublicClient({
chain: hoodi,
transport: http("https://ethereum-hoodi-rpc.publicnode.com"),
});
// Distribute funds to beneficiary (principal) and rewardRecipient (rewards)
const hash = await walletClient.writeContract({
address: OVM_ADDRESS,
abi: ovmAbi,
functionName: "distributeFunds",
});
console.log("Distribute funds tx:", hash);
await publicClient.waitForTransactionReceipt({ hash: hash });
console.log("Funds distributed to beneficiary and reward recipient");
```
#### Appendix: MEV Smoothing
If you setup validators where every customer gets their own fee recipient address (and underlying splitter), they will each get proposals rarely (approximately twice per year for a 32 ETH validator). Due to MEV being unequally distributed, only a small number of proposals in the year contain most of the MEV. This means that most of your users will get the median amount of Ether as MEV rather than the average, and may notice a lower APR versus setups that pool and distribute their variable rewards across their users. It may be beneficial for you to instead smooth the MEV being accrued through block proposals across all depositors in the cluster. This can be achieved through two nested split contracts as follows:
- First create an editable [PullSplit](https://docs.splits.org/core/split-v2) we'll refer to as the Child Split. The owner of this split should be the `$BACKEND_API_ADDRESS`.
- Next create a second PullSplit we'll refer to as the Parent Split. It can be immutable if preferred. It should send the majority of its inflow to the Child Split, and some amount to a set of addresses that receive operating fees for the cluster.
- Set the parent split as the `--fee-recipient-address` for all validators in the cluster. This means all proposal rewards for the cluster will go to this address.
- When a customer makes a deposit, use the `$BACKEND_API_PRIVATE_KEY` to update the Child Split to proportionally reflect the eth provided by all customers to the cluster.
- As proposals by the validators earn tips and MEV, this collects on the Split Contracts. Distributing these rewards sends the ether to the fee recipients and customers.
---
# Enable MEV
URL: https://docs.obol.org/advanced-and-troubleshooting/advanced/enable-mev
# Enable MEV
This quickstart guide focuses on configuring the builder API for Charon and supported validator and consensus clients.
### Getting started with Charon & the Builder API {#getting-started-with-charon--the-builder-api}
Running a distributed validator cluster with the builder API enabled will give the validators in the cluster access to the builder network. This builder network is a network of "Block Builders" who work with MEV searchers to produce the most valuable blocks a validator can propose.
[MEV-Boost](https://boost.flashbots.net/) is one such product from Flashbots that enables you to ask multiple block relays (who communicate with the "Block Builders") for blocks to propose. The block that pays the largest reward to the validator will be signed and returned to the relay for broadcasting to the wider network. The end result for the validator is generally an increased APR as they receive some share of the MEV.
:::info
Before completing this guide, please check your cluster version, which can be found inside the `cluster-lock.json` file. If you are using cluster-lock version `1.7.0` or higher, Charon seamlessly accommodates all validator client implementations within a MEV-enabled distributed validator cluster.
For clusters with a `cluster-lock.json` version `1.6.0` and below, Charon is compatible only with [Teku](https://github.com/ConsenSys/teku). Use the version history feature of this documentation to see the instructions for configuring a cluster in that manner (`v0.16.0`).
:::
### Client configuration {#client-configuration}
:::info
You need to add CLI flags to your consensus client, Charon client, and validator client, to enable the builder API.
You need all operators in the cluster to have their nodes properly configured to use the builder API, or you risk missing a proposal.
:::
#### Charon {#charon}
Charon supports builder API with the `--builder-api` flag. To use builder API, one simply needs to add this flag to the `charon run` command:
```
charon run --builder-api
```
#### Consensus Clients {#consensus-clients}
The following flags need to be configured on your chosen consensus client. A Flashbots relay URL is provided for example purposes, you should use the [charon test mev command](../../run-a-dv/prepare/test-a-cluster.mdx#test-mev-relay) and select the two or three relays with the lowest latency to your node that also conform to your block building preferences. A public list of MEV relays is available [here](https://github.com/eth-educators/ethstaker-guides/blob/main/MEV-relay-list.md#mev-relay-list-for-mainnet).
Teku can communicate with a single relay directly:
```
teku --builder-endpoint="https://0xac6e77dfe25ecd6110b8e780608cce0dab71fdd5ebea22a16c0205200f2f8e2e3ad3b71d3499c54ad14d6c21b41a37ae@boost-relay.flashbots.net"
```
Or you can configure it to communicate with a local [MEV-boost](https://github.com/flashbots/mev-boost) sidecar to configure multiple relays:
```
teku --builder-endpoint=http://mev-boost:18550
```
Lighthouse can communicate with a single relay directly:
```
lighthouse bn --builder="https://0xac6e77dfe25ecd6110b8e780608cce0dab71fdd5ebea22a16c0205200f2f8e2e3ad3b71d3499c54ad14d6c21b41a37ae@boost-relay.flashbots.net"
```
Or you can configure it to communicate with a local [MEV-boost](https://github.com/flashbots/mev-boost) sidecar to configure multiple relays:
```
lighthouse bn --builder="http://mev-boost:18550"
```
Prysm can communicate with a single relay directly:
```
prysm beacon-chain --http-mev-relay="https://0xac6e77dfe25ecd6110b8e780608cce0dab71fdd5ebea22a16c0205200f2f8e2e3ad3b71d3499c54ad14d6c21b41a37ae@boost-relay.flashbots.net"
```
Nimbus can communicate with a single relay directly:
```
nimbus_beacon_node \
--payload-builder=true \
--payload-builder-url="https://0xac6e77dfe25ecd6110b8e780608cce0dab71fdd5ebea22a16c0205200f2f8e2e3ad3b71d3499c54ad14d6c21b41a37ae@boost-relay.flashbots.net"
```
Lodestar can communicate with a single relay directly:
```
node ./lodestar --builder --builder.urls="https://0xac6e77dfe25ecd6110b8e780608cce0dab71fdd5ebea22a16c0205200f2f8e2e3ad3b71d3499c54ad14d6c21b41a37ae@boost-relay.flashbots.net"
```
#### Validator Clients {#validator-clients}
The following flags need to be configured on your chosen validator client
```
teku validator-client --validators-builder-registration-default-enabled=true
```
```
lighthouse vc --builder-proposals
```
```
prysm validator --enable-builder
```
```
nimbus_validator_client --payload-builder=true
```
```
node ./lodestar validator --builder="true" --builder.selection="builderalways"
```
:::info
For at-scale deployments, additional flags should be configured on the consensus or validator client to ensure builder bids are preferred over locally-built blocks whenever available. See [Builder Block Selection](../../run-a-dv/prepare/deployment-best-practices.md#builder-block-selection) in the deployment best practices for the recommended flag per client.
:::
### Verify your cluster is correctly configured {#verify-your-cluster-is-correctly-configured}
It can be difficult to confirm everything is configured correctly with your cluster until a proposal opportunity arrives, but here are some things you can check.
When your cluster is running, you should see if Charon is logging something like this each epoch:
```
13:10:47.094 INFO bcast Successfully submitted validator registration to beacon node {"delay": "24913h10m12.094667699s", "pubkey": "84b_713", "duty": "1/builder_registration"}
```
This indicates that your Charon node is successfully registering with the relay for a blinded block when the time comes.
If you are using the [Ultrasound Relay](https://relay.ultrasound.money/), you can enter your cluster's distributed validator public key(s) into their website, to confirm they also see the validator as correctly registered. If you are using [Titan Relay](https://titanrelay.xyz), you can check their API by running `curl https://titanrelay.xyz/relay/v1/data/validator_registration?pubkey=0x123..456` with the public key of a validator in your cluster.
You should check that your validator client's logs look healthy, and ensure that you haven't added a `fee-recipient` address that conflicts with what has been selected by your cluster in your `cluster-lock.json` file, as that may prevent your validator from producing a signature for the block when the opportunity arises. You should also confirm the same for all of the other peers in your cluster. If you need to update the fee recipient address after cluster creation, see [Change Fee Recipient](change-fee-recipient.md).
Once a proposal has been made, you should look at the `Block Extra Data` field under `Execution Payload` for the block on [Beaconcha.in](https://beaconcha.in/block/18450364), and confirm there is text present, this generally suggests the block came from a builder, and was not a locally constructed block.
---
# Change Fee Recipient
URL: https://docs.obol.org/advanced-and-troubleshooting/advanced/change-fee-recipient
# Change Fee Recipient
The fee recipient address determines where transaction tips and MEV rewards are sent when a validator proposes a block. In a distributed validator cluster, the fee recipient and gas limit are set at cluster creation time and stored in the `cluster-lock.json` file. The `charon feerecipient` commands allow a threshold of operators to collaboratively update the fee recipient address and optionally the gas limit for one or more validators after the cluster has been created.
:::info
The updated fee recipient address applies to both MEV (builder API) and non-MEV block proposals.
:::
## Prerequisites
- A running distributed validator cluster with Charon `v1.10.3` or later.
- Access to validator private key shares on each operator's node.
- Agreement among a threshold of operators on the new fee recipient address and which validator public keys to update.
## Overview
The workflow involves three steps:
1. **Sign** — A threshold of operators each sign new builder registration messages specifying the new fee recipient address (and optionally a new gas limit).
2. **Fetch** — Any operator fetches the aggregated registrations from the remote API once enough partial signatures have been submitted.
3. **Apply** — Charon automatically detects and applies the updated overrides file. No restart is required.
## 1. Check current fee recipients
Before making changes, list the current fee recipient details for your validators:
```sh
docker run -u $(id -u):$(id -g) --rm -v "$(pwd)/:/opt/charon" obolnetwork/charon:v1.10.3 feerecipient list
```
To check specific validators only:
```sh
docker run -u $(id -u):$(id -g) --rm -v "$(pwd)/:/opt/charon" obolnetwork/charon:v1.10.3 feerecipient list \
--validator-public-keys="0xYOUR_VALIDATOR_PUBKEY"
```
This displays the most recent builder registration for each validator, selecting the entry with the highest timestamp from the cluster lock file, the overrides file, or the remote API.
## 2. Sign new fee recipient registrations
A threshold of operators must each run the `feerecipient sign` command with matching parameters. For example, in a 4-node cluster, at least 3 operators must sign.
Each participating operator runs:
```sh
docker run -u $(id -u):$(id -g) --rm -v "$(pwd)/:/opt/charon" obolnetwork/charon:v1.10.3 feerecipient sign \
--fee-recipient="0xNEW_FEE_RECIPIENT_ADDRESS" \
--validator-public-keys="0xVALIDATOR_PUBKEY_1,0xVALIDATOR_PUBKEY_2"
```
:::info
`validator-public-keys` are the distributed validator public keys for which the fee recipient should be updated (find them in your `cluster-lock.json` file or on the DV Launchpad). `fee-recipient` is the new Ethereum address that will receive transaction tips and MEV rewards for the specified validators. The address must not be the zero address, and if supplied in mixed case it must match its EIP-55 checksum — both protect against typos that would irrecoverably send rewards to the wrong address.
:::
:::info
Operators do not need to sign simultaneously. The first operator to sign sets the timestamp to the current time. Subsequent operators automatically adopt the first signer's timestamp and registration data from the remote API, ensuring all partial signatures are compatible. If operators prefer to coordinate explicitly, they can agree on a Unix timestamp beforehand and pass it with the `--timestamp` flag.
:::
:::warning
Builder registrations are applied by timestamp. If you set `--timestamp` manually, choose a timestamp later than the current latest registration for the validators being updated. You can check the latest timestamp with `charon feerecipient list`. The `sign` command rejects a timestamp that is not later than the registration that currently has quorum on the remote API, since the resulting registration would never be applied. When joining an in-progress registration started by another operator, the in-progress timestamp and gas limit are adopted even if you pass different values, so all partial signatures aggregate — a warning is logged when your explicit flags are overridden.
:::
### Updating the gas limit
Besides the fee recipient address, the `sign` command also allows you to modify the gas limit for builder registrations by passing the `--gas-limit` flag. If not set, the gas limit is taken from whichever source is most recent for the validator: the cluster lock, the local overrides file, or the registration that currently has quorum on the remote API. Consulting the remote API keeps operators with divergent local files signing the same gas limit.
```sh
docker run -u $(id -u):$(id -g) --rm -v "$(pwd)/:/opt/charon" obolnetwork/charon:v1.10.3 feerecipient sign \
--fee-recipient="0xNEW_FEE_RECIPIENT_ADDRESS" \
--gas-limit=36000000 \
--validator-public-keys="0xVALIDATOR_PUBKEY_1"
```
## 3. Fetch the aggregated registrations
Once a threshold of operators have submitted their partial signatures, any operator can fetch the fully aggregated builder registrations:
```sh
docker run -u $(id -u):$(id -g) --rm -v "$(pwd)/:/opt/charon" obolnetwork/charon:v1.10.3 feerecipient fetch \
--validator-public-keys="0xVALIDATOR_PUBKEY_1,0xVALIDATOR_PUBKEY_2"
```
This merges the aggregated registrations into the overrides file at `.charon/builder_registrations_overrides.json`. Existing overrides for validators that are not included in the fetch are preserved. If the file already contains an override for a fetched validator, Charon keeps the registration with the latest timestamp.
:::info
If not enough operators have signed yet, the command logs that no fully signed builder registrations are available and does not write or update the overrides file. Coordinate with your cluster peers to ensure the threshold is met, then run `fetch` again.
:::
:::info
The `--validator-public-keys` flag is optional for the `fetch` command. If omitted, it fetches registrations for all validators in the cluster.
:::
:::info
Fetched builder registrations are signature-verified before they are written or applied. A registration that fails verification is skipped and logged as a warning; registrations for other validators in the same fetch are still merged and written. A fetched registration that is not newer than the existing override for the same validator is discarded with a warning.
:::
:::info
A corrupt or invalid overrides file does not block fetching: `fetch` logs a warning, discards the unreadable content, and rebuilds the file from the valid existing entries and the fetched registrations. The file is written atomically, so an interrupted fetch cannot leave a truncated file behind.
:::
## 4. Verify the change
After fetching, confirm the updated fee recipients are in place:
```sh
docker run -u $(id -u):$(id -g) --rm -v "$(pwd)/:/opt/charon" obolnetwork/charon:v1.10.3 feerecipient list
```
You should see the new fee recipient address reflected for the updated validators. If a validator still shows the previous fee recipient, check whether enough operators signed the same fee recipient, gas limit, and timestamp, and whether a newer registration already exists for that validator.
## Automatic application by Charon
A running `charon run` process watches the overrides file for changes using filesystem events and automatically reloads it — **no restart is required**.
Additionally, `charon run` can periodically fetch updated builder registrations from the remote API automatically. To enable this, set the flag `--fetch-feerecipient-updates`:
```sh
charon run --fetch-feerecipient-updates ...
```
When enabled, the background fetch runs on the following schedule:
- Every **24 hours** under normal conditions.
- Every **1 hour** if partial (not yet fully aggregated) entries are detected.
- On every **restart**.
This means that in most cases, once a threshold of operators have signed, a running Charon node with `--fetch-feerecipient-updates` enabled will automatically pick up the new fee recipient without any manual `fetch` step. The manual `charon feerecipient fetch` command is useful for applying the change immediately or for verifying the result before relying on the automatic background fetch.
## Further reading
- [CLI Reference](../../learn/charon/charon-cli-reference.md#the-feerecipient-command) for the full list of `feerecipient` command flags.
- [Enable MEV](enable-mev.mdx) for configuring the builder API in your cluster.
---
# Combine DV Private Key Shares
URL: https://docs.obol.org/advanced-and-troubleshooting/advanced/quickstart-combine
# Combine DV Private Key Shares
:::danger
Reconstituting Distributed Validator private key shares into a standard validator private key is a security risk, and can potentially cause your validator to be slashed.
Only combine private keys as a last resort and do so with extreme caution.
:::
Combine distributed validator private key shares into an Ethereum validator private key.
## Pre-requisites
* Ensure you have the `.charon` directories of at least a threshold of the cluster's node operators.
* Ensure you have [docker](https://docs.docker.com/engine/install/) installed.
* Make sure `docker` is running before executing the commands below.
## Step 1. Set up the key combination directory tree
Rename each cluster node operator `.charon` directory in a different way to avoid folder name conflicts.
We suggest naming them clearly and distinctly, to avoid confusion.
At the end of this process, you should have a tree like this:
```shell
$ tree ./cluster
cluster/
├── node0
│ ├── charon-enr-private-key
│ ├── cluster-lock.json
│ ├── deposit-data.json
│ └── validator_keys
│ ├── keystore-0.json
│ ├── keystore-0.txt
│ ├── keystore-1.json
│ └── keystore-1.txt
├── node1
│ ├── charon-enr-private-key
│ ├── cluster-lock.json
│ ├── deposit-data.json
│ └── validator_keys
│ ├── keystore-0.json
│ ├── keystore-0.txt
│ ├── keystore-1.json
│ └── keystore-1.txt
├── node2
│ ├── charon-enr-private-key
│ ├── cluster-lock.json
│ ├── deposit-data.json
│ └── validator_keys
│ ├── keystore-0.json
│ ├── keystore-0.txt
│ ├── keystore-1.json
│ └── keystore-1.txt
...
└── nodeN
├── charon-enr-private-key
├── cluster-lock.json
├── deposit-data.json
└── validator_keys
├── keystore-0.json
├── keystore-0.txt
├── keystore-1.json
└── keystore-1.txt
```
:::warning
Make sure to never mix the various `.charon` directories with one another.
Doing so can potentially cause the combination process to fail.
:::
## Step 2. Combine the key shares
Run the following command:
```shell
# Combine a clusters private keys
docker run --rm -v "$(pwd):/opt/charon" obolnetwork/charon:v1.10.3 combine --cluster-dir /opt/charon/cluster --output-dir /opt/charon/combined
```
This command will store the combined keys in the `output-dir`, in this case a folder named `combined`.
```shell
$ tree combined
combined
├── keystore-0.json
├── keystore-0.txt
├── keystore-1.json
└── keystore-1.txt
```
We can verify that the directory names are correct by looking at the lock file:
```shell
$ jq .distributed_validators[].distributed_public_key cluster/node0/cluster-lock.json
"0x822c5310674f4fc4ec595642d0eab73d01c62b588f467da6f98564f292a975a0ac4c3a10f1b3a00ccc166a28093c2dcd"
"0x8929b4c8af2d2eb222d377cac2aa7be950e71d2b247507d19b5fdec838f0fb045ea8910075f191fd468da4be29690106"
```
:::info
The generated private keys are in the standard [EIP-2335](https://github.com/ethereum/ercs/blob/master/ERCS/erc-2335.md) format, and can be imported in any Ethereum validator client that supports it.
Ensure your distributed validator cluster is completely shut down before starting a replacement validator or you are likely to be slashed.
:::
---
# Beacon node authentication
URL: https://docs.obol.org/advanced-and-troubleshooting/advanced/beacon-node-authentication
# Beacon node authentication
## HTTP Basic Access Authentication
If you want to use Charon with an [HTTP basic access authentication](https://en.wikipedia.org/wiki/Basic_access_authentication) protected beacon node, then you can supply `charon run` with the `--beacon-node-headers` flag. The flag's value should be set like: `Authorization=Basic ` where `Authorization` will be the header key and `Basic ` will be the header value. The `` are a [Base64](https://en.wikipedia.org/wiki/Base64) encoding of the username and password joined by a single colon `:`.
:::warning
These headers will be sent in every request to every beacon node. This could leak your credentials to the other beacon nodes. Make sure you trust every listed beacon node.
:::
## Usage example
Suppose we have an HTTP Basic access protected beacon node with username `john` and password `doe`. To access it we would construct the credentials by running the following command:
```
echo -n "john:doe" | base64
```
Then you could pass the flag to your Charon instance like this:
```
charon run --beacon-node-headers="Authorization=Basic am9objpkb2U="
```
Or you could specify it as an environment variable like this:
```
CHARON_BEACON_NODE_HEADERS="Authorization=Basic am9objpkb2U="
```
:::info
Note that 'Authorization' is followed with an `=` rather than the usual `:`.
:::
---
# Alter Withdrawal Addresses
URL: https://docs.obol.org/advanced-and-troubleshooting/advanced/alter-withdrawal-addresses
# Altering a Withdrawal Address for an unused validator
:::warning
Please take care when changing a withdrawal address for an inactivated validator. Activating a validator that exits to a withdrawal address you don't control likely means your funds are lost.
A signed deposit message is a public bearer artifact: anyone who has the bytes can submit it to the canonical Ethereum deposit contract. If a previous valid deposit message exists for the same validator pubkey — for instance the original one signed by the operators at cluster creation time — it [could be used to front-run](https://medium.com/immunefi/rocketpool-lido-frontrunning-bug-fix-postmortem-e701f26d7971) the alternative deposit, and the validator would activate with the original withdrawal credentials instead of the new ones.
Once a deposit has been processed for a validator pubkey, its withdrawal credentials are fixed — every subsequent deposit ignores the `withdrawal_credentials` field and follows the originally activated ones. A re-signed deposit message for a pubkey that has already been deposited is therefore wasted: the funds sent with it will land at the original withdrawal address, not the new one. Before using a re-signed deposit, verify on-chain that no `DepositEvent` for the validator pubkey exists on the canonical deposit contract (`0x00000000219ab540356cBB839Cbe05303d7705Fa`).
:::
On occasion it can be useful to be able to change the withdrawal address specified for an already created but unused distributed validator. For example if they are unneeded extra capacity, or if the withdrawal address to be used was not known at cluster creation time and a trusted placeholder address was used instead. The `charon deposit` commands allow you to sign alternative deposit messages for **inactive validators** with the help of the Obol [API](../../api/what-is-this-api.md).
:::info
If you want to change the withdrawal address of a running validator, consider a validator [consolidation](../../run-a-dv/editing/replace-operator.md#method-2-validator-consolidation) instead.
:::
## Sign an alternative deposit message
A threshold of operators must decide which public keys they are changing the withdrawal address for, and what the new withdrawal address will be. Then each run the `charon deposit sign` command with their partial private keys and the appropriate (identical) flags.
**Single public key**
```sh
docker run -u $(id -u):$(id -g) --rm -v "$(pwd)/:/opt/charon" obolnetwork/charon:v1.10.3 deposit sign \
--validator-public-keys="0xb9171b84a09da7ff983a36e1c6e873e1537e97ad31aa868185d62c68e255baad8c1cfb83f508460ed96572d2a8e9e9da" \
--withdrawal-addresses="0xd8dA6BF26964aF9D7eEd9e03E53415D37aA96045"
```
:::info
`validator-public-keys` are the distributed validator public keys for which the alternative deposit data should be signed (find them in your cluster_lock.json file in the `distributed_validator_public_keys` mapping or on the DV Launchpad). `withdrawal-addresses` are the new withdrawal address(es) for which the new deposit data should be signed. There should either be the same amount as `validator-public-keys` specified, or a single address that will be used for all public keys specified.
Optionally, users can also specify multiple different `deposit-amounts` (defaults to only `32`) to be prepared.
:::
**Multiple public keys, multiple withdrawal addresses**
```sh
docker run -u $(id -u):$(id -g) --rm -v "$(pwd)/:/opt/charon" obolnetwork/charon:v1.10.3 deposit sign \
--validator-public-keys="0xb9171b84a09da7ff983a36e1c6e873e1537e97ad31aa868185d62c68e255baad8c1cfb83f508460ed96572d2a8e9e9da,0xc9171b84a09da7ff983a36e1c6e873e1537e97ad31aa868185d62c68e255baad8c1cfb83f508460ed96572d2a8e9e9da" \
--withdrawal-addresses="0xd8dA6BF26964aF9D7eEd9e03E53415D37aA96045,0x1db3439a222c519ab44bb1144fc28167b4fa6ee6"
```
**Multiple public keys, single withdrawal address**
```sh
docker run -u $(id -u):$(id -g) --rm -v "$(pwd)/:/opt/charon" obolnetwork/charon:v1.10.3 deposit sign \
--validator-public-keys="0xb9171b84a09da7ff983a36e1c6e873e1537e97ad31aa868185d62c68e255baad8c1cfb83f508460ed96572d2a8e9e9da,0xc9171b84a09da7ff983a36e1c6e873e1537e97ad31aa868185d62c68e255baad8c1cfb83f508460ed96572d2a8e9e9da" \
--withdrawal-addresses="0xd8dA6BF26964aF9D7eEd9e03E53415D37aA96045"
```
## Fetch full deposit data
After a threshold of operators have submitted partial alternative deposits, a full aggregated deposit message can be fetched from Obol API.
```sh
docker run -u $(id -u):$(id -g) --rm -v "$(pwd)/:/opt/charon" obolnetwork/charon:v1.10.3 deposit fetch \
--validator-public-keys="0xb9171b84a09da7ff983a36e1c6e873e1537e97ad31aa868185d62c68e255baad8c1cfb83f508460ed96572d2a8e9e9da" \
```
:::info
`validator-public-keys` are the validator public keys for which the new deposit data should be fetched.
:::
After a successful fetch the new deposit data files are saved in `.charon/deposit-data-.json`.
If there are not enough partial signatures, an error message will be returned.
```sh
17:18:40.771 ERRO cmd Application failed to start: fetch full deposit data from Obol API: not enough partial signatures to meet threshold {"submitted_public_keys": "[0x8677e2014a173f72b3d4528893cb01881549631c2a39d90d7c19c230299a57440e73c82c7daf1d72713b1e26e42bae99]", "submitted_public_keys_length": 1, "required_threshold": 3}
```
This deposit message file can be used with a deposit interface, to activate the validator on the Ethereum deposit contract.
:::danger
Please take care not to mistakenly activate the old `deposit-data.json` file when the cluster was originally created, containing the withdrawal address you hope to replace. If you activate a validator with a withdrawal address you don't control, your funds are likely lost.
:::
---
# Partial Deposits
URL: https://docs.obol.org/advanced-and-troubleshooting/advanced/partial-deposit
# The need of partial deposits
Some operators opt to create a big cluster, even though only a subset of the validators will be activated in the short term.
When there is enough business incentive to activate more validators from the cluster, the business cases might have changed and a different withdrawal addresses to be required for those new validators.
Changing the signed deposit data post- cluster creation and pre- validator activation can be useful in such scenarios. Threshold of nodes need to agree and sign the new deposit data, then the signatures are aggregated and the new deposit data message is created. For convenience, Obol API is used for that purpose.
## Sign partial deposit data
First a partial deposit data signature from the current Charon node should be signed and broadcasted to Obol API.
`validator-public-keys` are the validator public keys for which the new deposit data should be signed.
`withdrawal-addresses` are the new addresses for which the new deposit data should be signed. They should either be the same amount as `validator-public-keys` or a single one, that will be used for all keys.
Optionally, users can also specify different multiple `deposit-amounts` (defaults to only `32`).
**Single public key**
```sh
docker run -u $(id -u):$(id -g) --rm -v "$(pwd)/:/opt/charon" obolnetwork/charon:v1.10.3 deposit sign \
--validator-public-keys="0xb9171b84a09da7ff983a36e1c6e873e1537e97ad31aa868185d62c68e255baad8c1cfb83f508460ed96572d2a8e9e9da" \
--withdrawal-addresses="0x0100000000000000000000000d941218c10b055f0907fe1bbe486ccdaa7e332b"
```
**Multiple public keys, multiple withdrawal addresses**
```sh
docker run -u $(id -u):$(id -g) --rm -v "$(pwd)/:/opt/charon" obolnetwork/charon:v1.10.3 deposit sign \
--validator-public-keys="0xb9171b84a09da7ff983a36e1c6e873e1537e97ad31aa868185d62c68e255baad8c1cfb83f508460ed96572d2a8e9e9da,0xc9171b84a09da7ff983a36e1c6e873e1537e97ad31aa868185d62c68e255baad8c1cfb83f508460ed96572d2a8e9e9da" \
--withdrawal-addresses="0x0100000000000000000000000d941218c10b055f0907fe1bbe486ccdaa7e332b,0x0100000000000000000000000e941218c10b055f0907fe1bbe486ccdaa7e332b"
```
**Multiple public keys, single withdrawal address**
```sh
docker run -u $(id -u):$(id -g) --rm -v "$(pwd)/:/opt/charon" obolnetwork/charon:v1.10.3 deposit sign \
--validator-public-keys="0xb9171b84a09da7ff983a36e1c6e873e1537e97ad31aa868185d62c68e255baad8c1cfb83f508460ed96572d2a8e9e9da,0xc9171b84a09da7ff983a36e1c6e873e1537e97ad31aa868185d62c68e255baad8c1cfb83f508460ed96572d2a8e9e9da" \
--withdrawal-addresses="0x0100000000000000000000000d941218c10b055f0907fe1bbe486ccdaa7e332b"
```
## Fetch full deposit data
After a threshold of operators have submitted partial deposits, a full deposit can be fetched from Obol API.
`validator-public-keys` are the validator public keys for which the new deposit data should be fetched.
```sh
docker run -u $(id -u):$(id -g) --rm -v "$(pwd)/:/opt/charon" obolnetwork/charon:v1.10.3 deposit fetch \
--validator-public-keys="0xb9171b84a09da7ff983a36e1c6e873e1537e97ad31aa868185d62c68e255baad8c1cfb83f508460ed96572d2a8e9e9da" \
```
After a successful fetch the new deposit data files are saved in `.charon/deposit-data-`.
If there are not enough partial signatures, an error message will be returned.
```sh
17:18:40.771 ERRO cmd Application failed to start: fetch full deposit data from Obol API: not enough partial signatures to meet threshold {"submitted_public_keys": "[0x8677e2014a173f72b3d4528893cb01881549631c2a39d90d7c19c230299a57440e73c82c7daf1d72713b1e26e42bae99]", "submitted_public_keys_length": 1, "required_threshold": 3}
```
---
# Custom Graffiti
URL: https://docs.obol.org/advanced-and-troubleshooting/advanced/custom-graffiti
# Custom Graffiti
By default, Charon adds a `charon/-` graffiti to all block proposals. This can be customized using the `--graffiti` and `--graffiti-disable-client-append` CLI flags.
The `--graffiti` flag accepts either:
* A single string, which will be used by all validators, or
* A comma-separated list of strings, allowing each validator to have a unique graffiti (one string per validator).
When possible, Charon automatically appends an Obol signature (`OB`) and the specific consensus client type used (``) to the end of the custom graffiti. This behavior can be disabled by setting the `--graffiti-disable-client-append` flag.
:::info
The graffiti field in block proposals has a maximum size of 32 bytes.
:::
---
# Enable TLS Protocol
URL: https://docs.obol.org/advanced-and-troubleshooting/advanced/enable-tls-protocol
# Enable TLS protocol
## Securing VC to Charon communication
To secure the communication between the Validator Client and Charon, you can enable the TLS protocol in Charon's HTTP server. This only affects [Beacon API](https://ethereum.github.io/beacon-APIs/) endpoints and not debug/metrics endpoints. As an operator of the node, you need to have a TLS certificate and a private key that signed this certificate or CSR. Then you need to configure Charon to use them.
## Usage example
Suppose we don't have a TLS certificate and a key yet. We can create a self-signed certificate and a key using OpenSSL:
```
openssl req -x509 -newkey rsa:4096 -keyout key.pem -out cert.pem -days 365 -nodes
```
Then you could pass the flags to your Charon instance like this:
```
charon run --vc-tls-cert-file cert.pem --vc-tls-key-file key.pem
```
Charon accepts a certificate in PEM or CRT formats and the private key in PEM or DER formats.
Also you can specify these parameters as environment variables like this:
```
CHARON_VC_TLS_CERT_FILE="cert.pem"
CHARON_VC_TLS_KEY_FILE="key.pem"
```
On the Validator Client (VC) side, no additional configuration is typically required. The VC will automatically use the TLS protocol when communicating with Charon. However, if the TLS certificate is signed by a custom or non-standard certificate authority (CA), you may need to configure the VC to trust this CA. This can usually be achieved by adding the CA's certificate to the trusted certificate store on the machine running the VC.
If necessary, you can also enable `insecure` mode in the VC configuration to bypass TLS verification. Note that this approach is not recommended for production environments as it compromises security. Detailed instructions for configuring specific Validator Clients are beyond the scope of this article.
---
# Fallback Beacon Nodes
URL: https://docs.obol.org/advanced-and-troubleshooting/advanced/fallback-beacon-nodes
# Fallback beacon nodes
Charon allows specifying multiple beacon node URL endpoints. It sends requests to all specified endpoints simultaneously and proceeds with the first response received. This approach improves reliability but increases the load on the beacon nodes.
To mitigate this additional load, Charon supports configuring a fallback list of beacon nodes. These fallback nodes are only used if all primary beacon nodes fail to respond. This allows operators to designate less critical or public beacon nodes as a backup option, without impacting them under normal conditions.
To configure fallback beacon nodes, provide a comma-separated list of beacon node URLs using the `--fallback-beacon-node-endpoints` CLI flag.
---
# Set a Nickname
URL: https://docs.obol.org/advanced-and-troubleshooting/advanced/nicknames
# Nicknames
By default, Charon assigns each node a name by combining a random adjective with a random name from a predefined list. While these names are human-readable, they are not easily memorable or personalized for operators.
You can set a personalized nickname for your Charon node by using the `--nickname` CLI flag followed by the desired string. This nickname is shared with other Charon nodes in the same cluster and included as a label in your Prometheus metrics.
Nicknames can serve various purposes, such as providing a more memorable identifier, including a Discord ID for alerting, or adding a website URL for publicity.
---
# Self-Host a Relay
URL: https://docs.obol.org/advanced-and-troubleshooting/advanced/self-relay
# Self-Host a Relay
If you are experiencing connectivity issues with the Obol hosted relays, or you want to improve your clusters latency, resilience, and decentralization, you can opt to host your own relay on a separate open and static internet port.
Below is a simple `docker compose` file which runs a Charon as a relay server:
```shell
# Clone the repo and cd into it.
git clone https://github.com/ObolNetwork/charon-distributed-validator-node.git
cd charon-distributed-validator-node
# If you are exposing your relay on the public internet, determine your public IP
curl v4.ident.me
# Replace 'replace.with.public.ip.or.hostname' in relay/docker-compose.yml with your
# public IPv4 or DNS hostname, or with your private IP on your local (v)LAN, if this
# relay is running for Charon's sharing a private network.
nano relay/docker-compose.yml
# Start the relay
docker compose -f relay/docker-compose.yml up
```
Test whether the relay is publicly (or privately) accessible. This should return an ENR: `curl http://replace.with.public.ip.or.hostname:3640/enr`
Ensure the ENR returned by the relay contains the correct public IP and port by decoding it with [ENR viewer](https://enr-viewer.com/).
Configure **ALL** charon nodes in your cluster to use this relay:
* Either by adding a flag: `--p2p-relays=http://replace.with.public.ip.or.hostname:3640/enr`
* Or by setting the environment variable: `CHARON_P2P_RELAYS=http://replace.with.public.ip.or.hostname:3640/enr`
:::info
Keep the default relays and append your self-hosted relay to Charon's flag/environment variables if you want the most resilience `https://0.relay.obol.tech,https://1.relay.obol.tech,https://2.relay.obol.dev`, rather than having your one relay be a single point of failure in your cluster.
:::
:::info
If you are running a relay on a private network, consult your monitoring to confirm your Charon nodes are able to establish a direct connection with one another for optimal performance. You may need to update `charon run` to specify `--p2p-tcp-address=
```
Without this, Charon advertises only its private/internal address (e.g. `172.19.0.x`, `192.168.x.x`). Peers have no way to reach you and hole punching cannot be initiated.
:::warning
**Dynamic IP:** Home ISPs frequently reassign public IPs. If you use `--p2p-external-ip`, it will go stale when your IP changes and peers will silently fail to connect. Prefer `--p2p-external-host` with a Dynamic DNS (DDNS) service (e.g. DuckDNS, No-IP) if possible. Charon re-resolves the hostname periodically.
:::
## Docker
### Add port mappings (required)
Docker's bridge network blocks all inbound traffic by default. Unlike a home router — which allows return traffic for outbound-initiated flows — Docker requires explicit port mappings:
```yaml
ports:
- "3610:3610/udp"
- "3610:3610/tcp"
```
### Optionally use `network_mode: host`
Setting `network_mode: host` removes Docker's bridge NAT entirely, eliminating a layer of complexity for hole punching:
```yaml
services:
charon:
network_mode: host
```
:::warning
**Risks:**
- The container shares the host's full network namespace. Any port Charon binds to is bound directly on the host, which can conflict with other services running on the same machine.
- A compromised container has direct access to the host network stack, increasing the blast radius of a security incident.
- The `ports` mapping in your compose file has no effect in this mode and can be misleading if left in.
:::
## Kubernetes
### Expose both TCP and UDP in your service (required)
Define a service that exposes both protocols on the Charon P2P port:
```yaml
apiVersion: v1
kind: Service
metadata:
name: charon-p2p
spec:
type: NodePort
selector:
app: charon
ports:
- name: p2p-tcp
port: 3610
targetPort: 3610
protocol: TCP
- name: p2p-udp
port: 3610
targetPort: 3610
protocol: UDP
```
:::info
Some Kubernetes distributions cannot handle TCP and UDP on the same port in a single service. If you encounter issues, split them into two separate services.
:::
### Optionally use `hostNetwork: true`
Setting `hostNetwork: true` on the pod removes the Kubernetes network overlay, letting Charon bind directly to the node's network interface:
```yaml
spec:
hostNetwork: true
containers:
- name: charon
```
:::warning
**Risks:**
- The pod shares the host's full network namespace. Port conflicts with other workloads on the same node become possible.
- Kubernetes network policies no longer apply to the pod, removing a layer of traffic isolation.
- A compromised pod has direct access to the host network stack.
- In multi-node clusters, the pod is tied to a specific node's network, which can complicate scheduling and failover.
:::
:::info
**Running Kubernetes on a cloud provider?** Cloud environments use deny-by-default firewalls that sit below the Kubernetes layer and must be configured separately in the cloud console (AWS Security Groups, GCP Firewall Rules, Azure NSGs). Ensure inbound TCP and UDP on your P2P port are explicitly allowed.
:::
---
# Troubleshooting
URL: https://docs.obol.org/advanced-and-troubleshooting/troubleshooting
# troubleshooting
---
# Errors & Resolutions
URL: https://docs.obol.org/advanced-and-troubleshooting/troubleshooting/errors
# Errors & Resolutions
All operators should try to restart their nodes and should check if they are on the latest stable version before attempting any other configuration change. You can restart and update with the following commands:
```shell
docker compose down
git pull
docker compose up
```
You can check your logs using
```shell
docker compose logs
```
## ENRs & Keys
### How do I get my ENR if I want to generate it again?
`cd` to the directory where your private keys are located (ex: `cd /path/to/charon/enr/private/key`)
Run `docker run --rm -v "$(pwd):/opt/charon" obolnetwork/charon:v1.10.3 enr`. This prints the ENR on your screen.
### What do I do if lose my `charon-enr-private-key`?
If an ENR is lost, a new cluster operator can be created replacing the operator with the lost ENR. The steps to recover from a lost key are:
1. Generate a new ENR with `charon create enr`
2. Complete the [replace-operator ceremony](../../run-a-dv/editing/replace-operator.md) within the cluster, using the new ENR public key as the `new-operator` and the lost ENR as the `old-operator`. Consult the `cluster-lock.json` file if you don't know the lost ENR public key.
3. Shut down the existing cluster across all operators. Wait at least two epochs fully offline to minimize any slashing risk. Have all operators replace their previous cluster artifacts with the new artifacts created in the replacement ceremony.
4. Bring the cluster nodes back online with the new artifacts. The lost ENR has now been cycled out of the cluster.
To avoid having to disrupt cluster operation, it's recommended to make a secure backup of your ENR.
### I can't find the keys anywhere
The `charon-enr-private-key` is generated inside a hidden folder `.charon`. To view it, run `ls -al` in your terminal. This step may be a bit different for Windows.
Else, if you are on macOS, press `Cmd + Shift + .` to view the `.charon` folder in the Finder application.
## Lighthouse
### Lighthouse says "downloading historical blocks"
This means that Lighthouse is still syncing which will throw a lot of errors down the line. Wait for the sync before moving further.
### Lighthouse gives the error `failed to request attester duties`
This indicates there is something wrong with your Lighthouse beacon node. This might be because the request buffer is full as your node is never starting consensus since it never gets the duties.
### Lighthouse gives the error `not enough time for a discovery search`
This could be linked to a internet connection being too slow or relying on a slow third-party service such as Infura.
## Beacon Node
### `Error communicating with Beacon Node API` & `Error while connecting to beacon node event stream`
This is likely due to Lighthouse not done syncing, wait and try again once synced. Can also be linked to Teku keystore issue.
### Clock sync issues
Either your clock server time is off, or you are talking to a remote beacon client that is super slow (this is why we advise against using services like Infura).
### My beacon node API is flaky with lots of errors and timeouts
A good quality beacon node API is critical to validator performance. It is always advised to run your own beacon node to ensure low latencies to boost validator performance.
Using 3rd-party services like Infura's beacon node API has significant disadvantages since the quality is often low. Requests often return 500s or timeout. This results in lots of warnings and errors and failed duties. Running a local beacon node is always preferred.
## Charon Errors
### `Can't connect to Beacon API`
If you are running EL and CL outside Obol on the same machine, you might need to open ports in your firewall to allow connections incoming from the docker instance.
In order to know the IP of the docker network, run:
`docker network inspect `
### `Attester failed in consensus component`
The required number of operators defined in your cluster-lock file is
probably not online to sign successfully. Make sure all operators are
running the latest version of Charon. To check if some peers are not online:
`docker logs charon-distributed-validator-node-charon-1 2>&1 | grep 'absent'`
### `Load private key`
Make sure you have successfully run a DKG before running the node. The key
should be created and placed in the right directory during the ceremony.
Also, make sure you are working in the right directory:
`charon-distributed-validator-node`.
### `Failed to confirm node connection`
Wait for Teku & Lighthouse sync to be complete.
### `Reserve relay circuit: reservation failed`
`RESERVATION_REFUSED` is returned by the libp2p relay when some maximum
limit has been reached. This is most often due to "maximum reservations per IP/peer".
This is when your Charon node is restarting or in some error loop and constantly
attempting to create new relay reservations reaching the maximum.
To fix this error, stop your Charon node for 30mins before restarting it.
This should allow the relay enough time to reset your IP/peer limits and
should then allow new reservations. This could also be due to the relay
being overloaded in general, so reaching a server wide "maximum connections"
limit. This is an issue with relay scalability and we are working in a long
term fix for this.
### `Error opening relay circuit: NO_RESERVATION`
Error opening relay circuit NO_RESERVATION (204)` indicates the peer
isn't connected to the relay, so the the Charon client cannot connect to the
peer via the relay. That might be because the peer is offline or the peer is
configured to connect to a different relay.
To fix this error, ensure the peer is online and configured with the exact
same `--p2p-relays` flag.
### `Beacon Node is unreachable`
This error indicates that Charon cannot establish a connection to the configured beacon node API endpoint. Common causes include:
- The beacon node process has crashed or is not running. Check its status with `docker ps` or `docker compose ps` and inspect the beacon node container logs for crash messages.
- The beacon node API endpoint URL in your configuration is incorrect. Verify that `CHARON_BEACON_NODE_ENDPOINTS` in your `docker-compose.yml` points to the correct host and port.
- A firewall or network rule is blocking the connection between the Charon container and the beacon node. If you are running the beacon node outside of the Charon docker compose stack on the same machine, you may need to use the host's docker network IP rather than `localhost`. Run `docker network inspect ` to find the correct IP.
- The beacon node API port is not exposed or is bound to a different interface. Ensure the beacon node is listening on an interface accessible from the Charon container (e.g., `0.0.0.0` rather than `127.0.0.1`).
Restart the beacon node, confirm it is healthy, and verify network connectivity before restarting Charon.
### Beacon Node is syncing
This error occurs when Charon detects that the connected beacon node has not finished its initial sync with the Ethereum network. While the beacon node is syncing, it cannot provide accurate duty data, attestation information, or block proposals, which causes cascading failures across Charon and the validator client.
- Check your beacon node logs to monitor sync progress. For Lighthouse, look for messages like `Syncing` with slot progress indicators. For Teku, look for `Slot Event` logs showing the current sync state.
- Do not attempt to troubleshoot other Charon errors until the beacon node is fully synced. Most duty failures, fetcher errors, and consensus errors will resolve themselves once the beacon node reaches the head of the chain.
- If syncing is taking an unusually long time, ensure your execution layer (EL) client is also fully synced, as the beacon node depends on it. Check that your machine has sufficient disk I/O, CPU, and memory resources.
### Beacon Node has zero peers
This error indicates that your beacon node is running but has not discovered or connected to any peers on the Ethereum p2p network. Without peers, the beacon node cannot sync or stay up to date with the chain head.
- Check that the beacon node's p2p port (typically `9000` for both TCP and UDP) is open and reachable from the internet. Verify any firewall, security group, or router/NAT port-forwarding rules are correctly configured.
- Ensure that the beacon node's discovery port (UDP) is not being blocked. Some cloud providers or ISPs may block UDP traffic by default.
- If running behind a NAT, confirm that the beacon node is configured with the correct external IP address (e.g., `--enr-address` for Lighthouse).
- Restart the beacon node to re-trigger peer discovery. If the issue persists, try adding known bootstrap nodes or peers manually via the beacon node's CLI flags.
- Check that your system clock is accurate, as significant clock drift can cause peers to reject connections.
### Beacon Node is too far behind the current slot
This error indicates that the beacon node is running and has peers but is lagging significantly behind the current head of the chain. This means duties fetched from the beacon node are stale, leading to missed attestations and proposals.
- Check the beacon node logs for warnings about slow processing, database errors, or resource exhaustion (CPU, memory, disk I/O).
- Ensure your execution layer (EL) client is healthy and fully synced. A degraded or lagging EL client will cause the beacon node to fall behind as it cannot verify payloads.
- Review system resource utilization. Insufficient disk I/O is a common cause, particularly on spinning disks or under-provisioned cloud instances. SSDs are mandatory for beacon node operation.
- If the beacon node has fallen far behind, it may be faster to resync from scratch using checkpoint sync rather than waiting for it to catch up incrementally.
### Insufficient peers to reach the required cluster threshold
This error indicates that Charon cannot communicate with enough peer operators to meet the threshold required for signing duties. In a distributed validator cluster, a minimum number of operators (the [threshold](../../learn/charon/cluster-configuration.md#cluster-size-and-resilience) must be online and participating for any duty to succeed.
- Check which peers are absent by inspecting Charon logs
- Coordinate with your fellow cluster operators to ensure they are online and running. Peers may be offline due to maintenance, crashes, or misconfiguration.
- Verify that all operators are running the same compatible version of Charon. Version mismatches can cause p2p communication failures that prevent peers from being recognized.
- Check for p2p connectivity issues. If operators are behind restrictive firewalls or NATs, relay connections may be failing. Look for relay-related errors in the logs.
- If a peer's node has permanently failed and cannot be recovered, consider initiating the [replace-operator ceremony](../../run-a-dv/editing/replace-operator.md) to cycle the offline operator out of the cluster.
### Validator Client is not connected
This error indicates that Charon is not receiving any requests from the local validator client (VC). The validator client must be connected to Charon's validator API in order to submit partial signatures for cluster duties.
- Verify that the validator client container is running by checking `docker ps` or `docker compose ps`. If it has exited, inspect the logs with `docker compose logs ` to determine the cause of the crash.
- Ensure the validator client is configured to point to Charon's validator API endpoint, not directly to the beacon node. The VC should be using the Charon API address (typically `http://charon:3600` within the docker compose network) as its beacon node URL.
- Check for port conflicts or network misconfigurations if using the docker compose stack. The Charon container must expose its validator API port, and the VC container must be able to reach it.
- If the validator client is running but Charon still reports no connection, check the VC logs for authentication errors, TLS issues, or repeated connection timeouts that may indicate a configuration mismatch.
- Restart the validator client after verifying the configuration.
### Validator Client is missing validator private keys
This error indicates that the validator client cannot find or load the validator key shares required for signing duties. Without these keys, the VC cannot submit partial signatures to Charon.
- Ensure a DKG ceremony has been completed successfully before starting the node.
- Verify that the keystore files (`keystore-*.json`) and their corresponding password files exist in the directory mounted into the validator client container. Check your `docker-compose.yml` volume mounts to confirm the correct path is being used.
- Ensure file permissions allow the validator client to read the keystore files. Run `ls -la` on the validator keys directory to check ownership and permissions. If necessary, adjust file permissions.
- If you have recently moved or redeployed your node, double-check that you copied the correct key shares for your specific operator index. Each operator in the cluster has unique key shares — using another operator's keys will result in mismatching key share errors.
### `Couldnt fetch duty data from the beacon node`
`msgFetcher` indicates a duty failed in the fetcher component when
it failed to fetch the required data from the beacon node API. This indicates
a problem with the upstream beacon node.
### `Couldnt aggregate attestation due to failed attester duty`
`msgFetcherAggregatorNoAttData` indicates an attestation aggregation
duty failed in the fetcher component since it couldn't fetch the prerequisite
attestation data. This indicates the associated attestation duty failed to obtain
a cluster agreed upon value.
### `Couldnt aggregate attestation due to insufficient partial v2 committee subscriptions`
`msgFetcherAggregatorZeroPrepares` indicates an attestation aggregation
duty failed in the fetcher component since it couldn't fetch the prerequisite
aggregated v2 committee subscription. This indicates the associated prepare aggregation
duty failed due to no partial v2 committee subscription submitted by the cluster
validator clients.
### `Couldnt aggregate attestation due to failed prepare aggregator duty`
`msgFetcherAggregatorFailedPrepare` indicates an attestation aggregation
duty failed in the fetcher component since it couldn't fetch the prerequisite
aggregated v2 committee subscription. This indicates the associated prepare aggregation
duty failed.
### `Couldnt propose block due to insufficient partial randao signatures`
`msgFetcherProposerFewRandaos` indicates a block proposer duty failed
in the fetcher component since it couldn't fetch the prerequisite aggregated
RANDAO. This indicates the associated randao duty failed due to insufficient
partial randao signatures submitted by the cluster validator clients.
### `Couldnt propose block due to zero partial randao signatures`
`msgFetcherProposerZeroRandaos` indicates a block proposer duty failed
in the fetcher component since it couldn't fetch the prerequisite aggregated
RANDAO. This indicates the associated randao duty failed due to no partial randao
signatures submitted by the cluster validator clients.
### `Couldnt propose block due to failed randao duty`
`msgFetcherProposerZeroRandaos` indicates a block proposer duty failed
in the fetcher component since it couldn't fetch the prerequisite aggregated
RANDAO. This indicates the associated randao duty failed.
### `Consensus algorithm didn't complete`
`msgConsensus` indicates a duty failed in consensus component. This
could indicate that insufficient honest peers participated in consensus or p2p
network connection problems.
### `Signed duty not submitted by local validator client` error
`msgValidatorAPI` indicates that partial signature were never submitted
by the local validator client. This could indicate that the local validator client
is offline, or has connection problems with Charon, or has some other problem.
See validator client logs for more details.
### `Bug: partial signature database didn't trigger partial signature exchange`
`msgParSigDBInternal` indicates a bug in the partial signature database
as it is unexpected.
### `No partial signatures received from peers`
`msgParSigEx` indicates that no partial signature for the duty was
received from any peer. This indicates all peers are offline or p2p network connection
problems.
### `Insufficient partial signatures received, minimum required threshold not reached`
`msgParSigDBThreshold` indicates that insufficient partial signatures
for the duty was received from peers. This indicates problems with peers or p2p
network connection problems.
### `Bug: threshold aggregation of partial signatures failed due to inconsistent signed data`
`msgSigAgg` indicates that BLS threshold aggregation of sufficient
partial signatures failed. This indicates inconsistent signed data. This indicates
a bug in Charon as it is unexpected.
### `Existing private key lock file found, another charon instance may be running on your machine`
When you turn on the `--private-key-file-lock` option in Charon, it
checks for a special file called the private key lock file. This file has the
same name as the ENR private key file but with a `.lock` extension.
If the private key lock file exists and is not older than 5 seconds, Charon won't
run. It doesn't allow running multiple Charon instances with the same ENR private
key. If the private key lock file has a timestamp older than 5 seconds, Charon
will replace it and continue with its work. If you`re sure that no other Charon
instances are running, you can delete the private key lock file.
### `Validator api 5xx response: mismatching validator client key share index, Mth key share submitted to Nth charon peer`
The issue revolves around an invalid setup or deployment, where the
validators private key shares don't match the ENR private key. There may
have been a mix-up during deployment, leading to a mismatching validator
client key share index.
For example: Imagine node N is Alice, and node M is Bob, the error would read:
` mismatching validator client key share index, Bob's key share submitted to Alice's charon node `
Bob's private key share(s) are imported to a VC that is connected to
Alice's Charon node. This is an invalid setup/deployment.
Alice`s Charon node should only be connected to Alice`s VC.
Check the partial public key shares of each node inside
cluster-lock.json and see that matches with the public key inside
`node(num)/validator_keys/keystore-0.json`.
## Grafana
### How to fix the Grafana dashboard?
Sometimes, Grafana dashboard doesn't load any data the first time.
You can solve this by following the steps below:
- Click the Wheel Icon > Datasources.
- Click prometheus.
- Change the "Access" field from `Server (default)` to `Browser`. Press "Save & Test". It should fail.
- Change the "Access" field back to `Server (default)` and press "Save & Test". You should be presented with a green success icon saying "Data source is working" and you can return to the dashboard page.
### `N/A` & `No data` in validator info panel
Can be linked to a Teku keystore issue.
## Prometheus
### `Unauthorized: authentication error: invalid token`
You can ignore this error unless you have been contacted by the Obol Team
with monitoring credentials. In that case, follow [Monitoring your Node](../../run-a-dv/running/monitoring.md) in our guides. It does not affect cluster performance or prevent the cluster from running.
## Docker
### How to fix `permission denied` errors?
Permission denied errors can come up in a variety of manners, particularly
on Linux and WSL for Windows systems. In the interest of security, the
charon docker image runs as a non-root user, and this user often does not
have the permissions to write in the directory you have checked out the code
to. This can be generally be fixed with some of the following:
- Running docker commands with `sudo`, if you haven't [set up docker to be run as a non-root user](https://docs.docker.com/engine/install/linux-postinstall/)
- Changing the permissions of the `.charon` folder with the commands:
- `mkdir .charon` (if it doesn't already exist);
- `sudo chmod -R 666 .charon`.
### I see a lot of errors after running `docker compose up`
This is because both EL and CL clients start syncing, causing connectivity issues among the containers. Simply let the containers run for
a while. You won't observe frequent errors when the EL client finishes syncing. You
can also add a second beacon node endpoint for something like Infura by
adding a comma separated API URL to the end of
`CHARON_BEACON_NODE_ENDPOINTS` in the docker-compose.yml.
### How do I fix the `plugin "loki" not found` error?
If you get the following error when calling `docker compose up`:
`Error response from daemon: error looking up logging plugin loki: plugin "loki" not found`.
Then it probably means that the Loki docker driver isn't installed. In that case, run the following command to install loki:
`docker plugin install grafana/loki-docker-driver:latest --alias loki --grant-all-permissions`.
## Relay
### ` Resolve IP of p2p external host flag: lookup replace.with.public.ip.or.hostname:no such host`
Replace `replace.with.public.ip.or.hostname` in the
relay/docker-compose.yml with your real public IP or DNS hostname.
### ` Timeout resolving bootnode ENR: context deadline exceeded`
The relay you are trying to connect to your peers via is offline or
unreachable.
---
# Handling DKG Failure
URL: https://docs.obol.org/advanced-and-troubleshooting/troubleshooting/dkg_failure
# Handling DKG Failure
While the DKG process has been tested and validated against many different configuration instances, it can still encounter issues which might result in failure.
Our DKG is designed in a way that doesn't allow for inconsistent results: either it finishes correctly for every peer, or it fails.
This is a **safety** feature: you don't want to deposit an Ethereum distributed validator that not every operator is able to participate in.
The most common source of issues lies in the network stack: if any of the peers' Internet connection glitches substantially, the DKG will fail. If you are attempting to run the `dkg` command in two places at once, or you have a `charon run` command with the same `charon-enr-private-key` as you are trying to DKG with, these may also disrupt a key generation ceremony.
Charon's DKG doesn't allow peer reconnection once the process is started, but it does allow for re-connections before that.
When you see the following message:
```log
14:08:34.505 INFO dkg Waiting to connect to all peers...
```
this means your Charon instance is waiting for all the other cluster peers to start their DKG process: at this stage, peers can disconnect and reconnect at will, the DKG process will still continue.
A log line will confirm the connection of a new peer:
```log
14:08:34.523 INFO dkg Connected to peer 1 of 3 {"peer": "fantastic-adult"}
14:08:34.529 INFO dkg Connected to peer 2 of 3 {"peer": "crazy-bunch"}
14:08:34.673 INFO dkg Connected to peer 3 of 3 {"peer": "considerate-park"}
```
As soon as all the peers are connected, this message will be shown:
```log
14:08:34.924 INFO dkg All peers connected, starting DKG ceremony
```
Past this stage **no disconnections are allowed**, and _all peers must leave their terminals open_ in order for the DKG process to complete: this is a synchronous phase, and every peer is required in order to reach completion.
If for some reason the DKG process fails, you would see error logs that resemble this:
```log
14:28:46.691 ERRO cmd Fatal error: sync step: p2p connection failed, please retry DKG: context canceled
```
As the error message suggests, the DKG process needs to be retried.
## Cleaning up the `.charon` directory
One cannot simply retry the DKG process: Charon refuses to overwrite any runtime file in order to avoid inconsistencies and private key loss.
When attempting to re-run a DKG with an unclean data directory - which is either `.charon` or what was specified with the `--data-dir` CLI parameter - this is the error that will be shown:
```log
14:44:13.448 ERRO cmd Fatal error: data directory not clean, cannot continue {"disallowed_entity": "cluster-lock.json", "data-dir": "/compose/node0"}
```
The `disallowed_entity` field lists all the files that Charon refuses to overwrite, while `data-dir` is the full path of the runtime directory the DKG process is using.
In order to retry the DKG process one must delete the following entities, if present:
* `validator_keys` directory
* `cluster-lock.json` file
* `deposit-data.json` file
:::warning
The `charon-enr-private-key` file **must be preserved**, failure to do so requires the DKG process to be restarted from the beginning by creating a new cluster definition.
:::
If you're doing a DKG with a custom cluster definition - for example, create with `charon create dkg`, rather than the Obol Launchpad - you can re-use the same file.
Once this process has been completed, the cluster operators can retry a DKG.
## Further debugging
If you are trying to create an extremely large, geographically diverse cluster, there is a chance the process could be timing out. Consider adding the flags `--timeout=5m --shutdown-delay=60s` to allow more time for the ceremony to complete and safely shut down across all nodes.
If for some reason the DKG process still fails, node operators are advised to reach out to the Obol team by opening an [issue](https://github.com/ObolNetwork/charon/issues), detailing the troubleshooting steps that were taken and providing **debug logs**.
To enable debug logs, first clean up the Charon data directory as explained in [the previous section](dkg_failure.md#cleaning-up-the-charon-directory), then run your DKG command while appending `--log-level=debug` at the end.
In order for the Obol team to debug your issue as quickly and precisely as possible, please provide full logs in text form, not through screenshots or display photos.
Providing complete debug logs from all peers is particularly important, since it allows the team to reconstruct precisely what happened throughout the ceremony.
---
# Client Configuration
URL: https://docs.obol.org/advanced-and-troubleshooting/troubleshooting/client_configurations
# Client Configuration
Many execution, consensus, and validator clients need custom flags or parameters to work best with Distributed Validators. These settings are often dispersed across a number of documentation pages or example repos. This page aims to be a reference for each client and the specific additions they may require.
## Nethermind
Nethermind should be configured to not include blobs in locally-built blocks while using MEV relays. In the case where MEV relays fail to provide blocks to propose and the node falls back to building locally, significant time will have passed and there is a risk of missing the block proposal window should block building be further delayed with blob processing. For this reason, blob inclusion should be disabled:
```shell
--Blocks.BlockProductionBlobLimit 0
```
## Lighthouse
### Consensus Client
Nothing specific for distributed validators is required. If you are configuring MEV-boost, consult the settings you need [here](../advanced/enable-mev.mdx#consensus-clients).
### Validator Client
Required flags:
```shell
--distributed
```
## Lodestar
### Consensus Client
Nothing specific for distributed validators is required. If you are configuring MEV-boost, consult the settings you need [here](../advanced/enable-mev.mdx#consensus-clients).
### Validator Client
Required flags:
```shell
--distributed
```
## Nimbus
### Validator Client
Required flags:
```shell
--distributed
```
## Prysm
### Consensus Client
Nothing specific for distributed validators is required. If you are configuring MEV-boost, consult the settings you need [here](../advanced/enable-mev.mdx#consensus-clients).
### Validator Client
Required flags:
```shell
--distributed
```
## Teku
### Consensus Client
Required flags:
```shell
--validators-graffiti-client-append-format=DISABLED
```
### Validator Client
Required flags:
```shell
--Xobol-dvt-integration-enabled
```
---
# Test Commands
URL: https://docs.obol.org/advanced-and-troubleshooting/troubleshooting/test_command
# Test Commands
This page aims to give guidance on the causes, and potential for troubleshooting or improvement, of failed tests or low test scores from the [Charon Test commands](../../run-a-dv/prepare/test-a-cluster.mdx).
## Running test commands
Below are sample invocations for each deployment method. Replace placeholder values (e.g. ``, ``) with your actual configuration. For full details on all available flags, refer to the [Test a Cluster](../../run-a-dv/prepare/test-a-cluster.mdx) page.
:::info
Most test commands require a `--lock-file` or `--definition-file` flag to identify your cluster. There is no default value for these flags in test commands, so you must specify them explicitly. If you have completed DKG, use `--lock-file`; if you have only created a cluster definition, use `--definition-file`.
:::
If you are using the [CDVN](https://github.com/ObolNetwork/charon-distributed-validator-node) or [LCDVN](https://github.com/ObolNetwork/lido-charon-distributed-validator-node) repo, run test commands with Docker from within the repo directory.
```sh
# Run from within the charon-distributed-validator-node/ directory
docker run --rm -u $(id -u):$(id -g) -v "$(pwd):/opt/charon" obolnetwork/charon:v1.10.3 alpha test \
--lock-file="/opt/charon/.charon/cluster-lock.json" \
--private-key-file="/opt/charon/.charon/charon-enr-private-key" \
[FLAGS]
```
On DappNode, you can run test commands by executing them inside the Charon container via the DappNode UI terminal or SSH.
```sh
# Via docker exec (find your container name with `docker ps`)
docker exec -it DAppNodePackage-hoodi-obol.dnp.dappnode.eth charon alpha test \
--lock-file=".charon/cluster-lock.json" \
[FLAGS]
```
:::info
The container name depends on the network package you installed (e.g. `DAppNodePackage-hoodi-obol.dnp.dappnode.eth` for Hoodi or `DAppNodePackage-obol.dnp.dappnode.eth` for Mainnet). Verify using `docker ps`.
:::
For Kubernetes deployments using the [Obol Helm charts](https://github.com/ObolNetwork/helm-charts), exec into the Charon pod to run test commands. Replace the namespace and release name if you used different values during installation.
```sh
# Find your Charon pod (default namespace: dv-pod, default release: my-dv-pod)
kubectl get pods -n dv-pod -l app.kubernetes.io/instance=my-dv-pod
# Exec into the pod and run the test
kubectl exec -it -n dv-pod my-dv-pod-0 -- charon alpha test \
--lock-file=".charon/cluster-lock.json" \
[FLAGS]
```
If you have the Charon binary installed directly, run test commands from the directory containing your `.charon` folder.
```sh
charon alpha test \
--lock-file=".charon/cluster-lock.json" \
[FLAGS]
```
## Peers
### Charon Peers
#### Ping
* Peers might have not started their nodes or are not reachable.
#### PingMeasure
* Peer might be too far away (geographically) from you.
* If the connection to the peer is indirect, the route is from your node, to the relay, to the peer. Meaning you are measuring the travel time from you to the relay, and from the relay to the peer: (your node -> relay -> peer). This means, even if your peer's node is right next to yours, if the connection is being transmitted through a relay far away, the latency between your nodes might be too high to be effective.
* Your general network latency to the public internet might be high. Verify with the [`charon test infra`](../../run-a-dv/prepare/test-a-cluster.mdx#test-machine-and-network-performance) tests.
* If the connection to the peer is indirect, there is a potential that the relay might be overloaded or under-resourced, consider adding [alternative relays](../security/risks.md#risk-obol-hosting-the-relay-infrastructure), or preferably [opening charon's p2p port](../../learn/charon/charon-networking.md#libp2p-relays-and-peer-discovery) to the internet to establish direct peer to peer connections.
#### PingLoad
Same causes as PingMeasure test apply here.
#### DirectConn
* Your or your peer's port might not be publicly exposed.
* Your or your peer's port might be behind a firewall.
* Your or your peer's port might be behind a strict NAT gateway.
### Charon Relays
#### PingRelay
* Relay might be down or uncontactable for other reasons.
#### PingMeasureRelay
* Relay might be under heavy load.
* Your network latency might be high. Verify with the `charon test infra` tests.
### Self
#### Libp2pTCPPortOpenTest
* There might be another process running on the designated port (tcp/3610 by default).
* The process might have died.
## Beacon
#### Ping
* Beacon node might not be started or is not reachable.
#### PingMeasure
* Beacon node might be too far away (geographically) from you.
* Your network latency might be high. Verify with the `charon test infra` tests.
#### Version
* The beacon node version is not compatible with charon.
#### IsSynced
* Beacon node is not synced to the network.
#### PeerCount
* Beacon node does not have enough peers. This may result in slower fetching and broadcasting of slots and duties.
#### PingLoad
This is a load test, to enable it add the `--load-test` flag.
Same causes as PingMeasure test apply here.
#### Simulation
This is a load test, to enable it add the `--load-test` flag.
Same causes as PingMeasure test apply here and additionally:
* The infrastructure on which the beacon node runs (amount of RAM, disk IOPS) might not be enough to handle the number of simulated validators supplied in this test.
## Validator
#### Ping
* Validator client might not be started or is not reachable.
#### PingMeasure
* Validator client might be too far away (geographically) from the charon client. Generally a low latency between a validator client and its charon client is important for timely signing.
#### PingLoad
Same causes as PingMeasure test apply here.
## MEV
#### Ping
* MEV relay might not be started or is not reachable.
#### PingMeasure
* MEV relay might be too far away (geographically) from you.
* Your network latency might be high. Verify with the `charon test infra` tests.
#### CreateBlock
Same causes as PingMeasure test apply here and additionally:
* MEV relay might be too slow in block production.
#### CreateMultipleBlocks
Same causes as CreateBlock test apply here.
## Infra
#### DiskWriteSpeed
* Read more in our [Deployment Best Practices](../../run-a-dv/prepare/deployment-best-practices.md#hardware-specifications).
#### DiskWriteIOPS
* Read more in our [Deployment Best Practices](../../run-a-dv/prepare/deployment-best-practices.md#hardware-specifications).
#### DiskReadSpeed
* Read more in our [Deployment Best Practices](../../run-a-dv/prepare/deployment-best-practices.md#hardware-specifications).
#### DiskReadIOPS
* Read more in our [Deployment Best Practices](../../run-a-dv/prepare/deployment-best-practices.md#hardware-specifications).
#### AvailableMemory
* Your available memory (RAM) is not enough to run Charon. The minimum available memory should be 2GB, the recommended available memory is 4GB. Note that this test is a best estimate, as memory availability can be hard to predict, particularly if the command is run in a virtualized environment (i.e.: a Docker container).
#### TotalMemory
* Your total memory (RAM) may not be enough to run a full validating node. The recommended minimum total memory is 16GB. Specialized, or optimized deployments can use less RAM than the recommended minimum, but may require some monitoring to assert sufficient stability and performance. Read more in our [Deployment Best Practices](../../run-a-dv/prepare/deployment-best-practices.md#hardware-specifications)
#### InternetLatency
* Your internet latency to the nearest server is too high. Latency is expected to be at least less than 50ms and at best less than 20ms.
#### InternetDownloadSpeed
* Your internet download speed from the nearest test server is too low. Download speed is expected to be at least above 10Mb/s and at best above 50Mb/s.
#### InternetUploadSpeed
* Your internet upload speed to the nearest test server is too low. Upload speed is expected to be at least above 10Mb/s and at best above 50Mb/s.
---
# Security
URL: https://docs.obol.org/advanced-and-troubleshooting/security
# security
---
# Overview
URL: https://docs.obol.org/advanced-and-troubleshooting/security/overview
# Overview
This page serves as an overview of the Obol Network from a security point of view.
This page is updated quarterly. The last update was on 2025-December-05.
View the operational status of Obol's supporting infrastructure at https://status.obol.org/. Your distributed validator does not require any centrally managed software to operate (if you run your own [relay](./risks.md)).
## Table of Contents
* [Overview](overview.md#overview)
* [Table of Contents](overview.md#table-of-contents)
* [Official Domains and Channels](overview.md#domain-names-and-official-channels)
* [List of Security Audits and Assessments](overview.md#list-of-security-audits-and-assessments)
* [Security focused documents](overview.md#security-focused-documents)
* [Bug Bounty](overview.md#bug-bounty)
## Domain names and official channels
The Obol network and affiliated teams may use the following domain names and social media accounts;
- [obol.org](https://obol.org/)
- [obol.tech](https://obol.tech/)
- obol.dev
- [dvlabs.tech](https://dvlabs.tech/)
- [@obol_collective](https://twitter.com/obol_collective) on x.com
- [@dv_labs](https://x.com/dv_labs) on x.com
Be wary of any communication presenting as related to Obol from other domains or social media accounts. Use good judgement and caution even when interacting with trusted domains and channels, as domain names, emails, and social media accounts can be compromised or impersonated.
## List of Security Audits and Assessments
The completed audits reports are linked [here](https://github.com/ObolNetwork/obol-security/tree/main/audits).
* A review of Obol Labs [development processes](ev-assessment.md) by [Ethereal Ventures](https://www.etherealventures.com/).
* A [security assessment](https://github.com/ObolNetwork/obol-security/blob/f9d7b0ad0bb8897f74ccb34cd4bd83012ad1d2b5/audits/Sigma_Prime_Obol_Network_Charon_Security_Assessment_Report_v2_1.pdf) of Charon by [Sigma Prime](https://sigmaprime.io/) resulting in version [`v0.16.0`](https://github.com/ObolNetwork/charon/releases/tag/v0.16.0).
* A second [assessment of Charon](https://obol.tech/charon_quantstamp_assessment.pdf) by [QuantStamp](https://quantstamp.com/) resulting in version [`v0.19.1`](https://github.com/ObolNetwork/charon/releases/tag/v0.19.1).
* A [security assessment of Charon's editability features](https://github.com/ObolNetwork/charon/blob/main/docs/audit/2026%20-%20Charon%20V2%20Audit%20-%20TrailOfBits.pdf) by [Trail of Bits](https://www.trailofbits.com/) resulting in version [`v1.9.0`](https://github.com/ObolNetwork/charon/releases/tag/v1.9.0).
* A [solidity audit](smart-contract-audit.md) of the Obol Splits contracts by [Zach Obront](https://zachobront.com/).
* A [penetration testing certificate](https://github.com/ObolNetwork/obol-security/blob/main/audits/Sayfer_2024-03_Penetration_Testing_CFD.pdf) of the Obol DV Launchpad by [Sayfer](https://sayfer.io/).
* A [second](https://github.com/ObolNetwork/obol-splits/blob/main/audit/2025%20-%20Obol%20Splits%20V2%20Audit%20-%20Nethermind.pdf) and [third](https://github.com/ObolNetwork/obol-splits/blob/main/audit/2025%20-%20Obol%20Splits%20V3%20Audit%20-%20Nethermind.pdf) solidity audit by [Nethermind Security](https://www.nethermind.io/nethermind-security).
## Security focused documents
* A [threat model](threat_model.md) for a DV middleware client like Charon.
## Bug Bounty
Information related to disclosing bugs and vulnerabilities to Obol can be found on [the next page](bug-bounty.md).
---
# Centralization Risks and Mitigation
URL: https://docs.obol.org/advanced-and-troubleshooting/security/risks
# Centralization Risks and Mitigation
## Risk: Obol hosting the relay infrastructure
**Mitigation**: Self-host a relay.
One of the risks associated with Obol hosting the [LibP2P relays](../../learn/charon/charon-networking.md) infrastructure allowing peer discovery is that if Obol-hosted relays go down, peers won't be able to discover each other and perform the DKG or reconnect after a restart. To mitigate this risk, external organizations and node operators can consider self-hosting a relay. This way, if Obol's relays go down, the clusters can still operate through other relays in the network. Ensure that all nodes in the cluster use the same relays, or they will not be able to find each other if they are connected to different relays.
The following non-Obol entities run relays that you can consider adding to your cluster (you can have more than one per cluster, see the `--p2p-relays` flag of [`charon run`](../../learn/charon/charon-cli-reference.md#the-run-command)):
| Entity | Relay URL |
| ------------------------------------------- | ------------------------------------ |
| [DSRV](https://www.dsrvlabs.com/) | https://charon-relay.dsrvlabs.dev |
| [Hashquark](https://www.hashquark.io/) | https://relay-2.prod-relay.721.land/ |
| [Hashquark](https://www.hashquark.io/) | https://secondary.prod-relay.721.land/ |
| [Nethermind](https://nethermind.io/) | https://pluto-relay-0.ovh.dev-nethermind.xyz/ |
| [Nethermind](https://nethermind.io/) | https://pluto-relay-1.ovh.dev-nethermind.xyz/ |
## Risk: Obol being able to update Charon code
**Mitigation**: Pin specific docker versions or compile from source on a trusted commit.
Another risk associated with Obol is the Labs team having the ability to update the [Charon code](https://github.com/ObolNetwork/charon) used by node operators within DV clusters, which could introduce vulnerabilities or malicious code. To mitigate this risk, operators can consider pinning specific versions or hashes of the Docker image or git repo commits that have been [thoroughly tested](overview.md#list-of-security-audits-and-assessments) and accepted by the network. This would ensure that any updates are carefully vetted and reviewed by the community, and only introduced into a running cluster gradually. The labs team will strive to communicate the security or operational impact any Charon update entails, giving operators the chance to decide whether they want potential performance or quality of experience improvements, or whether they remain on a trusted version for longer.
## Risk: Obol hosting the DV Launchpad
**Mitigation**: Use [`create cluster`](../../learn/charon/charon-cli-reference.md#the-create-command) or [`create dkg`](../../learn/charon/charon-cli-reference.md#creating-the-configuration-for-a-dkg-ceremony) locally and distribute the files manually.
Hosting the first Charon frontend, the [DV Launchpad](../../learn/intro/launchpad.md), on a centralized server could create a single point of failure, as users would have to rely on Obol's server to access the protocol. This could limit the decentralization of the protocol and could make it vulnerable to attacks or downtime. Obol hosting the launchpad on a decentralized network, such as IPFS would be a first step but not enough. This is why the Charon code is source-available and contains a CLI interface to interact with the protocol locally.
To mitigate the risk of launchpad failure, consider using the `create cluster` or `create dkg` commands locally and distributing the key shares files manually.
## Risk: Obol custodying pre-signed exit messages
**Mitigation**: Use withdrawal address initiated exits or validator client exits
Before the Pectra hardfork, there was no way for a delegator to exit their validator without the co-operation of the node operator(s). In an effort to reduce this risk, Obol developed the [Charon exit](../../learn/charon/charon-cli-reference.md#the-exit-command) command, which allows operators to pre-sign and download exit messages to give to the delegator for safe keeping, ensuring they could broadcast them at any point in time. This feature relies on Obol's [API](../../api/what-is-this-api), and means the Obol core team could in theory initiate an unwanted exit. If a delegator does not want to be exposed to that centralization risk, they should not use Charon's built-in exit commands, and instead should initiate exits using the [EIP7002](https://eips.ethereum.org/EIPS/eip-7002) exit contract, or alternatively by running normal exit commands on the operator's validator clients.
Guides to exiting validators using all three approaches are outlined [here](../../run-a-dv/running/exit-a-dv.mdx).
## Risk: Obol going bust/rogue
**Mitigation**: Use key recovery.
The final centralization risk associated with Obol is the possibility of the company going bankrupt or acting maliciously, which could lead to a loss of confidence in the Charon client. To mitigate this risk, Obol has implemented a key reconstitution mechanism. This would allow the clusters to continue operating and to (re)create full validator private keys suitable for standard staking setups even if Obol is no longer able or willing to provide support.
A guide to recombine key shares into a single private key can be accessed [here](../advanced/quickstart-combine.md).
---
# Obol Bug Bounty Program
URL: https://docs.obol.org/advanced-and-troubleshooting/security/bug-bounty
# Obol Bug Bounty Program
## Overview
At Obol, we prioritize the security of our distributed validator software and the staking capital that depends on it. Our Bug Bounty Program rewards security researchers who find and responsibly disclose vulnerabilities in the software, smart contracts, and supporting services that operators and delegators rely on.
Because an Obol Distributed Validator (DV) is an independent BFT cluster — not a shared network with global liveness or a pooled balance sheet — our threat model and reward structure are different from those of an L1 chain or a defi protocol. We reward findings that map to the way DVs actually fail.
## Participant Eligibility
Participants must:
- Not reside in countries where participation in such programs is prohibited.
- Be at least 14 years of age and possess the legal capacity to participate.
- Have received consent from your employer, if applicable.
- Not have been employed or contracted by Obol Labs, nor be an immediate family member of an employee, within the last 12 months.
## Scope of the Program
Eligible submissions must concern software and services developed by Obol, specifically:
- [Charon](https://github.com/ObolNetwork/charon), the DV middleware client.
- The [Obol DV Launchpad](https://launchpad.obol.org) and the [Obol public API](https://api.obol.tech).
- The **Obol Validator Manager (OVM)** smart contracts — the current-generation withdrawal address contract that manages validator deposits, EIP-7002 triggered exits, EIP-7251 consolidations, and reward/principal splitting. Deployed on mainnet (`0x2c26B5A373294CaccBd3DE817D9B7C6aea7De584`), Sepolia, and Hoodi.
- The **OBOL token** contract (`0x0B010000b7624eb9B3DfBC279673C76E9D29D5F7`) governing the Obol Collective.
- Legacy **Obol Splits** contracts (OWR — Optimistic Withdrawal Recipient — and 0xSplits-based contracts deployed before the OVM). These remain in scope for live deployments but findings against deprecated code paths only are lower priority.
- Obol-operated public relay infrastructure.
- Charon's cluster lifecycle commands, including the DKG ceremony.
Submissions related to the following are considered out of scope:
- Social engineering of Obol staff or community members.
- Rate limiting and similar non-security UX issues.
- Physical security breaches.
- Non-security UX/UI issues.
- Third-party application or library vulnerabilities (please report upstream).
- The [obol.org](https://obol.org) static website and Obol's internal corporate infrastructure.
- The operational security of node operators running Obol software (operators are responsible for their own host security).
- The Obol Stack and its in-cluster components (Hermes, OpenClaw, x402 facilitator, Cloudflared, eRPC, etc.). The Obol Stack is pre-release software and is currently out of scope. It will be added to the program when it reaches a stable, publicly supported release.
- Experimental `charon alpha` commands (`charon alpha edit` and related subcommands). These are pre-release features and are not yet in scope for this bounty.
## How we prioritize
The Obol threat model treats **external attackers harming live DV clusters** as the highest priority — these are the failures that destroy delegator capital or take validators offline at scale. A cluster member acting irrationally against the cluster they themselves operate is a real but lower-priority risk: the cluster's BFT thresholds and slashing economics already make this self-defeating, and we deliberately don't over-reward findings that depend on a member being maliciously incompetent against their own stake.
In practice, this means:
- A vulnerability that lets an **outside attacker** slash, partition, or destabilize a DV is rewarded above a comparable-impact finding that requires a **threshold of operators to collude** against themselves.
- Direct vulnerabilities in Obol smart contracts (where capital lives) are rewarded above operational vulnerabilities of equivalent impact severity.
- Findings that survive careful review by a security-aware operator (e.g. a malicious cluster invite that passes inspection) are rewarded above findings that require the victim to opt into known-unsafe behavior (e.g. running with `--no-verify`).
## Program Rules
- Submitted bugs must not have been previously disclosed publicly.
- Only first reports of vulnerabilities will be considered for rewards; previously reported or known vulnerabilities are ineligible.
- The severity of the vulnerability, as assessed by our team, determines the reward amount.
- Submissions must include a reproducible proof of concept.
- The Obol security team reserves the right to determine the eligibility and reward for each submission.
- Program terms may be updated at Obol's discretion.
- Valid bugs may be disclosed to partner protocols within the Obol ecosystem to enhance overall security.
## Rewards Structure
Rewards are issued based on the severity and impact of the disclosed vulnerability, determined at the discretion of Obol Labs. Reward ceilings are guidelines; the exact payout reflects exploitability, blast radius, and the quality of the report.
### Critical Vulnerabilities: Up to $50,000
A Critical finding gives an **external attacker** a path to large-scale loss of delegator funds or systemic harm across many clusters. High impact, high likelihood.
Eligible impacts:
- An external attacker (not a cluster member) can cause a Charon cluster to produce a slashable signature, or otherwise trigger a slashing event, without colluding with cluster operators.
- An external attacker can exfiltrate enough BLS validator key shares from a threshold of operators in a cluster to reconstruct a validator's full private key.
- A vulnerability in the OVM allows an attacker to bypass role-based access controls (WITHDRAWAL_ROLE, CONSOLIDATION_ROLE, DEPOSIT_ROLE) to trigger unauthorized EIP-7002 voluntary exits or EIP-7251 consolidations, or to redirect principal or rewards to an address they control.
- A vulnerability in Obol Splits, the OVM, or legacy OWR contracts allows direct theft of delegator or operator funds at rest or in flight.
- A vulnerability in the DV Launchpad or its dependencies allows an attacker to craft a cluster invite that passes careful operator review while diverting deposits or substituting withdrawal credentials.
- Remote code execution in Charon, exploitable from a peer or relay connection, without prior compromise of the host.
- A vulnerability in the OBOL token contract that allows unauthorized minting, burning, or transfer of tokens at scale.
### High Vulnerabilities: Up to $5,000
A High finding lets an **external attacker** take down a cluster's liveness, exfiltrate operator key material, or compromise infrastructure that many clusters share. High impact, medium likelihood; or medium impact, high likelihood.
Eligible impacts:
- An external attacker can partition a cluster and keep it offline indefinitely, even after operators take reasonable recovery steps.
- An external attacker can exfiltrate Charon ENR (SECP256K1 identity) private keys from a node without compromising the host operating system.
- An external attacker can destroy validator funds (e.g. force exit-with-loss) but cannot steal them.
- An external attacker compromises Obol-operated public relay infrastructure in a way that reveals cluster topologies, disrupts peer discovery across many clusters, or facilitates partitioning attacks against the clusters relying on it.
- An attacker exfiltrates pre-signed exit messages held by the Obol API and uses them to forcibly exit validators against the delegator's wishes (see [Centralization Risks](risks.md)).
- An attacker subverts the DKG ceremony such that the post-ceremony cluster is no longer controlled by its legitimate operators.
- Retrieval of sensitive operational secrets from a running Obol-operated service: BLS or ENR keys, database credentials, signing keys for the public API, etc.
- Authenticated, state-modifying actions on the DV Launchpad or the Obol API performed on behalf of another user without their interaction (changing cluster definitions, redirecting withdrawals, manipulating pre-signed exits, etc.).
- A vulnerability in the OVM role assignment (bitwise permission system) that allows escalation to a higher-privileged role without the owner's consent, without enabling immediate fund theft.
### Medium Vulnerabilities: Up to $1,000
A Medium finding requires either an **insider** (a malicious cluster member) or a constrained external position to cause cluster-level damage. These are real, but the BFT and slashing economics of a DV mean the attacker is usually harming themselves alongside their victims. High impact, low likelihood; medium impact, medium likelihood; low impact, high likelihood.
Eligible impacts:
- A cluster member can exfiltrate K1 (identity) or BLS key material from another member of the same cluster.
- A cluster member can DoS enough peers in their own cluster to take the validator offline, beyond what is possible by simply going offline themselves.
- A cluster member can bias the protocol to control a disproportionate share of block proposal opportunities or other duty assignment.
- A DV Launchpad user can be steered into interacting with a smart contract that is not part of the normal launchpad flow.
- A vulnerability in the OVM or legacy Obol Splits contracts prevents normal operation without permanent loss of funds (e.g. temporary freeze, denial of withdrawal or consolidation under specific state).
- Block-stuffing-style or unbounded-gas vulnerabilities in any Obol smart contract.
- Charon cluster lock-file tampering accepted by a victim operator who is *not* running with `--no-verify`.
- An open-redirect or similar phishing aid on Obol-operated domains.
- Manipulation of OBOL token governance (e.g. vote inflation, delegation hijacking) that does not directly steal tokens.
### Low Vulnerabilities: Up to $250
Low-severity findings have minimal impact on the integrity of a DV cluster or the security of Obol's smart contracts. Low impact, medium likelihood; medium impact, low likelihood.
Eligible impacts:
- An attacker can occasionally put a Charon node into a state that causes it to drop a small fraction of attestations (e.g. one in a hundred).
- An attacker can display incorrect data on a non-interactive part of the DV Launchpad.
- An Obol smart contract behaves suboptimally but does not lose value or block legitimate operations.
- Temporary lockout from a wallet-connected session on Obol-operated services that does not persist past a normal session refresh.
- Takeover of broken or expired outgoing links from Obol-operated content (e.g. abandoned social handles linked from official channels).
- Minor griefing or local-storage tampering that requires significant social interaction to land and does not modify server-side state.
Rewards may be issued as cash, merchandise, or other forms of recognition, at Obol's discretion. Only one reward will be granted per unique vulnerability.
## Prohibited testing
The following activities are not authorized under this program:
- Any testing on mainnet or public testnet deployed code; all testing must be done on local forks. For network-specific testing, Hoodi is the preferred testnet.
- Any testing involving pricing oracles or third-party smart contracts.
- Phishing or other social engineering attacks against Obol employees, contractors, partners, or community members.
- Any testing against third-party systems, applications, browser extensions, or websites (including SSO providers and advertising networks).
- Denial-of-service attacks executed against Obol-operated infrastructure or the deployed contracts.
- Automated testing of services that generates significant traffic.
- Public disclosure of an unpatched vulnerability under an embargoed bounty.
## Submission process
Before investing significant time in a proof of concept, you may email [security@obol.tech](mailto:security@obol.tech) with a brief, non-detailed description of the affected component and the class of vulnerability (e.g. "potential role escalation in OVM" or "Charon peer message handling"). We will confirm within 48 hours whether the issue is already known or under active remediation. This check does not establish submission priority — it only avoids duplicate effort.
To report a vulnerability, please contact us at [security@obol.tech](mailto:security@obol.tech) with:
- A detailed description of the vulnerability and its potential impact.
- Steps to reproduce the issue.
- Any relevant proof-of-concept code, screenshots, or documentation.
- Your contact information.
Incomplete reports may not be eligible for rewards.
## Disclosure and Confidentiality
Obol Labs will disclose vulnerabilities and the identity of the researcher (with consent) after remediation. Researchers are required to maintain confidentiality until official disclosure by Obol Labs.
## Legal and Ethical Compliance
Participants must adhere to all relevant laws and regulations. Obol Labs will not pursue legal action against researchers reporting vulnerabilities in good faith, but reserves the right to respond to violations of this policy.
## Non-Disclosure Agreement (NDA)
Participants may be required to sign an NDA for access to certain proprietary information during their research.
---
# Smart Contract Audit
URL: https://docs.obol.org/advanced-and-troubleshooting/security/smart-contract-audit
# Smart Contract Audit
The Obol Splits smart contracts have undergone multiple security audits to ensure the safety and reliability of the protocol. All audit reports are available in the [obol-splits audit directory](https://github.com/ObolNetwork/obol-splits/tree/main/audit).
## Obol Splits V3 Audit (2025)
Prepared by: Nethermind Security
Date: 2025
[PDF Version](https://github.com/ObolNetwork/obol-splits/blob/main/audit/2025%20-%20Obol%20Splits%20V3%20Audit%20-%20Nethermind.pdf)
This audit covers the latest version of Obol Splits including the Obol Validator Manager (OVM) contracts and related improvements for Pectra upgrade support (EIP-7002 and EIP-7251).
## Obol Splits V2 Audit (2025)
Prepared by: Nethermind Security
Date: 2025
[PDF Version](https://github.com/ObolNetwork/obol-splits/blob/main/audit/2025%20-%20Obol%20Splits%20V2%20Audit%20-%20Nethermind.pdf)
This audit covers enhancements and updates to the Obol Splits protocol following the initial audit.
## Obol Splits V1 Audit (2023)
Prepared by: Zach Obront, Independent Security Researcher
Date: Sept 18 to 22, 2023
[PDF Version](https://github.com/ObolNetwork/obol-splits/blob/main/audit/2023%20-%20Obol%20Splits%20V1%20Audit%20-%20Zach%20Obront.pdf)
Markdown version of the audit follows below:
### About **Obol** {#about-obol}
The Obol Network is an ecosystem for trust minimized staking that enables people to create, test, run & co-ordinate distributed validators.
The Obol Manager contracts are responsible for distributing validator rewards and withdrawals among the validator and node operators involved in a distributed validator.
### About **zachobront** {#about-zachobront}
Zach Obront is an independent smart contract security researcher. He serves as a Lead Senior Watson at Sherlock, a Security Researcher at Spearbit, and has identified multiple critical severity bugs in the wild, including in a Top 5 Protocol on Immunefi. You can say hi on Twitter at [@zachobront](http://twitter.com/zachobront).
### Summary & Scope {#summary--scope}
The [ObolNetwork/obol-manager-contracts](https://github.com/ObolNetwork/obol-manager-contracts/) repository was audited at commit [50ce277919723c80b96f6353fa8d1f8facda6e0e](https://github.com/ObolNetwork/obol-manager-contracts/tree/50ce277919723c80b96f6353fa8d1f8facda6e0e).
The following contracts were in scope:
* src/controllers/ImmutableSplitController.sol
* src/controllers/ImmutableSplitControllerFactory.sol
* src/lido/LidoSplit.sol
* src/lido/LidoSplitFactory.sol
* src/owr/OptimisticWithdrawalReceiver.sol
* src/owr/OptimisticWithdrawalReceiverFactory.sol
After completion of the fixes, the [2f4f059bfd145f5f05d794948c918d65d222c3a9](https://github.com/ObolNetwork/obol-manager-contracts/tree/2f4f059bfd145f5f05d794948c918d65d222c3a9) commit was reviewed. After this review, the updated Lido fee share system in [PR #96](https://github.com/ObolNetwork/obol-manager-contracts/pull/96/files) (at commit [fd244a05f964617707b0a40ebb11b523bbd683b8](https://github.com/ObolNetwork/obol-splits/pull/96/commits/fd244a05f964617707b0a40ebb11b523bbd683b8)) was reviewed.
### Summary of Findings {#summary-of-findings}
| Identifier | Title | Severity | Fixed |
| -------------------------------------------------------------------------------------------------------------------------------------------------------------- | -------------------------------------------------------------------------------------- | ------------- | ----- |
| [M-01](#m-01-future-fees-may-be-skirted-by-setting-a-non-eth-reward-token) | Future fees may be skirted by setting a non-ETH reward token | Medium | ✓ |
| [M-02](#m-02-splits-with-256-or-more-node-operators-will-not-be-able-to-switch-on-fees) | Splits with 256 or more node operators will not be able to switch on fees | Medium | ✓ |
| [M-03](#m-03-in-a-mass-slashing-event-node-operators-are-incentivized-to-get-slashed) | In a mass slashing event, node operators are incentivized to get slashed | Medium | |
| [L-01](#l-01-obol-fees-will-be-applied-retroactively-to-all-non-distributed-funds-in-the-splitter) | Obol fees will be applied retroactively to all non-distributed funds in the Splitter | Low | ✓ |
| [L-02](#l-02-if-owr-is-used-with-rebase-tokens-and-theres-a-negative-rebase-principal-can-be-lost) | If OWR is used with rebase tokens and there's a negative rebase, principal can be lost | Low | ✓ |
| [L-03](#l-03-lidosplit-can-receive-eth-which-will-be-locked-in-contract) | LidoSplit can receive ETH, which will be locked in contract | Low | ✓ |
| [L-04](#l-04-upgrade-to-latest-version-of-solady-to-fix-libclone-bug) | Upgrade to latest version of Solady to fix LibClone bug | Low | ✓ |
| [G-01](#g-01-steth-and-wsteth-addresses-can-be-saved-on-implementation-to-save-gas) | stETH and wstETH addresses can be saved on implementation to save gas | Gas | ✓ |
| [G-02](#g-02-owr-can-be-simplified-and-save-gas-by-not-tracking-distributedfunds) | OWR can be simplified and save gas by not tracking distributedFunds | Gas | ✓ |
| [I-01](#i-01-strong-trust-assumptions-between-validators-and-node-operators) | Strong trust assumptions between validators and node operators | Informational | |
| [I-02](#i-02-provide-node-operator-checklist-to-validate-setup) | Provide node operator checklist to validate setup | Informational | |
### Detailed Findings {#detailed-findings}
#### \[M-01] Future fees may be skirted by setting a non-ETH reward token {#m-01-future-fees-may-be-skirted-by-setting-a-non-eth-reward-token}
Fees are planned to be implemented on the `rewardRecipient` splitter by updating to a new fee structure using the `ImmutableSplitController`.
It is assumed that all rewards will flow through the splitter, because (a) all distributed rewards less than 16 ETH are sent to the `rewardRecipient`, and (b) even if a team waited for rewards to be greater than 16 ETH, rewards sent to the `principalRecipient` are capped at the `amountOfPrincipalStake`.
This creates a fairly strong guarantee that reward funds will flow to the `rewardRecipient`. Even if a user were to set their `amountOfPrincipalStake` high enough that the `principalRecipient` could receive unlimited funds, the Obol team could call `distributeFunds()` when the balance got near 16 ETH to ensure fees were paid.
However, if the user selects a non-ETH token, all ETH will be withdrawable only thorugh the `recoverFunds()` function. If they set up a split with their node operators as their `recoveryAddress`, all funds will be withdrawable via `recoverFunds()` without ever touching the `rewardRecipient` or paying a fee.
**Recommendation**
I would recommend removing the ability to use a non-ETH token from the `OptimisticWithdrawalRecipient`. Alternatively, if it feels like it may be a use case that is needed, it may make sense to always include ETH as a valid token, in addition to any `OWRToken` set.
**Review**
Fixed in [PR 85](https://github.com/ObolNetwork/obol-manager-contracts/pull/85) by removing the ability to use non-ETH tokens.
#### \[M-02] Splits with 256 or more node operators will not be able to switch on fees {#m-02-splits-with-256-or-more-node-operators-will-not-be-able-to-switch-on-fees}
0xSplits is used to distribute rewards across node operators. All Splits are deployed with an ImmutableSplitController, which is given permissions to update the split one time to add a fee for Obol at a future date.
The Factory deploys these controllers as Clones with Immutable Args, hard coding the `owner`, `accounts`, `percentAllocations`, and `distributorFee` for the future update. This data is packed as follows:
```solidity
function _packSplitControllerData(
address owner,
address[] calldata accounts,
uint32[] calldata percentAllocations,
uint32 distributorFee
) internal view returns (bytes memory data) {
uint256 recipientsSize = accounts.length;
uint256[] memory recipients = new uint[](recipientsSize);
uint256 i = 0;
for (; i < recipientsSize;) {
recipients[i] = (uint256(percentAllocations[i]) << ADDRESS_BITS) | uint256(uint160(accounts[i]));
unchecked {
i++;
}
}
data = abi.encodePacked(splitMain, distributorFee, owner, uint8(recipientsSize), recipients);
}
```
In the process, `recipientsSize` is unsafely downcasted into a `uint8`, which has a maximum value of `256`. As a result, any values greater than 256 will overflow and result in a lower value of `recipients.length % 256` being passed as `recipientsSize`.
When the Controller is deployed, the full list of `percentAllocations` is passed to the `validSplit` check, which will pass as expected. However, later, when `updateSplit()` is called, the `getNewSplitConfiguation()` function will only return the first `recipientsSize` accounts, ignoring the rest.
```solidity
function getNewSplitConfiguration()
public
pure
returns (address[] memory accounts, uint32[] memory percentAllocations)
{
// fetch the size first
// then parse the data gradually
uint256 size = _recipientsSize();
accounts = new address[](size);
percentAllocations = new uint32[](size);
uint256 i = 0;
for (; i < size;) {
uint256 recipient = _getRecipient(i);
accounts[i] = address(uint160(recipient));
percentAllocations[i] = uint32(recipient >> ADDRESS_BITS);
unchecked {
i++;
}
}
}
```
When `updateSplit()` is eventually called on `splitsMain` to turn on fees, the `validSplit()` check on that contract will revert because the sum of the percent allocations will no longer sum to `1e6`, and the update will not be possible.
**Proof of Concept**
The following test can be dropped into a file in `src/test` to demonstrate that passing 400 accounts will result in a `recipientSize` of `400 - 256 = 144`:
```solidity
// SPDX-License-Identifier: MIT
pragma solidity ^0.8.0;
interface ISplitsMain {
function createSplit(address[] calldata accounts, uint32[] calldata percentAllocations, uint32 distributorFee, address controller) external returns (address);
}
contract ZachTest is Test {
function testZach_RecipientSizeCappedAt256Accounts() public {
vm.createSelectFork("https://mainnet.infura.io/v3/fb419f740b7e401bad5bec77d0d285a5");
ImmutableSplitControllerFactory factory = new ImmutableSplitControllerFactory(address(9999));
bytes32 deploymentSalt = keccak256(abi.encodePacked(uint256(1102)));
address owner = address(this);
address[] memory bigAccounts = new address[](400);
uint32[] memory bigPercentAllocations = new uint32[](400);
for (uint i = 0; i < 400; i++) {
bigAccounts[i] = address(uint160(i));
bigPercentAllocations[i] = 2500;
}
// confirmation that 0xSplits will allow creating a split with this many accounts
// dummy acct passed as controller, but doesn't matter for these purposes
address split = ISplitsMain(0x2ed6c4B5dA6378c7897AC67Ba9e43102Feb694EE).createSplit(bigAccounts, bigPercentAllocations, 0, address(8888));
ImmutableSplitController controller = factory.createController(split, owner, bigAccounts, bigPercentAllocations, 0, deploymentSalt);
// added a public function to controller to read recipient size directly
uint savedRecipientSize = controller.ZachTest__recipientSize();
assert(savedRecipientSize < 400);
console.log(savedRecipientSize); // 144
}
}
```
**Recommendation**
When packing the data in `_packSplitControllerData()`, check `recipientsSize` before downcasting to a uint8:
```solidity
function _packSplitControllerData(
address owner,
address[] calldata accounts,
uint32[] calldata percentAllocations,
uint32 distributorFee
) internal view returns (bytes memory data) {
uint256 recipientsSize = accounts.length;
+ if (recipientsSize > 256) revert InvalidSplit__TooManyAccounts(recipientSize);
...
}
```
**Review**
Fixed as recommended in [PR 86](https://github.com/ObolNetwork/obol-manager-contracts/pull/86).
#### \[M-03] In a mass slashing event, node operators are incentivized to get slashed {#m-03-in-a-mass-slashing-event-node-operators-are-incentivized-to-get-slashed}
When the `OptimisticWithdrawalRecipient` receives funds from the beacon chain, it uses the following rule to determine the allocation:
> If the amount of funds to be distributed is greater than or equal to 16 ether, it is assumed that it is a withdrawal (to be returned to the principal, with a cap on principal withdrawals of the total amount they deposited).
> Otherwise, it is assumed that the funds are rewards.
This value being as low as 16 ether protects against any predictable attack the node operator could perform. For example, due to the effect of hysteresis in updating effective balances, it does not seem to be possible for node operators to predictably bleed a withdrawal down to be below 16 ether (even if they timed a slashing perfectly).
However, in the event of a mass slashing event, slashing punishments can be much more severe than they otherwise would be. To calculate the size of a slash, we:
* take the total percentage of validator stake slashed in the 18 days preceding and following a user's slash
* multiply this percentage by 3 (capped at 100%)
* the full slashing penalty for a given validator equals 1/32 of their stake, plus the resulting percentage above applied to the remaining 31/32 of their stake
In order for such penalties to bring the withdrawal balance below 16 ether (assuming a full 32 ether to start), we would need the percentage taken to be greater than `15 / 31 = 48.3%`, which implies that `48.3 / 3 = 16.1%` of validators would need to be slashed.
Because the measurement is taken from the 18 days before and after the incident, node operators would have the opportunity to see a mass slashing event unfold, and later decide that they would like to be slashed along with it.
In the event that they observed that greater than 16.1% of validators were slashed, Obol node operators would be able to get themselves slashed, be exited with a withdrawal of less than 16 ether, and claim that withdrawal as rewards, effectively stealing from the principal recipient.
**Recommendations**
Find a solution that provides a higher level of guarantee that the funds withdrawn are actually rewards, and not a withdrawal.
**Review**
Acknowledged. We believe this is a black swan event. It would require a major ETH client to be compromised, and would be a betrayal of trust, so likely not EV+ for doxxed operators. Users of this contract with unknown operators should be wary of such a risk.
#### \[L-01] Obol fees will be applied retroactively to all non-distributed funds in the Splitter {#l-01-obol-fees-will-be-applied-retroactively-to-all-non-distributed-funds-in-the-splitter}
When Obol decides to turn on fees, a call will be made to `ImmutableSplitController::updateSplit()`, which will take the predefined split parameters (the original user specified split with Obol's fees added in) and call `updateSplit()` to implement the change.
```solidity
function updateSplit() external payable {
if (msg.sender != owner()) revert Unauthorized();
(address[] memory accounts, uint32[] memory percentAllocations) = getNewSplitConfiguration();
ISplitMain(splitMain()).updateSplit(split, accounts, percentAllocations, uint32(distributorFee()));
}
```
If we look at the code on `SplitsMain`, we can see that this `updateSplit()` function is applied retroactively to all funds that are already in the split, because it updates the parameters without performing a distribution first:
```solidity
function updateSplit(
address split,
address[] calldata accounts,
uint32[] calldata percentAllocations,
uint32 distributorFee
)
external
override
onlySplitController(split)
validSplit(accounts, percentAllocations, distributorFee)
{
_updateSplit(split, accounts, percentAllocations, distributorFee);
}
```
This means that any funds that have been sent to the split but have not yet be distributed will be subject to the Obol fee. Since these splitters will be accumulating all execution layer fees, it is possible that some of them may have received large MEV bribes, where this after-the-fact fee could be quite expensive.
**Recommendation**
The most strict solution would be for the `ImmutableSplitController` to store both the old split parameters and the new parameters. The old parameters could first be used to call `distributeETH()` on the split, and then `updateSplit()` could be called with the new parameters.
If storing both sets of values seems too complex, the alternative would be to require that `split.balance <= 1` to update the split. Then the Obol team could simply store the old parameters off chain to call `distributeETH()` on each split to "unlock" it to update the fees.
(Note that for the second solution, the ETH balance should be less than or equal to 1, not 0, because 0xSplits stores empty balances as `1` for gas savings.)
**Review**
Fixed as recommended in [PR 86](https://github.com/ObolNetwork/obol-manager-contracts/pull/86).
#### \[L-02] If OWR is used with rebase tokens and there's a negative rebase, principal can be lost {#l-02-if-owr-is-used-with-rebase-tokens-and-theres-a-negative-rebase-principal-can-be-lost}
The `OptimisticWithdrawalRecipient` is deployed with a specific token immutably set on the clone. It is presumed that that token will usually be ETH, but it can also be an ERC20 to account for future integrations with tokenized versions of ETH.
In the event that one of these integrations used a rebasing version of ETH (like `stETH`), the architecture would need to be set up as follows:
`OptimisticWithdrawalRecipient => rewards to something like LidoSplit.sol => Split Wallet`
In this case, the OWR would need to be able to handle rebasing tokens.
In the event that rebasing tokens are used, there is the risk that slashing or inactivity leads to a period with a negative rebase. In this case, the following chain of events could happen:
* `distribute(PULL)` is called, setting `fundsPendingWithdrawal == balance`
* rebasing causes the balance to decrease slightly
* `distribute(PULL)` is called again, so when `fundsToBeDistributed = balance - fundsPendingWithdrawal` is calculated in an unchecked block, it ends up being near `type(uint256).max`
* since this is more than `16 ether`, the first `amountOfPrincipalStake - _claimedPrincipalFunds` will be allocated to the principal recipient, and the rest to the reward recipient
* we check that `endingDistributedFunds <= type(uint128).max`, but unfortunately this check misses the issue, because only `fundsToBeDistributed` underflows, not `endingDistributedFunds`
* `_claimedPrincipalFunds` is set to `amountOfPrincipalStake`, so all future claims will go to the reward recipient
* the `pullBalances` for both recipients will be set higher than the balance of the contract, and so will be unusable
In this situation, the only way for the principal to get their funds back would be for the full `amountOfPrincipalStake` to hit the contract at once, and for them to call `withdraw()` before anyone called `distribute(PUSH)`. If anyone was to be able to call `distribute(PUSH)` before them, all principal would be sent to the reward recipient instead.
**Recommendation**
Similar to #74, I would recommend removing the ability for the `OptimisticWithdrawalRecipient` to accept non-ETH tokens.
Otherwise, I would recommend two changes for redundant safety:
1. Do not allow the OWR to be used with rebasing tokens.
2. Move the `_fundsToBeDistributed = _endingDistributedFunds - _startingDistributedFunds;` out of the unchecked block. The case where `_endingDistributedFunds` underflows is already handled by a later check, so this one change should be sufficient to prevent any risk of this issue.
**Review**
Fixed in [PR 85](https://github.com/ObolNetwork/obol-manager-contracts/pull/85) by removing the ability to use non-ETH tokens.
#### \[L-03] LidoSplit can receive ETH, which will be locked in contract {#l-03-lidosplit-can-receive-eth-which-will-be-locked-in-contract}
Each new `LidoSplit` is deployed as a clone, which comes with a `receive()` function for receiving ETH.
However, the only function on `LidoSplit` is `distribute()`, which converts `stETH` to `wstETH` and transfers it to the `splitWallet`.
While this contract should only be used for Lido to pay out rewards (which will come in `stETH`), it seems possible that users may accidentally use the same contract to receive other validator rewards (in ETH), or that Lido governance may introduce ETH payments in the future, which would cause the funds to be locked.
**Proof of Concept**
The following test can be dropped into `LidoSplit.t.sol` to confirm that the clones can currently receive ETH:
```solidity
function testZach_CanReceiveEth() public {
uint before = address(lidoSplit).balance;
payable(address(lidoSplit)).transfer(1 ether);
assertEq(address(lidoSplit).balance, before + 1 ether);
}
```
**Recommendation**
Introduce an additional function to `LidoSplit.sol` which wraps ETH into stETH before calling `distribute()`, in order to rescue any ETH accidentally sent to the contract.
**Review**
Fixed in [PR 87](https://github.com/ObolNetwork/obol-manager-contracts/pull/87/files) by adding a `rescueFunds()` function that can send ETH or any ERC20 (except `stETH` or `wstETH`) to the `splitWallet`.
#### \[L-04] Upgrade to latest version of Solady to fix LibClone bug {#l-04-upgrade-to-latest-version-of-solady-to-fix-libclone-bug}
In the recent [Solady audit](https://github.com/Vectorized/solady/blob/main/audits/cantina-solady-report.pdf), an issue was found the affects LibClone.
In short, LibClone assumes that the length of the immutable arguments on the clone will fit in 2 bytes. If it's larger, it overlaps other op codes and can lead to strange behaviors, including causing the deployment to fail or causing the deployment to succeed with no resulting bytecode.
Because the `ImmutableSplitControllerFactory` allows the user to input arrays of any length that will be encoded as immutable arguments on the Clone, we can manipulate the length to accomplish these goals.
Fortunately, failed deployments or empty bytecode (which causes a revert when `init()` is called) are not problems in this case, as the transactions will fail, and it can only happen with unrealistically long arrays that would only be used by malicious users.
However, it is difficult to be sure how else this risk might be exploited by using the overflow to jump to later op codes, and it is recommended to update to a newer version of Solady where the issue has been resolved.
**Proof of Concept**
If we comment out the `init()` call in the `createController()` call, we can see that the following test "successfully" deploys the controller, but the result is that there is no bytecode:
```solidity
function testZach__CreateControllerSoladyBug() public {
ImmutableSplitControllerFactory factory = new ImmutableSplitControllerFactory(address(9999));
bytes32 deploymentSalt = keccak256(abi.encodePacked(uint256(1102)));
address owner = address(this);
address[] memory bigAccounts = new address[](28672);
uint32[] memory bigPercentAllocations = new uint32[](28672);
for (uint i = 0; i < 28672; i++) {
bigAccounts[i] = address(uint160(i));
if (i < 32) bigPercentAllocations[i] = 820;
else bigPercentAllocations[i] = 34;
}
ImmutableSplitController controller = factory.createController(address(8888), owner, bigAccounts, bigPercentAllocations, 0, deploymentSalt);
assert(address(controller) != address(0));
assert(address(controller).code.length == 0);
}
```
**Recommendation**
Delete Solady and clone it from the most recent commit, or any commit after the fixes from [PR #548](https://github.com/Vectorized/solady/pull/548/files#diff-27a3ba4730de4b778ecba4697ab7dfb9b4f30f9e3666d1e5665b194fe6c9ae45) were merged.
**Review**
Solady has been updated to v.0.0.123 in [PR 88](https://github.com/ObolNetwork/obol-manager-contracts/pull/88).
#### \[G-01] stETH and wstETH addresses can be saved on implementation to save gas {#g-01-steth-and-wsteth-addresses-can-be-saved-on-implementation-to-save-gas}
The `LidoSplitFactory` contract holds two immutable values for the addresses of the `stETH` and `wstETH` tokens.
When new clones are deployed, these values are encoded as immutable args. This adds the values to the contract code of the clone, so that each time a call is made, they are passed as calldata along to the implementation, which reads the values from the calldata for use.
Since these values will be consistent across all clones on the same chain, it would be more gas efficient to store them in the implementation directly, which can be done with `immutable` storage values, set in the constructor.
This would save 40 bytes of calldata on each call to the clone, which leads to a savings of approximately 640 gas on each call.
**Recommendation**
1. Add the following to `LidoSplit.sol`:
```solidity
address immutable public stETH;
address immutable public wstETH;
```
2. Add a constructor to `LidoSplit.sol` which sets these immutable values. Solidity treats immutable values as constants and stores them directly in the contract bytecode, so they will be accessible from the clones.
3. Remove `stETH` and `wstETH` from `LidoSplitFactory.sol`, both as storage values, arguments to the constructor, and arguments to `clone()`.
4. Adjust the `distribute()` function in `LidoSplit.sol` to read the storage values for these two addresses, and remove the helper functions to read the clone's immutable arguments for these two values.
**Review**
Fixed as recommended in [PR 87](https://github.com/ObolNetwork/obol-manager-contracts/pull/87).
#### \[G-02] OWR can be simplified and save gas by not tracking distributedFunds {#g-02-owr-can-be-simplified-and-save-gas-by-not-tracking-distributedfunds}
Currently, the `OptimisticWithdrawalRecipient` contract tracks four variables:
* distributedFunds: total amount of the token distributed via push or pull
* fundsPendingWithdrawal: total balance distributed via pull that haven't been claimed yet
* claimedPrincipalFunds: total amount of funds claimed by the principal recipient
* pullBalances: individual pull balances that haven't been claimed yet
When `_distributeFunds()` is called, we perform the following math (simplified to only include relevant updates):
```solidity
endingDistributedFunds = distributedFunds - fundsPendingWithdrawal + currentBalance;
fundsToBeDistributed = endingDistributedFunds - distributedFunds;
distributedFunds = endingDistributedFunds;
```
As we can see, `distributedFunds` is added to the `endingDistributedFunds` variable and then removed when calculating `fundsToBeDistributed`, having no impact on the resulting `fundsToBeDistributed` value.
The `distributedFunds` variable is not read or used anywhere else on the contract.
**Recommendation**
We can simplify the math and save substantial gas (a storage write plus additional operations) by not tracking this value at all.
This would allow us to calculate `fundsToBeDistributed` directly, as follows:
```solidity
fundsToBeDistributed = currentBalance - fundsPendingWithdrawal;
```
**Review**
Fixed as recommended in [PR 85](https://github.com/ObolNetwork/obol-manager-contracts/pull/85).
#### \[I-01] Strong trust assumptions between validators and node operators {#i-01-strong-trust-assumptions-between-validators-and-node-operators}
It is assumed that validators and node operators will always act in the best interest of the group, rather than in their selfish best interest.
It is important to make clear to users that there are strong trust assumptions between the various parties involved in the DVT.
Here are a select few examples of attacks that a malicious set of node operators could perform:
1. Since there is currently no mechanism for withdrawals besides the consensus of the node operators, a minority of them sufficient to withhold consensus could blackmail the principal for a payment of up to 16 ether in order to allow them to withdraw. Otherwise, they could turn off their node operators and force the principal to bleed down to a final withdrawn balance of just over 16 ether.
2. Node operators are all able to propose blocks within the P2P network, which are then propogated out to the rest of the network. Node software is accustomed to signing for blocks built by block builders based on the metadata including quantity of fees and the address they'll be sent to. This is enforced by social consensus, with block builders not wanting to harm validators in order to have their blocks accepted in the future. However, node operators in a DVT are not concerned with the social consensus of the network, and could therefore build blocks that include large MEV payments to their personal address (instead of the DVT's 0xSplit), add fictious metadata to the block header, have their fellow node operators accept the block, and take the MEV for themselves.
3. While the withdrawal address is immutably set on the beacon chain to the OWR, the fee address is added by the nodes to each block. Any majority of node operators sufficient to reach consensus could create a new 0xSplit with only themselves on it, and use that for all execution layer fees. The principal (and other node operators) would not be able to stop them or withdraw their principal, and would be stuck with staked funds paying fees to the malicious node operators.
Note that there are likely many other possible attacks that malicious node operators could perform. This report is intended to demonstrate some examples of the trust level that is needed between validators and node operators, and to emphasize the importance of making these assumptions clear to users.
**Review**
Acknowledged. We believe EIP 7002 will reduce this trust assumption as it would enable the validator exit via the execution layer withdrawal key.
#### \[I-02] Provide node operator checklist to validate setup {#i-02-provide-node-operator-checklist-to-validate-setup}
There are a number of ways that the user setting up the DVT could plant backdoors to harm the other users involved in the DVT.
Each of these risks is possible to check before signing off on the setup, but some are rather hidden, so it would be useful for the protocol to provide a list of checks that node operators should do before signing off on the setup parameters (or, even better, provide these checks for them through the front end).
1. Confirm that `SplitsMain.getHash(split)` matches the hash of the parameters that the user is expecting to be used.
2. Confirm that the controller clone delegates to the correct implementation. If not, it could be pointed to delegate to `SplitMain` and then called to `transferControl()` to a user's own address, allowing them to update the split arbitrarily.
3. `OptimisticWithdrawalRecipient.getTranches()` should be called to check that `amountOfPrincipalStake` is equal to the amount that they will actually be providing.
4. The controller's `owner` and future split including Obol fees should be provided to the user. They should be able to check that `ImmutableSplitControllerFactory.predictSplitControllerAddress()`, with those parameters inputted, results in the controller that is actually listed on `SplitsMain.getController(split)`.
**Review**
Acknowledged. We do some of these already (will add the remainder) automatically in the launchpad UI during the cluster confirmation phase by the node operator. We will also add it in markdown to the repo.
\
---
# Software Development at Obol
URL: https://docs.obol.org/advanced-and-troubleshooting/security/ev-assessment
# Software Development at Obol
When hardening a project's technical security, team member's operational security, and the security of the software development practices in use by the team are some of the most critical areas to secure. Many hacks and compromises in the space to date have been a result of these attack vectors rather than exploits of the software itself.
With this in mind, in January 2023 the Obol team retained the expertise of Ethereal Venture's security researcher Alex Wade; to interview key stakeholders and produce a report into the team's Software Development Lifecycle.
The below page is a result of the report that was produced. What is present here has had some sensitive information redacted, and contains responses to the recommendations made, detailing the actions the Obol team have taken to mitigate what has been highlighted.
## Obol Report
**Prepared by: Alex Wade (Ethereal Ventures)** **Date: Jan 2023**
Over the past month, I worked with Obol to review their software development practices in preparation for their upcoming security audits. My goals were to review and analyze:
* Software development processes
* Vulnerability disclosure and escalation procedures
* Key personnel risk
The information in this report was collected through a series of interviews with Obol’s project leads.
## Contents
* Background Info
* Analysis - Cluster Setup and DKG
* Key Risks
* Potential Attack Scenarios
* Recommendations
* R1: Users should deploy cluster contracts through a known on-chain entry point
* R2: Users should deposit to the beacon chain through a pool contract
* R3: Raise the barrier to entry to push an update to the Launchpad
* Additional Notes
* Vulnerability Disclosure
* Key Personnel Risk
## Background Info
**Each team lead was asked to describe Obol in terms of its goals, objectives, and key features.**
### What is Obol?
Obol builds DVT (Distributed Validator Technology) for Ethereum.
### What is Obol’s goal?
Obol’s goal is to solve a classic distributed systems problem: uptime.
Rather than requiring Ethereum validators to stake on their own, Obol allows groups of operators to stake together. Using Obol, a single validator can be run cooperatively by multiple people across multiple machines.
In theory, this architecture provides validators with some redundancy against common issues: server and power outages, client failures, and more.
### What are Obol’s objectives?
Obol’s business objective is to provide base-layer infrastructure to support a distributed validator ecosystem. As Obol provides base layer technology, other companies and projects will build on top of Obol.
Obol’s business model is to eventually capture a portion of the revenue generated by validators that use Obol infrastructure.
### What is Obol’s product?
Obol’s product consists of three main components, each run by its own team: a webapp, a client, and smart contracts.
* [DV Launchpad](../../learn/intro/launchpad.md): A webapp to create and manage distributed validators.
* [Charon](../../learn/charon/intro.md): A middleware client that enables operators to run distributed validators.
* [Solidity](../../learn/intro/obol-splits.md): Withdrawal and fee recipient contracts for use with distributed validators.
## Analysis - Cluster Setup and DKG
The Launchpad guides users through the process of creating a cluster, which defines important parameters like the validator’s fee recipient and withdrawal addresses, as well as the identities of the operators in the cluster. In order to ensure their cluster configuration is correct, users need to rely on a few different factors.
**First, users need to trust the Charon client** to perform the DKG correctly, and validate things like:
* Config file is well-formed and is using the expected version
* Signatures and ENRs from other operators are valid
* Cluster config hash is correct
* DKG succeeds in producing valid signatures
* Deposit data is well-formed and is correctly generated from the cluster config and DKG.
However, Charon’s validation is limited to the digital: signature checks, cluster file syntax, etc. It does NOT help would-be operators determine whether the other operators listed in their cluster definition are the real people with whom they intend to start a DVT cluster. So -
**Second, users need to come to social consensus with fellow operators.** While the cluster is being set up, it’s important that each operator is an active participant. Each member of the group must validate and confirm that:
* the cluster file correctly reflects their address and node identity, and reflects the information they received from fellow operators
* the cluster parameters are expected – namely, the number of validators and signing threshold
**Finally, users need to perform independent validation.** Each user should perform their own validation of the cluster definition:
* Is my information correct? (address and ENR)
* Does the information I received from the group match the cluster definition?
* Is the ETH2 deposit data correct, and does it match the information in the cluster definition?
* Are the withdrawal and fee recipient addresses correct?
These final steps are potentially the most difficult, and may require significant technical knowledge.
## Key Risks
### 1. Validation of Contract Deployment and Deposit Data Relies Heavily on Launchpad
From my interviews, it seems that the user deploys both the withdrawal and fee recipient contracts through the Launchpad.
What I’m picturing is that during the first parts of the cluster setup process, the user is prompted to sign one or more transactions deploying the withdrawal and fee recipient contracts to mainnet. The Launchpad apparently uses an npm package to deploy these contracts: `0xsplits/splits-sdk`, which I assume provides either JSON artifacts or a factory address on chain. The Launchpad then places the deployed contracts into the cluster config file, and the process moves on.
If an attacker has published a malicious update to the Launchpad (or compromised an underlying dependency), the contracts deployed by the Launchpad may be malicious. The questions I’d like to pose are:
* How does the group creator know the Launchpad deployed the correct contracts?
* How does the rest of the group know the creator deployed the contracts through the Launchpad?
My understanding is that this ultimately comes down to the independent verification that each of the group’s members performs during and after the cluster’s setup phase.
At its worst, this verification might consist solely of the cluster creator confirming to the others that, yes, those addresses match the contracts I deployed through the Launchpad.
A more sophisticated user might verify that not only do the addresses match, but the deployed source code looks roughly correct. However, this step is far out of the realm of many would-be validators. To be really certain that the source code is correct would require auditor-level knowledge.
The risk is that:
* the deployed contracts are NOT the correctly-configured 0xsplits waterfall/fee splitter contracts
* most users are ill-equipped to make this determination themselves
* we don’t want to trust the Launchpad as the single source of truth
In the worst case, the cluster may end up depositing with malicious withdrawal or fee recipient credentials. If unnoticed, this may net an attacker the entire withdrawal amount, once the cluster exits.
Note that the same (or similar) risks apply to validation of deposit data, which has the potential to be similarly difficult. I’m a little fuzzy on which part of the Obol stack actually generates the deposit data / deposit transaction, so I can’t speak to this as much. However, I think the mitigation for both of these is roughly the same - read on!
**Mitigation:**
It’s certainly a good idea to make it harder to deploy malicious updates to the Launchpad, but this may not be entirely possible. A higher-yield strategy may be to educate and empower users to perform independent validation of the DVT setup process - without relying on information fed to them by Charon and the Launchpad.
I’ve outlined some ideas for this in #R1 and #R2.
### 2. Social Consensus, aka “Who sends the 32 ETH?”
Depositing to the beacon chain requires a total of 32 ETH. Obol’s product allows multiple operators to act as a single validator together, which means would-be operators need to agree on how to fund the 32 ETH needed to initiate the deposit.
It is my understanding that currently, this process comes down to trust and loose social consensus. Essentially, the group needs to decide who chips in what amount together, and then trust someone to take the 32 ETH and complete the deposit process correctly (without running away with the money).
Granted, the initial launch of Obol will be open only to a small group of people as the kinks in the system get worked out - but in preparation for an eventual public release, the deposit process needs to be much simpler and far less reliant on trust.
Mitigation: See #R2.
**Potential Attack Scenarios**
During the interview process, I learned that each of Obol’s core components has its own GitHub repo, and that each repo has roughly the same structure in terms of organization and security policies. For each repository:
* There are two overall github organization administrators, and a number of people have administrative control over individual repositories.
* In order to merge PRs, the submitter needs:
* CI/CD checks to pass
* Review from one person (anyone at Obol)
Of course, admin access also means the ability to change these settings - so repo admins could theoretically merge PRs without needing checks to pass, and without review/approval, organization admins can control the full GitHub organization.
The following scenarios describe the impact an attack may have.
**1. Publishing a malicious version of the Launchpad, or compromising an underlying dependency**
* Reward: High
* Difficulty: Medium-Low
As described in Key Risks, publishing a malicious version of the Launchpad has the potential to net the largest payout for an attacker. By tampering with the cluster’s deposit data or withdrawal/fee recipient contracts, an attacker stands to gain 32 ETH or more per compromised cluster.
During the interviews, I learned that merging PRs to main in the Launchpad repo triggers an action that publishes to the site. Given that merges can be performed by an authorized Obol developer, this makes the developers prime targets for social engineering attacks.
Additionally, the use of the `0xsplits/splits-sdk` NPM package to aid in contract deployment may represent a supply chain attack vector. It may be that this applies to other Launchpad dependencies as well.
In any case, with a fairly large surface area and high potential reward, this scenario represents a credible risk to users during the cluster setup and DKG process.
See #R1, #R2, and #R3 for some ideas to address this scenario.
**2. Publishing a malicious version of Charon to new operators**
* Reward: Medium
* Difficulty: High
During the cluster setup process, Charon is responsible both for validating the cluster configuration produced by the Launchpad, as well as performing a DKG ceremony between a group’s operators.
If new operators use a malicious version of Charon to perform this process, it may be possible to tamper with both of these responsibilities, or even get access to part or all of the underlying validator private key created during DKG.
However, the difficulty of this type of attack seems quite high. An attacker would first need to carry out the same type of social engineering attack described in scenario 1 to publish and tag a new version of Charon. Crucially, users would also need to install the malicious version - unlike the Launchpad, an update here is not pushed directly to users.
As long as Obol is clear and consistent with communication around releases and versioning, it seems unlikely that a user would both install a brand-new, unannounced release, and finish the cluster setup process before being warned about the attack.
**3. Publishing a malicious version of Charon to existing validators**
* Reward: Low
* Difficulty: High
Once a distributed validator is up and running, much of the danger has passed. As a middleware client, Charon sits between a validator’s consensus and validator clients. As such, it shouldn’t have direct access to a validator’s withdrawal keys nor signing keys.
If existing validators update to a malicious version of Charon, it’s likely the worst thing an attacker could theoretically do is slash the validator, however, assuming Charon has no access to any private keys, this would be predicated on one or more validator clients connected to Charon also failing to prevent the signing of a slashable message. In practice, a compromised Charon client is more likely to pose liveness risks than safety risks.
This is not likely to be particularly motivating to potential attackers - and paired with the high difficulty described above, this scenario seems unlikely to cause significant issues.
## Recommendations
### R1: Users should deploy cluster contracts through a known on-chain entry point
During setup, users should only sign one transaction via the Launchpad - to a contract located at an Obol-held ENS (e.g. `launchpad.obol.eth`). This contract should deploy everything needed for the cluster to operate, like the withdrawal and fee recipient contracts. It should also initialize them with the provided reward split configuration (and any other config needed).
Rather than using an NPM library to supply a factory address or JSON artifacts, this has the benefit of being both:
* **Harder to compromise:** as long as the user knows launchpad.obol.eth, it’s pretty difficult to trick them into deploying the wrong contracts.
* **Easier to validate** for non-technical users: the Obol contract can be queried for deployment information via etherscan. For example:\
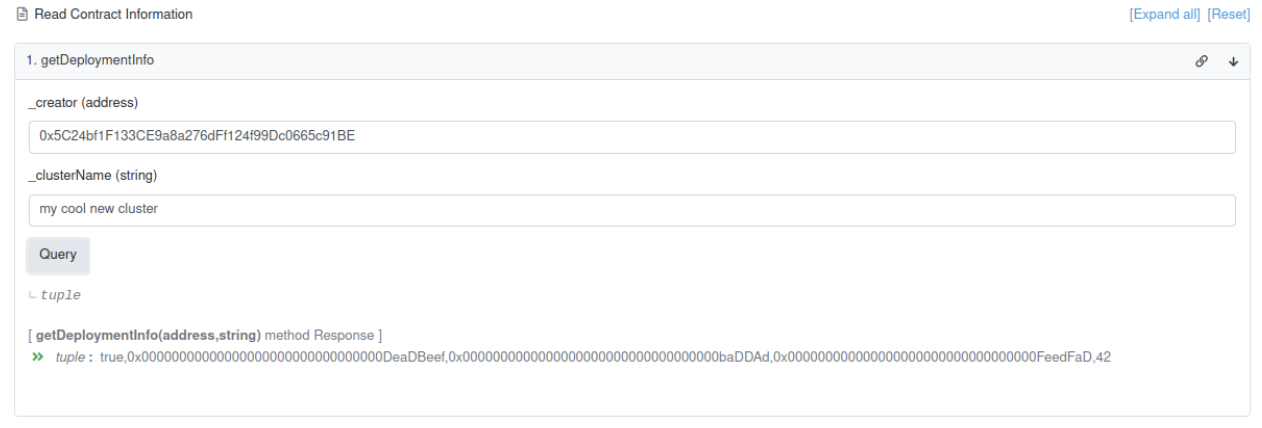
Note that in order for this to be successful, Obol needs to provide detailed steps for users to perform manual validation of their cluster setups. Users should be able to treat this as a “checklist:”
* Did I send a transaction to `launchpad.obol.eth`?
* Can I use the ENS name to locate and query the deployment manager contract on etherscan?
* If I input my address, does etherscan report the configuration I was expecting?
* withdrawal address matches
* fee recipient address matches
* reward split configuration matches
As long as these steps are plastered all over the place (i.e. not just on the Launchpad) and Obol puts in effort to educate users about the process, this approach should allow users to validate cluster configurations themselves - regardless of Launchpad or NPM package compromise.
**Obol’s response**
Roadmapped: add the ability for the OWR factory to claim and transfer its reverse resolution ownership.
### R2: Users should deposit to the beacon chain through a pool contract
Once cluster setup and DKG is complete, a group of operators should deposit to the beacon chain by way of a pool contract. The pool contract should:
* Accept Eth from any of the group’s operators
* Stop accepting Eth when the contract’s balance hits (32 ETH \* number of validators)
* Make it easy to pull the trigger and deposit to the beacon chain once the critical balance has been reached
* Offer all of the group’s operators a “bail” option at any point before the deposit is triggered
Ideally, this contract is deployed during the setup process described in #R1, as another step toward allowing users to perform independent validation of the process.
Rather than relying on social consensus, this should:
* Allow operators to fund the validator without needing to trust any single party
* Make it harder to mess up the deposit or send funds to some malicious actor, as the pool contract should know what the beacon deposit contract address is
**Obol’s response**
Roadmapped: give the operators a streamlined, secure way to deposit Ether (ETH) to the beacon chain collectively, satisfying specific conditions:
* Pooling from multiple operators.
* Ceasing to accept ETH once a critical balance is reached, defined by 32 ETH multiplied by the number of validators.
* Facilitating an immediate deposit to the beacon chain once the target balance is reached.
* Provide a 'bail-out' option for operators to withdraw their contribution before initiating the group's deposit to the beacon chain.
### R3: Raise the barrier to entry to push an update to the Launchpad
Currently, any repo admin can publish an update to the Launchpad unchecked.
Given the risks and scenarios outlined above, consider amending this process so that the sole compromise of either admin is not sufficient to publish to the Launchpad site. It may be worthwhile to require both admins to approve publishing to the site.
Along with simply adding additional prerequisites to publish an update to the Launchpad, ensure that both admins have enabled some level of multi-factor authentication on their GitHub accounts.
**Obol’s response**
We removed individual’s ability to merge changes without review, enforced MFA, signed commits, and employed Bulldozer bot to make sure a PR gets merged automatically when all checks pass.
## Additional Notes
### Vulnerability Disclosure
During the interviews, I got some conflicting information when asking about Obol’s vulnerability disclosure process.
Some interviewees directed me towards Obol’s security repo, which details security contacts: [ObolNetwork/obol-security](https://github.com/ObolNetwork/obol-security), while some answered that disclosure should happen primarily through Immunefi. While these may both be part of the correct answer, it seems that Obol’s disclosure process may not be as well-defined as it could be. Here are some notes:
* I wasn’t able to find information about Obol on Immunefi. I also didn’t find any reference to a security contact or disclosure policy in Obol’s docs.
* When looking into the Obol security repo, I noticed broken links in a few of the sections in README.md and SECURITY.md:
* Security policy
* More Information
* Some of the text and links in the Bug Bounty Program don’t seem to apply to Obol (see text referring to Vaults and Strategies).
* The Receiving Disclosures section does not include a public key with which submitters can encrypt vulnerability information.
It’s my understanding that these items are probably lower priority due to Obol’s initial closed launch - but these should be squared away soon! \[Obol response to latest vuln disclosure process goes here]
**Obol’s response**
we addressed all of the concerns in the obol-security repository:
1. The security policy link has been fixed
2. The Bug Bounty program received an overhaul and clearly states rewards, eligibility, and scope
3. We list two GPG public keys for which we accept encrypted vulnerabilities reports.
We are actively working towards integrating Immunefi in our security pipeline.
### Key Personnel Risk
A final section on the specifics of key personnel risk faced by Obol has been redacted from the original report. Particular areas of control highlighted were github org ownership and domain name control.
**Obol’s response**
These risks have been mitigated by adding an extra admin to the github org, and by setting up a second DNS stack in case the primary one fails, along with general Opsec improvements.
---
# Charon Threat Model
URL: https://docs.obol.org/advanced-and-troubleshooting/security/threat_model
# Charon Threat Model
This page outlines a threat model for Charon, in the context of it being a Distributed Validator middleware for Ethereum validator clients.
## Actors
* Node owner (NO)
* Cluster node operators (CNO)
* Rogue node operator (RNO)
* Outside attacker (OA)
## General observations
This page describes some considerations the Obol core team made about the security of a distributed validator in the context of its deployment and interaction with outside actors.
The goal of this threat model is to provide transparency, but it is by no means a comprehensive audit or complete security reference. It’s a sharing of the experiences and thoughts we gained during the last few years building distributed validator technologies.
While to the Beacon Chain, a distributed validator is seen in much the same way as a regular validator, and thus retains some of the same security considerations, Charon’s threat model is different from a validator client’s threat model because of its general design.
While a validator client owns and operates on a set of validator private keys, the design of Charon allows its node operators to rarely (if ever) see the complete validator private keys, relying instead on modern cryptography to generate partial private key shares.
An Ethereum distributed validator employs advanced signature primitives such that no operator ever handles the full validator private key in any standard lifecycle step: the [BLS digital signature scheme](https://en.wikipedia.org/wiki/BLS_digital_signature) employed by the Ethereum network allows distributed validators to individually sign a blob of data and then aggregate the resulting signatures in a transparent manner, never requiring any of the participating parties to know the full private key to do so.
If the subset of the available Charon nodes is lower than a given threshold, the cluster is not able to continue with its duties.
Given the collaborative nature of a Distributed Validator cluster, every operator must prioritize the liveness and well-being of the cluster. Charon, at the moment of writing this page cannot reward and penalize operators within a cluster independently.
This implies that Charon’s threat model can’t quite be equated to that of a single validator client, since they work on a different - albeit similar - set of security concepts.
## Identity private key
A distributed validator cluster is made up of a number of nodes, often run by a number of independent operators. For each DV cluster there’s a set of Ethereum validator private keys on which they want to validate on behalf of.
Alongside those, each node (henceforth ‘operator’) holds an SECP256K1 identity private key, referred to as an ENR, that identifies their node to the other cluster operators’ nodes.
Exfiltration of said private key could lead to possible impersonation from an outside attacker, possibly leading to intra-cluster peering issues, eclipse attack risks, and degraded validator performance.
Charon client communication is handled via BFT consensus, which is able to tolerate a given number of misbehaving nodes up to a certain threshold: once this threshold is reached, the cluster is not able to continue with its lifecycle and loses liveness guarantees (the validator goes offline). If more than two-thirds of nodes in a cluster are malicious, a cluster also loses safety guarantees (enough bad actors could collude to come to consensus on something slashable).
Identity private key theft and the subsequent execution of a rogue cluster node is equivalent in the context of BFT consensus to a misbehaving node, hence the cluster can survive and continue with its duties up to what’s specified by the cluster’s BFT protocol’s parameters.
The likelihood of this happening is low: an OA with enough knowledge of the topology of the operator’s network must steal `fault tolerance of the cluster + 1` identity private keys and run Charon nodes to subvert the distributed validator BFT consensus to push the validator offline.
## Ethereum validator private key access
A distributed validator cluster executes Ethereum validator duties by acting as a middleman between the beacon chain and a validator client.
To do so, the cluster must have knowledge of the Ethereum validator’s private key.
The design and implementation of Charon minimizes the chances of this by splitting the Ethereum validator private keys into parts, which are then assigned to each node operator. A [distributed key generation](https://en.wikipedia.org/wiki/Distributed_key_generation) (DKG) process is used in order to evenly and safely create the private key shares without any central party having access to the full private key.
The cryptography primitives employed in Charon can allow a threshold of the node operator’s private key shares to be reconstructed into the whole validator private key if needed.
While the facilities to do this are present in the form of CLI commands, as stated before Charon never reconstructs the key in normal operations since BLS digital signature system allows for signature aggregation.
A distributed validator cluster can be started in two ways:
1. An existing Ethereum validator private key is split by the private key holder, and distributed in a trusted manner among the operators.
2. The operators participate in a distributed key generation (DKG) process, to create private key shares that collectively can be used to sign validation duties as an Ethereum distributed validator. The full private key for the cluster never exists in one place during or after the DKG.
In case 1, one of the node operators K has direct access to the Ethereum validator key and is tasked with the generation of other operator’s identity keys and key shards.
It is clear that in this case the entirety of the sensitive material set is as secure as K’s environment; if K is compromised or malicious, the distributed validator could be slashed.
Case 2 is different, because there’s no pre-existing Ethereum validator key in a single operator's hands: it will be generated using the FROST DKG algorithm.
Assuming a successful DKG process, each operator will only ever handle its own key shares instead of the full Ethereum validator private key.
A set of rogue operators composed of enough members to reconstruct the original Ethereum private keys might pose the risk of slashing for a distributed validator by colluding to produce slashable messages together.
We deem this scenario’s likelihood as low, as it would mean that node operators decided to willfully slash the stake that they should be being rewarded for staking.
Still, in the context of an outside attack, purposefully slashing a validator would mean stealing multiple operator key shares, which in turn means violating many cluster operator’s security almost at the same time. This scenario may occur if there is a 0-day vulnerability in a piece of software they all run or in case of node misconfiguration.
## Rogue node operator
Nodes are connected by means of either relay nodes, or directly to one another.
Each node operator is at risk of being impeded by other nodes or by the relay operator in the execution of their duties.
Nodes need to expose a set of TCP ports to be able to work, and the mere fact of doing that opens up the opportunity for rogue parties to execute DDoS attacks.
Another attack surface for the cluster exists in rogue nodes purposefully filling the various inter-state databases with meaningless data, or more generally submitting bogus information to the other parties to slow down the processing or, in the case of a sybil attack, bring the cluster to a halt.
The likelihood of this scenario is medium, because there’s no active threat hunting part: there’s no need for the rogue node operator to penetrate and compromise other nodes to disturb the cluster’s lifecycle.
## Outside attackers interfering with a cluster
There are two levels of sophistication in an OA:
1. No knowledge of the topology of the cluster: The attacker doesn’t know where each cluster node is located and so can’t force fault tolerance +1 nodes offline if it can’t find them.
2. Knowledge of the topology of the network (or part of it) is possessed: the OA can operate DDoS attacks or try breaking into node’s servers - at that point, the “rogue node operator” scenario applies.
The likelihood of this scenario is low: an OA needs extensive capabilities and sufficient incentive to be able to carry out an attack of this size.
An outside attacker could also find and use vulnerabilities in the underlying cryptosystems and cryptography libraries used by Charon and other Ethereum clients. Forging signatures that fool Charon’s cryptographic library or other dependencies may be feasible, but forging signatures or otherwise finding a vulnerability in either the SECP256K1+ECDSA or BLS12-381+BLS cryptosystems we deem to be a low likelihood risk.
## Malicious beacon nodes
A malicious beacon node (BN) could prevent the distributed validator from operating its validation duties, and could plausibly increase the likelihood of slashing by serving Charon illegitimate information.
If the amount of nodes configured with the malicious BN are equal to the byzantine threshold for the Charon BFT consensus protocol, the validation process can potentially halt since the BFT parameter threshold is reached - most of the nodes are byzantine - the system will reach consensus on a set of data that isn’t valid.
We deem the likelihood of this scenario to be medium depending on the trust model associated with the BNs deployment (cloud, self-hosted, SaaS product): node operators should always host or at least trust their own beacon nodes.
## Malicious Charon relays
A Charon relay is used as a communication bridge between nodes that aren’t directly exposed on the Internet. It also acts as the peer discovery mechanism for a cluster.
Once a peer’s IP address has been discovered via the relay, a direct connection can be attempted. Nodes can either communicate by exchanging data through a relay, or by using the relay as a means to establish a direct TCP connection to one another.
A malicious relay owned by a OA could lead to:
* Network topology discovery, facilitating the “outside attackers interactions with a cluster” scenario
* Impeding node communication, potentially impacting the BFT consensus protocol liveness (not security) and distributed validator duties
* DKG process disruption leading to frustration and potential abandonment by node operators: could lead to the usage of a standard Ethereum validator setup, which implies weaker security overall
We note that BFT consensus liveness disruption can only happen if the number of nodes using the malicious relay for communication is equal to the byzantine nodes amount defined in the consensus parameters.
This risk can be mitigated by configuring nodes with multiple relay URLs from only [trusted entities](../advanced/self-relay.md).
The likelihood of this scenario is medium: Charon nodes are configured with a default set of relay nodes, so if an OA were to compromise those, it would lead to many cluster topologies getting discovered and potentially attacked and disrupted.
## Compromised runtime files
Charon operates with two runtime files:
* A lock file used to address operator’s nodes, define the Ethereum validator public keys and the public key shares associated with it
* A cluster definition file used to define the operator’s addresses and identities during the DKG process
The lock file is signed and validated by all the nodes participating in the cluster: assuming good security practices on the node operator side, and no bugs in Charon or its dependencies’ implementations, this scenario is unlikely.
If one or more node operators are using less than ideal security practices an OA could rewire the Charon CLI flags to include the `--no-verify` flags, which disables lock file signature and hash verification (usually intended only for development purposes).
By doing that, the OA can edit the lock file as it sees fit, leading to the “rogue node operator” scenario. An OA or RNO might also manage to social engineer their way into convincing other operators into running their malicious lock file with verification disabled.
The likelihood of this scenario is low: an OA would need to compromise every node operator through social engineering to both use a different set of files, and to run its cluster with `--no-verify`.
## Conclusions
Distributed Validator Technology (DVT) helps maintain a high-assurance environment for Ethereum validators by leveraging modern cryptography to ensure no single point of failure is easily found in the system.
As with any computing system, security considerations are to be expected in order to keep the environment safe.
From the point of view of an Ethereum validator entity, running their services with a DV client can help greatly with availability, minimizing slashing risks, and maximizing participation in the network.
On the other hand, one must take into consideration the risks involved with dishonest cluster operators, as well as rogue third-party beacon nodes or relay providers.
In the end, we believe the benefits of DVT greatly outweigh the potential threats described in this overview.
---
# Contacts
URL: https://docs.obol.org/advanced-and-troubleshooting/security/contact
# Contacts
Please email security@obol.tech to report a security incident, vulnerability, bug or inquire about Obol's security.
Also, visit the [obol security repo](https://github.com/ObolNetwork/obol-security) for more details.
---
# Governance
URL: https://docs.obol.org/community-and-governance/governance
# Governance
## Governance is in Transition
Governance within Obol is currently paused and undergoing a transition phase.
In its initial phase, Obol operated a delegate-based governance system, where OBOL token holders could delegate voting power and participate in proposal discussions, voting cycles, and funding decisions. This system enabled early coordination across our ecosystem, and the full history of proposals (OIPs), votes, and discussions remains publicly available on the [Governance Forum](https://community.obol.org/). In addition to discussions on the forum, you can explore past proposals, voting activity, and delegate participation through:
* [Curia Dashboard](https://obol.curiahub.xyz/proposal)
* [Anticapture Dashboard](https://app.anticapture.com/obol)
These tools provide a full view of previous governance cycles, including what was proposed, voted on, and how decisions were made.
However, both internal learnings and broader ecosystem developments have made it clear that this model is not the right long-term solution for Obol.
Several factors led us to pause governance and redesign it rather than continue with the current model.
#### Structural Challenges in DAO Governance
Structural challenges across DAO governance have become harder to ignore: low participation, recurring quorum risk, over-reliance on a small number of highly active delegates, and a growing gap between formal votes and actual execution. Even large DAOs have openly acknowledged these issues. More broadly, the retreat from token-vote governance at several major projects is a response to dysfunction, “governance theater,” and the need for more accountable execution models.
#### Evolving Regulatory Landscape (SEC & CFTC Guidance while waiting for Clarity)
While we’re waiting for the Clarity Act, the [joint SEC/CFTC guidance ](https://www.sec.gov/files/rules/interp/2026/33-11412.pdf)explicitly says the agencies are trying to draw clearer lines between securities and non-securities and that the new interpretation is meant to be a first step toward a clearer federal framework. It also emphasizes that crypto-asset analysis still turns on the economic realities of the arrangement and on the Howey test, including whether holders are led to expect profits from the essential managerial efforts of others.
A crypto asset is less likely to be a security where it operates as part of a functional network, does not convey rights to income or enterprise value, and where any rewards arise from protocol-level participation rather than the managerial efforts of others. Governance features may exist, but are not determinative; the key question is whether the asset reflects participation in a network or an investment in a business.
We also need to await the outcome of the passage of the Clarity Act through the US Senate and see what emerges from that process.
#### Why This Means a Pause for Obol Governance
For Obol, that means it would be premature to keep pretending the current model is the right long-term answer. Our existing design was delegate-based, portal-dependent, and ultimately still routed implementation through the Obol Association. That was a useful early-stage model, but it is not yet the governance system we want to scale with. Pausing now gives us room to design governance that is better suited to Obol specifically: more credible in practice, more tightly connected to real execution and stakeholder responsibility, and better aligned with the direction regulatory guidance is taking. The history of proposals, votes, and discussions remains live and publicly accessible, but the next phase needs to be more intentional than simply preserving the old rails.
## Why Governance is Paused
Rather than continuing with a system that is no longer fit for purpose, governance has been intentionally paused to allow space for redesign.
Our goal is not to maintain governance for its own sake, but to build a model that:
* Reflects the realities of how the Obol operates
* Enables effective decision-making and execution
* Aligns stakeholders with real participation and responsibility
* Is designed with long-term regulatory clarity in mind
## What Comes Next
We are actively exploring and designing the next iteration of governance for Obol.
This includes rethinking:
* The role of token holders
* The structure of decision-making
* The balance between execution and oversight
* How contributors and stakeholders meaningfully participate
Progress is ongoing. While this work takes time, it is moving forward deliberately.
## Stay Involved
If you want to follow along or contribute to the future of Obol governance, we encourage you to join the discussion:
→ [Governance Forum](https://community.obol.org/)
---
# The OBOL Token
URL: https://docs.obol.org/community-and-governance/obol-token
# The OBOL Token
## Overview
The OBOL token is the core coordination asset of the Obol Collective. It plays a central role in aligning participants, supporting the growth of the Distributed Validator ecosystem, and enabling long-term value creation across the network.
Below you’ll find the key information related to the token, including contract details, distribution, and current status.
## Token Information
### Token Contract
The official token contract address of the OBOL Token is[ 0x0B010000b7624eb9B3DfBC279673C76E9D29D5F7](https://etherscan.io/address/0x0B010000b7624eb9B3DfBC279673C76E9D29D5F7)
### Official Uniswap Pool
The official Uniswap Pool for the OBOL Token is [https://app.uniswap.org/explore/pools/ethereum/0x29ecbccc2be2c0c9f87f4f84438bc9756a88f7cfe5ee91649a01240ae2242093](https://app.uniswap.org/explore/pools/ethereum/0x29ecbccc2be2c0c9f87f4f84438bc9756a88f7cfe5ee91649a01240ae2242093)
## Current Token Utility
Following recent updates and broader changes in the ecosystem, the OBOL token is evolving in how it is used.
### Staking
Staking is no longer actively promoted as a core token utility.
* Existing staking contracts remain live and fully functional
* Users who have staked OBOL (via stOBOL) can keep their position as-is
* However, no new incentives or emissions are currently associated with staking
This change reflects both:
* A shift away from mechanisms that primarily extract value without strengthening the core network
* The need to ensure long-term alignment with evolving regulatory frameworks
### Unstaking
If you wish to unstake your tokens, you can do so at any time directly on-chain.
This currently requires interacting with the staking contracts manually.
We are working on a lightweight interface to simplify this process.
Until then, you can follow the step-by-step guide [in the next page](guide-for-unstaking-obol.md).
## Long-Term Token Vision
The long-term role of OBOL remains unchanged.
Our goal is for the token to become the economic backbone of the Distributed Validator ecosystem, tightly integrated into the core product and network dynamics.
This includes:
* Aligning incentives between operators, users, and contributors
* Supporting sustainable network growth
* Enabling deeper integration within validator workflows and infrastructure
We are actively working toward a model where token utility is:
* Product-driven rather than purely financial
* Tightly coupled to real usage and demand
* Sustainable over the long term
## Ongoing Work
Several initiatives are currently underway to strengthen OBOL’s role within the ecosystem:
* [Strategic treasury operations to support long-term token health](https://x.com/Obol_Collective/status/2020904507895579028)
* [The Obol Economic Engine and Protocol Owned Liquidity](https://x.com/Obol_Collective/status/2019439135585628267)
* Deeper integration of the token within the Distributed Validator stack
More details will be shared progressively as these efforts evolve.
---
# Token Distribution & Liquidity
URL: https://docs.obol.org/community-and-governance/obol-token/token-distribution-and-liquidity
# Token Distribution & Liquidity
## Token Distribution
The total supply is capped at 500 million tokens. The full supply is not immediately circulating and tokens will unlock over the coming months and years.
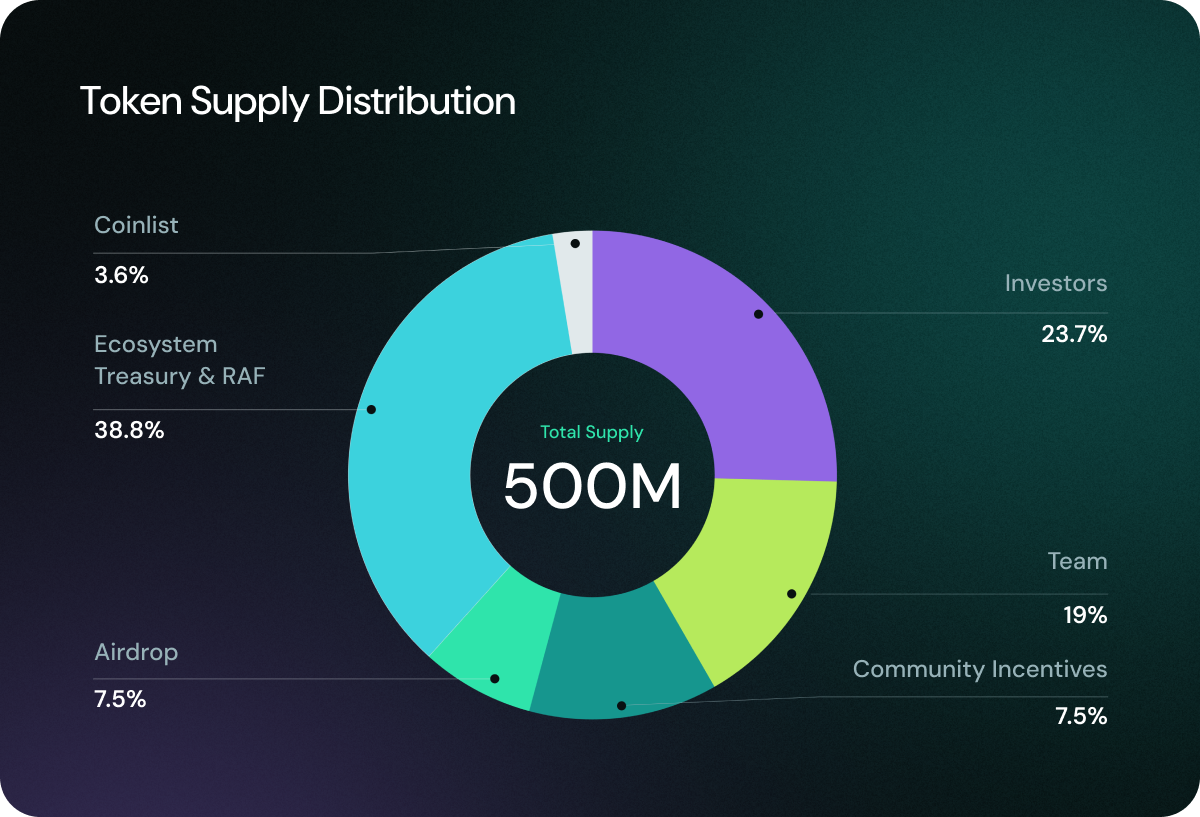
### **Ecosystem Treasury & Retroactive Funding (RAF) | 38.8%**
A significant portion of OBOL Tokens are allocated to the ecosystem treasury to drive innovation and decentralization. These funds support different initiatives, for example, [**SQUAD Goals**](https://community.obol.org/t/oip-3-obol-collective-2025-goals-proposal/)**, Grants & Incentives Funding** contributors who help to the growth of the protocol and the broader Collective and [**Retroactive Funding (RAF)**](https://blog.obol.org/raf1-results/)**,** rewarding contributions that have positively impacted the Obol Collective. Over time, the Obol Association plans to give additional control over these tokens to the community.
### **Investors | 23.7%**
Early investors played a key role in bringing the Obol Collective to life. This allocation ensures that individuals and entities that provided early financial support are fairly rewarded while adhering to best practices in responsible token vesting.
### **Team | 19%**
To attract and retain top-tier talent, a portion of tokens is reserved for core contributors, founders, and developers. This allocation aligns with the long-term vision of the project and is subject to a lock-up period similar to the one of investors.
### **Community Incentives | 7.5%**
To promote awareness and adoption, OBOL tokens will be used for user-focused initiatives that drive adoption of Obol DVs. The first of these initiative is the [Obol Incentives Program.](https://obol.org/incentives)
### **Airdrop | 7.5%**
As a community-first initiative, Obol has rewarded early contributors and supporters through a retroactive airdrop. This ensures ongoing participation in the Collective and strengthens the decentralized operator ecosystem. For more information about the Airdrop distribution, please [see this blog article](https://blog.obol.org/airdrop/).
### **Public Sale via Coinlist | 3.6%**
To ensure broad and fair token distribution, a portion of OBOL Tokens have been made available through a [Coinlist public sale](https://coinlist.co/obol) at better terms than investors. 50% of tokens purchased in the token sale will be fully unlocked and transferable at TGE, followed by a 12 month linear unlock for the remainder of the tokens.
## Token Liquidity
Once the token becomes transferable, the community will be able to track the distribution schedule and observe how the circulating supply increases over time according to the structured unlock plan.
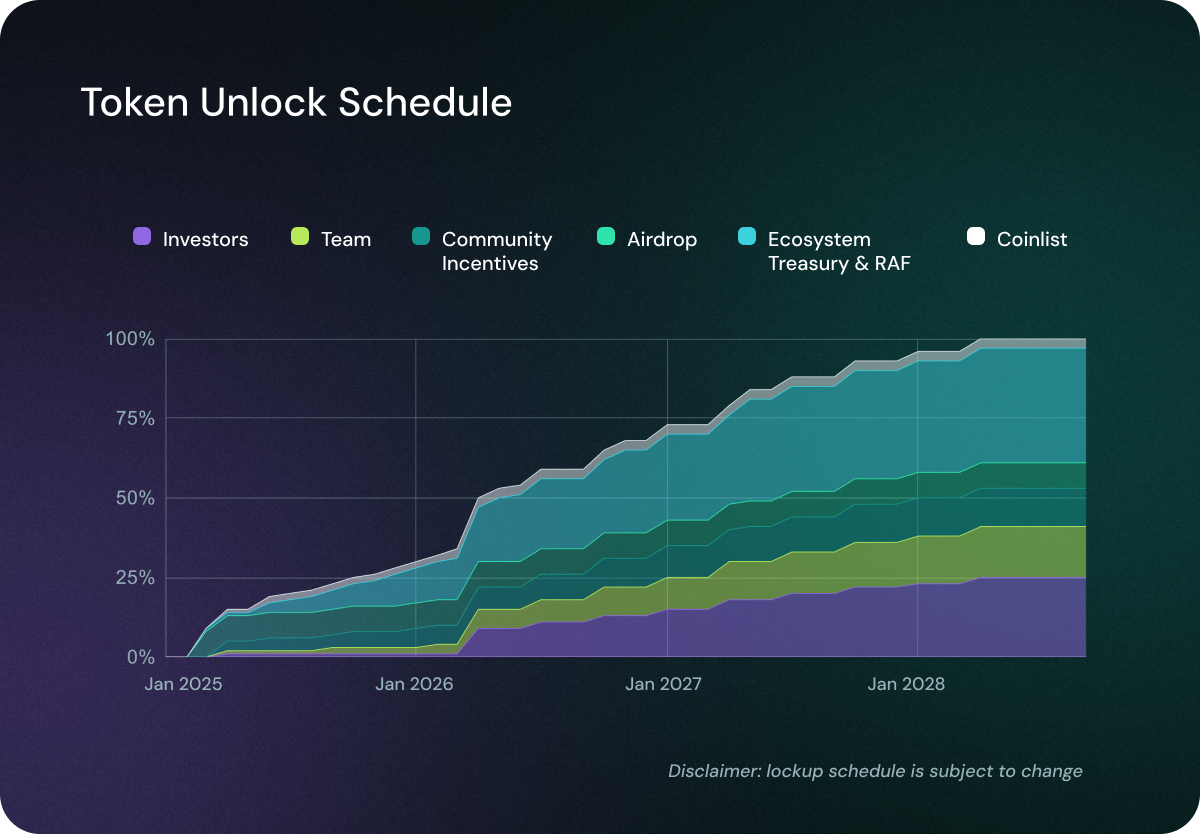
---
# Guide for Unstaking OBOL
URL: https://docs.obol.org/community-and-governance/obol-token/guide-for-unstaking-obol
# Guide for Unstaking OBOL
With the [previous staking interface hosted by Tally being deprecated](https://x.com/tallyxyz/status/2033917127304814802?s=20), you can still unstake your OBOL at any time directly on-chain. All smart contracts remain live and fully functional.
Below is a step-by-step guide to help you withdraw your tokens.
## Overview
If you previously staked OBOL, you received stOBOL in return. To unstake you will:
* interact with the stOBOL contract
* call the unstake function
* receive your OBOL back in your wallet
## Step-by-Step Guide
### 1. Go to the stOBOL Contract
Open the contract on Etherscan:
[https://etherscan.io/address/0x6590cBBCCbE6B83eF3774Ef1904D86A7B02c2fCC#writeContract](https://etherscan.io/address/0x6590cBBCCbE6B83eF3774Ef1904D86A7B02c2fCC#writeContract)
### 2. Connect Your Wallet
* Click “Connect to Web3”
* Select your wallet (e.g. MetaMask)
* Make sure you are on Ethereum Mainnet
### 3. Find the unstake function
In the list of functions, locate:
```
unstake
```
### 4. Enter the Amount
You need to enter the amount in wei (18 decimals).
Examples:
* 1 OBOL → 1000000000000000000
* 2 OBOL → 2000000000000000000
💡 Tip: If you want to fully exit, enter your full stOBOL balance.
### 5. Submit the Transaction
* Click “Write”
* Confirm the transaction in your wallet
## What Happens Next
Once the transaction is confirmed:
* your stOBOL balance decreases
* your OBOL tokens are returned to your wallet
You can verify the transaction on Etherscan.
## Notes
* You do not need to approve anything before unstaking
* You can unstake at any time, there are no lockups
* If you have multiple deposits, the contract handles this automatically
## Coming Soon
We are currently building a lightweight interface to make this process easier.
Until then, you can always unstake using the steps above.
---
# Community
URL: https://docs.obol.org/community-and-governance/community
# community
---
# Grants Program
URL: https://docs.obol.org/community-and-governance/community/grants-program
# Grants Program
## Program Status
The Obol Grants Program is currently paused.
Over its initial phase, the program supported a wide range of initiatives across the ecosystem and played a key role in accelerating growth, onboarding contributors, and strengthening the Collective.
We’re incredibly proud of what was achieved and grateful to everyone who participated.
→ [View Previously Funded Projects](https://x.com/Obol_Collective/status/2029557003371336159)
## What’s Next
Following this first phase, we’ve decided to take a step back and regroup.
The goal is to:
* Reflect on what worked well
* Identify areas for improvement
* Redesign the program to better align with the next phase of the Obol Collective
We believe this pause will allow us to come back with a stronger, more focused, and more impactful grants program.
## Stay Updated
Updates on the future of the Grants Program will be shared as they become available.
In the meantime, if you have ideas, feedback, or would like to stay involved:
→ [Governance Forum](https://community.obol.org/)
---
# Techne
URL: https://docs.obol.org/community-and-governance/community/techne
# Techne
Information about the Techne Credential Program can be found at https://squadstaking.com/techne.
## Welcome to the Obol Network Techne Credential 👋
At Obol Network, we believe in empowering our community by providing them with the tools, knowledge, and recognition they deserve. The credential is designed to provide an on-chain attestation that identifies, acknowledges, and elevates individuals who demonstrate proven experience, knowledge, and commitment within the Distributed Validators domain.
Drawing inspiration from the rich heritage of Ancient Greece, the name "Techne" reflects ideas of art, skill, or craft, representing technical mastery. Today, Techne embodies our vision to empower and uplift individuals who not only showcase technical expertise but also actively contribute to strengthening the staking ecosystem.
## Why Earn the Credential?
Each Obol Techne Credential is a verifiable, non-transferable NFT credential from Obol that proves your knowledge and experience operating Obol DVs. This on-chain attestation can then be used to showcase your experience, whether it’s to the Obol Core Team, other Obol community members, or the broader staking ecosystem. The credentials are defined in different tiers to ensure a progression path towards deeper expertise while offering an accessible entry point.\\
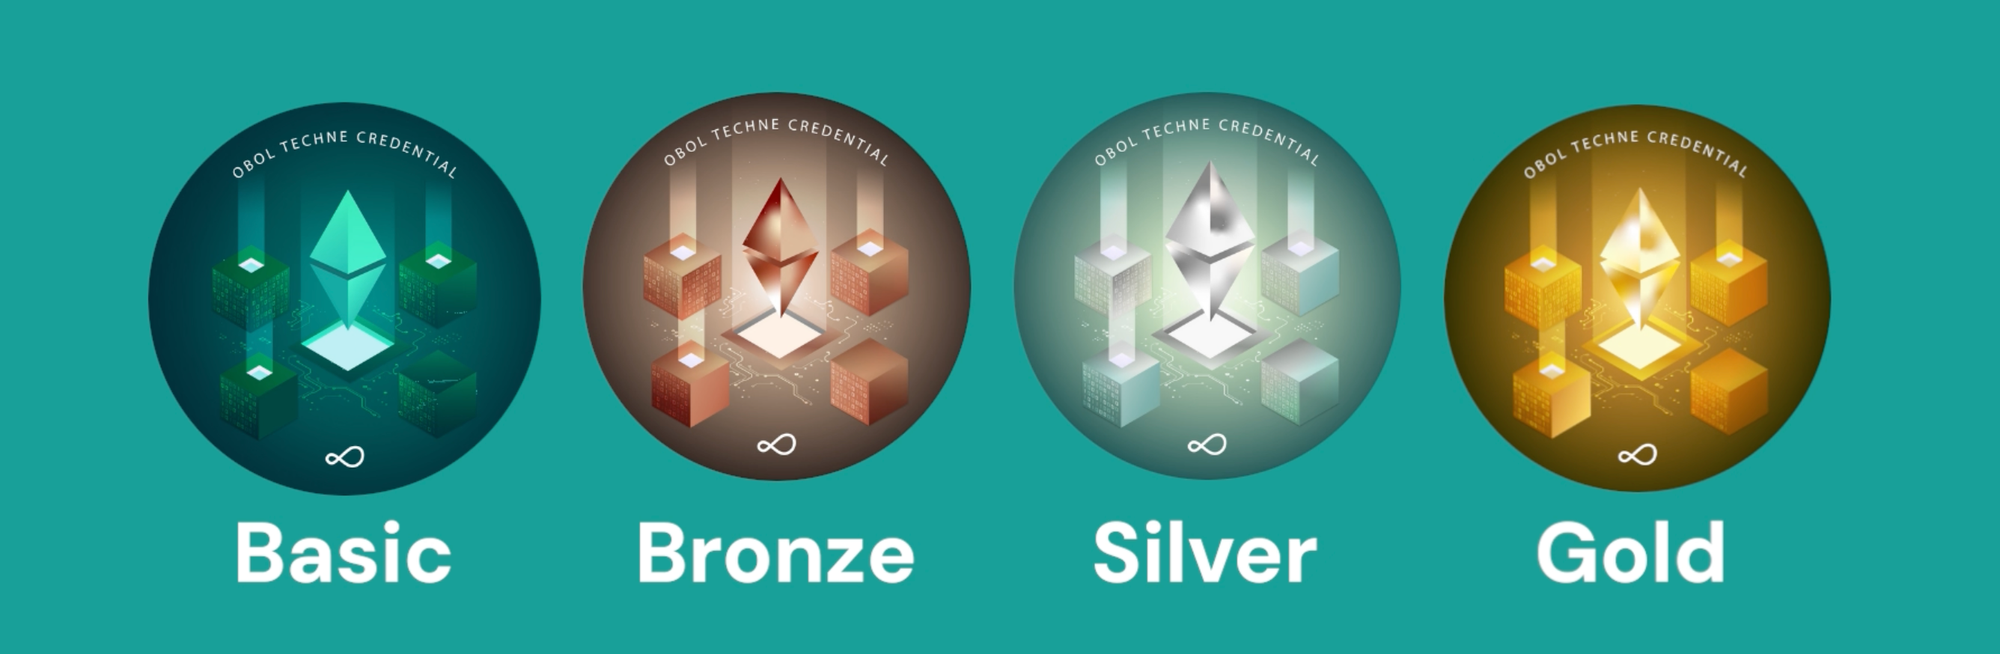
### Techne Credential Benefits
The goal of the Obol Techne Credential is to give community validators more opportunities to become node operators. Today, many liquid staking protocols and other staking services are looking to build community-focused, permissionless, and more decentralized node operator sets. However, to be considered in those programs, validators must have proven experience and demonstrated ability to run high-performing nodes. The key benefit of the Obol Techne Credential is to give every validator to prove their knowledge and experience with Obol DVs.
* **Recognition**: Receive a verifiable non-transferable NFT to prove and showcase your knowledge and experience running distributed validators.
* **Opportunities**: Credentialed individuals have proven experience running distributed validators, providing a path to access delegated stake in programs such as EtherFi’s Operation Solo Staker, Lido’s SimpleDVT Module and many more.
## Program Overview
### Eligibility
The Obol Techne Credential is open to all community members interested in gaining knowledge and experience in running distributed validators.
### Credentialing Journey
The credentialing journey currently takes place in waves. Each wave lasts around 8 weeks and consists of a preparation period called the _Learning Phase_, followed by a hands-on experience period, called _Experience_, during which Obol monitors performance. Before the start of a wave, you already have the opportunity to create your squad. Credentials are awarded at the end of the wave based on a snapshot taken that verifies average performance during the Experience phase.
Also, it's important to understand the concept of Credential Tiers. Currently, there are three: the Base Credential, the Bronze Credential and the Silver Credential. Base and Bronze are earned on testnet, with Silver earned on mainnet.
### Learning Phase & Knowledge Assessment
During each wave of our program, you will have the opportunity to join live training sessions on our Discord. We will teach the basics of Ethereum Proof of Stake and Obol Distributed Validators (DVs), and will demonstrate how to run your first DV. There will also be a training session where you can ask questions and receive answers directly from experienced community members. Head to Discord to see the full agenda of the current wave or next wave.
Also, don’t forget to thoroughly read the [comprehensive documentation](https://docs.obol.tech/docs/int/Overview)!
### Practical Experience
To obtain your Obol Techne Credential, you will need to demonstrate your abilities to **set up, run, and maintain a DV cluster for multiple weeks**. For Base and Bronze, this is around 4 weeks. For Silver, this is around 8 weeks. This is the essence of the Techne credential, to allow you to showcase your experience in an honest and verifiable manner on-chain.
### Performance Requirements
You not only need to setup, run and maintain your DV, but also achieve **high performance.** Distributed Validators have been shown to outperform traditional validators, while providing much more [benefits and advantages](https://blog.obol.tech/what-is-dvt-and-how-does-it-improve-staking-on-ethereum/).
The performance requirements are different depending on the different tiers.
* For the **Base Credential**, you will need to run a DV cluster for 4 weeks with a performance near or above the [network average](https://grafana.monitoring.gcp.obol.tech/d/adgym07d8ak1sf/techne-credentials?orgId=6) (open the link in incognito mode if the link does not work). We will take into account the overall performance of the cluster, not the individual performances of the operators.
* For the **Bronze Credential** , you will need to create and manage 50 validators for 4 weeks with a performance equal to or above the [average of the Liquid Staking Providers](https://grafana.monitoring.gcp.obol.tech/d/adgym07d8ak1sf/techne-credentials?orgId=6) (index composed of Lido, RocketPool, Coinbase Cloud, StakeWise and EtherFi). We will also take into account the individual performance of the operators (the exact requirements will be announced soon).
* For the **Silver Credential,** you will need to create and manage 1 or more validators for 8 months on mainnet, with performance at near or above the network average. We will take into account the overall performance of the cluster as well as the individual performance of the operators.
:::info
For Base + Bronze (testnet), if you require delegate hETH, we ask you to set the address 0x17E6F6270A101dc7687Cc9899889819EeAF8253f as the withdrawal recipient. We will not activate validators that have not done this. At the end of the wave, you will only be eligible for the Credentials after we receive the testnet ETH back.
:::
### Performance Monitoring
To track and verify the performance of your DV, you and your squad mates are required to properly setup a monitoring credential. You can learn more about setting up your monitoring credential [here](../../run-a-dv/start/obol-monitoring.mdx).
We are proud to share with you our [Techne Public Dashboard](https://grafana.monitoring.gcp.obol.tech/d/adgym07d8ak1sf/techne-credentials?orgId=6) (_open it in incognito mode if the link does not work_) which will allow you to track your performance and compare it to the requirements throughout your adventure. If the link does not work, open it in private browsing.
Please note that **if you do not properly setup monitoring, you will not be eligible for any Credential**.
### Claim your Credentials
After a wave has ended and if you have _created_, _ran_, and successfully _exited_ your cluster, you will have the right to your new Techne Credential.
We will make an announcement on our Discord and Twitter when the credentials are available to claim.
Base and Bronze will require you to manually claim, while Silver will be automatically airdropped.
## Get Started\*
Start your journey without further delay. Please find here the various documents and information you will need to get started in the program:
### [👉 Get Started Now](https://discord.com/invite/n6ebKsX46w)
Additional Resources
> [Quickstart Guide](https://docs.obol.tech/docs/start/quickstart_overview)
>
> [Support Channel on Discord](https://discord.obol.org)
>
> [Get Started Monitoring your Node](https://docs.obol.tech/docs/advanced/monitoring)
## **Disclaimer**
_Obol Network does not assume responsibility for any financial losses that may be incurred by individuals who choose to run on the Mainnet. Participants are advised to exercise due diligence and assess all risks associated with running on the Mainnet. Obol Network shall not be held liable for any damages, financial or otherwise, that may arise from participating in Mainnet operations._
## FAQ
**It looks like there is no wave active right now, how can I earn a Techne Credential?**
There are curerntly no active waves for earning Base or Bronze, but we plan to offer another wave in January of 2025. Currently, you still do have the ability to earn Silver. Please head to the [Obol Discord](https://discord.obol.org) to learn more about earning a Silver Techne Credential.
**It has been 24 hours since I filled out the form to receive my testnet ETH, but I haven't received anything yet. Is this normal?**
This is probably due to an unusually high number of requests. Please wait for up to 48 hours and reach out to us on Discord. Also, please note that we do not distribute any testnet ETH on weekends.
**Can I qualify for the program if I run all the nodes on a single machine?**
This is not aligned with the principle of distributed validators (DVs). You must form your cluster (squad) with other humans using other machines.
**Can I take part in the program if I’m running on Mainnet?**
Yes, those running a DV on mainnet have the opportunity to earn the Silver Techne Credential.
**I don’t have the Base Credential but I have enough testnet ETH to run 50 validators, can I aim for the Bronze Techne?**
Yes, you can. Please send a message on [Discord](https://discord.obol.org) in the #techne-applicants channel explaining your desire to run for Bronze using your own testnet ETH.
---
# Staking Mastery Program (Archived)
URL: https://docs.obol.org/community-and-governance/community/staking-masters
# Staking Mastery Program
Information about the Staking Mastery Program can be found at https://squadstaking.com/mastery.
## Achieving staking mastery
The Staking Mastery program is a carefully curated cohort based program designed to empower and promote individuals who are passionate about advancing staking adoption through research, development and/or education.\\

In ancient Greece, masters were esteemed for their expertise and their role as mentors. A master would guide an apprentice through rigorous training and intellectual development. They often performed research, led workshops, or built entire guilds. This master-apprentice relationship was fundamental to the transmission of skills and knowledge in ancient Greek society.
We're empowering the next generation of masters, the Ethereum Staking Masters.
## How does it work?
1. **Apply:** For those who are passionate about advancing Ethereum staking adoption through research, development and/or education.
2. **Interview:** Outstanding applicants will be interviewed to discuss their unique skills and how those can be best applied to advancing Ethereum staking adoption.
3. **Lead:** Selected Staking Masters will lead a project of their choosing for the length of their cohort, with support and recognition from DV Labs.
Apply now at [squadstaking.com/mastery](https://squadstaking.com/mastery)!
---
# Contribution & Feedback
URL: https://docs.obol.org/community-and-governance/contribution
# contribution
---
# Filing a Bug Report
URL: https://docs.obol.org/community-and-governance/contribution/bug-report
# Filing a Bug Report
Bug reports are critical to the rapid development of Obol. In order to make the process quick and efficient for all parties, it is best to follow some common reporting etiquette when filing to avoid double issues or miscommunications.
## Checking if your issue exists
Duplicate tickets are a hindrance to the development process and, as such, it is crucial to first check through Charon's existing issues to see if what you are experiencing has already been indexed.
To do so, head over to the [issue page](https://github.com/ObolNetwork/charon/issues) and enter some related keywords into the search bar. This may include a sample from the output or specific components it affects.
If searches have shown the issue in question has not been reported yet, feel free to open up a new issue ticket.
## Writing quality bug reports
A good bug report is structured to help the developers and contributors visualize the issue in the clearest way possible. It's important to be concise and use comprehensive language, while also providing all relevant information on-hand. Use short and accurate sentences without any unnecessary additions, and include all existing specifications with a list of steps to reproduce the expected problem. Issues that cannot be reproduced **cannot be solved**.
If you are experiencing multiple issues, it is best to open each as a separate ticket. This allows them to be closed individually as they are resolved.
An original bug report will very likely be preserved and used as a record and sounding board for users that have similar experiences in the future. Because of this, it is a great service to the community to ensure that reports meet these standards and follow the template closely.
## The bug report template
Below is the standard bug report template used by all of Obol's official repositories.
```shell
## Expected Behavior
## Current Behavior
## Steps to Reproduce
1.
2.
3.
4.
5.
## Detailed Description
## Specifications
Operating system:
Version(s) used:
## Possible Solution
## Further Information
## What is Charon?
## Charon explained
```
**Bold text**
Double asterisks `**` are used to define **boldface** text. Use bold text when the reader must interact with something displayed as text: buttons, hyperlinks, images with text in them, window names, and icons.
```markdown
In the **Login** window, enter your email into the **Username** field and click **Sign in**.
```
**Italics**
Underscores `_` are used to define _italic_ text. Style the names of things in italics, except input fields or buttons:
```markdown
Here are some American things:
- The _Spirit of St Louis_.
- The _White House_.
- The United States _Declaration of Independence_.
```
Quotes or sections of quoted text are styled in italics and surrounded by double quotes `"`:
```markdown
In the wise words of Winnie the Pooh _"People say nothing is impossible, but I do nothing every day."_
```
**Code blocks**
Tag code blocks with the syntax of the core they are presenting:
```markdown
```javascript
console.log(error);
```
```
**List items**
All list items follow sentence structure. Only _names_ and _places_ are capitalized, along with the first letter of the list item. All other letters are lowercase:
1. Never leave Nottingham without a sandwich.
2. Brian May played guitar for Queen.
3. Oranges.
List items end with a period `.`, or a colon `:` if the list item has a sub-list:
1. Charles Dickens novels:
1. Oliver Twist.
2. Nicholas Nickelby.
3. David Copperfield.
2. J.R.R Tolkien non-fiction books:
1. The Hobbit.
2. Silmarillion.
3. Letters from Father Christmas.
**Unordered lists**
Use the dash character `-` for un-numbered list items:
```markdown
- An apple.
- Three oranges.
- As many lemons as you can carry.
- Half a lime.
```
**Special characters**
Whenever possible, spell out the name of the special character, followed by an example of the character itself within a code block.
```markdown
Use the dollar sign `$` to enter debug-mode.
```
**Keyboard shortcuts**
When instructing the reader to use a keyboard shortcut, surround individual keys in code tags:
```shell
Press `ctrl` + `c` to copy the highlighted text.
```
The plus symbol `+` stays outside of the code tags.
#### Images
The following rules and guidelines define how to use and store images.
**Storage location**
All images must be placed in the `/static/img` folder. For multiple images attributed to a single topic, a new folder within `/img/` may be needed.
**File names**
All file names are lower-case with dashes `-` between words, including image files:
```
concepts/
├── content-addressed-data.md
├── images
│ └── proof-of-spacetime
│ └── post-diagram.png
└── proof-of-replication.md
└── proof-of-spacetime.md
```
_The framework and some information for this was forked from the original found on the_ [_Filecoin documentation portal_](https://docs.filecoin.io)
---
# Feedback
URL: https://docs.obol.org/community-and-governance/contribution/feedback
# Feedback
If you have followed our quickstart guides, and whether you succeeded or failed at running the distributed validator successfully, we would like to hear your feedback on the process and where you encountered difficulties.
- Please let us know by joining and posting on our [Discord](https://discord.gg/n6ebKsX46w).
- Also, feel free to add issues to our [GitHub repos](https://github.com/ObolNetwork).
---
# Introduction
URL: https://docs.obol.org/obol-stack/obol-stack
# Introduction to the Obol Stack
The Obol Stack is a local-first agent harness: a Kubernetes cluster on your laptop, a default AI agent ([Hermes](https://github.com/NousResearch/hermes)) with its own Ethereum wallet, dynamically-deployable blockchain networks, a Cloudflare tunnel for public exposure, and an [x402](https://www.x402.org/) payment gateway so agents can charge for what they serve.
The thesis is simple: **agents should be able to run real infrastructure, build something valuable on top of it, and sell access to it for micropayments — without asking permission and without standing up cloud accounts.**
:::info
The Obol Stack is alpha software. For production validator deployments, use the [Run a DV](../run-a-dv/start/) docs and dedicated infrastructure.
:::
## What's in the box
Obol Stack is a two-part system:
1. **`obolup.sh`** — bootstrap installer that lays down pinned dependencies (`kubectl`, `helm`, `k3d`, `helmfile`, `k9s`) and the `obol` CLI.
2. **`obol` CLI** — Go binary that drives everything: cluster lifecycle, the agent, networks, payment-gated services, and the tunnel.
The cluster runs entirely on your machine via [k3d](https://k3d.io/) (Kubernetes in Docker).
## Key features
* **Agent-first** — `obol stack up` brings up a default Hermes agent with its own Ethereum signing wallet (backed by a remote-signer), a chat TUI, and a growing skill set. Talk to it with `obol hermes chat`.
* **Sell what your agent builds** — `obol sell demo` deploys a payment-gated HTTP service in one command. Use it as the starting point for selling inference, indexed data, or any HTTP API for $OBOL or USDC micropayments.
* **Native $OBOL micropayments with sponsored gas on mainnet** — when buyers pay in $OBOL on Ethereum mainnet, the Obol facilitator sponsors the on-chain settlement gas. Buyers sign an [EIP-2612](https://eips.ethereum.org/EIPS/eip-2612) permit off-chain and never need ETH. Sellers receive $OBOL directly to their agent wallet.
* **Multiple network support** — sync local Ethereum nodes (mainnet, sepolia, hoodi), Aztec sequencers, and more. Built-in eRPC routes to public RPCs when no local node is present.
* **Public access** — expose only the routes you choose (`/services//*` and discovery metadata) via a Cloudflare quick tunnel. Internal routes (frontend, eRPC) stay locked to `obol.stack`.
* **Unique deployments** — every install gets a uniquely-namespaced deployment, so multiple stacks coexist on one machine.
## CLI overview
| Command | Description |
| --- | --- |
| `obol stack init / up / down / purge` | Cluster lifecycle |
| `obol agent init / new / setup / sync / list / delete` | Manage agent instances (default runtime: Hermes) |
| `obol hermes chat / skills / config / ...` | Pass-through to the in-cluster Hermes CLI |
| `obol model setup / status` | Configure LLM providers (Ollama, Anthropic, OpenAI, custom) |
| `obol network list / install / sync / delete` | Manage blockchain networks |
| `obol sell demo / inference / http / list / status / register` | Create payment-gated services and register on ERC-8004 |
| `obol app install / sync / list / delete` | Install arbitrary Helm charts |
| `obol tunnel status / setup / restart` | Manage the Cloudflare tunnel (`setup` creates a permanent URL) |
| `obol kubectl / helm / helmfile / k9s` | Kubernetes tool passthroughs (auto-configured `KUBECONFIG`) |
## Default infrastructure
When you run `obol stack up`, the following services are deployed automatically:
| Service | Namespace | Purpose |
| --- | --- | --- |
| **Hermes (default agent)** | `hermes-obol-agent` | AI agent + dashboard, with its own Ethereum signing wallet |
| **Traefik** | `traefik` | Gateway API ingress controller |
| **Cloudflared** | `traefik` | Cloudflare tunnel connector for public routes |
| **eRPC** | `erpc` | Unified RPC load balancer (local nodes + public fallbacks) |
| **Obol Frontend** | `obol-frontend` | Web management dashboard (local-only) |
| **Monitoring** | `monitoring` | Prometheus + kube-prometheus-stack |
| **LiteLLM** | `llm` | OpenAI-compatible LLM gateway (Ollama, Anthropic, OpenAI, custom endpoints) |
| **x402 verifier + ServiceOffer controller** | `x402` | Payment gating + reconciliation of payment-gated services |
## Use it from Claude Code
The Obol team publishes a Claude Code plugin with skills for installing, operating, and selling on the Obol Stack.
```
/plugin marketplace add ObolNetwork/skills
/plugin install obol@obol
```
Once installed, Claude Code can drive `obol stack up`, set up the agent, troubleshoot pods, and walk you through `obol sell demo`. Source: [github.com/ObolNetwork/skills](https://github.com/ObolNetwork/skills).
## System requirements
### Prerequisites
* **Docker** 20.10.0 or later (daemon must be running)
* **macOS** (Darwin) or **Linux**
* **amd64** or **arm64** architecture
### Resource recommendations
| Component | Minimum | Recommended |
| --- | --- | --- |
| **CPU** | 4 cores | 8 cores |
| **RAM** | 8 GB | 16 GB |
| **Storage** | 50 GB | 500+ GB (varies by network) |
:::warning
Running full Ethereum nodes requires significant disk space. Mainnet execution clients can require 1+ TB of storage.
:::
## Architecture overview
```
+---------------------------------------------------------+
| Obol Stack |
+---------------------------------------------------------+
| obol CLI |
| +-- stack (init, up, down, purge) |
| +-- agent (init, new, setup, sync, list, delete) |
| +-- hermes (passthrough — chat, skills, config) |
| +-- model (setup, status) |
| +-- network (list, install, sync, delete) |
| +-- sell (demo, inference, http, register, ...) |
| +-- app (install, sync, list, delete) |
| +-- tunnel (status, login, provision) |
| +-- kubectl / helm / helmfile / k9s |
+---------------------------------------------------------+
| k3d Cluster |
| +-- Traefik Gateway (ports 80, 8080, 443, 8443) |
| +-- Cloudflared (public tunnel) |
| +-- LiteLLM (LLM gateway) |
| +-- eRPC (RPC load balancer) |
| +-- Obol Frontend (web dashboard, local-only) |
| +-- x402 verifier + ServiceOffer controller |
| +-- Monitoring (Prometheus) |
+---------------------------------------------------------+
| Deployments |
| +-- hermes-obol-agent (default agent + signer) |
| +-- ethereum- (blockchain network) |
| +-- aztec- (blockchain network) |
| +-- demo (services from `obol sell`) |
+---------------------------------------------------------+
```
## Where next
- [Quickstart](quickstart.mdx) — install the stack, talk to your agent, and run `obol sell demo`.
- [Build a profitable Obol Stack](build-a-profitable-stack.md) — end-to-end: bounded archive node → index → paid service → specialized agent → listed on marketplaces.
- [Selling agent services](selling-services.md) — full orientation on the three `sell` shapes, x402 economics, ERC-8004 registration, and Telegram notifications.
- [Installing Networks](installing-networks.mdx) — sync Ethereum / Aztec, including bounded archives via `--since`.
## Need assistance?
If you have questions or encounter issues with the Obol Stack, head over to our [Discord](https://discord.gg/n6ebKsX46w) where a member of our team or the community will be happy to assist.
---
# Quickstart
URL: https://docs.obol.org/obol-stack/quickstart
# Quickstart
This guide walks you through installing the Obol Stack, chatting with your default agent, and selling your first payment-gated service.
## Prerequisites
* Docker installed and running on your machine.
* macOS or Linux operating system.
* At least 8 GB of RAM available.
:::info
Verify Docker is running with `docker info` before proceeding.
:::
**Optional but recommended:** install [Ollama](https://ollama.com) and pull a tool-call-capable model so your agent has a free, local LLM to talk to:
```shell
ollama pull qwen3.5:4b # or qwen3.5:9b on a 16 GB+ machine
```
If you'd rather route through Anthropic or OpenAI, you can configure that with `obol model setup` after the cluster is up.
## Step 1: Install the Obol Stack
Run the bootstrap installer:
```shell
bash <(curl -s https://stack.obol.org)
```
The installer will:
1. Validate that Docker is running.
2. Install the `obol` CLI binary and dependencies (kubectl, helm, k3d, helmfile, k9s).
3. Configure your PATH and add `obol.stack` to `/etc/hosts`.
4. Offer to start the cluster immediately.
```shell
bash <(curl -s https://stack.obol.org)
```
Files are installed to:
* Config: `~/.config/obol/`
* Data: `~/.local/share/obol/`
* Binaries: `~/.local/bin/`
```shell
OBOL_RELEASE=v0.9.0 bash <(curl -s https://stack.obol.org)
```
```shell
git clone https://github.com/ObolNetwork/obol-stack.git
cd obol-stack
OBOL_DEVELOPMENT=true ./obolup.sh
```
Development mode uses a local `.workspace/` directory and runs `go run` instead of a compiled binary.
## Step 2: Start the stack
```shell
obol stack init
obol stack up
```
`obol stack up` does a lot on first run — 2–5 minutes is normal — and ends with a default Hermes agent running in the `hermes-obol-agent` namespace, with its own Ethereum signing wallet.
:::info
First startup pulls several Docker images. If it stalls, check `obol kubectl get pods -A` to see what's still pending.
:::
## Step 3: Chat with your agent
Hermes is the default Obol Agent runtime. Talk to it directly from your terminal:
```shell
obol hermes chat
```
That drops you into a TUI chat session against the in-cluster Hermes gateway, using whichever LLM `obol stack up` auto-configured (your local Ollama models if available, otherwise the cloud provider you set up with `obol model setup`).
A few useful pass-through commands:
```shell
obol hermes skills list # see the agent's installed skills
obol hermes config show # inspect the runtime config
obol hermes --help # full Hermes CLI surface
```
:::tip
Want the agent to message you on Telegram, Discord, or Slack? Run `obol hermes setup` and follow the prompts to wire up a chat-app integration. Hermes will then notify you when long-running work finishes. The full Telegram bot flow (which involves talking to `@BotFather` and `@userinfobot` first) is covered in [Build a profitable Obol Stack](build-a-profitable-stack.md#step-6-tell-your-agent-to-ping-you-on-telegram).
:::
The agent has its own Ethereum wallet — back it up before you put anything on it:
```shell
obol agent wallet address # print the agent's wallet address
obol agent wallet backup -o ~/obol-wallet-backup.json --passphrase "..."
```
## Step 4: Sell your first service (`obol sell demo`)
This is the headline feature of the v0.9 release. `obol sell demo` deploys a tiny HTTP service behind an [x402](https://www.x402.org/) payment gate, registers it on a Cloudflare quick tunnel, and prints copy-paste instructions to test it as a buyer.
```shell
obol sell demo # deploys "hello" demo @ 1 OBOL/req on Ethereum mainnet
```
The output walks you through:
1. The public URL where the gated endpoint lives (`https://.trycloudflare.com/services/demo-hello/...`).
2. A `curl` snippet that hits the endpoint and gets back HTTP `402 Payment Required` with the price.
3. A `python` snippet using the [x402](https://github.com/coinbase/x402) SDK to pay and consume the response.
Other demo types ship in the same command:
```shell
obol sell demo blocks # 0.0001 USDC/req on base-sepolia (live chain data via eRPC)
obol sell demo quant # 0.01 USDC/req on base-sepolia (agent-driven analysis report)
```
Once you've watched a demo settle end-to-end, the same machinery lets you sell anything:
```shell
obol sell inference my-model --model qwen3.5:9b --per-mtok 0.01 --token USDC --chain base
obol sell http my-api --upstream my-svc --port 8080 --namespace my-ns \
--per-request 0.001 --chain base --wallet
```
The mental model is: **anything in your cluster that exposes a Service can be wrapped in a `ServiceOffer` and gated behind x402**. The goal of v0.9 is to make that loop short enough that you can actually iterate on what's worth selling.
See [Selling agent services](selling-services.md) for the full orientation on the three `sell` shapes (`http`, `inference`, `agent`), x402 economics, ERC-8004 registration, and marketplaces.
### Why $OBOL on mainnet?
Buyers paying in `$OBOL` on Ethereum mainnet sign an [EIP-2612](https://eips.ethereum.org/EIPS/eip-2612) permit off-chain, and the Obol-operated facilitator batches that permit with the on-chain transfer at settlement time. **Buyers never need ETH for gas**, and they skip the one-time `approve` step that most ERC-20 payment flows require.
Sellers receive `$OBOL` directly into their agent wallet. Read more about the [OBOL token](../community-and-governance/obol-token/).
### List on the agent registry (ERC-8004)
`obol sell demo` skips on-chain registration by default (to avoid double-register reverts and the need for ETH on the agent wallet). When you're ready to be discoverable on a public agent registry:
```shell
obol sell register --chain mainnet --name my-service --private-key-file
```
This publishes the agent's wallet + service catalog to the [ERC-8004](https://eips.ethereum.org/EIPS/eip-8004) Identity Registry on the chain you specify.
## Step 5: Drive the stack from Claude Code (optional)
The Obol team publishes a Claude Code plugin with skills for installing, operating, and selling on the Obol Stack. If you use Claude Code, install it once and let Claude run the playbook for you next time.
```
/plugin marketplace add ObolNetwork/skills
/plugin install obol@obol
```
The `run-obol-stack` skill teaches Claude how to drive the CLI end-to-end — bring-up, debugging stuck pods, deploying services, registering on ERC-8004, and pointing buyers at your tunnel URL. Source: [github.com/ObolNetwork/skills](https://github.com/ObolNetwork/skills).
## Step 6: Deploy a blockchain network (optional)
The stack ships with built-in eRPC routing to public Ethereum mainnet and Hoodi RPCs — no node required. If your agent makes a lot of requests, or you want a Consensus Layer client to run a distributed validator, run your own local node:
```shell
# Install an Ethereum node on Hoodi testnet
obol network install ethereum --network=hoodi
# Deploy to the cluster
obol network sync ethereum
```
This creates the deployment `ethereum/hoodi` and registers the local node as the primary RPC upstream, with the built-in public RPCs as automatic fallback. See [Installing Networks](installing-networks.mdx) for the full set of supported networks and clients.
## Step 7: Explore
```shell
obol k9s # interactive cluster TUI (press '0' to view all)
obol kubectl get pods -A # all pods across all namespaces
obol tunnel status # public tunnel URL
obol sell list # services you're selling
obol sell status # ServiceOffer reconciliation state
```
:::info
`obol stack up` gives you a **temporary** tunnel URL that changes on every restart. When you're ready to sell, give your stack a stable hostname — see [Set up a permanent URL](permanent-url.md).
:::
## Stopping and cleaning up
```shell
obol stack down # stop the cluster (preserves data)
obol stack up # restart
obol stack purge -f # remove everything, including data
```
:::warning
`obol stack purge -f` is irreversible. It removes all cluster data and configuration — including any agent wallets that aren't backed up outside `~/.config/obol/`.
:::
## Next steps
* [Build a profitable Obol Stack](build-a-profitable-stack.md) — the end-to-end narrative: sync a bounded archive node, build an index, wrap it as a paid service, and turn it into a specialized agent business.
* [Selling agent services](selling-services.md) — depth on the three `sell` shapes, x402 economics, and getting listed on marketplaces.
* [Installing Networks](installing-networks.mdx) — sync local Ethereum / Aztec nodes (including bounded archives via `--since`).
* [Installing Apps](installing-apps.md) — deploy any Helm chart.
* [FAQ](faq.md) — common questions and troubleshooting.
---
# Build a Profitable Obol Stack
URL: https://docs.obol.org/obol-stack/build-a-profitable-stack
# Build a profitable Obol Stack
This is the long-form narrative for an Obol Stack operator who wants to actually make money. It assumes you've finished the [Quickstart](quickstart.mdx) — you have `obol stack up` running, you can talk to your default Hermes agent, and you've watched `obol sell demo` settle a payment.
The journey:
1. Sync a **bounded archive node** of the chain your target application lives on, starting from the block at which it was deployed.
2. Build a **purpose-built index or feed** over that archive.
3. Wrap the index as a **paid HTTP service** (`obol sell http`).
4. Build a **specialized agent** on top that uses the index and a tight skill set to answer buyer questions better than any general-purpose agent could.
5. Sell the agent's replies via `obol sell agent` and **get listed** on the marketplaces where buyer-agents look.
6. Set up out-of-band notifications so your agent can ping you on **Telegram** when the work is done — you don't need to babysit it.
7. **Iterate**.
You can use Claude Code as your operator throughout — the [`run-obol-stack` skill](https://github.com/ObolNetwork/skills/blob/main/skills/run-obol-stack/SKILL.md) drives all of this and knows the right next command at every step.
## Step 1: pick the right archive scope
The single most important decision is **what history you actually need**. A full mainnet archive from genesis is ~4 TB and weeks of sync — overkill for almost every realistic agent business. A bounded archive is the right default.
If your target application is a DeFi protocol deployed at block `N`, install with `--mode=archive --since=`. You'll carry the state trie from `N` forward and nothing earlier:
```shell
obol network install ethereum \
--network=mainnet \
--mode=archive \
--since=22500000 # the block your app was deployed
obol network sync ethereum
```
Pick `--since` based on what your agent needs to answer:
- **A specific app deployed at block N** → `--since=N`.
- **Anything Cancun-or-later** → `--since=cancun` (~800 GB).
- **Anything from the last year** → `--since=365d` (~600 GB).
- **Recent execution-layer history for a quick indexer** → `--since=prague` (~0.4 TB).
See [Installing Networks](installing-networks.mdx#archive-nodes-and-bounded-history-since) for the full `--since` reference.
While the node syncs (hours to days depending on scope), keep moving. The other steps don't require the archive to be complete.
## Step 2: build the index your agent will sell
A raw archive node is not yet a product — it's storage. The product is **a query surface that returns useful, application-specific answers in milliseconds**.
Two reliable shapes:
- **An events index.** Subscribe to your app's contract logs from `--since` forward, decode them, and write them to a small Postgres or DuckDB. Buyers query "all positions opened between X and Y", "all liquidations involving address Z", etc.
- **A state snapshot service.** Run historical `eth_call` against the archive at the block ranges that matter, cache the results, and expose a stable HTTP endpoint that returns "what did this contract look like at this block?" without paying the archive node's full cost per query.
Deploy whatever you build as a regular Kubernetes Service in your cluster — the `obol app install` command takes any Helm chart, and the `obol-app` chart in [`ObolNetwork/helm-charts`](https://github.com/ObolNetwork/helm-charts) packages an arbitrary Dockerfile for you.
## Step 3: sell the index
Once the index is healthy, wrap it as a paid HTTP service:
```shell
obol sell http my-index \
--upstream my-index-svc \
--port 8080 \
--namespace my-ns \
--per-request 0.001 \
--chain base \
--token USDC \
--wallet 0x...your-wallet...
```
Confirm it reconciles to `Ready`:
```shell
obol sell status my-index --namespace my-ns
```
You now have a billable data feed. Some buyers — particularly other agents writing custom analyses — will pay for this directly.
## Step 4: build the specialized quant agent
The bigger margin lives one layer up. Buyers who don't want to write their own analysis will happily pay 10–50× more for an **agent that already knows what to do with the index**.
Inside the Obol Agent, the levers that compound are:
- **`SOUL.md`** — the agent's system prompt. The difference between "an LLM that knows about Ethereum" and "a quant agent that answers a specific class of questions reliably" is two well-edited paragraphs of `SOUL.md`.
- **Custom skills.** Add a skill that knows how to query your index, decode your app's events, and present the result in the format your buyers actually want.
- **Reference data.** Give the agent direct access to the index (and any other curated data you have) so it doesn't have to guess.
The `run-obol-stack` skill calls this the **margin-bearing path**: the LLM is fungible, but a tight skill plus proprietary data is not. Iterate on `SOUL.md` and the skill until paid buyers consistently give thumbs-up answers.
Once the agent is reliable, expose it as a paid agent service:
```shell
obol sell agent my-quant \
--instance my-quant \
--per-request 0.05 \
--token USDC \
--chain base
```
Buyers pay per reply, not per token — and pay for the answer, not the inference.
## Step 5: get a permanent URL
So far your service has been reachable on a temporary quick-tunnel URL (`https://.trycloudflare.com`) that changes on every restart. Before you register and start attracting buyers, give it a stable home — otherwise anyone who bookmarked or registered the old URL hits errors after a restart.
```shell
# 1. In the Cloudflare dashboard: Networks → Tunnels → Create a tunnel.
# 2. Add a Public Hostname:
# Subdomain/Domain: stack.example.com
# Service: http://traefik.traefik.svc.cluster.local:80
# 3. Copy the connector token and hand it to Obol:
obol tunnel setup --hostname stack.example.com
```
You can paste the whole `cloudflared tunnel run --token …` line the dashboard shows — Obol strips the prefix and keeps the token. This uses a least-privilege, single-tunnel **connector token**, not an account-wide API key, so the credential can only run this one tunnel.
Confirm it's live with `obol tunnel status`. For the full dashboard walkthrough with screenshots, see [Set up a permanent URL](permanent-url.md).
## Step 6: get listed
Register your agent on [ERC-8004](https://eips.ethereum.org/EIPS/eip-8004) so buyers can find it:
```shell
obol sell register \
--chain mainnet \
--name my-quant \
--private-key-file ~/.config/obol/agents/my-quant/wallet.json
```
Registration writes to the on-chain Identity Registry. From there, multiple marketplaces and explorers index your offer:
- **[x402scan.com](https://x402scan.com)** — the broadest cross-chain x402 registry.
- **[Coinbase Bazaar](https://www.coinbase.com/)** — Coinbase's USDC-on-Base agent marketplace.
- **The ERC-8004 contracts directly** — for buyer-agents written against the raw registry.
You don't need to pick one marketplace; registering once gets you indexed by all of them. See [Selling agent services](selling-services.md#get-discoverable-erc-8004-and-marketplaces) for the longer marketplace orientation.
## Step 7: tell your agent to ping you on Telegram
By the time you have an archive node syncing in the background, an index updating, and a paid agent live on a tunnel — you probably don't want to sit and watch a terminal. `obol hermes setup` wires Hermes to a Telegram bot (or Discord, Slack, etc.) so it can message you when things change.
The Telegram bot flow involves talking to two other Telegram bots:
1. **Talk to `@BotFather`** in Telegram (`https://t.me/BotFather`). Send `/newbot`, follow the prompts to pick a name and a username for your bot, and you'll receive an **HTTP API token** (something like `1234567890:ABCdefGhIJKlmNoPQRstUvWXYZabcdefghi`). Save it — this is how Hermes will send messages **as** the bot.
2. **Talk to `@userinfobot`** in Telegram (`https://t.me/userinfobot`). It will reply with your numeric **Telegram user ID** (something like `123456789`). Save this — this is the chat the bot will message.
3. **Start a chat with your new bot** by clicking through the link `@BotFather` gave you, and send it `/start`. Telegram won't let a bot DM you until you initiate the conversation.
4. **Run `obol hermes setup`** and paste both the bot token and your numeric user ID when prompted.
Test it: ask the agent to ping you when the next sync milestone hits. If you get a Telegram message, you're done — you can close the laptop and let the agent work.
## Step 8: iterate
The compounding loop:
- Watch which buyer questions your agent answers poorly — that's the prompt for the next `SOUL.md` edit or skill improvement.
- Watch which queries against your index are popular — that's the prompt for the next index expansion (more contracts decoded, deeper historical coverage, etc.).
- Watch your revenue per buyer. Specialized work is not price-sensitive in the way raw inference is — once you're reliably better than the alternatives, raise the price.
- When you stop an offer, **drain it gracefully** (`obol sell stop --grace 1h`). On-chain buyers' reputation systems penalize abrupt teardown.
A profitable Obol Stack is one where the operator is *bored*. The agent syncs the data, builds the index, sells the queries, sells the replies, pings the operator on Telegram when something interesting happens, and otherwise gets on with it.
## Where to go from here
- [Selling agent services](selling-services.md) — in-depth coverage of `obol sell`, x402 economics, and marketplaces.
- [Installing Networks](installing-networks.mdx) — full archive `--since` reference and multi-network setup.
- [Installing Apps](installing-apps.md) — deploying any Helm chart (your index, your custom services) into the stack.
- [`run-obol-stack` Claude Code skill](https://github.com/ObolNetwork/skills/blob/main/skills/run-obol-stack/SKILL.md) — drive the entire flow from your terminal, with a Claude that already knows the right next command.
---
# Selling Agent Services
URL: https://docs.obol.org/obol-stack/selling-services
# Selling agent services
The Obol Stack turns any pod, model, or sub-agent in your local cluster into a payment-gated HTTP service that buyers — humans or other agents — can pay for over [x402](https://www.x402.org/) micropayments. This page is the orientation for sellers: how to ship your first paid service, which `obol sell` shape fits which kind of agent business, and how to get listed on the marketplaces buyers actually use.
The mental model is: **anything in your cluster that exposes a Kubernetes Service can be wrapped in a `ServiceOffer` and gated behind x402**. Run `obol sell demo` to see the full loop settle end-to-end, then wrap your own services.
:::info
The selling subsystem is alpha software. Run smoke tests on `base-sepolia` before quoting a buyer real prices on mainnet.
:::
## Start here: `obol sell demo`
`obol sell demo` is the "Hello World" of selling on the Obol Stack. It deploys a tiny HTTP service behind an x402 payment gate, exposes it through a Cloudflare quick tunnel, and prints copy-paste instructions for paying it as a buyer.
```shell
obol sell demo # default: 1 OBOL/req on Ethereum mainnet (gas-sponsored)
obol sell demo blocks # 0.0001 USDC/req on base-sepolia (live chain data via eRPC)
obol sell demo quant # 0.01 USDC/req on base-sepolia (agent-driven analysis report)
```
The output walks you through:
1. The public URL where the gated endpoint lives (`https://.trycloudflare.com/services/demo-hello/...`).
2. A `curl` snippet that hits the endpoint and gets back `HTTP 402 Payment Required` with the price.
3. A `python` snippet using the [x402 SDK](https://github.com/coinbase/x402) to pay and consume the response.
Watch the offer reconcile:
```shell
obol sell list
obol sell status demo-hello
```
Once a single paid request settles end-to-end, you understand the loop. Everything below is variations on this same machinery.
## Pick the right `sell` shape
Three shapes, three different agent businesses:
### `obol sell http` — sell access to indexed data, an API, or a dashboard
Wrap any HTTP endpoint in your cluster — an index built from your archive node, a custom analytics API, a curated data feed — and charge per request.
```shell
obol sell http my-index \
--upstream my-svc \
--port 8080 \
--namespace my-ns \
--per-request 0.001 \
--chain base \
--token USDC \
--wallet 0x...your-wallet...
```
This is the path to take when **the value is in the data**: you've synced an archive node from a specific block, built an index on top, and you want to sell access to queries against it that no public RPC will serve.
### `obol sell inference` — sell raw LLM completions
Wrap your cluster's LiteLLM (which already routes to local Ollama and/or your configured cloud providers) and charge per million tokens or per request.
```shell
obol sell inference my-model \
--model qwen3.5:9b \
--per-mtok 1.25 \
--token USDC \
--chain base
```
This is the path when **the value is in the compute**: you've got a GPU, or a model under license, or a low-latency setup, and you want to sell raw token completions to anyone who needs them.
### `obol sell agent` — sell an agent business
Wrap a running agent — with its skills, its reference data, and its memory — as a paid OpenAI-compatible endpoint. Buyers don't pay for tokens; they pay for **specialized work**.
```shell
obol sell agent my-quant \
--instance my-quant \
--per-request 0.05 \
--token USDC \
--chain base
```
This is the **margin-bearing path**. The moat is not the LLM — buyers can rent any model cheaply. The moat is:
- **Proprietary skills** you've written for this agent (the analysis methodology, the parsing tricks, the report format).
- **Reference data** the agent has access to — your archive-node index, your curated knowledge base, your historical results.
- **Iteration**: tighter `SOUL.md`, better tool selection, better failure handling, all guided by what real paying buyers ask for.
A specialized quant agent that answers questions about your archive-node data set will out-earn a generic `qwen3.5:9b` endpoint by an order of magnitude on the same hardware — because the buyer is paying for the answer, not the inference.
## Why pay in `$OBOL` on mainnet
Buyers paying in `$OBOL` on Ethereum mainnet sign an [EIP-2612](https://eips.ethereum.org/EIPS/eip-2612) permit off-chain. The Obol-operated x402 facilitator batches that permit with the on-chain transfer at settlement time, so:
- **Buyers never spend ETH on gas** for an OBOL payment.
- Buyers skip the one-time `approve(Permit2, max)` step that most ERC-20 payment flows require.
- Sellers receive `$OBOL` directly to their agent's wallet.
USDC and other tokens settle on the rails their issuers support (EIP-3009 for USDC on Base, etc.). For everyday smoke tests, use **USDC on `base-sepolia`** — it's free and fast. For live mainnet sales, quote in **OBOL on Ethereum mainnet** (headline gasless UX) or **USDC on Base** (cheap real money).
:::info
When quoting prices, name the unit explicitly — `0.01 OBOL / MTok`, `0.001 USDC / request`. Never write `$0.01`; the payment rail matters and the conversion depends on it.
:::
## Get discoverable: ERC-8004 and marketplaces
Buyers need to find you. The Obol Stack publishes an [ERC-8004](https://eips.ethereum.org/EIPS/eip-8004) agent registration document at `/.well-known/agent-registration.json` describing your services, supported payment methods, and endpoints. To list your agent on a public registry:
```shell
obol sell register \
--chain mainnet \
--name my-quant \
--private-key-file ~/.config/obol/agents/my-quant/wallet.json
```
This publishes your agent's wallet and service catalog to the ERC-8004 Identity Registry on the chain you specify. **Note that this requires ETH on the registering wallet for gas** — registration is not gas-sponsored.
`obol sell demo` deliberately skips registration by default (to avoid double-register reverts and the need for ETH on the agent wallet). Run `obol sell register` later when you want on-chain discovery.
### Where buyers actually look
Once registered, several marketplaces and explorers index ERC-8004 registries and x402-gated endpoints:
- **[x402scan.com](https://x402scan.com)** — the broadest registry of x402-gated services across chains. Indexes the on-chain registry automatically once you've registered.
- **[Coinbase Bazaar](https://www.coinbase.com/)** — Coinbase's agent marketplace, focused on Base. Surfaces USDC-on-Base agent services to its buyer-side audience.
- **The ERC-8004 contracts directly** — for buyer-agents written against the raw on-chain registry, `obol sell register` is all you need. The registry is the source of truth; marketplaces are just frontends.
We do not recommend a single "official" marketplace — the agent-registry ecosystem is evolving fast, and the best strategy is to register on-chain and let multiple indexers pick you up.
## Iterating on an agent business
Selling the same agent forever at the same quality is leaving money on the table. The loop that compounds:
1. **Watch what buyers ask.** Log every paid request body and response. Pay attention to questions your agent gives a mediocre answer to.
2. **Improve the skill, not the model.** Most quality gains come from a sharper `SOUL.md`, better tool selection in the agent's skill, and richer reference data — not from upgrading the LLM behind it.
3. **Expand the reference data.** If your quant agent is good because of an archive-node index, add more indexes. If it's good at parsing a specific contract's events, parse more of them.
4. **Tighten the price.** Once the agent is reliably better than the alternatives, raise the per-request price. The buyers paying for specialized work are not price-sensitive in the way buyers paying for raw inference are.
5. **Drain old offers gracefully.** Use `obol sell stop --grace 1h` so in-flight buyers can wind down; only `--force` when you need to reclaim a path immediately. Abrupt teardown is a worse reputation signal on-chain than a drain.
## Lifecycle: drain, delete, replace
```shell
# Drain gracefully — advertises wind-down via discovery, then tears down the route
obol sell stop my-quant --namespace my-ns --grace 1h
# Force-stop immediately (worse reputation signal)
obol sell stop my-quant --namespace my-ns --force
# Delete the offer and clean up
obol sell delete my-quant --namespace my-ns
```
Deletion removes the ServiceOffer CR, cascades the underlying Middleware and HTTPRoute via owner references, and deactivates the ERC-8004 registration (sets `active=false`). The agent's wallet and accumulated revenue are untouched.
## Verifying your paths
When you've shipped your first real (non-demo) offer, walk these checks:
```shell
export TUNNEL_URL=$(obol tunnel status | grep -oE 'https://[a-z0-9-]+\.trycloudflare\.com')
# Public frontend (should be 200 — but cluster-admin UI; do not expose deeper routes)
curl -s -o /dev/null -w "%{http_code}\n" "$TUNNEL_URL/"
# Your paid route (should be 402 with payment requirements)
curl -s -w "\nHTTP %{http_code}\n" -X POST \
"$TUNNEL_URL/services/my-quant/v1/chat/completions" \
-H "Content-Type: application/json" \
-d '{"model":"qwen3.5:9b","messages":[{"role":"user","content":"ping"}]}'
# Your ERC-8004 registration document
curl -s "$TUNNEL_URL/.well-known/agent-registration.json" | jq .
```
A `402` with a JSON body containing `accepts[].asset`, `accepts[].amount`, and `accepts[].payTo` confirms the gate is live.
## Going deeper
- [Build a profitable Obol Stack](build-a-profitable-stack.md) — the end-to-end narrative from archive-node sync to a discoverable, billable specialized agent.
- [Installing Networks](installing-networks.mdx) — sync local Ethereum / Aztec / L2 nodes, including bounded archive nodes via `--since`.
- The source-repo guide [`obol-stack/docs/guides/monetize-inference.md`](https://github.com/ObolNetwork/obol-stack/blob/main/docs/guides/monetize-inference.md) covers the ServiceOffer condition state machine, the self-hosted x402 facilitator path, and the buyer-side `blockrun-llm` SDK in depth.
- The Claude Code skill [`run-obol-stack`](https://github.com/ObolNetwork/skills/blob/main/skills/run-obol-stack/SKILL.md) drives all of this from your terminal end-to-end.
---
# Set up a Permanent URL
URL: https://docs.obol.org/obol-stack/permanent-url
# Set up a permanent URL
By default `obol stack up` brings up a **temporary** Cloudflare quick tunnel. Its `https://.trycloudflare.com` address is great for local testing, but it **changes on every restart** — so anyone who bookmarked it, or any ERC-8004 registration that points at it, breaks the next time your stack comes back up.
Once you're ready to attract buyers, give your stack a **permanent URL** on a hostname you control. Obol does this with a Cloudflare **connector token**: a least-privilege, single-tunnel credential — *not* an account-wide API key. You create the tunnel in the Cloudflare dashboard, and Obol runs the connector for you.
:::info
**Prerequisite — a Cloudflare account with a domain.** You need a [Cloudflare](https://dash.cloudflare.com) account (the free plan is fine) with a domain that lives as a **zone** in that account — either bought through Cloudflare Registrar or transferred/added in. The hostname you expose has to live on that domain.
**No domain yet?** You have two options, whichever is easier:
- **In the Cloudflare dashboard** (recommended if you're more comfortable there) — buy a domain via [Registrar](https://dash.cloudflare.com/?to=/:account/registrar) or add an existing one as a zone, then come back here.
- **From the CLI** (optional convenience) — `obol domain search `, `obol domain check `, and `obol domain register ` wrap Cloudflare Registrar so you never leave the terminal. `obol domain list` shows domains you already own.
Either way, **registering a domain is billable**, so your Cloudflare account needs a saved payment method. The CLI path also needs a scoped Cloudflare **API token** (Account → Domain permission) — note this is a *different* credential from the tunnel connector token below.
:::
## 1. Create the tunnel and copy its token
Open the [Cloudflare Zero Trust dashboard](https://one.dash.cloudflare.com) → **Networks → Tunnels → Create a tunnel**, and choose the **Cloudflared** connector type. On the **Create a Tunnel** screen, give it a name (e.g. `Obol Agent Storefront`), pick your operating system under **Setup Environment**, and copy the token from the **Install and Run** commands — it's the long `eyJ…` value.
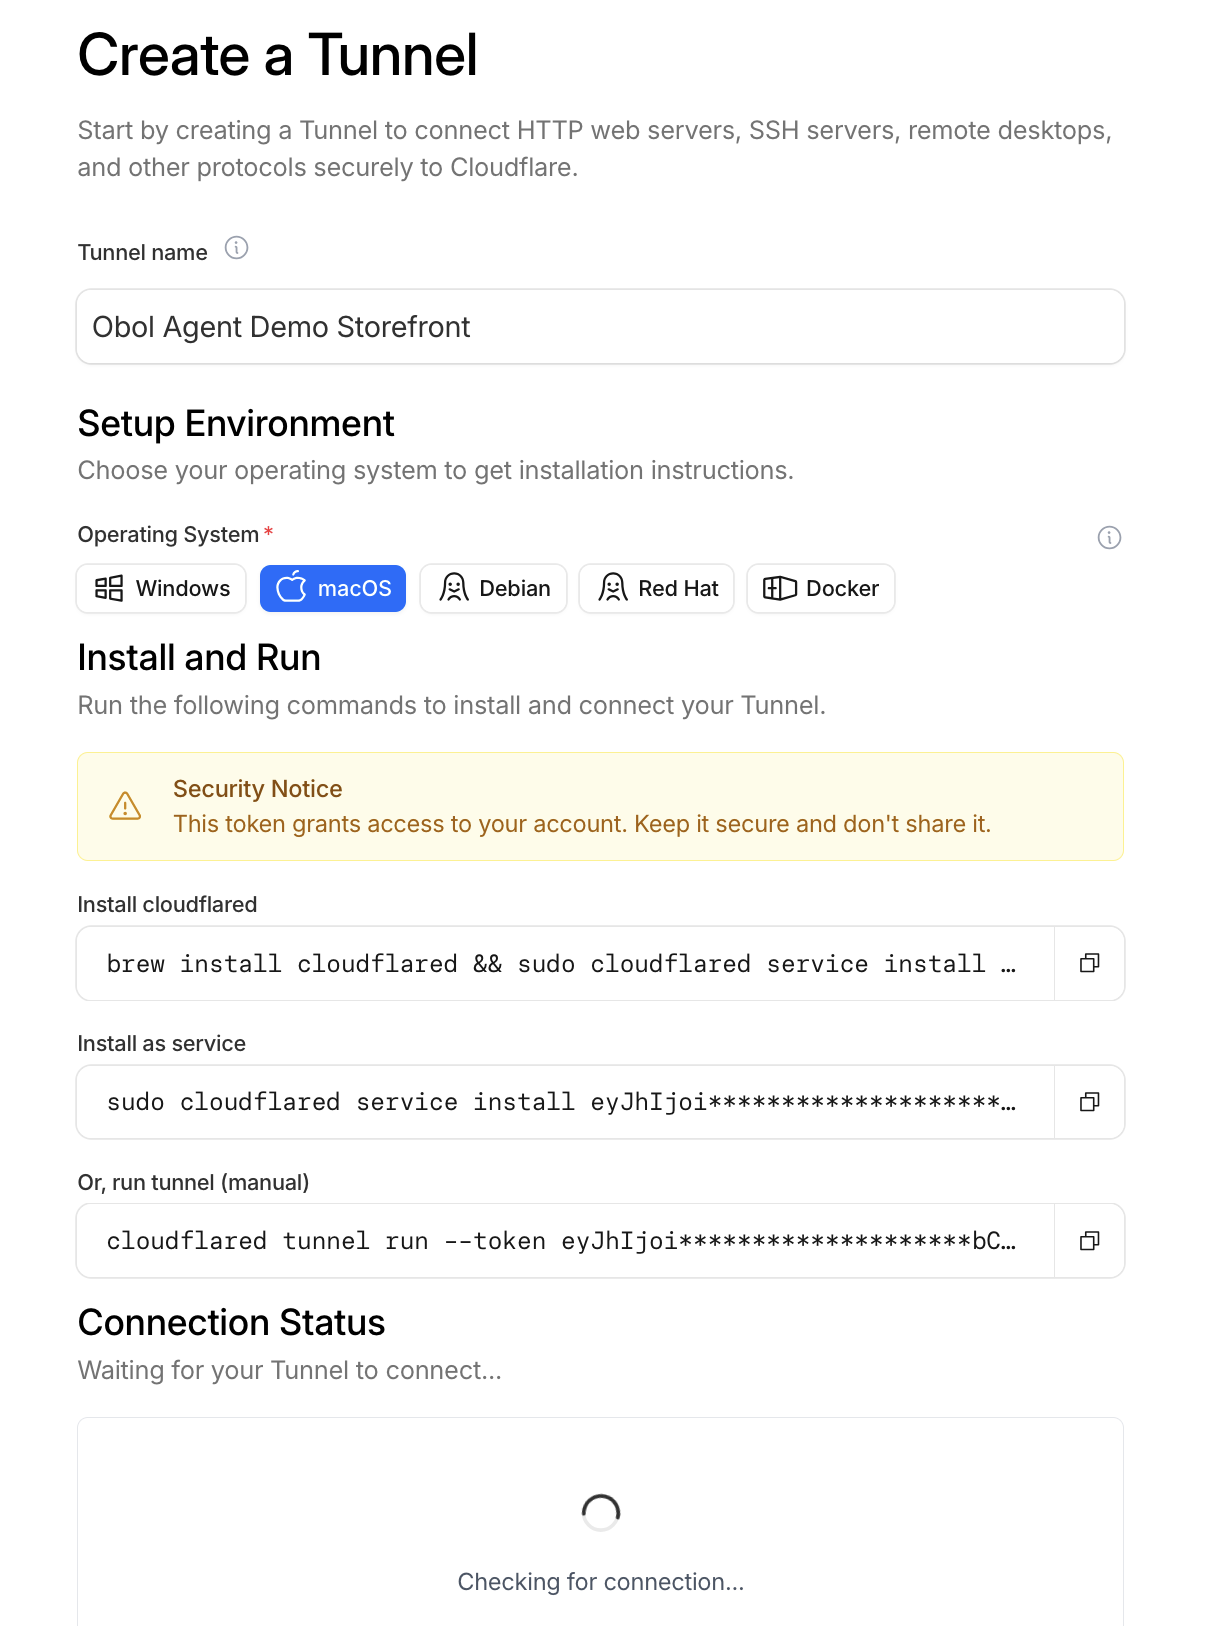
Name the tunnel, then copy the eyJ… token from the install commands.
:::warning
You do **not** run any of the commands Cloudflare shows — Obol runs the connector inside your cluster, so you don't install `cloudflared` yourself. You only need the token. The easiest is to copy the whole `cloudflared tunnel run --token eyJ…` line and paste it into Obol; it strips the prefix and keeps the token. Treat the token like a password.
:::
## 2. Publish your stack on a hostname
Next, on **Add published application** (the "Route tunnel" / Public Hostname step), choose the **Subdomain** and **Domain** you want (e.g. `demo` + `obol.org` → `demo.obol.org`), leave **Path** empty, and set the **Service URL** to your cluster's Traefik ingress.
Pick your hostname, then point Service URL at the in-cluster Traefik address.
:::warning
**Set the Service URL to exactly this** — it's the in-cluster address of your stack's Traefik ingress, and it's the same for every Obol Stack:
```
http://traefik.traefik.svc.cluster.local:80
```
Don't use `localhost`, `obol.stack`, or your machine's IP — the connector runs *inside* the cluster, so it must reach Traefik by its Kubernetes service name. Then click **Add route**.
:::
Saving this creates the DNS record and forwards traffic for your hostname into the cluster automatically.
## 3. Hand the token to Obol
```shell
obol tunnel setup --hostname stack.example.com
```
You can paste the bare token, pass it with `--token`, or paste the whole `cloudflared tunnel run --token …` line. If you run `obol tunnel setup` with no token, it walks you through these dashboard steps interactively and prompts for it.
Obol stores the token as an in-cluster secret and runs the connector. Confirm it's live:
```shell
obol tunnel status
```
You should see a **permanent** mode, your hostname, and a connected connector. Your services are now reachable at `https://stack.example.com/...` and survive `obol stack down` / `obol stack up`.
:::tip
With a stable URL in place, register on-chain so buyers can discover you — see [Build a Profitable Obol Stack](build-a-profitable-stack.md#step-6-get-listed) and [Selling Agent Services](selling-services.md).
:::
## Alternative: browser login (no dashboard)
If you'd rather not use the dashboard, Obol can authenticate a locally-managed tunnel through a browser login instead. This needs the [`cloudflared`](https://developers.cloudflare.com/cloudflare-one/connections/connect-networks/downloads/) binary installed on your machine:
```shell
obol tunnel setup --hostname stack.example.com --management local
```
This opens a browser to authorize cloudflared against your Cloudflare account, then creates the tunnel and DNS route for you. It produces the same kind of permanent URL — the only difference is how the tunnel is managed.
## Troubleshooting
- **`obol tunnel status` shows `waiting_for_connections`** — the connector started but hasn't established a connection yet. Give it a few seconds, or check `obol tunnel logs`.
- **Public check fails / 5xx** — confirm the dashboard Public Hostname's Service is exactly `http://traefik.traefik.svc.cluster.local:80` and that the hostname matches the one you passed to `obol tunnel setup`.
- **`Invalid format for Authorization header`** — you pasted a Cloudflare **API token** or Global API Key instead of the **connector token** from the tunnel's install screen. Use the connector token.
- **Need a fresh quick tunnel instead** — `obol tunnel restart` rotates the temporary URL; `obol tunnel setup` is only for the permanent one.
---
# Installing Networks
URL: https://docs.obol.org/obol-stack/installing-networks
# Installing networks
The Obol Stack supports installing multiple blockchain networks on your local Kubernetes cluster. Each network installation creates a unique deployment with its own namespace, allowing you to run multiple instances simultaneously.
## Available networks
View all available networks:
```shell
obol network list
```
Currently supported networks:
| Network | Description |
| --- | --- |
| **ethereum** | Full Ethereum node (execution + consensus clients) |
| **aztec** | Aztec Layer 2 sequencer node |
## Network installation workflow
Installing a network follows a two-step process:
1. **Install** - Generate configuration and save to disk
2. **Sync** - Deploy the configuration to the cluster
This separation allows you to review and modify configuration before deployment.
### Install command
```shell
obol network install [flags]
```
This creates a deployment directory at `~/.config/obol/networks///` containing:
* `values.yaml` - Configuration values (editable)
* `helmfile.yaml` - Deployment definition
### Sync command
```shell
# Auto-selects if only one deployment exists
obol network sync
# By type (auto-selects if only one ethereum deployment)
obol network sync ethereum
# By full identifier
obol network sync /
# Sync all deployments at once
obol network sync --all
```
This deploys the configuration to your Kubernetes cluster using Helmfile.
### Delete command
```shell
# Auto-selects if only one deployment exists
obol network delete
# By type (auto-selects if only one of that type)
obol network delete ethereum
# By full identifier
obol network delete /
```
This removes both the Kubernetes resources and local configuration.
## Ethereum network
Deploy a full Ethereum node with configurable execution and consensus clients.
### Configuration options
| Flag | Description | Options | Default |
| --- | --- | --- | --- |
| `--id` | Deployment identifier | Any string | Network name (e.g. `mainnet`), then petname |
| `--network` | Ethereum network | mainnet, sepolia, hoodi | mainnet |
| `--execution-client` | Execution layer client | reth, geth, nethermind, besu, erigon, ethereumjs | reth |
| `--consensus-client` | Consensus layer client | lighthouse, prysm, teku, nimbus, lodestar, grandine | lighthouse |
| `--mode` | Pruning mode | full, archive | full |
| `--since` | Lower bound for archive history (requires `--mode=archive`) | fork name, duration, block number, `genesis`/`all` | (interactive picker on TTY; `all` on non-TTY) |
### Examples
Deploy an Ethereum node on Hoodi testnet with default clients:
```shell
# Install configuration (ID defaults to "hoodi")
obol network install ethereum --network=hoodi
# Deploy to cluster
obol network sync ethereum/hoodi
```
Deploy a mainnet node with Geth and Prysm:
```shell
obol network install ethereum \
--id=mainnet-prod \
--network=mainnet \
--execution-client=geth \
--consensus-client=prysm
obol network sync ethereum/mainnet-prod
```
Run mainnet and testnet nodes simultaneously:
```shell
obol network install ethereum --network=mainnet
obol network install ethereum --network=hoodi
obol network sync ethereum/mainnet
obol network sync ethereum/hoodi
```
:::warning
Full Ethereum nodes require significant resources. Mainnet execution clients need 1+ TB of storage and can take days to sync. Consider using testnets for development.
:::
### Archive nodes and bounded history (`--since`)
Pruned full nodes are sufficient for everyday RPC use, but they cannot serve historical state. If you plan to **index events, run historical `eth_call`, build a block explorer, or back a query service with a specific app's history**, you need an archive node — and you almost certainly do not need it all the way back to genesis.
`--mode=archive` switches reth to archive mode. `--since` bounds the archive at a known starting point, so you only carry the history you actually need.
```shell
# Archive back to the Cancun hardfork (~800 GB on mainnet)
obol network install ethereum --network=mainnet --mode=archive --since=cancun
# Archive of the last 365 days (~600 GB)
obol network install ethereum --network=mainnet --mode=archive --since=365d
# Archive from a specific block forward (e.g. the block at which your DeFi app was deployed)
obol network install ethereum --network=mainnet --mode=archive --since=22500000
# Full archive from genesis (~4 TB+ on mainnet)
obol network install ethereum --network=mainnet --mode=archive --since=all
```
Accepted `--since` values:
| Form | Example | Meaning |
| --- | --- | --- |
| EL fork name | `merge`, `shanghai`, `cancun`, `prague`, `osaka` | Prune state before that mainnet hardfork. |
| Duration | `365d`, `1y`, `6mo` | Keep approximately the last N blocks (~12s slot rate). |
| Block number | `22500000` | Prune state before that block. |
| `genesis` / `all` | `all` | Full archive from genesis. |
:::info
Fork-name presets reference **mainnet** block numbers. On testnets, use a raw block number or a duration.
:::
When `--mode=archive` is set without `--since` on a TTY, the installer shows an interactive picker. On non-TTY (scripts, CI), the default is `all`. `--since` is currently fine-tuned for **reth**; other execution clients fall back to their chart-default pruning behavior with a warning.
This pairs naturally with [Selling agent services](selling-services.md) — once your archive node has synced from the block at which your target application was deployed, you have a defensible data set that no public RPC will serve, and you can wrap it as a paid endpoint or a specialized agent.
### Check sync status
```shell
# View pod status
obol kubectl get pods -n ethereum-
# Check execution client logs
obol kubectl logs -n ethereum- -l app=execution -f
# Check consensus client logs
obol kubectl logs -n ethereum- -l app=consensus -f
```
## Aztec network
Deploy an Aztec Layer 2 sequencer node for the privacy-focused Ethereum rollup.
### Configuration options
| Flag | Description | Options | Default |
| --- | --- | --- | --- |
| `--id` | Deployment identifier | Any string | Network name (e.g. `mainnet`), then petname |
| `--network` | Aztec network | mainnet | mainnet |
| `--attester-private-key` | Attester private key (hex) | Required | None |
| `--l1-execution-url` | L1 execution RPC URL | URL | ERPC endpoint |
| `--l1-consensus-url` | L1 consensus RPC URL | URL | Public endpoint |
### Example
```shell
obol network install aztec \
--attester-private-key= \
--l1-execution-url=https://geth-prysm-mainnet-1.gcp.obol.tech/ \
--l1-consensus-url=https://prysm-geth-mainnet-1.gcp.obol.tech/
```
Deploy to the cluster:
```shell
obol network sync aztec/
```
:::info
You can use your own Ethereum node endpoints or the in-cluster ERPC endpoint by changing the L1 URL flags.
:::
### Resource requirements
| Resource | Request | Limit |
| --- | --- | --- |
| **CPU** | 4 cores | 8 cores |
| **Memory** | 16 GB | 32 GB |
| **Storage** | 1 TB | - |
:::warning
Ensure your machine has sufficient resources before deploying an Aztec node.
:::
## Managing deployments
### View deployment status
```shell
obol kubectl get namespaces | grep -E "ethereum|aztec"
```
### Modify configuration
```shell
$EDITOR ~/.config/obol/networks///values.yaml
# Re-deploy (auto-selects if only one deployment, otherwise specify)
obol network sync /
```
### Delete a deployment
```shell
# Auto-selects if only one deployment exists
obol network delete
# Or specify explicitly
obol network delete /
```
:::warning
Deletion is permanent. All blockchain data stored in the deployment will be lost.
:::
---
# Installing Apps
URL: https://docs.obol.org/obol-stack/installing-apps
# Installing apps
The Obol Stack supports installing arbitrary Helm charts as managed applications. Each installation creates an isolated deployment with its own namespace, similar to network deployments.
## Install an application
Install any Helm chart using one of the supported reference formats:
```shell
# Install from ArtifactHub (repo/chart format)
obol app install bitnami/redis
# Specific version
obol app install bitnami/postgresql@15.0.0
# Direct URL to chart archive
obol app install https://charts.bitnami.com/bitnami/redis-19.0.0.tgz
# Custom name and deployment ID
obol app install bitnami/postgresql --name mydb --id production
```
:::info
Find charts at [Artifact Hub](https://artifacthub.io).
:::
**Supported chart reference formats:**
| Format | Example |
| --- | --- |
| `repo/chart` | `bitnami/redis` (resolved via ArtifactHub) |
| `repo/chart@version` | `bitnami/redis@19.0.0` |
| `https://.../*.tgz` | Direct URL to chart archive |
**What happens during installation:**
1. Resolves the chart reference (via ArtifactHub for `repo/chart` format).
2. Fetches default values from the chart.
3. Generates a `helmfile.yaml` that references the chart remotely.
4. Saves configuration to `~/.config/obol/applications///`.
## Deploy to the cluster
After installing, deploy the application:
```shell
# Auto-selects if only one app is installed
obol app sync
# By type (auto-selects if only one postgresql deployment)
obol app sync postgresql
# By full identifier
obol app sync postgresql/eager-fox
```
Check status:
```shell
obol kubectl get all -n postgresql-eager-fox
```
## List applications
```shell
# Simple list
obol app list
# Detailed output
obol app list --verbose
```
## Customize configuration
Edit the values file before deploying or re-syncing:
```shell
$EDITOR ~/.config/obol/applications/postgresql/eager-fox/values.yaml
# Re-deploy with changes (auto-selects if only one app)
obol app sync
```
**Local files per deployment:**
* `helmfile.yaml` - Deployment configuration (references chart remotely)
* `values.yaml` - Configuration values (edit to customize)
## Delete an application
```shell
# Auto-selects if only one app is installed
obol app delete
# By type or full identifier
obol app delete postgresql
obol app delete postgresql/eager-fox
# Skip confirmation
obol app delete postgresql/eager-fox --force
```
This removes the Kubernetes namespace, all deployed resources, and the local configuration directory.
## Default infrastructure
The following services are deployed automatically when the stack starts (you do not need to install them):
| Service | Namespace | Purpose |
| --- | --- | --- |
| **Hermes (default agent)** | `hermes-obol-agent` | AI agent + dashboard |
| **eRPC** | `erpc` | Unified RPC load balancer for Ethereum endpoints |
| **Obol Frontend** | `obol-frontend` | Web management dashboard (local-only) |
| **Monitoring** | `monitoring` | Prometheus + kube-prometheus-stack |
| **Traefik** | `traefik` | Gateway API ingress controller |
| **Cloudflared** | `traefik` | Cloudflare tunnel connector |
| **LiteLLM** | `llm` | OpenAI-compatible LLM gateway |
| **x402 verifier + ServiceOffer controller** | `x402` | Payment gating for `obol sell` |
View all running services:
```shell
obol helm list -A
```
---
# FAQ
URL: https://docs.obol.org/obol-stack/faq
# Frequently Asked Questions
## General
### What is the Obol Stack?
The Obol Stack is a local Kubernetes-based environment for running AI agents alongside blockchain infrastructure. It uses k3d (Kubernetes in Docker) to provide a lightweight cluster where you can deploy a default AI agent (Hermes), Ethereum nodes, Layer 2 networks, payment-gated services, and other applications.
### Is the Obol Stack suitable for production?
It is not yet advised. The Obol Stack works on mainnet, as do DV pods, but it would be wise to only use it with less than a threshold amount of validator nodes, or with only as much crypto assets under management that you would be okay with an Obol Agent losing. For production validator deployments, see the [Run a DV](../run-a-dv/start/) docs for the latest mainnet guides.
### What operating systems are supported?
* **macOS** (Darwin) — Intel and Apple Silicon
* **Linux** — amd64 and arm64 architectures
Windows is not currently supported. Windows users may be able to use WSL2, but it is not yet tested.
### What are the hardware requirements?
| Resource | Minimum | Recommended |
| --- | --- | --- |
| **CPU** | 4 cores | 8+ cores |
| **RAM** | 8 GB | 16+ GB |
| **Storage** | 50 GB | 500 GB – 2 TB (depends on networks) |
:::info
Running multiple networks or full Ethereum mainnet nodes significantly increases resource requirements.
:::
## Installation
### The installer fails with "Docker daemon not running"
Ensure Docker is installed and running:
```shell
# Check Docker status
docker info
# Start Docker (macOS)
open -a Docker
# Start Docker (Linux)
sudo systemctl start docker
```
### How do I update the Obol Stack?
Re-run the installer:
```shell
bash <(curl -s https://stack.obol.org)
```
The installer will update the CLI binary while preserving your configuration and data. Apply chart updates inside the running cluster with `obol upgrade`.
### How do I uninstall the Obol Stack?
```shell
obol stack purge -f
rm -f ~/.local/bin/{obol,kubectl,helm,k3d,helmfile,k9s,obolup.sh}
rm -rf ~/.config/obol ~/.local/share/obol
```
### The installer cannot modify /etc/hosts
Manually add the entry:
```shell
echo "127.0.0.1 obol.stack" | sudo tee -a /etc/hosts
```
## The Obol Agent
### What's the default agent?
[Hermes](https://github.com/NousResearch/hermes) is the default Obol Agent runtime as of v0.9.0. `obol stack up` provisions a default Hermes instance in the `hermes-obol-agent` namespace, with its own Ethereum signing wallet and a built-in skill library.
OpenClaw remains supported as an optional alternate runtime — `obol agent new --runtime openclaw` if you want one.
### How do I chat with the agent?
```shell
obol hermes chat
```
That command passes through to the in-cluster Hermes CLI and gives you an interactive chat TUI. Other useful pass-throughs:
```shell
obol hermes skills list # see installed skills
obol hermes config show # inspect config
obol hermes --help # full Hermes CLI surface
```
### How do I get my agent to message me on Telegram / Discord / Slack?
```shell
obol hermes setup
```
This walks through Hermes' messaging integrations. Once configured, the agent can ping you when long-running work finishes, when a paid service settles a transaction, or any time it decides it needs your attention.
### How do I change the model provider?
```shell
obol model setup
```
Or set up a specific provider:
```shell
obol model setup ollama
obol model setup anthropic
obol model setup openai
obol model setup custom --name my-vllm --endpoint http://192.168.1.10:8000/v1 --model qwen36
```
Custom endpoints work with any OpenAI-compatible server (vLLM, sglang, mlx-lm, etc.).
### Where's the agent's Ethereum wallet?
Each agent instance gets a unique Ethereum signing wallet, backed by a remote-signer service. To inspect:
```shell
obol agent wallet address # print the address
obol agent wallet list # list wallets across all instances
```
Back it up — losing it means losing the agent's on-chain identity:
```shell
obol agent wallet backup -o ~/obol-wallet-backup.json --passphrase "..."
```
## Selling services
### What is `obol sell demo`?
`obol sell demo` deploys a small HTTP service behind an x402 payment gate and prints copy-paste instructions for paying it. It's the canonical "first paid endpoint" experience on the Obol Stack.
```shell
obol sell demo # 1 OBOL/req on Ethereum mainnet
obol sell demo blocks # 0.0001 USDC/req on base-sepolia
obol sell demo quant # 0.01 USDC/req on base-sepolia
```
Use it to see the full sell → discover → pay → receive loop end-to-end before you wrap your own services with `obol sell http` or `obol sell inference`.
### Why pay in $OBOL on mainnet?
Buyers paying in `$OBOL` on Ethereum mainnet sign an EIP-2612 permit off-chain. The Obol-operated x402 facilitator batches that permit with the transfer at settlement time, **so buyers never spend ETH on gas** and never need to do a one-time `approve`. They just sign a message, the seller gets paid in OBOL, the facilitator covers the on-chain cost.
USDC and other tokens settle on the rail their issuer supports (EIP-3009 for USDC).
### How do I list my service on a public agent registry?
```shell
obol sell register --chain mainnet --name my-service --private-key-file
```
This publishes the agent's wallet + service catalog to the [ERC-8004](https://eips.ethereum.org/EIPS/eip-8004) Identity Registry on the chain you specify. Note that this requires ETH on the registering wallet for gas.
`obol sell demo` deliberately skips registration by default — run `obol sell register` later when you want on-chain discovery.
## Stack operations
### The cluster fails to start
**Port conflicts:**
The Obol Stack uses ports 80, 443, 8080, and 8443. Check for conflicts:
```shell
lsof -i :8080
lsof -i :8443
```
If ports 80/443 are taken (common on macOS where they require root), edit `~/.config/obol/k3d.yaml` and remove the `80:80` and `443:443` entries (keep `8080:80` and `8443:443`). Access at `http://obol.stack:8080` instead.
**Previous cluster not cleaned up:**
```shell
k3d cluster delete --all
obol stack init --force
obol stack up
```
### Can I use my existing kubectl configuration?
The Obol Stack uses an isolated kubeconfig at `~/.config/obol/kubeconfig.yaml`. To use it with your standard `kubectl`:
```shell
export KUBECONFIG=~/.config/obol/kubeconfig.yaml
kubectl get nodes
```
Or use the bundled passthrough: `obol kubectl get nodes`.
### How do I persist data across cluster restarts?
Data is automatically persisted. `obol stack down` stops the cluster but keeps data in `~/.local/share/obol/`. Only `obol stack purge -f` deletes persistent data.
## Networks
### How do I know which deployment ID was generated?
The deployment ID is displayed when you run `obol network install`. You can also list deployments:
```shell
ls ~/.config/obol/networks/
```
### Can I run multiple instances of the same network?
Yes. Each deployment gets a unique namespace:
```shell
obol network install ethereum --id=mainnet --network=mainnet
obol network install ethereum --id=hoodi --network=hoodi
```
### How long does it take to sync an Ethereum node?
| Network | Client | Approximate Time |
| --- | --- | --- |
| Hoodi | Reth | 2–6 hours |
| Hoodi | Geth | 4–12 hours |
| Mainnet | Reth | 1–3 days |
| Mainnet | Geth | 3–7 days |
:::info
Sync times depend on hardware, network connection, and chain state.
:::
### My network deployment is stuck in Pending state
```shell
obol kubectl describe pod -n
obol kubectl get events -n
obol kubectl get pvc -n
```
Common causes: insufficient Docker resources, PVC not bound, image pull errors.
## Claude Code plugin
### How do I use the Obol skills with Claude Code?
```
/plugin marketplace add ObolNetwork/skills
/plugin install obol@obol
```
The `run-obol-stack` skill teaches Claude how to drive the CLI: bring-up, agent setup, debugging, deploying networks, and walking through `obol sell demo`. Source: [github.com/ObolNetwork/skills](https://github.com/ObolNetwork/skills).
## Troubleshooting
### Error: "stack not running, use 'obol stack up' first"
Start the cluster:
```shell
obol stack up
```
### Error: "deployment not found" or "multiple deployments found"
If you have a single deployment, `obol network sync` auto-selects it. With multiple deployments, specify which one:
```shell
ls ~/.config/obol/networks/
obol network sync ethereum/correct-id
```
### How do I report a bug?
Report issues on GitHub: [https://github.com/ObolNetwork/obol-stack/issues](https://github.com/ObolNetwork/obol-stack/issues)
Include:
* Obol Stack version (`obol version`)
* Operating system and architecture
* Docker version (`docker version`)
* Steps to reproduce
* Relevant logs (`obol kubectl logs -n `)
## Need more help?
Head over to our [Discord](https://discord.gg/n6ebKsX46w) where a member of our team or the community will be happy to assist you.
---
# Walkthroughs
URL: https://docs.obol.org/walkthrough-guides/walkthroughs
# walkthroughs
---
# Walkthrough Guides
URL: https://docs.obol.org/walkthrough-guides/walkthroughs/walkthrough-guides
# Walkthrough Guides
This section contains walkthrough guides for beginner users. Some of these guides are specific to particular hardware or operating systems, and may not replace more general documentation. These guides contain more detailed step-by-step information which may be useful for beginner users with limited experience with Linux, validators, and other topics which the primary guides assume some prior familiarity of.
Some of these guides are community-created, and may contain issues or omissions.
## Running Charon with Native Execution/Consensus Clients - by Atomic Whale
See the guide [here](https://github.com/atomicwhale/obol-guides/blob/main/charon_local-native.md).
This guide covers running Charon with local EC/BN running as system service (systemd). For example, if you have followed one of these guides (Somer Esat Guides / CoinCashew Guides / EthPilar) to set up your node.
## Running Charon with Docker Execution/Consensus Clients - by Atomic Whale
See the guide [here](https://github.com/atomicwhale/obol-guides/blob/main/charon_local-docker.md).
This guide covers running Charon with local EC/BN managed by a docker-based stack (ETH-Docker/Rocket Pool Smart Node).
## Running Charon with remote EC/BN - by Atomic Whale
See the guide [here](https://github.com/atomicwhale/obol-guides/blob/main/charon_remote.md).
This guide covers running Charon with remote EC/BN. For people who already have EC/BN running on a remote/differnt machine, and want to run Charon separately (for example a small VPS).
## Running Multiple Charon instances on one machine - by Atomic Whale
See the guide [here](https://github.com/atomicwhale/obol-guides/blob/main/charon_multiple.md).
This guide covers steps to run multiple Charon instaces on one machine.
---
# Intro
URL: https://docs.obol.org/sdk/index
# Intro
**SDK Version:** v2.11.8
## Obol SDK
This repo contains the Obol Software Development Kit, for creating Distributed Validators with the help of the [Obol API](../api/what-is-this-api.md).
## Getting Started
Checkout our [docs](../advanced-and-troubleshooting/advanced/create-a-dv-using-the-sdk.mdx), [examples](https://github.com/ObolNetwork/obol-sdk-examples/), and SDK [reference](https://obolnetwork.github.io/obol-sdk). Further guides and walkthroughs coming soon.
### Terms and Conditions
## Terms and Conditions
To use obol-sdk and in order to be able to create a cluster definition or accept an invite to join a cluster, you must accept the [latest Obol terms and conditions](https://obol.org/terms.pdf) by calling acceptObolLatestTermsAndConditions.
## ⚠️ Important Security Notice:
If you're integrating this SDK with a **backend** (e.g., in Node.js), and you store a private key for executing splitter transactions, handle it with extreme caution. Ensure that:
- The private key is securely stored (e.g., in an `.env` file).
- Never commit or push your `.env` file containing the private key to version control.
## ⚡️ Integration with Safe Wallet
When integrating the Obol SDK with a **Safe Wallet**, you can either pass an RPC URL OR provide the `RPC_MAINNET` or `RPC_HOLESKY` or `RPC_GNOSIS` or `RPC_SEPOLIA` or `RPC_HOODI` environment variable, pointing to the correct network's RPC URL. This is required to interact with Safe kit.
## Contributing
Please review the following guidelines:
- [How to Report Bugs](#how-to-report-bugs)
- [How to Propose Changes](#how-to-propose-changes)
- [Code Review Process](#code-review-process)
### How to Report Bugs
If you encounter a bug or unexpected behavior, please follow these steps to report it:
1. Go to the "Issues" tab of this repository.
2. Click on the "Get started" button in the Bug report section.
3. Provide a clear title and description of the issue following the format provided.
### How to Propose Changes
If you'd like to propose improvements or new features, please follow these steps:
1. Fork this repository.
2. Create a new branch for your changes.
3. Make your changes and commit them with clear messages.
4. Open a pull request with a detailed description of the changes.
### Code Review Process
All contributions are reviewed before they are merged into the main branch. Please address any feedback provided during the review process.
Thank you for contributing to Obol-SDK!
## Next.js / SSR Configuration
If using this SDK in **Next.js** or other SSR frameworks, add this minimal config to your `next.config.js`:
```javascript
webpack: (config, { isServer, webpack }) => {
if (!isServer) {
config.plugins.push(
new webpack.DefinePlugin({
'process.stdout.isTTY': 'false',
'process.stderr.isTTY': 'false',
})
);
} else {
// Server: Externalize native dependencies
config.externals = config.externals || [];
config.externals.push({
'@chainsafe/bls': 'commonjs @chainsafe/bls',
'@chainsafe/blst': 'commonjs @chainsafe/blst',
'bcrypto': 'commonjs bcrypto',
});
}
// Ignore .node files
config.plugins.push(
new webpack.IgnorePlugin({ resourceRegExp: /\.node$/ })
);
return config;
}
```
## Enumerations
- [FORK\_MAPPING](enumerations/FORK_MAPPING.md)
## Classes
- [EOA](classes/EOA.md)
- [Exit](classes/Exit.md)
- [Incentives](classes/Incentives.md)
- [Client](classes/Client.md)
- [ObolSplits](classes/ObolSplits.md)
## Interfaces
- [ClusterDefinition](interfaces/ClusterDefinition.md)
- [RewardsSplitPayload](interfaces/RewardsSplitPayload.md)
- [ExitOperator](interfaces/ExitOperator.md)
- [ExitClusterDefinition](interfaces/ExitClusterDefinition.md)
- [ExitDistributedValidator](interfaces/ExitDistributedValidator.md)
- [ExitClusterConfig](interfaces/ExitClusterConfig.md)
- [ExitValidationMessage](interfaces/ExitValidationMessage.md)
- [SignedExitValidationMessage](interfaces/SignedExitValidationMessage.md)
- [ExitValidationBlob](interfaces/ExitValidationBlob.md)
- [ExitValidationPayload](interfaces/ExitValidationPayload.md)
- [ExistingExitValidationBlobData](interfaces/ExistingExitValidationBlobData.md)
## Type Aliases
- [ClusterOperator](type-aliases/ClusterOperator.md)
- [OperatorPayload](type-aliases/OperatorPayload.md)
- [ClusterCreator](type-aliases/ClusterCreator.md)
- [ClusterValidator](type-aliases/ClusterValidator.md)
- [ClusterPayload](type-aliases/ClusterPayload.md)
- [SplitRecipient](type-aliases/SplitRecipient.md)
- [TotalSplitPayload](type-aliases/TotalSplitPayload.md)
- [OVMBaseSplitPayload](type-aliases/OVMBaseSplitPayload.md)
- [OVMRewardsSplitPayload](type-aliases/OVMRewardsSplitPayload.md)
- [OVMTotalSplitPayload](type-aliases/OVMTotalSplitPayload.md)
- [OVMSplitPayload](type-aliases/OVMSplitPayload.md)
- [SplitV2Recipient](type-aliases/SplitV2Recipient.md)
- [OWRTranches](type-aliases/OWRTranches.md)
- [BuilderRegistrationMessage](type-aliases/BuilderRegistrationMessage.md)
- [BuilderRegistration](type-aliases/BuilderRegistration.md)
- [DepositData](type-aliases/DepositData.md)
- [DistributedValidator](type-aliases/DistributedValidator.md)
- [ClusterLock](type-aliases/ClusterLock.md)
- [ClaimableIncentives](type-aliases/ClaimableIncentives.md)
- [ETH\_ADDRESS](type-aliases/ETH_ADDRESS.md)
- [ProviderType](type-aliases/ProviderType.md)
- [SafeRpcUrl](type-aliases/SafeRpcUrl.md)
- [SignerType](type-aliases/SignerType.md)
- [ClaimIncentivesResponse](type-aliases/ClaimIncentivesResponse.md)
- [HttpRequestFunc](type-aliases/HttpRequestFunc.md)
- [OVMArgs](type-aliases/OVMArgs.md)
- [OVMRequestWithdrawalPayload](type-aliases/OVMRequestWithdrawalPayload.md)
- [EOAWithdrawalPayload](type-aliases/EOAWithdrawalPayload.md)
- [OVMDepositPayload](type-aliases/OVMDepositPayload.md)
- [EOADepositPayload](type-aliases/EOADepositPayload.md)
## Variables
- [CAPELLA\_FORK\_MAPPING](variables/CAPELLA_FORK_MAPPING.md)
## Functions
- [validateClusterLock](functions/validateClusterLock.md)
- [clusterConfigOrDefinitionHash](functions/clusterConfigOrDefinitionHash.md)
- [clusterLockHash](functions/clusterLockHash.md)
- [verifyDepositData](functions/verifyDepositData.md)
---
# Enumerations
URL: https://docs.obol.org/sdk/enumerations
# Enumerations
---
# FORK_MAPPING
URL: https://docs.obol.org/sdk/enumerations/fork_mapping
# FORK\_MAPPING
Defined in: [types.ts:13](https://github.com/ObolNetwork/obol-sdk/blob/5137bd5c4ded55a50234f19135ea3a5bfeab4d47/src/types.ts#L13)
Permitted ChainID's
## Enumeration Members
| Enumeration Member | Value | Description | Defined in |
| ------ | ------ | ------ | ------ |
| `0x00000000` | `1` | Mainnet. | [types.ts:15](https://github.com/ObolNetwork/obol-sdk/blob/5137bd5c4ded55a50234f19135ea3a5bfeab4d47/src/types.ts#L15) |
| `0x00001020` | `5` | Goerli/Prater. | [types.ts:18](https://github.com/ObolNetwork/obol-sdk/blob/5137bd5c4ded55a50234f19135ea3a5bfeab4d47/src/types.ts#L18) |
| `0x00000064` | `100` | Gnosis Chain. | [types.ts:21](https://github.com/ObolNetwork/obol-sdk/blob/5137bd5c4ded55a50234f19135ea3a5bfeab4d47/src/types.ts#L21) |
| `0x01017000` | `17000` | Holesky. | [types.ts:24](https://github.com/ObolNetwork/obol-sdk/blob/5137bd5c4ded55a50234f19135ea3a5bfeab4d47/src/types.ts#L24) |
| `0x90000069` | `11155111` | Sepolia. | [types.ts:27](https://github.com/ObolNetwork/obol-sdk/blob/5137bd5c4ded55a50234f19135ea3a5bfeab4d47/src/types.ts#L27) |
| `0x10000910` | `560048` | Hoodi Chain. | [types.ts:30](https://github.com/ObolNetwork/obol-sdk/blob/5137bd5c4ded55a50234f19135ea3a5bfeab4d47/src/types.ts#L30) |
---
# Classes
URL: https://docs.obol.org/sdk/classes
# Classes
---
# Client
URL: https://docs.obol.org/sdk/classes/client
# Client
Defined in: [index.ts:67](https://github.com/ObolNetwork/obol-sdk/blob/5137bd5c4ded55a50234f19135ea3a5bfeab4d47/src/index.ts#L67)
Obol sdk Client can be used for creating, managing and activating distributed validators.
## Extends
- `Base`
## Constructors
### Constructor
> **new Client**(`config`, `signer?`, `provider?`): `Client`
Defined in: [index.ts:113](https://github.com/ObolNetwork/obol-sdk/blob/5137bd5c4ded55a50234f19135ea3a5bfeab4d47/src/index.ts#L113)
#### Parameters
| Parameter | Type | Description |
| ------ | ------ | ------ |
| `config` | \{ `baseUrl?`: `string`; `chainId?`: `number`; \} | Client configurations |
| `config.baseUrl?` | `string` | obol-api url |
| `config.chainId?` | `number` | Blockchain network ID |
| `signer?` | [`SignerType`](../type-aliases/SignerType.md) | ethersJS Signer |
| `provider?` | [`ProviderType`](../type-aliases/ProviderType.md) | - |
#### Returns
`Client`
Obol-SDK Client instance
An example of how to instantiate obol-sdk Client:
[obolClient](https://github.com/ObolNetwork/obol-sdk-examples/blob/main/TS-Example/index.ts#L29)
#### Overrides
`Base.constructor`
## Properties
| Property | Modifier | Type | Description | Defined in |
| ------ | ------ | ------ | ------ | ------ |
| `incentives` | `public` | [`Incentives`](Incentives.md) | The incentives module, responsible for managing Obol tokens distribution. | [index.ts:77](https://github.com/ObolNetwork/obol-sdk/blob/5137bd5c4ded55a50234f19135ea3a5bfeab4d47/src/index.ts#L77) |
| `exit` | `public` | [`Exit`](Exit.md) | The exit module, responsible for managing exit validation. | [index.ts:83](https://github.com/ObolNetwork/obol-sdk/blob/5137bd5c4ded55a50234f19135ea3a5bfeab4d47/src/index.ts#L83) |
| `splits` | `public` | [`ObolSplits`](ObolSplits.md) | The splits module, responsible for managing splits. | [index.ts:89](https://github.com/ObolNetwork/obol-sdk/blob/5137bd5c4ded55a50234f19135ea3a5bfeab4d47/src/index.ts#L89) |
| `eoa` | `public` | [`EOA`](EOA.md) | The eoa module, responsible for managing EOA operations. | [index.ts:95](https://github.com/ObolNetwork/obol-sdk/blob/5137bd5c4ded55a50234f19135ea3a5bfeab4d47/src/index.ts#L95) |
| `provider` | `public` | [`ProviderType`](../type-aliases/ProviderType.md) \| `null` \| `undefined` | The blockchain provider, used to interact with the network. It can be null, undefined, or a valid provider instance and defaults to the Signer provider if Signer is passed. | [index.ts:101](https://github.com/ObolNetwork/obol-sdk/blob/5137bd5c4ded55a50234f19135ea3a5bfeab4d47/src/index.ts#L101) |
## Methods
### acceptObolLatestTermsAndConditions()
> **acceptObolLatestTermsAndConditions**(): `Promise`\<`string`\>
Defined in: [index.ts:143](https://github.com/ObolNetwork/obol-sdk/blob/5137bd5c4ded55a50234f19135ea3a5bfeab4d47/src/index.ts#L143)
Accepts Obol terms and conditions to be able to create or update data.
#### Returns
`Promise`\<`string`\>
terms and conditions acceptance success message.
#### Throws
On unverified signature or wrong hash.
An example of how to use acceptObolLatestTermsAndConditions:
[acceptObolLatestTermsAndConditions](https://github.com/ObolNetwork/obol-sdk-examples/blob/main/TS-Example/index.ts#L44)
***
### createObolRewardsSplit()
> **createObolRewardsSplit**(`rewardsSplitPayload`): `Promise`\<[`ClusterValidator`](../type-aliases/ClusterValidator.md)\>
Defined in: [index.ts:198](https://github.com/ObolNetwork/obol-sdk/blob/5137bd5c4ded55a50234f19135ea3a5bfeab4d47/src/index.ts#L198)
Deploys OWR and Splitter Proxy.
#### Parameters
| Parameter | Type | Description |
| ------ | ------ | ------ |
| `rewardsSplitPayload` | [`RewardsSplitPayload`](../interfaces/RewardsSplitPayload.md) | Data needed to deploy owr and splitter. |
#### Returns
`Promise`\<[`ClusterValidator`](../type-aliases/ClusterValidator.md)\>
owr address as withdrawal address and splitter as fee recipient
An example of how to use createObolRewardsSplit:
[createObolRewardsSplit](https://github.com/ObolNetwork/obol-sdk-examples/blob/main/TS-Example/index.ts#L141)
#### Remarks
**⚠️ Important:** If you're storing the private key in an `.env` file, ensure it is securely managed
and not pushed to version control.
***
### createObolTotalSplit()
> **createObolTotalSplit**(`totalSplitPayload`): `Promise`\<[`ClusterValidator`](../type-aliases/ClusterValidator.md)\>
Defined in: [index.ts:325](https://github.com/ObolNetwork/obol-sdk/blob/5137bd5c4ded55a50234f19135ea3a5bfeab4d47/src/index.ts#L325)
Deploys Splitter Proxy.
#### Parameters
| Parameter | Type | Description |
| ------ | ------ | ------ |
| `totalSplitPayload` | [`TotalSplitPayload`](../type-aliases/TotalSplitPayload.md) | Data needed to deploy splitter if it doesnt exist. |
#### Returns
`Promise`\<[`ClusterValidator`](../type-aliases/ClusterValidator.md)\>
splitter address as withdrawal address and splitter as fee recipient too
An example of how to use createObolTotalSplit:
[createObolTotalSplit](https://github.com/ObolNetwork/obol-sdk-examples/blob/main/TS-Example/index.ts#L168)
#### Remarks
**⚠️ Important:** If you're storing the private key in an `.env` file, ensure it is securely managed
and not pushed to version control.
***
### getOWRTranches()
> **getOWRTranches**(`owrAddress`): `Promise`\<[`OWRTranches`](../type-aliases/OWRTranches.md)\>
Defined in: [index.ts:430](https://github.com/ObolNetwork/obol-sdk/blob/5137bd5c4ded55a50234f19135ea3a5bfeab4d47/src/index.ts#L430)
Read OWR Tranches.
#### Parameters
| Parameter | Type | Description |
| ------ | ------ | ------ |
| `owrAddress` | `string` | Address of the Deployed OWR Contract |
#### Returns
`Promise`\<[`OWRTranches`](../type-aliases/OWRTranches.md)\>
owr tranch information about principal and reward reciepient, as well as the principal amount
#### Remarks
**⚠️ Important:** If you're storing the private key in an `.env` file, ensure it is securely managed
and not pushed to version control.
***
### createClusterDefinition()
> **createClusterDefinition**(`newCluster`): `Promise`\<`string`\>
Defined in: [index.ts:448](https://github.com/ObolNetwork/obol-sdk/blob/5137bd5c4ded55a50234f19135ea3a5bfeab4d47/src/index.ts#L448)
Creates a cluster definition which contains cluster configuration.
#### Parameters
| Parameter | Type | Description |
| ------ | ------ | ------ |
| `newCluster` | [`ClusterPayload`](../type-aliases/ClusterPayload.md) | The new unique cluster. |
#### Returns
`Promise`\<`string`\>
config_hash.
#### Throws
On duplicate entries, missing or wrong cluster keys.
An example of how to use createClusterDefinition:
[createObolCluster](https://github.com/ObolNetwork/obol-sdk-examples/blob/main/TS-Example/index.ts#L59)
***
### acceptClusterDefinition()
> **acceptClusterDefinition**(`operatorPayload`, `configHash`): `Promise`\<[`ClusterDefinition`](../interfaces/ClusterDefinition.md)\>
Defined in: [index.ts:513](https://github.com/ObolNetwork/obol-sdk/blob/5137bd5c4ded55a50234f19135ea3a5bfeab4d47/src/index.ts#L513)
Approves joining a cluster with specific configuration.
#### Parameters
| Parameter | Type | Description |
| ------ | ------ | ------ |
| `operatorPayload` | [`OperatorPayload`](../type-aliases/OperatorPayload.md) | The operator data including signatures. |
| `configHash` | `string` | The config hash of the cluster which the operator confirms joining to. |
#### Returns
`Promise`\<[`ClusterDefinition`](../interfaces/ClusterDefinition.md)\>
The cluster definition.
#### Throws
On unauthorized, duplicate entries, missing keys, not found cluster or invalid data.
An example of how to use acceptClusterDefinition:
[acceptClusterDefinition](https://github.com/ObolNetwork/obol-sdk-examples/blob/main/TS-Example/index.ts#L106)
***
### getClusterDefinition()
> **getClusterDefinition**(`configHash`): `Promise`\<[`ClusterDefinition`](../interfaces/ClusterDefinition.md)\>
Defined in: [index.ts:570](https://github.com/ObolNetwork/obol-sdk/blob/5137bd5c4ded55a50234f19135ea3a5bfeab4d47/src/index.ts#L570)
#### Parameters
| Parameter | Type | Description |
| ------ | ------ | ------ |
| `configHash` | `string` | The configuration hash returned in createClusterDefinition |
#### Returns
`Promise`\<[`ClusterDefinition`](../interfaces/ClusterDefinition.md)\>
The cluster definition for config hash
#### Throws
On not found config hash.
An example of how to use getClusterDefinition:
[getObolClusterDefinition](https://github.com/ObolNetwork/obol-sdk-examples/blob/main/TS-Example/index.ts#L74)
***
### getClusterLock()
> **getClusterLock**(`configHash`): `Promise`\<[`ClusterLock`](../type-aliases/ClusterLock.md)\>
Defined in: [index.ts:589](https://github.com/ObolNetwork/obol-sdk/blob/5137bd5c4ded55a50234f19135ea3a5bfeab4d47/src/index.ts#L589)
#### Parameters
| Parameter | Type | Description |
| ------ | ------ | ------ |
| `configHash` | `string` | The configuration hash in cluster-definition |
#### Returns
`Promise`\<[`ClusterLock`](../type-aliases/ClusterLock.md)\>
The matched cluster details (lock) from DB
#### Throws
On not found cluster definition or lock.
An example of how to use getClusterLock:
[getObolClusterLock](https://github.com/ObolNetwork/obol-sdk-examples/blob/main/TS-Example/index.ts#L89)
***
### getClusterLockByHash()
> **getClusterLockByHash**(`lockHash`): `Promise`\<[`ClusterLock`](../type-aliases/ClusterLock.md)\>
Defined in: [index.ts:605](https://github.com/ObolNetwork/obol-sdk/blob/5137bd5c4ded55a50234f19135ea3a5bfeab4d47/src/index.ts#L605)
#### Parameters
| Parameter | Type | Description |
| ------ | ------ | ------ |
| `lockHash` | `string` | The configuration hash in cluster-definition |
#### Returns
`Promise`\<[`ClusterLock`](../type-aliases/ClusterLock.md)\>
The matched cluster details (lock) from DB
#### Throws
On not found cluster definition or lock.
---
# Interfaces
URL: https://docs.obol.org/sdk/interfaces
# Interfaces
---
# ClusterDefinition
URL: https://docs.obol.org/sdk/interfaces/clusterdefinition
# ClusterDefinition
Defined in: [types.ts:121](https://github.com/ObolNetwork/obol-sdk/blob/5137bd5c4ded55a50234f19135ea3a5bfeab4d47/src/types.ts#L121)
Cluster definition data needed for dkg
## Extends
- [`ClusterPayload`](../type-aliases/ClusterPayload.md)
## Properties
| Property | Type | Description | Overrides | Inherited from | Defined in |
| ------ | ------ | ------ | ------ | ------ | ------ |
| `name` | `string` | The cluster name. | - | `ClusterPayload.name` | [types.ts:97](https://github.com/ObolNetwork/obol-sdk/blob/5137bd5c4ded55a50234f19135ea3a5bfeab4d47/src/types.ts#L97) |
| `operators` | [`ClusterOperator`](../type-aliases/ClusterOperator.md)[] | The cluster nodes operators addresses. | - | `ClusterPayload.operators` | [types.ts:100](https://github.com/ObolNetwork/obol-sdk/blob/5137bd5c4ded55a50234f19135ea3a5bfeab4d47/src/types.ts#L100) |
| `validators` | [`ClusterValidator`](../type-aliases/ClusterValidator.md)[] | The cluster validators information. | - | `ClusterPayload.validators` | [types.ts:103](https://github.com/ObolNetwork/obol-sdk/blob/5137bd5c4ded55a50234f19135ea3a5bfeab4d47/src/types.ts#L103) |
| `deposit_amounts?` | `string`[] \| `null` | The cluster partial deposits in gwei or 32000000000. | - | `ClusterPayload.deposit_amounts` | [types.ts:106](https://github.com/ObolNetwork/obol-sdk/blob/5137bd5c4ded55a50234f19135ea3a5bfeab4d47/src/types.ts#L106) |
| `creator` | [`ClusterCreator`](../type-aliases/ClusterCreator.md) | The creator of the cluster. | - | - | [types.ts:123](https://github.com/ObolNetwork/obol-sdk/blob/5137bd5c4ded55a50234f19135ea3a5bfeab4d47/src/types.ts#L123) |
| `version` | `string` | The cluster configuration version. | - | - | [types.ts:126](https://github.com/ObolNetwork/obol-sdk/blob/5137bd5c4ded55a50234f19135ea3a5bfeab4d47/src/types.ts#L126) |
| `dkg_algorithm` | `string` | The cluster dkg algorithm. | - | - | [types.ts:129](https://github.com/ObolNetwork/obol-sdk/blob/5137bd5c4ded55a50234f19135ea3a5bfeab4d47/src/types.ts#L129) |
| `fork_version` | `string` | The cluster fork version. | - | - | [types.ts:132](https://github.com/ObolNetwork/obol-sdk/blob/5137bd5c4ded55a50234f19135ea3a5bfeab4d47/src/types.ts#L132) |
| `uuid` | `string` | The cluster uuid. | - | - | [types.ts:135](https://github.com/ObolNetwork/obol-sdk/blob/5137bd5c4ded55a50234f19135ea3a5bfeab4d47/src/types.ts#L135) |
| `timestamp` | `string` | The cluster creation timestamp. | - | - | [types.ts:138](https://github.com/ObolNetwork/obol-sdk/blob/5137bd5c4ded55a50234f19135ea3a5bfeab4d47/src/types.ts#L138) |
| `config_hash` | `string` | The cluster configuration hash. | - | - | [types.ts:141](https://github.com/ObolNetwork/obol-sdk/blob/5137bd5c4ded55a50234f19135ea3a5bfeab4d47/src/types.ts#L141) |
| `threshold` | `number` | The distributed validator threshold. | - | - | [types.ts:144](https://github.com/ObolNetwork/obol-sdk/blob/5137bd5c4ded55a50234f19135ea3a5bfeab4d47/src/types.ts#L144) |
| `num_validators` | `number` | The number of distributed validators in the cluster. | - | - | [types.ts:147](https://github.com/ObolNetwork/obol-sdk/blob/5137bd5c4ded55a50234f19135ea3a5bfeab4d47/src/types.ts#L147) |
| `definition_hash?` | `string` | The hash of the cluster definition. | - | - | [types.ts:150](https://github.com/ObolNetwork/obol-sdk/blob/5137bd5c4ded55a50234f19135ea3a5bfeab4d47/src/types.ts#L150) |
| `consensus_protocol?` | `string` | The consensus protocol e.g qbft. | `ClusterPayload.consensus_protocol` | - | [types.ts:153](https://github.com/ObolNetwork/obol-sdk/blob/5137bd5c4ded55a50234f19135ea3a5bfeab4d47/src/types.ts#L153) |
| `target_gas_limit?` | `number` | The target gas limit where default is 36M. | `ClusterPayload.target_gas_limit` | - | [types.ts:156](https://github.com/ObolNetwork/obol-sdk/blob/5137bd5c4ded55a50234f19135ea3a5bfeab4d47/src/types.ts#L156) |
| `compounding?` | `boolean` | A withdrawal mechanism with 0x02 withdrawal credentials. | `ClusterPayload.compounding` | - | [types.ts:159](https://github.com/ObolNetwork/obol-sdk/blob/5137bd5c4ded55a50234f19135ea3a5bfeab4d47/src/types.ts#L159) |
---
# RewardsSplitPayload
URL: https://docs.obol.org/sdk/interfaces/rewardssplitpayload
# RewardsSplitPayload
Defined in: [types.ts:193](https://github.com/ObolNetwork/obol-sdk/blob/5137bd5c4ded55a50234f19135ea3a5bfeab4d47/src/types.ts#L193)
OWR and Split Proxy Params
## Extends
- [`TotalSplitPayload`](../type-aliases/TotalSplitPayload.md)
## Properties
| Property | Type | Description | Inherited from | Defined in |
| ------ | ------ | ------ | ------ | ------ |
| `splitRecipients` | [`SplitRecipient`](../type-aliases/SplitRecipient.md)[] | The split recipients addresses and splits. | `TotalSplitPayload.splitRecipients` | [types.ts:178](https://github.com/ObolNetwork/obol-sdk/blob/5137bd5c4ded55a50234f19135ea3a5bfeab4d47/src/types.ts#L178) |
| `ObolRAFSplit?` | `number` | Split percentageNumber allocated for obol retroactive funding, minimum is 1%. | `TotalSplitPayload.ObolRAFSplit` | [types.ts:181](https://github.com/ObolNetwork/obol-sdk/blob/5137bd5c4ded55a50234f19135ea3a5bfeab4d47/src/types.ts#L181) |
| `distributorFee?` | `number` | The percentageNumber of accrued rewards that is paid to the caller of the distribution function to compensate them for the gas costs of doing so. Cannot be greater than 10%. For example, 5 represents 5%. | `TotalSplitPayload.distributorFee` | [types.ts:184](https://github.com/ObolNetwork/obol-sdk/blob/5137bd5c4ded55a50234f19135ea3a5bfeab4d47/src/types.ts#L184) |
| `controllerAddress?` | `string` | Address that can mutate the split, should be ZeroAddress for immutable split. | `TotalSplitPayload.controllerAddress` | [types.ts:187](https://github.com/ObolNetwork/obol-sdk/blob/5137bd5c4ded55a50234f19135ea3a5bfeab4d47/src/types.ts#L187) |
| `principalRecipient` | `string` | Address that will reclaim validator principal after exit. | - | [types.ts:195](https://github.com/ObolNetwork/obol-sdk/blob/5137bd5c4ded55a50234f19135ea3a5bfeab4d47/src/types.ts#L195) |
| `etherAmount` | `number` | Amount needed to deploy all validators expected for the OWR/Splitter configuration. | - | [types.ts:198](https://github.com/ObolNetwork/obol-sdk/blob/5137bd5c4ded55a50234f19135ea3a5bfeab4d47/src/types.ts#L198) |
| `recoveryAddress?` | `string` | Address that can control where the owr erc-20 tokens can be pushed, if set to zero it goes to splitter or principal address. | - | [types.ts:201](https://github.com/ObolNetwork/obol-sdk/blob/5137bd5c4ded55a50234f19135ea3a5bfeab4d47/src/types.ts#L201) |
---
# Type-Aliases
URL: https://docs.obol.org/sdk/type-aliases
# Type-Aliases
---
# BuilderRegistration
URL: https://docs.obol.org/sdk/type-aliases/builderregistration
# BuilderRegistration
> **BuilderRegistration** = `object`
Defined in: [types.ts:290](https://github.com/ObolNetwork/obol-sdk/blob/5137bd5c4ded55a50234f19135ea3a5bfeab4d47/src/types.ts#L290)
Pre-generated Signed Validator Builder Registration
## Properties
| Property | Type | Description | Defined in |
| ------ | ------ | ------ | ------ |
| `message` | [`BuilderRegistrationMessage`](BuilderRegistrationMessage.md) | Builder registration message. | [types.ts:292](https://github.com/ObolNetwork/obol-sdk/blob/5137bd5c4ded55a50234f19135ea3a5bfeab4d47/src/types.ts#L292) |
| `signature` | `string` | BLS signature of the builder registration message. | [types.ts:295](https://github.com/ObolNetwork/obol-sdk/blob/5137bd5c4ded55a50234f19135ea3a5bfeab4d47/src/types.ts#L295) |
---
# BuilderRegistrationMessage
URL: https://docs.obol.org/sdk/type-aliases/builderregistrationmessage
# BuilderRegistrationMessage
> **BuilderRegistrationMessage** = `object`
Defined in: [types.ts:273](https://github.com/ObolNetwork/obol-sdk/blob/5137bd5c4ded55a50234f19135ea3a5bfeab4d47/src/types.ts#L273)
Unsigned DV Builder Registration Message
## Properties
| Property | Type | Description | Defined in |
| ------ | ------ | ------ | ------ |
| `fee_recipient` | `string` | The DV fee recipient. | [types.ts:275](https://github.com/ObolNetwork/obol-sdk/blob/5137bd5c4ded55a50234f19135ea3a5bfeab4d47/src/types.ts#L275) |
| `gas_limit` | `number` | Default is 30000000. | [types.ts:278](https://github.com/ObolNetwork/obol-sdk/blob/5137bd5c4ded55a50234f19135ea3a5bfeab4d47/src/types.ts#L278) |
| `timestamp` | `number` | Timestamp when generating cluster lock file. | [types.ts:281](https://github.com/ObolNetwork/obol-sdk/blob/5137bd5c4ded55a50234f19135ea3a5bfeab4d47/src/types.ts#L281) |
| `pubkey` | `string` | The public key of the DV. | [types.ts:284](https://github.com/ObolNetwork/obol-sdk/blob/5137bd5c4ded55a50234f19135ea3a5bfeab4d47/src/types.ts#L284) |
---
# ClusterCreator
URL: https://docs.obol.org/sdk/type-aliases/clustercreator
# ClusterCreator
> **ClusterCreator** = `object`
Defined in: [types.ts:74](https://github.com/ObolNetwork/obol-sdk/blob/5137bd5c4ded55a50234f19135ea3a5bfeab4d47/src/types.ts#L74)
Cluster creator data
## Properties
| Property | Type | Description | Defined in |
| ------ | ------ | ------ | ------ |
| `address` | `string` | The creator address. | [types.ts:76](https://github.com/ObolNetwork/obol-sdk/blob/5137bd5c4ded55a50234f19135ea3a5bfeab4d47/src/types.ts#L76) |
| `config_signature?` | `string` | The cluster configuration signature. | [types.ts:78](https://github.com/ObolNetwork/obol-sdk/blob/5137bd5c4ded55a50234f19135ea3a5bfeab4d47/src/types.ts#L78) |
---
# ClusterLock
URL: https://docs.obol.org/sdk/type-aliases/clusterlock
# ClusterLock
> **ClusterLock** = `object`
Defined in: [types.ts:341](https://github.com/ObolNetwork/obol-sdk/blob/5137bd5c4ded55a50234f19135ea3a5bfeab4d47/src/types.ts#L341)
Cluster Details after DKG is complete
## Properties
| Property | Type | Description | Defined in |
| ------ | ------ | ------ | ------ |
| `cluster_definition` | [`ClusterDefinition`](../interfaces/ClusterDefinition.md) | The cluster definition. | [types.ts:343](https://github.com/ObolNetwork/obol-sdk/blob/5137bd5c4ded55a50234f19135ea3a5bfeab4d47/src/types.ts#L343) |
| `distributed_validators` | [`DistributedValidator`](DistributedValidator.md)[] | The cluster distributed validators. | [types.ts:346](https://github.com/ObolNetwork/obol-sdk/blob/5137bd5c4ded55a50234f19135ea3a5bfeab4d47/src/types.ts#L346) |
| `signature_aggregate` | `string` | The cluster bls signature aggregate. | [types.ts:349](https://github.com/ObolNetwork/obol-sdk/blob/5137bd5c4ded55a50234f19135ea3a5bfeab4d47/src/types.ts#L349) |
| `lock_hash` | `string` | The hash of the cluster lock. | [types.ts:352](https://github.com/ObolNetwork/obol-sdk/blob/5137bd5c4ded55a50234f19135ea3a5bfeab4d47/src/types.ts#L352) |
| `node_signatures?` | `string`[] | Node Signature for the lock hash by the node secp256k1 key. | [types.ts:355](https://github.com/ObolNetwork/obol-sdk/blob/5137bd5c4ded55a50234f19135ea3a5bfeab4d47/src/types.ts#L355) |
---
# ClusterOperator
URL: https://docs.obol.org/sdk/type-aliases/clusteroperator
# ClusterOperator
> **ClusterOperator** = `object`
Defined in: [types.ts:45](https://github.com/ObolNetwork/obol-sdk/blob/5137bd5c4ded55a50234f19135ea3a5bfeab4d47/src/types.ts#L45)
Node operator data
## Properties
| Property | Type | Description | Defined in |
| ------ | ------ | ------ | ------ |
| `address` | `string` | The operator address. | [types.ts:47](https://github.com/ObolNetwork/obol-sdk/blob/5137bd5c4ded55a50234f19135ea3a5bfeab4d47/src/types.ts#L47) |
| `enr?` | `string` | The operator ethereum node record. | [types.ts:50](https://github.com/ObolNetwork/obol-sdk/blob/5137bd5c4ded55a50234f19135ea3a5bfeab4d47/src/types.ts#L50) |
| `fork_version?` | `string` | The cluster fork_version. | [types.ts:53](https://github.com/ObolNetwork/obol-sdk/blob/5137bd5c4ded55a50234f19135ea3a5bfeab4d47/src/types.ts#L53) |
| `version?` | `string` | The cluster version. | [types.ts:56](https://github.com/ObolNetwork/obol-sdk/blob/5137bd5c4ded55a50234f19135ea3a5bfeab4d47/src/types.ts#L56) |
| `enr_signature?` | `string` | The operator enr signature. | [types.ts:59](https://github.com/ObolNetwork/obol-sdk/blob/5137bd5c4ded55a50234f19135ea3a5bfeab4d47/src/types.ts#L59) |
| `config_signature?` | `string` | The operator configuration signature. | [types.ts:62](https://github.com/ObolNetwork/obol-sdk/blob/5137bd5c4ded55a50234f19135ea3a5bfeab4d47/src/types.ts#L62) |
---
# ClusterPayload
URL: https://docs.obol.org/sdk/type-aliases/clusterpayload
# ClusterPayload
> **ClusterPayload** = `object`
Defined in: [types.ts:95](https://github.com/ObolNetwork/obol-sdk/blob/5137bd5c4ded55a50234f19135ea3a5bfeab4d47/src/types.ts#L95)
Cluster configuration
## Extended by
- [`ClusterDefinition`](../interfaces/ClusterDefinition.md)
## Properties
| Property | Type | Description | Defined in |
| ------ | ------ | ------ | ------ |
| `name` | `string` | The cluster name. | [types.ts:97](https://github.com/ObolNetwork/obol-sdk/blob/5137bd5c4ded55a50234f19135ea3a5bfeab4d47/src/types.ts#L97) |
| `operators` | [`ClusterOperator`](ClusterOperator.md)[] | The cluster nodes operators addresses. | [types.ts:100](https://github.com/ObolNetwork/obol-sdk/blob/5137bd5c4ded55a50234f19135ea3a5bfeab4d47/src/types.ts#L100) |
| `validators` | [`ClusterValidator`](ClusterValidator.md)[] | The cluster validators information. | [types.ts:103](https://github.com/ObolNetwork/obol-sdk/blob/5137bd5c4ded55a50234f19135ea3a5bfeab4d47/src/types.ts#L103) |
| `deposit_amounts?` | `string`[] \| `null` | The cluster partial deposits in gwei or 32000000000. | [types.ts:106](https://github.com/ObolNetwork/obol-sdk/blob/5137bd5c4ded55a50234f19135ea3a5bfeab4d47/src/types.ts#L106) |
| `compounding?` | `boolean` | A withdrawal mechanism with 0x02 withdrawal credentials. | [types.ts:109](https://github.com/ObolNetwork/obol-sdk/blob/5137bd5c4ded55a50234f19135ea3a5bfeab4d47/src/types.ts#L109) |
| `target_gas_limit?` | `number` | The target gas limit where default is 36M. | [types.ts:112](https://github.com/ObolNetwork/obol-sdk/blob/5137bd5c4ded55a50234f19135ea3a5bfeab4d47/src/types.ts#L112) |
| `consensus_protocol?` | `string` | The consensus protocol e.g qbft. | [types.ts:115](https://github.com/ObolNetwork/obol-sdk/blob/5137bd5c4ded55a50234f19135ea3a5bfeab4d47/src/types.ts#L115) |
---
# ClusterValidator
URL: https://docs.obol.org/sdk/type-aliases/clustervalidator
# ClusterValidator
> **ClusterValidator** = `object`
Defined in: [types.ts:84](https://github.com/ObolNetwork/obol-sdk/blob/5137bd5c4ded55a50234f19135ea3a5bfeab4d47/src/types.ts#L84)
Validator withdrawal configuration
## Properties
| Property | Type | Description | Defined in |
| ------ | ------ | ------ | ------ |
| `fee_recipient_address` | `string` | Address to receive MEV rewards (if enabled), block proposal and priority fees. | [types.ts:86](https://github.com/ObolNetwork/obol-sdk/blob/5137bd5c4ded55a50234f19135ea3a5bfeab4d47/src/types.ts#L86) |
| `withdrawal_address` | `string` | Address to receive skimming rewards and validator principal at exit. | [types.ts:89](https://github.com/ObolNetwork/obol-sdk/blob/5137bd5c4ded55a50234f19135ea3a5bfeab4d47/src/types.ts#L89) |
---
# DepositData
URL: https://docs.obol.org/sdk/type-aliases/depositdata
# DepositData
> **DepositData** = `object`
Defined in: [types.ts:301](https://github.com/ObolNetwork/obol-sdk/blob/5137bd5c4ded55a50234f19135ea3a5bfeab4d47/src/types.ts#L301)
Required deposit data for validator activation
## Properties
| Property | Type | Description | Defined in |
| ------ | ------ | ------ | ------ |
| `pubkey` | `string` | The public key of the distributed validator. | [types.ts:303](https://github.com/ObolNetwork/obol-sdk/blob/5137bd5c4ded55a50234f19135ea3a5bfeab4d47/src/types.ts#L303) |
| `withdrawal_credentials` | `string` | The 0x01 withdrawal address of the DV. | [types.ts:306](https://github.com/ObolNetwork/obol-sdk/blob/5137bd5c4ded55a50234f19135ea3a5bfeab4d47/src/types.ts#L306) |
| `amount` | `string` | 32 ethers. | [types.ts:309](https://github.com/ObolNetwork/obol-sdk/blob/5137bd5c4ded55a50234f19135ea3a5bfeab4d47/src/types.ts#L309) |
| `deposit_data_root` | `string` | A checksum for DepositData fields . | [types.ts:312](https://github.com/ObolNetwork/obol-sdk/blob/5137bd5c4ded55a50234f19135ea3a5bfeab4d47/src/types.ts#L312) |
| `signature` | `string` | BLS signature of the deposit message. | [types.ts:315](https://github.com/ObolNetwork/obol-sdk/blob/5137bd5c4ded55a50234f19135ea3a5bfeab4d47/src/types.ts#L315) |
---
# DistributedValidator
URL: https://docs.obol.org/sdk/type-aliases/distributedvalidator
# DistributedValidator
> **DistributedValidator** = `object`
Defined in: [types.ts:321](https://github.com/ObolNetwork/obol-sdk/blob/5137bd5c4ded55a50234f19135ea3a5bfeab4d47/src/types.ts#L321)
Required deposit data for validator activation
## Properties
| Property | Type | Description | Defined in |
| ------ | ------ | ------ | ------ |
| `distributed_public_key` | `string` | The public key of the distributed validator. | [types.ts:323](https://github.com/ObolNetwork/obol-sdk/blob/5137bd5c4ded55a50234f19135ea3a5bfeab4d47/src/types.ts#L323) |
| `public_shares` | `string`[] | The public key of the node distributed validator share. | [types.ts:326](https://github.com/ObolNetwork/obol-sdk/blob/5137bd5c4ded55a50234f19135ea3a5bfeab4d47/src/types.ts#L326) |
| `deposit_data?` | `Partial`\<[`DepositData`](DepositData.md)\> | The deposit data for activating the DV. | [types.ts:329](https://github.com/ObolNetwork/obol-sdk/blob/5137bd5c4ded55a50234f19135ea3a5bfeab4d47/src/types.ts#L329) |
| `partial_deposit_data?` | `Partial`\<[`DepositData`](DepositData.md)\>[] | The deposit data with partial amounts or full amount for activating the DV. | [types.ts:332](https://github.com/ObolNetwork/obol-sdk/blob/5137bd5c4ded55a50234f19135ea3a5bfeab4d47/src/types.ts#L332) |
| `builder_registration?` | [`BuilderRegistration`](BuilderRegistration.md) | pre-generated signed validator builder registration to be sent to builder network. | [types.ts:335](https://github.com/ObolNetwork/obol-sdk/blob/5137bd5c4ded55a50234f19135ea3a5bfeab4d47/src/types.ts#L335) |
---
# ETH_ADDRESS
URL: https://docs.obol.org/sdk/type-aliases/eth_address
# ETH\_ADDRESS
> **ETH\_ADDRESS** = `string`
Defined in: [types.ts:381](https://github.com/ObolNetwork/obol-sdk/blob/5137bd5c4ded55a50234f19135ea3a5bfeab4d47/src/types.ts#L381)
String expected to be Ethereum Address
---
# OperatorPayload
URL: https://docs.obol.org/sdk/type-aliases/operatorpayload
# OperatorPayload
> **OperatorPayload** = `Partial`\<[`ClusterOperator`](ClusterOperator.md)\> & `Required`\<`Pick`\<[`ClusterOperator`](ClusterOperator.md), `"enr"` \| `"version"`\>\>
Defined in: [types.ts:68](https://github.com/ObolNetwork/obol-sdk/blob/5137bd5c4ded55a50234f19135ea3a5bfeab4d47/src/types.ts#L68)
A partial view of `ClusterOperator` with `enr` and `version` as required properties.
---
# SplitRecipient
URL: https://docs.obol.org/sdk/type-aliases/splitrecipient
# SplitRecipient
> **SplitRecipient** = `object`
Defined in: [types.ts:165](https://github.com/ObolNetwork/obol-sdk/blob/5137bd5c4ded55a50234f19135ea3a5bfeab4d47/src/types.ts#L165)
Split Recipient Keys
## Properties
| Property | Type | Description | Defined in |
| ------ | ------ | ------ | ------ |
| `account` | `string` | The split recipient address. | [types.ts:167](https://github.com/ObolNetwork/obol-sdk/blob/5137bd5c4ded55a50234f19135ea3a5bfeab4d47/src/types.ts#L167) |
| `percentAllocation` | `number` | The recipient split. | [types.ts:170](https://github.com/ObolNetwork/obol-sdk/blob/5137bd5c4ded55a50234f19135ea3a5bfeab4d47/src/types.ts#L170) |
---
# TotalSplitPayload
URL: https://docs.obol.org/sdk/type-aliases/totalsplitpayload
# TotalSplitPayload
> **TotalSplitPayload** = `object`
Defined in: [types.ts:176](https://github.com/ObolNetwork/obol-sdk/blob/5137bd5c4ded55a50234f19135ea3a5bfeab4d47/src/types.ts#L176)
Split Proxy Params
## Extended by
- [`RewardsSplitPayload`](../interfaces/RewardsSplitPayload.md)
## Properties
| Property | Type | Description | Defined in |
| ------ | ------ | ------ | ------ |
| `splitRecipients` | [`SplitRecipient`](SplitRecipient.md)[] | The split recipients addresses and splits. | [types.ts:178](https://github.com/ObolNetwork/obol-sdk/blob/5137bd5c4ded55a50234f19135ea3a5bfeab4d47/src/types.ts#L178) |
| `ObolRAFSplit?` | `number` | Split percentageNumber allocated for obol retroactive funding, minimum is 1%. | [types.ts:181](https://github.com/ObolNetwork/obol-sdk/blob/5137bd5c4ded55a50234f19135ea3a5bfeab4d47/src/types.ts#L181) |
| `distributorFee?` | `number` | The percentageNumber of accrued rewards that is paid to the caller of the distribution function to compensate them for the gas costs of doing so. Cannot be greater than 10%. For example, 5 represents 5%. | [types.ts:184](https://github.com/ObolNetwork/obol-sdk/blob/5137bd5c4ded55a50234f19135ea3a5bfeab4d47/src/types.ts#L184) |
| `controllerAddress?` | `string` | Address that can mutate the split, should be ZeroAddress for immutable split. | [types.ts:187](https://github.com/ObolNetwork/obol-sdk/blob/5137bd5c4ded55a50234f19135ea3a5bfeab4d47/src/types.ts#L187) |
---
# Functions
URL: https://docs.obol.org/sdk/functions
# Functions
---
# validateClusterLock
URL: https://docs.obol.org/sdk/functions/validateclusterlock
# validateClusterLock()
> **validateClusterLock**(`lock`, `safeRpcUrl?`): `Promise`\<`boolean`\>
Defined in: [services.ts:14](https://github.com/ObolNetwork/obol-sdk/blob/5137bd5c4ded55a50234f19135ea3a5bfeab4d47/src/services.ts#L14)
Verifies Cluster Lock's validity.
## Parameters
| Parameter | Type | Description |
| ------ | ------ | ------ |
| `lock` | [`ClusterLock`](../type-aliases/ClusterLock.md) | cluster lock |
| `safeRpcUrl?` | `string` | optional safeRpcUrl for safe wallet verification |
## Returns
`Promise`\<`boolean`\>
boolean result to indicate if lock is valid
## Throws
on missing keys or values.
An example of how to use validateClusterLock:
[validateClusterLock](https://github.com/ObolNetwork/obol-sdk-examples/blob/main/TS-Example/index.ts#L127)
---
# What is this API?
URL: https://docs.obol.org/api/what-is-this-api
# What is this API?
### What is this API?
This API is for creating and managing [Distributed Validators](https://docs.obol.tech/docs/int/key-concepts#distributed-validator). This API works in tandem with Obol's [Distributed Validator Launchpad](https://launchpad.obol.org), a dApp designed to allow people to authenticate their counterparties and agree to the terms of a Distributed Validator Cluster. This API can also be used via the [Obol-SDK](../sdk/index.md).
Read more about Obol and how to use the [launchpad](https://launchpad.obol.org) on our [docs site](https://docs.obol.tech/).
For enquiries: DV Labs: [support@dvlabs.tech](mailto:support@obol.tech)
---
# System
URL: https://docs.obol.org/api/system
# System
---
# Metrics
URL: https://docs.obol.org/api/metrics
# Metrics
---
# Cluster Definition
URL: https://docs.obol.org/api/cluster-definition
# Cluster Definition
---
# Cluster Lock
URL: https://docs.obol.org/api/cluster-lock
# Cluster Lock
---
# State
URL: https://docs.obol.org/api/state
# State
---
# DV Exit
URL: https://docs.obol.org/api/dv-exit
# DV Exit
---
# DV Migrate
URL: https://docs.obol.org/api/dv-migrate
# DV Migrate
---
# Cluster Effectiveness
URL: https://docs.obol.org/api/cluster-effectiveness
# Effectiveness
---
# Deposit Data
URL: https://docs.obol.org/api/deposit-data
# Deposit Data
---
# Terms And Conditions
URL: https://docs.obol.org/api/terms-and-conditions
# TermsAndConditions
---
# Techne Credentials
URL: https://docs.obol.org/api/techne-credentials
# Techne Credentials
---
# Address
URL: https://docs.obol.org/api/address
# Address
---
# OWR Information
URL: https://docs.obol.org/api/owr-information
# OWR
---
# Test
URL: https://docs.obol.org/api/test
# Test
---
# TVS
URL: https://docs.obol.org/api/tvs
# TVS